Golden Buttermilk Cornbread Loaf

Golden Buttermilk Cornbread Loaf

πŸ›’ Ingredients

  • 1 cup Yellow cornmeal (fine ground) 🌽

  • 1 cup All-purpose flour 🌾

  • 1/2 cup Granulated sugar (adjust to preference) 🍬

  • 1 tbsp Baking powder πŸ₯„

  • 1/2 tsp Salt πŸ§‚

  • 1 cup Buttermilk (at room temperature) πŸ₯›

  • 2 large Eggs πŸ₯š

  • 1/2 cup Unsalted butter (melted and slightly cooled) 🧈

  • 1 tbsp Honey (optional, for a golden crust) 🍯


πŸ“ Step-by-Step Instructions

  1. Preheat & Prep ➑️ Preheat your oven to 375Β°F (190Β°C). Grease an 8×4 inch loaf pan thoroughly with butter or line it with parchment paper for easy removal. 🌑️

  2. Mix Dry Ingredients ➑️ In a large mixing bowl, whisk together the cornmeal, flour, sugar, baking powder, and salt until there are no clumps. πŸ₯£

  3. Combine Wet Ingredients ➑️ In a separate medium bowl, whisk the eggs, buttermilk, and honey. Slowly pour in the melted butter while whisking to ensure everything is well combined. πŸ₯›βž‘️πŸ₯š

  4. Create the Batter ➑️ Make a well in the center of the dry ingredients. Pour the wet mixture into the dry. Use a spatula to gently fold until just combined. Do not overmix, or the bread will be tough! πŸ₯„βœ¨

  5. Bake ➑️ Pour the batter into your prepared loaf pan and smooth the top. Bake for 30–35 minutes, or until a toothpick inserted into the center comes out clean and the top is a beautiful golden brown. ⏲️πŸ”₯

  6. Cool ➑️ Let the bread cool in the pan for about 10 minutes, then transfer to a wire rack to cool completely before slicing. This helps the crumb set so it doesn’t crumble! πŸ’¨πŸ§±


❓ Common Questions (Q&A)

Q: Can I make this dairy-free? A: Yes! ➑️ Use a dairy-free milk (like soy or almond) mixed with 1 tsp of lemon juice to mimic buttermilk, and swap the butter for a neutral oil like avocado oil. πŸ₯‘πŸ₯›

Q: My bread is too dry. What can I do? A: This is usually from over-baking. ➑️ Next time, start checking for doneness 5 minutes early. You can also add 1/4 cup of sour cream or Greek yogurt to the batter for extra moisture! πŸ¦πŸ’§

Q: Why are there large holes in my bread? A: This is often caused by over-mixing the batter or having the oven temp too high. ➑️ Mix until the flour just disappears and ensure your oven is properly calibrated. 🌑️🚫

Q: How do I get that shiny top seen in the photo? A: ➑️ Brush the top of the warm loaf with a little melted butter and honey as soon as it comes out of the oven! 🍯🧈

Enjoy your fresh, golden slices! πŸ˜‹πŸžβœ¨

Simple 3-Ingredient Sponge Cake

Simple 3-Ingredient Sponge Cake

This cake is the ultimate base for any dessert. It relies on the air whipped into the eggs to get that incredible lift without any baking powder or soda!

πŸ›’ Ingredients

  • 5 Large Eggs (at room temperature) πŸ₯š

  • 1 Cup (200g) Sugar 🀍

  • 1 Cup (125g) All-purpose Flour (sifted) 🌾


πŸ‘©β€πŸ³ Step-by-Step Instructions

  1. Preheat & Prep: Preheat your oven to 170°C (340°F). Grease a 7 or 8-inch round cake pan and line the bottom with parchment paper. ➑️

  2. Whip the Eggs & Sugar: In a large bowl, combine the 5 eggs and the sugar. Use an electric mixer on high speed to beat them together for about 10–12 minutes. ⏱️ ➑️

    • Tip: The mixture should become pale, thick, and triple in volume. When you lift the whisk, it should leave a “ribbon” trail that stays on the surface for a few seconds.

  3. Sift the Flour: Sift the all-purpose flour into the egg mixture in three separate batches. ➑️

  4. Fold Gently: Use a spatula to gently fold the flour into the eggs using a figure-eight motion. Be very careful not to deflate the air bubbles you just created! πŸ₯£ ➑️

  5. Bake: Pour the batter into your prepared pan. Bake for 25–30 minutes or until a toothpick inserted into the center comes out clean and the top is golden brown. πŸ₯§ ➑️

  6. Cool: Let the cake cool in the pan for 10 minutes, then run a knife around the edge and turn it out onto a wire rack to cool completely. ➑️

  7. Serve: Slice it plain, or top it with fresh fruit and whipped cream! πŸ“ ➑️


❓ Common Questions (Q&A)

Q: Why didn’t my cake rise? A: This usually happens if the eggs weren’t whipped long enough or if the flour was stirred in too roughly. The air in the eggs is the only thing making it rise, so handle the batter like a cloud! ☁️

Q: Can I add flavor to this? A: Yes! You can add 1 teaspoon of vanilla extract or some lemon zest to the egg mixture while whipping for extra aroma. πŸ‹

Q: Does the pan need to be greased on the sides? A: For the tallest sponge, some bakers only grease the bottom parchment. This allows the cake to “climb” the sides of the pan as it bakes! πŸ“ˆ

Q: How do I store it? A: Keep it in an airtight container at room temperature for up to 2 days, or wrap it tightly and freeze for up to one month. 🧊


Enjoy your baking!

Glazed Blueberry Lemon Loaf 🫐

Glazed Blueberry Lemon Loaf 🫐

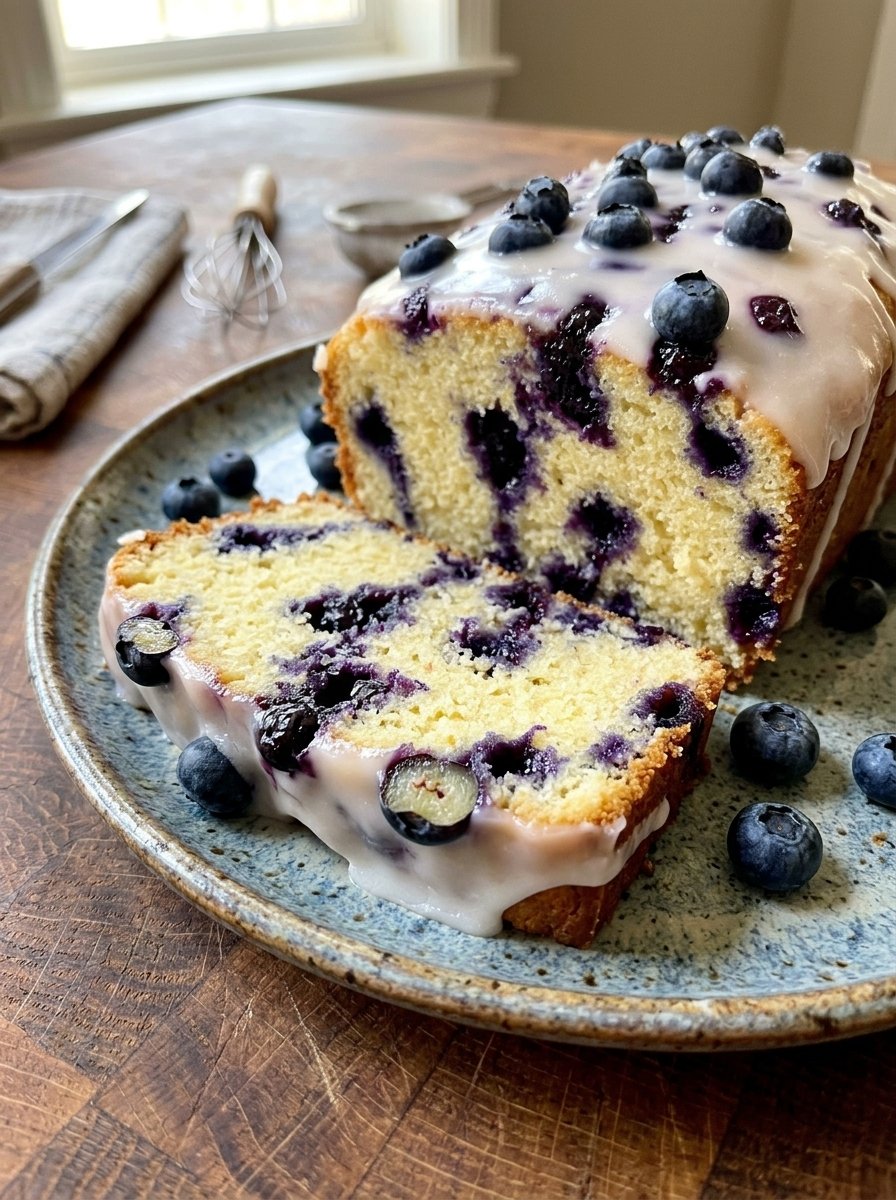
A moist, buttery cake packed with fresh blueberries and finished with a zesty lemon glaze.

πŸ›’ Ingredients

  • Dry Ingredients: 250g All-purpose flour, 1 Β½ tsp Baking powder, Β½ tsp Salt πŸ§‚

  • Wet Ingredients: 175g Unsalted butter (softened), 200g Granulated sugar, 3 Large eggs, 120ml Greek yogurt or Sour cream, 1 tsp Vanilla extract πŸ₯š

  • Flavor & Fruit: Zest of 1 lemon, 200g Fresh blueberries (plus extra for topping) 🫐

  • The Glaze: 120g Powdered sugar & 2 tbsp Lemon juice πŸ‹


πŸ‘©β€πŸ³ Step-by-Step Instructions

  1. Prep the Oven & Pan ➑️ Preheat your oven to 175°C. Grease a standard loaf pan with butter and line it with parchment paper for easy removal. 🍞

  2. Cream the Butter & Sugar ➑️ In a large bowl, beat the softened butter and sugar together until light and fluffy. Add the eggs one at a time, followed by the vanilla and lemon zest. πŸ₯£

  3. Mix in the Moisture ➑️ Stir in the Greek yogurt or sour cream. This is the secret to making the loaf incredibly moist! πŸ₯›

  4. Combine Dry & Wet ➑️ Gently fold in the flour, baking powder, and salt. Pro Tip: Toss your blueberries in a teaspoon of flour before folding them into the batterβ€”this stops them from sinking to the bottom! 🫐➑️

  5. Bake ➑️ Pour the batter into the pan and smooth the top. Bake for 55–65 minutes. Test it by inserting a toothpick; if it comes out clean, it’s ready. πŸ•’

  6. Cool Down ➑️ Let the loaf cool in the pan for 10 minutes, then move it to a wire rack to cool completely. ❄️

  7. Glaze & Decorate ➑️ Whisk the powdered sugar and lemon juice until smooth. Pour it over the cooled loaf, letting it drip down the sides. Top with extra fresh blueberries while the glaze is still wet. ✨


❓ Common Questions (Q&A)

Q: Can I use frozen blueberries? A: Yes! However, do not thaw them first, as the juice will streak through the batter and turn the whole cake purple. Toss them in flour while frozen and fold them in quickly. β„οΈπŸ«

Q: My cake is browning too fast on top but isn’t done inside. What should I do? A: Simply tent a piece of aluminum foil loosely over the top of the loaf pan for the last 15–20 minutes of baking. This protects the top while the middle finishes cooking. πŸ›‘οΈ

Q: Can I make this a “Weight Watchers” friendly version? A: To lighten it up, you can swap the sugar for a granulated stevia blend and use non-fat Greek yogurt. You can also skip the butter and use applesauce, though the texture will be slightly denser. 🍎

Q: How do I get that perfectly smooth glaze seen in the photo? A: Make sure your loaf is completely cold before glazing. If the cake is even slightly warm, the glaze will melt and run off instead of staying thick and white. 🧊

Enjoy every slice of this summery delight! 🍰✨

Jeweled Fruit & Apricot Cheesecake

Jeweled Fruit & Apricot Cheesecake


Ingredients

For the Crust:

  • 1 Β½ cups Graham cracker crumbs

  • 3 tablespoons Granulated sugar (or sugar substitute)

  • 6 tablespoons Unsalted butter (melted)

For the Creamy Filling:

  • 16 oz (two 8-oz blocks) Cream cheese (softened to room temperature)

  • Β½ cup Greek yogurt or Sour cream

  • ΒΎ cup Granulated sugar (or sugar substitute)

  • 2 Large eggs

  • 1 tablespoon All-purpose flour

  • 2 teaspoons Vanilla extract

  • Β½ teaspoon Lemon zest (optional, for brightness)

For the Jeweled Topping:

  • 1 cup Dark raisins

  • Β½ cup Dried apricots (chopped into bite-sized pieces)

  • ΒΌ cup Orange juice or warm water (to plump the fruit)

  • 2 tablespoons Apricot preserves or Honey (for the final glaze)


Preparation Instructions

1. Prep the Fruit: Place the raisins and chopped apricots in a small bowl with the orange juice or warm water. Let them soak for 15–20 minutes to plump up, then drain any excess liquid and pat them dry with a paper towel.

2. Prepare the Crust: Preheat your oven to 325Β°F (160Β°C). In a bowl, combine the graham cracker crumbs, sugar, and melted butter. Stir until the mixture looks like wet sand. Press the mixture firmly into the bottom of a 9-inch springform pan. Bake for 8–10 minutes, then remove and let cool while you prepare the filling.

3. Cream the Base: In a large mixing bowl, beat the softened cream cheese and sugar together until completely smooth and creamy. Ensure there are no lumps remaining.

4. Add Wet Ingredients: Mix in the Greek yogurt (or sour cream), vanilla extract, and lemon zest. Add the eggs one at a time, beating on low speed just until combined. Avoid over-beating the eggs to prevent air bubbles in your cheesecake. Fold in the tablespoon of flour last.

5. Layer the Fruit: Pour half of the cheesecake batter over the cooled crust. Sprinkle a small handful of the soaked raisins and apricots over the batter. Pour the remaining batter on top and smooth it out.

6. Add the Top Layer: Generously arrange the remaining raisins and apricots over the top of the batter. Press them down very lightly so they stay nestled in the cream cheese during baking.

7. Bake: Bake for 45–55 minutes. The edges should be set and slightly puffed, but the center should still have a slight jiggle. Turn off the oven, crack the door open, and let the cheesecake cool inside for 30 minutes to prevent cracking.

8. Glaze and Chill: Once the cake is at room temperature, warm the apricot preserves or honey and brush it gently over the fruit on top to give it that “jeweled” shine. Refrigerate for at least 4–6 hours (preferably overnight) before slicing.


Cooking Tips

  • Clean Slices: To get the perfect clean slice shown in your photo, dip a sharp knife in hot water and wipe it dry between every single cut.

  • Room Temp Ingredients: Ensure your cream cheese and eggs are at room temperature before starting to achieve that ultra-smooth, professional texture.

Moist Apple and Raisin Glazed Cake

Moist Apple and Raisin Glazed Cake


Ingredients

For the Cake Batter:

  • 1 Β½ cups All-purpose flour (sifted)

  • 1 teaspoon Baking powder

  • Β½ teaspoon Baking soda

  • ΒΌ teaspoon Salt

  • 1 teaspoon Ground cinnamon

  • Β½ cup Unsalted butter (softened at room temperature)

  • ΒΎ cup Granulated sugar

  • 2 Large eggs

  • 1 teaspoon Vanilla extract

  • Β½ cup Greek yogurt or sour cream (for moisture)

  • 2 medium Granny Smith apples (peeled, cored, and chopped into small cubes)

  • Β½ cup Raisins (plus extra for topping)

For the Glaze:

  • ΒΌ cup Apricot jam or Honey

  • 1 tablespoon Water


Preparation Instructions

1. Preheat and Prep: Preheat your oven to 350Β°F (175Β°C). Grease an 8-inch round cake pan with butter and line the bottom with parchment paper to ensure easy removal.

2. Cream the Butter and Sugar: In a large mixing bowl, beat the softened butter and granulated sugar together using a hand mixer or stand mixer. Continue beating for about 3–5 minutes until the mixture is light, pale, and fluffy.

3. Add Eggs and Aromatics: Add the eggs one at a time, beating well after each addition. Stir in the vanilla extract.

4. Mix Dry Ingredients: In a separate medium bowl, whisk together the sifted flour, baking powder, baking soda, salt, and cinnamon.

5. Combine Wet and Dry: Lower the mixer speed. Add half of the dry ingredients to the butter mixture, followed by the Greek yogurt (or sour cream). Mix until just combined. Add the remaining dry ingredients and mix until smooth. Do not overmix, as this can make the cake tough.

6. Fold in Fruit: Using a spatula, gently fold in the cubed apples and half of the raisins.

7. Bake: Pour the batter into the prepared cake pan and smooth the top with a spatula. Sprinkle the remaining raisins over the top of the batter. Place in the center of the oven and bake for 40–50 minutes. The cake is done when a toothpick inserted into the center comes out clean.

8. Prepare the Glaze: While the cake is cooling slightly in the pan, heat the apricot jam (or honey) with a tablespoon of water in a small saucepan over low heat. Stir until it becomes a thin, brushable liquid. If using jam with large fruit pieces, strain it through a mesh sieve first.

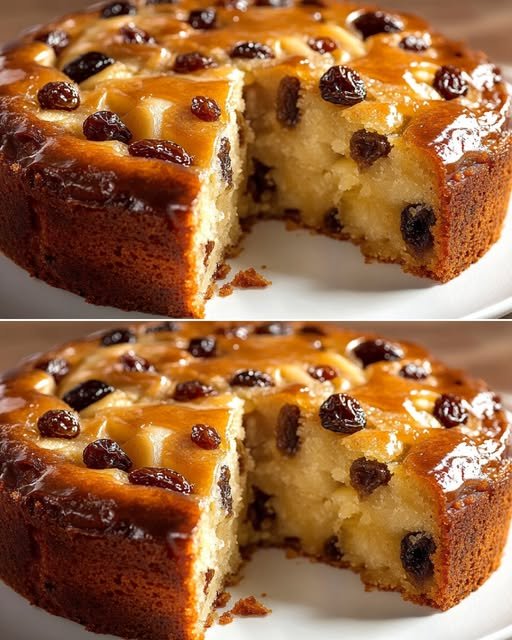
9. Finish and Serve: While the cake is still warm, brush the glaze generously over the top. This gives it that professional, shiny finish seen in the image. Let the cake cool completely in the pan before transferring it to a serving plate.


Serving Suggestion

This cake is excellent served at room temperature. For an extra treat, serve a slice with a dollop of whipped cream or a scoop of vanilla bean ice cream.

πŸ§€ Classic Tall & Fluffy Baked Cheesecake

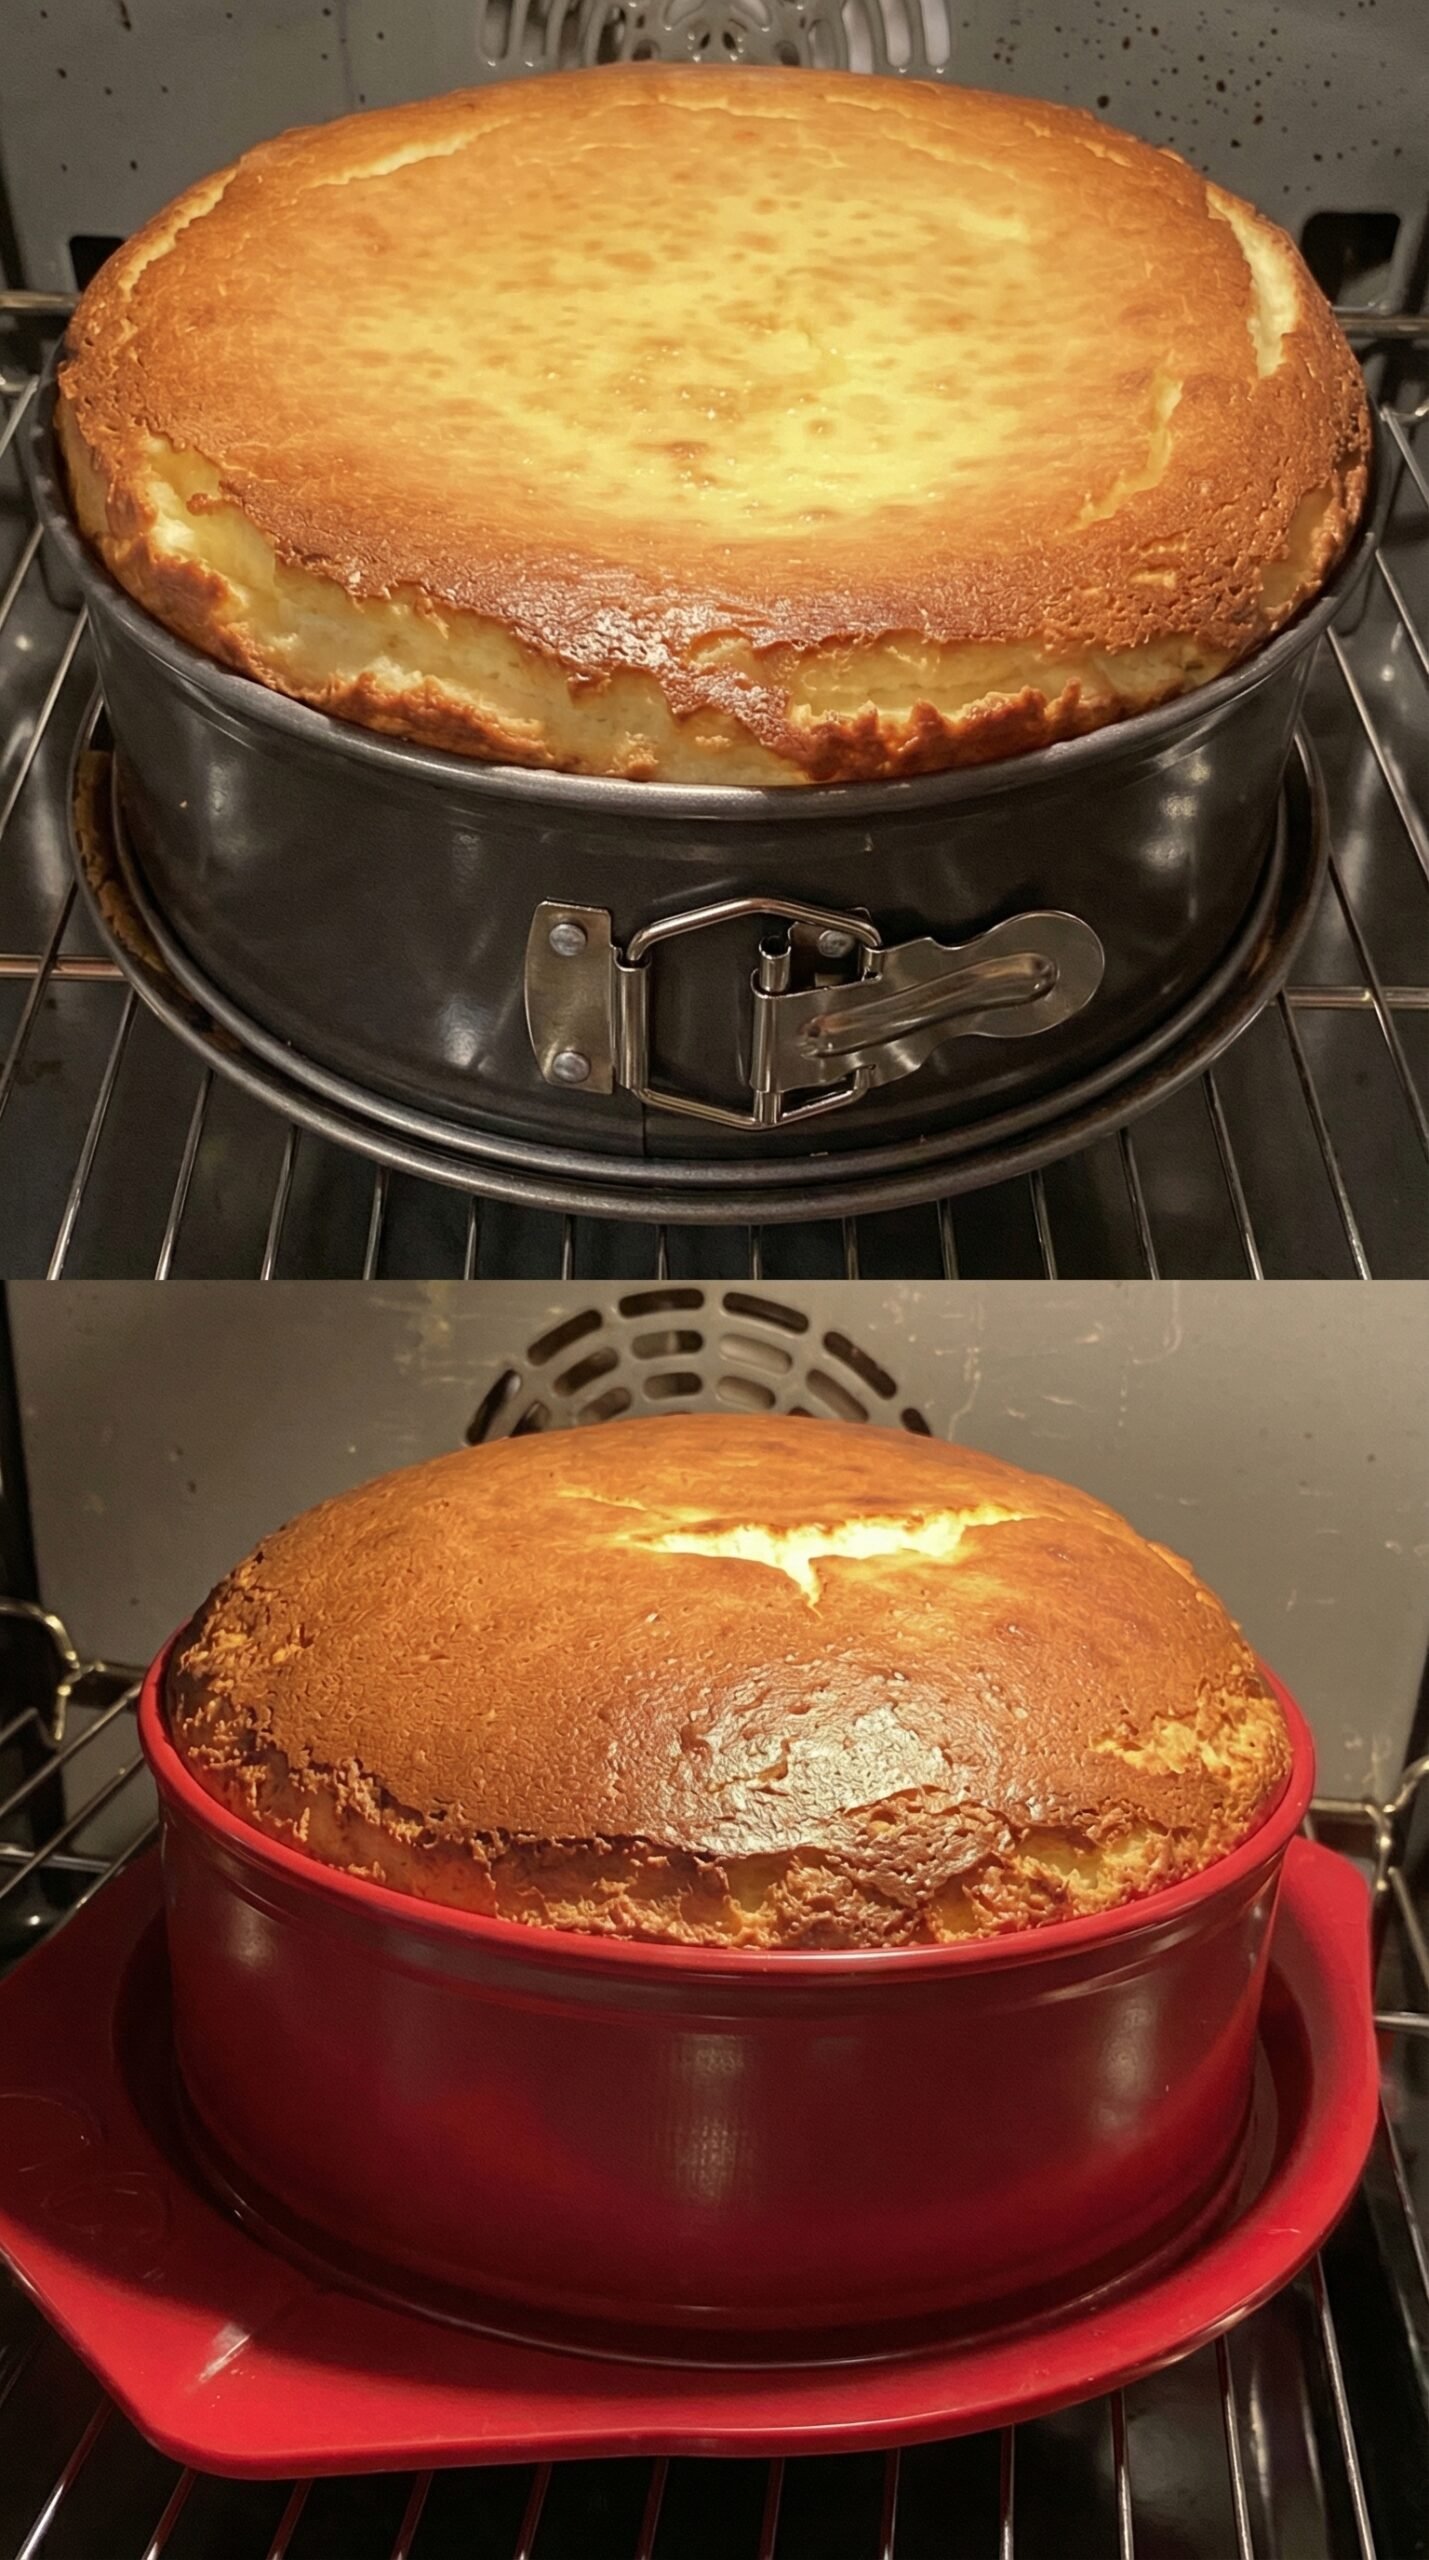
This is a rich, creamy, bakery-style cheesecake that rises beautifully in the oven and forms that signature golden top with slight cracksβ€”just like in your picture. The secret is slow baking, gentle cooling, and the right batter texture.


πŸ“ Ingredients

For the Crust (Optional but recommended)

  • 2 cups digestive biscuits or graham crackers (crushed)
  • Β½ cup (115g) melted butter
  • 2 tbsp sugar (optional)

For the Cheesecake Filling

  • 900g (2 lbs) cream cheese (room temperature)
  • 1 cup (200g) sugar
  • 4 large eggs (room temperature)
  • 1 cup (240ml) sour cream (or yogurt)
  • 1 tbsp vanilla extract
  • 2 tbsp cornstarch (helps stability)
  • Β½ cup (120ml) heavy cream
  • Pinch of salt

🍳 Instructions

1. Prepare the Pan

  • Use a springform pan (8–9 inch)
  • Wrap the bottom with foil (important if using water bath)
  • Grease lightly

2. Make the Crust

  1. Mix crushed biscuits + melted butter + sugar
  2. Press firmly into the base
  3. Bake at 180Β°C (350Β°F) for 10 minutes
  4. Let cool

(You can skip crust if you want a pure cheesecake like in the image)


3. Prepare the Batter

  1. Beat cream cheese until smooth (no lumps!)
  2. Add sugar and mix gently
  3. Add eggs one at a time (don’t overmix)
  4. Add sour cream, vanilla, salt
  5. Mix in cornstarch + cream

πŸ‘‰ Batter should be smooth, thick, and silky


4. Bake (Very Important Step!)

Option 1: Water Bath (Best for no cracks)

  • Place pan in a larger tray with hot water
  • Bake at 160Β°C (320Β°F) for 60–75 minutes

Option 2: No Water Bath (like your image)

  • Bake at 170Β°C (338Β°F)
  • Place a tray of water in the oven for moisture
  • Bake 50–65 minutes

πŸ‘‰ Center should still jiggle slightly!


5. Cooling (SECRET TO PERFECT TEXTURE)

  • Turn oven OFF
  • Leave cheesecake inside with door slightly open for 1 hour
  • Then remove and cool at room temp
  • Refrigerate at least 6 hours (overnight best)

πŸ”₯ Pro Tips (For That Tall Bakery Look)

  • Don’t overmix β†’ prevents sinking
  • Use room temp ingredients β†’ smooth batter
  • Slow cooling β†’ prevents cracks
  • Slight cracks = normal & authentic look
  • Use deep pan β†’ helps height like in photo

πŸ“ Optional Toppings

  • Fresh berries πŸ“
  • Chocolate ganache 🍫
  • Caramel drizzle 🍯
  • Whipped cream

πŸ’‘ Why It Rises Like in the Picture

  • Eggs create structure
  • Steam helps lift
  • Slow cooling prevents collapse