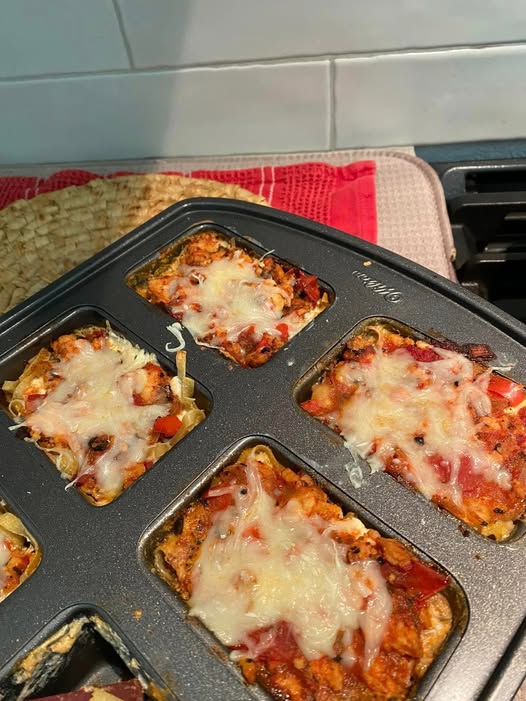
3 Points Lasagna Bombs

it is 3 weight watchers points total for 2 bombs! Beyond satisfying! recipe makes 4 servings.
Ingredients
  • Canned fire roasted tomatoes 2 cup s 0 Canned tomato sauce 1/2 cup(s) 0
  • 1 % low fat cottage cheese 1 cup s
  • Shredded fat free mozzarella cheese 4 Oz
  • Carla nada fettuccine 2 serving s
Instructions
  • I just made a homemade spaghetti sauce with , onion, minced garlic and chopped red pepper with seasoning of salt pepper onion powder garlic powder oregano Italian seasoning. I don’t measure stuff when I’m cooking.
  • Then I cooked 4 dry cups of Carba Nada fettuccine al dente.
  • I mixed 1 cup low fat cottage cheese with 1/4 -1/3 cup fat free mozzarella and seasoned with some of same seasonings I used in sauce.
  • Sprayed Pam in 8 mini loaf pan.
  • Put a dollop of sauce in to cover bottom, then 1/8 of noodles, then dollop of cottage cheese mixture spread around topped with another dollop of sauce.
  • Baked 350 for 20 minutes. Added a little shredded non fat mozzarella to top and baked 5 more minutes. Let rest then scooped out with spatula.
Recipe Notes
Would try Egglife wraps if I had them for lasagna noodles or manicotti.
Could lower points with fat fee cottage cheese but that’s not what was in my fridge. Hope this helps someone get creative and make something delicious that’s satisfying and low points. Over and out.
(notes Nancy includes meat in her recipe -i don’t include meat recipes on the blog so didn’t include in the recipe
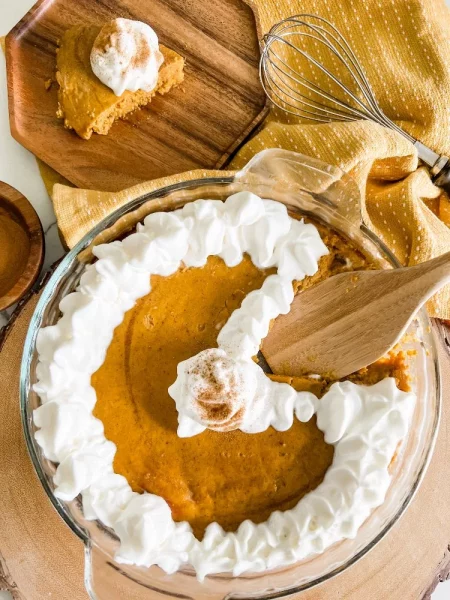
Zero Point Crustless Pumpkin Pie

An easy recipe for a homemade crustless pumpkin pie.  This Zero Point Crustless Pumpkin Pie recipe is perfect for fall-it so good. I won’t regret making this for your next family gathering!

PREP TIME5 minutes

COOK TIME45 minutes

ADDITIONAL TIME5 minutes

TOTAL TIME55 minutes

Ingredients

  • 1 (15 oz) can 100% canned pumpkin purée
  • 1/3 cup zero-point brown sugar substitute – I use Lakanto Golden Monkfruit Sweetener
  • 1 tsp cinnamon
  • 1/2 tsp nutmeg
  • 1/2 tsp vanilla extract
  • 1 tsp pumpkin spice
  • 2 large eggs or 1/2 cup liquid egg substitute
  • 8 oz. unsweetened almond milk, premier protein, unsweetened coconut milk, or Carbmaster no sugar added milk

Instructions

  1. Preheat oven to 375 degrees.
  2. Spray a 9-inch pie dish with nonstick cooking spray.
    In a large mixing bowl, combine all ingredients and mix until all ingredients are well combined.
  3. Pour into prepared pie dish.
  4. Bake for 40-45 minutes or until knife inserted in the center comes out clean.
  5. Remove from oven and let it cool for 10 minutes before serving.
  6. Store in the fridge for up to a week.

0-1 Personal.Points™ p.er slice
*This number shows the PersonalPoints™ range. The points will vary based on your individualized plan.

Notes

Smartpoints for crustless pie: GREEN: Zero Smart.points if using liquid egg substitute or 1 Smart.points per slice if using whole eggs BLUE/PURPLE: Zero SmartPoints per slice

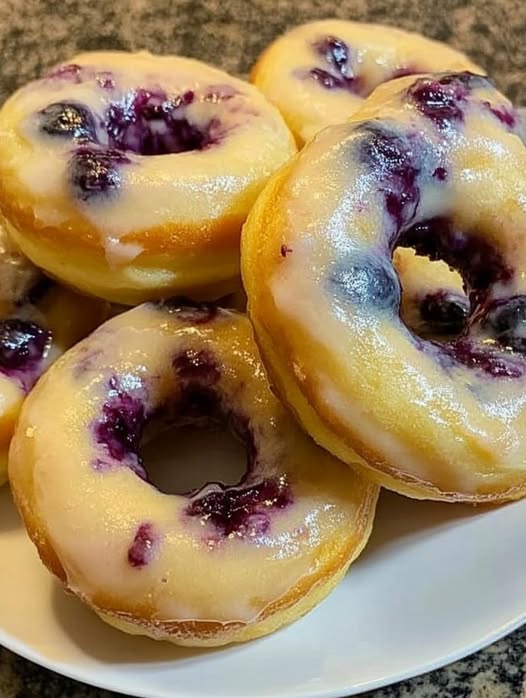
Blueberry Lemon Donuts – 1 WW Point Each 🍋🫐

Bright, fruity, and guilt-free—perfect for a sweet breakfast or snack!

Servings: Varies by donut pan size
W-W Points: 1 (per donut, based on minis)

Ingredients

  • 1 box lemon cake mix

  • 1 can Sprite Zero

  • 1 container fresh blueberries

Instructions

  1. Preheat oven to 350°F (175°C).

  2. In a mixing bowl, combine cake mix and Sprite Zero. The batter will be frothy.

  3. Spray donut pan with nonstick cooking spray.

  4. Fill each donut cavity with the cake batter.

  5. Drop a few blueberries into each donut.

  6. Bake 15–25 minutes, checking frequently (mini donuts take less time).

  7. Cool slightly before removing from the pan.

Tips

  • For extra lemon flavor, add fresh lemon zest to the batter.

  • If using full-sized donut pans, baking time will be closer to the 25-minute mark.

  • Store in an airtight container for up to 3 days or refrigerate for up to 5.

If you’d like, I can make you a W-W recipe binder sheet where these donuts, your tilapia, and other recipes you’ve shared are all in the same clean style. That way, every recipe is easy to find and ready for meal pr

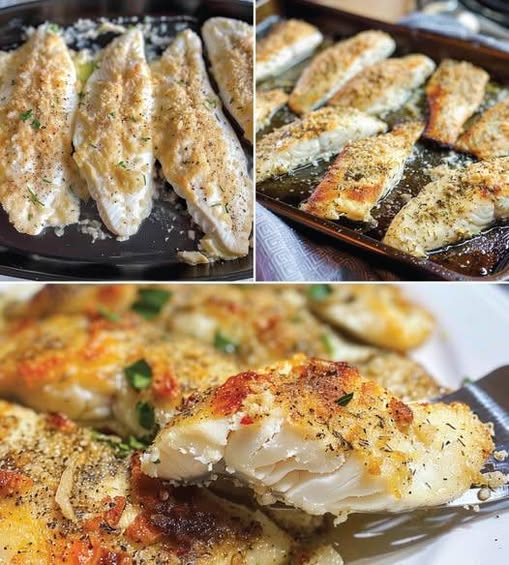
WW Crispy Tilapia (2 Points)

Light, crispy, and full of fresh flavor—perfect for Weight Watchers and quick weeknight meals.

Servings: 4
W-W Points: 2 (per serving)
Calories: 124
Protein: 12g

Ingredients

  • 1/4 cup low-fat mayonnaise

  • 1 tbsp chopped fresh parsley

  • 1 tbsp dill (fresh or dried)

  • 1 tsp garlic powder

  • 1/4 tsp salt (or to taste)

  • 1/4 tsp black pepper

  • 6 oz tilapia fillets

  • 3/4 cup dried potato flakes

  • 1 tsp olive oil

Instructions

Air Fryer Method

  1. Preheat air fryer to 400°F.

  2. In a shallow dish, mix together mayonnaise, parsley, dill, garlic powder, salt, and pepper.

  3. Place potato flakes on a separate plate.

  4. Cut tilapia into chunks or strips. Coat each piece in the mayonnaise mixture, then press into potato flakes until fully coated.

  5. Lightly grease air fryer basket with olive oil. Arrange fish pieces in a single layer.

  6. Air fry for 4–8 minutes, until golden and cooked through.

Oven Method

  1. Preheat oven to 400°F. Line a baking tray with aluminum foil.

  2. Pat tilapia dry with paper towels. Cut into even pieces.

  3. Coat in the mayonnaise mixture, then press into potato flakes.

  4. Lightly coat fish with olive oil, place on the tray, and cover loosely with foil.

  5. Bake for 8–10 minutes, until cooked through.

Serving Suggestions

Pair with:

  • W-W Grilled Corn on the Cob

  • Air Fryer Zucchini Chips

  • Roasted Baby Potatoes

  • Bacon-Wrapped Asparagus

Seasoning Variations

  • Swap garlic powder for onion powder

  • Add cayenne pepper for heat

  • Try Italian, Creole, or Old Bay seasoning for different flavor profiles

Tips

  • Avoid overcooking—tilapia dries out quickly.

  • Use a meat thermometer (145°F internal temp) to check doneness.

  • Fresh lemon juice over the top brightens the flavor.

Do you want me to also make you a one-page printable recipe sheet so you can keep all your W-W recipes in the same format? That way, they’ll look consistent in your binder or digital meal prep folder.

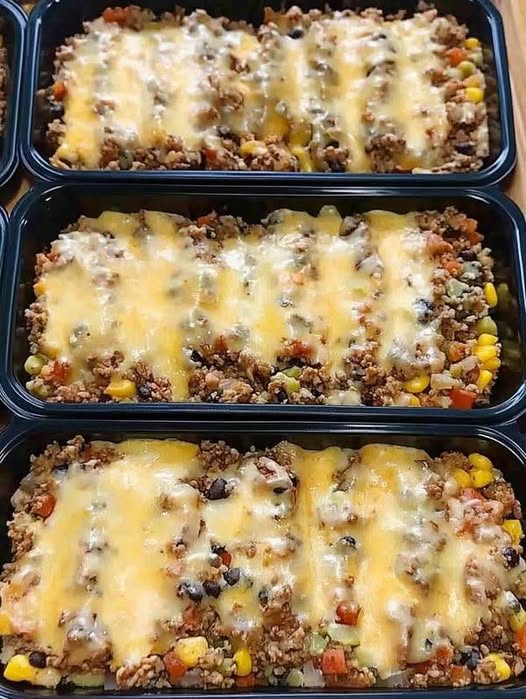
WW Zero-Point Mexican Casserole

A hearty, protein-packed meal prep option with big flavor and zero guilt.

Servings: 6–8
Prep Time: 15 minutes
Cook Time: 30 minutes
Total Time: 45 minutes
W-W Points: 0 (per serving)
Protein: 60+ g (per batch)

Ingredients

  • Homemade ground chicken (seasoned to taste)

  • 1 bag Great Value peppers & onions blend (or 1½–2 cups fresh sliced peppers & onions)

  • 2 (10 oz) bags cauliflower rice

  • 1 can fire-roasted Great Value taco sauce

  • 2 cans black beans, rinsed and drained

  • 2 cans Mexican corn, drained

  • 2 cans green chilies

  • Seasonings of your choice (taco seasoning, cumin, chili powder, garlic powder, onion powder, paprika, etc.)

  • 3 tablespoons Walden Farms Street Taco Sauce – Queso variety (for topping)

Instructions

  1. Cook the Chicken
    In a large skillet over medium heat, cook the ground chicken until browned and fully cooked. Season as you wish while cooking.

  2. Add Veggies & Rice
    Stir in the peppers & onions blend and cauliflower rice. Cook for 5–7 minutes until heated through and excess moisture is reduced.

  3. Add Remaining Ingredients
    Stir in taco sauce, black beans, Mexican corn, and green chilies. Mix well and adjust seasonings to taste.

  4. Simmer
    Let the mixture cook together for 5–10 minutes over low heat to allow flavors to blend.

  5. Serve & Top
    Divide into meal prep containers or serve hot. Top each portion with 3 tablespoons of Walden Farms Street Taco Sauce – Queso variety.

Tips

  • For extra spice, add jalapeños or hot sauce.

  • Make it creamy by stirring in a spoonful of fat-free Greek yogurt before serving.

  • This freezes and reheats well — great for batch prep.

Do you want me to calculate the approximate nutrition breakdown per serving so you’ll know calories, protein, carbs, and fat? That could make tracking even easier.

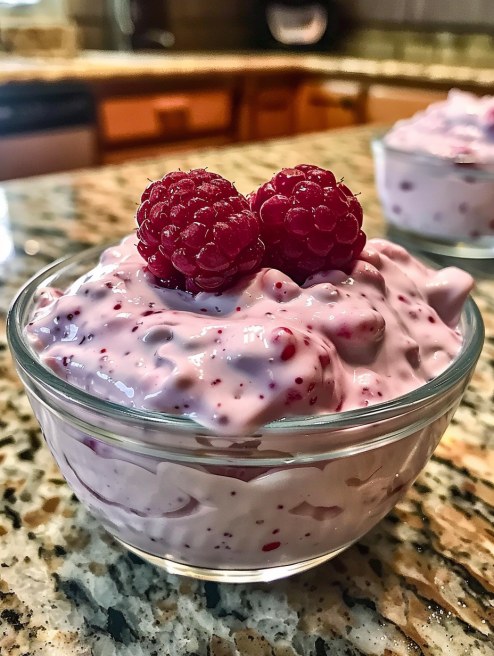
Weight Watchers Raspberry Dessert

A quick, creamy, and zero-guilt treat that’s bursting with berry flavor!

Servings: 2
Prep Time: 5 minutes
Chill Time: 40 minutes (optional for best flavor)
Total Time: 45 minutes
WW Points: 0–1 (varies by milk choice)

Ingredients

  • 1 cup frozen raspberries

  • ¼ cup almond milk (or fat-free milk)

  • 2 tablespoons granulated Swerve sweetener

Instructions

  1. Blend the Base
    Add frozen raspberries, granulated Swerve, and half of the almond milk to a blender or food processor.

  2. Adjust the Consistency
    Blend for 2–4 minutes until smooth. Gradually add more almond milk if needed to reach your desired creamy texture.

  3. Serve & Garnish
    Transfer to a small serving bowl. Top with fresh or frozen raspberry slices for presentation.

Ingredient Notes

  • Raspberries: Frozen gives a thicker, chilled texture and a richer color. Fresh works too for a lighter, fresher feel.

  • Milk: Use fat-free to keep points low. Almond milk adds a subtle nutty flavor.

  • Sweetener: Swerve keeps it sugar-free, but you can swap for erythritol, Monk fruit, or stevia.

Optional Mix-Ins

  • Chopped nuts (almonds, walnuts)

  • Shredded coconut

  • Sugar-free dark chocolate chips

  • Fresh fruits like peaches, blueberries, or strawberries

  • A spoonful of plain or vanilla Greek yogurt

Serving Suggestions

  • Top with a dollop of low-calorie whipped cream

  • Serve alongside tea, coffee, or fresh fruit juice

  • Layer with granola and yogurt for a parfait

  • Fill light cream puffs with the mixture

  • Pair with raspberry sorbet for a frozen dessert duo

Tips

  • Chill for at least 40 minutes to allow flavors to meld

  • Avoid over-chilling to prevent texture loss

  • Garnish with mint leaves or a sprinkle of mini chocolate chips

  • Try with other berries like blueberries or strawberries

Storage

  • Fridge: Store in an airtight container for up to 1 day

  • Freezer: Freeze up to 60 days; thaw in the fridge before serving

Nutrition Facts (per serving)

  • Calories: 58 kcal

  • Carbohydrates: 13 g

  • Total Fat: 1 g

  • Protein: 1 g

  • Sugar: 5 g

  • Dietary Fiber: 6 g

  • Sodium: 2 mg

If you’d like, I can combine this recipe with your other WW breakfast & dessert recipes into a printable mini cookbook so they’re all in one place and point values are clear. That way, you’ll have a handy go-to guide.