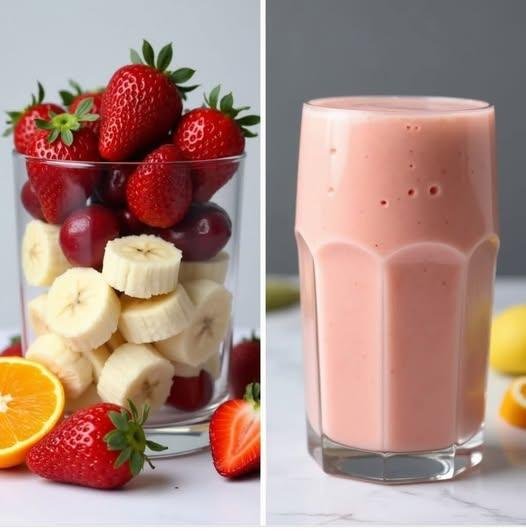
Strawberry Banana & Citrus Smoothie.

Strawberry Banana & Citrus Smoothie.

Ingredients

  • 1 cup fresh strawberries (hulled)

  • 1 large banana (sliced, preferably frozen for extra thickness)

  • 1/2 cup cherries (pitted)

  • 1/2 cup fresh orange juice (approx. 1 large orange)

  • 1/2 cup Greek yogurt or a milk of your choice (almond, oat, or dairy)

  • Optional: A drizzle of honey or maple syrup if you prefer it sweeter.

  • Optional: A few ice cubes if your fruit isn’t frozen.


Instructions

  1. Prep the Fruit: Wash the strawberries and remove the green tops. Ensure your cherries are pitted to avoid any hard pieces in the blender.

  2. Layer the Blender: To help your blender run smoothly, pour in the liquid (orange juice and yogurt/milk) first.

  3. Add Solids: Add the banana slices, cherries, and strawberries on top of the liquid.

  4. Blend: Start on a low speed and gradually increase to high. Blend for about 45–60 seconds until the texture is completely velvety and pink, just like the glass in your image.

  5. Serve: Pour into a tall glass and enjoy immediately while chilled.


Pro-Tips for the Best Texture

  • For a thicker smoothie: Use frozen banana slices. This creates a “soft-serve” consistency without watering it down with ice.

  • The Citrus Kick: If you want more zest, you can add a tiny pinch of orange zest before blending.

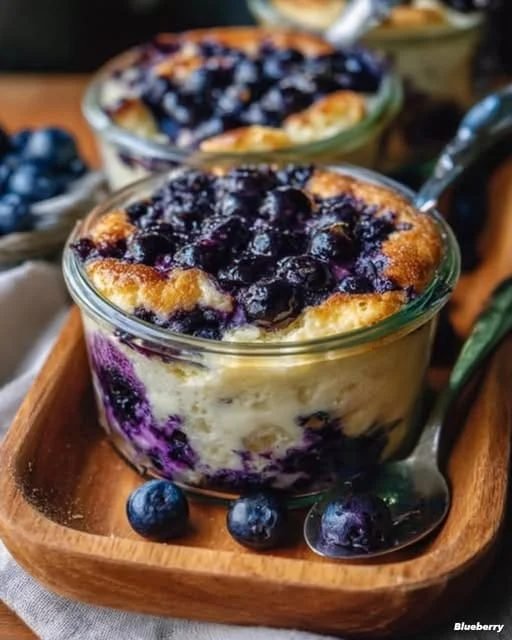
Baked Blueberry Cottage Cheese Breakfast Bowls

Baked Blueberry Cottage Cheese Breakfast Bowls
Irresistible Healthy  Blueberry Oatmeal Bars
 along with the estimated SmartPoints value for those following the  Weight Watchers program.

Ingredients

For the Oatmeal Base:

  • 2 cups  rolled oats (about 12 SmartPoints)
  • 1 cup whole wheat flour (about 4 SmartPoints)
  • 1/2 cup brown sugar or coconut sugar (about 6 SmartPoints)
  • 1/2 teaspoon baking powder (0 SmartPoints)
  • 1/2 teaspoon baking soda (0 SmartPoints)
  • 1/4 teaspoon salt (0 SmartPoints)
  • 1/2 cup coconut oil or unsalted butter, melted (about 24 SmartPoints)
  • 1/4 cup honey or maple syrup (about 4 SmartPoints)
  • 1 teaspoon vanilla extract (0 SmartPoints)

For the Blueberry Filling:

  • 2 cups fresh or frozen blueberries (about 2 SmartPoints)
  • 2 tablespoons honey or maple syrup (about 3 SmartPoints)
  • 1 tablespoon lemon juice (0 SmartPoints)
  • 1 tablespoon cornstarch (optional, for thickening) (about 1 SmartPoint)

Total SmartPoints

  • Base: 12 (oats) + 4 (flour) + 6 (sugar) + 24 (oil) + 4 (honey) = 50 SmartPoints
  • Filling: 2 (blueberries) + 3 (honey) + 1 (cornstarch) = 6 SmartPoints
  • Total for the entire recipe: 56 SmartPoints

Serving Size

If you cut the bars into 12 pieces, each bar would be approximately 4.67 SmartPoints (56 SmartPoints ÷ 12 servings).

Instructions

  1. Preheat the Oven: Preheat your oven to 350°F (175°C). Grease a 9×9-inch baking pan or line it with parchment paper.
  2. Prepare the Oatmeal Base:
    • In a large bowl, combine the rolled oats, flour, brown sugar, baking powder, baking soda, and salt.
    • In another bowl, mix the melted coconut oil, honey (or maple syrup), and vanilla extract.
    • Pour the wet ingredients into the dry ingredients and stir until well combined. The mixture will be crumbly.
  3. Make the Blueberry Filling:
    • In a medium saucepan over medium heat, combine the blueberries, honey (or maple syrup), lemon juice, and cornstarch.
    • Cook for about 5-7 minutes, gently stirring until the blueberries start to soften and release their juices. Remove from heat.
  4. Assemble the Bars:
    • Press half of the oatmeal mixture into the bottom of the prepared baking pan to form a base layer.
    • Spread the blueberry filling evenly over the oatmeal base.
    • Crumble the remaining oatmeal mixture on top of the blueberries.
  5. Bake: Bake in the preheated oven for 25-30 minutes or until the top is golden brown.
  6. Cool and Serve: Allow the bars to cool in the pan for at least 10 minutes before slicing. For best results, let them cool completely before cutting.

Storage

Store the bars in an airtight container at room temperature for up to 3 days or in the refrigerator for up to a week. They can also be frozen for longer storage.

Cheesy Taco Sticks

These Cheesy Taco Sticks are the perfect crowd-pleaser—crispy on the outside, packed with seasoned beef, and oozing with melted cheese. They work great as a quick dinner or a game-day snack.

Prep time: 15 mins | Cook time: 15 mins | Yields: 10–12 sticks


Ingredients

  • 1 lb Ground Beef (lean is best to avoid sogginess)

  • 1 packet Taco Seasoning (or 2 tbsp homemade)

  • 1/4 cup Water

  • 1 can (13.8 oz) Refrigerated Pizza Crust or 10–12 small flour tortillas

  • 5–6 Mozzarella or Colby Jack cheese sticks (cut in half)

  • 2 tbsp Butter, melted

  • Optional: Garlic powder and dried parsley for the topping

  • For dipping: Salsa, sour cream, or guacamole


Instructions

1. Prepare the Filling

In a large skillet over medium-high heat, brown the ground beef until fully cooked. Drain any excess fat. Add the taco seasoning and water, stirring well. Let it simmer for 2–3 minutes until the liquid has thickened and coated the meat. Remove from heat and let it cool slightly.

2. Prepare the Dough

Preheat your oven to 400°F (200°C).

  • If using pizza dough: Unroll it on a piece of parchment paper and cut it into 10–12 equal rectangles.

  • If using tortillas: Lay them flat on your work surface.

3. Assemble the Sticks

Place a generous spoonful of the taco meat in the center of each dough rectangle (or tortilla). Top the meat with half of a cheese stick.

4. Roll and Seal

Carefully roll the dough around the filling, tucking in the ends to ensure the cheese doesn’t leak out while baking. Place the sticks seam-side down on a baking sheet lined with parchment paper.

5. Add the Topping

Brush the tops of the sticks with melted butter. If you like, sprinkle a little garlic powder or parsley on top for extra flavor and color.

6. Bake

Bake for 10 to 12 minutes, or until the crust is golden brown and crispy.


Pro Tip: If you want an extra-crispy exterior, you can lightly pan-fry the sticks in a little oil for 1–2 minutes per side instead of baking them.

“Cottage Cheese Bagels: High-Protein, Fluffy, and So Easy to Make”

Servings: 6 bagels
Total Time: 25 minutes (Prep: 10 min | Bake: 15 min)
Difficulty: Easy
Calories per Serving: ~150 kcal (varies by diet)
Macros per Serving (approx):

  • WW: Protein: 10g | Carbs: 12g | Fat: 6g | Fiber: 2g | SmartPoints: 3
  • Keto: Protein: 10g | Carbs: 6g | Fat: 10g | Fiber: 2g
  • Slimming : Syns: 0–2 (depending on cheese choice)
  • Mediterranean: Protein: 10g | Carbs: 10g | Fat: 7g | Fiber: 2g

Introduction

Bagels are often considered indulgent, carb-heavy treats—but these Cottage Cheese Bagels flip that notion on its head. Soft, protein-packed, and low in carbs, they’re perfect for Weight Watchers, Keto, Slimming , and Mediterranean diets.

With just a few simple ingredients, these bagels are fluffy, chewy, and loaded with nutrition. They’re ideal for breakfast, a snack, or a quick sandwich base, making them versatile, wholesome, and diet-friendly.

Whether you’re craving a comforting baked treat or a quick meal prep option, this recipe delivers flavor, texture, and macro-conscious goodness in every bite.


Why You’ll Love This Recipe

  • Sensory Appeal: Golden, soft exterior with a chewy, tender interior.
  • Flavor Highlight: Subtle tang from cottage cheese and a slight eggy richness.
  • Diet-Friendly Benefit: High in protein, low in carbs, and suitable for multiple diet plans.

Ingredients Needed

Dry Ingredients:

  • 1 cup almond flour (Keto) / whole wheat flour (WW/Slimming/Mediterranean)
  • 1 tsp baking powder
  • 1/4 tsp salt

Wet Ingredients:

  • 1 cup cottage cheese
  • 2 large eggs
  • 1 tsp vanilla extract (optional)

Topping (Optional):

  • Sesame seeds, poppy seeds, or everything bagel seasoning

How to Make Our Cottage Cheese Bagels

  1. Preheat oven to 180°C (350°F) and line a baking tray with parchment paper.
  2. Mix dry ingredients in a bowl: almond flour, baking powder, and salt.
  3. Blend wet ingredients in a separate bowl: cottage cheese, eggs, and vanilla until smooth.
  4. Combine wet and dry ingredients, mixing until a dough forms.
  5. Shape into bagels: divide dough into 6 portions and roll each into a ball, then create a hole in the center.
  6. Place on prepared tray and sprinkle toppings if desired.
  7. Bake for 15–18 minutes until golden brown. Cool slightly before serving.

Storage & Serving Suggestions

  • Storing: Keep in an airtight container at room temperature for 2 days or refrigerate for up to 5 days.
  • Freezing: Freeze cooked bagels for up to 2 months; thaw overnight in the fridge or reheat in the oven.
  • Serving Pairings: Top with smoked salmon, avocado, low-fat cream cheese, or fresh vegetables for a Mediterranean twist.

Tips & FAQs

Q1: Can I make these completely Keto?
Yes! Use almond flour and avoid toppings with added carbs.

Q2: Can I make them gluten-free?
Absolutely. Use almond or coconut flour and ensure all other ingredients are gluten-free.

Q3: Can I add flavor variations?
Yes! Add garlic powder, herbs, or cinnamon for a savory or sweet twist.

Q4: Can these be used for sandwiches?
Yes! Slice them horizontally and fill with your favorite protein or veggies.

Q5: How do I get a chewier texture?
Blend cottage cheese and eggs thoroughly and avoid overbaking to maintain softness.

Grandma’s Italian Yogurt Cake

Grandma’s Italian Yogurt Cake

Prep time: 15 mins | Bake time: 35-40 mins | Yield: 1 Ring Cake (22-24cm)

Ingredients

  • 3 eggs

  • 1 pot of yogurt (125g)

  • 1 jar of sugar (70g)

  • 0.5 jar of milk (70ml)

  • 3/4 jar of oil (80ml)

  • 4 jars of all-purpose flour (270g)

  • 11g baking powder

  • 3-4 tbsp raisins

  • 1 Apple (peeled and diced)

  • Lemon juice and zest

  • Grain sugar (for the topping)

Instructions

  1. Prepare the Fruit: Place the raisins in a small bowl of warm water to soften for 10 minutes, then drain and pat dry. Toss the diced apple with a squeeze of lemon juice to prevent browning.

  2. Mix the Batter: In a large bowl, whisk the eggs and sugar until pale and frothy. Stir in the yogurt, milk, oil, and lemon zest.

  3. Incorporate Dry Ingredients: Sift the flour and baking powder into the wet mixture. Fold gently until smooth and no lumps remain.

  4. Fold in Fruit: Gently fold the softened raisins and diced apple into the cake batter.

  5. Assemble: Grease and flour a 22-24cm ring cake pan (bundt style). Pour the batter in evenly and smooth the top. Sprinkle a generous layer of grain sugar over the surface for that traditional Italian crust.

  6. Bake: Bake at 350°F (180°C) for 35–40 minutes. The cake should be a beautiful golden brown and pull slightly away from the edges.

  7. Cool: Let it cool in the pan for 10 minutes before turning it out onto a wire rack.


Recent Recipe Favorites

  • Holiday Baking: Eggless Buttermilk Fruit Cake featuring a rich, dark fruit-studded crumb.

  • Quick Treats: 10-Minute Chocolate Mousse Cake with a nutty ganache topping.

  • Savory Snacks: Fried Boiling Water Dumplings served golden and crispy.

  • Kitchen Staples: Secret Pastry Cream for tarts and pastries

Carrot & Banana Smoothie

Carrot & Banana Smoothie

Ingredients

  • 1 cup Carrots: Roughly chopped or sliced (as seen in the glass). For the smoothest texture, you can lightly steam them first, or use a high-powered blender if they are raw.

  • 1 large Banana: Sliced. Using a frozen banana will make the smoothie extra thick and cold.

  • Liquid Base: 1 cup of your choice (Water, Coconut Water, Almond Milk, or Orange Juice).

  • Optional Boosters: A pinch of cinnamon, a squeeze of lemon juice, or a small knob of fresh ginger.


Instructions

  1. Prepare the Carrots: If you don’t have a high-speed blender, grate the carrots or steam them for 5 minutes until slightly soft to ensure there are no “crunchy” bits in your drink.

  2. Layer the Blender: Add your liquid base first. This helps the blades move freely. Add the sliced bananas next, followed by the carrot pieces.

  3. Blend: Start on a low speed and gradually increase to high. Blend for about 45–60 seconds until the mixture is completely vibrant orange and smooth.

  4. Adjust Consistency: If it’s too thick, add a splash more liquid. If you want it colder, add a handful of ice cubes and blend again.

  5. Serve: Pour into a tall glass and enjoy immediately while fresh.


Why this combo works

  • Carrots provide beta-carotene and fiber.

  • Bananas provide natural sweetness and creaminess, eliminating the need for added sugars.