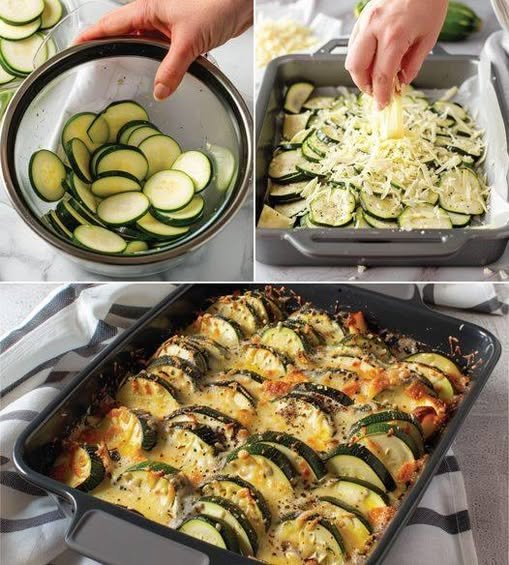
Cheesy Baked Zucchini Protein Casserole 🥒🧀

Cheesy Baked Zucchini Protein Casserole 🥒🧀

A simple, comforting, high-protein dish that’s light yet satisfying. This baked zucchini casserole combines tender zucchini slices, creamy yogurt, eggs, and melted cheese for a flavorful meal that works perfectly for lunch, dinner, or meal prep.


Overview

This recipe is perfect if you want something healthy, filling, and easy to prepare. Zucchini becomes soft and slightly sweet when baked, while mozzarella and Parmesan create a rich, golden topping. Greek yogurt and eggs add protein and creaminess without making the dish heavy.

Servings: 4
Prep Time: 15 minutes
Cook Time: 30–35 minutes
Total Time: About 50 minutes


Ingredients

Main Ingredients

  • 3 medium zucchini, thinly sliced

  • ½ cup chopped onion

  • 1 cup shredded mozzarella cheese

  • ½ cup grated Parmesan cheese

  • 2 large eggs

  • ½ cup plain Greek yogurt (or light sour cream)

Seasonings

  • ½ teaspoon garlic powder

  • ½ teaspoon salt

  • ¼ teaspoon black pepper

  • ½ teaspoon Italian seasoning

Optional Add-Ins (for extra flavor)

  • 1 tablespoon chopped fresh parsley

  • 1 tablespoon olive oil

  • ¼ teaspoon chili flakes for a mild kick

  • ½ cup cooked chicken pieces for extra protein


Kitchen Equipment

  • Cutting board

  • Sharp knife or mandoline slicer

  • Mixing bowl

  • Whisk or fork

  • Small baking dish (8×8 inch recommended)

  • Oven


Step-by-Step Instructions

Step 1: Prepare the Oven

Preheat your oven to 375°F (190°C).

Lightly grease a small baking dish using:

  • olive oil, or

  • cooking spray.

This prevents sticking and helps the edges brown nicely.


Step 2: Slice the Vegetables

Wash the zucchini thoroughly.

Slice them thinly (about 3–4 mm thick). Thin slices cook evenly and become tender during baking.

Chop the onion into small pieces so it blends smoothly with the zucchini.


Step 3: Make the Creamy Base

In a medium mixing bowl combine:

  • eggs

  • Greek yogurt (or sour cream)

  • garlic powder

  • salt

  • black pepper

  • Italian seasoning

Whisk everything together until the mixture becomes smooth and creamy.

This mixture acts like the custard base that holds the casserole together.


Step 4: Combine Vegetables

Add the sliced zucchini and chopped onion to the bowl.

Stir gently until the vegetables are fully coated with the creamy mixture.

This ensures every bite is flavorful.


Step 5: Add Cheese

Fold in half of the shredded mozzarella cheese.

Mix lightly so the cheese distributes evenly throughout the zucchini mixture.

The remaining cheese will be used as the topping.


Step 6: Assemble the Casserole

Pour the mixture into the prepared baking dish.

Spread it evenly using a spoon or spatula.

Sprinkle the top with:

  • remaining mozzarella cheese

  • grated Parmesan cheese

The Parmesan adds a slightly nutty flavor and crispy golden finish.


Step 7: Bake

Place the dish in the preheated oven.

Bake for 30–35 minutes until:

  • the center is set

  • the top becomes golden and bubbly

  • the edges lightly brown

If you want extra browning, you can bake an additional 3–5 minutes.


Step 8: Rest Before Serving

Remove the casserole from the oven and let it rest for 5 minutes.

This helps the dish firm up so it slices neatly.


How to Serve

This cheesy zucchini bake can be served:

🥗 With a fresh green salad
🍗 Alongside grilled chicken
🍞 With toasted bread or garlic bread
🍳 As a breakfast casserole


Storage Tips

Refrigerator

Store leftovers in an airtight container for up to 3 days.

Reheating

Warm in the oven at 160°C (320°F) for about 10 minutes, or microwave individual portions.

Freezing

You can freeze the baked casserole for up to 2 months. Thaw overnight in the refrigerator before reheating.
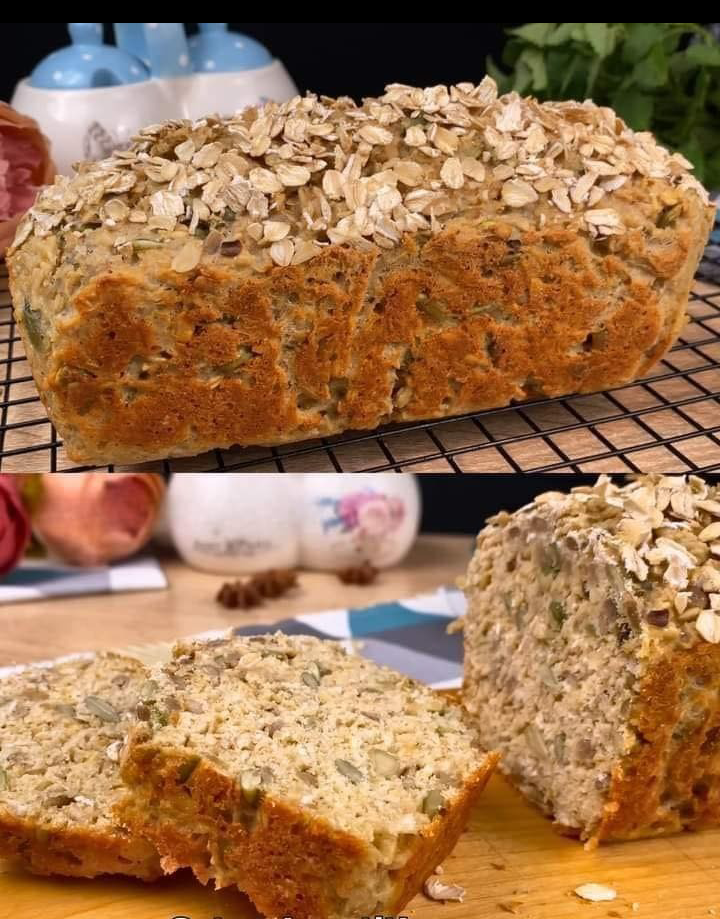
Simple Oat & Seed Bread (No Yeast, No Flour)

Simple Oat & Seed Bread (No Yeast, No Flour)

Prep Time: 10 minutes

Bake Time: 40–50 minutes

Total Time: About 1 hour

Yield: 1 small loaf

This bread is dense, hearty, and made with oats and seeds instead of flour. It is best sliced and toasted before serving.


📝

Ingredients

Base

280 g rolled oats (regular oats, not instant)


2 large eggsDairy & Eggs


200–250 ml plain yogurt


10 g baking powder


Texture & Flavor

50 g pumpkin seeds


50 g sunflower seeds


Salt, to taste


Black pepper, to taste


For Baking

Olive oil (for greasing the pan)Herbs & Spices


Extra rolled oats (for topping)


👩‍🍳 Instructions


Step 1: Prepare the Pan and Oven

Preheat the oven to 350°F (180°C).

Lightly grease a loaf pan or small baking dish with olive oil.

You may line the base with parchment paper for easier removal.


Step 2: Mix the Wet Ingredients

In a large bowl:Baked Goods


Whisk the eggs until smooth.


Add the yogurt and mix until creamy and fully combined.


Step 3: Add Oats, Seeds, and Seasoning


Add to the bowl:


Rolled oatsDairy & Eggs


Pumpkin seeds


Sunflower seeds


Baking powder


Salt and black pepperHerbs & Spices


Mix with a spoon or spatula until all oats are evenly coated.

Tip: Let the mixture rest for 5 minutes so the oats absorb moisture and the texture improves.


Step 4: Transfer and Top

Pour the thick batter into the prepared pan.

Smooth the top with a spatula.

Sprinkle extra rolled oats over the surface for texture.


Step 5: Bake

Bake for 40–50 minutes, until:


The top is golden brown


The loaf feels firm when pressed


A knife inserted in the center comes out mostly clean


Step 6: Cool


Let the bread cool in the pan for 15 minutes.

Remove and place on a wire rack to cool completely before slicing.Baked Goods


Cooling helps the loaf hold its shape and slice neatly.


🌟 Tips for Best Results

Oats: Use rolled oats, not quick or steel-cut oats.


Texture: This bread is naturally dense and works best toasted.


Flavor options: Add herbs (oregano or rosemary) or a little garlic powder if desired.


Serving ideas: Toast and top with avocado, cheese, or serve alongside soups and salads.

📦 Storage

Store in an airtight container in the refrigerator for up to 5 days.


Slice and freeze for up to 3 months.


Best enjoyed toasted after storing.

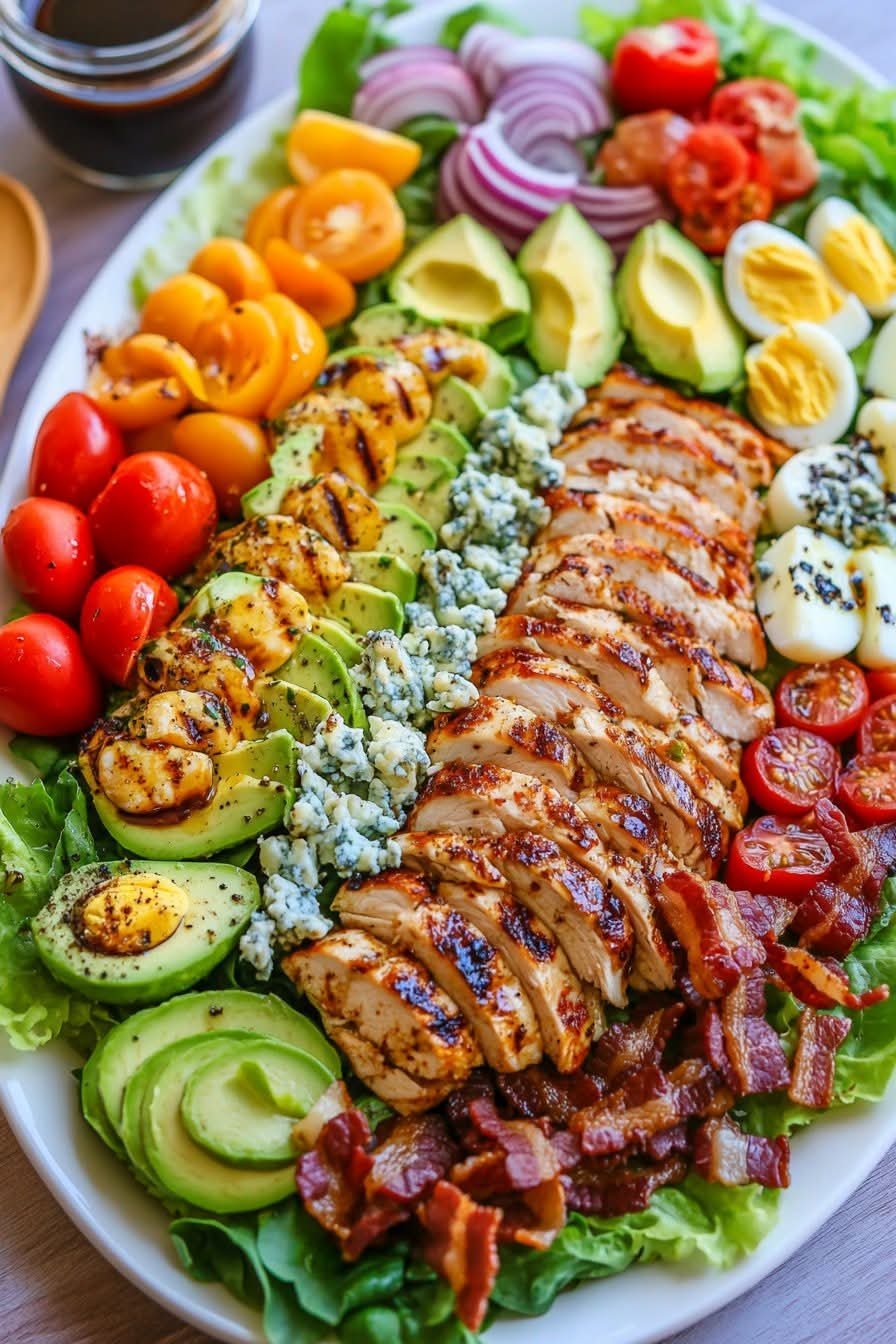
Cobb Salad with the Best Dressing

Cobb Salad with the Best Dressing


Why You’ll Love This Cobb Salad

Perfect as a meal or side: Filling enough to be the star of the show, but versatile as a side dish.

Quick and fresh: Just 25 minutes of prep and minimal cooking.

Bold flavors: Smoky bacon, creamy blue cheese, and tangy balsamic dressing.

Great for gatherings: A showstopper presentation on a large platter.


Cobb Salad Ingredients

This Cobb Salad serves about 6 people as a side salad—or 3-4 as a light main dish. Here’s what you’ll need:


For the Salad:

6 oz bacon (about 6 slices), chopped and browned

1 medium head romaine lettuce (approx. 5 cups), chopped, rinsed, and dried

2 cooked chicken breasts, sliced or diced (see note below)

2 hard-boiled eggs, peeled and quartered

1 large avocado, sliced

1 cup cherry tomatoes, halved

½ cup red onion, thinly sliced

½ cup crumbled blue cheese (or feta if you prefer)

2 tablespoons parsley, finely chopped (for garnish)

For the Cobb Salad Dressing:

3 tablespoons balsamic vinegar

1 tablespoon Dijon mustard

1 garlic clove, finely minced or pressed

⅓ cup extra virgin olive oil

¼ teaspoon salt

⅛ teaspoon black pepper

Instructions: How to Make the Best Cobb Salad

Step 1: Prepare the Protein

Cook the bacon until golden and crispy. You can bake it, air fry it, or sauté it in a skillet.

While the bacon cooks, boil the eggs. Once done, chill them in ice water, then peel and quarter.

Tip: Use rotisserie chicken or grilled chicken breasts for a time-saving shortcut.

Step 2: Prep the Base

Chop and rinse the romaine lettuce, then spin dry or pat dry with paper towels.

Arrange the lettuce on a large shallow serving platter or salad bowl.

Step 3: Assemble the Salad

Create beautiful rows of ingredients:

Sliced chicken

Quartered eggs

Avocado slices

Halved cherry tomatoes

Sliced red onions

Crumbled blue cheese

Crispy bacon

Sprinkle the salad with freshly chopped parsley for color and flavor.

Step 4: Make the Dressing

In a mason jar or bowl, combine the balsamic vinegar, Dijon mustard, garlic, olive oil, salt, and pepper.

Shake vigorously (or whisk) until emulsified.

Step 5: Serve It Up

Drizzle the dressing over the salad just before serving, or let guests dress their plates to taste.

Serve immediately for best texture and freshness.

Cobb Salad Variations

Feel free to make it your own! Try these ideas:


Swap chicken for grilled shrimp or turkey.

Use ranch or blue cheese dressing instead of balsamic.

Add croutons for an extra crunch.

Include cucumber or corn for even more veggie goodness.

Storage Tips

If making ahead, store ingredients separately and assemble just before serving.

Dressing can be made 3 days in advance and kept refrigerated.

Avoid cutting the avocado until ready to serve to prevent browning.

FAQs About Cobb Salad

Q: Can I make this salad ahead of time?


Yes! Just prep all the ingredients and store them separately. Assemble just before serving for the best texture.


Q: What’s the best substitute for blue cheese?

Feta or goat cheese works well if you prefer a milder flavor.


Q: Is this Cobb Salad gluten-free?


Yes, all ingredients are naturally gluten-free—but double-check your mustard and balsamic labels to be sure.


More Fresh Recipes You’ll Love

Greek Chicken Salad with Tzatziki Dressing

Southwest Quinoa Salad

Homemade Caesar Salad with Garlic Croutons

Caprese Pasta Salad with Pesto

Final Thoughts

This Cobb Salad is proof that salads don’t have to be boring. With its medley of colors, textures, and bold flavors, it’s as much a feast for the eyes as it is for the taste buds. Whether you’re hosting a lunch, meal-prepping for the week, or just craving something fresh, this salad brings serious satisfaction every time.Meta Title & Description

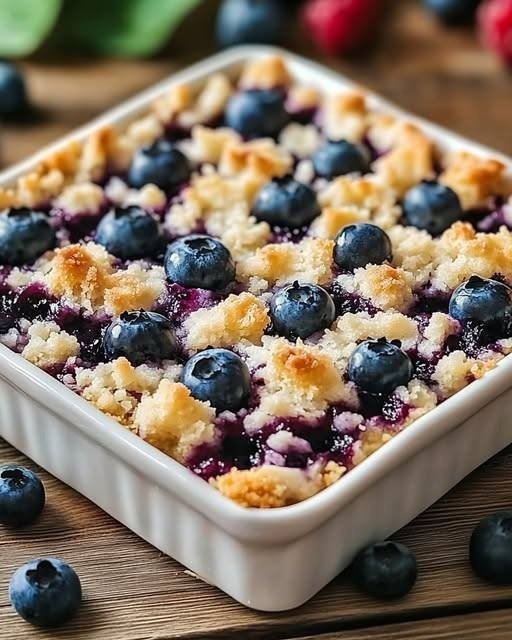
Blueberry Cottage Cheese Breakfast Bake

This Blueberry Cottage Cheese Breakfast Bake is a wholesome, protein-packed way to start your morning. Naturally sweetened with honey or maple syrup and filled with juicy blueberries, this bake has a soft, custard-like texture with hearty oats for structure. It’s simple to prepare, meal-prep friendly, and perfect for busy mornings when you want something nourishing yet comforting.

Ingredients

  • 1 cup cottage cheese
  • ½ cup rolled oats
  • ½ cup fresh blueberries
  • 2 large eggs
  • ¼ cup honey or maple syrup
  • ½ teaspoon cinnamon

Instructions

1. Preheat and Prepare
Preheat your oven to 175°C (350°F). Lightly grease a small baking dish (about 6×6 or 7×7 inches) with butter or non-stick spray. This prevents sticking and makes serving easier.

2. Blend the Base
In a mixing bowl, whisk together the cottage cheese and eggs until well combined. If you prefer a smoother texture, you can blend them briefly in a blender or food processor. Blending removes the curds and creates a creamier, cheesecake-like consistency.

3. Add Sweetness and Flavor
Stir in the honey (or maple syrup) and cinnamon. The cinnamon adds warmth and enhances the natural sweetness of the blueberries. Mix until everything is evenly incorporated.

4. Incorporate the Oats
Fold in the rolled oats. They absorb moisture as the bake cooks, giving structure and a soft, hearty texture. Let the mixture sit for 5 minutes to allow the oats to begin soaking up some liquid.

5. Add the Blueberries
Gently fold in the fresh blueberries. Be careful not to overmix so they stay whole and distribute evenly throughout the batter.

See also  Cinnamon Roll Ice Cream

6. Bake
Pour the mixture into the prepared baking dish and spread it evenly. Bake for 30–35 minutes, or until the center is set and the top is lightly golden. A toothpick inserted in the center should come out mostly clean.

7. Cool and Serve
Allow the bake to cool for 10–15 minutes before slicing. This helps it firm up for cleaner pieces.

Serving Suggestions

Enjoy warm on its own, or top with extra blueberries, a drizzle of honey, Greek yogurt, or a sprinkle of chopped nuts. Store leftovers in the refrigerator for up to 4 days. Simply reheat in the microwave for a quick, protein-rich breakfast anytime.

Simple, nutritious, and satisfying — the perfect make-ahead morning treat. 💙

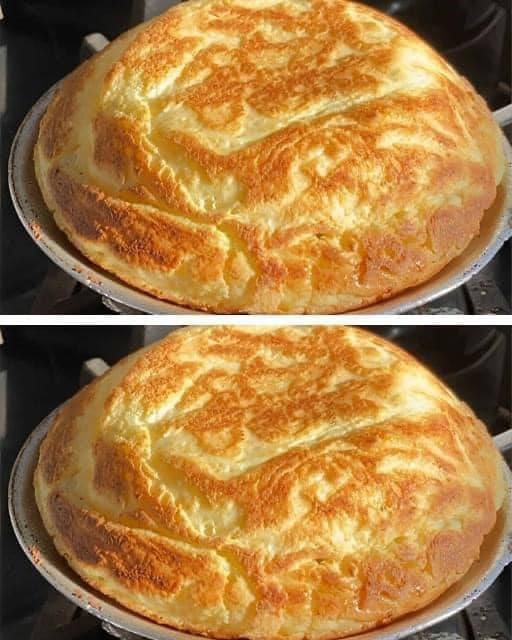
Fluffy Skillet Bread: A simple recipe with just a few ingredients

Fluffy Skillet Bread: A simple recipe with just a few ingredients, perfect for your morning or snack time

Hi, everyone, today we’re going to learn how to make Skillet Bread using simple ingredients. So grab your pen and paper to jot down the ingredients, then follow the complete preparation method.

How to Make Fluffy Skillet Bread

Here is the perfect recipe: healthy, easy, and quick to make. This bread, in addition to being a tasty option, provides several health benefits, standing out for its soft texture and versatility in the kitchen. See below the list of all ingredients and required quantities. And then, a very complete preparation method with details of the recipe.

Recipe Ingredients:

  • 3 tablespoons of cornstarch (e.g., Maizena or another brand)
  • 1 egg
  • 1 tablespoon of cream cheese or spreadable cheese
  • 1 teaspoon of chia seeds
  • ½ tablespoon of baking powder (e.g., Royal or another brand)
  • Salt to taste

Instructions:

First, in a bowl, combine the cornstarch, egg, cream cheese (or spreadable cheese), and salt. Mix well until the ingredients are fully incorporated.

Then, add the chia seeds and baking powder, mixing again until you achieve a smooth and consistent batter.

Next, pour the batter into a preheated and greased non-stick skillet. Cook it over low heat.

After that, check the bottom of the batter. When it turns golden and starts to release easily from the skillet, flip it to cook the other side.

Once both sides are cooked, remove the bread from the skillet and let it rest for a few minutes. This will improve the texture and make it easier to cut.

Finally, the bread can be served on its own or with accompaniments like butter, honey, jam, cream cheese, or any other topping of your choice.

🫐 No-Bake Blueberry Cheesecake Parfait

No-Bake Blueberry Cheesecake Parfait

The Layers:

  • The Crunch: 1 cup graham cracker crumbs + 2 tbsp melted butter + 1 tsp brown sugar. Mix until it looks like wet sand.

  • The Cream: 1 cup softened cream cheese + ½ cup Greek yogurt + ¼ cup powdered sugar + 1 tsp vanilla. Whip until fluffy! ☁️

  • The Glow-Up: 1 ½ cups blueberries + 2 tbsp sugar + splash of lemon juice. Simmer for 8 mins until syrupy, then cool.

The Method:

  1. Press the crust into the bottom of your jars.

  2. Pipe or spoon the cream layer (press a few fresh berries against the glass for that pro look!). 📸

  3. Top with the cooled blueberry compote.

  4. Chill for 2 hours before serving.

Pro Tip: Use a piping bag for the cream layer to keep your jar sides crystal clear and “cinematic.”


Would you like m

Cheesy Garlic Butter Mozzarella Stuffed Rolls 🍞🧀🧄

Cheesy Garlic Butter Mozzarella Stuffed Rolls 🍞🧀🧄

Soft, fluffy bread rolls filled with gooey mozzarella and brushed with rich garlic butter—perfect as a snack, side dish, or party appetizer. When you pull one apart, the melted cheese stretches beautifully for that irresistible “cinematic” cheese pull.


Ingredients

1. The Dough

  • 3½ cups all-purpose flour

  • 1 cup warm milk (about 38 °C / 100 °F)

  • 2¼ tsp instant yeast (1 packet)

  • 2 tbsp sugar

  • 1 tsp salt

  • 4 tbsp melted butter

  • 1 large egg


2. The Filling

  • 12–15 cubes low-moisture mozzarella cheese (about 1.5–2 cm cubes)


3. The Garlic Butter

  • 6 tbsp softened butter

  • 4 cloves garlic, finely minced

  • 2 tbsp fresh parsley, chopped

  • ½ tsp salt


4. The Topping

  • 1 cup shredded mozzarella & parmesan cheese mix

  • ½ tsp dried oregano


Step-by-Step Method

Step 1: Prepare the Dough

  1. In a large mixing bowl, combine the warm milk, sugar, and yeast.

  2. Stir gently and let the mixture sit for 5 minutes until it becomes foamy. This indicates the yeast is activated.

  3. Add the melted butter, egg, and salt to the mixture. Whisk until combined.

  4. Gradually add the flour while mixing until a soft dough forms.

Kneading

  • Transfer the dough to a lightly floured surface.

  • Knead for 8–10 minutes until the dough becomes smooth, soft, and elastic.

Pro Tip:
If the dough sticks too much to your hands, add flour 1 tablespoon at a time. Avoid adding too much—slightly sticky dough produces softer rolls.


Step 2: First Rise

  1. Lightly grease a bowl with oil or butter.

  2. Place the dough inside and turn it once to coat the surface.

  3. Cover with a damp cloth or plastic wrap.

  4. Let it rise in a warm place for about 1 hour, or until the dough doubles in size.


Step 3: Shape and Stuff

  1. Punch down the risen dough gently to release air.

  2. Divide the dough into 12–15 equal portions.

  3. Flatten each piece into a small circle.

  4. Place a cube of mozzarella in the center.

  5. Fold the edges over the cheese and pinch tightly to seal.

  6. Roll gently into a smooth ball.

Arrange

  • Place the dough balls seam-side down in a greased baking dish.

  • Arrange them so they are slightly touching—this helps create soft pull-apart rolls.


Step 4: Second Rise

  1. Cover the pan again with a cloth.

  2. Let the rolls rise for 30 minutes until puffy.

Prepare Garlic Butter

While waiting:

  1. In a small bowl combine

    • softened butter

    • minced garlic

    • chopped parsley

    • salt

  2. Mix until smooth.

Brush the Rolls

  • Brush half of the garlic butter over the tops of the risen rolls.


Step 5: Bake

  1. Preheat the oven to 190 °C (375 °F).

  2. Bake the rolls for 15 minutes.

Add Topping

  1. Remove the tray from the oven.

  2. Brush the remaining garlic butter over the rolls.

  3. Sprinkle the shredded mozzarella & parmesan mixture on top.

  4. Add a light sprinkle of dried oregano.

Final Bake

Return to the oven and bake for 8–10 minutes until:

  • the cheese melts

  • the tops become golden brown

  • the surface looks bubbly.

🥦 Cheesy Broccoli and Chicken Bake in Foil

Foil packet meals are the ultimate dinner-time heroes! I’ve taken all the wonderful details from the text you shared and organized them into a clean, easy-to-follow recipe format so you can skip the scrolling and get right to the good part: cooking and eating.

Here is your streamlined recipe:

🥦 Cheesy Broccoli and Chicken Bake in Foil

A warm hug on a plate. This easy, low-carb weeknight dinner delivers juicy seasoned chicken, tender broccoli, and melty golden cheese with practically zero cleanup.

Why You’ll Love It

  • Minimal Cleanup: Cooking in foil means fewer pans and dishes to wash.

  • Perfectly Juicy: The sealed foil traps moisture, ensuring the chicken never dries out.

  • Low-Carb & Keto-Friendly: Naturally satisfying without heavy starches.

  • Complete Meal: Protein, veggies, and dairy all in one tidy packet.


🛒 Ingredients

  • 4 boneless, skinless chicken breasts (about 150–180g each)

  • 3 cups fresh broccoli florets, cut into small pieces

  • 1 cup shredded cheddar cheese

  • ½ cup shredded mozzarella cheese

  • 3 tbsp olive oil (or melted butter)

  • 3 cloves garlic, minced

  • 1 tsp Italian seasoning

  • ½ tsp paprika

  • ¾ tsp salt

  • ½ tsp black pepper

  • 2 tbsp heavy cream (optional, for an extra creamy sauce)

  • Fresh parsley, chopped (for garnish)


👩‍🍳 Step-by-Step Instructions

  1. Preheat & Prep: Preheat your oven to 400°F (200°C). Cut 4 large sheets of heavy-duty aluminum foil and lightly spray them with cooking spray or brush with oil.

  2. Season the Chicken: Pat the chicken breasts dry. Rub each piece with olive oil, then season evenly on both sides with the minced garlic, Italian seasoning, paprika, salt, and pepper.

  3. Assemble the Packets: Place one seasoned chicken breast in the center of each foil sheet. Divide the broccoli florets evenly around the chicken.

  4. Make it Creamy: Drizzle a little extra olive oil over the broccoli. If using, spoon ½ tablespoon of heavy cream over each piece of chicken. (Pro-tip: You can also smear a spoonful of softened cream cheese over the chicken here for a richer base!)

  5. Add the Cheese: Sprinkle the shredded cheddar and mozzarella evenly over the top of the chicken and broccoli.

  6. Seal Tightly: Fold the foil over the ingredients and crimp the edges tightly to seal completely. Leave a little space inside for air circulation, but make sure no steam can escape.

  7. Bake: Place the foil packets on a baking sheet. Bake for 25–30 minutes, or until the chicken reaches an internal temperature of 165°F (74°C) and the broccoli is tender.

  8. Broil & Rest: For a golden, bubbly top, carefully open the foil packets and broil for 2–3 minutes (watch closely so it doesn’t burn). Let the packets rest for 5 minutes before serving to lock in the juices. Garnish with fresh parsley.

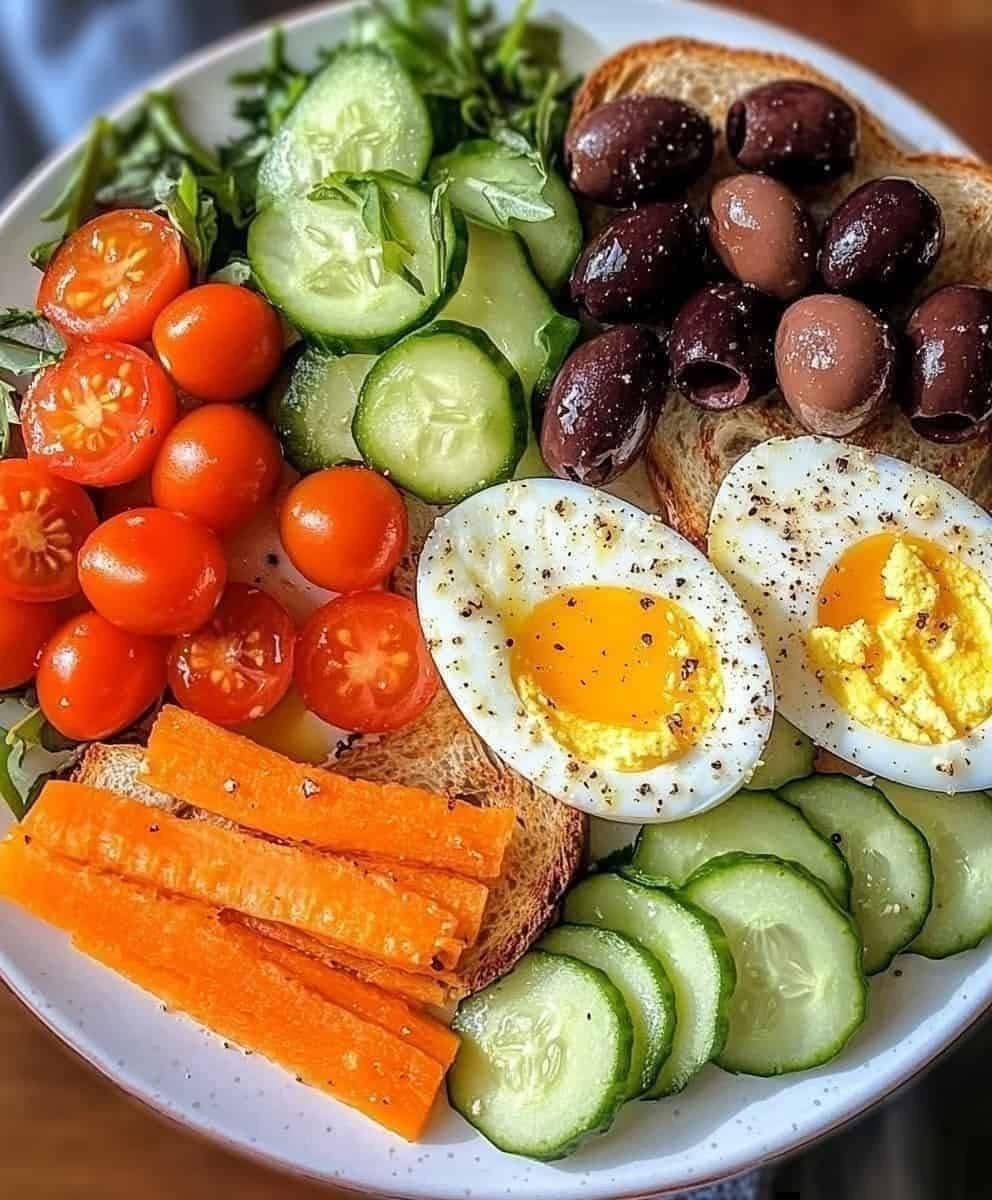
The Mediterranean Sunshine Plate

The Mediterranean Sunshine Plate

This dish focuses on high-quality fats, fiber, and protein to keep you fueled without the mid-morning sugar crash.

Ingredients

• 2 Large Eggs: Soft-boiled (6–7 minutes) for that jammy center.

• Vegetable Base: Handful of cherry tomatoes, half a cucumber (sliced), and a handful of fresh arugula or spinach.

• The Crunch: 2 slices of sourdough or whole-grain toast and a medium carrot, sliced into batons.

• The Savory: A generous serving of Kalamata or mixed dark olives.

• Seasoning: Extra virgin olive oil, sea salt, and freshly cracked black pepper.

Assembly Instructions

1. Prep the Eggs: Bring water to a boil, gently lower the eggs in, and simmer for 6.5 minutes. Immediately transfer to an ice bath. Once cool, peel and slice them in half.

2. Toast & Texture: Lightly toast your bread. While it’s warm, you can rub a halved garlic clove over the surface for extra depth. Slice your carrots into thick sticks for a satisfying crunch.

3. Plate with Intention: Arrange the greens as a bed. Group the tomatoes, cucumbers, and olives in distinct sections to keep the flavors clean.

4. The Finishing Touch: Place the eggs and toast in the center. Drizzle the entire plate with high-quality olive oil and sprinkle the eggs with salt and pepper.

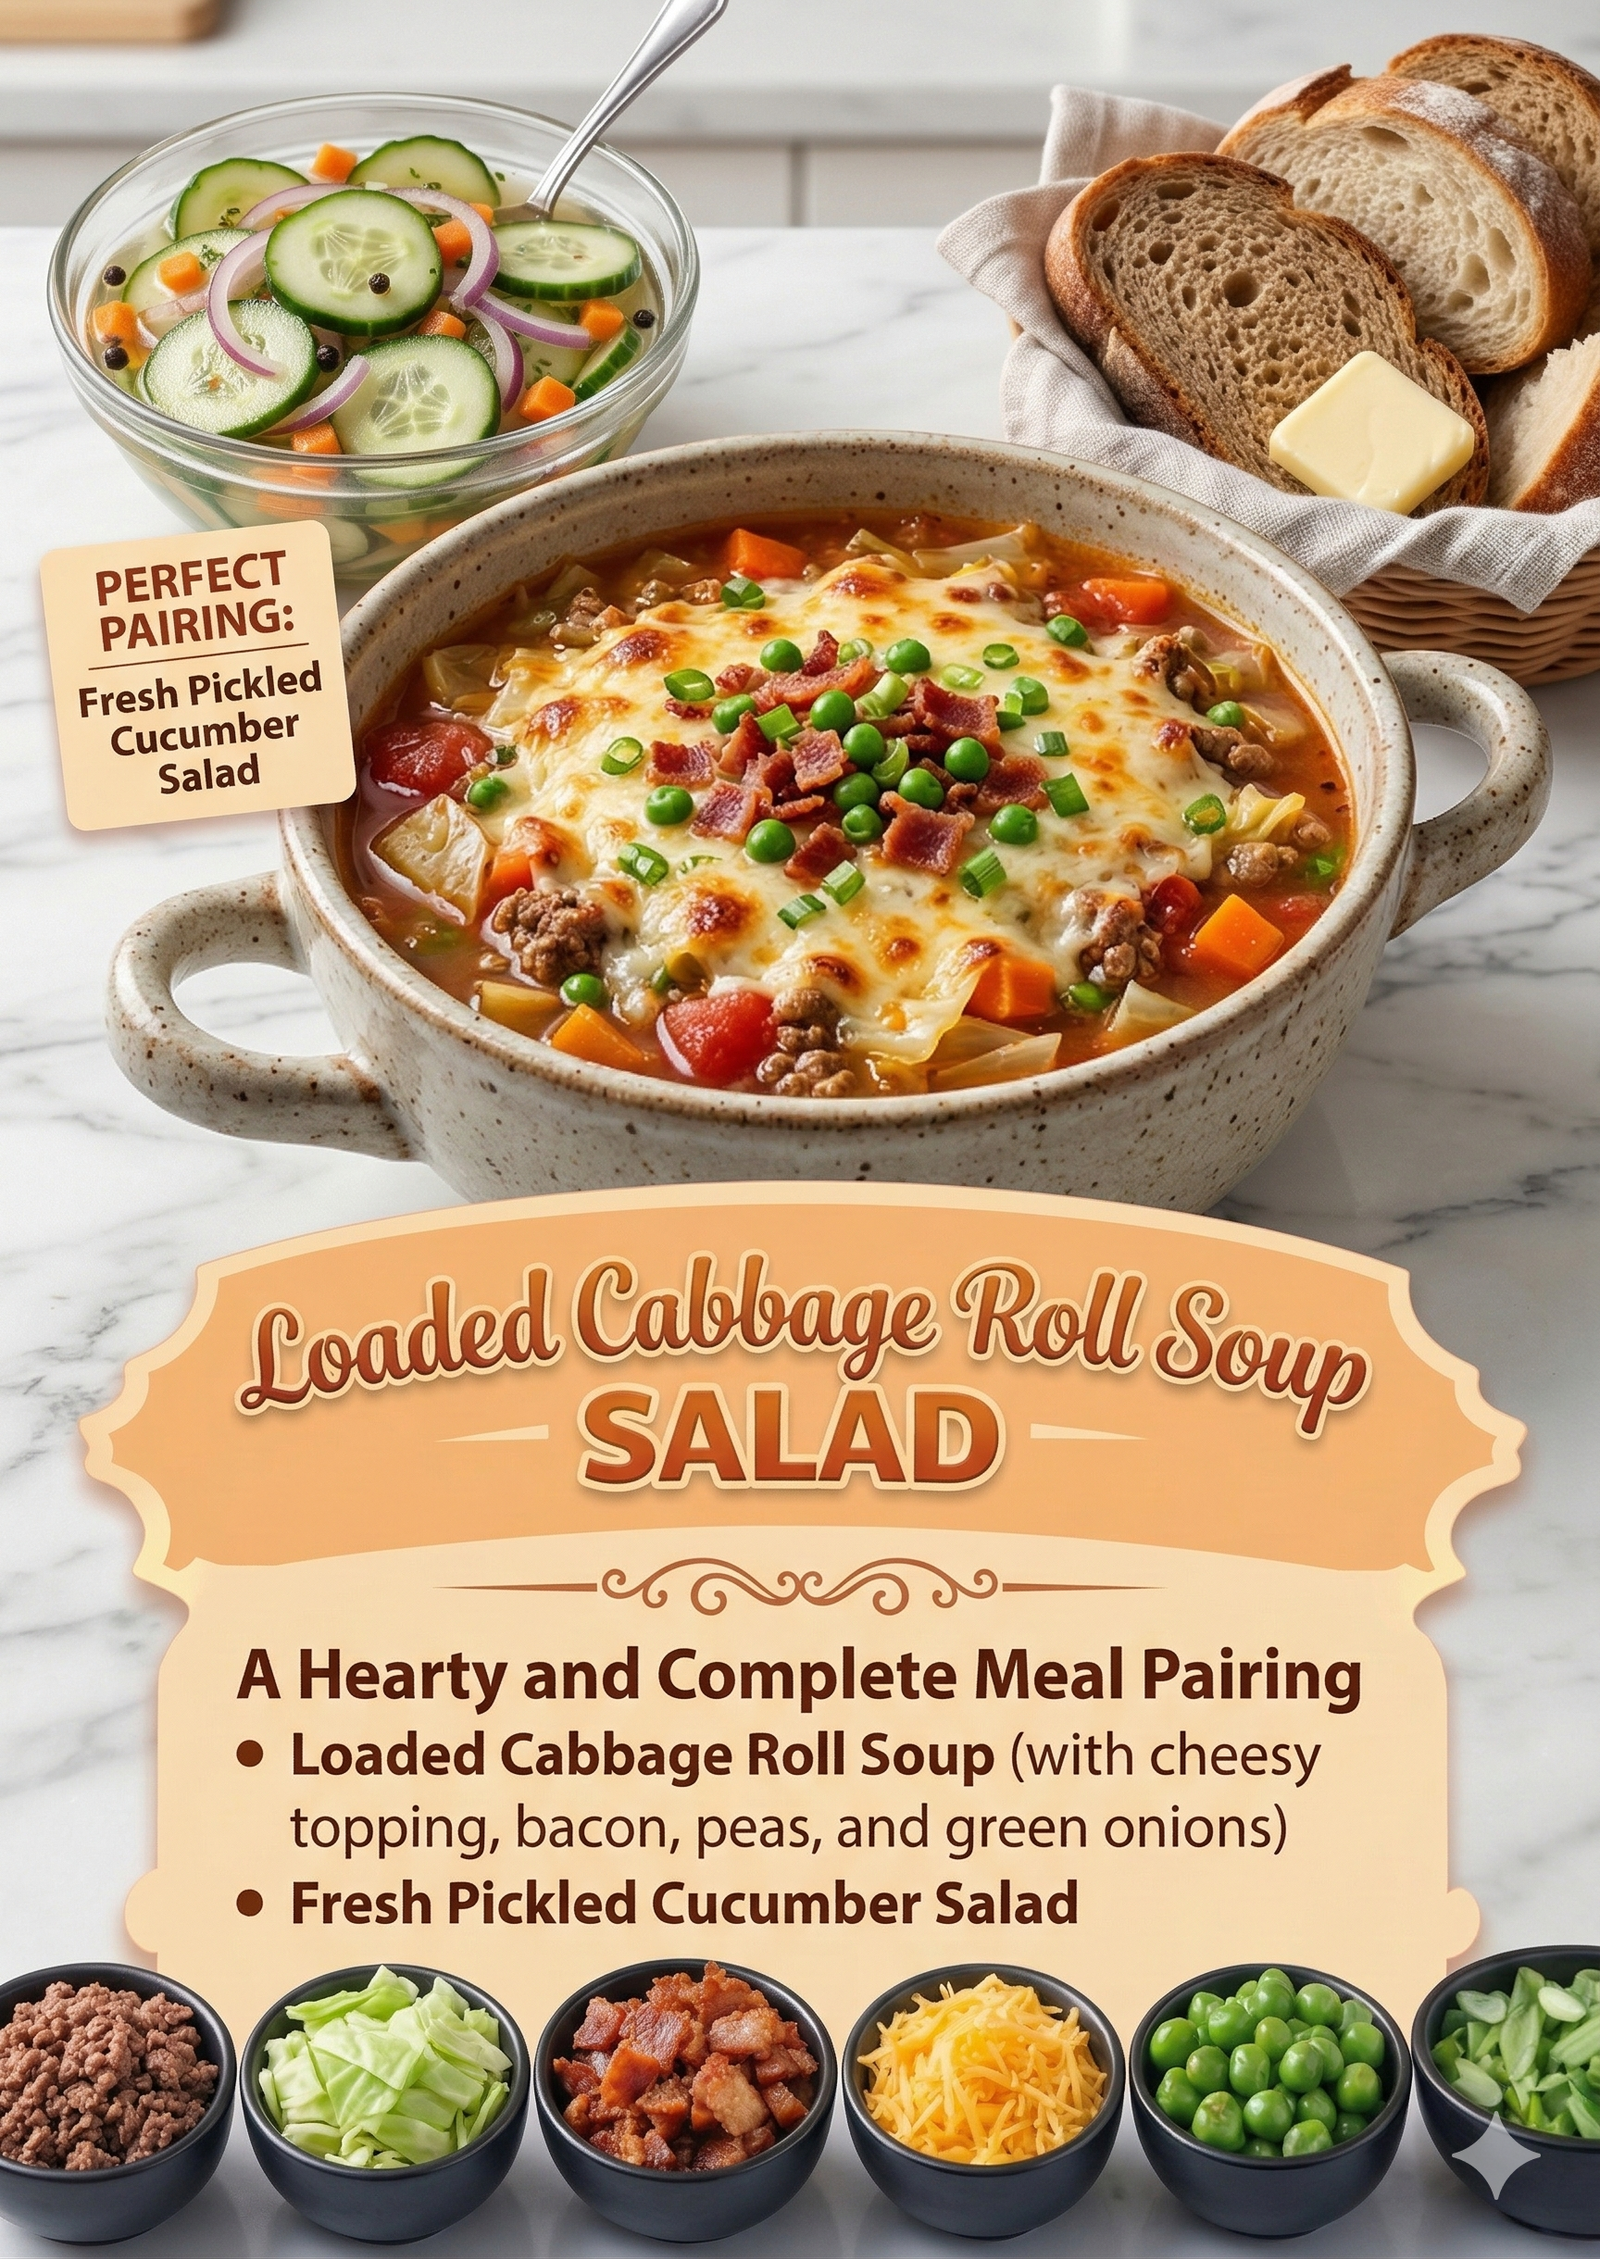
🥬 Stuffed Cabbage Rolls with a Roasted Vegetable Bed

🥬 Stuffed Cabbage Rolls with a Roasted Vegetable Bed

This comforting, one-pan meal is hearty, wholesome, and packed with flavor—perfect for family dinners, meal prep, or impressing guests without spending hours in the kitchen.

Why You’ll Love This Recipe

  • Deeply Satisfying: Juicy meat filling and fluffy rice nestled on a vibrant layer of caramelized vegetables.

  • Versatile: Perfect for cozy weeknight dinners, holiday meals, or healthy lunches.

  • Prep-Friendly: Excellent for batch cooking and freezing.


🛒 Ingredients

For the Cabbage Rolls:

  • 1 large head green cabbage or Savoy cabbage (~10–12 leaves)

  • 1 lb (450g) ground beef, turkey, pork, or plant-based crumbles

  • 1 cup cooked rice (white, brown, or wild)

  • 1 small onion, finely diced (~½ cup)

  • 2 cloves garlic, minced

  • 1 large egg (optional, helps bind filling)

  • 1 tsp smoked paprika

  • 1 tsp dried thyme

  • Salt & freshly ground black pepper, to taste

For the Tomato Sauce:

  • 1 can (15 oz / 425g) crushed tomatoes

  • ½ cup (120ml) tomato sauce or passata

  • ¼ cup (60ml) chicken or vegetable broth

  • 1 tbsp Worcestershire sauce (or soy sauce for a vegetarian option)

  • 1 tsp sugar (optional, balances acidity)

  • ½ tsp garlic powder

  • Salt & pepper, to taste

For the Vegetable Bed:

  • 2 medium carrots, sliced into coins

  • 1 medium zucchini, chopped

  • 1 red bell pepper, sliced

  • 1 small onion, chopped

  • 2 tbsp olive oil

  • Optional seasonings: Pinch of red pepper flakes, Italian herbs, salt & pepper


👩‍🍳 Step-by-Step Instructions

  1. Preheat Oven & Prep Pan: Preheat your oven to 375°F (190°C). Lightly grease a 9×13-inch baking dish or deep casserole with oil or nonstick spray.

  2. Soften the Cabbage Leaves: Bring a large pot of water to a boil. Carefully place the whole cabbage head into the boiling water, core-side down. Boil 5–7 minutes, removing leaves with tongs as they soften (about 8–10 total). Cool slightly before handling.

  3. Make the Filling: In a large bowl, combine the ground meat, cooked rice, diced onion, minced garlic, egg (if using), paprika, thyme, salt, and pepper. Mix gently until evenly blended—don’t overwork the meat.

  4. Assemble the Rolls: Lay out a cabbage leaf on a flat surface, vein-side up. Spoon 2–3 tbsp of filling into the center. Fold the sides inward, then roll tightly from the base to enclose completely. Repeat with the remaining leaves.

  5. Prepare the Vegetable Bed: Toss the carrots, zucchini, bell pepper, and chopped onion with olive oil and a pinch of salt, pepper, and herbs. Spread evenly across the bottom of the prepared baking dish.

  6. Layer & Sauce: Arrange the cabbage rolls seam-side down on top of the vegetables. In a bowl, whisk together the sauce ingredients. Pour the sauce evenly over the rolls and vegetables until covered completely.

  7. Bake Until Tender: Cover the dish tightly with aluminum foil. Bake for 45–50 minutes. Remove the foil and bake for 10–15 minutes more, until the sauce is bubbling and slightly reduced.

  8. Serve Warm: Let the dish rest for 5 minutes before serving to help the rolls hold their shape. Spoon rolls and vegetables onto plates, drizzle with extra sauce, and serve hot!

Sweetened Condensed Milk Bread

Sweetened Condensed Milk Bread

Ingredients:

  • 1/2 cup keto sweetened condensed milk (store-bought or homemade)
  • 2 cups almond flour
  • 1/4 cup coconut flour
  • 2 tbsp baking powder
  • 1/4 tsp salt
  • 1/4 cup melted butter
  • 4 large eggs
  • 1/2 cup unsweetened almond milk (or any low-carb milk)
  • 1 tsp vanilla extract

Instructions:

  • Preheat Oven:
  • Preheat your oven to 350°F (175°C). Grease a loaf pan (8×4 inches) with butter or line it with parchment paper for easy removal.
  • Prepare Dry Ingredients:
  • In a large mixing bowl, whisk together the almond flour, coconut flour, baking powder, and salt until fully combined.
  • Mix Wet Ingredients:
  • In a separate bowl, whisk together the eggs, melted butter, keto sweetened condensed milk, almond milk, and vanilla extract until smooth and well-combined.
  • Combine Wet and Dry Ingredients:
  • Pour the wet ingredients into the dry ingredients and stir until a thick batter forms. If the batter seems too thick, you can add a little more almond milk, one tablespoon at a time, until it reaches a thicker cake-batter-like consistency.
  • Bake the Bread:
  • Pour the batter into the prepared loaf pan and spread it out evenly.
  • Bake for 30-40 minutes or until the top is golden brown and a toothpick inserted into the center comes out clean.
  • Cool and Serve:
  • Let the bread cool in the pan for 10 minutes before transferring it to a wire rack to cool completely.
  • Slice and serve as is, or enjoy with butter, sugar-free jams, or any keto-friendly spread.

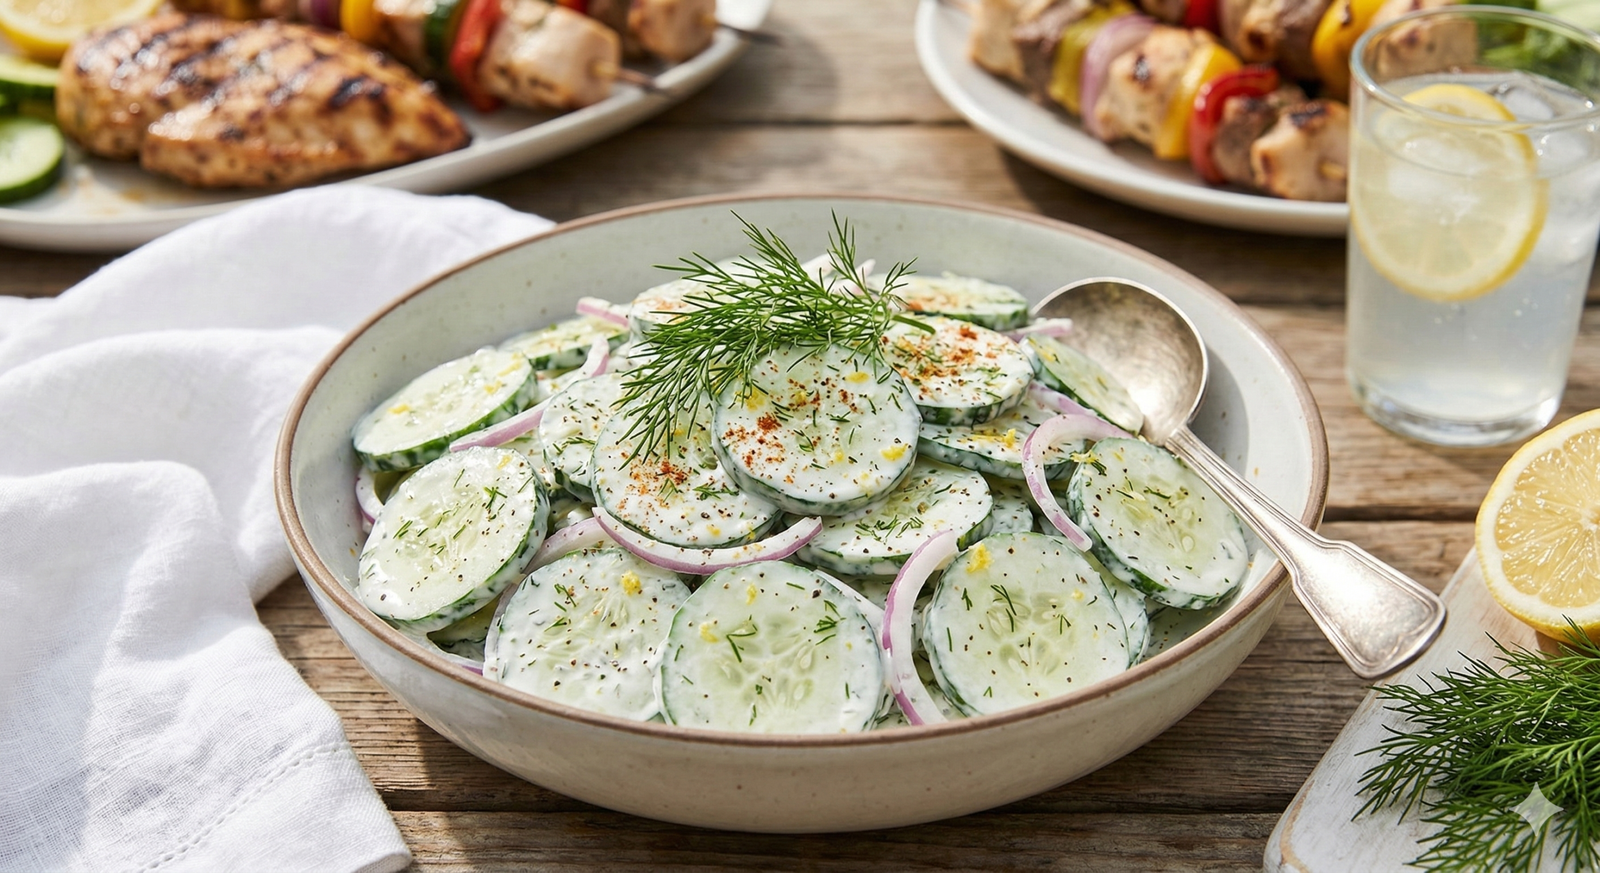
🥒 Creamy Cucumber Salad

Creamy Cucumber Salad

📝 Description

Creamy Cucumber Salad is a cool, tangy, and refreshing side dish made with crisp cucumbers tossed in a creamy yogurt or sour cream dressing infused with garlic, dill, and lemon. It’s light, hydrating, and perfect for summer meals, BBQs, or as a side to grilled meats and rice dishes.

🛒 Ingredients (Serves 4)

  • 3 large cucumbers (thinly sliced)
  • ½ small red onion (thinly sliced)
  • 1 cup sour cream or Greek yogurt
  • 1 tablespoon fresh lemon juice (or white vinegar)
  • 1 teaspoon lemon zest (optional)
  • 1 tablespoon fresh dill (chopped) or 1 teaspoon dried dill
  • 1 clove garlic (minced)
  • ½ teaspoon sugar (optional, balances flavor)
  • ½ teaspoon salt (or to taste)
  • ¼ teaspoon black pepper
  • 1 tablespoon olive oil (optional, for richness)

👩‍🍳 Instructions

1️⃣ Prepare the Cucumbers

  • Wash and thinly slice cucumbers.
  • For extra crispness: sprinkle with a little salt and let sit 15–20 minutes.
  • Drain excess water and gently pat dry with paper towel.

2️⃣ Make the Creamy Dressing

In a bowl, whisk together:

  • Sour cream (or Greek yogurt)
  • Lemon juice & zest
  • Garlic
  • Dill
  • Sugar
  • Salt & pepper
  • Olive oil (if using)

Mix until smooth and creamy.

3️⃣ Combine

  • Add cucumbers and red onion to the dressing.
  • Toss gently until well coated.

4️⃣ Chill

  • Cover and refrigerate for at least 30 minutes before serving.
  • Stir before serving and adjust seasoning if needed.

💡 Tips for Best Results

✔ Use English cucumbers for fewer seeds and less bitterness.
✔ For a lighter version, use all Greek yogurt.
✔ Add a splash of apple cider vinegar for extra tang.
✔ Sprinkle paprika or extra dill on top before serving.
✔ Add cherry tomatoes for color and sweetness.

🍽️ Serving Suggestions

Perfect with:

  • Grilled chicken
  • Kebabs
  • Rice dishes
  • BBQ platters
  • Mediterranean wraps

🥗 Nutritional Info (Approx. per serving)

  • Calories: 120–150 kcal
  • Protein: 4g
  • Carbs: 8g
  • Fat: 10g
  • Fiber: 1g

(Varies depending on sour cream or yogurt used)

🌿 Health Benefits

  • 🥒 Cucumbers are hydrating and low in calories
  • 🦠 Yogurt provides probiotics for gut health
  • 🌿 Dill and garlic have anti-inflammatory properties
  • ❤️ Light and heart-friendly when made with Greek yogurt

❓ Frequently Asked Questions

Q: Can I make it ahead of time?
Yes! Best eaten within 24 hours for freshness.

Q: How do I prevent it from getting watery?
Salt and drain cucumbers before mixing.

Q: Can I make it dairy-free?
Yes, use a plant-based yogurt or vegan sour cream.

Q: Can I add protein?
Add chickpeas or grilled chicken to turn it into a light meal.

Mediterranean Red Onion & Black Bean Skillet

Mediterranean Red Onion & Black Bean Skillet

A blood-sugar–friendly savory dish

Description

This colorful Mediterranean-style skillet combines red onions, black beans, sweet potatoes, and fresh herbs. It’s rich in fiber, plant protein, and healthy fats—key nutrients that help support steady blood sugar levels when part of a balanced diet.

 Ingredients (Serves 4)

  • 1 large red onion, thinly sliced

  • 2 medium sweet potatoes, diced small

  • 1 cup cooked black beans (rinsed)

  • ½ cup corn kernels (optional)

  • 1 red bell pepper, diced

  • 2 cloves garlic, minced

  • 2 tablespoons olive oil

  • 1 teaspoon ground cumin

  • ½ teaspoon smoked paprika

  • ½ teaspoon oregano

  • Salt & pepper to taste

  • 1 tablespoon lemon juice

  • Fresh parsley or cilantro for garnish

  • Optional: ½ avocado, diced

 Instructions

  1. Sauté the Onion
    Heat olive oil in a skillet over medium heat. Add sliced red onion and cook 5–7 minutes until softened and slightly caramelized.

  2. Cook Sweet Potatoes
    Add diced sweet potatoes. Cover and cook 8–10 minutes, stirring occasionally, until fork-tender.

  3. Add Remaining Ingredients
    Stir in garlic, black beans, bell pepper, corn, and spices. Cook another 5 minutes.

  4. Finish
    Add lemon juice, adjust seasoning, and garnish with herbs and avocado.

Serve warm.

 Notes & Tips

  • Slice onions thinly to maximize caramelization (this enhances natural sweetness without added sugar).

  • Pair with a protein (grilled chicken, tofu, or Greek yogurt) to slow glucose absorption.

  • Keep portions moderate—sweet potatoes and beans contain carbs.

  • Monitor blood sugar individually, as responses vary.

Servings

Makes 4 servings
Serving size: About 1–1¼ cups

 Estimated Nutritional Info (Per Serving)

Approximate values:

  • Calories: 280–320

  • Carbohydrates: 40–45g

  • Fiber: 9–11g

  • Protein: 8–10g

  • Fat: 10–14g

  • Glycemic impact: Moderate (balanced by fiber and fat)

 Potential Benefits

  • Red onion: Contains antioxidants like quercetin

  • Black beans: High fiber & plant protein

  • Sweet potatoes: Provide complex carbs & beta-carotene

  • Olive oil: Heart-healthy fats

These ingredients may help support stable blood sugar as part of an overall healthy lifestyle—but they do not replace medical treatment.

Q & A

Q: Can this cure diabetes?
No. There is currently no cure for type 1 diabetes and most cases of type 2 require ongoing management.

Q: Can onions lower blood sugar?
Some small studies suggest onions may have mild glucose-lowering effects, but they are not a substitute for prescribed medication.

Q: Is this safe for diabetics?
Generally yes, in appropriate portions—but always consult your healthcare provider and monitor blood glucose.

Q: Can I make it lower carb?
Yes. Reduce or remove sweet potatoes and corn, and add more non-starchy vegetables like zucchini or spinach.

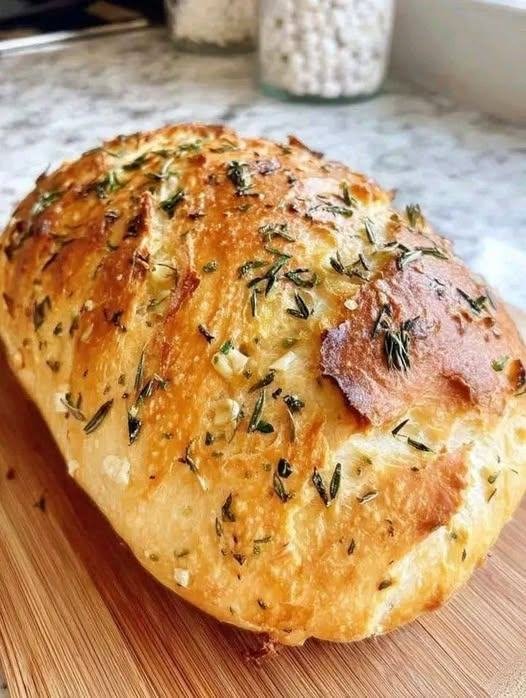
🍞 Crusty Air Fryer Artisan Bread

:


🍞 Crusty Air Fryer Artisan Bread

A light, fluffy loaf with a chewy crust. Perfect for dipping in olive oil or serving with soup.

🛒 Ingredients

  • All-Purpose Flour: $1\frac{1}{2}$ cups

  • Instant Yeast: $1\frac{1}{4}$ tsp

  • Salt: $1$ tsp

  • Granulated Sugar: $\frac{1}{2}$ tsp

  • Warm Water: $\frac{3}{4}$ cup (approx. $105^\circ\text{F}$ to $115^\circ\text{F}$)

  • Olive Oil: $1$ tsp

🥣 Step-by-Step Instructions

1. Mix and First Rise

  • In a large bowl, whisk the flour, yeast, salt, and sugar.

  • Add the warm water and olive oil. Stir until a very sticky dough forms.

  • Cover the bowl and let it rise in a warm, draft-free spot for 1 hour.

2. Shape and Second Rise

  • Turn the sticky dough onto a lightly floured surface.

  • The Technique: Gently pull the edges of the dough up toward the center to create a tension-filled round ball.

  • Flip the loaf over so the smooth side is up.

  • Place the loaf on a piece of parchment paper inside a 6” or 8” round pan.

  • Let it rise again in the pan for 1 hour. Just before baking, use a sharp knife to cut 2–3 shallow slits (scores) across the top.

3. The Air Fryer “Steam” Bake

  • Preheat your air fryer to 400°F for 10 minutes.

  • Place the pan into the basket.

  • The Pro Secret: Toss a few ice cubes into the bottom of the air fryer basket (outside of the bread pan). This creates steam for a crispier crust.

  • Bake at 400°F for 20–25 minutes until golden.

  • Carefully flip the bread over and bake for an additional 5 minutes to crisp the bottom.


💡 Baker’s Success Tips

  • The Sticky Factor: Don’t be tempted to add too much extra flour. High hydration (sticky dough) is what creates those beautiful air bubbles inside the bread.

  • Parchment Safety: Ensure the parchment paper doesn’t stick up too high, or it might hit the heating element and burn. Trim it to the height of your pan.

  • The Tap Test: Not sure if it’s done? Tap the bottom of the loaf; if it sounds hollow, it’s ready!


🧊 Storage

  • Room Temp: Up to 3 days in a bread box.

  • Fridge: Up to 5 days in an airtight container.

  • Freezer: Wrap tightly in foil and plastic for up to 3 months.

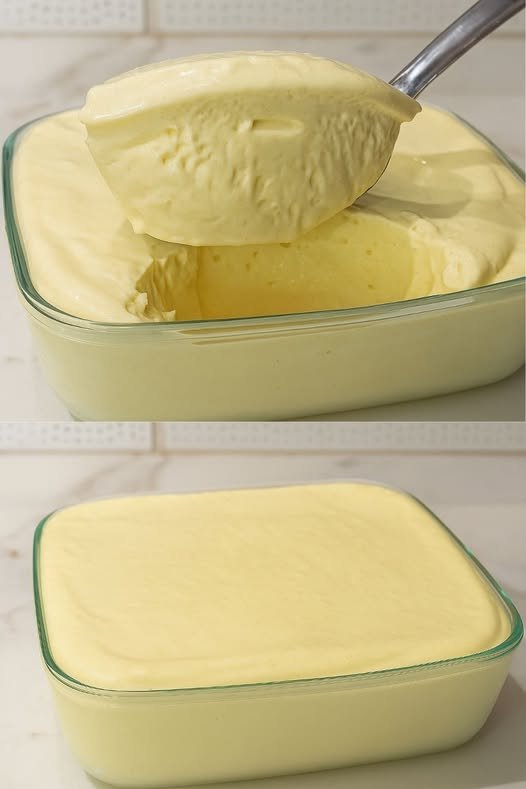
🍍 2-Ingredient Creamy Pineapple Mousse

🍍 2-Ingredient Creamy Pineapple Mousse

Prep time: 5 minutes | Chilling time: 2 hours | Yields: 4–6 servings

🛒 Ingredients

  • Heavy Cream (Chilled): 2 boxes or cans 

    Tip: Using “Table Cream” or heavy whipping cream that has been in the fridge for a few hours helps it thicken faster.

  • Pineapple Powdered Drink Mix: 1 packet ($25\text{ g}$ | $0.88\text{ oz}$), such as Tang or similar.

  • Optional Toppings: Fresh pineapple chunks, shredded coconut, or white chocolate shavings.


🥣 Step-by-Step Instructions

  1. The Base: Pour both containers of chilled heavy cream into your blender.

  2. The Flavor: Add the entire packet of pineapple drink mix.

  3. The Blend: Blend on high speed for approximately 1 to 2 minutes.

    • Watch closely: You will see the mixture transform from a liquid to a thick, velvety cream. The sound of the blender will change as the mixture becomes dense.

  4. The Set: Pour the mixture into a large glass serving dish (like the one in your photo) or divide it into individual dessert ramekins.

  5. The Chill: Smooth the top with a spatula and refrigerate for at least 2 hours. This allows the mousse to “set” so it holds its shape when scooped.

  6. The Finish: Just before serving, add your chosen toppings.


💡 Why This Works (The “Science”)

You don’t need gelatin or eggs because the citric acid in the powdered drink mix reacts with the fats and proteins in the heavy cream. This causes the cream to “denature” and thicken instantly, creating a stable mousse that won’t deflate.

🌟 Flavor Variations

If you want to try something different using the exact same method:

  • Passion Fruit: Use a passion fruit drink mix (very popular in Brazil!).

  • Strawberry: Use a strawberry mix and top with fresh berries.

  • Grape: Use a grape mix for a nostalgic, vibrant purple dessert.

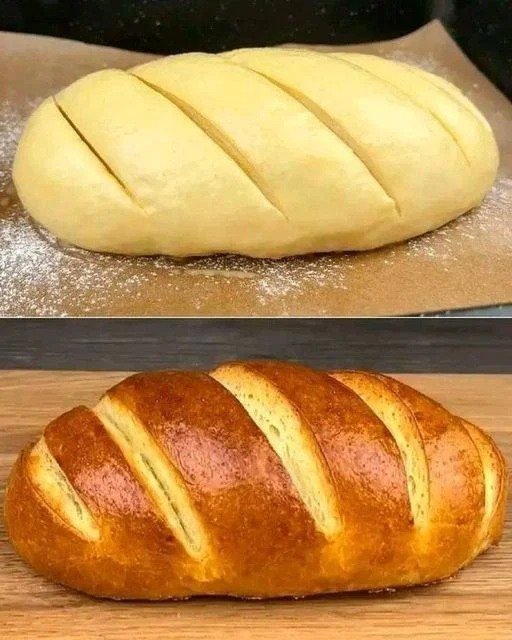
After trying this recipe, you’ll never want to buy bread again — you’ll bake it fresh at home instead

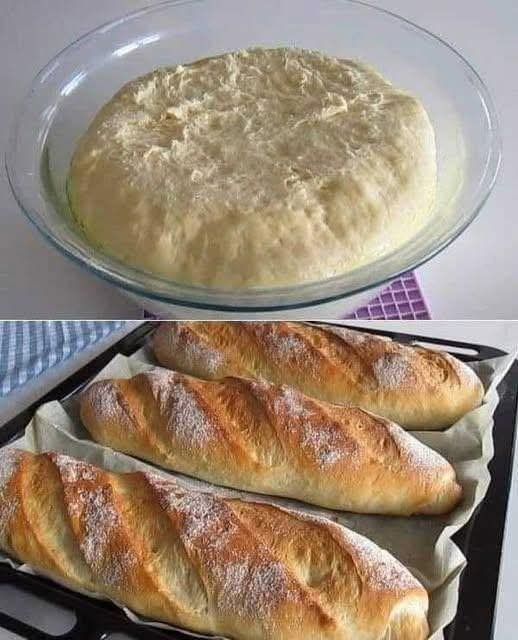
Homemade White Bread

Ingredients

For the Bread:


4 cups all-purpose flour

2 teaspoons instant yeast

2 teaspoons salt

2 tablespoons sugar

2 tablespoons unsalted butter, softened

1 ½ cups warm water

For the Topping (optional):

1 tablespoon milk

1 tablespoon unsalted butter, melted

Instructions

Step 1: Activate the Yeast

In a small bowl, stir together the warm water, sugar, and yeast. Let it rest for 5–10 minutes, until the mixture becomes foamy and active.


Step 2: Make the Dough

In a large mixing bowl, combine the flour, salt, softened butter, and the yeast mixture. Knead the dough on a lightly floured surface for about 10 minutes, or until it’s smooth and elastic.


Step 3: First Rise

Place the dough into a greased bowl, cover it, and set it in a warm area for 1–2 hours, or until it doubles in volume.

Step 4: Shape the Loaf

Gently punch down the dough to release trapped air. Form it into a loaf shape and place it in a greased bread


Step 5: Second Rise

Cover and let the shaped dough rise again for 30–45 minutes, until it puffs up nicely.


Step 6: Preheat & Prepare the Topping

Preheat your oven to 375°F (190°C). If you’re adding the topping, mix the milk and melted butter together.

Step 7: Bake

Brush the loaf with the milk-butter mixture if desired. Bake for 30–35 minutes, or until the top is golden brown and the loaf sounds hollow when tapped.


Step 8: Cool & Serve

Let the bread cool in the pan for a few minutes, then transfer it to a wire rack to cool completely. Slice and enjoy your homemade loaf fresh or toasted!

3-Ingredient Slow Cooker Cream Cheese Chicken

3-Ingredient Slow Cooker Cream Cheese Chicken

This 3-Ingredient Slow Cooker Cream Cheese Chicken is the perfect comfort food for busy days. It’s creamy, flavorful, and requires minimal effort, making it ideal for weeknight dinners or meal prep. With just a few simple ingredients and a slow cooker, you can create a rich and satisfying dish that the whole family will love.


Ingredients

2 lbs. (900 g) boneless, skinless chicken breasts


8 oz. (225 g) cream cheese, cut into cubes


1 packet ranch seasoning mix


Instructions

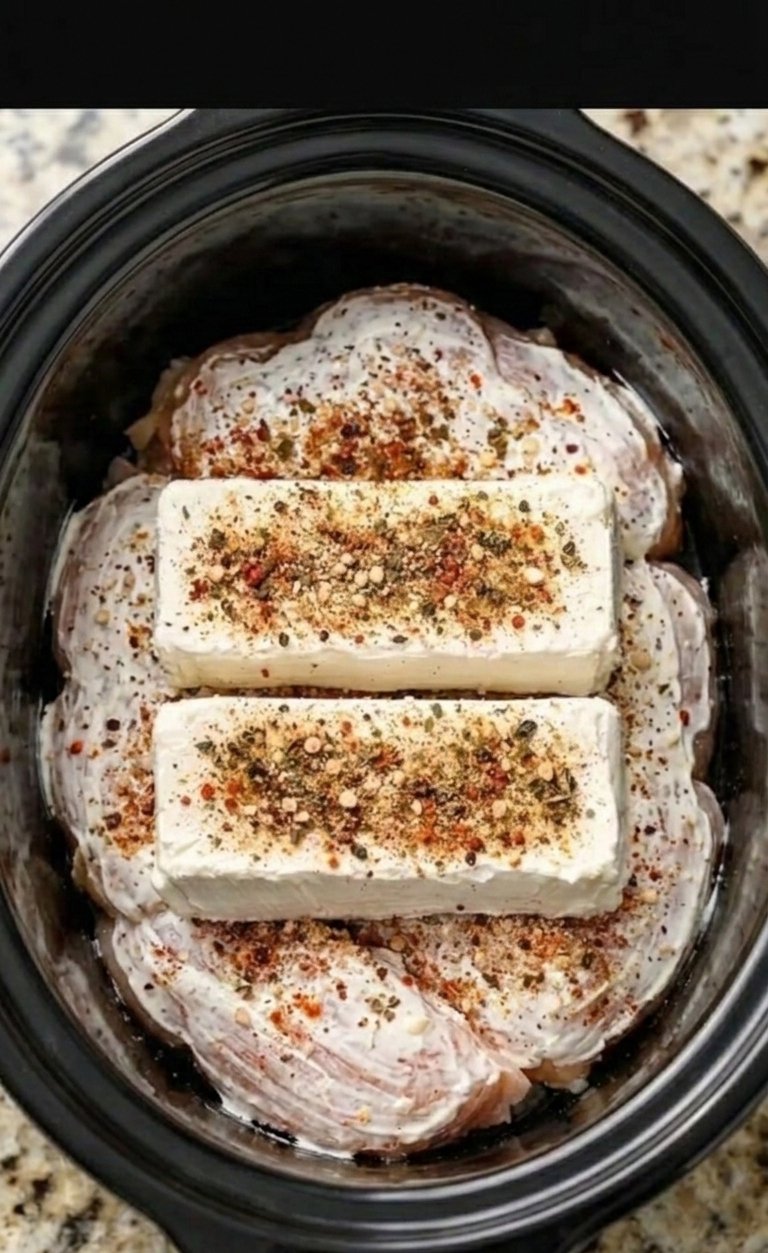
Start by placing the boneless, skinless chicken breasts evenly in the bottom of your slow cooker. Make sure they are spread out so they cook evenly. Next, sprinkle the ranch seasoning mix evenly over the chicken, ensuring each piece is well coated for maximum flavor.


After seasoning, add the cubed cream cheese on top of the chicken. There’s no need to stir at this stage—the cream cheese will melt slowly as it cooks, creating a rich and creamy sauce.


Cover the slow cooker with the lid and cook on LOW for 6–7 hours or HIGH for 3–4 hours, until the chicken is tender and fully cooked. Once done, you can either leave the chicken breasts whole or shred them using two forks, depending on your preference.


Stir everything together well so the cream cheese blends with the ranch seasoning and chicken juices, forming a smooth and creamy sauce. Taste and adjust seasoning if needed.


Serving Ideas

This dish is incredibly versatile. Serve it over steamed rice, pasta, or mashed potatoes for a comforting meal. It also works perfectly as a filling for wraps, sandwiches, or even stuffed baked potatoes.


Simple, creamy, and delicious—this slow cooker recipe is sure to become a favorite in your kitchen. 🍽️

Chicken & Potato Stew (3-Ingredient Slow Cooker Recipe)

Chicken & Potato Stew (3-Ingredient Slow Cooker Recipe)

Description

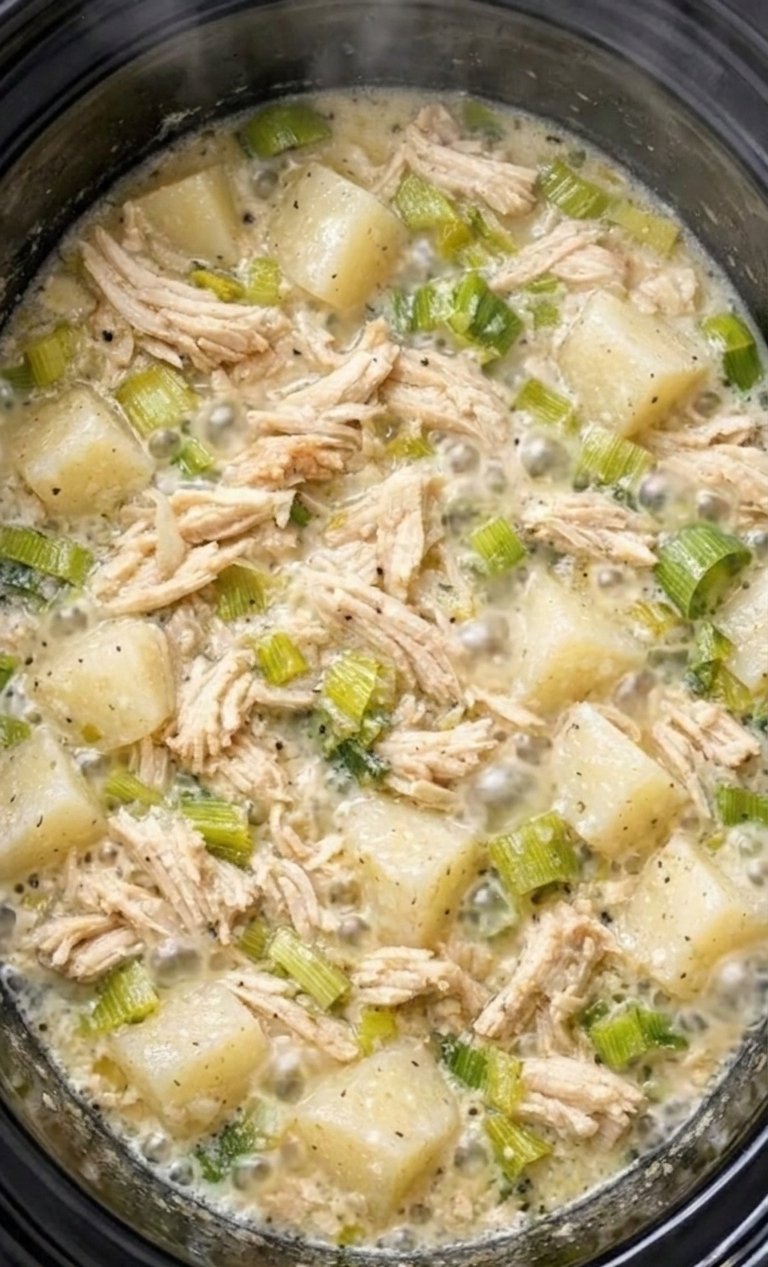
This Chicken & Potato Stew is a simple, comforting, and hearty slow cooker meal made with only three main ingredients. Tender shredded chicken and soft potatoes cook slowly in a creamy chicken soup base, creating a rich and satisfying dish with minimal effort. It’s perfect for busy weeknights, meal prep, or cozy family dinners. The slow cooking process allows the flavors to blend beautifully while keeping the chicken juicy and the potatoes perfectly tender.

Ingredients

Main Ingredients (3)

2 lbs boneless skinless chicken breasts


4 cups potatoes, peeled and diced


1 can (10.5 oz) cream of chicken soup


Optional Seasonings

½ tsp salt


½ tsp black pepper


½ tsp garlic powder


¼ cup chopped green onions (optional garnish)


Instructions

Step 1 – Prepare Ingredients

Peel and dice the potatoes into medium-sized cubes. Place the chicken breasts in the bottom of your slow cooker.


Step 2 – Add Ingredients

Add the diced potatoes on top of the chicken and pour the cream of chicken soup over everything.


Step 3 – Cook

Cook in the slow cooker:


Low: 6–7 hours

or


High: 3–4 hours


Step 4 – Shred the Chicken

Remove the chicken breasts, shred them with two forks, and return the shredded chicken to the stew. Stir well to combine.

Step 5 – Serve

Serve hot and garnish with chopped green onions if desired.


Servings

6 servings


Nutritional Information (Per Serving – Approximate)

Nutrient Amount

Calories 320 kcal

Protein 30 g

Carbohydrates 24 g

Fat 10 g

Fiber 3 g

Sodium 520 mg

Values may vary depending on ingredients used.

Recipe Notes

Yukon Gold potatoes work best because they hold their shape well during slow cooking.

If you want a thinner stew, add ½ cup chicken broth while cooking.

For extra flavor, stir in shredded cheddar cheese before serving.


Helpful Tips

✔ Use fresh potatoes instead of frozen for the best texture.

✔ Stir the stew during the last hour to mix flavors evenly.

✔ Add vegetables like carrots, celery, or peas for extra nutrition.

✔ If the stew becomes too thick, add a little warm chicken broth.


Health Benefits

Chicken

High in lean protein


Helps support muscle repair and growth


Potatoes

Rich in potassium


Provide energy and fiber


Slow Cooking

Helps preserve nutrients


Enhances natural flavors without excessive fats


Storage

Refrigerator

Store leftovers in an airtight container for 3–4 days.


Freezer

Freeze for up to 2 months.


Reheating

Reheat in the microwave or on the stove with a splash of broth or water.


Frequently Asked Questions

Can I make this recipe in an Instant Pot?

Yes. Cook on High Pressure for 25 minutes, then shred the chicken and stir.

Can I use chicken thighs instead of chicken breasts?

Yes. Chicken thighs will make the stew even more flavorful and juicy.


Can I add vegetables?

Absolutely. Popular additions include:


carrots


celery


peas


corn


Can I make it dairy-free?

Yes. Replace cream of chicken soup with chicken broth thickened with cornstarch.


What potatoes work best?

Yukon Gold or Russet potatoes work best because they become tender without turning mushy.


✅ Recipe Summary

Recipe Name: Chicken & Potato Stew


Method: Slow Cooker


Prep Time: 10 minutes


Cook Time: 6 hours


Difficulty: Easy


Servings: 6

chocolate ice cream recipe

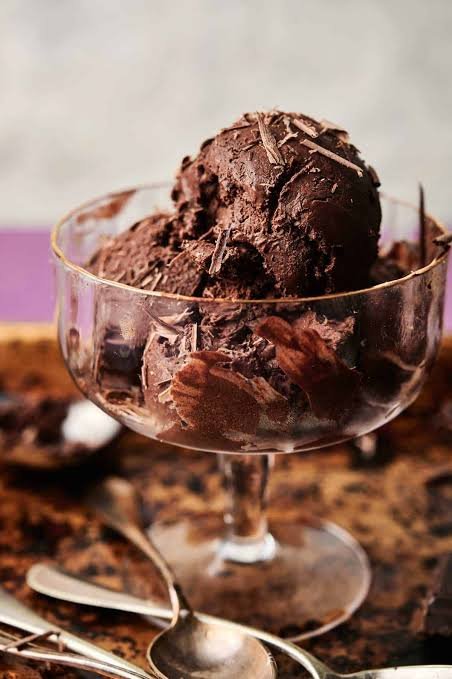
chocolate ice cream recipe

Here’s a simple chocolate ice cream recipe:

Ingredients

– 2 cups heavy cream

– 1 cup whole milk

– 3/4 cup granulated sugar

– 1/2 cup cocoa powder

– 1 tsp vanilla extract


Instructions

1. Whisk together cream, milk, and sugar until sugar dissolves.

2. Add cocoa powder and whisk until smooth.

3. Stir in vanilla extract.

4. Chill the mixture in the fridge for at least 2 hours.

5. Pour into an ice cream maker and churn according to manufacturer’s instructions.

6. Freeze for at least 2 hours before serving.


No ice cream maker? You can also freeze the mixture in a shallow metal pan and blend it every 30 minutes until you get a creamy texture.


Want any variations (like adding nuts or chocolate chips)?

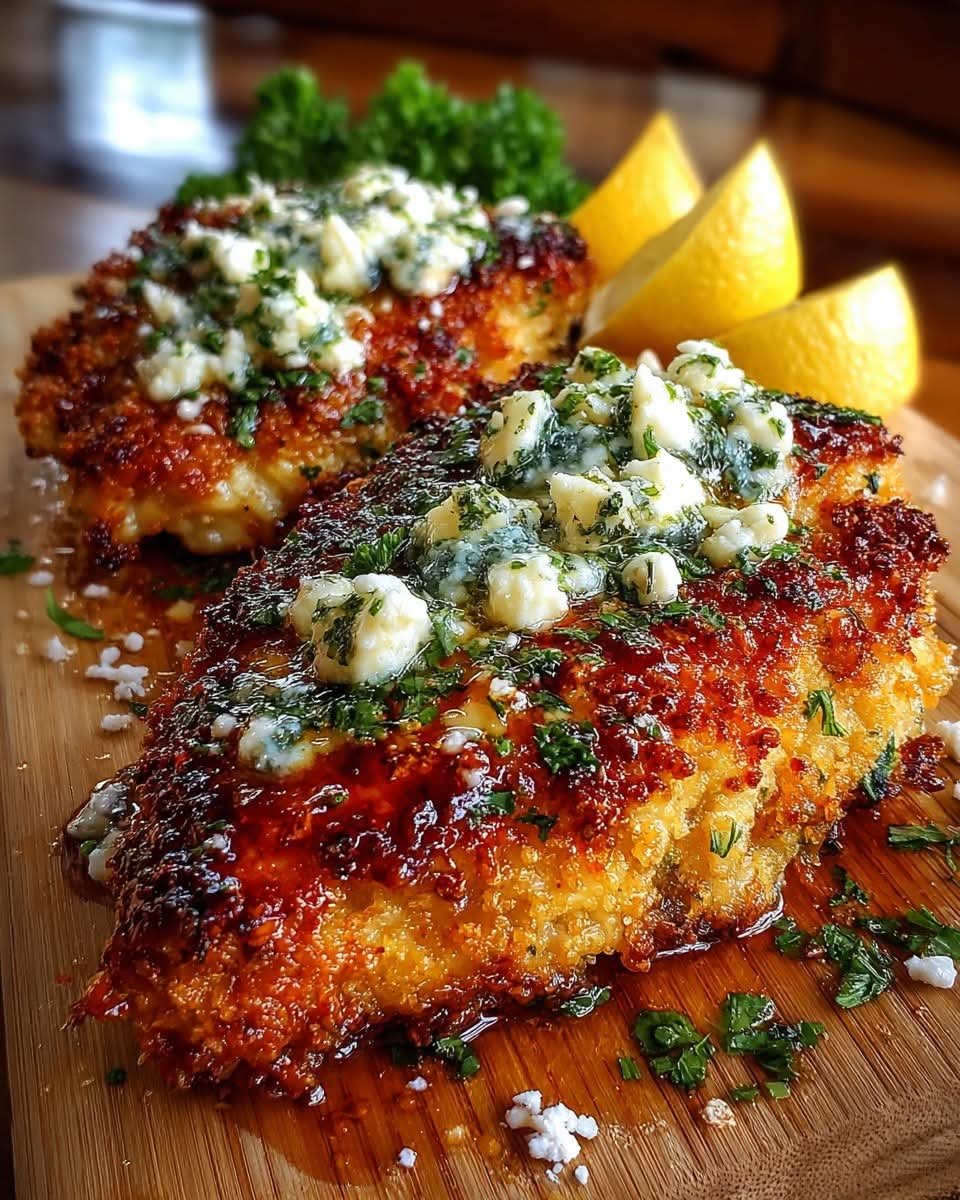
Crispy Hot Honey Lemon Feta Chicken with Panko Herb Crust

Crispy Hot Honey Lemon Feta Chicken with Panko Herb Crust


Ingredients

For the Chicken

  • 4 boneless skinless chicken breasts
  • Salt and black pepper to taste
  • 1/2 teaspoon paprika
  • 1/2 teaspoon garlic powder

For the Panko Herb Crust

  • 1 cup panko breadcrumbs
  • 1/3 cup grated Parmesan cheese
  • 2 tablespoons chopped fresh parsley
  • 1 teaspoon dried oregano
  • 1 teaspoon dried thyme
  • Zest of 1 lemon
  • 2 tablespoons olive oil

For the Coating

  • 1/2 cup all-purpose flour
  • 2 large eggs, beaten

For the Hot Honey Lemon Glaze

  • 1/3 cup honey
  • 1–2 teaspoons red pepper flakes (adjust to taste)
  • 2 tablespoons fresh lemon juice
  • 1 teaspoon lemon zest

For the Feta Topping

4 oz (115g) feta cheese, crumbled

Directions

Prepare the Chicken: Pat chicken breasts dry and season with salt, pepper, paprika, and garlic powder.

Prepare the Breading Station: Place flour in one shallow bowl, beaten eggs in a second, and mix panko breadcrumbs with Parmesan, parsley, oregano, thyme, lemon zest, and olive oil in a third bowl.

Bread the Chicken: Dredge each chicken breast in flour, dip into the beaten eggs, then press into the panko herb mixture to coat evenly.

Cook the Chicken: Heat a large skillet over medium heat with 2 tablespoons olive oil, or bake at 400°F (200°C) for 22–25 minutes until golden and fully cooked (internal temperature 165°F / 75°C).

Make the Hot Honey Lemon Glaze: In a small saucepan over low heat, combine honey, red pepper flakes, lemon juice, and lemon zest. Warm gently for 2–3 minutes until slightly thinned.

Assemble the Dish: Once chicken is cooked, drizzle with hot honey lemon glaze and sprinkle crumbled feta over the top.

Serve: Garnish with extra fresh herbs or lemon slices. Serve immediately while crispy and warm.

Nutritional Information (Per Serving – Approximate)

Calories: 625

Protein: 48g

Carbohydrates: 38g

Fat: 33g

Fiber: 1g

Sugar: 18g

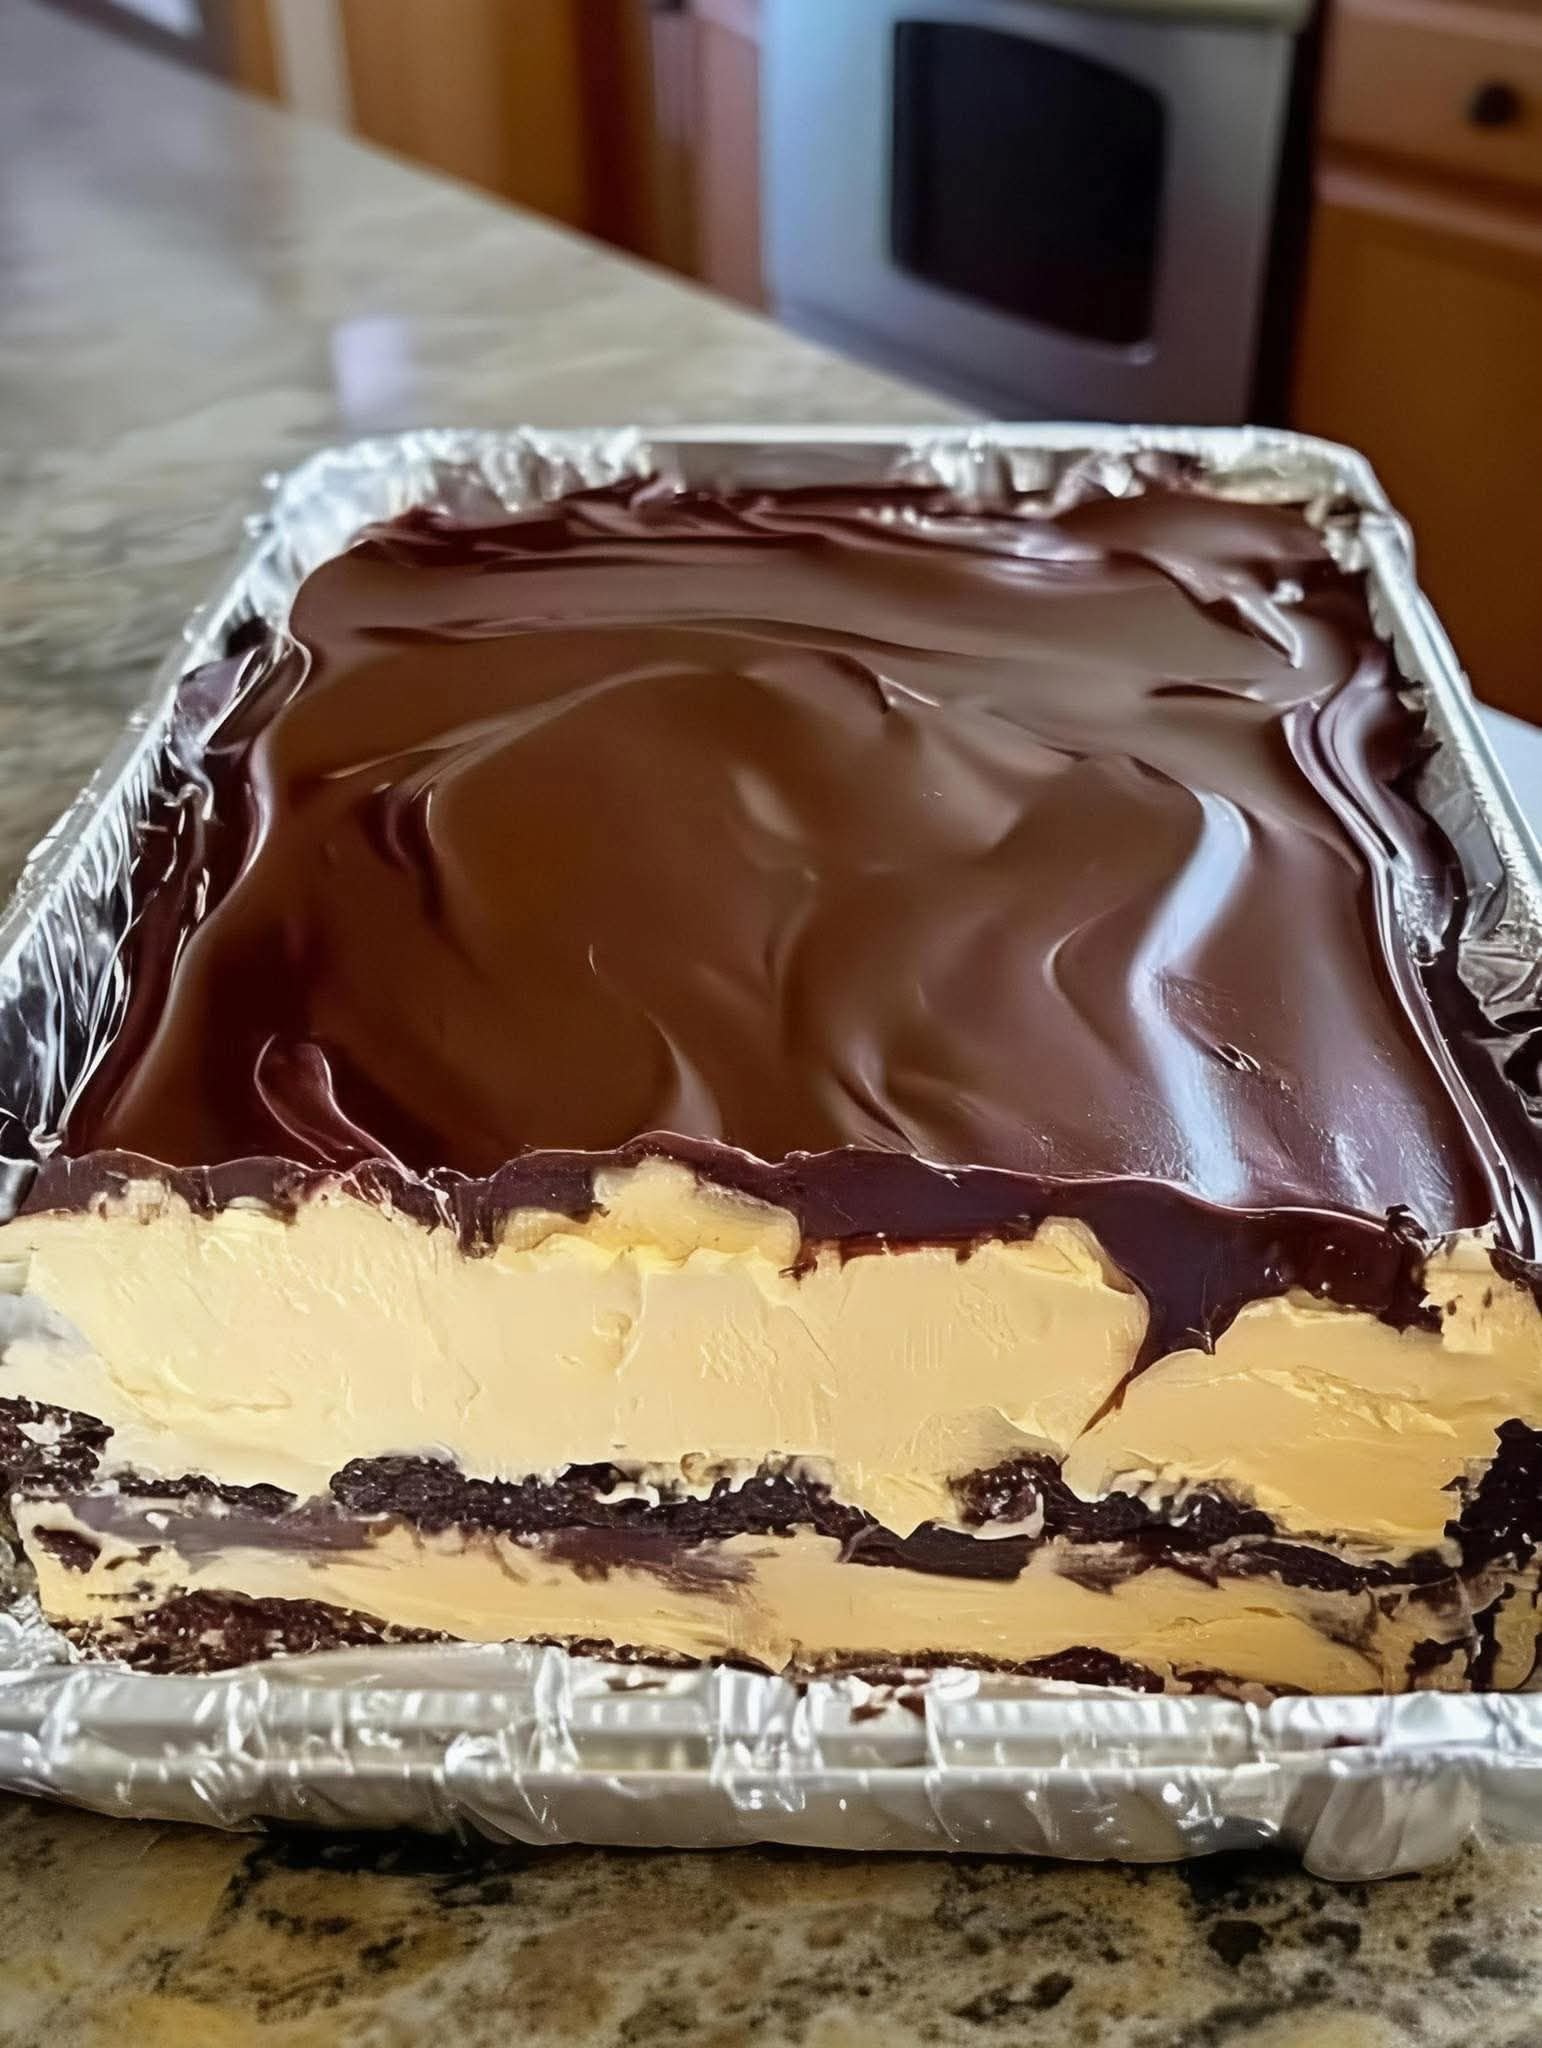
No bake Chocolate Eclair Cake

No Bake Eclair Cake is the perfect dessert to whip up in a snap and serve for any occasion. Rich vanilla pudding mixed with whipped cream and layered between graham crackers then topped with sweet chocolate frosting, everyone will enjoy this easy icebox cake!

Chocolate Eclair Cake is a great way to go. It is best served the first or second day, after being refrigerated for a few hours. I sometimes like to freeze it for an hour before serving for an even firmer texture. I love it!


Ingredients:

2 (3.5 oz) package of instant vanilla pudding mix

1 (8 oz) container of whipped topping (COOL WHIP) thawed

3 cups milk

2 sleeves graham cracker squares

1 (16 oz) tub chocolate frosting

How To Make No bake Chocolate Eclair Cake:

In a medium bowl, mix together the pudding mix, milk and Cool Whip.

In an 9 x 13 baking dish, arrange a single layer of graham cracker squares on the bottom. You may have to break them up a bit to get enough crackers to cover the bottom of your dish.


Spread half of the pudding mixture on top of the crackers.

Layer another layer of graham crackers over the pudding mixture.

Then layer the other half of the pudding mixture on top of crackers.

Top with a final layer of graham crackers.

Put plastic wrap over dish and put in fridge for about 30 min to an hour to allow pudding to set.


When ready, put the tub of chocolate frosting in the microwave for about 15 seconds to soften (remove lid and aluminum foil top before microwaving).

Take out and stir frosting. It should be easily spreadable now.

Remove plastic wrap from dish and evenly spread chocolate frosting all over the top layer of graham crackers.


Place plastic wrap over top of dish and put back in fridge and let it chill overnight.

This dessert gets better over time. The graham crackers need plenty of time to soften up.

When ready, slice and serve!

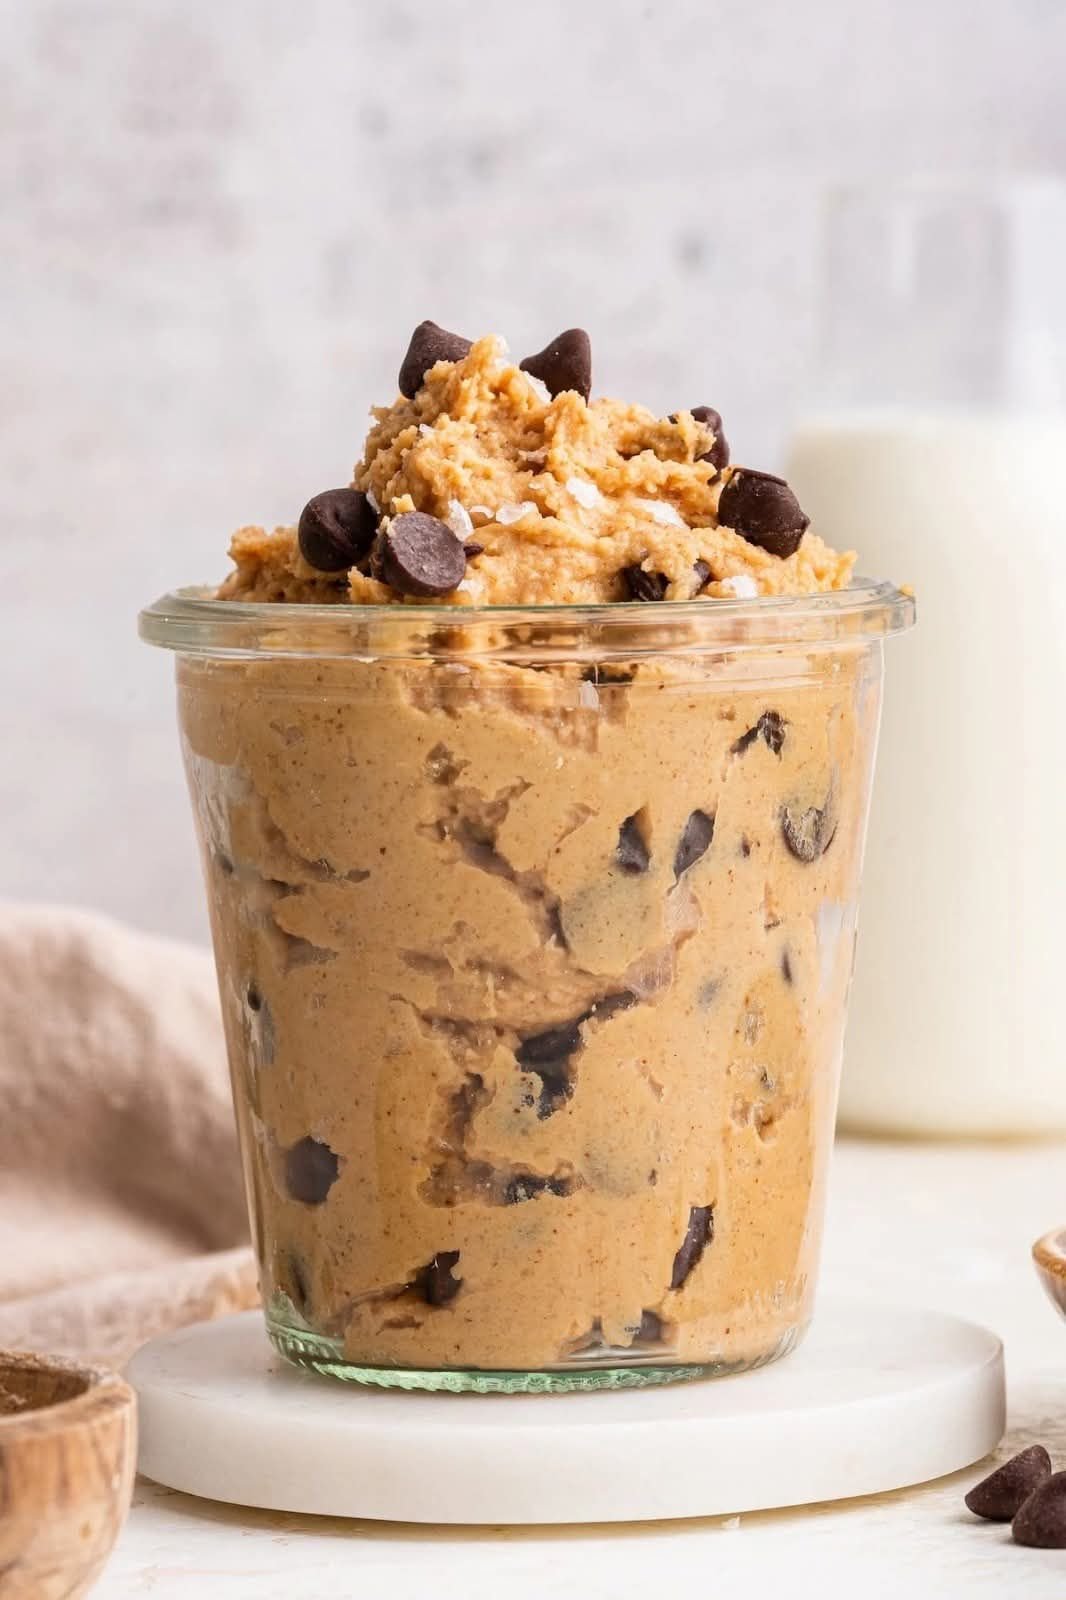
Low-Carb Sugar-Free Chocolate Chip Cookie Dough Dip

A creamy, rich, dessert-style dip that tastes just like classic cookie dough — without the sugar.


Recipe Card

Sugar-Free Chocolate Chip Cookie Dough Dip

A silky, indulgent cookie-dough–style dip made with cream cheese, tahini (or nut butter), and sugar-free chocolate chips. No baking required and ready in minutes.


Servings: 16 (2 tbsp each)

Prep Time: 10 minutes

Total Time: 10 minutes

Yield: ~2 cups

Dietary: Sugar-Free • Low-Carb

Ingredients

8 oz cream cheese, room temperature

1 tsp vanilla extract

1 tsp vanilla liquid stevia (or preferred sweetener)

1/4 cup almond butter (or cashew butter, peanut butter)

1/2 tsp salt

1/2 cup butter, softened (or coconut oil for dairy-free)

1/2 cup sugar-free chocolate chips

Instructions

Blend the Base

Add room-temperature cream cheese to a stand mixer or mixing bowl. Beat until smooth.

Add Flavor

Mix in vanilla extract and liquid stevia. Blend until creamy.

Incorporate almond butter

Add almond butter and salt. Mix well until fully combined. Scrape down the sides as needed.

Add Butter

Beat in softened butter (or coconut oil) until the mixture becomes silky and fluffy.

Adjust the Sweetness

Taste and add a few extra drops of stevia if you prefer a sweeter dip.

Fold in Chocolate Chips

Stir in the sugar-free chocolate chips gently.

Chill & Serve

Transfer to an airtight container and refrigerate for at least 30 minutes for best texture.

Quick Notes

Keep refrigerated for up to 5 days.

For a firmer, scoopable dip, chill longer.

For a lighter texture, whip the butter before adding.

Brief Introduction

This Sugar-Free Chocolate Chip Cookie Dough Dip delivers the nostalgic flavor of classic raw cookie dough in a guilt-free, low-carb form. Made in just 10 minutes with simple ingredients, it’s the perfect high-satisfaction dessert dip for fruits, low-carb crackers, or straight from the spoon. Since it’s sugar-free and gluten-free, it fits easily into low-carb, diabetic-friendly, or keto lifestyles.


Step-by-Step Cooking Guide (With Detailed Notes)

1. Cream the Base

Beat cream cheese until smooth.

Tip: Cold cream cheese creates lumps. Room temperature works best.


2. Add Sweetness & Flavor

Blend in vanilla extract and stevia.

Tip: Stevia can vary in strength — start small and adjust.

3. Add Almond Butter

Mix in almond butter for richness and thickness.


4. Add the Butter

Blend until fluffy.

Troubleshooting:

If it separates, keep mixing — it will come together.


5. Fold in Chocolate Chips

Use a spatula to mix in sugar-free chocolate chips.

Tip: Mini chips mix more evenly than full-size ones.

6. Chill

Chill 30–60 minutes for best cookie-dough texture.


Ingredient Details & Substitutions

Cream Cheese

Provides structure and creaminess.

Sub: Dairy-free cream cheese works perfectly.

Sweetener

Vanilla liquid stevia keeps it smooth.

Sub options:

Monk fruit drops

2–3 tbsp powdered erythritol

1–2 tbsp allulose (adds softness)

Almond butter

Adds richness and slight nuttiness.

Sub options:

Cashew butter

Peanut butter

Sunflower seed butter (nut-free)

Butter / Coconut Oil

Butter gives a classic cookie-dough taste.

Use coconut oil for dairy-free or a firmer dip.

Sugar-Free Chocolate Chips

Use stevia or monk fruit sweetened chips.

Variations & Serving Suggestions

Flavor Variations

Peanut Butter Cookie Dough:

Replace tahini with peanut butter.

Double Chocolate:

Add 2 tbsp cocoa powder.

Brownie Batter Dip:

Add cocoa + crushed walnuts.

Birthday Cake Dip:

Add sugar-free sprinkles + 1/4 tsp almond extract.

Dietary Adaptations

Keto: Use allulose or monk fruit and coconut oil.

Dairy-Free: Use vegan cream cheese + coconut oil.

Nut-Free: Use tahini or sunflower seed butter.

How to Serve

Low-carb crackers

Apple slices

Strawberries

Celery sticks

On pancakes or low-carb waffles

As a dessert dip in party platters

Storage & Make-Ahead

Refrigeration

Store in an airtight container up to 5 days.

Freezing

Freeze up to 2 months.

Thaw in the fridge and mix before serving.

Make-Ahead

Prepare up to 24 hours early.

Flavor improves after chilling.

Nutrition (Approx. per 2 tbsp serving)

Calories: 120

Fat: 11g

Carbs: 2–3g net carbs

Protein: 1g

Sugar: 0g


(Values vary slightly based on chocolate chips and sweetener used.)


FAQ

Q: Can I make this without a mixer?

Yes, but cream cheese must be very soft. Mix with a sturdy spoon or whisk.

Q: My dip is too soft — what happened?

It likely needs more chilling time. Chill longer or add 1–2 tbsp almond flour to thicken.


Q: Can I use powdered sweetener instead of liquid?

Yes — use 2–3 tbsp and adjust to taste.


Q: Why tahini?

It creates a buttery, rich cookie dough flavor with fewer carbs than nut butter.

Optional Personal Note

This dip was created on a day when I wanted a “spoonable dessert” without baking or sugar — and I was shocked at how much it tastes like classic cookie dough. It’s become a reader favorite for quick gatherings, last-minute cravings, and kid-approved treats.

Low-Carb Chocolate Cottage Cheese Mousse

Low-Carb Chocolate Cottage Cheese Mousse

Ingredients

  • 1 cup cottage cheese (preferably low-fat)

  • 2-3 tablespoons unsweetened cocoa powder

  • 2-3 tablespoons low-carb sweetener (erythritol or stevia)

  • 1 teaspoon vanilla extract

  • A pinch of salt

  • Optional: Sugar-free chocolate chips or nuts for garnish

Instructions

  1. Blend: Place the cottage cheese, cocoa powder, sweetener, vanilla, and salt into a blender or food processor.

  2. Smooth: Process on high until the mixture is completely smooth and no cottage cheese curds remain.

  3. Chill: Transfer to a bowl or ramekin and refrigerate for at least 30 minutes to allow the texture to set.

  4. Serve: Top with chocolate chips or nuts if desired and enjoy.

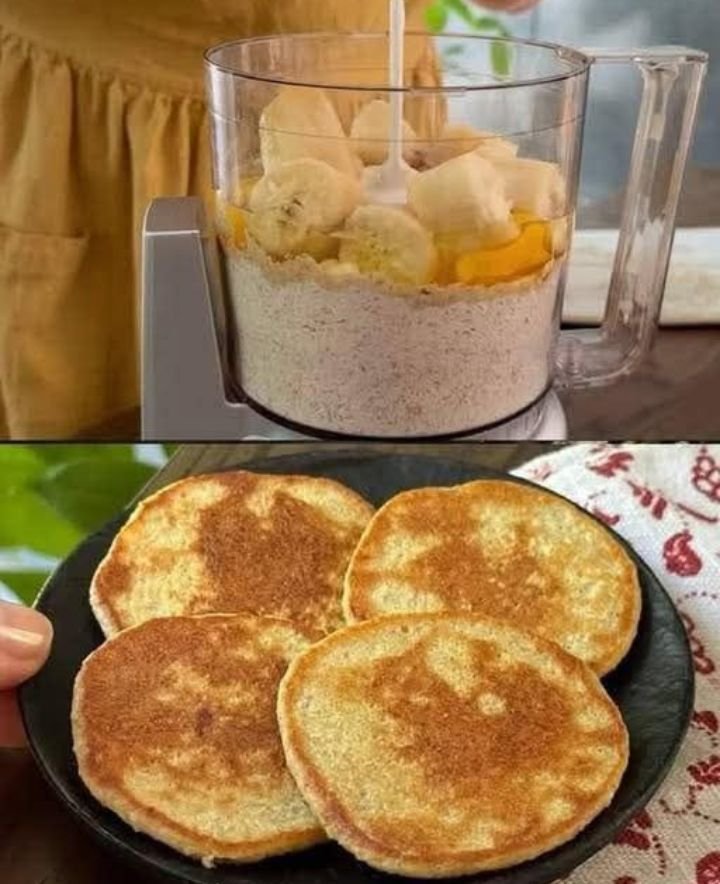
Banana Oatmeal Pancakes

Banana Oatmeal Pancakes

Naturally Sweet • Soft & Filling • Simple Ingredients

Prep Time: 5 minutes
Cooking Time: 10 minutes
Servings: 2–3


Ingredients

  • 1 cup rolled oats or quick oats

  • 2 ripe bananas

  • 2 eggs, at room temperature

  • 100 ml water (or milk, if preferred)

  • 4 tablespoons yogurt (2 for batter, 2 for serving)

  • ¼ teaspoon baking soda

  • Oil for cooking (neutral oil or coconut oil)


Step-by-Step Instructions

1. Prepare the Oat Flour

Add the oats to a blender or food processor.

Blend until the oats turn into a fine, powder-like flour. This helps create a smooth and tender pancake texture.


2. Make the Batter

Add the bananas, eggs, water, baking soda, and 2 tablespoons of the yogurt to the blender with the oat flour.

Blend until the mixture becomes smooth, creamy, and evenly mixed.

Let the batter rest for 2–3 minutes.
This short rest allows the oats to absorb liquid, giving the pancakes a softer and fluffier texture.


3. Heat the Pan

Place a non-stick pan or griddle over medium-low heat.

Lightly grease the surface with a small amount of oil, spreading it evenly.

Allow the pan to warm gently before cooking.


4. Cook the Pancakes

Pour about ¼ cup of batter onto the pan for each pancake.

Cook for 2–3 minutes, until:

  • Small bubbles appear on the surface

  • The edges look set and no longer shiny

Carefully turn the pancake over.

Cook the second side for 1–2 minutes, until lightly golden and cooked through.

Repeat with the remaining batter, adding a little more oil if needed.


5. Serve and Enjoy

Serve the pancakes warm.

Top with the remaining yogurt and add fresh fruit, chopped nuts, or a light drizzle of honey if desired.


Helpful Tips for Best Results

  • Banana Choice: Very ripe bananas add natural sweetness and a pleasant aroma.

  • Gentle Heat: Cooking over medium-low heat helps the pancakes cook evenly.

  • Batter Consistency: If the batter thickens after resting, add a small splash of water or milk to loosen it.

  • Pan Size: Smaller pancakes are easier to flip and cook more evenly.


Serving Ideas

These pancakes pair beautifully with:

  • Sliced strawberries or berries

  • Chopped almonds or walnuts

  • A spoon of nut butter

  • Extra yogurt and banana slices

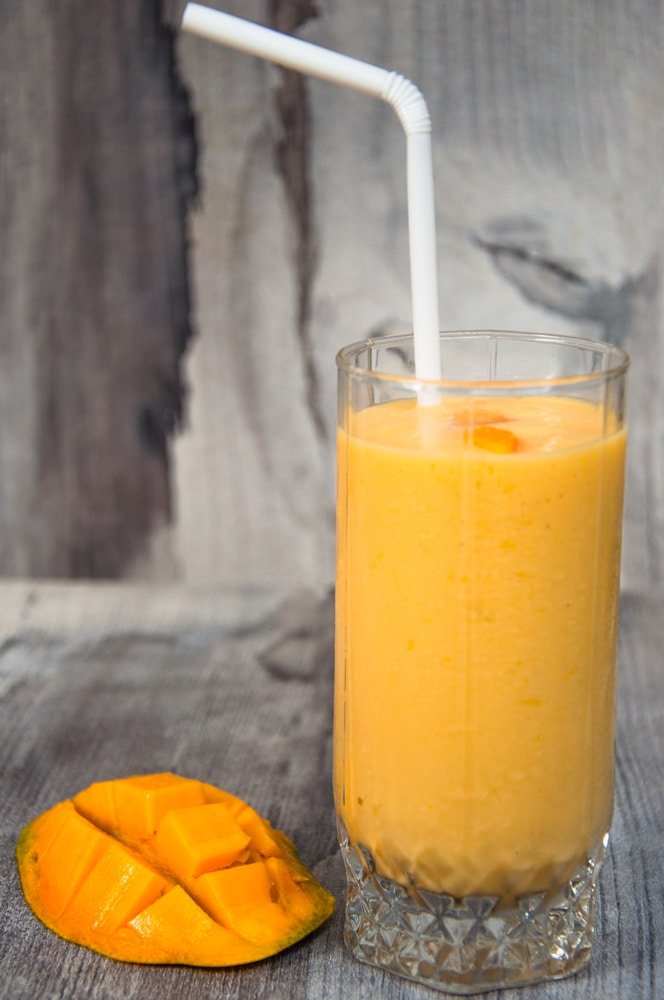
🥭 Creamy Mango Lassi Recipe

🥭 Creamy Mango Lassi Recipe

Prep time: 5 minutes | Servings: 2

Ingredients

  • 1 cup Ripe mango pulp (freshly cubed or canned)

  • 1 cup Plain yogurt (Greek yogurt works for a thicker texture)

  • 1/2 cup Milk (or water to adjust consistency)

  • 1-2 tablespoons Honey or sugar (adjust based on mango sweetness)

  • A pinch of Ground cardamom (optional, for authentic aroma)

  • Ice cubes (optional, for serving chilled)


Instructions

  1. Prepare the Mango: If using fresh mango, peel and cube the fruit, discarding the pit. Ensure the mango is fully ripe for the best flavor.

  2. Blend: Combine the mango pulp, yogurt, milk, sweetener, and cardamom in a blender.

  3. Liquefy: Blend on high speed until the mixture is completely smooth and frothy.

  4. Adjust: Check the thickness. If it is too thick, add a splash more milk. If you want it sweeter, add more honey/sugar and pulse again.

  5. Serve: Pour into a tall glass. You can garnish with a few small mango cubes on top, just like in your photo!


Tips for the Perfect Lassi

  • The Mango Matters: Use varieties like Alphonso or Honey (Ataulfo) mangoes for a vibrant orange color and a “fiber-free” smooth texture.

  • Dairy-Free Option: You can easily swap the yogurt for coconut yogurt and the milk for almond or coconut milk.

  • Chill Your Glass: For the best experience, let the lassi sit in the fridge for 10 minutes or serve in a chilled glass.