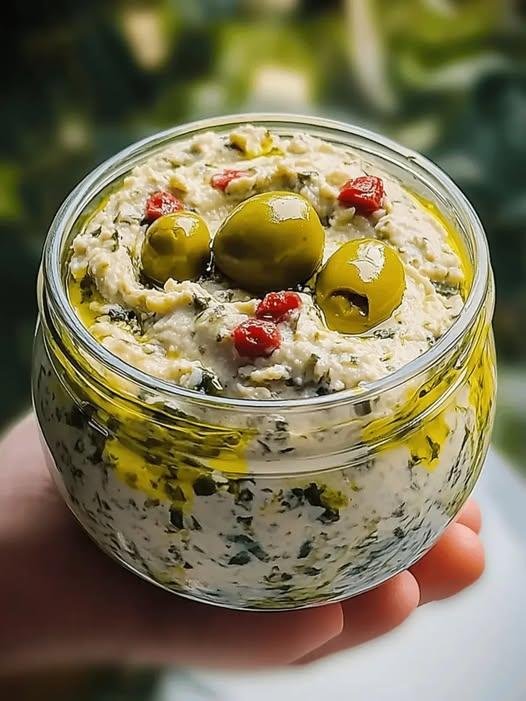
Green Olive Dip – Creamy, Tangy & Flavorful

A smooth and savory dip made with tangy green olives, creamy cheese, and fresh lemon juice. Perfect for parties, game nights, or as a quick appetizer.

Ingredients:

  • 1 cup pitted green olives (Castelvetrano, Manzanilla, or Kalamata green)
  • 8 oz (225g) cream cheese, softened
  • 1/2 cup sour cream or Greek yogurt
  • 1/4 cup mayonnaise
  • 2 cloves garlic, finely minced
  • 2 tbsp fresh lemon juice
  • Optional garnish: chopped parsley, chives, or a pinch of red pepper flakes

Instructions:

  1. Mix the base: In a medium bowl, beat the softened cream cheese, sour cream, and mayonnaise until smooth and creamy.
  2. Add flavor: Stir in the garlic and lemon juice.
  3. Fold in olives: Roughly chop the green olives and mix them into the creamy base.
  4. Customize: Add herbs (parsley, chives) or a little red pepper flakes if you want extra flavor.
  5. Chill & serve: Cover and refrigerate for at least 30 minutes before serving for best flavor.
  6. Enjoy: Serve with crackers, toasted crostini, pita chips, or fresh veggies.

 Q&A Section

Q1: Can I make this dip ahead of time?
👉 Yes! It tastes even better if made a few hours or a day before, since the flavors develop while chilling.

Q2: What type of olives works best?
👉 Castelvetrano olives are buttery and mild, while Manzanilla olives are briny. You can even mix different olives for a unique taste.

Q3: Can I make it healthier?
👉 Replace cream cheese with light cream cheese and mayonnaise with extra Greek yogurt.

See also  10-Minute No-Bake Chocolate Cheesecake

Q4: How long does it last in the fridge?
👉 Store in an airtight container for up to 3–4 days. Stir before serving.

Q5: Can I make it spicy?
👉 Yes! Add a dash of cayenne, red pepper flakes, or even a little jalapeño for a kick.

Q6: What pairs well with this dip?
👉 Crackers, sliced baguette, celery sticks, cucumber, carrot sticks, or pita bread.
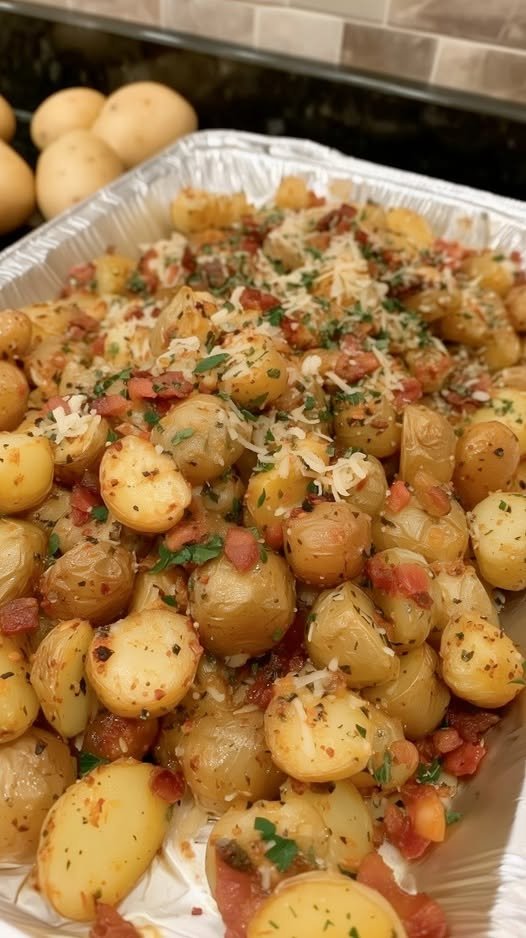
Crispy Parmesan Garlic Roasted Potatoes

Crispy Parmesan Garlic Roasted Potatoes

The ultimate “hero” side dish: golden-brown and crispy on the outside and buttery-soft on the inside.

  • Prep time: 10 minutes

  • Cook time: 30 minutes

  • Total time: 40 minutes

  • Servings: 6-8

Ingredients

  • 3 lbs small red-skinned potatoes, halved (keep the skins on!)

  • 2 tbsp refined olive oil

  • 5 cloves fresh garlic, finely crushed

  • 1 tsp dried thyme

  • ½ tsp dried oregano

  • ½ tsp dried basil

  • ⅓ cup finely shredded or grated aged Parmesan cheese

  • To taste: Coarse sea salt and freshly ground black pepper

  • 2 tsp unsalted butter, melted (for the finish)

  • 2 tsp fresh parsley, finely chopped (for garnish)

Instructions

  1. Preheat & Prep: Preheat your oven to 400°F (200°C). Lightly coat a large baking sheet with cooking spray or a thin layer of oil.

  2. Season the Potatoes: In a large mixing bowl, combine the halved potatoes, olive oil, crushed garlic, thyme, oregano, basil, and Parmesan cheese.

  3. Toss: Add a generous pinch of coarse salt and black pepper. Toss vigorously until every potato is evenly coated in the oil, herbs, and cheese.

  4. Arrange: Spread the potatoes onto the prepared sheet pan in a single layer. For the best results, try to place as many as possible cut-side down—this creates that “gourmet” crispy crust.

  5. Roast: Bake for a total of 30 minutes.

  6. Flip: At the 15-minute mark, use a spatula to flip the potatoes. This ensures they get golden-brown on all sides and prevents the garlic from burning.

  7. Final Touch: Once the potatoes are tender and crispy, remove them from the oven. Immediately drizzle with the melted butter and sprinkle with fresh parsley.

  8. Serve: Best enjoyed hot right off the pan!


Pro-Tips for Success

  • The Dry Secret: If you wash your potatoes right before cooking, pat them completely dry with a towel. Moisture creates steam, which leads to soggy potatoes rather than crispy ones.

  • Sheet Pan Space: Don’t crowd the pan! If the potatoes are piled on top of each other, they will steam. Use two pans if necessary to keep them in a single layer.

  • Leftovers: These stay good in the fridge for up to 5 days. To bring back the crunch, pop them in an air fryer at 350°F for 3–5 minutes.

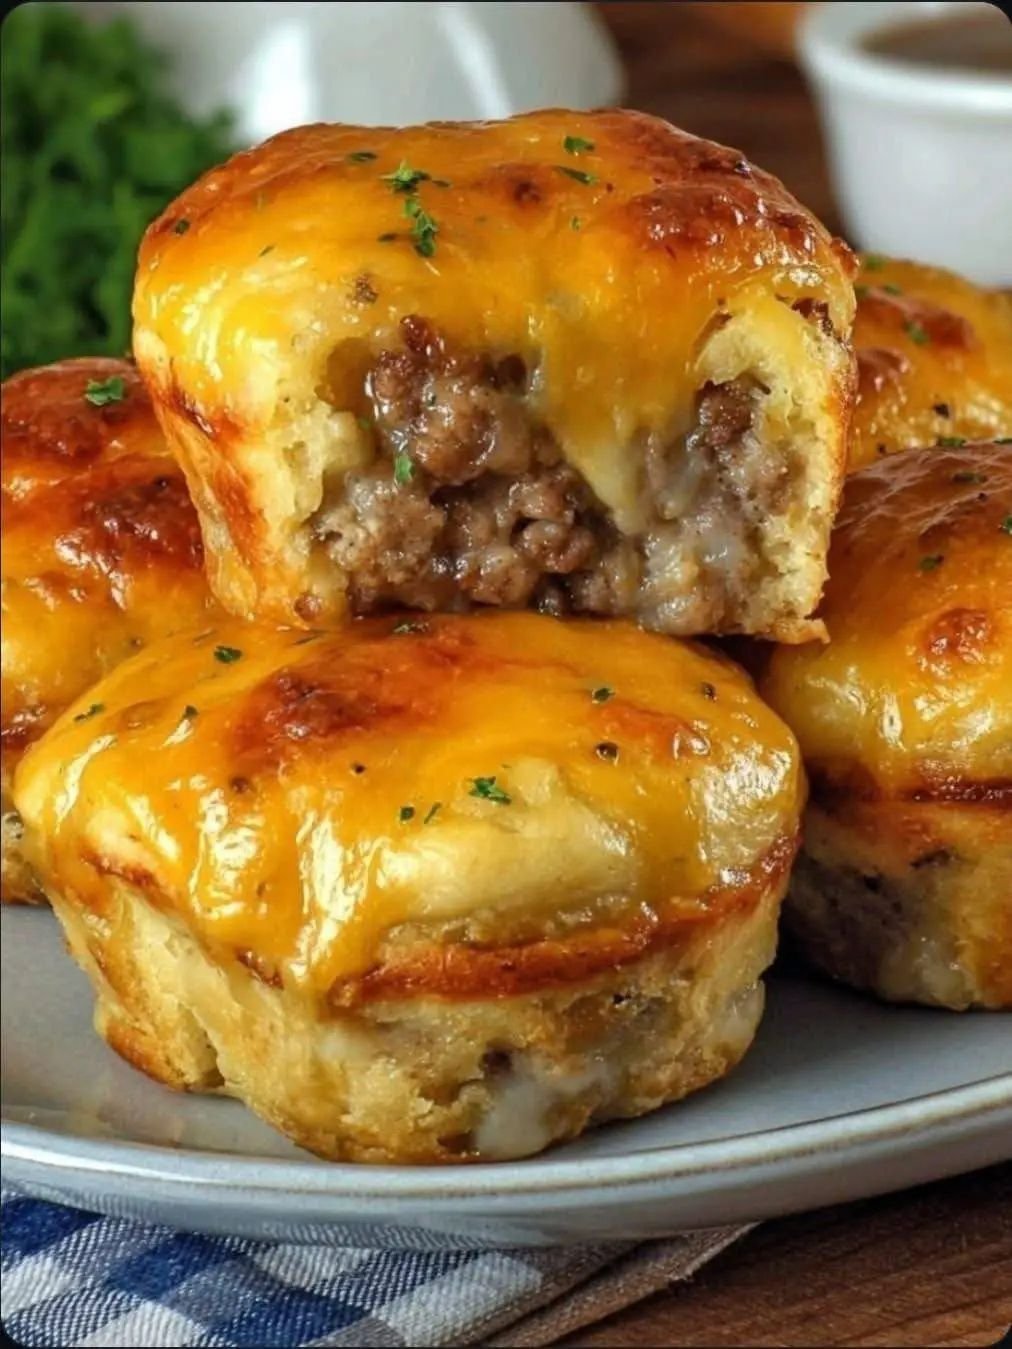
Cheeseburger Biscuit Bites

Cheeseburger Biscuit Bites

  • Prep time: 15 minutes

  • Cook time: 15-18 minutes

  • Yields: 10-12 bites

Ingredients

  • Meat Filling: 1 lb lean ground beef

  • Dough: 1 can (16.3 oz) refrigerated flaky layers biscuits (usually 8 or 10 count)

  • Cheese: 1 ½ cups shredded cheddar cheese (or 10-12 small cubes of cheddar)

  • Seasoning: ½ tsp garlic powder, ½ tsp onion powder, salt and pepper to taste

  • Sauce: 2 tbsp ketchup, 1 tbsp yellow mustard, and 1 tsp Worcestershire sauce

  • Garnish: Dried parsley or sesame seeds (optional)


Instructions

  1. Preheat & Prep: Preheat your oven to 375°F (190°C). Lightly grease a standard 12-cup muffin tin with non-stick cooking spray.

  2. Brown the Beef: In a large skillet over medium-high heat, cook the ground beef until it is fully browned and no longer pink. Drain off any excess fat. Stir in the garlic powder, onion powder, salt, pepper, ketchup, mustard, and Worcestershire sauce. Mix well and remove from heat.

  3. Prepare the Biscuits: Take each refrigerated biscuit and pull it apart into two thinner rounds (or flatten them out with your palm). Press each piece into the bottom and up the sides of the muffin tin cups to create a “well” for the meat.

  4. Assemble:

    • Place a small amount of shredded cheese at the bottom of each biscuit cup.

    • Spoon about 2 tablespoons of the beef mixture into each cup.

    • Top generously with the remaining shredded cheese.

  5. Bake: Place the tin in the oven and bake for 12 to 15 minutes, or until the biscuit edges are golden brown and the cheese is melted and bubbly.

  6. Serve: Let them cool for about 5 minutes before removing them from the tin. Garnish with a sprinkle of parsley for that “pro” look shown in your photo.


Tips for Success

  • Extra Flavor: Add finely diced sautéed onions or pickles into the meat mixture if you like a “loaded” burger taste.

  • Crispy Bottoms: Ensure the meat is well-drained before filling the biscuits to prevent the bottom of the dough from getting soggy.

  • Storage: These stay fresh in the fridge for up to 3 days and reheat perfectly in an air fryer or oven to keep the biscuit crisp.

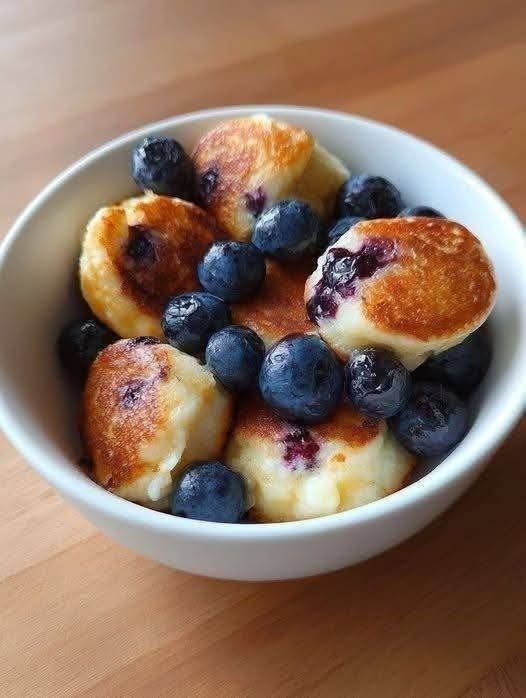
Blueberry Cottage Cheese Pancake Bites

 Blueberry Cottage Cheese Pancake Bites

Ingredients (Makes 10–12 Bites)

1 cup cottage cheese
2 large eggs
½ ripe banana, mashed
½ cup oat flour
(or almond flour for lower-carb option)
1 tbsp honey or maple syrup (optional)
1 tsp vanilla extract
1 tsp baking powder
Pinch of salt
½ cup fresh or frozen blueberries

Instructions

1. Make the Batter
Add cottage cheese, eggs, mashed banana, honey (if using), and vanilla to a blender or food processor.
Blend until smooth.
Pour mixture into a bowl and fold in oat flour, baking powder, and salt.
Gently stir in blueberries.
2. Air Fryer Method (Recommended)
Preheat air fryer to 350°F (175°C).
Lightly grease silicone molds or the air fryer basket.
Spoon batter into molds, filling each about ¾ full.
Air fry for 8–10 minutes, until set and lightly golden.
Cool slightly before removing.
3. Oven Method
Preheat oven to 375°F (190°C).
Grease a mini muffin tin or line with silicone cups.
Fill each cup about ¾ full.
Bake for 14–16 minutes, until puffed and a toothpick comes out clean.
Let cool for 5 minutes before serving.

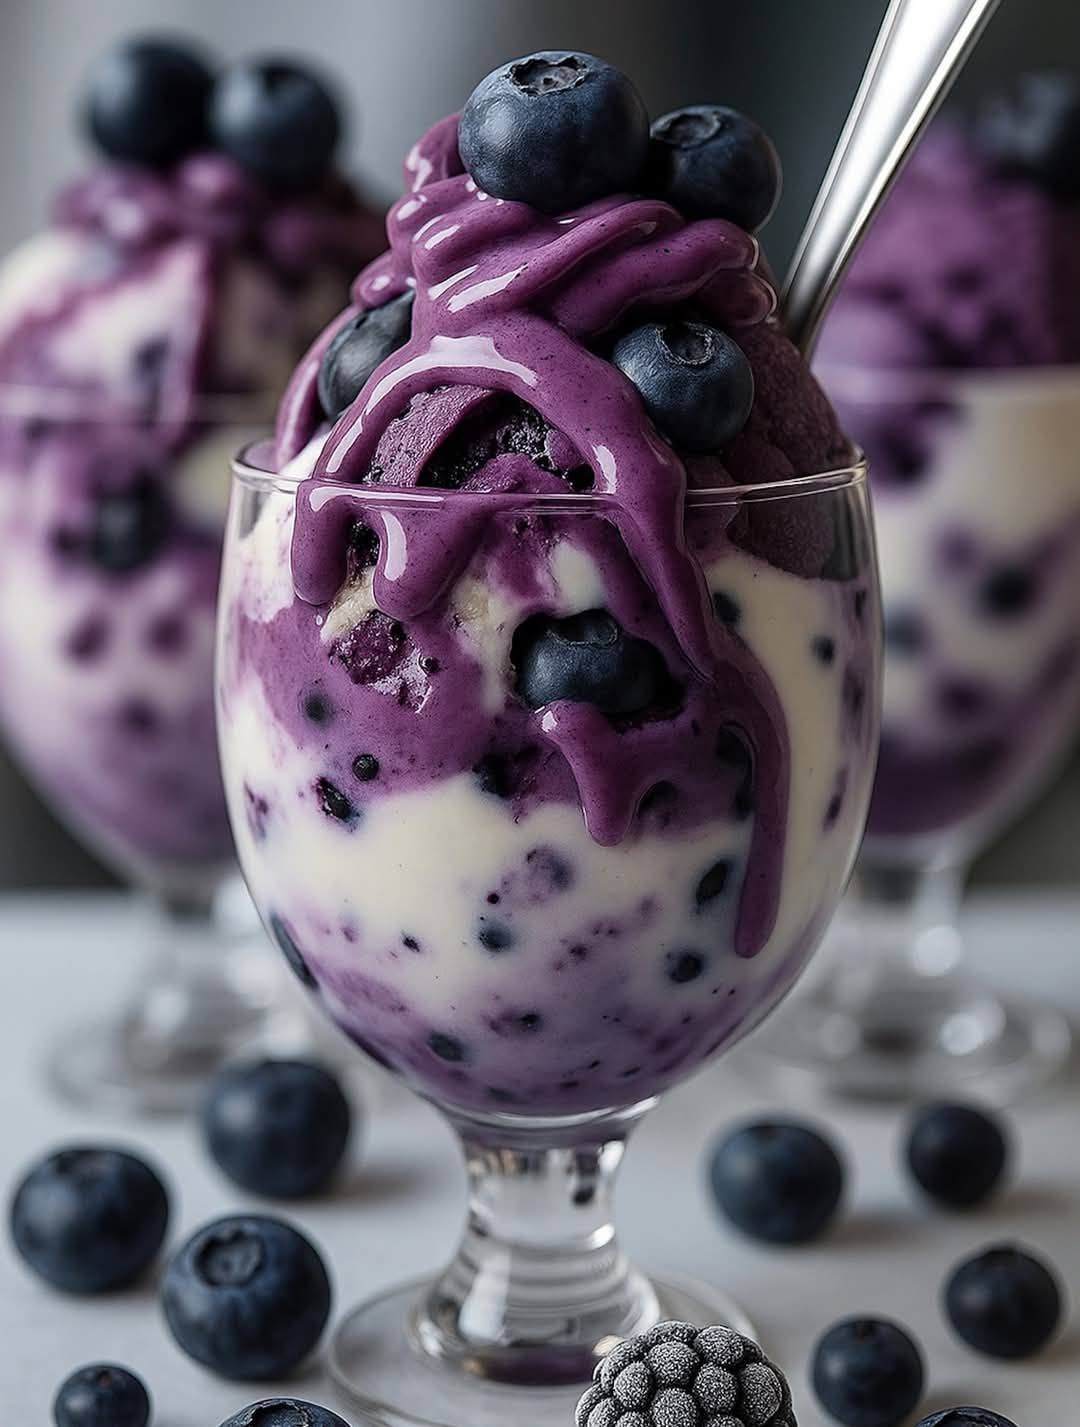
Creamy Blueberry Swirl Parfait

Creamy Blueberry Swirl Parfait

Ingredients

The Blueberry Swirl & Topping

  • 2 cups Frozen blueberries (thawed slightly for blending)

  • 1 tbsp Maple syrup or honey (optional)

  • 1 tsp Lemon juice

  • 1/2 cup Fresh blueberries (for garnish)

The Creamy Base

  • 2 cups Greek yogurt or Thick Vanilla Cream (for a vegan option, use coconut cream)

  • 1/2 tsp Vanilla extract

  • 1 tbsp Chia seeds (optional, for texture seen in the photo)


Instructions

  1. Prepare the Blueberry Coulis: In a blender or food processor, combine the frozen blueberries, lemon juice, and sweetener. Blend until completely smooth and thick. It should have a soft-serve consistency.

  2. Flavor the Cream: In a separate bowl, whisk together your yogurt (or cream) with the vanilla extract. Fold in the chia seeds if you want those small dark speckles visible in the glass.

  3. Layer the Glasses: * Start by dropping a few fresh blueberries into the bottom of two chilled glasses.

    • Add a thick layer of the white cream base.

    • Spoon in a layer of the purple blueberry mixture. Use a small spoon or skewer to gently swirl the two colors together against the glass.

    • Repeat the layers until the glass is full.

  4. The Topping: Top the parfait with a generous swirl of the remaining blueberry mixture. Finish by nesting several large, fresh blueberries on top as shown in the image.

  5. Serve: Serve immediately while chilled.


Tips for the Perfect Look

  • Texture: To get the “dripping” effect seen in the photo, ensure your blueberry mixture is thick but pourable. If it’s too thick, add a teaspoon of water; if too thin, blend in more frozen berries.

  • The Frosty Finish: For that “frosted” look on the berries at the bottom of the image, pop your fresh blueberries in the freezer for about 10 minutes before garnishing.

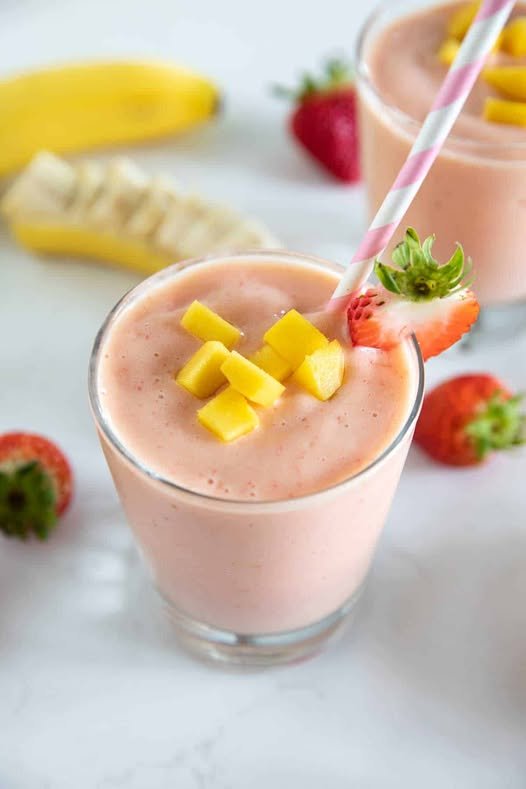
Strawberry Mango Banana Smoothie

Strawberry Mango Banana Smoothie

Ingredients

  • 1 cup frozen mango chunks

  • 1 cup fresh or frozen strawberries (hulled)

  • 1 medium ripe banana (fresh or frozen)

  • 1 cup milk of your choice (dairy, almond, oat, or coconut milk)

  • 1/2 cup Greek yogurt (optional, for extra creaminess and protein)

  • 1 tsp honey or maple syrup (optional, if you prefer it sweeter)

Instructions

  1. Prep the fruit: If using fresh strawberries, remove the green stems. If you have time, using frozen fruit will give you that thick, creamy texture seen in the picture.

  2. Combine: Place the banana, strawberries, mango, and yogurt into a high-speed blender.

  3. Add liquid: Pour in your milk of choice.

  4. Blend: Start on a low speed and gradually increase to high. Blend for about 45–60 seconds until completely smooth.

  5. Adjust: If the smoothie is too thick, add a splash more milk. If it’s too thin, add a few more frozen mango chunks or a couple of ice cubes.

  6. Serve: Pour into glasses and garnish with fresh mango dice and a strawberry slice, just like in your photo!


Tips for the Perfect Texture

  • Frozen is better: Using frozen fruit instead of ice ensures the flavor doesn’t get watered down.

  • Order matters: Always put your liquid in the blender first. This helps the blades move freely and prevents the fruit from getting stuck at the bottom.