Lemon, Ginger & Turmeric Warm Infusion

Lemon, Ginger & Turmeric Warm Infusion

Prep Time: 5 minutes | Infusion Time: 5 minutes
Serves: 1 cup

A comforting warm drink made with simple kitchen ingredients. Lightly citrusy, gently spiced, and easy to prepare.


Ingredients

  • 3 thin slices fresh lemon

  • 2–3 thin slices fresh ginger

  • A small pinch ground turmeric

    • or a small piece of freshly grated turmeric root

  • Optional: a light dash of black pepper (for balanced flavor)

  • 1 cup warm water (not boiling)


Step-by-Step Instructions

1. Prepare the Ingredients

  • Wash the lemon and ginger thoroughly.

  • Slice the lemon thinly, keeping the peel on.

  • Peel the ginger and cut it into thin slices.

  • If using fresh turmeric root, peel and grate a small amount.


2. Combine

  • Place the lemon slices, ginger slices, turmeric, and black pepper (if using) into a heat-safe mug or glass.


3. Infuse

  • Pour warm (not boiling) water over the ingredients.

  • Very hot water is avoided to maintain the fresh taste of the lemon.


4. Steep

  • Let the mixture sit for about 5 minutes so the flavors gently blend.


5. Enjoy

  • Stir lightly and sip slowly while warm.

  • You may strain the ingredients or leave them in the cup for a stronger flavor.


Flavor Notes

  • Lemon adds brightness and freshness

  • Ginger gives gentle warmth

  • Turmeric provides a rich golden color and earthy taste

  • Black pepper balances the overall flavor


Clove Water (Simple Infusion Option)

A lightly spiced drink with a warm aroma.

Ingredients

  • 3–5 whole cloves

  • 1 cup water

Method 1: Cold Infusion

  1. Place the cloves in a glass of water.

  2. Cover and let sit overnight at room temperature.

  3. Strain before drinking if desired.

Method 2: Warm Infusion

  1. Add cloves to hot (not boiling) water.

  2. Let steep for 10 minutes.

  3. Strain and enjoy warm.


Serving Tips

  • Best enjoyed freshly prepared

  • Adjust ingredient amounts to suit your taste

  • Can be enjoyed plain or lightly sweetened if desired

4-Ingredient Homemade Crusty Bread

4-Ingredient Homemade Crusty Bread

Simple • Beginner-Friendly • Oven-Baked

Servings: 1 round loaf
Prep Time: 10 minutes
Rest Time: 1–2 hours
Bake Time: 40–45 minutes

This is a classic rustic bread with a crisp golden crust and soft, airy inside—made using just four basic ingredients.


Ingredients

  • 1½ cups warm water (370 ml)
    (Warm, not hot — about body temperature)

  • 2 teaspoons active dry yeast

  • 4 cups all-purpose flour (about 500 g)

  • 1 teaspoon salt


Step-by-Step Instructions

1. Activate the Yeast

  1. Pour the warm water into a large mixing bowl.

  2. Sprinkle the yeast over the water.

  3. Stir gently and let it sit for 5–10 minutes until slightly foamy.

This shows the yeast is ready.


2. Add Flour and Salt

  1. Add the flour and salt to the yeast mixture.

  2. Mix with a spoon or spatula until a soft, sticky dough forms.

No kneading is required.


3. First Rest (Rising Time)

  1. Cover the bowl with a clean kitchen towel or plastic wrap.

  2. Let the dough rest in a warm place for 1–2 hours, until doubled in size and bubbly.


4. Prepare for Baking

  1. Preheat your oven to 450°F (230°C).

  2. Place a heavy oven-safe pot with a lid (Dutch oven or deep casserole) inside the oven to heat for 30 minutes.


5. Shape the Dough

  1. Lightly flour your hands and work surface.

  2. Gently turn out the dough and shape it into a round loaf.

  3. Do not press out the air—handle gently.


6. Bake the Bread

  1. Carefully remove the hot pot from the oven.

  2. Place the dough inside the pot (you may line with parchment paper).

  3. Cover with the lid and bake for 30 minutes.

  4. Remove the lid and bake for an additional 10–15 minutes, until golden brown.


7. Cool Before Slicing

  1. Remove the bread from the pot.

  2. Let it cool on a wire rack for at least 20 minutes before cutting.


Helpful Tips

  • Crispy crust: Baking covered first traps steam, giving the bread its crisp exterior.

  • Soft inside: Do not cut while hot; cooling helps set the crumb.

  • Flavor options: You may add herbs, garlic powder, or seeds if desired.


Storage

  • Store at room temperature, wrapped in a clean cloth, for up to 2 days.

  • For longer storage, slice and freeze.

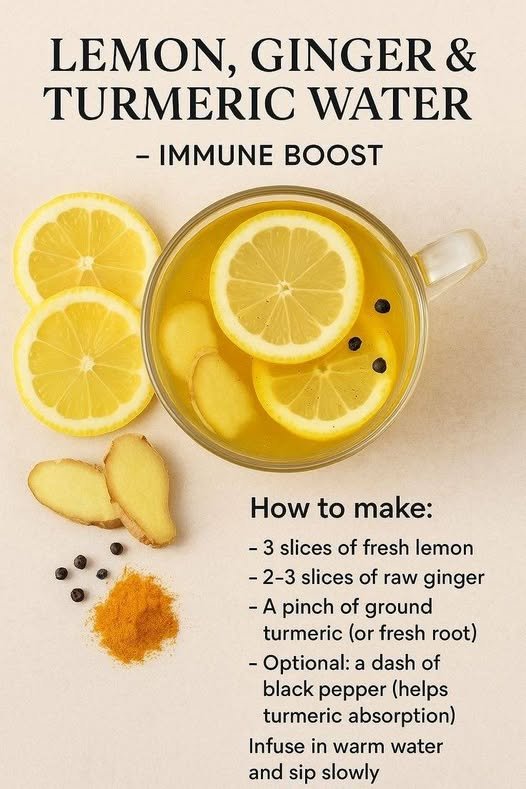
Lemon, Ginger & Turmeric Warm Tonic

Lemon, Ginger & Turmeric Warm Tonic

Servings: 1 cup
Prep Time: 5 minutes
Steep Time: 3–5 minutes

A warm, comforting drink made with lemon, ginger, and turmeric. This simple tonic is refreshing, gently spiced, and perfect for relaxing moments.


Ingredients

  • 3 thin slices fresh lemon

  • 2–3 thin slices fresh ginger

  • A small pinch ground turmeric

    • or about ½ teaspoon freshly grated turmeric root

  • A small dash black pepper (optional, enhances flavor balance)

  • 1 cup warm water (not boiling)

  • Optional sweetener:

    • 1 teaspoon honey or any preferred natural sweetener


Preparation Instructions

1. Prepare the Ingredients

  • Wash the lemon and ginger thoroughly.

  • Slice the lemon thinly, keeping the peel on.

  • Peel the ginger and slice it into thin pieces.

  • If using fresh turmeric root, peel and grate a small amount.


2. Combine in a Mug

  • Place the lemon slices, ginger slices, turmeric, and black pepper (if using) into a heat-safe mug.


3. Add Warm Water

  • Pour warm (not boiling) water over the ingredients.

  • Very hot water is avoided to maintain the fresh flavor of the lemon.


4. Steep

  • Let the mixture sit for 3–5 minutes.

  • This allows the flavors to blend gently into the water.


5. Sweeten and Enjoy

  • Add honey or another sweetener if desired.

  • Stir lightly and sip slowly while warm.


Flavor Notes

  • Lemon adds brightness and freshness.

  • Ginger provides gentle warmth and spice.

  • Turmeric contributes a deep golden color and earthy flavor.

  • Black pepper balances the turmeric and enhances overall taste.


Serving Tips

  • Enjoy this drink in the morning or evening as a calming warm beverage.

  • You can strain the solids before drinking or leave them in for a stronger flavor.

  • Adjust ingredient amounts to suit your taste preference.

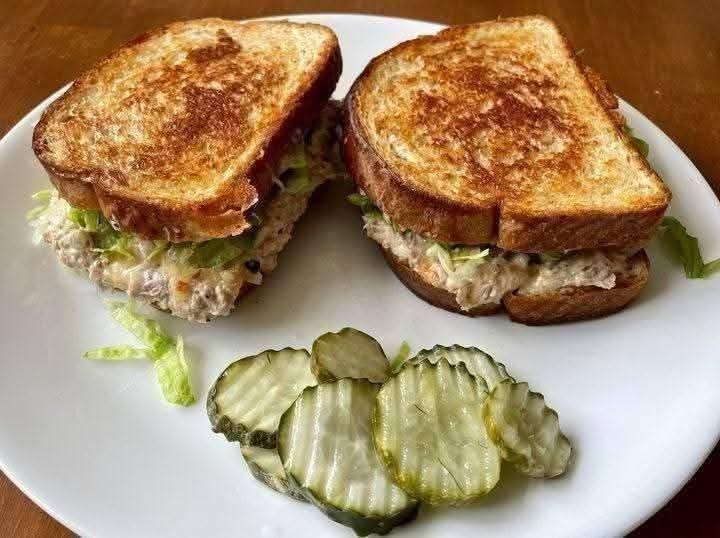
The Ultimate Toasted Tuna Melt

The Ultimate Toasted Tuna Melt

Ingredients

For the Tuna Salad:


1 can (5 oz) tuna, drained (chunk light or albacore)


2-3 tbsp mayonnaise (adjust for creaminess)


1 tsp Dijon mustard (optional, for tang)


1 tbsp finely diced celery (for crunch)


1/2 tsp lemon juice


Salt and black pepper to taste


For the Sandwich:


2-4 slices of sourdough or brioche bread (as seen in the photo)


2 slices of cheese (cheddar, provolone, or Swiss work best)


Shredded iceberg lettuce


Unsalted butter, softened (for toasting)


Crinkle-cut dill pickles (for the side)


Instructions

Mix the Salad: In a small bowl, flake the tuna with a fork. Mix in the mayonnaise, mustard, celery, lemon juice, salt, and pepper until well combined.


Prep the Bread: Generously butter one side of each slice of bread. This ensures that even, golden-brown crust seen in the image.


Build the Melt: * Place two slices of bread, butter-side down, in a cold skillet.


Top each slice with a piece of cheese and a generous scoop of the tuna mixture.


Place the remaining bread slices on top, butter-side up.


Toast to Perfection: Turn the heat to medium-low. Cook for 3-4 minutes per side.


Tip: Press down lightly with a spatula to ensure the bread makes full contact with the pan. You want it deep golden brown and the cheese melted.


The Fresh Crunch: Remove the sandwiches from the heat. Carefully open them and tuck in a handful of fresh shredded lettuce. This keeps the lettuce from wilting too much while adding a cool crunch.


Serve: Cut the sandwiches in half and serve immediately with a pile of chilled crinkle-cut pickles.


Loaded Broccoli Cauliflower Salad (Low Carb)

Loaded Broccoli Cauliflower Salad (Low Carb)!!!

Ingredients

Salad


3 cups fresh broccoli florets (bite-sized)


3 cups fresh cauliflower florets (bite-sized)


1 cup shredded sharp cheddar cheese (or cubed for extra texture)


6 slices bacon, cooked crispy and crumbled


¼ cup red onion, finely diced


2 tablespoons chives or green onions (optional)


Creamy Dressing


¾ cup mayonnaise (or avocado oil mayo)


¼ cup sour cream


1 tablespoon apple cider vinegar (or lemon juice)


1 teaspoon Dijon mustard


½ teaspoon garlic powder


Salt & black pepper, to taste


👩‍🍳 Instructions


Prep the Veggies

Wash and dry broccoli and cauliflower thoroughly. Cut into small, bite-sized florets.


Cook the Bacon

Cook bacon until crispy. Drain, cool, and crumble.


Make the Dressing

In a bowl, whisk together mayonnaise, sour cream, vinegar, Dijon mustard, garlic powder, salt, and pepper until smooth.


Assemble the Salad

In a large bowl, combine broccoli, cauliflower, cheddar cheese, bacon, red onion, and chives.


Toss & Chill

Pour dressing over the salad and toss until well coated. Refrigerate for at least 30 minutes before serving for best flavor.

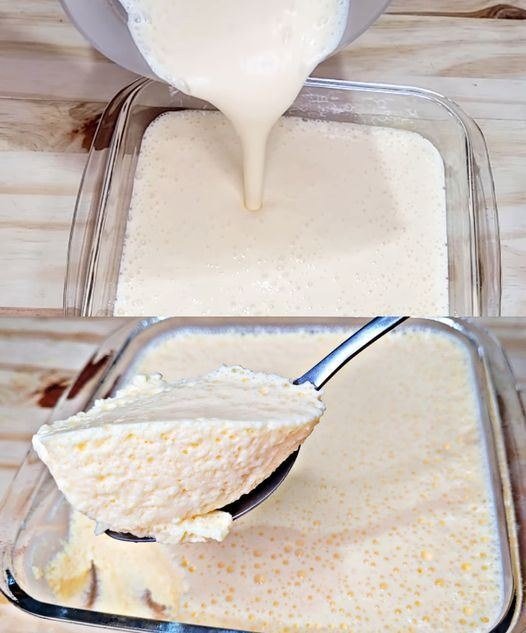
No-Bake Pineapple Cloud Mousse

No-Bake Pineapple Cloud Mousse

Prep time: 10 minutes | Chill time: 3–4 hours | Servings: 6-8


Ingredients

  • 2 packets (approx. 80g each) Pineapple-flavored gelatin (Jell-O)

  • 2 cups (500 ml) Boiling water

  • 2 cans (approx. 170g each) Table cream (media crema) or chilled heavy whipping cream

    • Note: If using heavy cream, whip it to soft peaks first for an even fluffier texture.

  • Optional: 1 can of crushed pineapple (well-drained) for added texture.


Instructions

  1. Dissolve the Gelatin: In a large bowl, pour the boiling water over the two packets of pineapple gelatin. Stir vigorously until the powder is completely dissolved and the liquid is clear.

  2. Cool Slightly: Let the mixture sit for about 5 minutes so it is no longer piping hot but still liquid.

  3. Blend/Mix: * Method A (Blender): Pour the gelatin liquid and the table cream into a blender. Blend on high for 2 minutes until very bubbly and pale. This creates those signature air bubbles seen in your photo.

    • Method B (Hand Mixer): Add the cream to the bowl of gelatin and beat with an electric mixer for 3–5 minutes until the mixture doubles in volume and becomes frothy.

  4. Add Fruit (Optional): If you are using crushed pineapple, fold it in gently with a spatula now.

  5. Set: Pour the mixture into a glass Pyrex dish (as shown in your image) or individual ramekins.

  6. Chill: Refrigerate for at least 3 to 4 hours, or until completely firm and “bouncy” to the touch.


Success Tips

  • The Bubbles: To get the aerated look on top, make sure you blend or whip the mixture long enough to incorporate air before it starts to set.

  • Cream Temperature: If using “Table Cream” (Media Crema), it blends best at room temperature or slightly cool. If using “Heavy Whipping Cream,” make sure it is very cold.

  • Serving: This is best served cold directly from the fridge. You can top it with a dollop of whipped cream or a maraschino cherry for a retro look.