AVOCADO AND SPINACH EGG SALAD

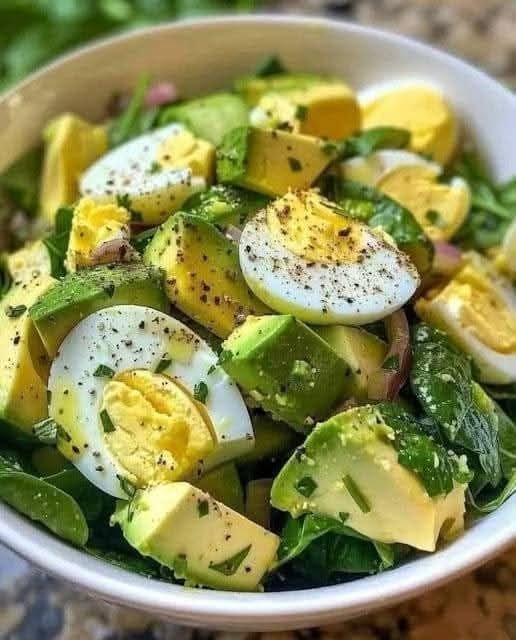
🥑 AVOCADO AND SPINACH EGG SALAD

A creamy, protein-packed, and refreshing salad perfect for a healthy lunch or light dinner!

  • 4 large eggs (hard-boiled and chopped)

  • 1 ripe avocado (mashed or diced)

  • 2 cups baby spinach (chopped)

  • 2 tbsp Greek yogurt (or mayonnaise for a richer flavor)

  • 1 tsp Dijon mustard

  • 1 tbsp lemon juice

  • 1 tbsp olive oil

  • Salt and black pepper to taste

  • Optional: chopped green onions, fresh dill, or red chili flakes for garnish

 Instructions:

  1. Boil the eggs:
    Place eggs in a pot, cover with water, and bring to a boil. Once boiling, simmer for 9–10 minutes, then cool and peel.

  2. Prepare the base:
    In a mixing bowl, mash the avocado with lemon juice, olive oil, and mustard.

  3. Add the rest:
    Stir in chopped eggs and spinach. Add Greek yogurt, salt, and pepper.

  4. Mix well:
    Gently combine all ingredients until creamy and evenly coated.

  5. Serve:
    Enjoy on whole-grain toast, in a sandwich, or as a side salad with grilled chicken or fish.

 Serving Ideas:

  • Spread on toast and top with cherry tomatoes.

  • Roll into a wrap with lettuce leaves.

  • Serve over quinoa or couscous for a heartier meal.

MELT IN YOUR MOUTH CHICKEN

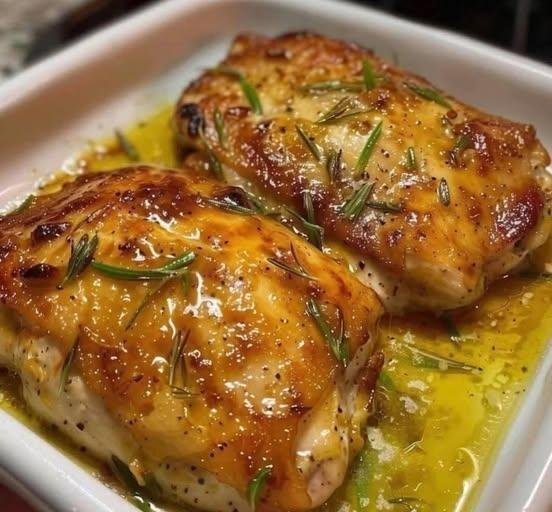
Melt in your mouth Chicken

This is one of those recipes I make over and over again. On those days when I get home late to start dinner, this is my go-to recipe. Melt in your mouth chicken is just that. It melts in your mouth.

Melt in Your Mouth Chicken is a classic recipe that’s been around for ages. Its origins are unclear, but I’m glad whoever came up with it did.

The idea of topping chicken breast with mayo and Parmesan is pure genius! The mixture turns beautifully golden post-baking, and it smells phenomenal, too.

The flavor is so rich, so creamy, and so addictive!

More importantly… OMG… the chicken is insanely tender and moist! That’s something that’s hard to come by with baked chicken breast.

Best of all, this recipe is impossible to mess up. Even if you’re a newbie in the kitchen, you can easily pull it off.

If you’re looking for a dish to shock and impress your family and friends, this is the one.

Prep time: 15-20 minutes
Cook time: 20-25 minutes
 Total time: 35-45 minutes

Ingredients:

Table of Contents

4 boneless, skinless chicken breasts

1 Cup mayonnaise

1/2 Cup Shredded Parmesan cheese

1 tsp salt

1/2 tsp black pepper

1 tsp minced garlic

1 tsp garlic powder

How To Make Melt in your mouth Chicken:

Preheat the oven to 375 degrees.

In a small bowl, add the mayonnaise, Parmesan cheese, and seasonings.

Mix to combine.

Place the chicken in a baking dish, sprayed with a non-sticking baking spray.

Spread the mixture on top of the chicken breasts.

See also  The Frittata: Your Weeknight Dinnertime Hero (Made 3 Times a Week for a Reason!)

Bake the chicken for 45 minutes, or until cooked through.

Serve warm!

Tips for Achieving Melt-in-Your-Mouth Chicken:

1. Marinate: Marinate the chicken in a mixture of acid (such as lemon juice or vinegar) and oil to help break down the proteins and tenderize the meat.
2. Pound: Pound the chicken to an even thickness to ensure it cooks evenly and prevents it from becoming tough.
3. Don’t Overcook: Cook the chicken until it reaches the recommended internal temperature, but avoid overcooking it, as this can make it dry and tough.
4. Rest: Let the chicken rest for a few minutes before serving to allow the juices to redistribute and the meat to relax.
5. Use a Meat Thermometer: Use a meat thermometer to ensure the chicken has reached a safe internal temperature.

Nutrition Information

Calories: 140-160

Protein: 25-30 grams

Fat: 3-4 grams

Saturated Fat: 1-2 grams

Cholesterol: 60-80 milligrams

Sodium: 200-250 milligrams

Carbohydrates: 0-5 grams

Fiber: 0-1 gram

Sugar: 0-1 gram

Enjoy !

🍮 Creamy Leche Flan Cheesecake

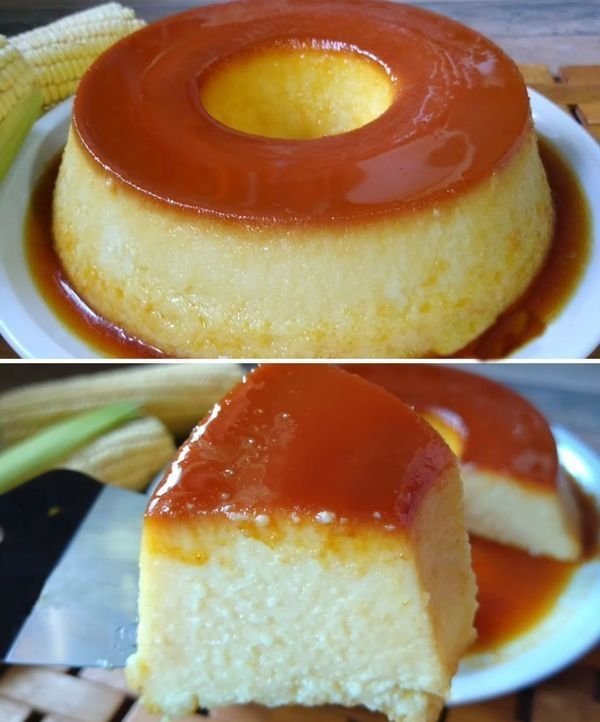
🍮 Creamy Leche Flan Cheesecake

Prep time: 20 mins | Bake time: 2 hours | Chilling time: 4 hours

Yields: One 20cm (8-inch) Cake

Ingredients

The Caramel Base

  • 100 g (½ cup) White sugar

The Leche Flan Layer

  • 10 Egg yolks

  • 375 ml (1 ½ cups) Milk

  • 250 g (1 cup) Condensed milk

  • 1 tsp Vanilla extract (added for flavor)

The Cheesecake Layer

  • 300 g (1 ¼ cups) Cream cheese, softened to room temperature

  • 100 g (½ cup) White sugar

  • 4 Egg whites

  • ½ tsp Salt


Instructions

1. Prepare the Caramel

Place the 100 g sugar in a saucepan over medium heat. Do not stir; swirl the pan occasionally until the sugar melts and turns a dark amber color. Immediately pour the hot caramel into a 20 cm (8-inch) round mold, tilting the mold to coat the bottom evenly. Set aside to harden.

2. Make the Flan Mixture

In a medium bowl, whisk the 10 egg yolks gently (avoid creating too many air bubbles). Stir in the milk, vanilla extract, and condensed milk. Mix slowly until fully incorporated. Set aside.

3. Make the Cheesecake Mixture

In a separate large bowl, beat the cream cheese with a hand mixer until smooth. Gradually add the 100 g sugar, salt, and 4 egg whites. Continue mixing until the batter is creamy and free of lumps.

4. Combine and Sift

Gently fold the flan mixture into the cheesecake mixture until combined. Crucial Step: Sift the entire mixture through a fine-mesh strainer directly into the prepared mold over the hardened caramel. This ensures a perfectly silky texture.

5. The Water Bath (Bain Marie)

Place the mold inside a larger roasting pan. Fill the roasting pan with hot water until it reaches about halfway up the sides of the cheesecake mold.

6. Bake and Chill

  • Bake: Place in the oven at 155°C (311°F) and bake for 2 hours. The center should have a slight jiggle but be set.

  • Cool: Remove from the water bath and let it cool completely at room temperature.

  • Chill: Refrigerate for at least 4 hours (or overnight) to allow the layers to fully set and the caramel to liquefy.

7. Serve

Run a thin knife around the edge of the mold. Invert the cake onto a large rimmed serving plate (to catch the caramel sauce). Slice and enjoy!


💡 Pro-Tips for a Perfect Flan Cake

  • Smoothness is Key: Sifting the mixture isn’t just a suggestion—it removes any bits of egg or undissolved cream cheese, which is the secret to that restaurant-quality “melt-in-your-mouth” feel.

  • Temperature Matters: Make sure your cream cheese is truly at room temperature before mixing; otherwise, you will have tiny white lumps in your cheesecake layer.

  • The “Jiggle” Test: Don’t be alarmed if it looks a little soft when you take it out of the oven. It will firm up significantly during the 4-hour chill time.

2-Ingredient Peanut Butter Fudge — Creamy, No-Bake, and Melt-in-Your-Mouth Delicious

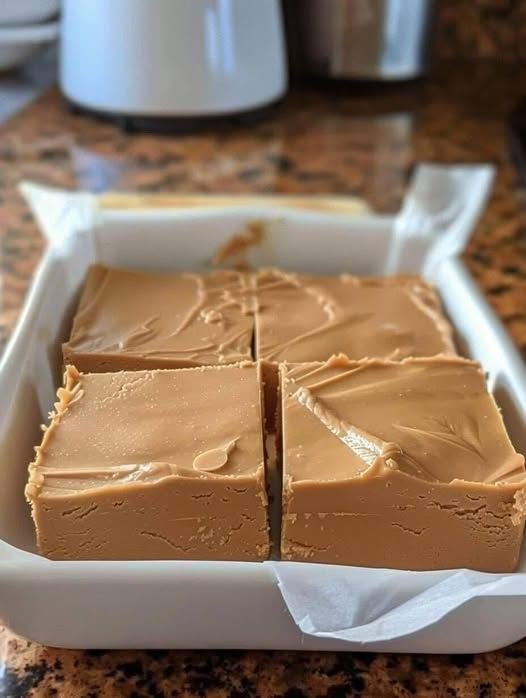
This 2-Ingredient Peanut Butter Fudge is a total game-changer if you want a rich, creamy dessert without the hassle of candy thermometers or boiling sugar. Using store-bought vanilla frosting gives you a pre-mixed “sugar and fat” base that, when combined with peanut butter, transforms into a perfectly smooth, melt-in-your-mouth fudge. Minimal effort, maximum reward!

Sugar cookies

2-Ingredient Peanut Butter Fudge

Ingredients

Core Ingredients Amount
Smooth peanut butter 2 cups
Vanilla frosting (16 oz tub) 1 container

Equipment

  • 8×8-inch baking dish
  • Parchment paper

How to Make It

Discover more
Peanut
Butter
sugar
peanut butter
Peanut Butter
fudge
Fudge
peanut
cookie
butter

Step 1: Prep the Pan
Line your 8×8-inch dish with parchment paper, leaving a little overhang. This makes it easy to lift the fudge out once set.

Step 2: Mix the Magic
In a large bowl, combine the peanut butter and vanilla frosting. Stir for about 30 seconds until smooth and fully blended. The mixture will be thick, like soft cookie dough.

Step 3: Press and Smooth
Transfer the mixture to your prepared pan. Press firmly into the corners and smooth the top with a spoon or spatula.

Step 4: Chill
Refrigerate for 1½–2 hours until firm. For a faster set, freeze for 45–60 minutes.

Step 5: Slice and Serve
Use the parchment overhang to lift the fudge out of the pan. Cut into bite-sized squares with a sharp knife and enjoy!

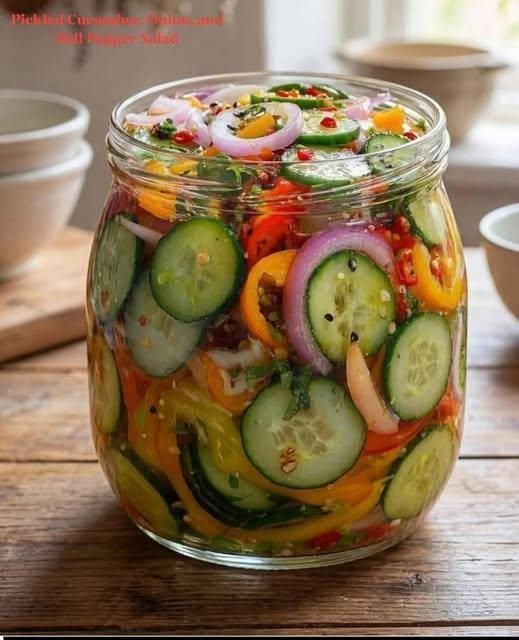
Anti-Inflammatory Pickled Cucumber, Onion & Bell Pepper Salad

Anti-Inflammatory Pickled Cucumber, Onion & Bell Pepper Salad 

Ingredients

1 large cucumber, thinly sliced

1 small red onion, thinly sliced

1 bell pepper (red, yellow, or orange), thinly sliced

½ cup apple cider vinegar

1 tablespoon olive oil

1 teaspoon honey or maple syrup (optional)

½ teaspoon salt

¼ teaspoon black pepper

½ teaspoon turmeric (anti-inflammatory boost)

Optional: fresh dill or parsley, thin garlic slices, or chili flakes


👩‍🍳 Instructions

Prepare the vegetables:

Thinly slice the cucumber, onion, and bell pepper. Place them in a large bowl or glass jar.

Make the pickling dressing:

In a small bowl, whisk together apple cider vinegar, olive oil, honey (if using), salt, pepper, and turmeric.

Combine:

Pour the dressing over the vegetables. Toss or shake gently to coat evenly.

Rest & pickle:

Let sit for 10–15 minutes at room temperature for quick pickling. For deeper flavor, refrigerate for 30–60 minutes.

Serve:

Enjoy chilled or at room temperature as a salad, topping, or side.


🍽 Servings

Serves: 4

Serving Size: About 1 cup


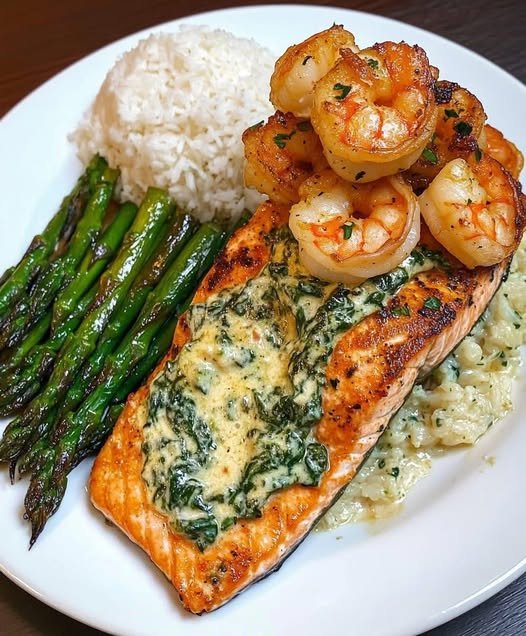
Creamed Spinach-Stuffed Salmon with Garlic Shrimp

This recipe sounds incredible—it’s essentially a high-end steakhouse meal made right in your kitchen. The combination of the rich cream cheese filling and the buttery garlic shrimp creates a perfect texture contrast with the seared salmon.

As requested, here is the full, organized recipe for your records.


🐟 Creamed Spinach-Stuffed Salmon with Garlic Shrimp

Prep time: 15 mins | Cook time: 20 mins | Servings: 2

Nutrition: ~520 Calories | ~45g Protein per serving

Ingredients

For the Salmon & Filling

  • 2 large Salmon fillets (skin-on or off)

  • 1 cup Chopped spinach (fresh or frozen, squeezed very dry)

  • 2 oz Cream cheese, softened

  • ¼ cup Shredded mozzarella or parmesan cheese

  • 1 tbsp Heavy cream

  • 1 Garlic clove, minced

  • 1 tbsp Olive oil

  • 1 tbsp Lemon juice

  • Seasonings: Salt, black pepper, and paprika (to taste)

For the Garlic Shrimp

  • ½ lb Large shrimp, peeled and deveined

  • 1 tbsp Butter

  • 1 Garlic clove, minced

  • 1 tbsp Fresh parsley, chopped

  • Optional: Red pepper flakes for heat

Recommended Sides

  • Steamed Rice: 1 cup dry, cooked according to package instructions.

  • Roasted Asparagus: 1 bunch, tossed in olive oil, salt, and pepper.


Instructions

1. Prepare the Creamed Spinach Filling

In a small saucepan over medium-low heat, combine the spinach, cream cheese, heavy cream, minced garlic, and shredded cheese. Stir continuously until the cheese is melted and the mixture is smooth and creamy. Set aside to cool slightly.

2. Prep and Stuff the Salmon

  • The Pocket: Using a sharp paring knife, cut a slit horizontally into the thickest part of the salmon fillet to create a pocket (be careful not to cut all the way through).

  • The Stuffing: Spoon the spinach mixture generously into the pocket of each fillet.

  • Season: Rub the outside of the salmon with olive oil, lemon juice, salt, pepper, and paprika.

3. Sear the Salmon

Heat a skillet over medium-high heat. Place the salmon fillets in the pan. Sear for 4–5 minutes per side until the crust is golden brown and the salmon is cooked to your preferred doneness. Remove from the pan and let rest.

4. Sizzle the Garlic Shrimp

In the same skillet (or a fresh one), melt the butter. Add the minced garlic and shrimp. Sauté for 2–3 minutes per side until the shrimp are pink and opaque. Toss in the parsley and optional red pepper flakes.

5. Prepare the Sides

  • Asparagus: While the salmon cooks, roast the asparagus at 400°F (200°C) for 10–12 minutes.

  • Rice: Prepare your steamed rice using your preferred quick-cook method.

6. Assemble and Serve

Place a bed of rice on each plate, add the roasted asparagus, and top with the stuffed salmon fillet. Pile the garlic shrimp directly on top of the salmon and drizzle any remaining garlic butter from the pan over the entire dish.


💡 Pro-Tips for Success

  • Keep it Dry: If using frozen spinach, squeeze it in a kitchen towel until no liquid remains. This prevents the filling from becoming watery inside the fish.

  • Toothpick Hack: If your salmon fillets are thin and the stuffing is falling out, use a toothpick to “stitch” the opening closed while searing.

  • The “Pan Flip”: Flip the salmon carefully using a wide spatula to ensure the stuffing stays intact.