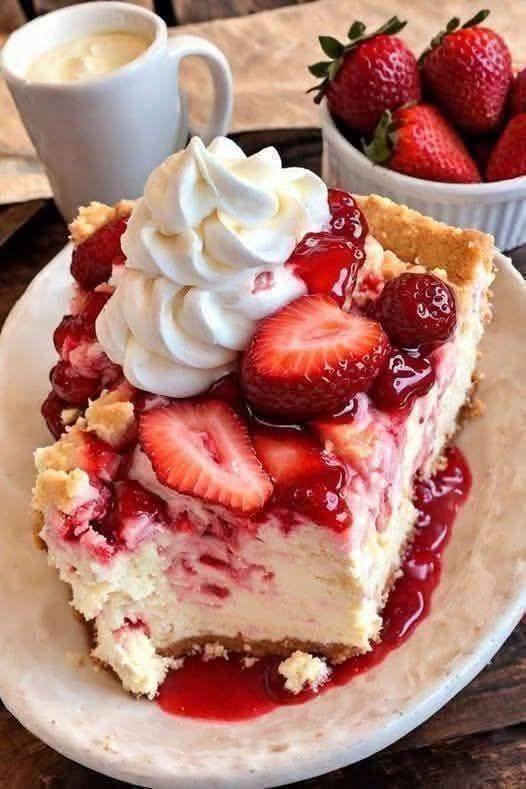
Anti-Inflammatory Italian Nonna Lemon Custard Cake

This Italian Nonna Lemon Custard Cake is a soft, lightly sweet dessert with a creamy custard center and delicate citrus aroma. Inspired by traditional Italian grandmother recipes, this anti-inflammatory version uses fresh lemon, olive oil, and minimal refined sugar to support digestion and reduce inflammation. Light, comforting, and naturally elegant, it’s perfect with tea or coffee.


Ingredients

Dry Ingredients

  • 1 cup all-purpose flour (or almond flour for gluten-friendly option)

  • ½ cup natural cane sugar or coconut sugar

  • 1 tsp baking powder

  • ¼ tsp sea salt

  • ¼ tsp turmeric powder (optional, anti-inflammatory boost)

Wet Ingredients

  • 3 large eggs, room temperature

  • ½ cup full-fat milk or almond milk

  • ⅓ cup extra virgin olive oil

  • Zest of 2 organic lemons

  • ¼ cup fresh lemon juice

  • 1 tsp pure vanilla extract


Instructions / Directions

  1. Preheat oven to 170°C (340°F). Grease an 8-inch round cake pan and line the base with parchment paper.

  2. In a bowl, whisk flour, baking powder, salt, and turmeric.

  3. In another bowl, beat eggs and sugar until light and creamy.

  4. Slowly add olive oil while whisking.

  5. Mix in milk, lemon juice, lemon zest, and vanilla extract.

  6. Gently fold dry ingredients into the wet mixture until smooth.

  7. Pour batter into prepared pan. The mixture will be thin.

  8. Bake for 45–50 minutes until the top is lightly golden and the center has a soft custard jiggle.

  9. Cool completely before slicing to allow custard to set.


Pro Tips (Diet & Health Related)

  • Use organic lemons for maximum antioxidant benefits.

  • Do not overbake; a soft center creates the custard texture.

  • Olive oil is key for heart-healthy fats and inflammation control.

  • For dairy-free, use almond or oat milk.

  • Chill for 1 hour for a firmer custard slice.


Nutrition (Per Slice – Approx.)

  • Calories: ~210 kcal

  • Fat: 11g

  • Saturated Fat: 2g

  • Carbohydrates: 24g

  • Protein: 5g

  • Sugar: 10g

  • Anti-Inflammatory Benefits: Vitamin C, polyphenols, healthy fats


Q & A

Q: Why is this cake anti-inflammatory?
Fresh lemon, olive oil, turmeric, and low sugar help reduce inflammation and support digestion.

Q: Can I make it gluten-free?
Yes. Replace flour with almond flour or gluten-free baking blend.

Q: How should I store it?
Refrigerate in an airtight container for up to 3 days.

Q: Is this cake overly sweet?
No. It’s lightly sweet with a fresh lemon balance, Italian-style.

🌿 Creamy High-Protein Herb Dip

🌿 Creamy High-Protein Herb Dip

A thick, savory, and cooling dip that packs 12 g of protein per serving. Perfect for keto meal prep or as a healthy party appetizer.

  • Servings: 6

  • Total Time: 10 minutes

  • Difficulty: Easy

  • Diet: Keto, Low-Carb, High-Protein, WW-Friendly


📊 Nutrition Facts (Per Serving)

Calories Protein Net Carbs Fat Fiber
~95 12 g 3g 4g 1g

📝 Ingredients

The Base

  • 1 ½ cups plain nonfat Greek yogurt

  • ½ cup low-fat cottage cheese

  • 1 scoop unflavored or savory whey protein powder

Herbs & Seasoning

  • 2 tbsp fresh parsley, finely chopped1


  • 1 tbsp fresh dill, finely chopped

  • 1 tbsp fresh chives, minced

  • 1 clove garlic, grated or finely minced

  • 1 tsp lemon zest

  • 1 tbsp lemon juice

  • ½ tsp onion powder

  • ½ tsp salt (adjust to taste)

  • ¼ tsp black pepper

Optional Add-Ins

  • 1–2 tsp olive oil (for keto richness)

  • Pinch of red pepper flakes (for heat)


👩‍🍳 Detailed Instructions

  1. Create the Silky Base: Place the Greek yogurt, cottage cheese, and protein powder into a blender or food processor. Blend on high until the mixture is completely smooth and no cottage cheese curds remain.

  2. Incorporate Flavors: Pour the blended base into a medium mixing bowl. Add the chopped parsley, dill, chives, garlic, lemon zest, and lemon juice. Fold gently until the herbs are evenly distributed.

  3. Season: Stir in the onion powder, salt, and black pepper. Taste the dip—if you prefer more zing, add an extra splash of lemon juice.

  4. The “Bloom” Phase: Cover and refrigerate for at least 20–30 minutes. This allows the dried seasonings and fresh herbs to “bloom” (release their flavors) into the dairy base and helps the texture firm up.

  5. Serve: Garnish with a sprinkle of fresh herbs or a drizzle of olive oil.


💡 Storage & Tips

  • Fridge: Store in an airtight container for 3–4 days. Give it a quick stir before serving if any natural whey separation occurs.

  • Keto Adjustment: To increase the healthy fats for a strict keto diet, stir in 1 tablespoon of extra virgin olive oil or a tablespoon of softened cream cheese.

  • Dipping Ideas: This is excellent with cucumber slices, bell pepper strips, celery, or even as a sauce for grilled chicken or salmon.

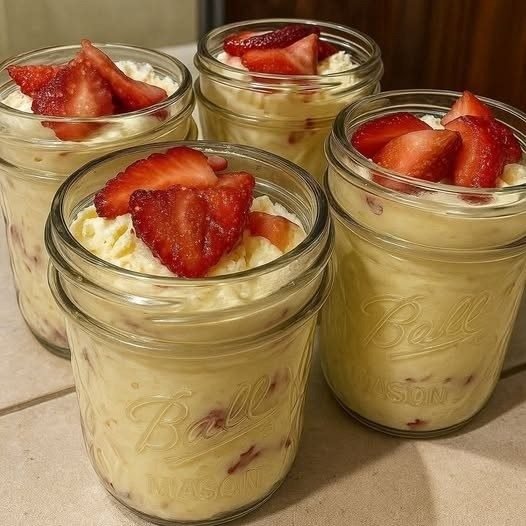
🍓 Keto No-Bake Strawberry Cheesecake Jars

This recipe is a brilliant “hack” for keto enthusiasts—using blended cottage cheese is a fantastic way to boost the protein content while maintaining that signature cheesecake creaminess.

Following your preference for full recipes, here is the complete, organized guide for your Cheesecake Jars.


🍓 Keto No-Bake Strawberry Cheesecake Jars

A high-protein, low-carb delight that layers a buttery almond crumble with a silky, citrus-kissed cheesecake filling and fresh macerated strawberries.

  • Servings: 4 jars

  • Prep Time: 15 minutes

  • Chill Time: 1 hour

  • Diet: Keto, Low-Carb, High-Protein, Sugar-Free


📝 Ingredients

For the Low-Carb “Crust” Layer

  • ½ cup almond flour

  • 1 tbsp butter, melted

  • 1 tbsp granular erythritol or allulose

  • ¼ tsp cinnamon (optional)

  • Pinch of salt

For the Cheesecake Filling

  • 1 cup cottage cheese (full fat or low fat)

  • 4 oz cream cheese, softened to room temperature

  • ½ cup Greek yogurt (0% or 2%)

  • 3–4 tbsp powdered erythritol or allulose (adjust to your sweetness preference)

  • 1 tsp vanilla extract

  • 1 tbsp lemon juice

For the Strawberry Layer

  • 1 cup fresh strawberries, diced

  • 1 tbsp powdered sweetener

  • 1 tsp lemon juice


👩‍🍳 Detailed Instructions

  1. Prepare the Crust: In a small bowl, combine the almond flour, melted butter, sweetener, cinnamon, and salt. Stir until it forms a soft, sandy crumble. Set aside.

  2. Blend the Base: Place the cottage cheese in a blender or food processor. Blend on high until it is completely silky with no visible curds.

  3. Finish the Filling: Add the softened cream cheese, Greek yogurt, sweetener, vanilla, and lemon juice to the blender. Process until the mixture is smooth, thick, and creamy.

  4. Prep the Berries: In a separate bowl, toss the diced strawberries with lemon juice and sweetener. Use a fork to gently mash a few of the berries—this creates a natural “syrup” while keeping most of the fruit chunky.

  5. Assemble: * Drop 1–2 tablespoons of the almond crust into the bottom of 4 small glass jars.

    • Spoon or pipe in a thick layer of the cheesecake cream.

    • Top with a generous spoonful of the strawberry mixture.

    • (Optional) Repeat the layers if using tall jars.

  6. Chill: Cover the jars and refrigerate for at least 1 hour. This allows the cheesecake layer to firm up and the flavors to meld.


❄️ Storage & Tips

  • Fridge: These jars are perfect for meal prep! They stay fresh for up to 4–5 days.

  • High Protein Tip: Don’t skip the cottage cheese; blending it is the secret to getting a high-protein count without a “diet” taste.

  • Texture: If the filling is too thick to blend easily, add 1 tablespoon of unsweetened almond milk to help the blades move.


📊 Quick Macros (Estimated per jar)

  • Net Carbs: ~5g

  • Protein: ~12g

  • Sugar: 0g added

Colon Cleanse: The 3-Ingredient Juice That Flushes Pounds of Toxins from Your Body

🍎 3-Ingredient Colon Cleanse Juice

This drink combines the pectin from apples, the acidity of lemon, and the mucilaginous fiber of chia seeds to support digestive regularity and reduce bloating.

  • Prep Time: 5 minutes

  • Wait Time: 10 minutes (for chia seeds)

  • Yield: 1 Serving

  • Dietary Info: Vegan, Gluten-Free, Raw


📝 Ingredients

  • 1 large organic apple (Cored and chopped; keep the skin on for maximum fiber)

  • 1 fresh lemon (Juiced)

  • 1 tbsp chia seeds

  • 1 cup filtered water


👩‍🍳 Detailed Instructions

  1. Prep the Produce: Wash the apple thoroughly. Core it and chop it into small chunks. Squeeze the juice from the lemon, ensuring no seeds fall in.

  2. Blend: Add the apple chunks, lemon juice, chia seeds, and water into a high-speed blender. Blend until completely smooth.

  3. The “Set” Phase: Pour the juice into a glass and let it sit for 5–10 minutes. This is a crucial step—it allows the chia seeds to absorb water and create a gel-like consistency that is easier on the digestive tract.

  4. Stir & Drink: Give the mixture a quick stir to redistribute the seeds and drink immediately.


💡 Consumption Guide

  • Frequency: For a focused “cleanse,” drink once daily for 5 consecutive days. For maintenance, 2–3 times per week is sufficient.

  • Best Time to Drink: Many prefer drinking this on an empty stomach in the morning to “wake up” the digestive system, followed by a large glass of plain water.

  • Storage: It is best consumed fresh. If you must save it, keep it in an airtight jar in the fridge for no more than 12 hours (the texture will thicken significantly over time).


⚖️ Why These Ingredients?

  • Apple: Contains pectin, a soluble fiber that acts as a prebiotic and helps sweep the digestive tract.

  • Lemon: High in vitamin C and citric acid, which can help stimulate bile production to assist in fat digestion.

  • Chia Seeds: A powerhouse of omega-3s and fiber; they can hold up to 10x their weight in water, helping to keep the colon hydrated and moving.


⚠️ A Note on Safety

When increasing fiber intake significantly (like adding chia seeds), it is essential to increase your water intake throughout the rest of the day. Without enough water, high fiber can occasionally cause temporary bloating or constipation rather than relieving it.

No-Bake Strawberry Cheesecake Jars

These No-Bake Strawberry Cheesecake Jars are the ultimate easy dessert—creamy, fruity, and beautifully layered with zero oven time required. Perfect for warm days, dinner parties, or make-ahead treats, these individual jars deliver all the flavor of classic cheesecake in a lighter, faster format. The buttery graham cracker crust, fluffy vanilla cheesecake filling, and juicy fresh strawberries come together in a dessert that looks elegant but is incredibly simple to prepare.

Serves: 4–6 jars
Prep Time: 15 minutes
Chill Time: 1–2 hours (optional but recommended)

Ingredients

Crust Layer

  • 1 cup graham cracker crumbs
  • 2 tablespoons sugar
  • 4 tablespoons butter, melted

Cheesecake Filling

  • 8 oz (225 g) cream cheese, softened
  • ½ cup powdered sugar
  • 1 teaspoon vanilla extract
  • 1 cup heavy whipping cream, cold

Strawberry Layer

  • 1½ cups fresh strawberries, diced
  • 1–2 tablespoons sugar (optional, depending on sweetness)

Toppings (Optional)

  • Sliced fresh strawberries
  • Whipped cream

Instructions

1. Prepare the Crust
In a small bowl, combine the graham cracker crumbs and sugar. Pour in the melted butter and mix until the crumbs are evenly coated and resemble wet sand. Spoon 2–3 tablespoons of the mixture into the bottom of each jar or glass. Gently press down with the back of a spoon to create a compact base. Set aside.

2. Prepare the Strawberries
Place the diced strawberries in a bowl and toss with sugar if desired. Let them sit for 10–15 minutes to release their natural juices. This step enhances the flavor and creates a light strawberry syrup that pairs beautifully with the cheesecake layer.

See also  Better Than Meat: Delicious Zucchini with Mushrooms Recipe

3. Make the Cheesecake Filling
In a medium mixing bowl, beat the softened cream cheese with powdered sugar and vanilla extract until completely smooth and creamy. In a separate chilled bowl, whip the cold heavy cream until stiff peaks form. Gently fold the whipped cream into the cream cheese mixture using a spatula, working slowly to keep the filling light, airy, and fluffy.

4. Assemble the Jars
Spoon a generous layer of cheesecake filling over the crust. Add a layer of juicy strawberries, including some of their released juices. Repeat the layers until the jars are full, finishing with a cheesecake or strawberry layer depending on your preference.

5. Chill and Serve
Top each jar with sliced strawberries and a swirl of whipped cream if desired. Chill the jars for at least 1 hour to allow the flavors to meld and the texture to set. Serve chilled for the best taste and consistency.

Tips & Variations

  • Substitute strawberries with blueberries, raspberries, or mango for variety
  • Add lemon zest to the cheesecake filling for extra freshness
  • Use digestive biscuits or vanilla wafers instead of graham crackers

These No-Bake Strawberry Cheesecake Jars are creamy, refreshing, and irresistibly indulgent—perfect for any occasion, with minimal effort and maximum flavor 🍓🍰

Avocado Chicken Salad

Avocado Chicken Salad
Fresh, creamy, and perfect for small portions + protein goals!
Ingredients:
1 small ripe avocado (mashed for creaminess)
4 oz cooked chicken breast, finely shredded (or canned chicken for convenience)
½ cup diced cucumber (crunch + hydration)
½ cup cherry tomatoes, halved
1 tbsp plain Greek yogurt (extra protein, keeps it light)
Pinch of salt, pepper, garlic powder, and squeeze of lemon juice
Instructions:
In a small bowl, mash the avocado and mix with Greek yogurt until smooth.
Fold in shredded chicken, cucumber, and cherry tomatoes.
Season with salt, pepper, garlic powder, and lemon juice to taste.
Chill for 10 minutes (optional) for flavors to blend.
Packs ~28g protein, healthy fats, and fiber with way fewer carbs than chickpeas. Perfect for wraps, lettuce cups, or just a few spoonfuls as a mini meal.