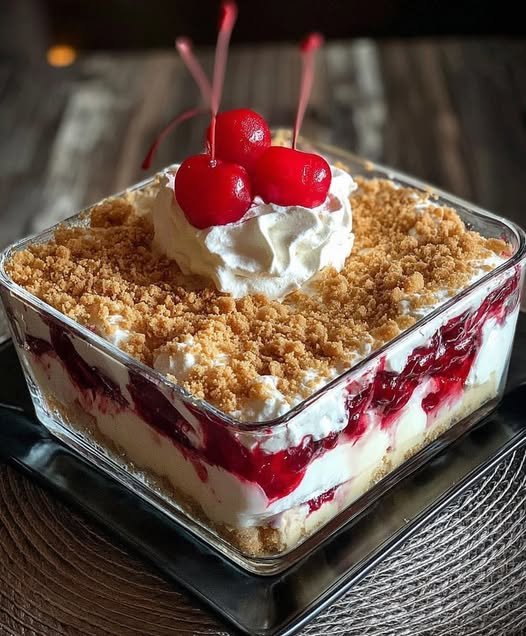
🍒 Cherry Cheesecake Lush

🍒 Cherry Cheesecake Lush

A decadent, layered “no-stress” dessert featuring a nutty crust, creamy cheesecake pudding, and vibrant cherry topping.

  • Prep time: 20 minutes

  • Bake time: 15 minutes

  • Chill time: 4+ hours

  • Yields: 12–15 servings

Ingredients

The Nutty Crust:

  • 1 cup Vanilla Wafer crumbs

  • 1 cup Pecans, finely chopped

  • 1 stick (1/2 cup) Butter, melted

The Creamy Layers:

  • 8 oz Cream Cheese, softened

  • 1 cup Powdered sugar

  • 16 oz Whipped topping (like Cool Whip), divided

  • 2 boxes (small) Cheesecake-flavored instant pudding

  • 3 cups Milk

The Topping:

  • 1 can (21 oz) Cherry pie filling

  • 1/2 cup Pecans, chopped (for garnish)


Instructions

  1. Prepare the Base: Preheat your oven to 350°F. In a medium bowl, combine the vanilla wafer crumbs, finely chopped pecans, and melted butter. Press the mixture firmly into the bottom of a 9×13 inch baking pan.

  2. Bake and Cool: Bake the crust for 15 minutes. Remove from the oven and let it cool completely. This is crucial to prevent your layers from melting!

  3. The Cheesecake Layer: In a separate bowl, beat the softened cream cheese and powdered sugar until smooth. Fold in 1 ½ cups of the whipped topping. Spread this evenly over the cooled crust.

  4. The Pudding Layer: In another bowl, whisk together the two boxes of cheesecake pudding mix, the milk, and 1 cup of whipped topping until thickened and smooth. Layer this carefully over the cream cheese mixture.

  5. The Cherry Finish: Gently spread the cherry pie filling over the pudding layer.

  6. Final Flourish: Top the cherries with the remaining whipped topping and sprinkle the 1/2 cup of chopped pecans over the top.

  7. The Big Chill: Refrigerate for at least 4 hours, though overnight is best to let the layers set firmly for those perfect, clean slices.


Pro-Tips for Success

  • Soften the Cheese: Ensure your cream cheese is truly at room temperature to avoid tiny white lumps in your “lush” layer.

  • Clean Slices: Wipe your knife with a warm, damp cloth between each cut to keep the layers looking sharp and professional.

  • Twist it up: As you mentioned, you can easily swap the cherries for blueberries or even lemon curd for a citrusy version!
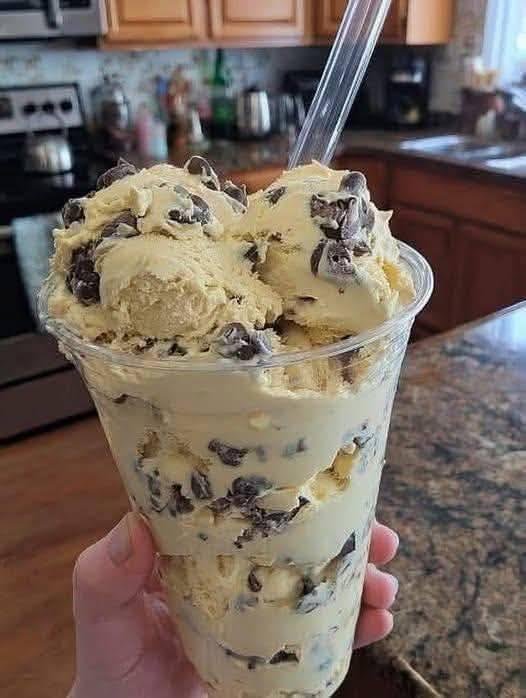
Fat Bomb Fluff ( Low-Carb Dessert)

Fat Bomb Fluff ( Low-Carb Dessert)

Description

Fat Bomb Fluff is a rich, creamy, no-bake keto dessert that tastes like a cross between cheesecake fluff and cookie dough ice cream. It’s high in healthy fats, low in carbs, and incredibly satisfying—perfect for curbing sweet cravings while staying keto or low-carb. Serve it chilled, frozen, or straight from the bowl.

 Ingredients

  • 8 oz cream cheese, softened

  • ½ cup unsalted butter, softened

  • ½ cup powdered erythritol or monk fruit sweetener (to taste)

  • 1 tsp vanilla extract

  • 1 cup heavy whipping cream, cold

  • ¾–1 cup sugar-free chocolate chips

  • Optional add-ins:

    • Pinch of salt (enhances flavor)

    • 1–2 tbsp peanut butter or almond butter

    • 1–2 tbsp cocoa powder (for chocolate version)

 Instructions

  1. In a large bowl, beat cream cheese and butter until smooth and fluffy (2–3 minutes).

  2. Add sweetener, vanilla, and salt. Beat again until fully combined.

  3. In a separate bowl, whip the heavy cream until stiff peaks form.

  4. Gently fold the whipped cream into the cream cheese mixture in batches.

  5. Fold in chocolate chips and any optional add-ins.

  6. Serve immediately or chill for 30–60 minutes for a firmer texture.

 Servings

  • 6 servings

  • Serving size: ~¾ cup

Nutritional Information (Per Serving – Approx.)

  • Calories: 270–290

  • Fat: 26–28g

  • Protein: 3–4g

  • Net Carbs: 2–3g

  • Sugar: 0g

(Values may vary depending on brands used)

 Benefits

  • ✅ Keto & low-carb friendly

  • ✅ No baking required

  • ✅ High-fat for satiety

  • ✅ Helps curb sugar cravings

  • ✅ Customizable flavors

  • ✅ Can be frozen or eaten chilled

 Recipe Notes

  • Use powdered sweetener, not granulated, to avoid grainy texture.

  • Let cream cheese and butter fully soften before mixing.

  • Fold whipped cream gently to keep the fluff airy.

  • Chill longer if you prefer an ice-cream-like consistency.

 Tips & Variations

  • Frozen Treat: Freeze in individual portions for 1–2 hours.

  • Chocolate Lover: Add cocoa powder and extra chocolate chips.

  • Cookie Dough Style: Add vanilla + chopped keto cookies.

  • Dairy-Free: Use dairy-free cream cheese, butter, and coconut cream.

  • Extra Protein: Mix in unflavored or vanilla collagen powder.


Q & A

Q: Is Fat Bomb Fluff keto-friendly?
A: Yes! It’s low in net carbs and high in fats, perfect for keto diets.

Q: Can I freeze it?
A: Absolutely. Freeze for a firmer texture—let it sit 5–10 minutes before serving.

Q: How long does it last?
A: Up to 5 days in the fridge or 2 months in the freezer (airtight container).

Q: Can I make it less sweet?
A: Yes, reduce sweetener or add a pinch of salt to balance flavors.

Q: Can I use flavored cream cheese?
A: You can, but check carb counts carefully.

Creamy Cucumber Salad with Dill & Red Onion

Creamy Cucumber Salad with Dill & Red Onion

🛒 Ingredients

3 large cucumbers, thinly sliced (English or Persian work best)
½ medium red onion, thinly sliced
¾ cup sour cream or Greek yogurt
2 tbsp mayonnaise (optional, for extra creaminess)
1–2 tbsp fresh lemon juice (to taste)
2 tbsp fresh dill, finely chopped
½ tsp garlic powder (or 1 small clove garlic, minced)
Salt, to taste
Freshly ground black pepper, to taste
Optional: pinch of sugar or honey (to balance acidity)

👩‍🍳 Instructions

1️⃣ Prepare the cucumbers
Place sliced cucumbers in a colander, sprinkle lightly with salt, and let sit for 10 minutes to release excess water. Pat dry with a paper towel.
2️⃣ Make the creamy dressing
In a bowl, whisk together sour cream (or yogurt), mayonnaise, lemon juice, dill, garlic powder, salt, pepper, and optional sugar.
3️⃣ Combine
Add cucumbers and red onion to the dressing. Gently toss until evenly coated.
4️⃣ Chill
Cover and refrigerate for 20–30 minutes to let flavors meld.
5️⃣ Serve
Give a final stir, adjust seasoning, and serve cold.

Texas Trash Dip

Texas Trash Dip

This warm, creamy bean dip is a legendary potluck favorite. It combines the heartiness of refried beans with a silky, seasoned cream cheese base and a thick blanket of melted cheese.

  • Prep time: 15 minutes

  • Cook time: 25 minutes

  • Total time: 40 minutes

  • Servings: 6–8 (large party portion)

Ingredients

The Base:

  • 1 pkg (8 oz) Cream cheese, softened to room temperature

  • 1 cup Sour cream (full-fat recommended)

  • 2 cans (16 oz each) Refried beans

  • 1 packet (1 oz) Taco seasoning

  • 1 can (4 oz) Diced green chilies, drained (optional, for a mild kick)

The Cheese:

  • 2 cups Shredded Mexican blend cheese, divided

  • 1 cup Shredded sharp cheddar cheese

The Toppings (Optional):

  • ½ cup Sliced black olives

  • ½ cup Chopped green onions

  • ½ cup Diced tomatoes or Pico de Gallo

  • Fresh cilantro


Instructions

  1. Preheat and Prep: Set your oven to 350°F (175°C). Lightly grease a 9×13-inch baking dish with non-stick spray.

  2. Cream the Base: In a large mixing bowl, beat together the softened cream cheese and sour cream until the mixture is smooth and no large lumps remain.

  3. Mix in Flavors: Add the refried beans, taco seasoning, and drained green chilies. Stir until the beans are fully incorporated into the cream base.

  4. Add Cheese: Fold in 1 cup of the Mexican blend cheese into the bean mixture. This ensures every bite is cheesy, not just the top layer.

  5. Assemble: Spread the bean mixture evenly into your prepared 9×13 baking dish using a spatula.

  6. Top it Off: Sprinkle the remaining 1 cup of Mexican blend cheese and the 1 cup of cheddar cheese evenly over the top.

  7. Bake: Bake uncovered for 20–25 minutes. You are looking for the cheese to be completely melted and the edges of the dip to be bubbling.

  8. Garnish and Serve: Remove from the oven and let it sit for about 5 minutes (this helps it thicken slightly). Top with olives, green onions, and tomatoes. Serve hot with a sturdy bag of tortilla chips or Fritos Scoops.


Tips for Success

  • The Cream Cheese Secret: If you forgot to take the cream cheese out of the fridge, pop it in the microwave (wrapper removed!) for 15-20 seconds so it blends smoothly without lumps.

  • Control the Salt: If you find store-bought taco seasoning too salty, use a “Low Sodium” version or make your own blend with chili powder, cumin, garlic powder, and onion powder.

  • Hearty Variation: If you want to turn this into a meal, stir in 1 lb of browned, drained ground beef or chorizo before spreading the mixture into the baking dish.

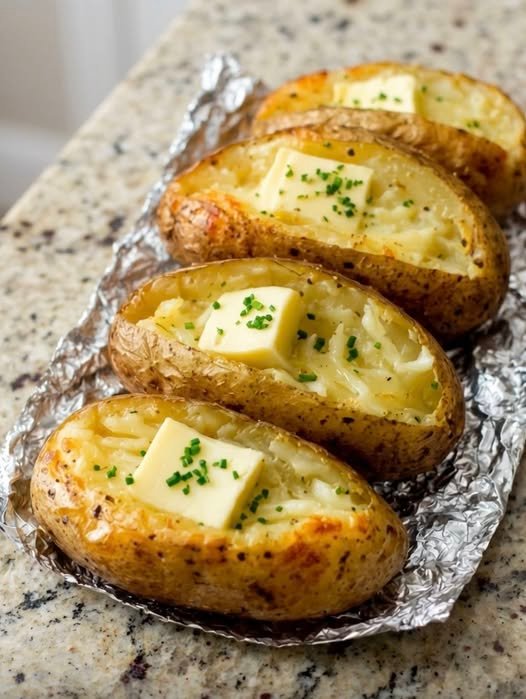
Baked Potato Recipe

The Perfect Crispy-Skin Baked Potato

This recipe focuses on the high-heat method to ensure the skin is salty and crunch while the inside remains light and fluffy.

  • Prep time: 10 minutes

  • Cook time: 55 minutes

  • Servings: 4 potatoes

Ingredients

  • 4 large Russet potatoes (scrubbed and dried thoroughly)

  • 2 tbsp Olive oil (or melted butter)

  • 1 tsp Kosher salt (coarse salt is best for texture)

  • ½ tsp Black pepper (freshly ground, optional)

Classic Toppings:

  • Salted butter

  • Sour cream

  • Shredded sharp cheddar cheese

  • Fresh chives or green onions

  • Crispy bacon bits


Instructions

  1. Heat the Oven: Preheat your oven to 425°F (220°C). Using a high temperature is the “secret” to getting that potato-skin-chip texture on the outside.

  2. Prep the Spuds: After washing and drying the potatoes completely (moisture on the skin will lead to steaming rather than crisping), pierce each potato 3–4 times with a fork.

  3. Season: Rub each potato generously with the olive oil until fully coated. Sprinkle the kosher salt and pepper over the entire surface.

  4. The Bake: Place the potatoes directly on the center oven rack for maximum air circulation. (You can place a baking sheet on the rack below to catch any stray oil drips).

  5. Timing: Bake for 50–60 minutes. Flip them once at the 30-minute mark to ensure even browning. They are done when the skin is crackly and a knife slides into the center with zero resistance.

  6. The Reveal: Remove from the oven and let them rest for 2–3 minutes. Use a knife to slice a long slit down the center. Use a towel to grab the ends and “pop” the potato open by pushing inward—this releases the steam immediately so the interior doesn’t get gummy.

  7. Fluff and Serve: Use a fork to mash and fluff the insides before adding a heavy pat of butter and your desired toppings.


Three Ways to Level Up Your Toppings

  • The Broccoli-Cheddar: Top with steamed broccoli florets and a quick homemade cheese sauce (or just plenty of melted sharp cheddar).

  • The Chili-Loaded: Pour a ladle of warm chili over the fluffed potato and top with red onions and pickled jalapeños.

  • The Mediterranean: Skip the butter and top with a dollop of Greek yogurt, a squeeze of lemon, and a sprinkle of dried oregano.

CLASSIC GREEK SALAD

CLASSIC GREEK SALAD
A Refreshing Taste of Greece
Ingredients you will need :
2 cups cucumber, sliced
1 cup cherry tomatoes, halved
1/2 red onion, sliced
1/4 cup Kalamata olives
1/4 cup green olives
1/2 cup feta cheese, cubed
1 tbsp fresh parsley, chopped
1/4 tsp dried oregano
Salt & pepper, to taste
2 tbsp olive oil
1 tbsp red wine vinegar
Instructions:
Prep the Vegetables:
Slice the cucumbers and red onion.
Halve the cherry tomatoes.
Cube the feta cheese.
Assemble the Salad:
In a large bowl, combine the cucumber, cherry tomatoes, red onion, Kalamata olives, and green olives.
Add the cubed feta cheese.
Season and Dress:
Sprinkle the salad with dried oregano, chopped parsley, salt, and pepper.
Drizzle with olive oil and red wine vinegar.