🍳 The Perfect “Doctor-Approved” Morning Scramble

🍳 The Perfect “Doctor-Approved” Morning Scramble

This recipe focuses on maintaining the integrity of the nutrients (like choline and lutein) by not overcooking the eggs while adding healthy fats and antioxidants.

Prep time: 5 mins | Cook time: 5 mins | Yield: 1 serving

Ingredients

  • The Base:

    • 2 to 3 large organic, pasture-raised eggs (higher in Vitamin D and Omega-3s)

    • 1 tbsp grass-fed butter or avocado oil

  • The “Booster” Add-ins:

    • 1/4 cup fresh spinach (for extra Vitamin K and Folate)

    • 1 tbsp nutritional yeast (optional, for a B-vitamin and cheesy flavor boost)

    • A pinch of sea salt and cracked black pepper

    • 1/4 avocado (served on the side for healthy monounsaturated fats)

Instructions

  1. Whisk with Intention: Crack the eggs into a bowl. Whisk vigorously for about 30 seconds. This incorporates air, making them fluffier without needing to add milk or cream.

  2. Low and Slow: Heat your skillet over medium-low heat. Add the butter. Once melted and bubbling slightly, pour in the eggs.

  3. The Gentle Fold: Let the eggs sit for 20 seconds until the edges set. Use a silicone spatula to gently push the cooked eggs toward the center, letting the raw eggs flow to the edges.

  4. Add Greens: When the eggs are halfway cooked (still looking wet), fold in the spinach and nutritional yeast. The residual heat will wilt the spinach perfectly without destroying its nutrients.

  5. Finish Early: Remove the pan from the heat while the eggs still look slightly underdone. They will continue to cook on the plate (carry-over cooking), ensuring they stay “jammy” and nutrient-dense rather than rubbery.

  6. Serve: Top with sliced avocado and a dash of black pepper.


How to Maximize the Benefits

  • Don’t Fear the Yolk: About 90% of an egg’s calcium, iron, and nearly all its fat-soluble vitamins (A, D, E, and K) are in the yolk. Eating only the whites means missing the brain-boosting choline.

  • Pair with Vitamin C: To help your body absorb the non-heme iron found in the egg and spinach, pair your breakfast with a few berries or a squeeze of lemon juice in your water.

  • Avoid High Heat: Cooking eggs at extremely high temperatures can oxidize the cholesterol in the yolk. Stick to medium or low heat for poaching, soft-boiling, or gentle scrambling.
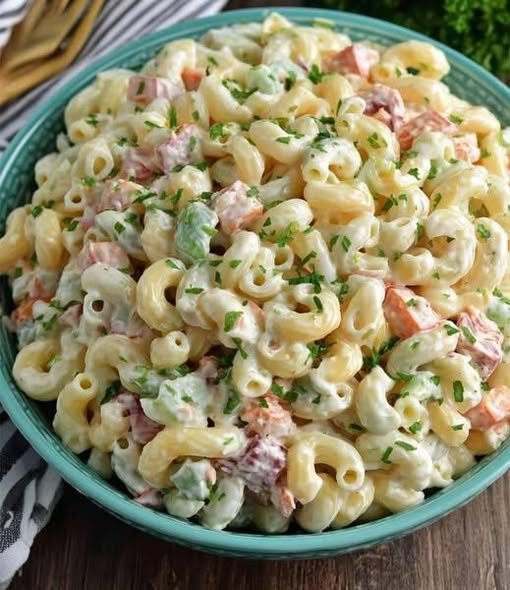

Keto Hawaiian Macaroni Salad

Keto Hawaiian Macaroni Salad

Prep time: 15 mins | Cook time: 7 mins | Total time: 22 mins (plus chilling) Yield: 6 servings | Net Carbs: ~3g per serving

Ingredients

  • The Base:

    • 8 oz low-carb elbow macaroni (e.g., Great Low Carb Bread Co., Immi, or konjac-based)

  • The Dressing:

    • 1 cup sugar-free mayonnaise (Avocado oil-based like Primal Kitchen is best)

    • 2 tbsp apple cider vinegar

    • 1 tbsp heavy cream (optional, for extra richness)

    • 1 tbsp sugar-free Dijon mustard

    • 1 tsp erythritol or monk fruit sweetener (optional)

    • 1/2 tsp garlic powder

    • 1/2 tsp onion powder

    • Salt and black pepper to taste

  • The Add-ins:

    • 1/2 cup celery, finely chopped

    • 1/4 cup red onion, finely chopped

    • 1/4 cup carrots, shredded (omit or swap for jicama to further reduce carbs)

    • 1 tbsp green onions, chopped

    • Optional: 1/2 tsp paprika for color

Instructions

  1. Boil the Pasta: Bring a large pot of salted water to a boil. Cook the low-carb pasta according to package directions (usually 5–7 minutes). Do not overcook, as low-carb pasta can become mushy. Drain and immediately rinse with cold water to stop the cooking process.

  2. Whisk the Dressing: In a large mixing bowl, combine the mayonnaise, apple cider vinegar, heavy cream, Dijon mustard, sweetener, garlic powder, and onion powder. Whisk until the mixture is smooth, creamy, and fully emulsified.

  3. Prep the Veggies: Finely chop your celery and onions. Add them to the dressing bowl along with the shredded carrots.

  4. Fold Together: Add the cooled, drained pasta to the dressing mixture. Using a spatula, gently fold the pasta until every piece is evenly coated. Be careful not to break the noodles.

  5. The Chill Factor (Crucial): Cover the bowl and refrigerate for at least 1 hour. For the most authentic “island style” flavor, let it sit overnight; this allows the pasta to absorb the tang of the vinegar and the sweetness of the dressing.

  6. Final Touch: Before serving, give it a quick stir. If it seems too dry (pasta absorbs moisture as it sits), fold in an extra tablespoon of mayo. Garnish with green onions or a dash of paprika.


Pro Tips for the Best Mac Salad

  • The “Double Dressing” Rule: Low-carb noodles are notorious for soaking up sauce. If you are making this a day ahead, consider making 1.5x the dressing recipe so it stays creamy until serving.

  • Texture Trick: If you find konjac-based pasta too “rubbery,” try a lupin-flour or almond-flour based elbow macaroni for a more traditional bite.

  • Plate Lunch Pairing: Serve this alongside Keto Kalua Pork or Grilled Teriyaki Chicken (using a sugar-free glaze) for a complete Hawaiian experience.

  • Storage: This keeps beautifully in an airtight container for up to 5 days in the fridge. Do not freeze, as the emulsion in the mayo will break and the pasta texture will degrade.


Nutritional Profile (Per Serving)

  • Calories: 210

  • Fat: 18g

  • Net Carbs: 3g

  • Protein: 6g

Classic Golden Crepes

Classic Golden Crepes

Prep time: 5 mins | Cook time: 15 mins | Yields: About 8–10 crepes


Ingredients

1 cup All-purpose flour


2 Large eggs


½ cup Milk


½ cup Water


¼ tsp Salt


2 tbsp Butter (melted)


Optional: 1 tsp sugar and 1 tsp vanilla extract (for sweet crepes only)


Instructions

Whisk the Batter: In a large mixing bowl, whisk together the flour and the eggs. Gradually add in the milk and water, stirring constantly to combine. Add the salt and melted butter (plus sugar/vanilla if using) and whisk until the batter is completely smooth with no lumps.


Rest (Important): Let the batter sit for about 10–15 minutes. This allows the flour to fully hydrate, resulting in a much more tender crepe.


Heat the Pan: Lightly coat a non-stick frying pan or crepe pan with a tiny bit of butter or oil over medium heat.


The Pour: Pour about ¼ cup of batter into the center of the pan. Immediately tilt and rotate the pan in a circular motion so the batter coats the entire surface in a thin, even layer (just like the top-left image in your photo).


The Cook: Cook for about 1–2 minutes until the bottom is light golden and the edges start to lift. Gently flip it with a spatula and cook the other side for another 30–60 seconds.


Serve: Stack them on a plate and fold them into triangles as seen in your image.


Pro Tips for Success

Consistency: The batter should be thin, like heavy cream. If it feels too thick, whisk in an extra tablespoon of milk.


The First One: Don’t worry if the first crepe looks a bit messy! The first one is usually the “test” crepe to get the pan temperature just right.


Toppings: For a classic look, dust them with powdered sugar or drizzle with a little maple syrup.

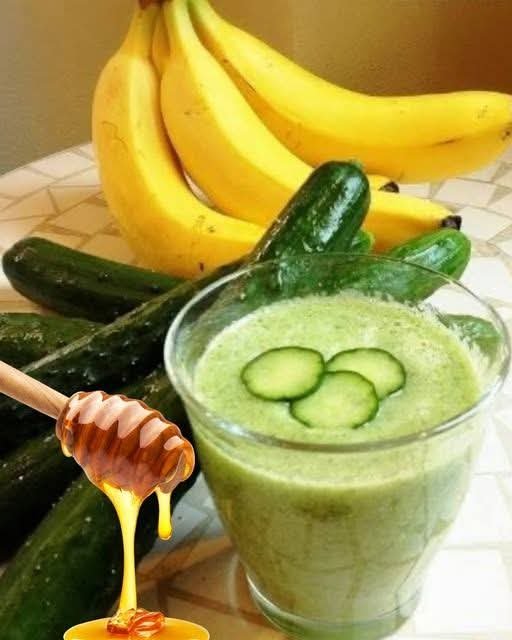
Cucumber Banana Glow Smoothie


Cucumber Banana Glow Smoothie

Ingredients

1 medium banana (frozen slices work best for a creamy texture)


1 medium cucumber (peeled if you want a smoother texture, or unpeeled for extra fiber)


1-2 teaspoons honey (adjust to your preferred sweetness)


1/2 cup liquid base (water, coconut water, or almond milk)


Optional: A squeeze of lemon juice for brightness or a few ice cubes.


Instructions

Prep the Produce: Wash the cucumber thoroughly. Slice the cucumber and the banana into chunks to make them easier to blend.


Combine: Place the cucumber, banana, honey, and your choice of liquid into a blender.


Blend: Start on a low speed and gradually increase to high. Blend for about 45–60 seconds or until the mixture is completely smooth and frothy.


Taste Test: Sip a small amount. If you’d like it sweeter, add a touch more honey. If it’s too thick, add a splash more liquid.


Serve: Pour into a glass and garnish with thin cucumber slices, just like in your photo!


Quick Tips for the Best Result

Coldness: If your fruit isn’t frozen, add 3–4 ice cubes before blending to get that chilled, refreshing finish.


Texture: Cucumbers have a high water content, so you may not need much extra liquid. Start with a small amount and add more as you go.

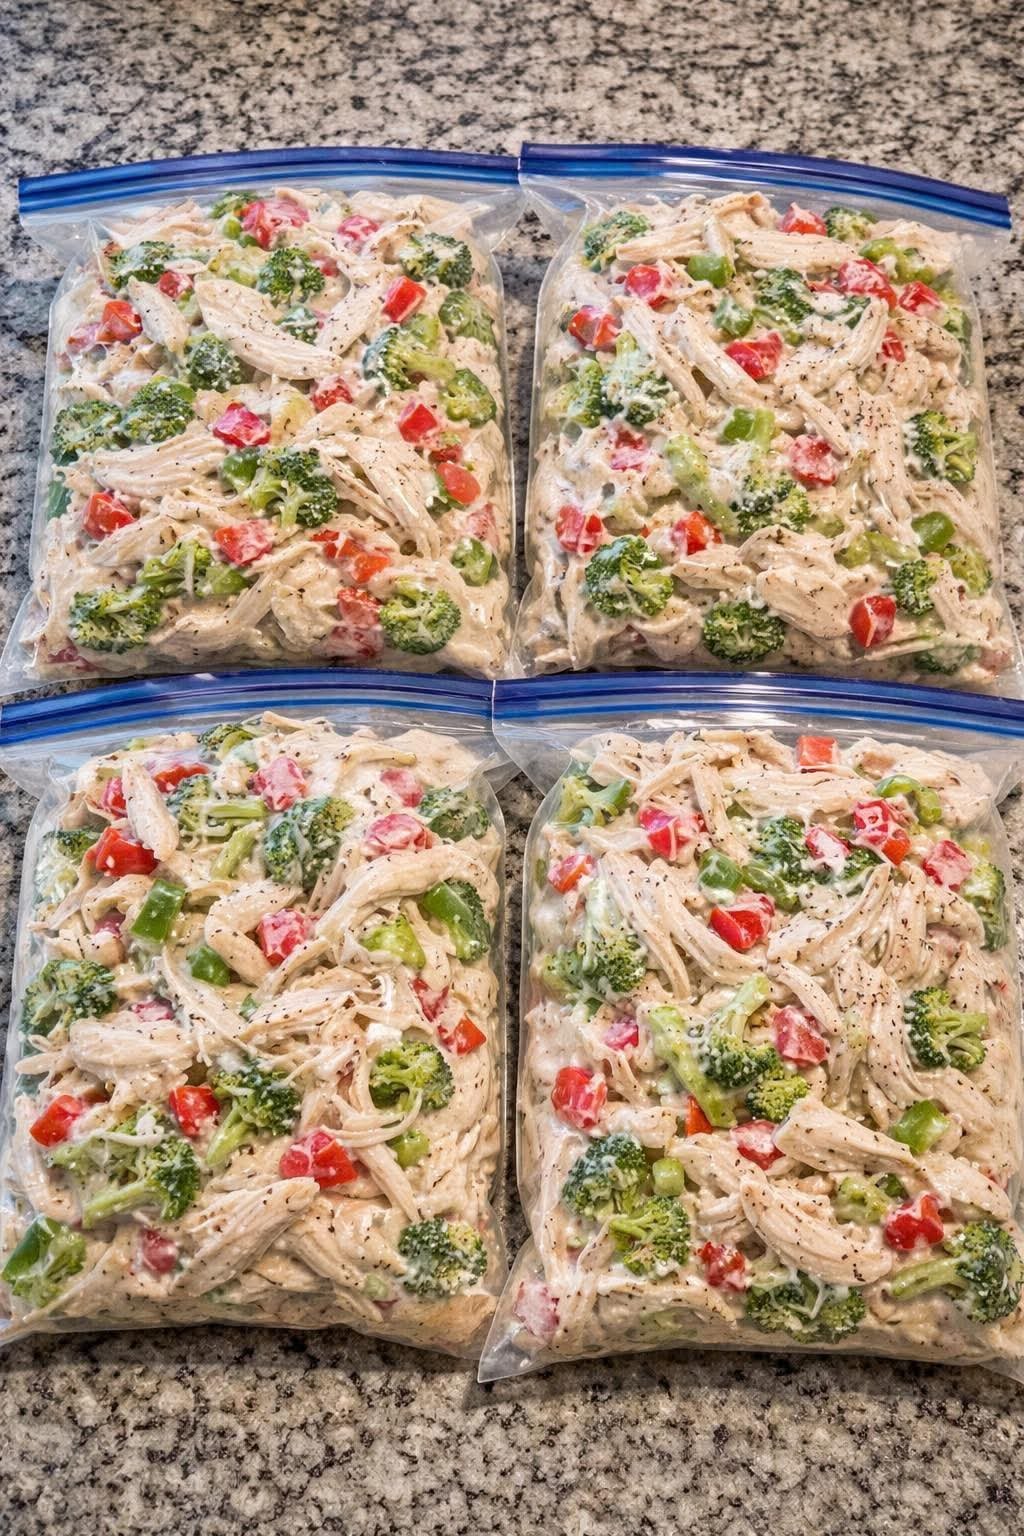
Creamy Chicken & Broccoli Meal Prep


Creamy Chicken & Broccoli Meal Prep

Yields 4 large freezer-friendly portions


Ingredients

Protein: 2 lbs boneless, skinless chicken breasts (cooked and shredded).


Vegetables: * 2 large heads of broccoli (cut into small florets).


2 large red bell peppers (diced).


The Sauce:


1 cup Greek yogurt or sour cream.


1 can (10.5 oz) condensed cream of chicken soup (or a homemade white sauce).


1/2 cup grated Parmesan cheese.


1 tbsp garlic powder.


1 tsp onion powder.


Salt and black pepper to taste.


Optional: 1 tsp dried oregano or Italian seasoning.


Instructions

Prepare the Chicken: Boil or bake the chicken breasts until fully cooked. Use two forks to shred the meat into bite-sized strips. Let it cool completely before mixing.


Chop the Veggies: Wash and chop the broccoli and peppers. Ensure they are dry so the sauce doesn’t become too watery.


Mix the Sauce: In a large bowl, whisk together the Greek yogurt (or sour cream), cream of chicken soup, Parmesan cheese, and seasonings.


Combine: Add the shredded chicken, broccoli, and peppers to the bowl. Toss everything until the ingredients are evenly coated in the creamy sauce.


Bag it Up: Divide the mixture into four large gallon-sized freezer bags, as seen in your photo. Squeeze out as much air as possible before sealing.


How to Cook It Later

From Fresh/Refrigerated: Empty a bag into a large skillet. Cover and cook over medium heat for 10-12 minutes, stirring occasionally until the broccoli is tender and the sauce is bubbling.


From Frozen: Thaw in the refrigerator overnight, then follow the skillet instructions.


Serving Suggestion: This is excellent served over cooked rice, quinoa, or your favorite pasta.

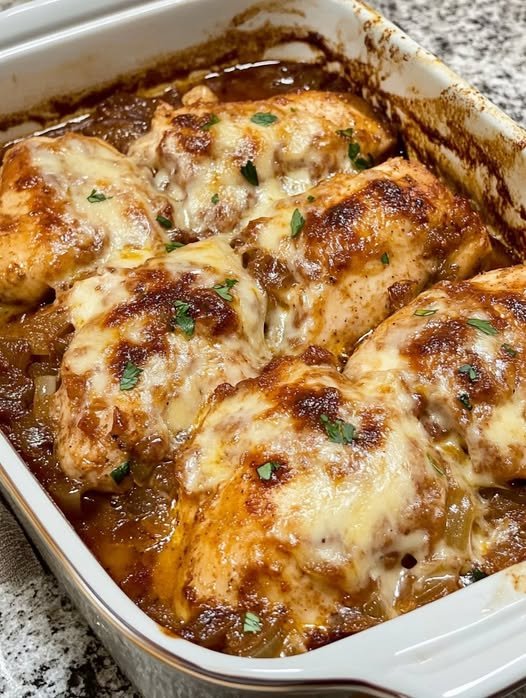
French Onion Chicken Bake

This French Onion Chicken Bake is the perfect marriage of two comfort food classics. Based on the details provided, here is the full, comprehensive recipe along with the best tips for perfecting those onions and making the dish work for your lifestyle.


French Onion Chicken Bake

Prep time: 10 mins | Cook time: 50 mins | Total time: 1 hour Yield: 4 servings

Ingredients

  • The Onions:

    • 4 large onions, peeled and sliced (Sweet onions like Vidalia are preferred)

    • 4 tbsp unsalted butter

    • 4 cloves garlic, finely chopped

    • 1 tsp fresh thyme

    • 2/3 cup low-sodium beef broth

    • 2 tbsp aged balsamic vinegar

  • The Chicken & Cheese:

    • 4 boneless, skinless chicken breasts

    • 1/2 tsp sea salt (adjust to taste)

    • 1/2 tsp black pepper

    • 1 cup shredded mozzarella cheese

    • 1/2 cup grated Parmesan cheese

Instructions

  1. Preheat and Prepare: Preheat your oven to 400°F (200°C). Lightly grease a 9×13 inch baking dish with cooking spray.

  2. Sauté the Onions: In a large skillet, melt the butter over medium-high heat. Add the sliced onions and sauté for about 5 minutes, stirring occasionally until they soften.

  3. Infuse Flavors: Reduce the heat to medium. Stir in the chopped garlic, black pepper, and fresh thyme. Cook for 1 more minute until fragrant.

  4. Create the Jam: Pour in the beef broth and balsamic vinegar. Continue to simmer on medium heat for about 10 minutes. The liquid will reduce, and the onions will become dark, tender, and “jam-like” in consistency.

  5. Assemble: Spread about one-third of the caramelized onion mixture into the bottom of your prepared baking dish. Place the chicken breasts on top of the onions and season them lightly with sea salt.

  6. Layer and Cheese: Top each chicken breast evenly with the remaining caramelized onions. Generously sprinkle the mozzarella and Parmesan over the top.

  7. Bake: Place in the oven and bake for 30 minutes, or until the chicken reaches an internal temperature of 165°F and the cheese is bubbly and golden brown.


Tips for Success

  • The Cheese Swap: For a more traditional French flavor, replace the mozzarella and Parmesan with Gruyere. If you want a sharper kick, mix in a little blue cheese with a mild melter like Fontina.

  • Keto Modification: To lower the carb count further, swap the balsamic vinegar for apple cider vinegar and a pinch of stevia. Serve with cauliflower mash instead of potatoes.

  • Make-Ahead Instructions: You can assemble the dish (onions and chicken) up to 24 hours in advance and store it covered in the fridge. Add the cheese just before baking, and add 5–10 minutes to the cook time since the dish is starting cold.

  • Wine Pairing: A Chardonnay with light oak notes or a crisp Pinot Noir pairs beautifully with the savory-sweet profile of the caramelized onions.