Perfectly Sliced Baked Potatoes

Crispy Baked Potato Slices

Crispy on the outside, fluffy on the insideβ€”these golden baked potato slices are an easy, comforting dish that both kids and adults love. Perfect as a snack, side dish, or party appetizer.


πŸ“ Ingredients

Ingredient Amount
Medium potatoes 4
Salt ΒΌ tsp
Black pepper β…› tsp
Cayenne pepper β…› tsp
Garlic powder β…› tsp
Paprika β…› tsp
Olive oil 4–6 tbsp

πŸ‘©β€πŸ³ Instructions

1. Prepare the Potatoes

Wash and scrub the potatoes well. Pat them dry completely with a kitchen towel.

2. Slice the Potatoes

Using a sharp knife, make thin slices across each potato, cutting almost all the way through but keeping the base intact (like a fan).
πŸ‘‰ Tip: You can place the potato between two chopsticks or wooden spoons to avoid cutting all the way through.

3. Preheat the Oven

Preheat oven to 400Β°F (200Β°C). Line a baking tray with parchment paper.

4. Make the Seasoning

In a small bowl, mix:

  • Salt

  • Black pepper

  • Cayenne pepper

  • Garlic powder

  • Paprika

5. Oil the Potatoes

Place potatoes on the tray. Brush or drizzle olive oil over them, making sure oil gets between the slices for even crisping.

6. Season

Sprinkle the spice mixture evenly over the potatoes, gently spreading it between the slices.

7. Bake

Bake for 40–45 minutes, until:
βœ” Edges are crispy
βœ” Centers are soft
βœ” Tops are golden brown

Optional: Broil for 1–2 minutes at the end for extra crispiness.

8. Serve

Let cool slightly before serving. Serve plain or top with:

  • Sour cream

  • Chopped chives

  • Grated cheese

  • Garlic yogurt sauce

Perfect as a side dish or crunchy snack.


πŸ’‘ Tips for Best Results

β€’ Slice evenly for uniform cooking
β€’ Leave space between potatoes for crisp edges
β€’ Adjust spices to your taste
β€’ For extra crunch, finish with broil
β€’ Russet or Yukon Gold potatoes work best

Avocado Tuna Salad

Avocado Tuna Salad


Ingredients:


– 2 cans (5 oz each) tuna, drained


– 2 ripe avocados, diced


– 1/4 cup red onion, chopped


– 1/4 cup celery, chopped


– 2 tablespoons fresh cilantro


– Juice of 1 lime


– Salt and black pepper to taste


– Bread or crackers for serving


Instructions:


1. *Mix tuna and avocado:* Combine tuna, avocado, red onion, and celery.


2. *Add flavor:* Mix in chopped cilantro and lime juice.


3. *Season:* Add salt and pepper to taste.


4. *Serve:* Enjoy on bread or crackers!

πŸ₯ž Fluffy Blueberry Pancake Bowls


πŸ₯ž Fluffy Blueberry Pancake Bowls

Ingredients

For the Pancakes:


2 cups All-purpose flour


2 tbsp Sugar


2 tsp Baking powder


1 tsp Baking soda


1/2 tsp Salt


2 cups Buttermilk (the secret to that fluffiness!)


2 Large eggs


1/4 cup Melted butter (cooled slightly)


1 tsp Vanilla extract


For the Blueberry Layer & Topping:


2 cups Fresh blueberries (split into two portions)


1 tbsp Maple syrup or honey


1 tsp Lemon juice


Optional: Powdered sugar for dusting


Instructions

Prep the Blueberry Compote: In a small saucepan over medium heat, combine half of your blueberries with the lemon juice and syrup. Simmer for about 5 minutes until the berries burst and create a thick, purple sauce. Set aside.


Mix Dry Ingredients: In a large bowl, whisk together the flour, sugar, baking powder, baking soda, and salt.


Mix Wet Ingredients: In a separate bowl, whisk the buttermilk, eggs, melted butter, and vanilla.


Combine: Pour the wet ingredients into the dry. Stir gently until just combined. Tip: Don’t over-mix! Lumps are okay; they make the pancakes loftier.


Cook: Heat a non-stick skillet over medium-low heat with a little butter. Pour small rounds of batter. Drop a few fresh blueberries onto each pancake before flipping. Cook until golden brown on both sides.


Assemble the Bowl: * Place one pancake at the bottom of a glass bowl.


Spoon some of the warm blueberry compote over it.


Layer another pancake on top and repeat.


Finish with a generous handful of fresh blueberries and a heavy dusting of powdered sugar.


Quick Tips for Success

The Sizzle: If your butter burns instantly in the pan, the heat is too high. Low and slow is the way to get that even golden color.


The “Bowl” Effect: To get the look in the photo, slightly tear or fold the pancakes to fit snugly into the bowl so the blueberry juices soak into every edge.

Classic Cucumber Tea Sandwiches

Classic Cucumber Tea Sandwiches

Prep time: 15 minutes


Yields: 12–16 finger sandwiches


Ingredients

Bread: 8 slices of soft white sandwich bread (shokupan or “pullman” loaf works best).


Cucumbers: 1 large English cucumber (these have thinner skin and fewer seeds).


The Spread:


4 oz (1/2 block) Cream cheese, softened to room temperature.


2 tbsp Mayonnaise.


1 tsp Fresh dill or chives, finely chopped.


A squeeze of fresh lemon juice.


A pinch of salt and cracked black pepper.


Instructions

Prep the Cucumbers: Peel the cucumber (or leave strips of skin for color). Use a mandoline or a sharp knife to slice them into paper-thin rounds. Place them on a paper towel and sprinkle with a tiny bit of salt to draw out moisture; pat them dry after 5 minutes so your bread doesn’t get soggy.


Mix the Spread: In a small bowl, whip the softened cream cheese, mayonnaise, herbs, and lemon juice until smooth. Season with salt and pepper to taste.


Assemble: Spread a generous, even layer of the cream cheese mixture onto one side of every bread slice. This acts as a “sealant” to keep the bread fluffy. Layer the cucumber slices slightly overlapping on half of the bread slices.


Close and Trim: Top with the remaining bread slices. Using a very sharp serrated knife, cut the crusts off first to create a perfect square.


The Signature Cut: Cut each square diagonally twice to create the small triangles shown in your image.


Pro-Tips for Success

Room Temp: Make sure your cream cheese is truly soft, or it will tear the delicate white bread.


Storage: If you aren’t serving them immediately, cover them with a slightly damp paper towel and plastic wrap to keep the bread from drying out.


The “Crunch”: For extra flavor, some people like to lightly butter the bread before adding the cream cheese spread.

Stuffed Cabbage Rolls on a Vegetable Bed

Stuffed Cabbage Rolls on a Vegetable Bed

Tender cabbage leaves wrapped around a savory meat and rice filling, slowly cooked in a rich tomato and vegetable sauce. This comforting classic is loved worldwide for its rustic flavor and hearty textureβ€”perfect for family dinners or cozy weekends.


Ingredients

For the Cabbage Rolls

  • 1 large green cabbage

  • 1 lb (450 g) ground beef

  • Β½ cup uncooked white rice

  • 1 medium onion, finely chopped

  • 2 garlic cloves, minced

  • 1 large egg

  • Β½ tsp paprika

  • Salt and black pepper, to taste

For the Vegetable Bed

  • 2 carrots, sliced thin

  • 1 onion, sliced

  • 1 bell pepper, sliced

  • 2 celery stalks, chopped

  • 2 garlic cloves, minced

  • 2 tbsp olive oil

For the Sauce

  • 1 can (14 oz / 400 g) crushed tomatoes or tomato sauce

  • 1 tbsp tomato paste

  • 1 tsp sugar

  • 1 tsp dried thyme or oregano

  • 1 bay leaf

  • 1 cup vegetable or chicken broth

  • Salt and black pepper, to taste


Instructions

  1. Bring a large pot of water to a boil. Remove the core from the cabbage and place the whole head into the boiling water.

  2. Cook for about 8–10 minutes, gently removing softened leaves as they loosen. Drain and allow leaves to cool.

  3. In a large bowl, combine ground beef, rice, onion, garlic, egg, paprika, salt, and pepper. Mix gently until combined.

  4. Trim the thick stem from each cabbage leaf to make rolling easier.

  5. Place about 2 tablespoons of filling in the center of each leaf. Fold in the sides and roll tightly.

  6. Heat olive oil in a large pot or baking dish. Add carrots, onion, bell pepper, celery, and garlic. Cook for 5–7 minutes until softened.

  7. Arrange cabbage rolls seam-side down on top of the vegetables in a single layer.

  8. In a bowl, mix crushed tomatoes, tomato paste, sugar, herbs, bay leaf, broth, salt, and pepper. Pour over the rolls.

  9. Cover and simmer gently for 1Β½ hours, or bake covered at 175Β°C (350Β°F) for 1 hour 30 minutes, until the cabbage is tender and the filling is cooked through.

  10. Remove the bay leaf and let rest for 10 minutes before serving.


How to Make (Summary)

  • Soften cabbage leaves first

  • Prepare the savory meat and rice filling

  • Roll tightly to secure the filling

  • Create a vegetable base for flavor and moisture

  • Cook slowly in tomato sauce until tender


Variations

  • Vegetarian: Use lentils, mushrooms, and extra rice

  • Spicy: Add chili flakes or hot paprika

  • Creamy Sauce: Stir in sour cream before serving

  • Middle Eastern Style: Use lamb with cumin and cinnamon

  • Sweet & Sour: Add vinegar and raisins to the sauce


Tips

  • Use fresh cabbage for easier rolling

  • Do not overfill rolls

  • Light browning before simmering adds flavor

  • Tastes even better the next day

  • Serve with bread or yogurt-based sauce

  • Freezes well for up to 3 months


Conclusion

These Stuffed Cabbage Rolls on a Vegetable Bed are a timeless comfort food. The tender cabbage, flavorful filling, and rich tomato sauce combine into a satisfying dish that brings warmth and tradition to every

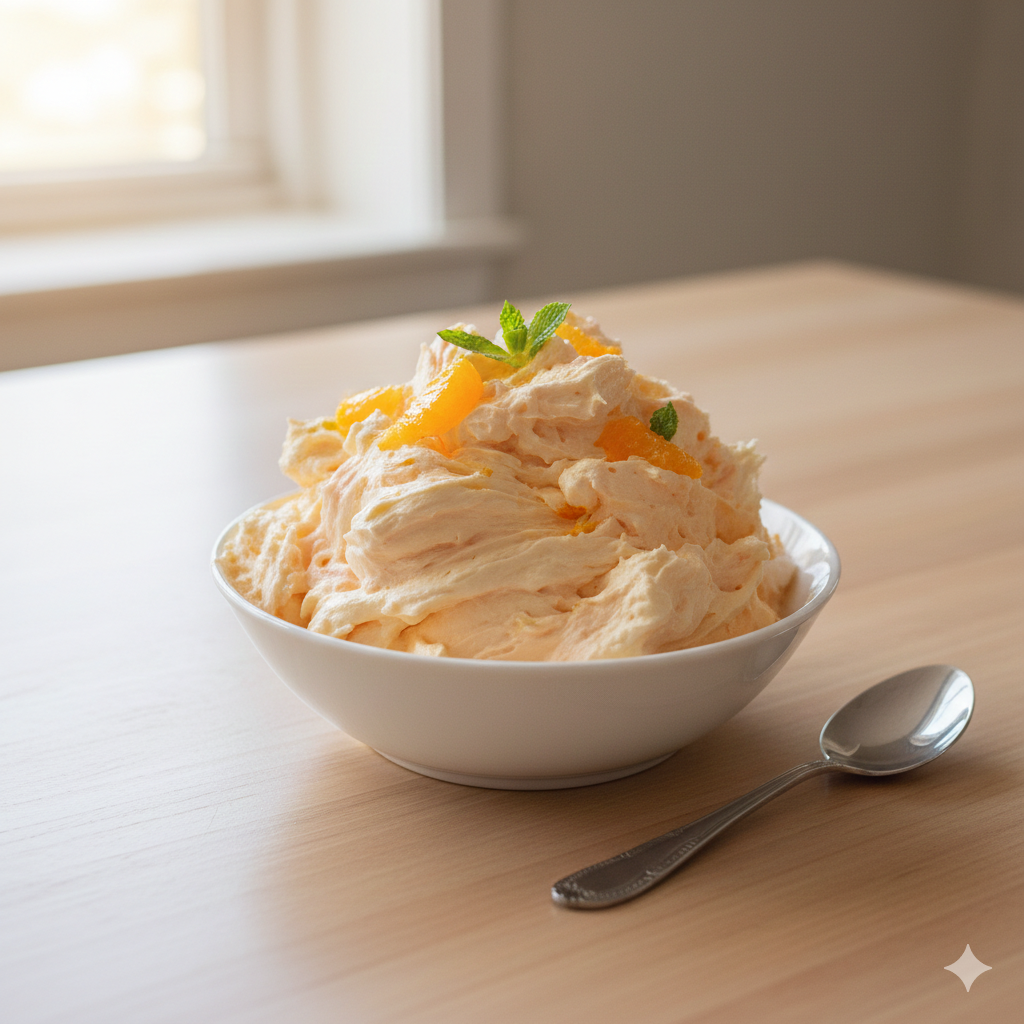
Orange Yogurt Cloud Dessert

Light, Creamy, No-Bake & Protein-Packed

If you’re craving something sweet, refreshing, and guilt-free, thisΒ Orange Yogurt Cloud DessertΒ is about to become your new favorite. It’s one of those magical recipes that feels indulgent but is incredibly simple and light. With just a few ingredients and no baking required, this dessert comes together in minutes and chills into a fluffy, mousse-like treat that tastes like a creamsicle in cloud form.

The combination of tangy Greek yogurt and bright orange gelatin creates a perfectly balanced flavorβ€”sweet, citrusy, and refreshing. The optional whipped topping adds volume and softness, giving it that signature β€œcloud” texture, but even without it, this dessert is creamy, satisfying, and packed with protein. It’s ideal for warm weather, busy days, or anytime you want a quick dessert without turning on the oven.

Ingredients

  • 2 cups Greek yogurtΒ (plain or vanilla)
  • 1 small box (0.3 oz) sugar-free orange gelatin mix
  • 1 cup whipped topping (optional) – such as Cool Whip, for extra fluff

Optional additions:

  • A drop of stevia or 1–2 teaspoons honey (if using plain yogurt)
  • Orange zest for garnish
  • Mandarin orange segments or berries for topping

Instructions

  1. Prepare the Yogurt
    Add the Greek yogurt to a large mixing bowl. If you’re using plain yogurt and prefer a sweeter dessert, add a small amount of sweetener to taste. Keep in mind that the gelatin mix already provides sweetness, so a little goes a long way.
  2. Add the Gelatin Powder
    Sprinkle the dry orange gelatin mix directly over the yogurt. Do not dissolve the gelatin in waterβ€”this recipe relies on the powder blending directly into the yogurt to create its creamy, airy texture.
  3. Mix Until Smooth
    Using a whisk or hand mixer, beat the yogurt and gelatin together until fully combined. The mixture should be smooth, evenly colored, and slightly thickened.
  4. Fold in Whipped Topping (Optional)
    If you’re using whipped topping, gently fold it into the yogurt mixture using a spatula. This step adds volume and creates a light, mousse-like consistency. Fold slowly to keep as much air in the mixture as possible.
  5. Chill to Set
    Cover the bowl and refrigerate for at least 30 minutes. As it chills, the dessert will set slightly and develop its signature β€œcloud” textureβ€”soft, fluffy, and spoonable.
See alsoΒ Β Healthy and Delicious: Energy Cookies Without Sugar or Flour

Serving Suggestions

Spoon the dessert into small bowls, dessert cups, or ramekins. Garnish with fresh orange zest, mandarin slices, or a sprinkle of crushed vanilla cookies for texture. For a frozen treat, place the mixture in the freezer for 1–2 hours and enjoy it like a light creamsicle mousse.

Why You’ll Love It

This Orange Yogurt Cloud Dessert is quick, customizable, and perfect for meal prep. It’s high in protein, low in effort, and endlessly adaptableβ€”swap the gelatin flavor, add fruit, or enjoy it plain. One bite, and you’ll understand why it’s called a cloud. ☁️🍊