🧀 Zero-Carb Cheese Crust Personal Pizza (Friendly)

Servings: 2 personal pizzas
Prep Time: 5 minutes
Cook Time: 12–15 minutes
Total Time: ~20 minutes
WW Points: 0–1 points (depends on toppings)

Ingredients

  • 1½ cups shredded mozzarella cheese, divided
  • 1 large egg
  • ¼ cup grated Parmesan cheese
  • Optional but highly recommended:
    • Sugar-free marinara sauce
    • Extra mozzarella or favorite low-point toppings

Instructions

  1. Preheat oven to 400°F (200°C). Line a baking sheet with parchment paper.
  2. In a bowl, mix 1 cup mozzarella, Parmesan, and egg until a sticky dough forms.
  3. Spread the mixture into a thin circle or rectangle on the prepared baking sheet.
  4. Bake for 10–12 minutes, until golden, set, and slightly crispy.
  5. Remove from oven, spread with sugar-free marinara, sprinkle with remaining mozzarella.
  6. Return to oven and bake 2–3 more minutes, until cheese is melted and bubbly.
  7. Slice and enjoy your low-carb, high-protein pizza!

Tips & Variations

  • 🔥 For extra crispiness: broil for the last 30–60 seconds
  • 🍕 Add toppings like turkey pepperoni, mushrooms, olives, or bell peppers
  • 🧄 Sprinkle garlic powder or Italian seasoning into the crust for more flavor

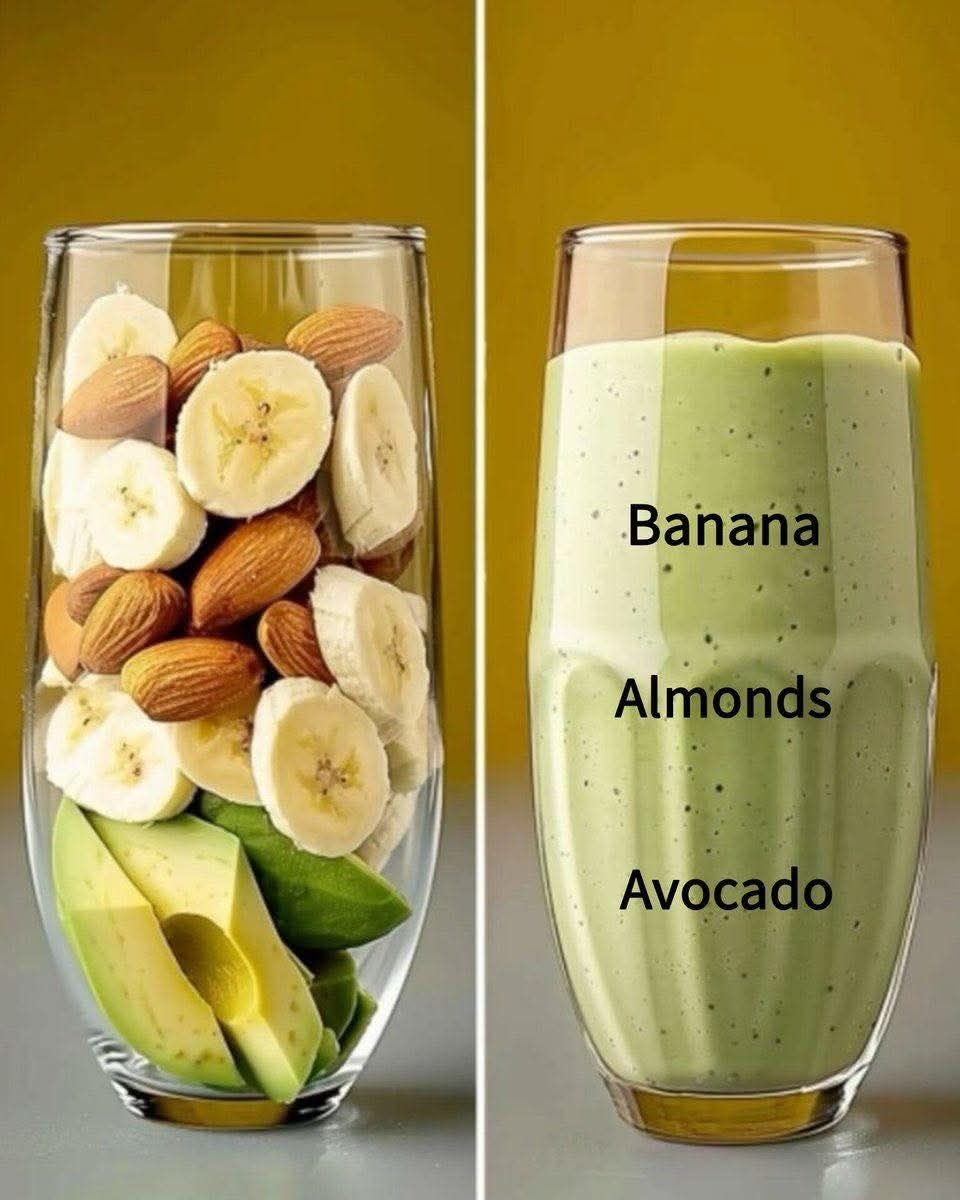
Creamy Avocado & Banana Smoothie

Creamy Avocado & Banana Fuel Smoothie

Prep time: 5 minutes | Servings: 1


Ingredients

  • 1/2 Medium Avocado: Ripe (should be soft to the touch).

  • 1 Frozen Banana: Sliced (frozen gives it a colder, thicker texture).

  • 2 tbsp Whole Almonds: Or 1 tbsp of almond butter for an even smoother finish.

  • 1 cup Liquid: Unsweetened almond milk, oat milk, or coconut water work best.

  • Optional: A drizzle of honey or 1-2 pitted dates if you prefer it sweeter.


Instructions

  1. Prep the Almonds: If you have a high-speed blender, you can toss the whole almonds right in. If your blender is less powerful, soak the almonds in water for 15 minutes beforehand or use almond butter to avoid “gritty” bits.

  2. Layer the Blender: Add the liquid first, followed by the avocado and banana slices. This helps the blades spin freely and prevents stalling.

  3. Blend: Start on a low speed to break up the frozen banana and nuts, then crank it up to high for 45–60 seconds until the mixture is completely velvety and pale green.

  4. Adjust: If it’s too thick (more like a smoothie bowl), add an extra splash of liquid.


Quick Nutritional Tip

This smoothie is rich in monounsaturated fats (the heart-healthy kind) and potassium. Because it’s quite dense, it’s very satiating and works great as a meal replacement or a post-workout recovery drink.

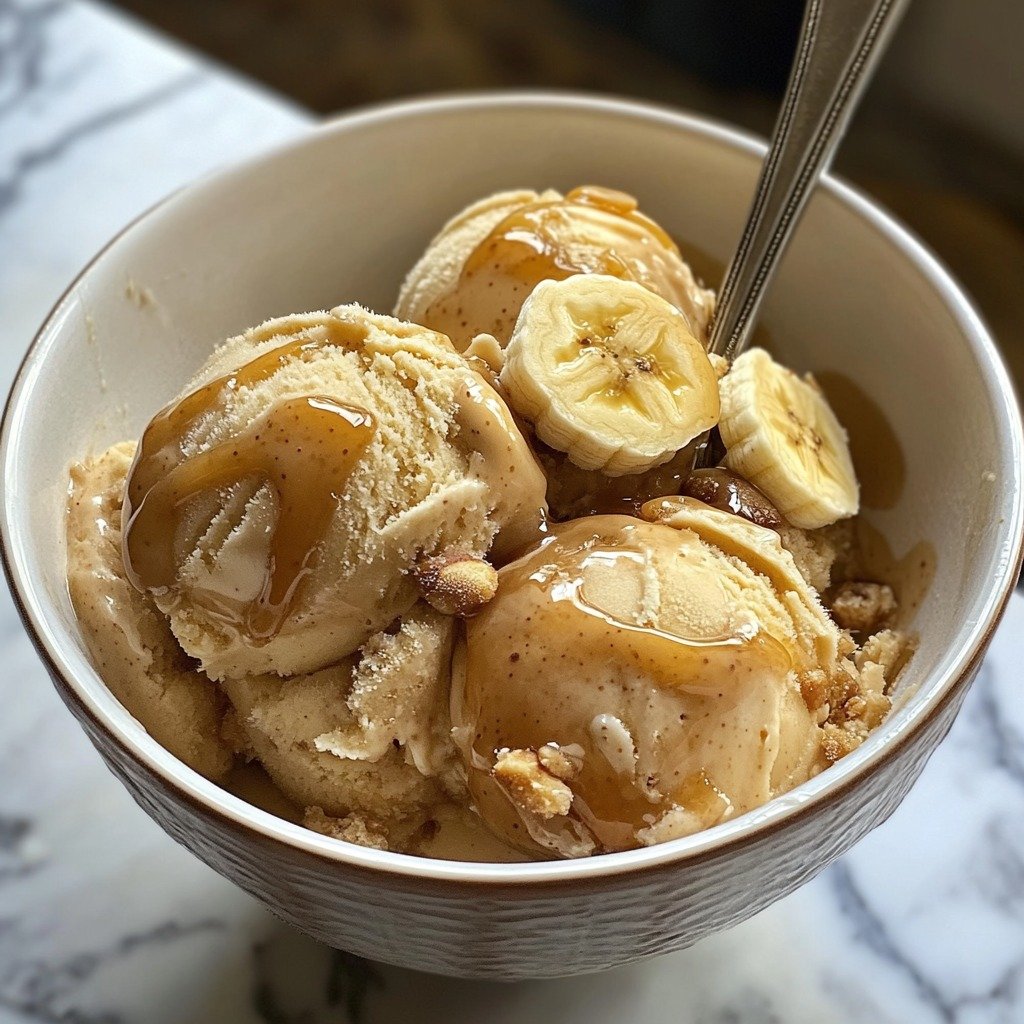
Salted Caramel Banana Sundae

Salted Caramel Banana Sundae

Ingredients

The Base (The Scoops):

  • 4 large ripe bananas: Sliced and frozen for at least 6 hours.

  • 2 tbsp almond butter or peanut butter: For richness and a tan color.

  • 1 tsp vanilla extract: For depth.

  • A pinch of sea salt: To create that “salted” profile.

The Toppings (As seen in the photo):

  • Fresh Banana: 1/2 banana, sliced into rounds.

  • Caramel Sauce: 2 tbsp (store-bought or homemade using melted coconut sugar and coconut milk).

  • Crushed Pecans or Walnuts: 1/4 cup, roughly chopped for crunch.

  • Cinnamon: A light dusting over the top.


Instructions

  1. Prepare the Base: Place your frozen banana slices into a high-speed blender or food processor.

  2. Blend: Pulse until the bananas look like small crumbs. Add the nut butter, vanilla, and salt. Continue blending on high until the mixture transforms into a smooth, soft-serve consistency.

    • Note: If the blender struggles, add 1–2 tablespoons of milk (dairy or plant-based) to help it move.

  3. Firm Up (Optional): For those perfect round scoops shown in the image, transfer the mixture to a container and freeze for 30–60 minutes.

  4. Assemble: Use an ice cream scoop to place three large mounds into a bowl.

  5. Garnish: Drizzle the caramel sauce generously over the scoops. Press your fresh banana slices into the side and sprinkle the crushed nuts and a dash of cinnamon over everything.


Pro-Tip for Style

To get that glossy, professional look on the caramel, warm the sauce slightly before drizzling. It will flow over the cold “ice cream” just like it does in your picture!

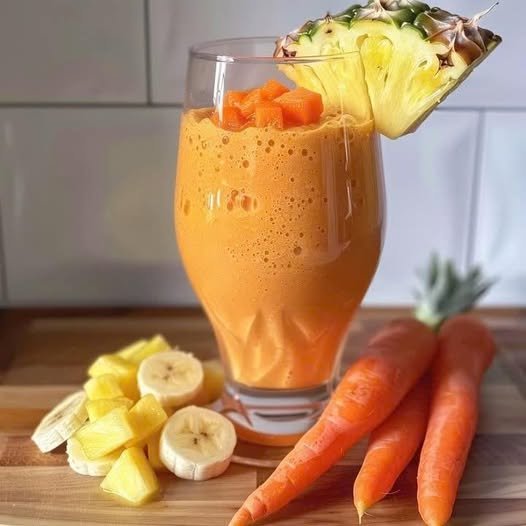
Tropical Carrot & Pineapple Smoothie

Tropical Carrot & Pineapple Smoothie

This blend is naturally sweet with a creamy texture, perfect for a morning boost or a post-workout treat.

Ingredients

  • Carrots: 2 medium carrots (peeled and roughly chopped)

  • Pineapple: 1 cup frozen pineapple chunks (adds chill and sweetness)

  • Banana: 1 ripe banana (fresh or frozen for extra creaminess)

  • Liquid Base: 1 cup orange juice or coconut water

  • Optional Kick: ½ inch fresh ginger (peeled) for a spicy zing

  • Garnish: Diced carrots and a pineapple wedge (as seen in your image)


Instructions

  1. Prep the Carrots: If you don’t have a high-speed blender, you may want to steam the carrot chunks for 5 minutes and let them cool first. This ensures a silky-smooth texture without the “grit.”

  2. Layer the Blender: Add your liquid base first, followed by the banana, pineapple, and carrots.

  3. Blend: Start on a low speed and gradually increase to high. Blend for about 45–60 seconds until the mixture is completely uniform and frothy.

  4. Adjust Consistency: * Too thick? Add a splash more juice.

    • Too thin? Add a few ice cubes or more frozen pineapple.

  5. Serve: Pour into a tall glass. Top with small carrot cubes and a slice of pineapple on the rim to match your photo.


Pro-Tips for the Best Result

  • The “Glow” Factor: Adding a tiny pinch of turmeric and a drop of healthy oil (like coconut oil) helps your body absorb the fat-soluble Vitamin A from the carrots.

  • Natural Sweetness: If your pineapple isn’t very sweet, add a teaspoon of honey or a single pitted date.

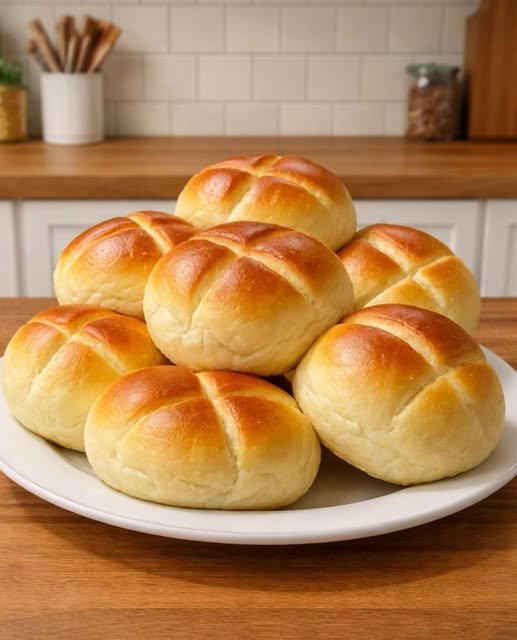
Easy 4 Ingredient Bread Rolls Recipe

Those 4-ingredient bread rolls sound like a baker’s dream—minimal ingredients with maximum fluffiness! Since you love full recipes, I’ve distilled that long article into a clean, professional format for your kitchen.

Here is your master recipe for 4-Ingredient Magic Bread Rolls.


4-Ingredient Magic Bread Rolls

Golden, pillowy, and beginner-friendly rolls that melt in your mouth.

  • Prep time: 1 hour 45 minutes (includes rising)

  • Cook time: 15–18 minutes

  • Yields: 8–10 rolls

Ingredients

  • 3 cups (375g) All-purpose flour (plus a little extra for dusting)

  • 1 cup (240 ml) Warm milk (target $100^{\circ}F$ to $110^{\circ}F$)

  • 2 ¼ tsp (1 packet) Instant yeast

  • 1 tbsp Granulated sugar

  • Optional: A pinch of salt (if your palate prefers) or melted butter for brushing.


Instructions

1. Activate the Yeast

In a large mixing bowl, combine the warm milk, sugar, and instant yeast. Stir gently and let it sit for 5–10 minutes until the mixture becomes foamy on top.

Chef’s Note: If the milk is too hot (above $120^{\circ}F$), it will kill the yeast. If it doesn’t foam, your yeast may be expired.

2. Mix and Knead

Gradually add all-purpose flour to the yeast mixture. Stir with a wooden spoon until a shaggy dough forms. Transfer the dough to a lightly floured surface and knead for about 8 minutes. The goal is a dough that is smooth, elastic, and soft but not sticky.

3. First Rise

Place the kneaded dough into a lightly greased bowl. Cover with a clean kitchen towel and place in a warm, draft-free spot. Let it rise for 1 hour, or until it has doubled in size.

4. Shape the Rolls

Gently punch down the risen dough to release the air. Divide it into 8 to 10 equal pieces. Roll each piece into a smooth ball. Place the balls on a baking tray lined with parchment paper, leaving space between them. Cover and let them rise a second time for 30 minutes.

5. Bake

Preheat your oven to 375°F (190°C). Once the rolls have puffed up, bake for 15–18 minutes until the tops are a beautiful golden brown.


Chef’s Tips for Success

  • The “Hollow” Test: To ensure they are done, tap the bottom of a roll; it should sound hollow.

  • Glossy Finish: For that bakery-style shine, brush the tops with melted butter immediately after pulling them out of the oven.

  • Storage: Store in an airtight bag for up to 3 days. To revive that “fresh-baked” feel, microwave for 10 seconds or warm in a 300°F oven for 8 minutes.

Variations

  • Garlic Herb: Add 1 tsp garlic powder and 1 tsp dried Italian herbs to the flour.

  • Cheesy: Press a small cube of mozzarella into the center of each ball before the second rise.

Creamy Coconut Pudding

Creamy Coconut Pudding

A smooth, luscious tropical dessert that’s easy to whip up.

Ingredients

  • 2 cups whole milk

  • 1 cup coconut milk (use full-fat for the best creaminess)

  • 1/2 cup granulated sugar

  • 3 tbsp cornstarch

  • 2 tbsp unsalted butter

  • 1 tsp vanilla extract

  • 1/4 cup shredded coconut (plus extra for topping)

  • A pinch of salt


Instructions

  1. Combine Bases: In a medium saucepan, whisk together the whole milk and coconut milk.

  2. Dissolve Dry Ingredients: Add the sugar, cornstarch, and salt to the pan. Whisk vigorously while cold until the cornstarch is fully dissolved and no lumps remain.

  3. Thicken: Place the saucepan over medium heat. Cook, stirring constantly with a whisk or wooden spoon to prevent burning on the bottom.

  4. Finish the Texture: Once the mixture begins to bubble and thicken, lower the heat. Stir in the butter, vanilla extract, and shredded coconut. Continue to stir for 1–2 minutes until the pudding is glossy and smooth.

  5. Portion and Cool: Remove from heat and pour the pudding into individual serving bowls or ramekins.

  6. Chill: Let the pudding cool to room temperature on the counter. Once cool, cover with plastic wrap (press it directly onto the surface of the pudding if you want to prevent a “skin” from forming) and refrigerate for at least 2 hours.

  7. Garnish: Before serving, sprinkle with extra shredded coconut. For extra flavor, toast the coconut in a dry pan for 2 minutes until golden brown first!


Variations to Try

  • Nutty Twist: Add a few drops of almond extract along with the vanilla.

  • Piña Colada Style: Stir in a handful of crushed, drained pineapple before chilling.

  • Crunchy Base: Add a layer of crushed graham crackers or digestive biscuits at the bottom of the cups before pouring in the pudding.

Pro Tip

If you want an even more indulgent dessert, drizzle a little sweetened condensed milk over the top just before serving.