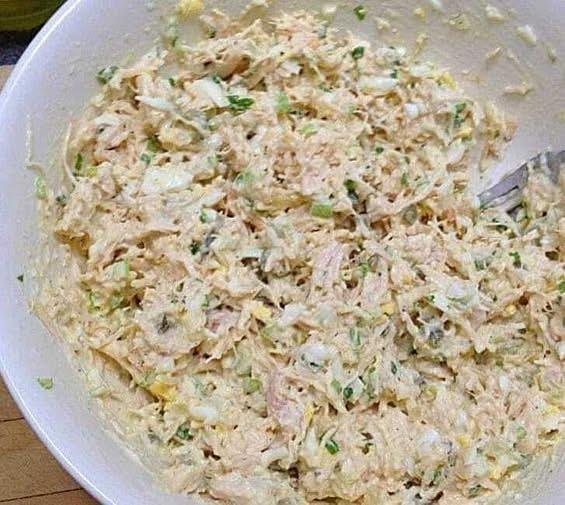
Keto Chicken Patties

🥩 Keto Chicken Patties (Low-Carb & High-Protein)

📝 Introduction

Keto chicken patties are a delicious and nutritious option for anyone following a ketogenic lifestyle. These patties are low in carbohydrates and rich in protein and healthy fats, making them perfect for maintaining energy while enjoying flavorful meals. This complete guide covers ingredients, step-by-step instructions, nutrition facts, storage tips, and success tips to help you make perfectly juicy chicken patties every time.


🛒 Ingredients

For the Chicken Patties:

  • 1 lb (450g) ground chicken (dark meat preferred for juiciness)

  • ½ cup (50g) almond flour

  • ¼ cup (30g) grated Parmesan cheese

  • 1 large egg

  • ½ tsp garlic powder

  • ½ tsp onion powder

  • 1 tsp Italian seasoning

  • Salt and pepper to taste

  • 2 tbsp fresh parsley, chopped (optional)

  • 2 tbsp olive oil or coconut oil (for frying)

Optional for Serving:

  • Lettuce leaves (for low-carb wraps)

  • Sliced avocado

  • Sugar-free mayonnaise or Greek yogurt

  • Sliced tomatoes (optional, within carb limits)


📊 Nutritional Information (per serving – 4 servings)

  • Calories: 260

  • Fat: 17g

  • Saturated Fat: 3g

  • Cholesterol: 120mg

  • Sodium: 250mg

  • Total Carbs: 3g

  • Fiber: 1g

  • Net Carbs: 2g

  • Protein: 24g

  • WW SmartPoints: 4


👩‍🍳 Instructions

Step 1: Prepare Ingredients

Measure and gather all ingredients to make the cooking process smooth and efficient.

Step 2: Mix the Patty Mixture

In a large bowl, combine ground chicken, almond flour, Parmesan cheese, egg, garlic powder, onion powder, Italian seasoning, salt, and pepper. Mix until well combined. The mixture should be moist but firm enough to shape.

Step 3: Shape the Patties

Divide mixture into equal portions (about ¼ cup each). Shape into round patties approximately 1 inch thick.

Step 4: Heat the Oil

Heat olive oil or coconut oil in a skillet over medium heat until hot but not smoking.

Step 5: Cook the Patties

Place patties in the skillet without overcrowding.
Cook 5–7 minutes per side until golden brown and fully cooked (internal temperature should reach 165°F / 75°C).

Step 6: Drain and Rest

Transfer patties to a paper towel-lined plate and rest for a few minutes to retain juiciness.


🍽 Serving Suggestions

  • Serve in lettuce wraps with avocado and sugar-free mayo

  • Pair with garden salad or steamed vegetables

  • Enjoy as a burger substitute or protein snack


🧊 Storage Instructions

  • Refrigerate cooked patties in an airtight container for up to 3 days

  • Freeze uncooked patties between parchment paper for up to 3 months

  • Thaw overnight in refrigerator before cooking


💡 Tips for Best Results

✔ Use high-quality chicken for better flavor
✔ Customize seasoning (paprika, cumin, chili powder)
✔ Avoid overcrowding the pan
✔ Always check doneness with a thermometer


✅ Conclusion

Keto chicken patties are a versatile, flavorful, and satisfying option for low-carb meal planning. With simple ingredients and easy preparation, they fit perfectly into a ketogenic lifestyle and can be enjoyed in multiple ways.


🌱 Nutritional Benefits

These patties provide high-quality protein for muscle maintenance while almond flour and Parmesan contribute healthy fats and texture. They are naturally gluten-free and keto-friendly.


⭐ Final Thoughts

Homemade keto chicken patties are a practical and tasty way to stay on track with your health goals. Whether for lunch, dinner, or meal prep, this recipe delivers flavor, nutrition, and convenience in every bite.
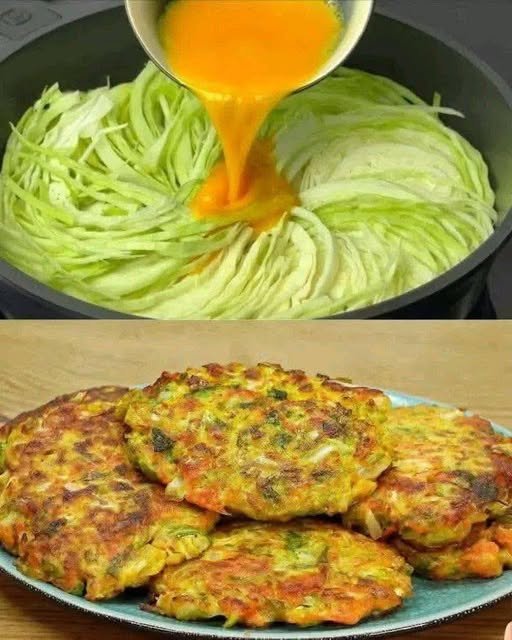
Golden Cabbage & Onion Fritters

Golden Cabbage & Onion Fritters

This recipe transforms simple vegetables into a hearty, savory dish that is crispy on the outside and tender on the inside.

Ingredients

  • 1 small cabbage (finely shredded)

  • 1 onion (finely diced)

  • 1 carrot (grated)

  • 2 eggs (beaten)

  • 4 tablespoons flour (all-purpose)

  • Spices: Salt, Black Pepper, Paprika, and Dried Garlic (to taste)

  • Olive oil (for frying)


Preparation Steps

  1. Prep the Vegetables: Shred the cabbage thinly and grate the carrot. Dice the onion into small pieces.

    • Tip: If the cabbage is very firm, sprinkle it with a pinch of salt and massage it for a minute to soften the fibers.

  2. Sauté (Optional but Recommended): Heat a drizzle of olive oil in a pan. Sauté the onion and carrot for 3–4 minutes until soft. Add the cabbage and cook for another 5 minutes until it wilts slightly. Let the mixture cool for a few minutes.

  3. Create the Batter: In a large bowl, whisk the 2 eggs. Stir in the 4 tablespoons of flour and all your spices (salt, pepper, paprika, and garlic) until you have a smooth paste.

  4. Combine: Fold your vegetable mixture into the egg and flour batter until everything is evenly coated.

  5. Fry: Heat olive oil in a skillet over medium heat. Scoop large spoonfuls of the mixture into the pan and flatten them slightly with a spatula.

  6. Cook to Perfection: Fry for about 3–4 minutes per side until they are a deep golden brown and crispy.

Viral Creamy Protein Salad

Viral Creamy Protein Salad

This “everything but the kitchen sink” protein bowl is designed to keep you full for hours while hitting those savory, tangy cravings.


Ingredients

  • Protein Base:

    • 1 cup Cooked shredded chicken (rotisserie chicken works great here)

    • 1 Large boiled egg, chopped

  • The “Cream” Factor:

    • ½ cup Low-fat cottage cheese (small curd works best for texture)

    • 1 tbsp Light mayo or plain Greek yogurt

  • The Crunch & Zing:

    • ¼ cup Cucumber, finely diced

    • ¼ cup Pickles or pickled jalapeños, chopped

  • Seasonings:

    • ¼ tsp Garlic powder

    • Salt and black pepper to taste

    • Optional: 1 tsp Everything Bagel seasoning or a sprinkle of sharp cheddar


Instructions

  1. Prep the Base: In a medium mixing bowl, combine the shredded chicken and the chopped boiled egg. Use a fork to slightly mash the egg if you prefer a more cohesive “salad” texture.

  2. Add the Creaminess: Fold in the cottage cheese and the mayo (or Greek yogurt). Stir until the protein is evenly coated.

  3. Mix in the Crunch: Add the diced cucumbers and your choice of pickles or jalapeños.

  4. Season: Sprinkle in the garlic powder, salt, and pepper. Give it one final, thorough toss.

  5. Chill & Set: For the best flavor, cover and refrigerate for at least 15 minutes. This allows the seasonings to meld and the cottage cheese to firm up slightly.

  6. Serve: Enjoy it on its own, scooped into large romaine lettuce leaves, or as a high-protein dip with bell pepper slices or seed crackers.

Creamy Anti-Inflammatory Mexicorn Dip

with Lime, Cilantro & Optional Sharp Cheddar

This Creamy Mexicorn Dip is a lighter, smarter twist on a classic party favorite. It keeps everything you love—sweet corn, zesty tomatoes, fresh herbs, and rich creaminess—while using anti-inflammatory swaps that don’t sacrifice flavor. Avocado-oil mayo and Greek yogurt (or coconut yogurt for dairy-free) create a luscious base, while turmeric, cumin, garlic, and lime bring warmth and brightness. The result is a bold, crave-worthy dip that feels indulgent yet nourishing, perfect for gatherings, meal prep, or snacking straight from the fridge.

🛒 Ingredients

Base

  • 2 cans Mexicorn, drained very well
  • 1 can Rotel (regular or hot), drained
  • 6–8 green onions, thinly sliced
  • 1 bunch fresh cilantro, finely chopped

Creamy Element (Anti-Inflammatory Swaps)

  • ¾ cup avocado-oil mayo (or olive-oil mayo)
  • ¾ cup full-fat Greek yogurt or cultured coconut yogurt
    • Greek yogurt adds protein and probiotics
    • Coconut yogurt keeps the dip dairy-free

Cheese (Optional but Traditional)

  • 1½ cups sharp cheddar cheese, shredded
    • Sharp cheese means more flavor with less quantity
    • Optional swap: aged goat cheese or omit entirely

Anti-Inflammatory Boosters

  • 1–2 cloves garlic, minced
  • Juice of 1 fresh lime
  • ½ teaspoon ground cumin
  • ½ teaspoon smoked paprika
  • ¼ teaspoon turmeric
  • Pinch of black pepper (activates turmeric)
  • Sea salt, to taste

 Instructions

1. Prep everything first
Drain the Mexicorn and Rotel extremely well. This step is key—excess liquid will thin the dip and mute the flavors. If needed, let them sit in a strainer for a few extra minutes or gently press with a spoon.

See also  Mediterranean Irresistible Gluten-Free Zucchini Cookies

2. Make the creamy base
In a large mixing bowl, whisk together the avocado-oil mayo and Greek (or coconut) yogurt until smooth. Add the lime juice, garlic, cumin, smoked paprika, turmeric, and black pepper. Whisk again until the mixture is evenly blended and lightly golden from the spices.

3. Fold it all together
Using a spatula, gently fold in the drained corn, Rotel, green onions, and cilantro. If using cheese, add it now and stir just until combined. The goal is a thick, scoopable dip with evenly distributed ingredients.

4. Taste & adjust
Season with sea salt to taste. Add more lime juice for brightness, cumin for warmth, or smoked paprika for depth. This dip is very forgiving, so adjust it to your personal flavor preference.

5. Chill for best flavor
Cover and refrigerate for at least 30–60 minutes. Chilling allows the flavors to meld and deepen, making the dip even more delicious.

 Serving Ideas

Serve with tortilla chips, seed crackers, cucumber slices, bell pepper strips, or as a spread in wraps and sandwiches. It also makes a fantastic topping for grilled chicken or roasted vegetables.

Ultimate Deli-Style Chicken Salad

If you’re craving a savory chicken salad, you’ve come to the right place. This recipe for the ultimate Deli Chicken Salad is not only tasty but also simple to prepare. With a few fresh ingredients and easy steps, you’ll have a delicious salad perfect for lunches, picnics, or any occasion.

Ingredients:
Before getting started, gather the following ingredients to make this irresistible chicken salad:

Ingredients Amount
Boneless chicken breasts, diced 500 grams
Boneless chicken thighs, diced 300 grams
Olive oil 2 tablespoons
Sea salt 1/2 teaspoon
Black pepper 1/4 teaspoon
Granulated onion 1/2 teaspoon
Mayonnaise 2/3 cup
Celery, diced 3 stalks
Extra salt and pepper To taste

Instructions:
Follow these steps to create your flavorful Deli Chicken Salad:

    1. Preheat the Oven: Set your oven to 350°F (175°C) and line a roasting pan with aluminum foil.

Discover more
Salt
beef
Garlic
cheese
garlic
Cheese
salt
burgers
Beef
Sausage

  1. Season the Chicken: Toss the diced chicken breasts and thighs with olive oil, then sprinkle with sea salt, black pepper, and granulated onion to coat evenly.
  2. Prepare for Baking: Arrange the chicken in the lined roasting pan and cover loosely with foil.
  3. Bake: Cook the chicken for 25–30 minutes, or until the thickest pieces reach 165°F (74°C).
  4. Cool: Remove from the oven and let the chicken rest for 10 minutes, then chill in the refrigerator for at least 1 hour.
  5. Dice the Chicken: Cut the cooled chicken into pieces roughly 1/4 inch long and 1/2 inch wide.
  6. Mix Salad: In a large bowl, combine the chicken, diced celery, and mayonnaise. Gently stir until well coated.
  7. Chill: Cover and refrigerate for 1–2 hours, or overnight, so the flavors can meld.
  8. Season to Taste: Before serving, check the seasoning and add extra salt or pepper if needed.
  9. Serve: Enjoy your Deli Chicken Salad on sandwiches, over a bed of greens, or as you like!

⭐ Keto-Friendly Chocolate Mousse (Rich, Creamy & Sugar-Free)

⭐ Keto-Friendly Chocolate Mousse (Rich, Creamy & Sugar-Free)

Servings: 4
Prep Time: 10 minutes
Chill Time: 1 hour
Total Time: 1 hour 10 minutes
Diet: Keto, Low-Carb, Gluten-Free, Sugar-Free, WW Friendly


🍫 Introduction

Keto-Friendly Chocolate Mousse is a rich and creamy low-carb dessert made with simple ingredients and easy steps. This smooth and fluffy mousse delivers full chocolate flavor without added sugar or flour, making it a great option for low-carb lifestyles.

This recipe is quick to prepare and requires only a few basic ingredients. It works well for family desserts, special occasions, or whenever you want a chocolate treat that fits into your meal plan.

Traditional chocolate mousse usually contains sugar and high-carb ingredients. This version uses sugar-free chocolate, low-carb sweetener, and fresh cream to create a dessert that is light, smooth, and satisfying.

The texture is soft, airy, and creamy, giving it a classic mousse consistency. It looks elegant when served and tastes rich without being heavy.

One of the best features of this recipe is how flexible it is. You can adjust the sweetness, chocolate level, and toppings based on your preference.

This mousse stores well in the refrigerator, making it useful for preparing ahead of time. You can enjoy it over several days while keeping its creamy texture.

It is also a good dessert choice for guests, including those who are not following a low-carb plan. Many people enjoy it without realizing it is sugar-free.

For WW users, this dessert stays moderate in SmartPoints because the main ingredient is cream, while the sweetener and chocolate contain no added sugar.

The combination of fats and low carbohydrates helps keep the dessert filling and enjoyable as part of a balanced plan.


📝 Ingredients

Base Mousse

  • 1 cup heavy whipping cream

  • ½ cup sugar-free dark chocolate chips

  • 2 tablespoons powdered erythritol (or keto-approved sweetener)

Extra Chocolate Option

Choose one:

  • 1 tablespoon unsweetened cocoa powder
    OR

  • 2 tablespoons shaved sugar-free chocolate

Optional Toppings

  • Sugar-free whipped cream

  • Fresh berries

  • Mint leaves

  • Extra cocoa powder

  • Sugar-free chocolate curls


👩‍🍳 Instructions

Step 1: Melt the chocolate
Place the chocolate chips in a microwave-safe bowl. Heat in 20-second intervals, stirring each time, until smooth. Set aside to cool slightly.

Step 2: Whip the cream
Add the cream and powdered sweetener to a chilled bowl. Beat until stiff peaks form. Do not overmix.

Step 3: Mix in the chocolate
Slowly drizzle the melted chocolate into the whipped cream while mixing on low speed.

Step 4: Add extra chocolate flavor
Gently fold in cocoa powder or shaved chocolate.

Step 5: Chill the mousse
Divide into serving cups and refrigerate for 1 hour.

Step 6: Garnish and serve
Top with whipped cream, berries, mint, or chocolate curls before serving.


🍽 Serving Suggestions

Serve alone or with low-carb berries such as raspberries or blackberries.
It can also be used as a filling for keto crepes or low-carb cakes.


🧊 Storage

Store in an airtight container in the refrigerator for up to 4 days.
Freezing is not recommended because the texture may change.


📊 Nutrition (Per Serving – Approximate)

Calories: 210
Fat: 20g
Net Carbs: 4g
Fiber: 2g
Sugar: 0g
Protein: 3g