Golden Layered Italian Beef & Pasta Bake

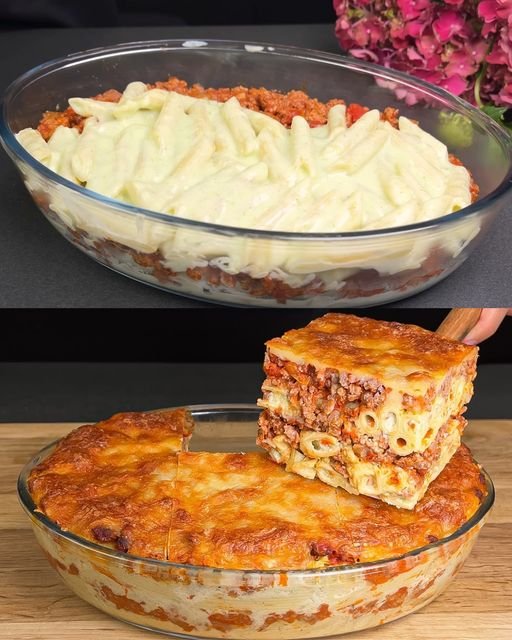
Golden Layered Italian Beef & Pasta Bake

Caption: 🇼đŸ‡č✹ A secret straight from Italy! This isn’t just a pasta dish; it’s a masterpiece of savory beef, creamy bĂ©chamel, and melted cheese. The best dinner you will ever have—simple, hearty, and absolutely unforgettable! 🍝🧀

Ingredients

For the Beef Sauce:

  • 600 g minced beef

  • 1 onion, chopped

  • 2 cloves of garlic, minced

  • 300 g chopped canned tomatoes (in their own juice)

  • Salt and black pepper to taste

  • 1 tbsp olive oil (for sautĂ©ing)

For the Creamy Béchamel & Pasta:

  • 300 g penne rigate pasta

  • 40 g butter

  • A bunch of spring onions, chopped

  • 2 tablespoons flour

  • 500 ml milk

  • 150 g hard Parmesan cheese, grated

  • 150 g hard mozzarella cheese, grated


Preparation Steps

1. Prepare the Savory Beef Base

  • Heat a splash of olive oil in a large pan over medium heat.

  • Add the chopped onion and minced garlic, sautĂ©ing until softened and fragrant.

  • Add the 600 g minced beef and cook until browned.

  • Stir in the 300 g chopped tomatoes and season with salt and black pepper.

  • Let the sauce simmer on low heat for about 10–15 minutes until thickened.

2. Cook the Pasta

  • Bring a large pot of salted water to a boil.

  • Cook the 300 g penne rigate until it is “al dente” (slightly firm to the bite).

  • Drain the pasta and set aside.

3. Make the Béchamel Sauce

  • In a medium saucepan, melt the 40 g of butter.

  • Add the chopped spring onions and cook for 1 minute.

  • Stir in the 2 tablespoons of flour and cook for another minute to create a roux.

  • Slowly pour in the 500 ml of milk, whisking constantly to ensure no lumps form.

  • Continue cooking and stirring until the sauce thickens and coats the back of a spoon.

  • Stir in half of the grated Parmesan cheese until melted.

4. Assemble the Layers

  • Preheat your oven to 390°F (200°C).

  • In a large baking dish, spread the beef sauce as the bottom layer.

  • Combine the cooked penne with the creamy bĂ©chamel sauce and spread this mixture evenly over the beef.

  • Top the dish with the remaining Parmesan and the 150 g grated mozzarella.

5. Bake to Perfection

  • Place in the oven and bake for 20–25 minutes, or until the cheese is melted and develops a beautiful golden-brown crust.

  • Let the dish rest for 5 minutes before slicing into squares to serve.
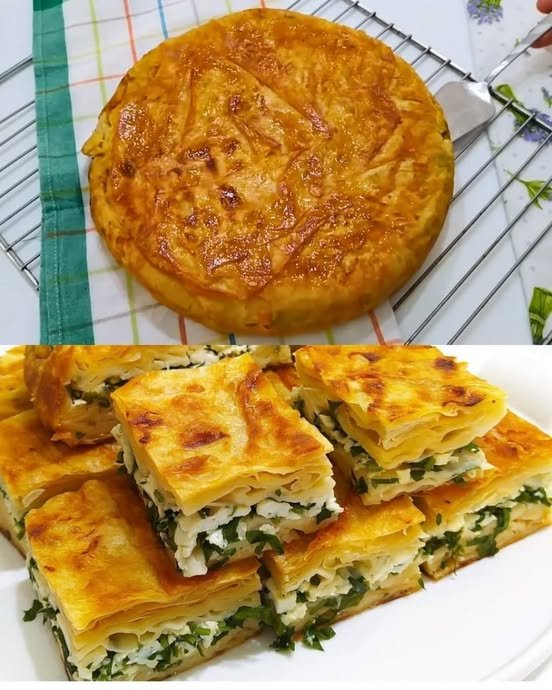
Golden Pan Börek (Su Böreği Style)

Golden Pan Börek (Su Böreği Style)

This pan-made börek has soft, layered pastry with a creamy cheese filling and a golden crust. It is inspired by traditional Su Böreği but prepared easily using ready-made phyllo dough and a frying pan.


📝 Ingredients

  • 4 sheets ready-made phyllo dough (yufka)

  • 300 g full-fat white cheese or feta cheese, crumbled

  • œ bunch fresh parsley, finely chopped

  • 2 large eggs

  • 3 tablespoons plain yogurt

  • œ cup milk (optional, for extra softness)

  • 3–4 tablespoons vegetable oil or melted butter


đŸ‘©â€đŸł Step-by-Step Instructions

1ïžâƒŁ Prepare the Filling

  • In a medium bowl, combine the crumbled cheese and chopped parsley.

  • Mix well and set aside.


2ïžâƒŁ Prepare the Sauce

  • In a separate bowl, whisk together:

    • Eggs

    • Yogurt

    • Milk (if using)

    • 2 tablespoons of oil or melted butter

  • Mix until smooth and well blended.

This mixture keeps the börek soft and tender.


3ïžâƒŁ Prepare the Pan

  • Lightly grease a large non-stick frying pan with oil or butter.

  • Place one sheet of phyllo into the pan, allowing the edges to hang over the sides.


4ïžâƒŁ Build the Layers

  • Brush the first phyllo sheet generously with the sauce.

  • Tear the second and third sheets into large pieces.

  • Dip each piece into the sauce and place them loosely into the pan to form layers.


5ïžâƒŁ Add the Filling

  • Spread the cheese and parsley mixture evenly over the layered dough.


6ïžâƒŁ Seal the Börek

  • Dip any remaining phyllo pieces into the sauce and place them over the filling.

  • Fold the overhanging edges of the first sheet over the top to seal everything inside.

  • Pour any remaining sauce evenly over the top.


7ïžâƒŁ Cook the Börek

  • Cover the pan with a lid and cook on medium-low heat for 8–10 minutes.

  • Check the bottom; when it turns golden, carefully flip the börek using a plate or lid.

  • Cook the second side uncovered for another 5–8 minutes until golden and cooked through.


8ïžâƒŁ Rest and Serve

  • Slide the börek onto a cutting board.

  • Let it rest for 5 minutes before cutting.

  • Slice into squares or triangles and serve warm.


⭐ Helpful Tips

  • Use low heat to prevent burning

  • Do not press the layers too tightly; this keeps the börek soft

  • Serve with yogurt or fresh salad

  • Best enjoyed fresh, but can be reheated gently in a pan

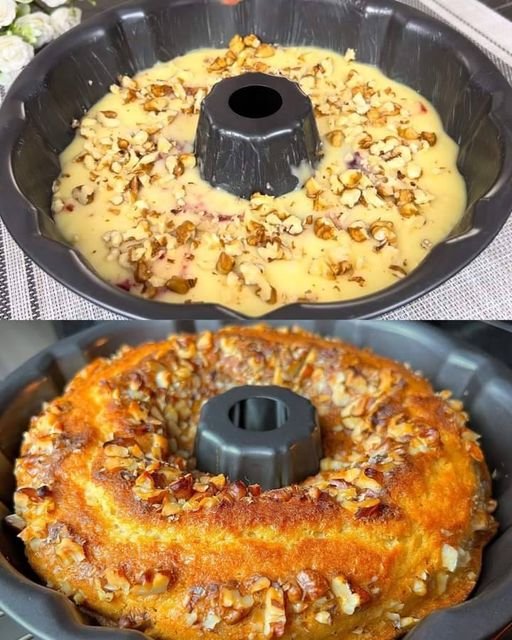
Golden Walnut & Jam Swirl Cake

Golden Walnut & Jam Swirl Cake

Caption: ✹ The cake of your dreams is only 5 minutes away! This soft, fluffy sponge features a sweet jam swirl and a crunchy walnut topping. It’s incredibly simple and absolutely delicious! đŸ°đŸ„š

Ingredients

  • Eggs: 2 large

  • Vanilla Sugar: 1 packet (8g)

  • Salt: A pinch

  • Sugar: 120g (2/3 cup)

  • Oil: 120ml (1/2 cup)

  • Milk: 120ml (1/2 cup)

  • Flour: 220g (1 Ÿ cups)

  • Baking Powder: 1 tablespoon

  • Jam: 50g (your favorite variety, like strawberry or apricot)

  • Walnuts: 50g, chopped

  • Baking Dish: 24 cm Bundt or round pan


Preparation Steps

  1. Prep the Pan and Oven:

    • Preheat your oven to 350°F (180°C).

    • Grease your 24 cm baking dish with a little oil or butter and dust lightly with flour to prevent sticking.

  2. Mix the Batter:

    • In a large bowl, whisk the 2 eggs, vanilla sugar, salt, and 120g of sugar until the mixture is light and frothy.

    • Pour in the 120ml of oil and 120ml of milk. Whisk until well combined.

  3. Add Dry Ingredients:

    • Sift the 220g of flour and 1 tablespoon of baking powder into the wet mixture.

    • Gently whisk until you have a smooth batter with no lumps.

  4. Assemble with Jam and Nuts:

    • Pour the batter into your prepared baking dish.

    • Drop small spoonfuls of the 50g of jam over the surface of the batter. Use a toothpick or knife to gently swirl it in for a marbled effect.

    • Sprinkle the 50g of chopped walnuts evenly over the top.

  5. Bake to Perfection:

    • Bake for 35–40 minutes.

    • The cake is ready when it is golden brown and a toothpick inserted into the center comes out clean.

  6. Cool and Serve:

    • Let the cake cool in the pan for 10 minutes before carefully turning it out onto a wire rack to cool completely.

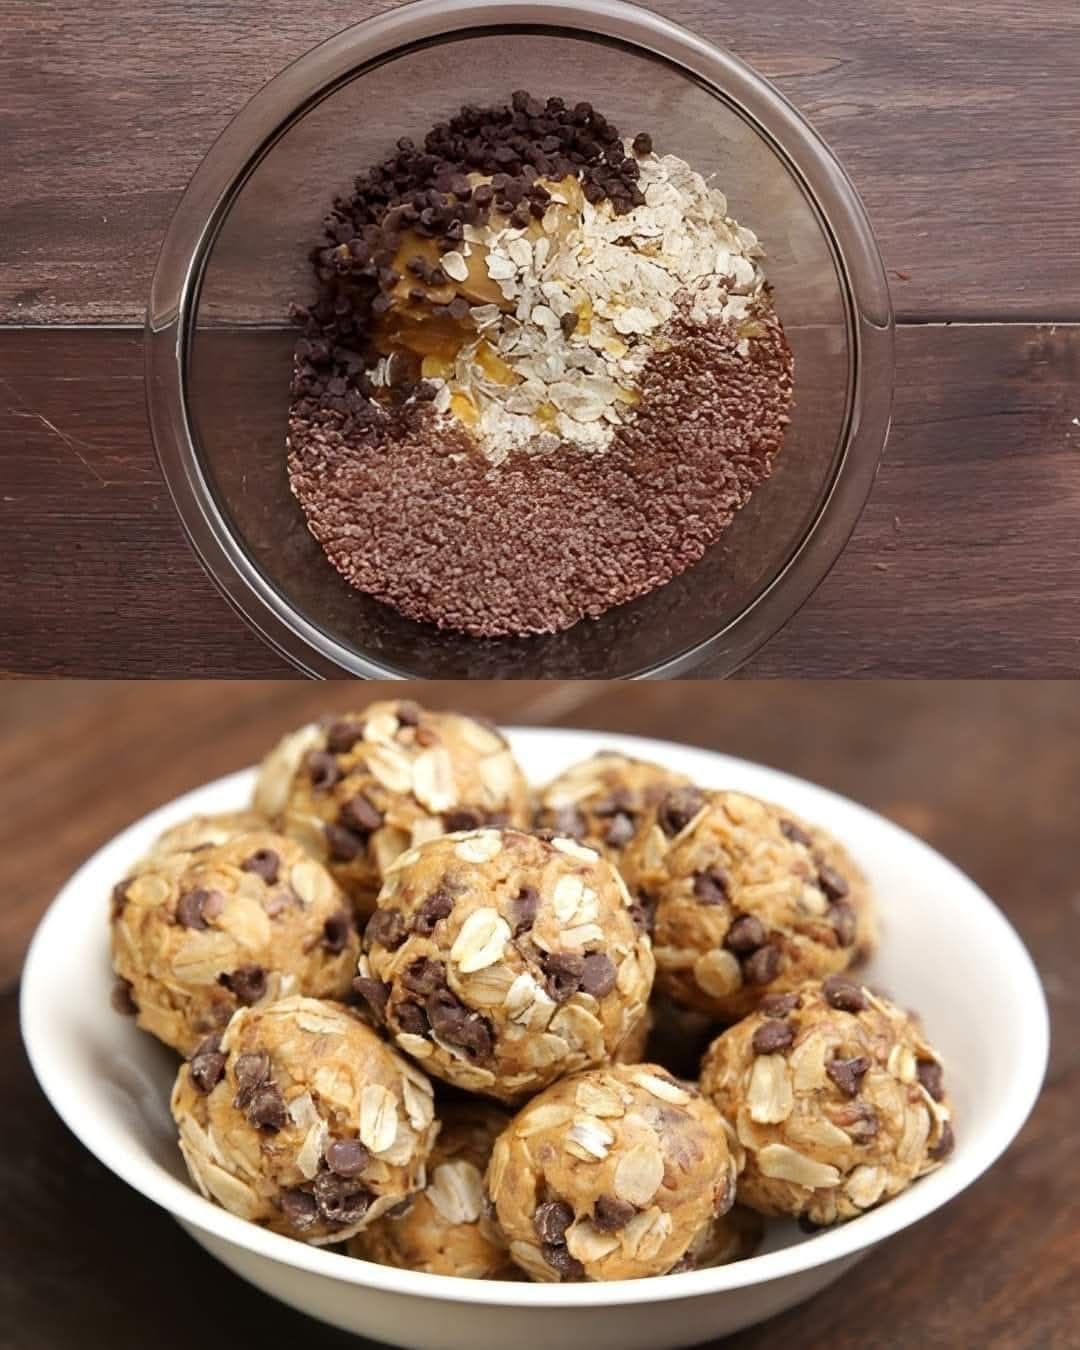
Peanut Butter Oat Energy Balls (No-Bake Snack)

đŸ„œ Peanut Butter Oat Energy Balls (No-Bake Snack)

These soft and chewy peanut butter energy balls are quick to prepare and made with simple ingredients. They are perfect for snacks, lunchboxes, or a small sweet bite during the day.


📝 Ingredients

  • ⅔ cup creamy peanut butter

  • 1 cup old-fashioned oats (plus extra for rolling, if desired)

  • 1œ tablespoons honey

  • ÂŒ cup mini dark chocolate chips (optional)

  • 1 tablespoon flax seeds or chia seeds (optional)


đŸ‘©â€đŸł Step-by-Step Instructions

1ïžâƒŁ Mix the Base

In a medium mixing bowl, add:

  • Peanut butter

  • Honey

Stir well until smooth and evenly blended.


2ïžâƒŁ Add the Dry Ingredients

Add the oats to the peanut butter mixture.
If using chocolate chips or seeds, add them now.

Mix thoroughly until everything is well combined and the mixture becomes thick and slightly sticky.


3ïžâƒŁ Chill the Mixture (Optional but Helpful)

Place the bowl in the refrigerator for 15–30 minutes.
This helps the mixture firm up and makes shaping easier.


4ïžâƒŁ Shape the Balls

Scoop about 1 tablespoon of the mixture at a time.
Roll it gently between your palms to form a small ball (about 2.5 cm / 1 inch wide).

If desired, roll each ball in dry oats for extra texture.


5ïžâƒŁ Set and Store

Place the balls on a tray or plate.
Refrigerate for 30 minutes until firm.

Transfer to an airtight container.


📩 Storage

  • Refrigerator: up to 7 days

  • Freezer: up to 1 month


⭐ Helpful Tips

  • Use smooth peanut butter for easy mixing

  • Add a little extra oats if mixture feels too soft

  • Add a small splash of milk if mixture feels too dry

  • Keep chilled for best texture


💛 Why You’ll Enjoy This Recipe

  • No baking needed

  • Made with simple pantry ingredients

  • Easy to prepare

  • Soft, chewy, and lightly sweet

Creamy Zesty Sausage Soup

Creamy Zesty Sausage Soup

Prep time: 10 mins | Cook time: 20 mins | Servings: 4


Ingredients

Protein: 1 lb Ground Italian Sausage (mild or hot, depending on your preference).


Vegetables: 1 small onion (diced), 2 cloves garlic (minced), and 1 can (14.5 oz) diced tomatoes.


Broth: 4 cups chicken broth.


Creaminess: 8 oz cream cheese (softened and cubed) or 1 cup heavy cream.


Seasoning: 1 tsp dried oregano, œ tsp red pepper flakes (optional), salt, and pepper to taste.


Garnish: Fresh chopped parsley or basil (as seen in your photo).


Instructions

Brown the Meat: In a large pot over medium-high heat, cook the ground sausage until browned and crumbled. Drain the excess fat, but leave a little for flavor.


SautĂ© Aromatics: Add the diced onion to the pot. Cook for 3–4 minutes until translucent, then stir in the garlic for about 30 seconds until fragrant.


Simmer: Pour in the chicken broth and the canned tomatoes (with ох juices). Stir in the oregano and red pepper flakes. Bring the mixture to a gentle boil, then reduce heat and simmer for 10 minutes.


Make it Creamy: Lower the heat to medium-low. Add the cream cheese or heavy cream. Stir constantly until the cheese is completely melted and the broth is smooth and orange-tinted.


Serve: Ladle into bowls and top with plenty of fresh parsley or basil.


Pro-Tips for the Best Result

The “Orange” Glow: To get that vibrant color in the photo, ensure you use tomatoes with their juices and let the cream cheese fully emulsify into the broth.


Add Greens: If you want more texture, stir in two cups of fresh spinach at the very end until it wilts.


Cheese: A sprinkle of shredded Parmesan on top adds a nice salty bite.

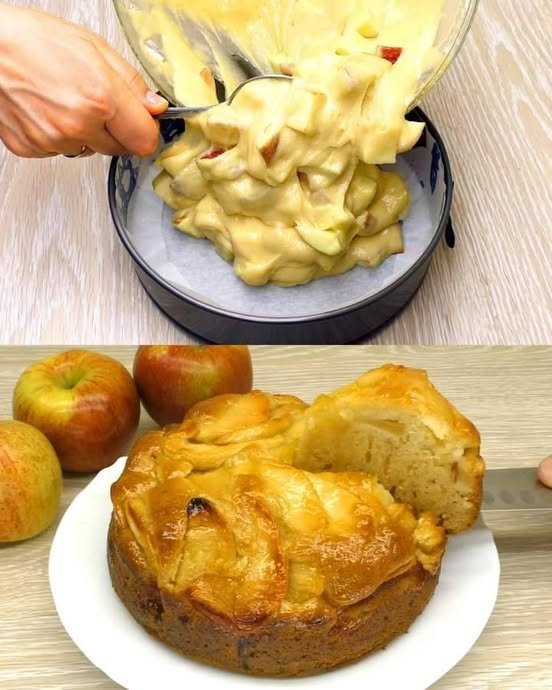
Golden Apple Sponge Pie (Soft & Light)

Golden Apple Sponge Pie (Soft & Light)

This apple sponge pie has a fluffy cake base topped with tender, lightly sweetened apples. It’s made with simple pantry ingredients and has a beautiful golden finish.


📝 Ingredients

For the Apple Topping

  • 2 large apples, peeled and sliced

  • 25 g butter

  • 1 tablespoon lemon juice

  • 20 g sugar

For the Sponge Batter

  • 2 large eggs

  • 130 g sugar

  • 60 ml milk

  • 150 g self-rising flour
    (or 150 g all-purpose flour + 1 teaspoon baking powder)


đŸ‘©â€đŸł Step-by-Step Instructions

1ïžâƒŁ Prepare the Apples

  • Peel and core the apples.

  • Slice them evenly so they cook uniformly.

  • Heat a pan over medium heat and melt the butter.

  • Add the apple slices, lemon juice, and sugar.

  • Cook gently for 3–5 minutes, stirring lightly, until the apples soften and become lightly golden.

  • Remove from heat and allow them to cool slightly.


2ïžâƒŁ Make the Batter

  • In a large bowl, whisk the eggs and sugar together until pale and fluffy.

  • Add the milk and mix gently until combined.


3ïžâƒŁ Add the Flour

  • Sift the flour (and baking powder if using).

  • Fold it into the batter gently using a spatula.

  • Mix only until combined to keep the batter light and airy.


4ïžâƒŁ Assemble the Pie

  • Preheat oven to 180°C (350°F).

  • Line a round baking tin with parchment paper.

  • Pour the batter evenly into the tin.

  • Arrange the cooked apple slices on top in a neat pattern.


5ïžâƒŁ Bake

  • Bake for 30–35 minutes or until a toothpick inserted in the center comes out clean.

  • The surface should be golden in color.


6ïžâƒŁ Cool and Serve

  • Let the pie cool in the pan for 10 minutes, then remove carefully.

  • Serve warm or at room temperature.

Optional toppings:
✔ Light dusting of powdered sugar
✔ Spoon of whipped cream
✔ Vanilla ice cream


⭐ Helpful Tips

  • Slice apples evenly for even cooking

  • Do not overmix the batter

  • Let the pie cool slightly before slicing

  • Store in an airtight container for up to 2 days


✹ Optional Finish

For a shiny top, lightly brush the warm apples with a little apricot jam or honey after baking.