Creamy Garlic Mushroom Chicken Pasta

This Creamy Garlic Mushroom Chicken Pasta is a delicious one-pan meal packed with tender chicken, mushrooms, asparagus, and a rich garlic Parmesan sauce. It’s perfect for a comforting and satisfying dinner!

Total Time:

Prep Time: 10 minutes

Cook Time: 25 minutes

Total Time: 35 minutes

Servings: 4

Ingredients

For the Chicken:

2 large chicken breasts (cut into bite-sized pieces)

1 tsp salt

1/2 tsp black pepper

1/2 tsp garlic powder

1/2 tsp paprika

2 tbsp olive oil

For the Pasta and Vegetables:

8 oz penne pasta (or any pasta of choice)

1 cup mushrooms (sliced)

1 cup asparagus (trimmed and cut into pieces)

3 cloves garlic (minced)

For the Creamy Sauce:

1 cup heavy cream

1/2 cup chicken broth

1/2 cup Parmesan cheese (grated)

1/2 tsp salt

1/4 tsp black pepper

1/2 tsp Italian seasoning

1 tbsp butter

Instructions

Step 1: Cook the Pasta

Cook the penne pasta according to package instructions until al dente. Drain and set aside.

Step 2: Cook the Chicken

Season the chicken pieces with salt, black pepper, garlic powder, and paprika.

Heat olive oil in a skillet over medium-high heat.

Cook the chicken for 5-6 minutes until golden brown and fully cooked. Remove and set aside.

See also  Mediterranean Mushroom Stroganoff

Step 3: Sauté the Vegetables

In the same skillet, melt butter and sauté the mushrooms for 2 minutes until soft.

Add asparagus and cook for another 2 minutes.

Stir in minced garlic and cook for 30 seconds until fragrant.

Step 4: Make the Creamy Sauce

Pour in the chicken broth and let it simmer for 2 minutes.

Add heavy cream, Parmesan cheese, salt, black pepper, and Italian seasoning. Stir and let the sauce thicken for 3-4 minutes.

Step 5: Combine Everything

Return the cooked chicken to the pan.

Add the drained pasta and toss to coat everything in the creamy sauce.

Tips for the Best Flavor

Use fresh Parmesan for the best taste and texture.

Adjust sauce thickness by adding more broth if needed.

For extra flavor, add a pinch of red pepper flakes for a mild spice.

Frequently Asked Questions (FAQs)

Q1: Can I use a different pasta?
Yes! Fettuccine, linguine, or rigatoni all work well.

Q2: How do I store leftovers?
Store in an airtight container in the fridge for up to 3 days. Reheat with a splash of cream or broth to maintain the sauce’s consistency.

Q3: Can I add other vegetables?
Absolutely! Bell peppers, spinach, or zucchini would be great additions.

Nutrition Facts (Per Serving)

(Approximate values)

Calories: 590

Protein: 42g

Carbohydrates: 52g

Fats: 26g

Fiber: 4 g

Conclusion

This Creamy Garlic Mushroom Chicken Pasta is a restaurant-quality dish that’s easy to make at home. The combination of juicy chicken, tender pasta, and a rich Parmesan sauce makes it a meal the whole family will love.
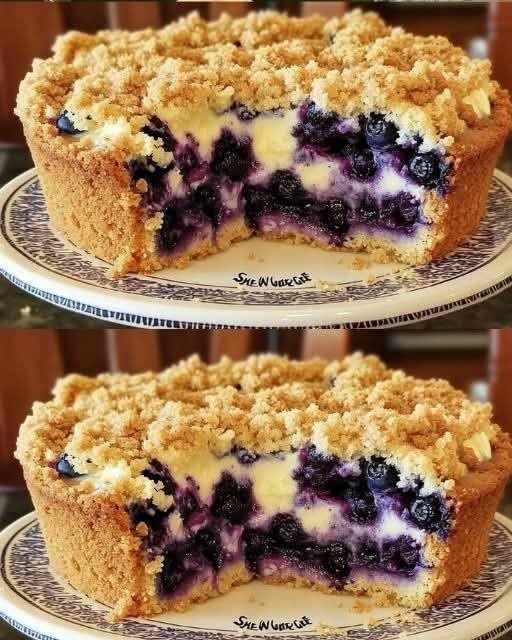
Blueberry Cream Cheese Crumb Cake

 Blueberry Cream Cheese Crumb Cake

Description

A luscious, bakery-style treat featuring a soft, buttery cake base layered with tangy cream cheese, juicy blueberries, and a sweet crumbly streusel topping. This cake is perfect for brunch, tea time, or dessert, offering richness and fruitiness in every bite.

Ingredients

For the Cake Batter:

  • 1/2 cup (1 stick) unsalted butter, softened
  • 3/4 cup granulated sugar
  • 2 large eggs
  • 1 tsp vanilla extract
  • 1 1/2 cups all-purpose flour
  • 1 1/2 tsp baking powder
  • 1/4 tsp salt
  • 1/2 cup whole milk

For the Cream Cheese Layer:

  • 8 oz cream cheese, softened
  • 1/4 cup granulated sugar
  • 1 egg yolk
  • 1/2 tsp vanilla extract

For the Blueberry Layer:

  • 1 1/2 cups fresh or frozen blueberries
  • 1 tbsp all-purpose flour (optional, to coat berries and prevent sinking)

For the Crumb Topping:

  • 1/2 cup all-purpose flour
  • 1/4 cup brown sugar
  • 1/4 cup granulated sugar
  • 1/2 tsp ground cinnamon
  • 1/4 cup unsalted butter, melted

Instructions

  1. Preheat Oven:
    Preheat your oven to 350°F (175°C). Grease and flour a 9-inch springform or square baking pan.
  2. Prepare Cake Batter:
    • In a bowl, cream the softened butter and sugar together until light and fluffy.
    • Beat in the eggs, one at a time, then add vanilla.
    • In a separate bowl, whisk together flour, baking powder, and salt.
    • Alternate adding the dry ingredients and milk into the butter mixture, mixing just until combined.
    • Spread the batter evenly into the prepared pan.
  3. Cream Cheese Layer:
    • In a bowl, beat the cream cheese, sugar, egg yolk, and vanilla extract until smooth.
    • Gently spread this mixture over the cake batter in the pan.
  4. Blueberry Layer:
    • Toss blueberries with 1 tbsp flour (optional).
    • Evenly distribute the blueberries over the cream cheese layer.
  5. Crumb Topping:
    • In a bowl, combine flour, brown sugar, granulated sugar, cinnamon, and melted butter. Mix until crumbly.
    • Sprinkle over the top of the blueberry layer.
  6. Bake:
    • Bake for 45–55 minutes, or until the top is golden and a toothpick inserted in the center comes out mostly clean (it’s okay if a little cream cheese clings).
    • Let the cake cool in the pan for 10 minutes, then remove to a wire rack to cool completely.

Notes

  • Frozen blueberries? Don’t thaw before using—just coat in flour to prevent sinking.
  • For a lemon twist: Add 1 tsp lemon zest to the cream cheese mixture.
  • Storage: Store leftovers in the fridge for up to 4 days because of the cream cheese layer.

Tips

  • Don’t overmix the cake batter—this keeps it soft and tender.
  • Use a springform pan for easy removal and a clean presentation.
  • Serve slightly warm or at room temperature for best flavor.

Servings

Makes 8–10 generous slices.

Nutritional Information (Per serving, approx.):

  • Calories: 370
  • Protein: 5g
  • Fat: 20g
  • Carbohydrates: 42g
  • Sugar: 24g
  • Fiber: 2g
  • Calcium: 6% DV
    (Values may vary depending on specific ingredients.)

Benefits

  • Rich flavor with creamy, fruity, and crumbly textures.
  • Great make-ahead dessert—tastes even better the next day!
  • Blueberries provide antioxidants and vitamin C.
  • Versatile—works as a dessert, breakfast, or tea-time treat.

Q&A Section

Q: Can I use other berries instead of blueberries?

A: Yes! You can use raspberries, blackberries, or chopped strawberries. Keep the total berry amount to about 1 1/2 cups for best texture.

Q: Can I freeze this cake?

A: Absolutely. Slice the cake, wrap tightly in plastic wrap and foil, and freeze for up to 2 months. Thaw overnight in the fridge or microwave for a quick treat.

Q: Can I make this gluten-free?

A: Yes. Use a 1:1 gluten-free flour blend in place of the all-purpose flour for all components of the cake.

Q: What’s the best way to serve it?

A: Slightly warm, dusted with powdered sugar or topped with whipped cream.

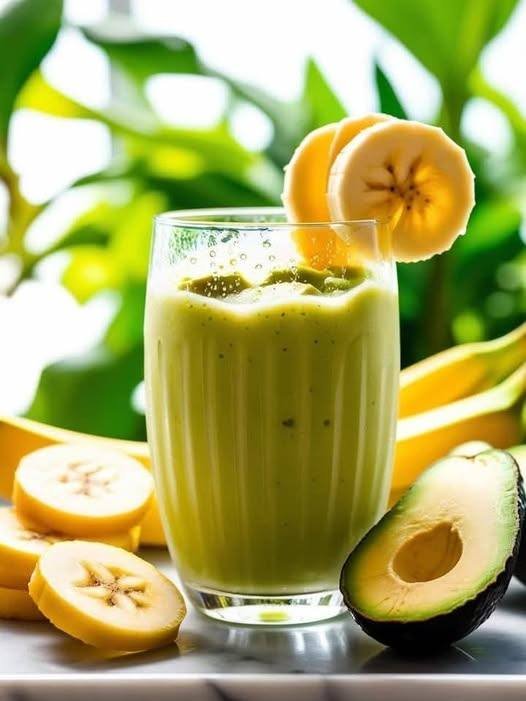
🥤 Creamy Avocado Banana Smoothie

🥤 Creamy Avocado Banana Smoothie

Prep time: 5 minutes | Servings: 1

Ingredients

  • 1 ripe banana (frozen bananas make it extra creamy)

  • 1/2 ripe avocado (pitted and scooped)

  • 1 cup milk of choice (almond, oat, or dairy)

  • 1/2 cup Greek yogurt (plain or vanilla)

  • 1 tbsp honey or maple syrup (optional, for sweetness)

  • A handful of ice cubes (if using a fresh banana)

  • Optional: A small squeeze of lime juice to keep the color vibrant.


Instructions

  1. Prep: Peel the banana and scoop out the avocado flesh.

  2. Combine: Place the banana, avocado, milk, yogurt, and sweetener into a high-speed blender.

  3. Blend: Start on a low setting and gradually increase to high. Blend for 45–60 seconds until the texture is completely smooth and velvety.

  4. Adjust: If it’s too thick, add a splash more milk. If you want it colder, add a few more ice cubes and pulse.

  5. Serve: Pour into a tall glass. For the aesthetic in your photo, garnish the rim with thin banana slices and enjoy immediately.


Pro-Tips for the Best Texture

  • The “Cold” Factor: Using a frozen banana is the secret to a milkshake-like consistency without watering it down with too much ice.

  • Nutrient Boost: Feel free to toss in a tablespoon of chia seeds or flax seeds; the avocado is so creamy you won’t even notice the extra texture!

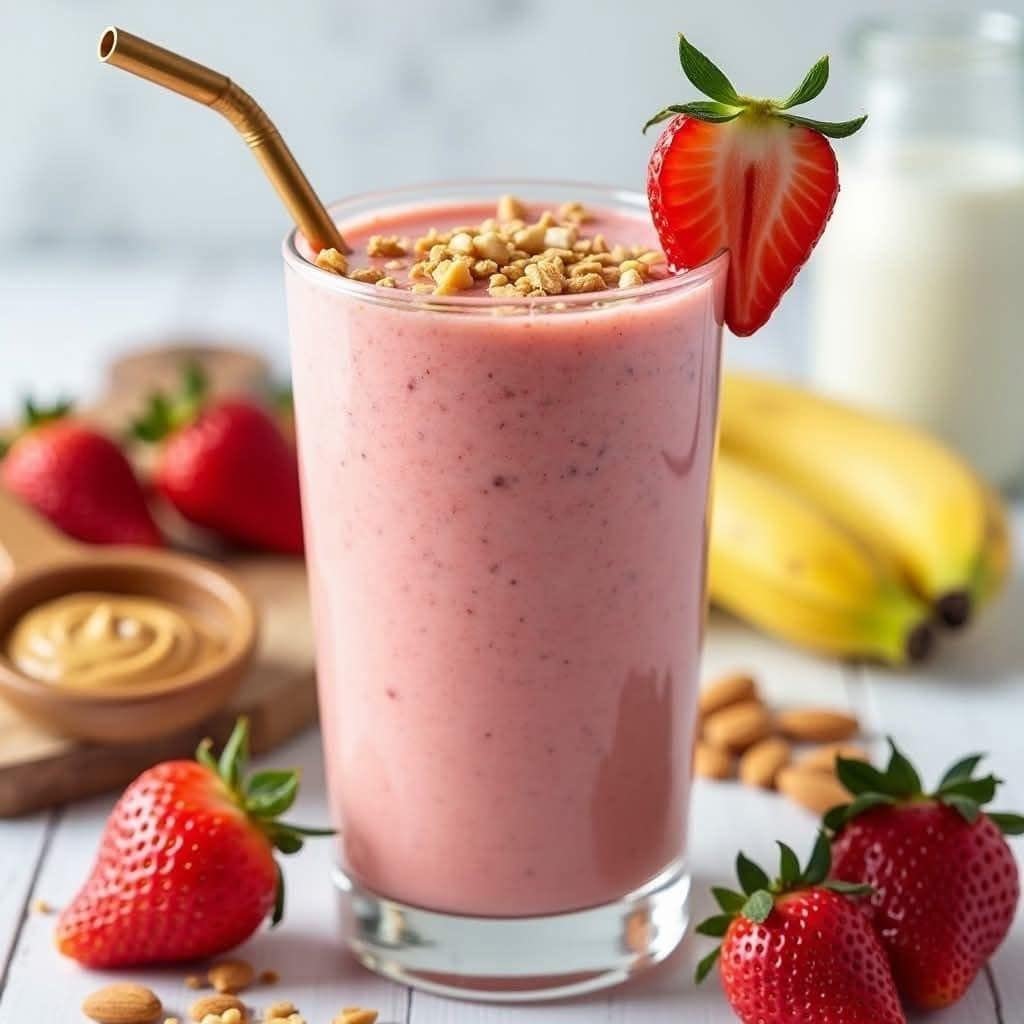
Strawberry & Peanut Butter Power Smoothie

Strawberry & Peanut Butter Power Smoothie

Prep time: 5 minutes | Servings: 1 large glass

Ingredients

  • 1 cup Fresh or frozen strawberries (plus one for garnish)

  • 1 Ripe banana (frozen works best for a creamy texture)

  • 1 tbsp Creamy peanut butter

  • 1 cup Milk of your choice (dairy, almond, or oat milk all work great)

  • 1/4 cup Greek yogurt (optional, for extra thickness)

  • Toppings: A sprinkle of crushed peanuts or granola and a few whole almonds.


Instructions

  1. Prep the Fruit: Wash the strawberries and remove the green stems. Peel your banana.

  2. Layer the Blender: To keep things moving smoothly, add your liquid (milk) first, followed by the peanut butter and yogurt, then the fruit.

  3. Blend: Start on a low speed and gradually increase to high. Blend for about 45–60 seconds until the mixture is completely smooth and those little strawberry seeds are well-incorporated.

  4. Adjust Consistency: * If it’s too thick, add a splash more milk.

    • If it’s too thin, add a couple of ice cubes or more frozen fruit and blend again.

  5. Garnish: Pour into a tall glass. Sprinkle the crushed peanuts or granola on top. Slice a strawberry halfway up the middle and slide it onto the rim of the glass.


Pro-Tip for Texture

Using a frozen banana is the secret to getting that milkshake-like consistency without watering it down with ice. If you have extra bananas, peel them and keep them in a freezer bag for future smoothies!

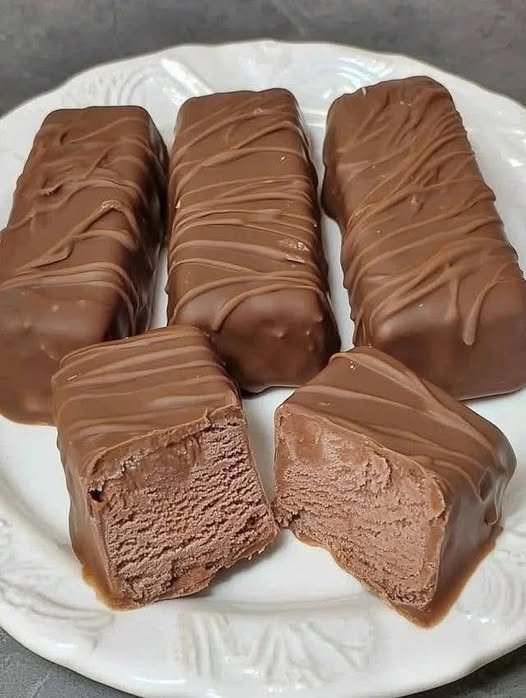
Frozen Chocolate Mousse Bars


🍦 Frozen Chocolate Mousse Bars

A light, airy no-bake treat with a crisp chocolate shell. Perfect for make-ahead entertaining.

  • Prep time: 20 minutes

  • Freeze time: 4–6 hours (or overnight)

  • Yield: 8–10 bars

Ingredients

For the Mousse Filling:

  • 1½ cups (360 ml) heavy whipping cream, cold

  • ½ cup (60 g) powdered sugar, sifted

  • ½ cup (50 g) unsweetened cocoa powder, sifted

  • 1 tsp vanilla extract

  • Optional: A pinch of espresso powder (to intensify the chocolate)

For the Chocolate Coating:

  • 12 oz (340 g) milk or semisweet chocolate, finely chopped

  • 1 tbsp coconut oil (optional, for a smoother, glossier finish)

Optional Garnishes:

  • Sea salt flakes, chopped toasted nuts, freeze-dried raspberries, or sprinkles.


Instructions

  1. Prepare Equipment: If using silicone bar molds, place them on a baking sheet for stability. If you don’t have molds, line a small loaf pan with parchment paper (you will slice these into bars once frozen).

  2. Whip the Mousse: In a chilled large bowl, beat the cold heavy cream until it starts to thicken. Add the sifted powdered sugar, cocoa powder, vanilla, and espresso powder (if using). Continue whipping until soft peaks form. The mixture should be thick enough to hold its shape but still airy.

  3. Fill Molds: Spoon or pipe the mousse into the molds. Smooth the tops with a spatula and tap the tray on the counter to pop any air bubbles.

  4. Initial Freeze: Freeze for at least 4–6 hours, or ideally overnight, until the bars are completely rock-solid.

  5. Prepare Coating: Melt the chopped chocolate and coconut oil in the microwave in 20-second bursts, stirring in between until smooth. Let the chocolate cool slightly so it isn’t piping hot when you dip.

  6. Dip and Decorate: Remove bars from the molds. Working quickly, dip each bar into the chocolate. Let the excess drip off, then place on a parchment-lined tray. Add toppings immediately before the chocolate sets.

  7. Final Set: Return the bars to the freezer for 15–30 minutes to let the shell fully harden.

  8. Serve: Remove from the freezer 2–3 minutes before eating for the perfect texture.


Tips for Success

  • The “Cold” Factor: Keep your cream, bowl, and beaters as cold as possible. This ensures the mousse stays stable and airy.

  • Batch Dipping: If you are making a large batch, keep half the bars in the freezer while you dip the first half. If the mousse starts to soften, the chocolate won’t “snap” correctly.

  • Storage: These keep beautifully for up to 4 weeks in an airtight container. Use parchment paper between layers to prevent them from sticking together.

Variations

  • Mint Chocolate: Swap vanilla for ½ tsp peppermint extract.

  • Mocha: Increase espresso powder to 1 tsp.

  • Nutty: Press crushed hazelnuts into the shell before it hardens.

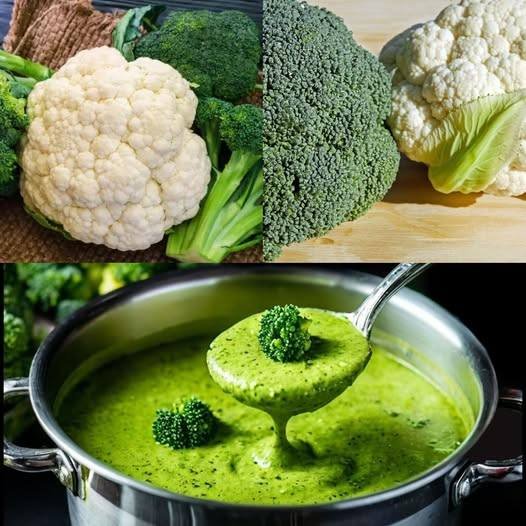
Creamy Broccoli & Cauliflower Soup

Creamy Broccoli & Cauliflower Soup

Ingredients

  • Broccoli: 1 large head (approx. 500g), cut into florets.

  • Cauliflower: 1/2 large head (approx. 300g), cut into florets.

  • Aromatics: 1 medium yellow onion (diced) and 3 cloves of garlic (minced).

  • Liquid: 4 cups (1 liter) of vegetable or chicken broth.

  • Creaminess: 1/2 cup heavy cream (or coconut milk for a dairy-free version).

  • Seasoning: Salt, black pepper, and a pinch of nutmeg.

  • Optional: 1/2 cup grated sharp cheddar or parmesan for extra depth.


Instructions

  1. Sauté the Base: In a large pot, heat a tablespoon of olive oil or butter over medium heat. Add the onion and sauté until translucent (about 5 minutes). Add the garlic and cook for another minute until fragrant.

  2. Simmer the Veggies: Add the broccoli and cauliflower florets to the pot. Pour in the broth. Bring the mixture to a boil, then reduce the heat, cover, and simmer for 12–15 minutes or until the vegetables are very tender.

  3. The Secret to the Color: To keep that bright green color seen in your photo, don’t overcook the broccoli! If you want it extra green, you can toss in a handful of fresh spinach right before blending.

  4. Blend: Use an immersion blender (stick blender) directly in the pot to blend until smooth. If using a standard blender, work in batches and be careful with the hot liquid.

  5. Finish: Stir in the cream and cheese (if using). Season with salt, pepper, and nutmeg to taste. Heat through for 2 minutes on low heat—do not let it boil again once the cream is added.

  6. Garnish: Serve hot. Reserve a few small, steamed broccoli florets to place on top just like in the picture!


Quick Tips for Success

  • Stems are flavor: Don’t throw away the broccoli stems! Peel the woody outer layer, chop the inside, and boil them with the florets—they add great body to the soup.

  • Texture: If the soup is too thick, splash in a little extra broth until it reaches your preferred consistency.