Creamy Lime & Chocolate Dessert (No-Bake Layered Dessert)

Creamy Lime & Chocolate Dessert (No-Bake Layered Dessert)

Yield: 6–8 servings
Prep Time: 15 minutes
Chill Time: 3 hours
Total Time: About 3 hours 15 minutes
Course: Dessert

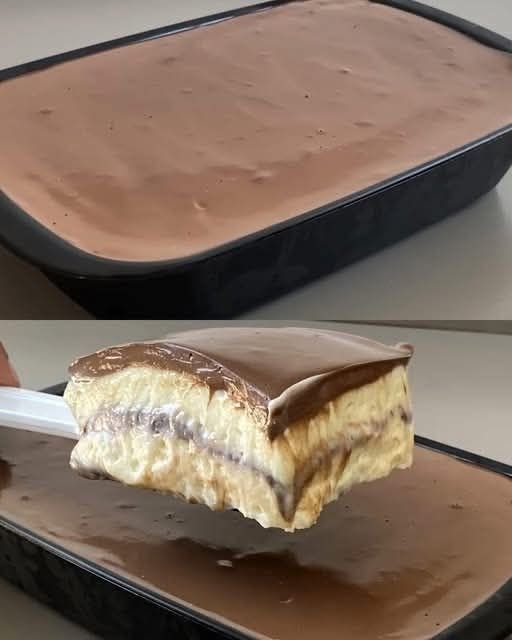
This dessert is made with a smooth lime-flavored cream layer and a rich chocolate ganache. It’s easy to prepare, requires no baking, and has a perfect balance of creamy and chocolatey flavors.


🧾 Ingredients

For the Lime Cream Layer:

  • 1 can (395 g / 14 oz) sweetened condensed milk

  • ⅓ cup (100 ml) milk

  • 1 cup (200 ml) heavy cream

  • Juice of 2 fresh limes
    (or 1 packet lime-flavored powdered drink mix)

For the Chocolate Ganache:

  • 80 g (3 oz) semi-sweet chocolate, chopped

  • ½ cup (100 ml) heavy cream


👩‍🍳 Instructions


1️⃣ Prepare the Lime Cream

  • Add to a blender:

    • Heavy cream

    • Condensed milk

    • Milk

    • Lime juice

  • Blend for 3–4 minutes until thick and smooth.

  • The acid from the lime will naturally thicken the mixture.


2️⃣ Prepare the Chocolate Ganache

  • Place chopped chocolate and heavy cream in a saucepan.

  • Heat on low, stirring constantly until chocolate melts fully.

  • Continue stirring until mixture becomes smooth and glossy.

  • Remove from heat and let cool slightly (still pourable).


3️⃣ Assemble the Dessert

  • Use a glass dish (about 800 ml / 27 fl oz capacity).

  • Spread one layer of lime cream on the bottom.

  • Add a layer of chocolate ganache on top.

  • Repeat layers until dish is filled.

  • Finish with chocolate ganache on top.


4️⃣ Chill

  • Cover and refrigerate for at least 3 hours, or until firm and set.


🍽 Serving

Serve cold.
Optional garnish:

  • Lime zest

  • Chopped nuts

  • Whipped cream

  • Chocolate shavings


💡 Tips & Variations

✔ For tangier flavor: use fresh lime juice
✔ For sweeter flavor: use bottled juice or milk chocolate
✔ For firmer texture: chill overnight
✔ For extra richness: use dark chocolate
✔ Can be served in individual cups


❄️ Storage

  • Refrigerator: Up to 3 days

  • Do not freeze (texture may change)


🧮 Nutrition (Approximate per serving)

  • Calories: 300–350

  • Fat: 18–22 g

  • Carbohydrates: 30–35 g

  • Protein: 4–5 g

Almond Cream Cake (Yeast-Based Almond Cake)

Almond Cream Cake (Yeast-Based Almond Cake)

Yield: 12–16 slices
Prep Time: 30 minutes
Rising Time: 1 hour 20 minutes
Bake Time: 35–40 minutes
Total Time: About 3 hours
Course: Dessert

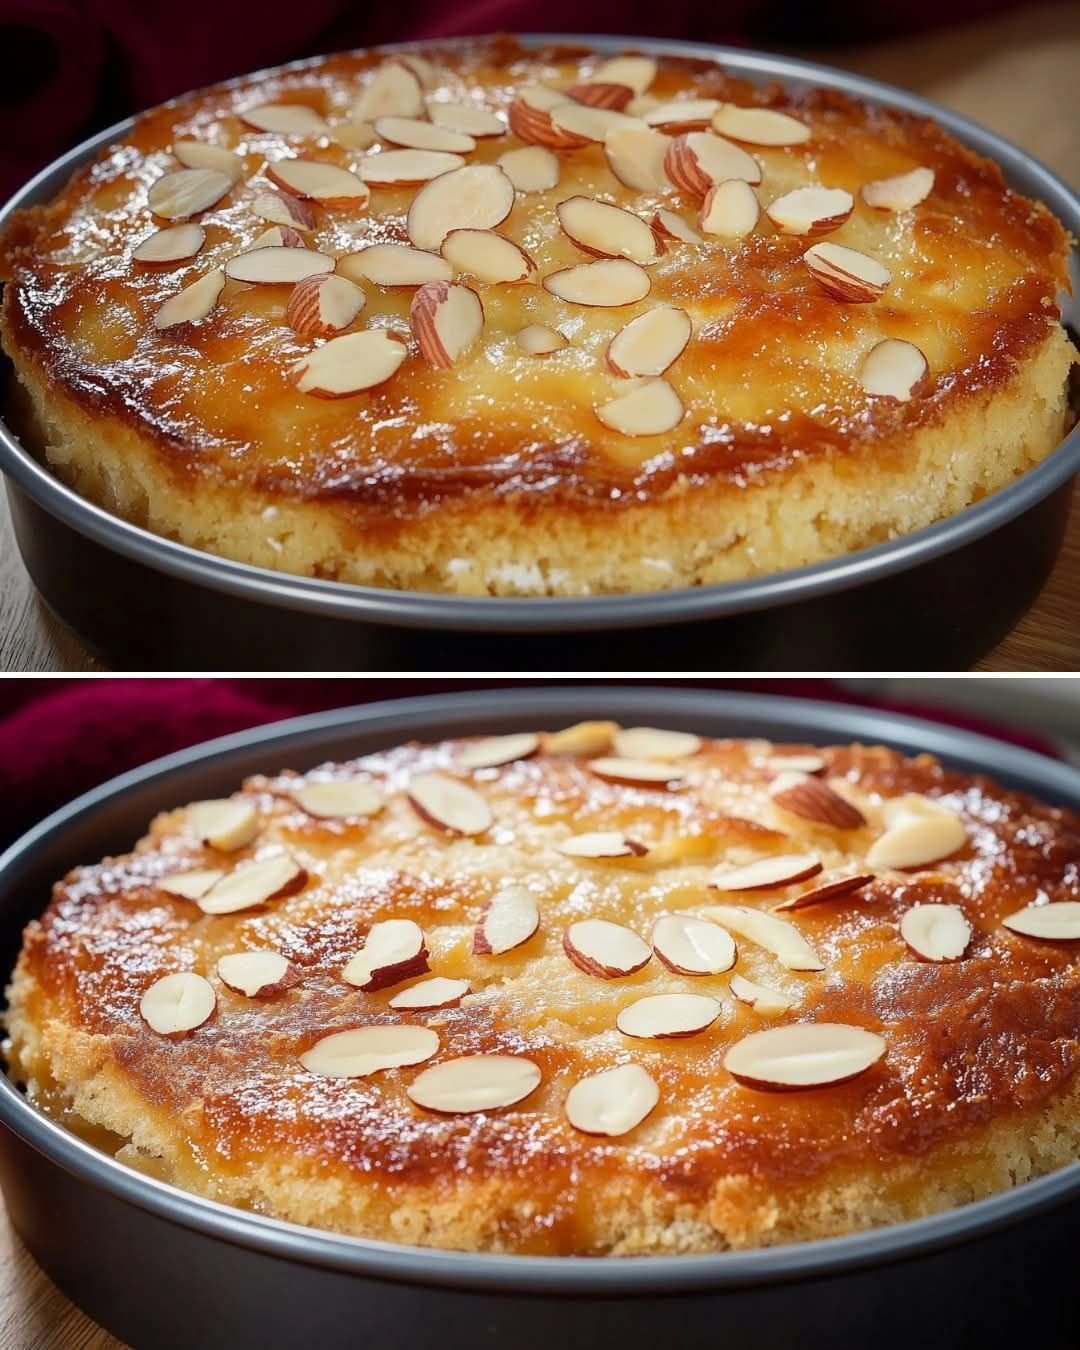
This soft, buttery yeast cake is topped with a sugar-butter crust, soaked with cream, and finished with almond flakes for a rich and tender texture. It’s similar to European bakery cream cakes and perfect for tea or special occasions.


🧾 Ingredients

For the Dough:

  • 200 ml (¾ cup + 1 tbsp) warm milk

  • 2 teaspoons active dry yeast

  • 2 tablespoons sugar

  • 2 large eggs (room temperature)

  • ½ teaspoon vanilla extract (or 2 g vanillin)

  • Pinch of salt

  • 120 g (½ cup) butter, melted and cooled

  • 470 g (about 4 cups) all-purpose flour

For the Topping:

  • 120 g (½ cup) sugar

  • 50 g (¼ cup) cold butter

  • Almond slices or almond flakes (as needed)

For the Cream Finish:

  • 125 ml (½ cup) heavy cream


👩‍🍳 Instructions


1️⃣ Activate the Yeast

  • Warm milk to about 43°C (110°F) — warm, not hot.

  • Add sugar and sprinkle yeast on top.

  • Stir gently and let sit 15–20 minutes until foamy.

✔ This step ensures a light, airy cake.


2️⃣ Prepare Wet Ingredients

In a large bowl, combine:

  • Activated yeast mixture

  • Eggs

  • Melted butter

  • Vanilla
    Whisk until smooth.


3️⃣ Make the Dough

  • Sift flour and add gradually to the wet mixture.

  • Add salt.

  • Knead for 10–15 minutes until soft and elastic.
    The dough should be smooth and slightly tacky, not sticky.


4️⃣ First Rise

  • Place dough in a greased bowl.

  • Cover and let rise in a warm place for 1 hour until doubled in size.


5️⃣ Prepare the Sugar-Butter Topping

  • Mix sugar with cold butter using fingers until crumbly.
    This creates a light crust during baking.


6️⃣ Shape and Second Rise

  • Grease a 9×13 inch (23×33 cm) pan.

  • Spread dough evenly into the pan.

  • Cover and let rise 20–30 minutes.

  • Preheat oven to 180°C (350°F).


7️⃣ Add Topping

  • Make small indentations with fingers across the dough.

  • Sprinkle sugar-butter mixture evenly on top.


8️⃣ Bake

  • Bake for 25–30 minutes until lightly golden.


9️⃣ Cream & Almond Finish

  • Remove cake from oven.

  • Pour heavy cream evenly over hot cake.

  • Sprinkle almond flakes on top.

  • Return to oven for 10 minutes.

✔ The cream soaks into the cake, making it moist and rich.


🔟 Cool and Serve

  • Cool completely in pan.

  • Cut into squares and serve at room temperature.


🧠 Helpful Tips

✔ Milk must be warm, not hot
✔ Use room-temperature eggs
✔ Bake on center rack
✔ Don’t skip second rise — it improves texture
✔ Let cake cool before slicing for best structure


🔁 Variations

  • Lemon version: Add 1 tsp lemon zest

  • Almond flavor: Add ½ tsp almond extract

  • Spiced: Add cinnamon or cardamom

  • Nut-free: Use coconut flakes instead of almonds

  • Dairy-free: Use plant milk, vegan butter, and coconut cream

  • Gluten-free: Use gluten-free baking flour blend


❄️ Storage

  • Room temperature (covered): 2–3 days

  • Refrigerator: Up to 5 days

  • Freezer: Up to 1 month (wrap tightly)


🧮 Nutrition (Approximate per slice)

  • Calories: 350–400

  • Fat: 18–22 g

  • Carbohydrates: 40–45 g

  • Protein: 6–7 g

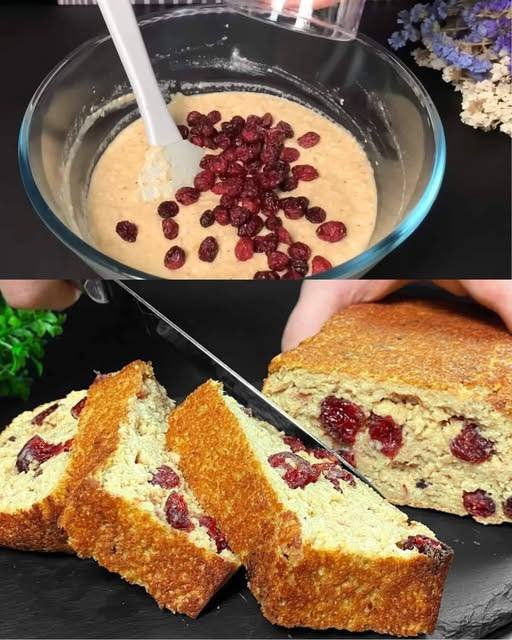
Healthy Diet Cake with Oats and Apples – Ready in Just 5 Minutes Prep

Healthy Diet Cake with Oats and Apples – Ready in Just 5 Minutes Prep

Ingredients:

    • 1 cup oats
      • 2 apples, grated
      • 100 ml water
      • 1 banana, mashed
    • 2 eggs
    • 80g cranberries
    • 1 teaspoon baking powder
  • 1/4 teaspoon cinnamon
  • Butter for greasing the pan

Instructions:

    1. Preheat the Oven:
      • Preheat your oven to 180°C (360°F).
  1. Prepare the Batter:
      • In a large mixing bowl, combine the oats, grated apples, water, mashed banana, and eggs. Mix well until all ingredients are evenly incorporated.


      • Add the cranberries, baking powder, and cinnamon to the mixture. Stir until everything is well combined.
  2. Prepare the Pan:
        • Grease a baking dish with butter to prevent the cake from sticking.


    • Pour the batter into the prepared baking dish, spreading it out evenly.
  3. Bake the Cake:
        • Place the baking dish in the preheated oven and bake for 40 minutes, or until the cake is golden brown and a toothpick inserted into the center comes out clean.


  4. Cool and Serve:
        • Allow the cake to cool in the pan for a few minutes before transferring it to a wire rack to cool completely.
      • Slice and serve warm or at room temperature.


Cooking Tips:

      • For added texture, you can include chopped nuts or seeds in the batter.
    • Use ripe bananas for a sweeter cake without adding any sugar.
    • If you don’t have cranberries, you can substitute them with raisins, dried cherries, or chopped dates.

Nutritional Benefits:

      • Oats are rich in fiber, which aids in digestion and helps keep you feeling full longer.
      • Apples provide vitamins and antioxidants that are beneficial for overall health.
      • Bananas are a good source of potassium, which is essential for heart health.
  • Eggs add high-quality protein and essential nutrients to the cake.

Why You’ll Love This Recipe:

      • It’s a quick and easy recipe that fits perfectly into a busy lifestyle.
      • The natural sweetness from fruits means no added sugar is needed.
      • It’s a healthy, nutritious option that can be enjoyed any time of the day.
    • The cake is moist and flavorful, with a delightful mix of textures from the oats and cranberries.

Dietary Information:

    • This cake is free from added sugar and flour, making it suitable for those on a sugar-free or gluten-free diet (ensure oats are certified gluten-free if necessary).
  • It contains eggs, so it’s not suitable for a vegan diet, but you can substitute the eggs with a flaxseed or chia seed egg replacement.

Butterfinger Balls (No-Bake Candy Bites)

Butterfinger Balls (No-Bake Candy Bites)

Yield: 20 balls
Prep Time: 15 minutes
Chill Time: 30 minutes
Total Time: About 45 minutes
Course: Dessert
Cuisine: American

These no-bake Butterfinger Balls combine creamy peanut butter, crunchy graham cracker crumbs, and crushed Butterfinger candy, all coated in smooth chocolate. They’re easy to make, freezer-friendly, and perfect for parties or gifting.


🧾 Ingredients

For the filling:

  • 4 tablespoons (56 g) unsalted butter, softened

  • 1 cup (240 g) creamy peanut butter (use regular creamy peanut butter, not natural)

  • 1 teaspoon vanilla extract

  • 1 cup (120 g) powdered (confectioners’) sugar, sifted

  • ¾ cup (75 g) graham cracker crumbs (about 6 full crackers, crushed)

  • ½ cup (about 50 g) Butterfinger bars, crushed (2–3 regular bars)

For coating:

  • 8 ounces (225 g) chocolate chips, melting wafers, or chocolate bark

Optional toppings:

  • Extra crushed Butterfinger

  • Sprinkles

  • Pinch of coarse sea salt


👩‍🍳 Instructions

1️⃣ Mix the base

In a medium bowl, beat together:

  • Softened butter

  • Peanut butter

Mix until smooth and fully blended.


2️⃣ Add sugar and vanilla

  • Stir in vanilla extract.

  • Gradually add powdered sugar (in 2–3 parts), mixing well after each addition.
    You should get a soft, moldable dough that holds together.


3️⃣ Add crumbs and candy

  • Fold in graham cracker crumbs.

  • Gently mix in crushed Butterfinger pieces.
    (Reserve 1 tablespoon of candy for topping, if desired.)


4️⃣ Shape the balls

  • Scoop about 1 to 1½ tablespoons of mixture.

  • Roll into smooth balls using your palms.

  • Place on a parchment-lined tray.


5️⃣ Chill

Refrigerate or freeze for 30 minutes until firm.
(Cold balls are much easier to dip in chocolate.)


6️⃣ Melt the chocolate

Melt chocolate:

  • In the microwave: 20–30 second bursts, stirring each time
    OR

  • Over a double boiler until smooth


7️⃣ Dip the balls

  • Dip each chilled ball into melted chocolate using a fork.

  • Tap gently to remove excess chocolate.

  • Place back on parchment paper.

Optional: sprinkle crushed Butterfinger, sprinkles, or sea salt on top before chocolate sets.


8️⃣ Set the coating

Chill for 10–20 minutes until chocolate hardens.


🧠 Troubleshooting

Too sticky?
➜ Add 1–2 tablespoons powdered sugar or graham crumbs.

Too dry?
➜ Add 1 teaspoon peanut butter or softened butter.

Chocolate too thick?
➜ Stir in 1 teaspoon vegetable oil or coconut oil.

Candy lost crunch?
➜ Do not over-crush Butterfinger; leave some small chunks.


❄️ Storage

Refrigerator:
Store in airtight container for up to 7 days

Freezer:
Freeze up to 5–6 months
Thaw overnight in fridge before serving.


💡 Expert Tips

✔ Use cookie scoop for equal sizes
✔ Let balls sit 5 minutes before dipping to prevent cracking
✔ For extra crunch, press candy on top after dipping
✔ Add espresso powder to chocolate for mocha flavor
✔ For nut-free: use sunflower seed butter and nut-free candy


🧮 Nutrition (Approximate per ball)

  • Calories: ~140

  • Fat: 9–10 g

  • Carbohydrates: 12–14 g

  • Protein: 3–4 g


📌 Important Note

Use regular creamy peanut butter.
Natural peanut butter can make the mixture too oily and soft.

Creamy High-Protein Herb Dip Fresh, flavorful, and packed with lean protein in every scoop.

Servings: 6
Total Time: 10 minutes
Difficulty: Easy
Calories per Serving: ~95
Macros (per serving): 12g Protein / 3g Net Carbs / 4g Fat / 1g Fiber

Intro

This Creamy High-Protein Herb Dip is the kind of snack that feels indulgent but fits perfectly into a keto, low-carb, and Weight Watchers–friendly lifestyle. It’s thick, cool, and packed with fresh herbs—like a cross between ranch dip and whipped Greek yogurt—yet made with clean, macro-balanced ingredients.

If you’re trying to stay low carb while keeping your protein intake high, this dip is a game changer. It pairs beautifully with crisp veggies, high-protein crackers, or grilled meats, making it a go-to for meal prep, parties, or everyday snacking.

The best part? It takes just 10 minutes to make and stays unbelievably creamy for days.


Look at the Recipe

• Thick, smooth, ultra-creamy texture that holds up on any veggie or cracker
• Fresh herb flavor with garlic, lemon, and cooling yogurt notes
• High-protein, low-carb ingredients that boost fullness and support clean eating goals


Ingredients Needed

Base

  • 1 ½ cups plain nonfat Greek yogurt
  • ½ cup low-fat cottage cheese
  • 1 scoop unflavored or savory whey protein powder

Herbs & Seasoning

  • 2 tbsp fresh parsley, finely chopped
  • 1 tbsp fresh dill, finely chopped
  • 1 tbsp fresh chives, minced
  • 1 clove garlic, grated
  • 1 tsp lemon zest
  • 1 tbsp lemon juice
  • ½ tsp onion powder
  • ½ tsp salt (adjust to taste)
  • ¼ tsp black pepper

Optional Add-Ins

  • 1–2 tsp olive oil for richness (optional for keto; skip for very low WW points)
  • Red pepper flakes for a little heat
  • Extra herbs for garnish

How to Make Our Creamy High-Protein Herb Dip

  1. Blend the base. Add Greek yogurt, cottage cheese, and protein powder to a blender or food processor. Blend until silky smooth and thick.
  2. Fold in flavor. Transfer the blended mixture to a bowl. Stir in the parsley, dill, chives, garlic, lemon zest, and lemon juice until evenly combined.
  3. Season to taste. Add salt, pepper, and onion powder. Mix well and adjust lemon or herbs if needed.
  4. Chill before serving. Let the dip rest for at least 20 minutes in the fridge so the flavors can bloom and the texture can firm up.
  5. Serve and enjoy. Pair with cucumbers, bell peppers, celery, or keto crackers for a high-protein, low-carb snack that satisfies every craving.

Storage & Serving Suggestions

  • Refrigeration: Keeps well for 3–4 days in an airtight container.
  • Meal Prep: Portion into small containers for easy grab-and-go protein snacks.
  • Freezing: Not ideal—dairy separates after thawing.
  • Serving Pairings: Veggie sticks, grilled chicken skewers, salmon bites, keto almond crackers.

Tips & FAQs

Can I use only yogurt (no cottage cheese)?
Yes, but cottage cheese adds thickness and extra protein. If skipping it, use a bit more protein powder.

Can this be made dairy-free?
Use a dairy-free Greek-style yogurt and a plant-based protein powder. Texture will be slightly looser.

What herbs work best?
Parsley, dill, and chives are classic, but basil or cilantro work too.

How do I make it richer for keto?
Add 1–2 teaspoons of olive oil or a spoonful of cream cheese.

Is this Weight Watchers friendly?
Absolutely—use nonfat Greek yogurt and skip added oil for minimal points.

Homemade Lemon Water

Homemade Lemon Water

Ingredients

  • 2 Large Lemons: Choose firm, bright yellow lemons.

  • 4–6 Cups Water: Filtered or spring water works best.

  • Ice: Optional, for serving.

  • Optional Sweetener: A small amount of honey or stevia if you find it too tart.


Instructions

  1. Wash the Lemons: Since you are putting the slices directly into the water, scrub the skin thoroughly to remove any wax or residue.

  2. Slice: Cut one lemon into thin rounds.

  3. Juice: Squeeze the juice of the second lemon into your pitcher.

  4. Combine: Add the lemon slices to the pitcher and fill with water.

  5. Infuse: Let the pitcher sit in the refrigerator for at least 30 minutes before drinking. This allows the lemon oils and juice to blend with the water.


Healthy Tips for Use

  • Protect Your Teeth: The acid in lemons can soften tooth enamel. It is best to drink this through a straw or rinse your mouth with plain water afterward.

  • Temperature: Many people prefer drinking this warm in the morning to help wake up their digestive system, or ice-cold for refreshment.

  • Manage Expectations: While staying hydrated can reduce bloating and help you feel better, sustainable body changes come from a balanced diet and regular physical activity.