Blender Protein Pancakes – Soft, Nutritious, and Easy

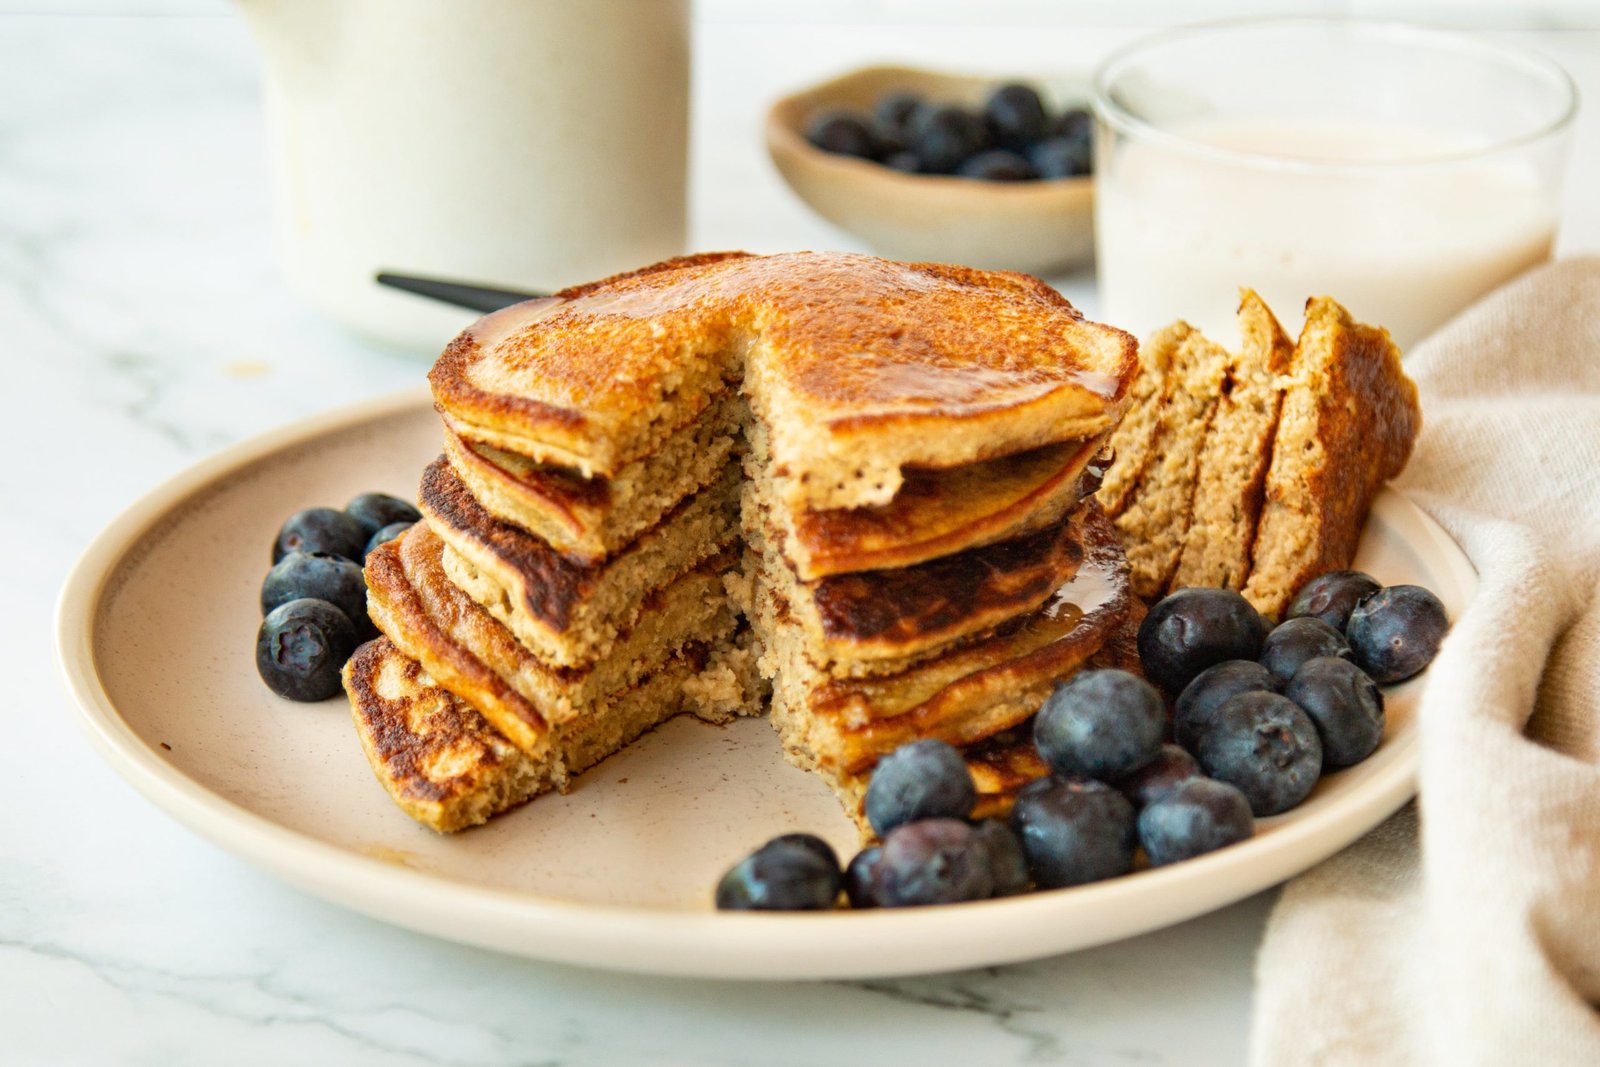
Blender Protein Pancakes are a wonderful option for a balanced breakfast or a satisfying snack. These pancakes are soft on the inside, lightly golden on the outside, and full of comforting flavor. Using a blender makes the process quick and smooth, with minimal cleanup. Everything blends together into a creamy batter that cooks evenly and produces fluffy pancakes every time. This recipe is perfect for busy mornings, relaxed weekends, or meal prep for the week ahead.

Ingredients

  • 1 cup rolled oats

  • 1 ripe banana

  • 2 large eggs

  • ½ cup milk (dairy or plant-based)

  • 1 scoop vanilla or plain protein powder

  • ½ teaspoon baking powder

  • ½ teaspoon cinnamon

  • 1 teaspoon vanilla extract

  • Pinch of salt

  • A small amount of oil or butter for cooking

Instructions

Start by adding the rolled oats to your blender. Blend for about 15–20 seconds until the oats turn into a fine flour. This step helps create a smooth pancake texture. Next, add the banana, eggs, milk, protein powder, baking powder, cinnamon, vanilla extract, and salt. Blend again until the mixture looks creamy and well combined. Scrape down the sides if needed and blend briefly once more.

Let the batter rest in the blender for 2–3 minutes. This allows the oats to absorb moisture, which improves the final texture. While the batter rests, place a non-stick pan or griddle over medium heat and lightly coat it with oil or butter.

Pour small amounts of batter onto the warm pan to form pancakes. Cook for about 2 minutes, or until bubbles appear on the surface and the edges look set. Gently flip and cook the other side for another 1–2 minutes until lightly golden. Repeat until all batter is used.

Serving Ideas

Serve these pancakes warm with fresh fruit such as blueberries or sliced bananas. A drizzle of honey, maple syrup, or nut butter adds extra comfort and flavor. Yogurt or cottage cheese on the side also pairs beautifully.

Helpful Tips

  • For thicker pancakes, reduce the milk slightly.

  • For thinner pancakes, add a splash more milk.

  • You can store cooked pancakes in the refrigerator for up to three days and reheat gently.

These Blender Protein Pancakes are simple, filling, and enjoyable, making them a lovely addition to your everyday cooking routine.


Cheesy Zucchini & Oat Rolls

Cheesy Zucchini & Oat Rolls

Ingredients Recap

  • The Base: 1 zucchini, 1 carrot, 1 potato.

  • The Binder: 2 eggs, 4 tbsp oats, 2 tbsp flour.

  • Flavor & Filling: 100 g cheese (shredded), 1 clove garlic (minced), parsley, salt, pepper, Italian herbs, paprika.

  • The Sauce: 2 tbsp sour cream, 1 tbsp mayonnaise, fresh dill, and salt (to taste).


Instructions

1. Prep the Vegetables

  • Grate the zucchini and potato. Place them in a bowl with a pinch of salt and let them sit for 5–10 minutes.

  • Squeeze the excess water out of the zucchini and potato very thoroughly. This is the secret to making sure they aren’t soggy!

  • Grate the carrot and finely chop the parsley.

2. Mix the Batter

  • In a large bowl, combine the squeezed zucchini, potato, and grated carrot.

  • Add the eggs, oats, flour, garlic, and all the spices (paprika, herbs, and pepper).

  • Mix until well combined. Let the mixture sit for 5 minutes so the oats can soften and absorb the moisture.

3. Cook the “Wraps”

  • Heat a bit of olive oil in a non-stick pan over medium heat.

  • Spread a portion of the mixture thinly across the pan (like a small pancake or crepe).

  • Cook for 2–3 minutes on each side until golden brown and firm enough to flip.

4. Fill and Roll

  • While the vegetable wrap is still warm, sprinkle a generous amount of cheese down the center.

  • Roll it up tightly. The residual heat will help melt the cheese inside.

  • Optional: Place the rolls back in the pan for 1 minute, rotating them to get an extra crispy exterior and ensure the cheese is fully gooey.

5. Make the Dipping Sauce

  • In a small bowl, whisk together the sour cream, mayonnaise, and fresh dill. This cool, tangy sauce perfectly balances the savory rolls.


Pro Tip

If you prefer a lighter version, you can bake these on a parchment-lined tray at 200°C for about 15–20 minutes, flipping halfway through.

Mexicorn Rotel Dip

Mexicorn Rotel Dip

A warm, creamy, and slightly spicy cheese dip perfect for parties and game days.

Why You’ll Love It

  • Quick and simple to make with mostly shelf-stable ingredients

  • Creamy cheese meets sweet corn and tangy, slightly spicy tomatoes

  • Crowd-pleasing flavor ideal for potlucks, casual gatherings, or snacks


Ingredients

  • 1 (16-ounce) package pasteurized process cheese product (e.g., Velveeta), cubed

  • 1 (10-ounce) can diced tomatoes with green chilies (e.g., Rotel), undrained

  • 1 (11-ounce) can Mexicorn (whole kernel corn with red and green peppers), drained

  • Optional toppings: sliced jalapeños, chopped fresh cilantro

  • For serving: tortilla chips

Notes:

  • Use the “Hot” variety of diced tomatoes for a spicier dip.

  • If Mexicorn is unavailable, substitute 1 can of whole kernel corn plus 2 tbsp of finely diced red or green bell pepper.


Step-by-Step Instructions

  1. Prepare Ingredients:

    • Cube the processed cheese for even melting.

    • Drain the Mexicorn.

  2. Combine Ingredients:

    • In a medium saucepan over low to medium heat, combine the cubed cheese, undrained tomatoes with green chilies, and drained Mexicorn.

  3. Melt and Stir:

    • Heat gently, stirring frequently to prevent scorching.

    • Continue until the cheese is fully melted and the mixture is smooth (about 10–15 minutes).

  4. Adjust Consistency:

    • For a thinner dip, stir in 1 tbsp of milk or water at a time.

    • Slow cooker option: Combine all ingredients in a slow cooker on low, stirring occasionally until melted and hot.

  5. Serve:

    • Transfer to a serving bowl and serve immediately with tortilla chips.

    • Optional: Top with fresh cilantro or sliced jalapeños for extra flavor.


FAQ

Can I make this dip in advance?

  • Yes. Prepare, cool, and store in the refrigerator for up to 2 days. Reheat gently on the stovetop or in a slow cooker, adding a little milk or water to restore creaminess.

What if I don’t have Mexicorn?

  • Use canned corn plus diced bell peppers (see ingredient notes).

Can I use natural cheese instead of processed cheese?

  • Yes, but combine shredded cheddar or Monterey Jack with 1 tbsp cornstarch to prevent separation. Texture may be slightly grainier, and frequent stirring is needed.


Storage Tips

  • Cool leftovers completely and store in an airtight container in the fridge for 3–4 days.

  • Reheat gently on the stovetop with a splash of milk or water.

  • Can be frozen for up to 2 months; corn and tomatoes may soften slightly after thawing.

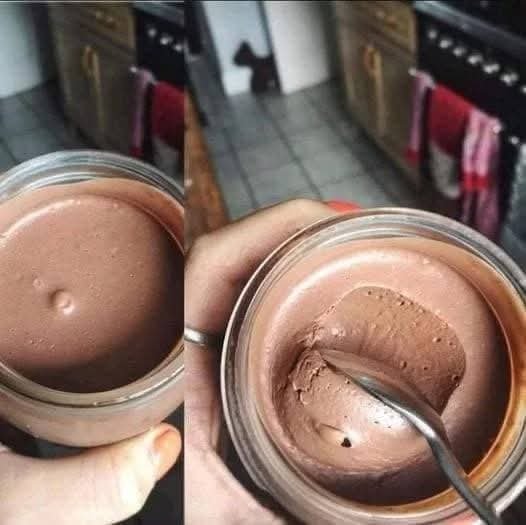
Chocolate mousse

Ingredients (2 servings)


2 large egg yolks (room temperature)


1 cup heavy cream (cold)


2 tbsp unsalted butter, melted and cooled


1–1½ tbsp unsweetened cocoa powder (100% cocoa)


Optional (relaxed carnivore only):


½–1 tsp raw honey or animal-based sweetener


Pinch of sea salt (enhances chocolate flavor)


🔥 For strict carnivore: use cocoa sparingly and omit sweeteners.


Instructions


Whip the cream

Whip heavy cream until soft peaks form. Set aside in the fridge.


Mix yolks & cocoa

In a separate bowl, whisk egg yolks with cocoa powder until smooth and glossy.


Add butter

Slowly whisk in melted butter until fully incorporated.


Sweeten (optional)

Add honey or sweetener if using. Mix gently.


Fold everything together

Carefully fold the whipped cream into the chocolate mixture in 2–3 batches to keep it airy.


Chill

Spoon into serving dishes and refrigerate for 30–60 minutes until set.


Tips for Best Results


Use very cold cream for better whipping


Fold gently — overmixing will deflate the mousse


If cocoa tastes bitter, reduce slightly or add a pinch of salt


For extra richness, add 1 more tablespoon of butter


Serving Suggestions


Serve chilled in ramekins


Top with a small dollop of whipped cream


Optional garnish (relaxed carnivore): shaved dark chocolate (100%)

FLUFFY PANCAKES

Ingredients


Dry


1½ cups (190 g) all-purpose flour


3½ tsp baking powder


1 tbsp sugar


¼ tsp salt


Wet


1¼ cups (300 ml) milk


1 large egg


3 tbsp melted butter (or oil)


1 tsp vanilla extract (optional)


👩‍🍳 Instructions


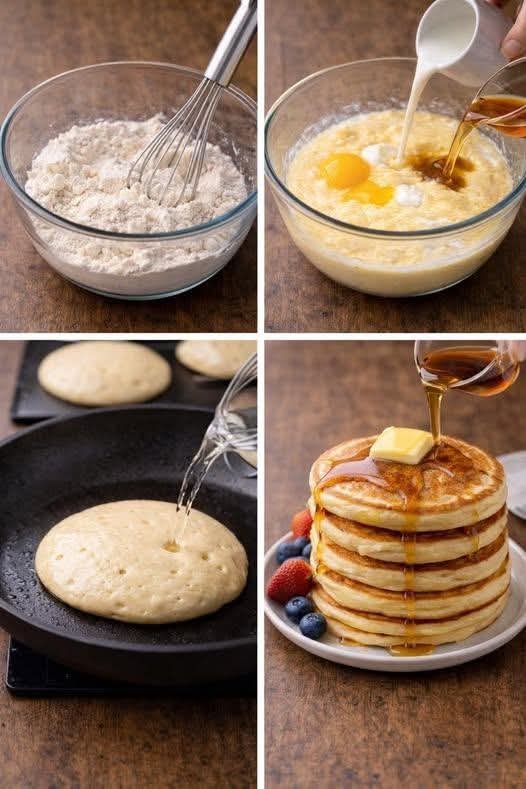
Mix dry ingredients

In a large bowl, whisk flour, baking powder, sugar, and salt.


Mix wet ingredients

In another bowl, whisk milk, egg, melted butter, and vanilla.


Combine

Pour wet ingredients into dry. Gently whisk just until combined.

👉 A few lumps are good—don’t overmix.


Rest the batter (optional but recommended)

Let it sit for 5–10 minutes for extra fluffiness.


Cook

Heat a non-stick pan or griddle over medium heat. Lightly grease.

Pour about ¼ cup batter per pancake.


Flip

Cook until bubbles form on the surface (about 2 minutes), flip, and cook another 1–2 minutes until golden.


Serve hot

Stack, butter, syrup—done. 🥞

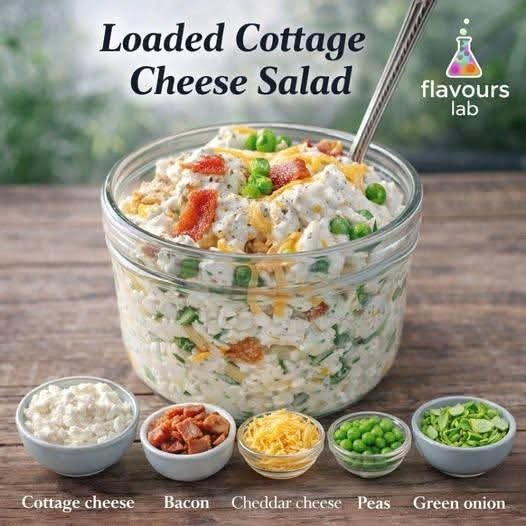
Loaded Cottage Cheese Salad – Creamy, Fresh, and Comforting

Loaded Cottage Cheese Salad is a satisfying and refreshing dish that brings together creamy texture, mild flavors, and colorful ingredients in one beautiful bowl. This salad is perfect as a light lunch, a side for gatherings, or even a wholesome snack. It feels rich and comforting while still being fresh and balanced, making it suitable for many occasions.

Ingredients

  • 2 cups fresh cottage cheese (small curd works best for a smooth texture)

  • ½ cup cooked turkey or beef strips, lightly crisped and cooled

  • ½ cup shredded cheddar cheese

  • ½ cup green peas (fresh or gently warmed frozen peas)

  • 3 tablespoons finely prepared green onion

  • 2 tablespoons plain yogurt or light cream (optional, for extra creaminess)

  • Salt to taste

  • Mild black pepper to taste

  • Optional additions: sweet corn, diced cucumber, or fresh herbs for garnish

Preparation Method

Begin by placing the cottage cheese into a medium-sized mixing bowl. Use a spoon to gently stir it so the texture becomes smooth and evenly spread. If you prefer a creamier consistency, add plain yogurt or light cream at this stage and mix slowly until blended.

Next, add the shredded cheddar cheese to the bowl. Stir gently so it spreads throughout the cottage cheese without clumping. The cheddar adds a soft richness and a pleasant depth of flavor.

Now fold in the cooked turkey or beef strips. Make sure they are cooled before adding so the salad stays fresh. These pieces bring a savory balance and make the salad more filling.

Add the green peas, which provide a natural sweetness and a pop of color. Follow with the finely prepared green onion for a mild, fresh aroma that brightens the entire dish.

Season the salad with salt and mild black pepper according to your taste. Stir everything together slowly and evenly, allowing all ingredients to blend while keeping their individual textures intact.

Once mixed, cover the bowl and let the salad rest in the refrigerator for about 20 to 30 minutes. This resting time allows the flavors to come together beautifully.

Serving Suggestions

Serve Loaded Cottage Cheese Salad chilled in a glass bowl or individual cups. Garnish with extra green onion, a sprinkle of cheddar, or fresh herbs if desired. It pairs well with toasted bread, wraps, or fresh vegetables.

This salad is creamy, comforting, and full of simple goodness, making it a reliable and enjoyable choice for everyday meals.