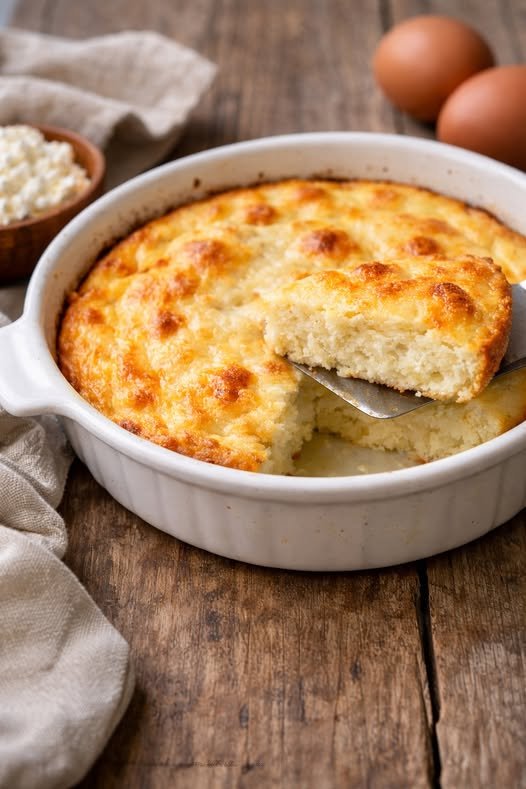
Carnivore Egg & Cottage Cheese Bake

 Carnivore Egg & Cottage Cheese Bake

Description

This Carnivore Egg & Cottage Cheese Bake is a soft, fluffy, and protein-packed dish made with just a few simple, animal-based ingredients. The cottage cheese melts into the eggs as it bakes, creating a creamy, custard-like texture that’s both filling and comforting. Perfect for breakfast, meal prep, or a quick dinner when you want something warm and nourishing.


Ingredients

  • 6 large eggs

  • 1½ cups full-fat cottage cheese

  • 1 cup shredded mozzarella or cheddar cheese (optional)

  • 1 tbsp melted butter or beef tallow

  • 1 tsp sea salt (or to taste)

  • ½ tsp black pepper (optional)


Instructions

  1. Preheat Oven
    Preheat oven to 375°F (190°C). Grease a small baking dish with butter or tallow.

  2. Mix the Base
    In a bowl, whisk eggs until smooth. Stir in cottage cheese, melted butter, salt, and pepper.

  3. Add Cheese (Optional)
    Fold in shredded cheese for extra richness.

  4. Bake
    Pour mixture into baking dish. Bake for 30–35 minutes, or until the center is set and the top is lightly golden.

  5. Rest & Serve
    Let rest 5–10 minutes before slicing. Serve warm.


Serving Suggestions

  • Top with a pat of butter for extra richness

  • Serve alongside crispy bacon or sausage patties

  • Pair with bone broth for a complete carnivore meal


Variations

  • Extra Fluffy: Blend the mixture before baking for a soufflé-style texture

  • Higher Fat: Add 2–3 tbsp heavy cream or cream cheese

  • Meaty Version: Mix in cooked ground beef or chopped bacon


Nutrition (Approx. Per Serving – 4 servings)

  • Calories: 300–350

  • Protein: 25–30g

  • Fat: 22–28g

  • Carbs: 2–4g

  • Sugar: 1–2g


Final Thoughts

This Carnivore Egg & Cottage Cheese Bake is simple, satisfying, and endlessly customizable. It’s a great way to pack in protein and healthy fats while keeping your meals comforting and easy—perfect for busy days or weekly meal prep.
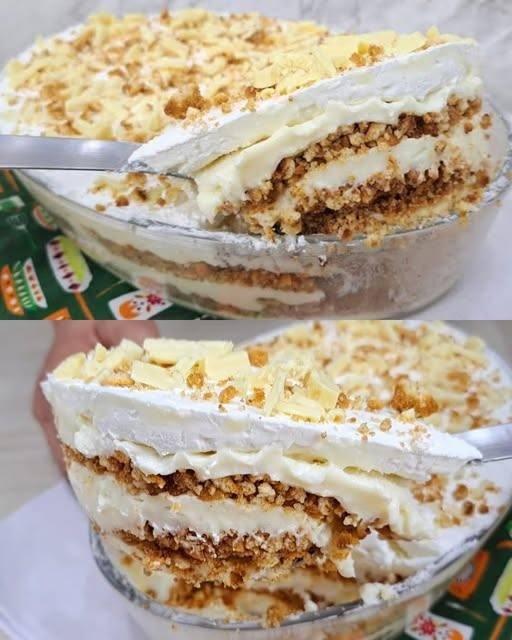
Creamy 4-Milk Ice Cream Pie

Creamy 4-Milk Ice Cream Pie

This recipe is designed to be assembled in layers, just like the one in your photo, using a “no-churn” method that stays soft even when frozen.

Ingredients

The 4-Milk Base:

  • 1 can (395g) Sweetened condensed milk

  • 1 can (300g) Heavy cream (table cream/crema de leite), chilled

  • 1 cup Whole milk

  • 1 ½ cups Powdered milk (like Ninho or any full-cream milk powder)

The Layers & Topping:

  • 1 pack (200g) Cornstarch biscuits or Maria cookies (crushed into coarse crumbs)

  • 1 cup Whipped topping or heavy whipping cream (beaten to stiff peaks)

  • White chocolate shavings and extra cookie crumbs for garnish


Instructions

1. Prepare the Cream

In a blender, combine the condensed milk, heavy cream, whole milk, and powdered milk. Blend on high for about 3–5 minutes.

Pro Tip: The longer you blend, the airier and “lighter” the final texture will be. If you want it extra thick, you can whisk it in a stand mixer instead.

2. The First Freeze

Pour the blended mixture into a plastic container and place it in the freezer for about 2 hours, or until it starts to firm up around the edges but is still soft in the middle.

3. Whip and Aerate

Remove the semi-frozen mixture and beat it in a mixer for 5 minutes until it doubles in volume. This step prevents ice crystals from forming and gives it that “ice cream” consistency.

4. Assembly (The Layers)

In a glass trifle bowl or rectangular dish (as seen in your image):

  1. Spread a layer of the creamy milk mixture at the bottom.

  2. Sprinkle a generous layer of crushed biscuits.

  3. Repeat the layers until the dish is nearly full.

  4. Top with a final layer of whipped cream or whipped topping to give it that bright white, fluffy finish.

5. Final Set

Cover with plastic wrap and freeze for at least 4 to 6 hours (overnight is best).

6. Garnish

Just before serving, sprinkle the top with white chocolate shavings and any remaining cookie crumbs. Let it sit at room temperature for 5 minutes before slicing so it’s easy to scoop.


Why this works

The high fat and sugar content from the condensed milk and powdered milk lowers the freezing point, ensuring the “pie” stays creamy rather than turning into a block of ice.

Instant Gingerbread Chia Pudding

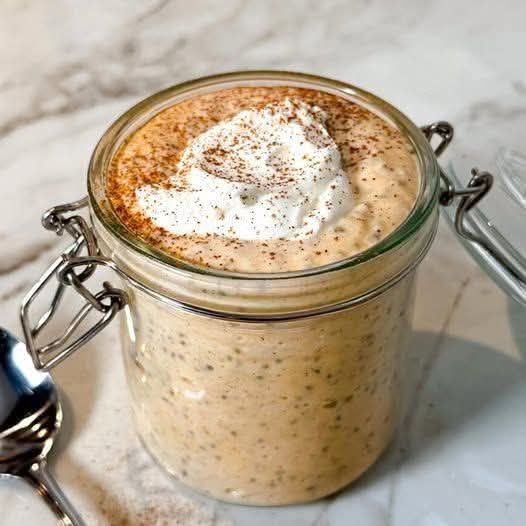
Instant Gingerbread Chia Pudding.

High-Protein • Gluten-Free • No Cooking

Introduction

This instant gingerbread chia pudding brings all the warm, cozy flavors of gingerbread into a creamy, protein-packed treat you can make in minutes. Naturally gluten-free and refined-sugar optional, it’s ideal for busy mornings, meal prep, or a light dessert that still feels indulgent.

 Time & Servings

Prep Time: 5 minutes


Set Time: 10 minutes (or overnight)


Total Time: 15 minutes


Servings: 1–2


Ingredients

Base


3 tbsp chia seeds


1 cup milk (dairy or almond, oat, soy)


½ cup Greek yogurt or high-protein yogurt


1–2 tbsp maple syrup or honey (to taste)

Gingerbread Spices


½ tsp ground ginger


¼ tsp cinnamon


Pinch of nutmeg


Pinch of cloves or allspice


Tiny pinch of salt


Optional Boosts


1 scoop vanilla protein powder


1 tsp vanilla extract


1 tsp molasses (for classic gingerbread flavor)

Instructions

In a bowl or jar, whisk milk, yogurt, sweetener, vanilla, and molasses (if using).


Add chia seeds and all spices. Mix very well.


Let rest 5 minutes, then stir again to prevent clumps.


Chill for 10 minutes for instant pudding, or refrigerate overnight for best texture.


Stir before serving. Add a splash of milk if too thick.

Topping Ideas

Crushed walnuts or almonds

Coconut flakes

Banana slices

Extra yogurt drizzle

A dusting of cinnamon

Nutrition Benefits

High protein from yogurt/protein powder

Gluten-free & grain-free

High fiber & omega-3s from chia seeds

Naturally filling and blood-sugar friendly

 Storage

Keeps in the fridge for 3 days

Perfect for meal prep jars


Final Thoughts

This instant gingerbread chia pudding is creamy, cozy, and packed with protein — all without cooking. It’s a festive-flavored breakfast you’ll want to enjoy year-round.

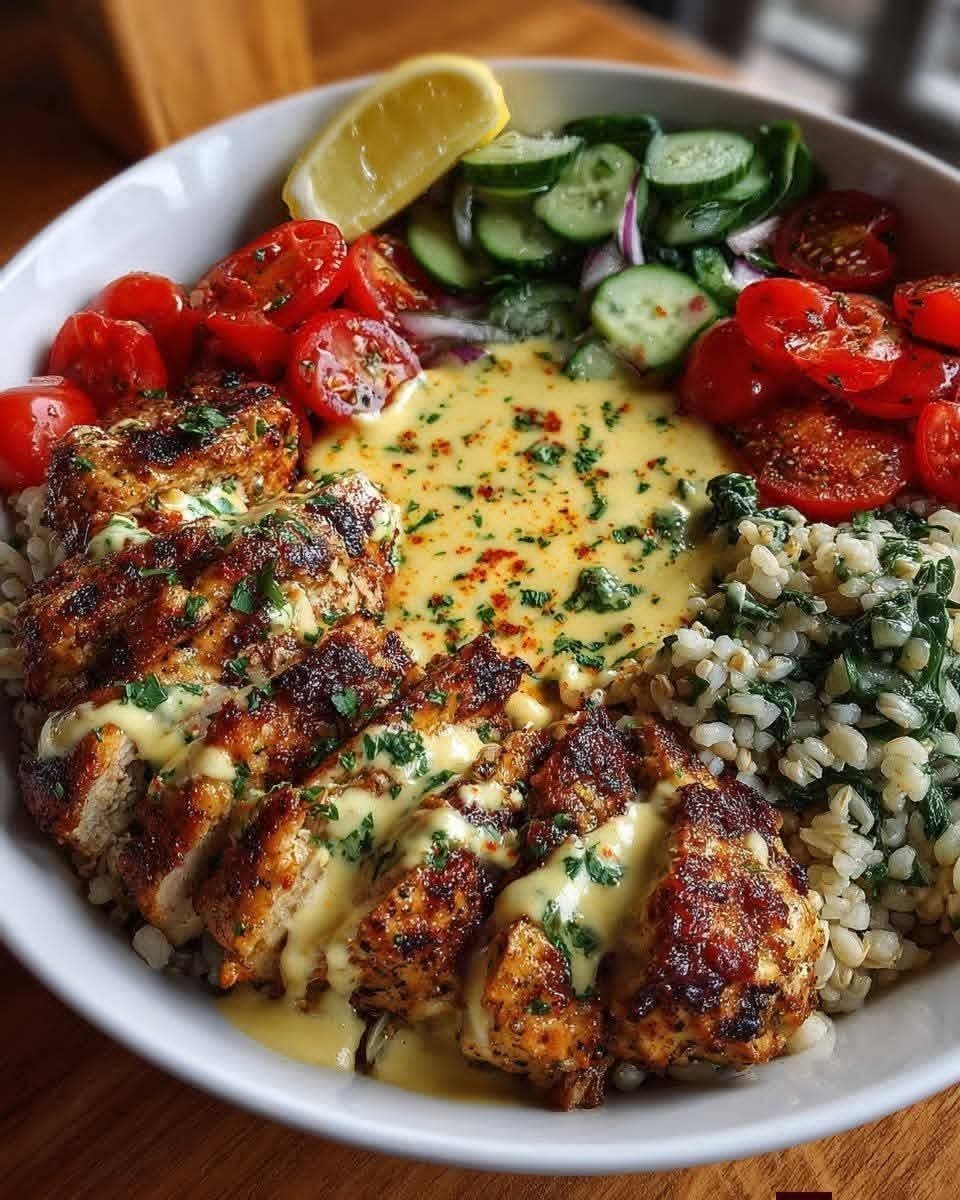
Greek Chicken Gyro Bowls with Lemon Tahini Sauce.

Greek Chicken Gyro Bowls with Lemon Tahini Sauce.

Ingredients

Greek Chicken

1½ lb (680 g) boneless skinless chicken thighs or breasts

2 tbsp extra-virgin olive oil

2 tbsp lemon juice

3 cloves garlic, minced

2 tsp dried oregano

1 tsp paprika

1 tsp cumin

½ tsp turmeric (anti-inflammatory powerhouse)

½ tsp black pepper

¾ tsp sea salt


Lemon Tahini Sauce

½ cup tahini

¼ cup fresh lemon juice

1 clove garlic, grated

¼–⅓ cup warm water (to thin)

½ tsp ground turmeric

Sea salt to taste


Bowls & Toppings

2 cups cooked farro, barley, or brown rice

1 cup cherry tomatoes, halved

1 cup cucumber, sliced

¼ cup thinly sliced red onion

1 cup baby spinach or kale (lightly sautéed optional..

Must express something to keep getting my recipes…. Thank you.

full recipe in comment..

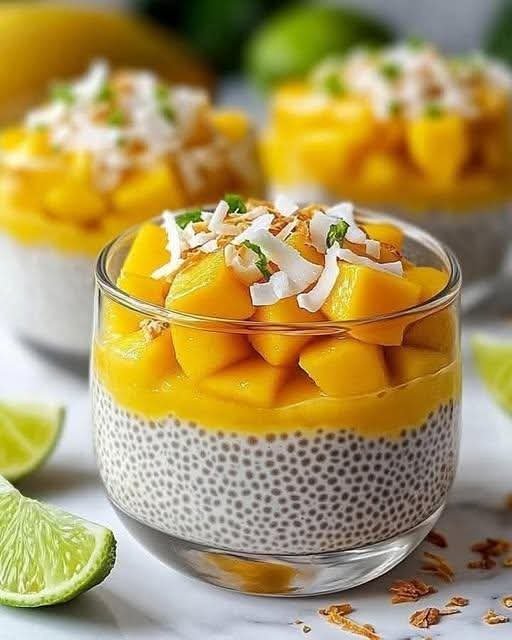
Mango Coconut Chia Pudding


Mango Coconut Chia Pudding

Prep time: 10 mins | Chill time: 4+ hours | Servings: 2


Ingredients

Layer Ingredients

Chia Base 1/4 cup chia seeds, 1 cup coconut milk (canned or carton), 1 tbsp maple syrup or honey, 1/2 tsp vanilla extract

Mango Puree 1 ripe mango (peeled and pitted), 1 tsp lime juice

Toppings Diced mango, toasted coconut flakes, fresh mint or lime zest

Instructions

Prepare the Pudding: In a jar or bowl, whisk together the chia seeds, coconut milk, sweetener, and vanilla. Stir well to ensure there are no clumps.


The First Set: Let it sit for 5–10 minutes, then give it one more stir. This prevents the seeds from sinking to the bottom. Cover and refrigerate for at least 4 hours (overnight is best).


Make the Puree: Blend half of your mango chunks with a squeeze of lime juice until smooth. Keep the other half diced for the top.


Assemble: Once the pudding is thick, spoon it into glasses. Pour the mango puree over the pudding, then pile on the diced mango.


Garnish: Finish with toasted coconut flakes and a tiny bit of lime zest or mint for that professional look.


Pro Tips for Success

Milk Choice: Use canned coconut milk if you want a very rich, dessert-like texture, or coconut milk from a carton for a lighter, everyday breakfast version.


Texture: If the pudding is too thick after chilling, stir in an extra splash of milk.


Layering: To get those clean lines like in the photo, use a spoon to gently place the mango puree over the set pudding rather than pouring it quickly.

Creamy Banana Coffee Smoothie (No Ice Cream)

Creamy Banana Coffee Smoothie (No Ice Cream)

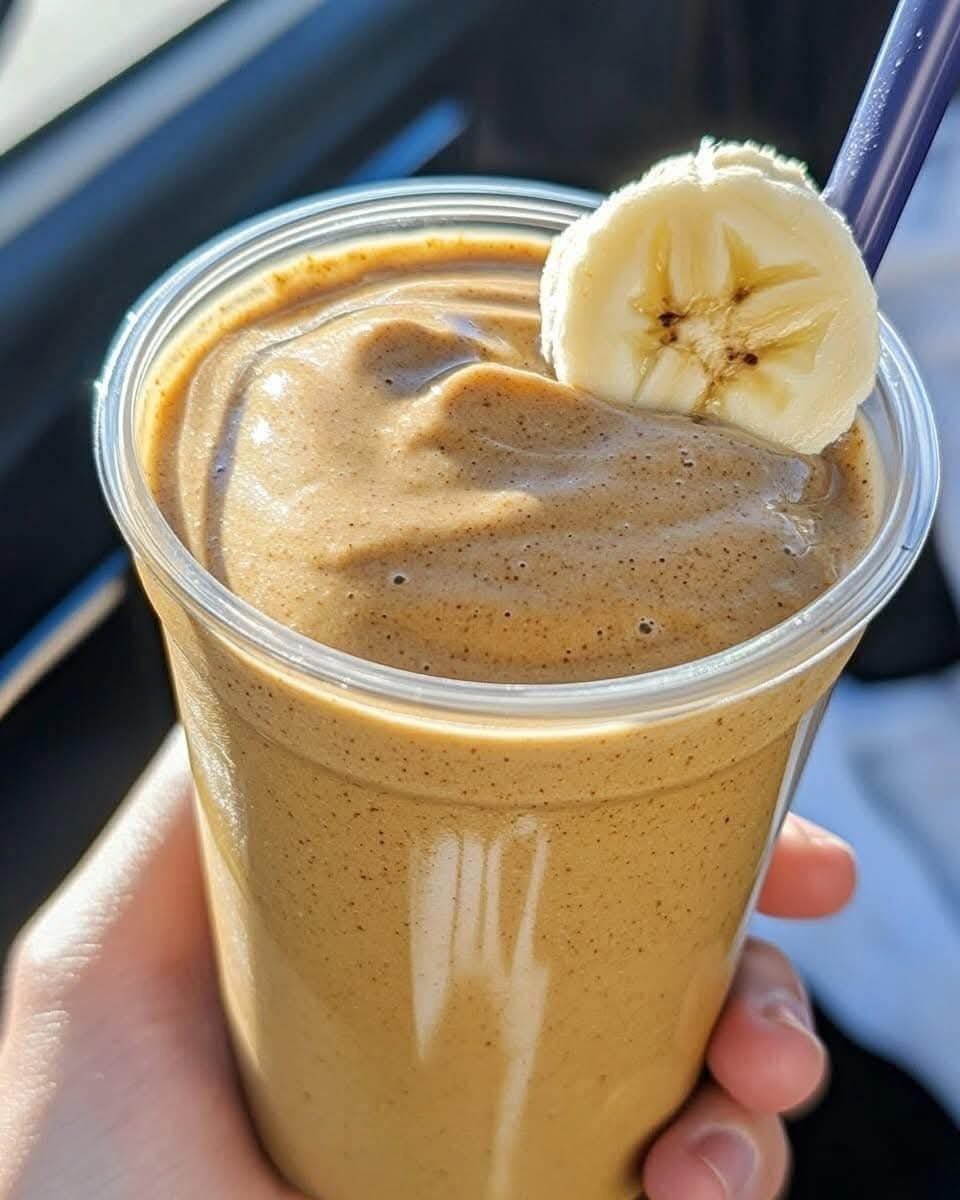
This rich and creamy banana ☕ smoothie is perfect for mornings, afternoon refreshment, or anytime you want something smooth, naturally sweet, and comforting. It has a thick texture, a beautiful light coffee color, and a naturally satisfying taste made from simple, wholesome ingredients. The smoothie looks elegant when topped with a banana slice and served cold, just like the image.


Ingredients (Serves 1–2)

1 ripe banana (fresh or frozen)


1 cup chilled milk (dairy or plant-based such as almond or oat milk)


1 tablespoon peanut butter or almond butter


1 teaspoon instant coffee or brewed coffee (cooled)


1 tablespoon honey or maple syrup (adjust to taste)


¼ teaspoon cinnamon powder


½ teaspoon vanilla extract


3–4 ice cubes (optional, for extra thickness)


Optional Additions

1 tablespoon oats for added body


1 teaspoon cocoa powder for a mocha-style flavor


A pinch of nutmeg for warmth


A scoop of plain yogurt for extra creaminess


Preparation Steps

Prepare the banana

Peel the banana and slice it into chunks. If you prefer a thicker smoothie, freeze the banana slices for at least one hour before blending.


Add liquids first

Pour the milk into the blender jar. This helps the blades move smoothly and creates a creamy base.


Add flavor ingredients

Add the coffee, nut butter, honey, vanilla extract, and cinnamon. These ingredients give the smoothie its rich aroma and balanced sweetness.


Add the banana

Place the banana pieces into the blender. If using oats or yogurt, add them at this stage.


Blend until smooth

Blend on high speed for 30–60 seconds until the mixture becomes thick, silky, and completely smooth. If needed, stop and scrape down the sides.


Adjust consistency

If the smoothie is too thick, add a splash of milk. If too thin, add a few ice cubes and blend again.


Serve immediately

Pour into a chilled glass. Garnish with a banana slice on the rim for a beautiful presentation.


Serving Tips

Serve with a reusable straw for easy sipping


Enjoy fresh for best flavor and texture


Pair with toast, oats, or fruit for a complete start to the day


Storage

This smoothie is best enjoyed fresh. If needed, it can be stored in a covered container in the refrigerator for up to 12 hours. Shake well before drinking.


If you want this recipe without coffee, extra thick, or made only with water, tell me and I’ll adjust it for you 😊