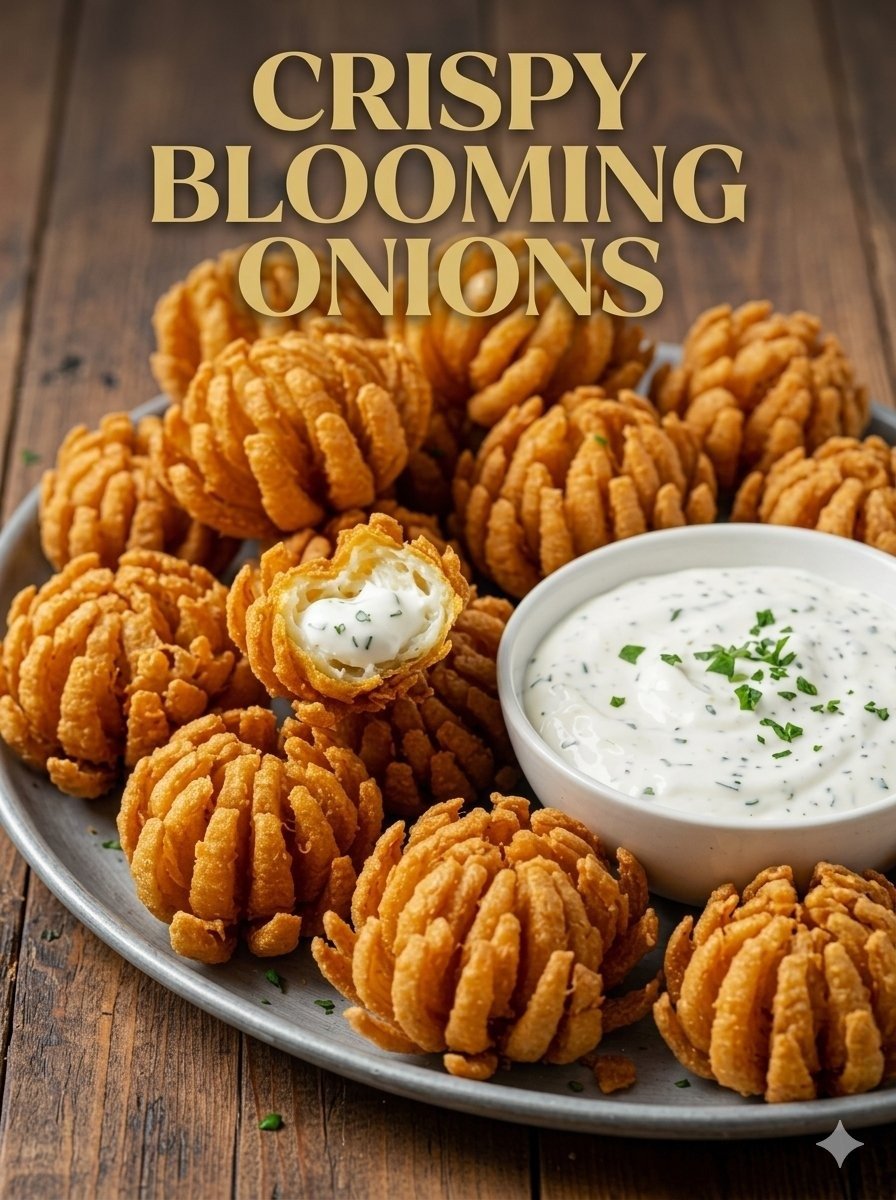
Crispy Blooming Onions with Herb Yogurt Dip
These Crispy Blooming Onions turn small pearl or sweet onions into an irresistible appetizer with delicate onion petals, a crunchy seasoned coating, and a creamy homemade herb yogurt dip. The onions are carefully cut so they open into a beautiful blooming shape, then coated in a flavorful mixture of flour, cornstarch, spices, egg, and milk before being fried until golden and crisp. Served with a cool lemon-herb yogurt sauce, they make a fun appetizer, snack, or party food that looks impressive but is surprisingly simple to prepare at home.
Prep Time: 25 minutes
Soaking Time: 15 minutes
Cook Time: 10 to 15 minutes
Total Time: 50 to 55 minutes
Servings: 4 to 6
Ingredients
Main Ingredients
12 to 16 pearl onions or small sweet onions, peeled with roots left intact
Vegetable oil, enough for deep frying
The Batter & Crispy Dredge
1½ cups all-purpose flour
¼ cup cornstarch
2 large eggs
⅓ cup milk or buttermilk
Seasonings
1 teaspoon paprika
1 teaspoon garlic powder
1 teaspoon onion powder
½ teaspoon cayenne pepper, optional
Salt, to taste
Black pepper, to taste
Herb Yogurt Dip
1 cup Greek yogurt or sour cream
2 tablespoons mayonnaise, optional
1 tablespoon fresh lemon juice
1 garlic clove, finely minced
2 tablespoons fresh herbs, finely chopped, such as chives, parsley, or dill
Salt, to taste
Black pepper, to taste
Instructions
Begin by preparing the onions. Carefully peel each onion while keeping the root end intact. The root is important because it holds the layers together while you cut the onion.
Place one onion on a cutting board with the root end facing upward. Using a sharp knife, make several evenly spaced cuts from the top toward the root, stopping about ½ inch before reaching the root. Do not cut all the way through. Rotate the onion and continue making cuts until the onion has several sections that will open into petals.
Repeat with the remaining onions. Work slowly and carefully because small onions can be difficult to cut evenly.
Once all the onions are cut, gently separate the layers with your fingers without breaking them. Place the prepared onions in a bowl of ice water for about 15 minutes. This helps encourage the petals to open and can make the blooming shape easier to achieve.
While the onions soak, prepare the seasoned flour mixture. In a shallow bowl, combine the all-purpose flour, cornstarch, paprika, garlic powder, onion powder, cayenne pepper if using, salt, and black pepper. Mix thoroughly so the seasonings are evenly distributed throughout the flour.
In a separate bowl, whisk together the eggs and milk or buttermilk until smooth.
Remove the onions from the ice water and drain them thoroughly. Pat them gently with paper towels to remove as much surface moisture as possible.
Take one onion and carefully spread the petals apart. Dip it into the seasoned flour mixture, making sure the flour reaches between the petals. Gently shake off excess flour.
Dip the floured onion into the egg mixture, allowing the liquid to coat the petals. Lift it carefully and let excess egg drip back into the bowl.
Return the onion to the seasoned flour mixture for a second coating. Gently press the flour mixture around the petals so you get a thick, crispy coating. Repeat with the remaining onions.
Heat vegetable oil in a deep, heavy-bottomed pot to approximately 350°F (175°C). Use enough oil so the onions can be submerged without overcrowding the pot.
Before frying, carefully check that the onions are dry and well coated. Fry the onions in batches rather than adding too many at once. Overcrowding lowers the oil temperature and can result in greasy onions.
Carefully lower the onions into the hot oil. Fry for approximately 2 to 4 minutes per side, depending on their size, turning gently when necessary. Cook until the coating is deeply golden, crisp, and the onion petals are tender.
Use a slotted spoon or spider strainer to remove the onions from the oil. Allow excess oil to drain, then transfer them to a wire rack or paper towel-lined plate.
While the onions are frying, prepare the herb yogurt dip. Add Greek yogurt, mayonnaise if using, lemon juice, minced garlic, chopped fresh herbs, salt, and black pepper to a small bowl. Stir until smooth and well combined.
Taste the dip and adjust the lemon juice, salt, pepper, or herbs according to your preference.
Serve the crispy blooming onions immediately while they are hot and crunchy, with the chilled herb yogurt dip on the side.
Tips
Choose small onions that are firm and similar in size. Pearl onions and small sweet onions work particularly well because their layers naturally separate into attractive petals.
Keeping the root end intact is one of the most important steps. If the root is completely removed, the onion may fall apart when you cut or fry it.
Use a very sharp knife when cutting the petals. A dull knife can crush the onion and make it harder to create clean, even sections.
Do not cut all the way through the root. Leaving approximately ½ inch uncut gives the onion enough structure to stay together.
The ice-water soak helps the petals open. Do not skip this step if you want a more pronounced blooming appearance.
Dry the onions thoroughly after soaking. Water and hot oil can cause dangerous splattering, while excess moisture can also prevent the coating from becoming properly crisp.
Cornstarch is especially useful for creating a lighter, crunchier exterior. Combining it with flour gives the coating a crisp texture while still providing enough structure to cling to the onion petals.
For an extra-crispy coating, make sure the seasoned flour reaches into the spaces between the petals during both dredging stages.
Maintain the frying oil around 350°F (175°C). If the temperature is too low, the onions can absorb excess oil. If it is too high, the coating may brown before the onion becomes tender.
Use a thermometer whenever possible to monitor the oil temperature accurately.
Do not overcrowd the pot. Frying only a few onions at a time helps maintain the oil temperature and produces a more consistent golden crust.
A wire rack is better than placing the fried onions directly on paper towels because air can circulate underneath, helping the bottoms stay crisp.
Serve the onions immediately. Like most fried foods, they are at their best when freshly cooked.
Variations
Spicy Blooming Onions
Increase the cayenne pepper or add crushed red pepper flakes to the seasoned flour. You can also add a little hot sauce to the egg mixture for extra heat.
Smoky Version
Replace regular paprika with smoked paprika. A small amount of ground cumin can also add a warm, smoky flavor.
Parmesan Herb Coating
Add ¼ cup finely grated Parmesan cheese and a tablespoon of dried Italian herbs to the flour mixture. The cheese adds savory flavor and creates an even richer crust.
Buttermilk Version
Use buttermilk instead of regular milk in the egg mixture. The slight tang works beautifully with the sweet onions and adds extra flavor to the coating.
Garlic Herb Dip
For a stronger garlic flavor, add another minced garlic clove to the yogurt sauce. Fresh dill and parsley create a particularly fresh combination.
Lighter Oven-Baked Version
Instead of deep frying, arrange the coated onions on a greased baking sheet or rack and spray lightly with oil. Bake at 425°F (220°C) until golden and crisp, turning carefully halfway through. The texture will be different from deep-fried onions but still delicious.
Air Fryer Version
Place the coated onions in a lightly greased air fryer basket without overcrowding. Spray the coating lightly with oil and air fry at approximately 375°F (190°C) until golden and crisp, turning carefully if needed.
Q&A
Can I use regular onions instead of pearl onions?
Yes. Small sweet onions work especially well, but smaller regular onions can also be used. Choose onions that are firm and similar in size for even cooking.
Why do I need to leave the root intact?
The root keeps the onion layers connected. Without it, the petals can separate completely during cutting, coating, and frying.
Can I prepare the onions ahead of time?
Yes. You can cut and soak the onions several hours ahead. Drain and dry them thoroughly, then refrigerate them until you are ready to coat and fry.
Why is my coating falling off?
The onions may be too wet. Make sure they are thoroughly dried after soaking. Also, press the seasoned flour gently onto the petals during the second coating.
Can I make the blooming onions without eggs?
Yes. You can experiment with a plant-based milk and flour slurry, although the coating may have a slightly different texture and may not adhere exactly like the egg-based version.
Can I make these in an air fryer?
Yes. Air frying is a convenient alternative to deep frying. Lightly spray the coated onions with oil and cook until golden and crisp, turning carefully if needed.
How do I keep the onions crispy after frying?
Place them on a wire rack immediately after frying instead of stacking them. Serve them as soon as possible for the best texture.
What can I serve with blooming onions?
They pair beautifully with the herb yogurt dip, ranch dressing, spicy mayo, garlic aioli, or another creamy dipping sauce.
Nutrition
Approximate nutrition per serving, based on 6 servings:
Calories: 390
Protein: 10 g
Carbohydrates: 38 g
Fat: 22 g
Fiber: 3 g
Sugar: 7 g
Sodium: 520 mg
Nutrition values are estimates and can vary depending on the amount of oil absorbed during frying, the exact ingredients used, and serving size.
Conclusion
These Crispy Blooming Onions are a fun way to transform simple onions into an impressive appetizer. Their golden seasoned coating and tender, sweet centers are even better when paired with the cool, tangy herb yogurt dip. Serve them fresh for parties, family gatherings, game nights, or whenever you want a crunchy homemade snack with plenty of flavor.
#CrispyBloomingOnions #EasyAppetizer #PartyFood #HomemadeSnacks #YogurtDip