Chicken: 1 lb (500g) chicken breast or tenderloins, sliced into strips.
The “Binder”: 2–3 egg yolks (as shown in your photo).
Seasonings: 1 tsp salt, ½ tsp black pepper, 1 tsp garlic powder, and 1 tsp paprika.
Breading: 1 cup Panko breadcrumbs (for extra crunch) or regular breadcrumbs.
Cooking: Vegetable oil for frying.
Step-by-Step Instructions
Marinate the Chicken: Place your chicken strips in a large glass bowl. Add the egg yolks and your seasonings (salt, pepper, garlic powder, and paprika). Mix thoroughly until every piece of chicken is well-coated. Let it sit for 10–15 minutes to allow the flavors to sink in.
Bread the Chicken: Place your breadcrumbs in a shallow dish. Take one strip of chicken at a time and press it firmly into the breadcrumbs, ensuring it is covered on all sides. Shake off any excess.
Heat the Oil: Fill a large skillet with about an inch of vegetable oil. Heat it over medium-high heat. To check if it’s ready, drop a breadcrumb in; if it sizzles immediately, you’re ready to fry.
Fry until Golden: Carefully place the chicken strips in the hot oil. Do not overcrowd the pan. Fry for about 3–4 minutes per side until they reach a deep golden-brown color and the chicken is cooked through.
Drain and Serve: Remove the chicken and place them on a plate lined with paper towels to soak up any extra oil.
Pro Tips for Success
Extra Flavor: Add a tablespoon of Dijon mustard or a splash of hot sauce to the egg yolks before mixing.
Air Fryer Version: If you prefer not to deep fry, spray the breaded tenders with a little oil and air fry at 400°F (200°C) for about 10–12 minutes, flipping halfway through.
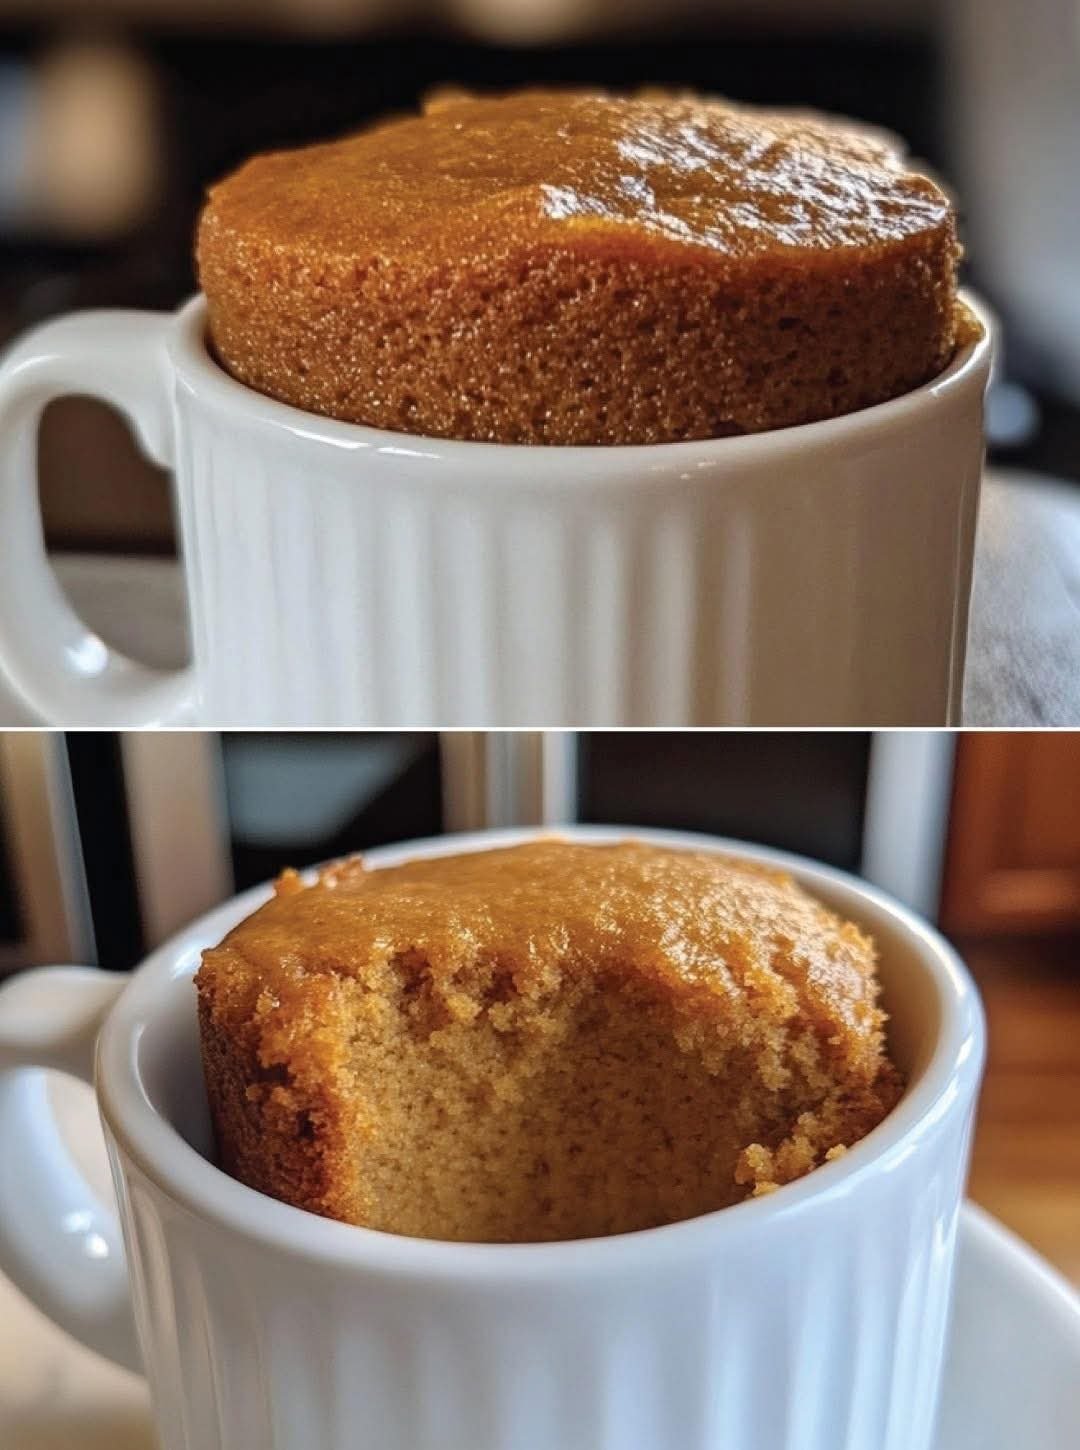
When that fall craving for pumpkin spice hits, you don’t have to head to the bakery and spend a day’s worth of points on a single muffin. This 2-Minute Pumpkin Spice Mug Cake is thePumpkin Spice Mug Cake is the perfect solution for Weight Watchers members who need a quick, sweet fix that won’t derail their progress. It is warm, comforting, and perfectly portioned to keep you on track.
This recipe is a staple for clean eating because it uses wholesome pumpkin purée and oat flour to provide a boost of fiber and Vitamin A. By utilizing a mix of a whole egg and liquid egg whites, we keep the texture rich and cake-like while significantly lowering the points and fat content. It’s a macro-friendly dessert that feels like a warm hug in a mug.
Whether you need a quick breakfast on a chilly morning or a late-night snack that fits your points, this mug cake delivers. It is a healthy recipe that requires no oven, no messy pans, and just a few minutes of your time.
Look at the Recipe
Moist & Tender Crumb: Thanks to the pumpkin purée, this cake stays incredibly soft without any added oil or butter.
Warm Harvest Spices: The aromatic blend of cinnamon and pumpkin spice provides that classic “autumn in a cup” flavor.
WW-Friendly Volume: A generous serving size that satisfies your hunger for very few points.
Ingredients Needed
90g Pumpkin Purée (1/3 cup): Use 100% pure pumpkin, not pumpkin pie filling.
1 Whole Egg: For structure and richness.
2 tbsp Liquid Egg Whites: Adds volume and protein without extra fat.
4 tbsp Oat Flour: (Or your favorite WW-friendly flour blend).
1 tbsp Erythritol: (Or 1 packet of Stevia) for calorie-free sweetness.
1/4 tsp Baking Powder: To give our mug cake the perfect rise.
1/4 tsp Vanilla Extract: To enhance the sweetness.
Pinch of Pumpkin Spice: Or cinnamon for that cozy flavor profile.
How to Make Our Pumpkin Mug Cake
Prep the Batter: Place a small mixing bowl on your counter. Add the pumpkin purée, whole egg, egg whites, flour, sweetener, vanilla, and baking powder.
Whisk Until Smooth:Mix well using a fork or whisk until the batter is completely smooth and no flour clumps remain.
Prepare the Mugs: Lightly spray two microwave-safe mugs with non-stick cooking spray if you plan on popping the cakes out to serve.
Divide and Portion:Pour the batter evenly between the two mugs.
Microwave Magic:Cook on high for 90–100 seconds. The tops should look set but still slightly springy to the touch.
Rest and Serve:Let the cakes rest for 1 minute before eating. This allows the steam to distribute, ensuring a moist texture.
Storage & Serving Suggestions
Storing: These are best enjoyed fresh, but you can store a cooked mug cake in the fridge for 24 hours. Just cover the top with plastic wrap.
Reheating: If eating cold from the fridge, microwave for 10–15 seconds to restore that “fresh-baked” warmth.
Serving Pairings: Top with a dollop of non-fat Greek yogurt or a swirl of sugar-free whipped topping. For a decadent twist, drizzle with 1 tsp of sugar-free maple syrup.
Tips & FAQs
How many WW points is this pumpkin mug cake?
Depending on your specific flour and sweetener, this recipe usually ranges between 2–4 WW points per mug. Using oat flour is often the most point-friendly option!
Can I add chocolate chips?
Yes! Adding 1 tsp of sugar-free mini chocolate chips is a great way to add a “treat” feel for a very small point increase.Why is my mug cake rubbery?
Overcooking is the main culprit. Start with 90 seconds; every microwave power varies. If it’s still wet, add 10-second increments.
Can I bake this in the oven?If you prefer the oven, bake at $350°F$ ($175°C$) in oven-safe ramekins for 12–15 minutes, or until a toothpick comes out clean.
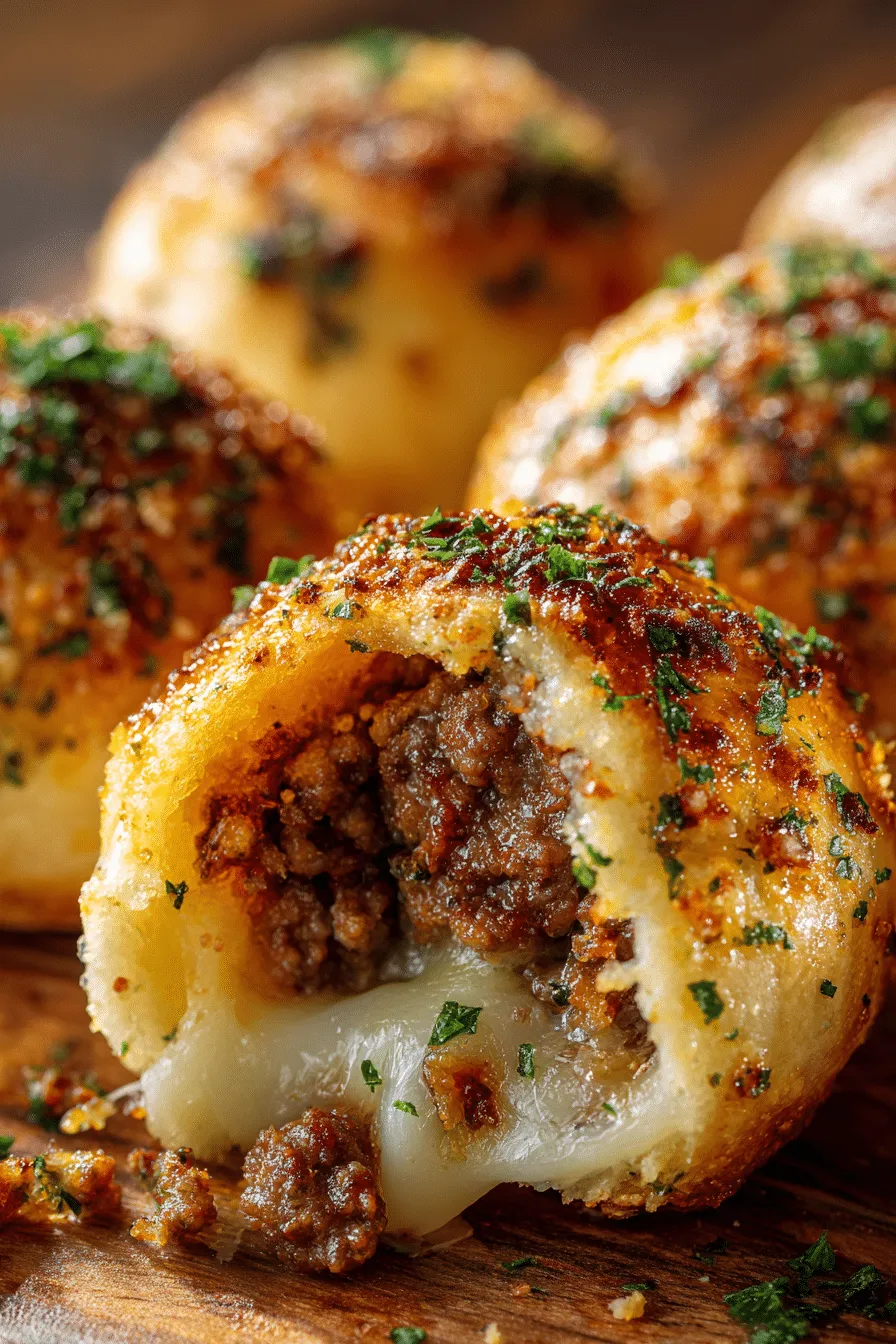
These handheld pockets feature seasoned ground beef and melty cheese tucked inside soft biscuit dough, finished with a savory garlic-Parmesan butter.
Prep time: 15 minutes
Cook time: 25 minutes
Servings: 6-8 (Makes 8 large bombs)
Ingredients
For the Filling:
1 lb (450g) ground beef (lean 85-90% recommended)
1 tbsp olive oil
1 small onion, finely diced
2 cloves garlic, minced
1 tsp Worcestershire sauce
1 tsp salt
½ tsp black pepper
1 cup shredded cheddar cheese (or mozzarella/Colby Jack mix)
For the Dough & Topping:
1 can (16 oz) refrigerated biscuit dough (8 count, like Pillsbury Grands)
¼ cup unsalted butter, melted
2 tbsp grated Parmesan cheese
1 tsp garlic powder
1 tsp dried parsley (optional garnish)
Instructions
1. Prepare the Beef Filling
Heat the olive oil in a skillet over medium heat.
Add the diced onion and sauté until softened (about 3 minutes). Stir in the minced garlic and cook for another 30 seconds until fragrant.
Add the ground beef, salt, pepper, and Worcestershire sauce. Cook until the beef is fully browned, breaking it up with a spatula as it cooks.
Drain any excess grease from the pan.
Remove from heat and stir in the shredded cheese until it begins to melt and bind the beef together. Let the mixture cool slightly so it doesn’t tear the dough.
2. Assemble the Bombs
Preheat your oven to 375°F (190°C) and line a large baking sheet with parchment paper.
Take each biscuit and flatten it with your hands or a rolling pin into a circle roughly 4–5 inches wide.
Place about 2 tablespoons of the beef and cheese mixture into the center of each dough circle.
Gather the edges of the dough over the filling and pinch tightly to seal. Roll it gently in your hands to form a smooth ball.
Place the balls seam-side down on the prepared baking sheet.
3. Add the Topping & Bake
In a small bowl, whisk together the melted butter, grated Parmesan, garlic powder, and parsley.
Brush the mixture generously over the top of each dough ball.
Bake for 15–18 minutes, or until the bombs are puffed and a deep golden brown.
(Optional) Brush with any remaining garlic butter immediately after taking them out of the oven for extra shine and flavor.
4. Serve
Serve warm while the cheese is still melty. These pair perfectly with ranch dressing, ketchup, or even a spicy marinara for dipping.
Pro-Tips for Success
Avoid the Leak: To prevent the “bombs” from bursting, ensure the beef mixture isn’t too hot when you assemble them, and make sure your pinch-seal is very firm.
Variety: Try adding a small slice of pickled jalapeño or a bit of crispy bacon inside the bomb for an extra flavor kick.
Storage: These keep well in the fridge for up to 3 days. Reheat them in an air fryer or oven to keep the biscuit exterior from getting soggy.
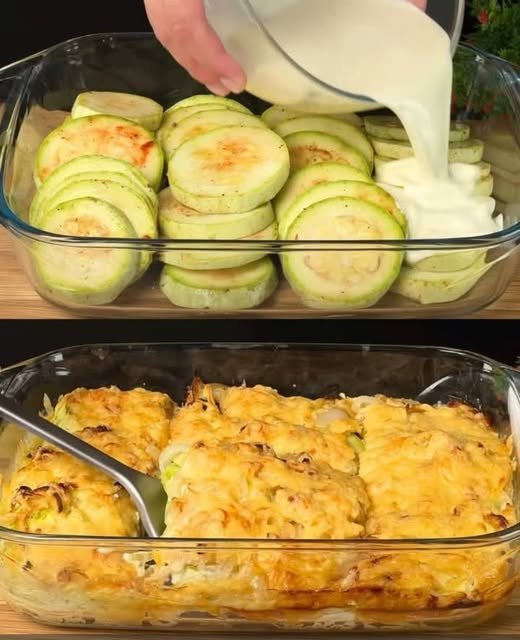
A creamy, golden-brown vegetable bake featuring tender zucchini and a savory yogurt-egg glaze.
Prep time: 15 minutes
Cook time: 30–35 minutes
Servings: 4 side portions
Ingredients
2 zucchini, sliced into rounds
2 onions, thinly sliced into rounds
2 cloves garlic, finely chopped
2 eggs
150 g yogurt (plain or Greek)
150 g cheese, grated (such as Mozzarella or Cheddar)
Seasonings: Salt, black pepper, paprika, and vegetable seasoning to taste
Oil for greasing and cooking
Instructions
1. Prepare the Vegetables
Preheat your oven to 390°F (200°C). Lightly grease a glass baking dish with oil. Season the zucchini rounds with salt, black pepper, paprika, and vegetable seasoning.
2. Layer the Dish
Arrange the seasoned zucchini rounds and sliced onions in rows in the baking dish, overlapping them slightly to fill the pan. Sprinkle the chopped garlic evenly over the top.
3. Mix the Creamy Glaze
In a small bowl, whisk together the 2 eggs and 150 g of yogurt until smooth. Season this mixture with a pinch of salt and pepper if desired.
4. Top and Bake
Pour the yogurt and egg mixture evenly over the rows of vegetables, ensuring they are well-coated. Sprinkle the 150 g of grated cheese generously over the entire surface.
5. Bake to Perfection
Place the dish in the oven and bake for 30–35 minutes, or until the zucchini is tender and the cheese topping is bubbly and deep golden brown.
6. Serve
Let the dish rest for 5 minutes before serving to allow the creamy sauce to set.
Recipe Variations
Extra Protein: You can tuck slices of cooked ham or turkey between the zucchini layers.
Herb Freshness: Top with fresh chopped parsley or dill after baking for a burst of color and flavor.
Crispy, garlic-buttered edges with a soft, cheesy center—made easily in the air fryer.
Prep time: 10 minutes
Cook time: 45 minutes
Total time: 55 minutes
Servings: 2 side portions
Ingredients
2 large russet potatoes (scrubbed and cleaned)
4 tbsp unsalted butter, melted
1 tbsp garlic paste (or finely minced garlic)
3 to 5 slices Colby Jack cheese (cut into small squares/fourths)
Kosher salt and black pepper, to taste
Optional Toppings:
Sour cream
Fresh chives, chopped
Bacon bits
Instructions
1. Prep the Potatoes
To ensure the potato sits still, cut a thin horizontal slice off the bottom of each potato to create a flat base. Do not discard these slices! Place the potato flat-side down between two chopsticks. Use a sharp knife to cut 1/4-inch slices across the potato. The chopsticks will act as a guard, preventing you from cutting all the way through the bottom.
2. The Air Fryer Setup
Place the small potato slices you cut from the bottoms into the air fryer basket. Place the large sliced potatoes directly on top of them. This creates a slight curve that helps the “Hasselback” slices fan out and open up during cooking.
3. First Garlic Butter Wash
In a small bowl, whisk together the melted butter, garlic paste, salt, and pepper. Gently pry the potato slices apart and brush about half of the garlic butter over the tops, ensuring some of it drips down into the crevices. Sprinkle with a little extra salt and pepper.
4. The Initial Roast
Set your air fryer to 370°F (188°C). Cook the potatoes for 20 minutes.
5. Second Baste
Open the air fryer and brush the remaining garlic butter over the potatoes. Continue cooking at 370°F for another 20–25 minutes. The potatoes should be tender on the inside and the edges should be golden-brown and crisp.
6. Add the Cheese
Take your cheese squares (Colby Jack melts beautifully here) and tuck them into the slices. You can put cheese in every slice for a “mega-melt” or every other slice depending on your preference. Return to the air fryer for 1–2 minutes until the cheese is bubbling and melted.
7. Garnish and Serve
Carefully remove the potatoes from the basket. Top with a dollop of sour cream and a sprinkle of fresh chives.
Success Tips
The Chopstick Trick: If you don’t have chopsticks, two wooden spoons with flat handles work just as well to stop your knife.
Potato Choice: Russets are best for this recipe because their high starch content leads to a fluffier interior and crispier skin compared to waxy potatoes.
Don’t Overcrowd: Ensure there is space between the two potatoes in the basket so the air can circulate and crisp up the sides.
Servings: 8 Total Time: 15 minutes Difficulty: Easy Calories per Serving: ~105 Macros (Per Slice): Protein 3g • Carbs 8g • Fat 7g • Fiber 1g
Intoduction
This garlic bread delivers everything we crave—crispy golden edges, a soft buttery center, and the kind of aroma that makes the whole kitchen feel warm and inviting. It’s quick, comforting, and wonderfully light compared to traditional versions.
Perfect for anyone wanting a simple, wholesome, and guilt-free recipe, this version uses clean, pantry-friendly ingredients while still delivering big garlic flavor. Whether you’re pairing it with dinner, serving it as a snack, or adding it to a weekend spread, this garlic bread fits beautifully into a lighter, more intentional approach to comfort food.
If you love easy weeknight meals, nutrient-conscious swaps, and bold, satisfying flavor, this garlic bread is your new go-to.
Look at the Recipe
Crispy edges with a soft, buttery center
Rich garlic flavor with herby, savory notes
Lightened-up ingredients for a guilt-free, cleaner comfort food experience
Ingredients Needed
Garlic Butter Spread
• 4 tbsp softened butter or light butter
• 1 tbsp olive oil
• 4–5 garlic cloves, minced
• 1 tbsp chopped parsley
• ½ tsp garlic powder
• ½ tsp dried oregano
• Salt and pepper to taste
• 2 tbsp parmesan (optional)
Bread
• 1 baguette, ciabatta, sourdough, or low-carb bread of choice
How to Make Our Garlic Bread
Preheat your oven to 400°F (200°C).
Mix together the butter, olive oil, minced garlic, parsley, garlic powder, oregano, salt, and pepper until smooth.
Slice your bread and spread the garlic mixture generously over the surface.
Sprinkle parmesan on top if you want deeper savory flavor.
Bake for 10–12 minutes until the edges turn golden and crisp.
Slice and serve warm for the best texture and flavor.
Macros & Plan Compatibility
Plan
Notes
Keto & Low-Carb
3–4g net carbs per slice using low-carb bread. Grain-free options work well.
Slimming
About 2 syns per slice using light butter and a lighter bread option.
High-Protein
6–8g protein per slice if using high-protein bread and adding parmesan.
Weight Watchers
About 2–3 SmartPoints per slice (Blue plan) using reduced-fat butter.
Mediterranean
Works well using whole-grain bread and olive oil for heart-healthy fats.
Storage & Serving Suggestions
Store:
Keep leftovers in an airtight container for up to 2 days. Reheat:
Warm in the oven at 350°F for 5–7 minutes to regain crispness. Freeze:
Freeze pre-buttered slices and bake straight from frozen. Serve With:
Soups, salads, pasta alternatives, grilled chicken, low-carb casseroles.
FAQs
1. Can I make this garlic bread without butter?
Yes. You can replace butter with olive oil to keep it lighter. Olive oil gives a crispier crust, while butter creates a richer texture.
2. How do I keep garlic bread from getting soggy?
Bake in a hotter oven, avoid excess butter/oil, and use a wire rack to allow air to circulate underneath.
3. Can I prepare garlic bread ahead of time?
Yes. Assemble the bread and refrigerate up to 24 hours before baking.
4. Does garlic bread freeze well?
Absolutely. Freeze prepared slices and bake directly from frozen at 400°F for 12–14 minutes.
5. What bread works best?
Baguette for crispness, ciabatta for chew, sourdough for depth, or keto/high-protein bread for diet-friendly versions.
6. How can I boost the flavor even more?
Use roasted garlic, stir parmesan into the spread, or add fresh herbs after baking.
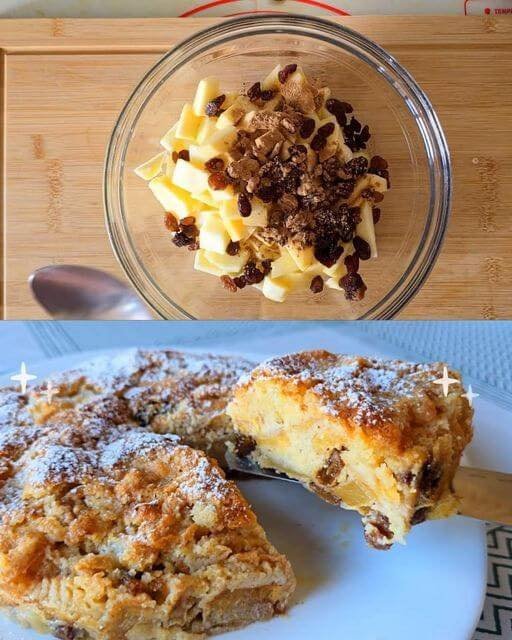
The Fruit Base: * 3 large apples (peeled and cut into small bite-sized pieces)
½ cup (75g) raisins
2 teaspoons cinnamon powder
The Dry Mix:
1 cup (130g) wheat flour
½ cup (100g) granulated sugar
1 teaspoon baking powder
The Liquid Binder:
3 large eggs
1 tablespoon extra sugar (for the eggs)
100g butter (melted and slightly cooled)
Optional Garnish: * Icing sugar for dusting
Flaked almonds (optional)
Step-by-Step Instructions
1. Prepare the Fruit
In a large mixing bowl, combine your chopped apples, raisins, and cinnamon. Toss them thoroughly until every piece of apple is coated in cinnamon. This ensures the flavor is distributed throughout the pie.
2. Prep the Baking Mold
Grease a 9-inch (23cm) springform pan or glass baking dish with butter. For easier removal, you can line the bottom with parchment paper. Spread the cinnamon-apple and raisin mixture evenly across the bottom of the pan.
3. Create the Dry Layer
In a separate medium bowl, whisk together the wheat flour, ½ cup sugar, and baking powder until well combined. The Secret Step: Sprinkle this dry flour mixture directly and evenly over the raw apples in the pan. Do not stir it in. You want a flat layer of dry ingredients sitting on top of the fruit.
4. Prepare the Liquid Layer
In another bowl, crack the 3 eggs and add the 1 tablespoon of extra sugar. Whisk vigorously (by hand or with a fork) for about 1-2 minutes until the eggs are pale and very frothy.
5. Assemble the “No-Beat” Layers
Slowly pour the frothy egg mixture over the dry flour layer in the pan.
Immediately follow by drizzling the 100g of melted butter evenly over the entire surface.
Important: Use a spoon to gently spread the liquid to any “dry spots” where you can still see white flour. The liquids will seep down through the flour and fruit during baking to create the dough.
6. Bake to Perfection
Place the pan in a preheated oven at 180°C (350°F). Bake for 35–40 minutes. The pie is done when the top is a deep golden brown and a toothpick inserted into the center comes out clean (though it will feel moist due to the apples).
7. Cool and Serve
Allow the pie to cool in the mold for at least 15 minutes. This is critical as it allows the “custard” formed by the eggs and butter to set. Dust generously with icing sugar before slicing.
A towering, diner-style classic with caramelized onions and double-melted cheese.
Prep time: 15 minutes
Cook time: 35 minutes
Servings: 4 sandwiches
Ingredients
For the Caramelized Onions:
2 large yellow onions, thinly sliced
1 tbsp olive oil
Pinch of salt
For the Patties:
1 lb ground chuck (80/20 fat ratio)
Salt and freshly cracked black pepper to taste
For the Sandwich Assembly:
8 slices thick-cut sourdough or rye bread
4 tbsp unsalted butter, softened
4 slices Swiss cheese
4 slices Gruyère or Havarti cheese
Optional “Secret Sauce” Dipping:
1/4 cup mayonnaise
1 tbsp Dijon mustard
1 tsp Worcestershire sauce
A dash of hot sauce
Instructions
1. Caramelize the Onions
Heat the olive oil in a skillet over low heat. Add the sliced onions and a pinch of salt. Cook slowly, stirring occasionally, for 20–25 minutes. You want them soft, jam-like, and deep golden brown. Remove from the pan and set aside.
2. Prep and Sear the Beef
Divide the ground beef into four equal portions. Shape them into thin oval patties slightly larger than your bread slices (to account for shrinkage). Season both sides generously with salt and pepper. Heat a cast-iron skillet over medium-high heat. Sear the patties for 3–4 minutes per side until a brown crust forms. Remove and let them rest on a plate for 2 minutes.
3. Assemble the Stack
Wipe your skillet clean. Spread the softened butter generously on one side of each bread slice. Place four slices,butter-side down, into the skillet over medium heat. Build in this order:
One slice of Swiss cheese.
One beef patty.
A large spoonful of caramelized onions.
One slice of Gruyère/Havarti.
The second slice of bread (butter-side up).
4. The Final Grill
Grill for 2–3 minutes per side. Use a spatula (or a heavy press) to gently weigh the sandwich down; this ensures the cheese acts as “glue.” Once the bread is golden-brown and the cheese is oozing, remove from heat.
5. Serve
Slice diagonally and stack the halves. If you’re going for a “high-rise” presentation, use a wooden skewer to hold the layers in place.
Pro-Tips for Success
The “Glue” Method: Placing cheese both below and above the patty is the secret to keeping the onions from falling out when you take a bite.
Bread Choice: Sourdough provides a sturdy structure that won’t get soggy, while Rye offers that traditional “patty melt” tang.
Don’t Rush the Onions: High heat will make onions bitter. Low and slow is the only way to get that natural sweetness.
Raspberry Jam: 2 tablespoons (to sweeten the berry layers)
The Creamy Layers
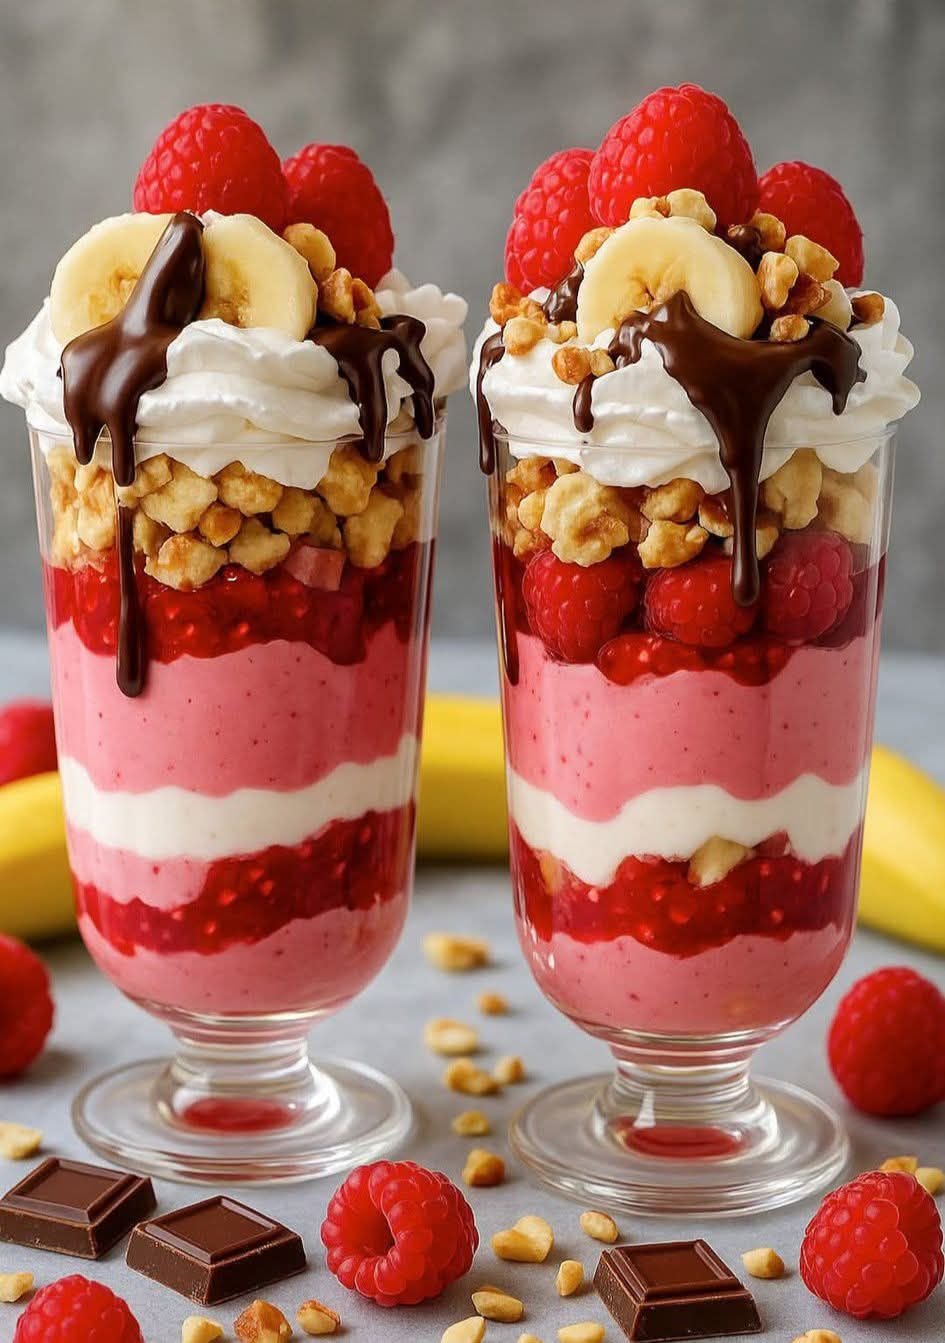
Greek Yogurt or Vanilla Pudding: 1.5 cups (you can use pink-tinted raspberry yogurt for the darker pink layers and plain vanilla/white for the center stripe)
Whipped Cream: 1 cup (heavy cream whipped with a little powdered sugar)
The Crunch & Toppings
Granola or Honey-Roasted Nuts: ½ cup (chopped walnuts or peanuts work great)
Dark Chocolate: 2 oz, melted (for the drizzle)
Extra Toppings: A few whole raspberries and banana slices for the garnish
Instructions
Prepare the Raspberry Compote: In a small bowl, lightly mash 1 cup of the raspberries with the raspberry jam. This creates that juicy, deep red layer seen in the photo. Keep the remaining whole raspberries for the middle and top.
Melt the Chocolate: Break the chocolate into pieces and melt it in 20-second intervals in the microwave, stirring until smooth. Set aside to cool slightly.
Build the Base: In two tall glasses, start with a thick layer of pink raspberry yogurt. Follow this with a spoonful of your mashed raspberry compote.
Create the Contrast: Add a thin, clean layer of white vanilla yogurt or whipped cream to create that bright center stripe.
Add Texture: Add another layer of pink yogurt, followed by a layer of whole raspberries and a generous handful of granola or chopped nuts.
The Topping: Pipe or spoon a large swirl of whipped cream onto the very top.
Final Flourish: Arrange a few banana slices and whole raspberries on top of the cream. Drip the melted chocolate over the fruit and cream so it runs down the sides. Sprinkle a few more nuts over the top.
Pro-Tips for Presentation
Clean Lines: Use a long spoon or a piping bag to drop the yogurt into the glass without smearing the sides.
Chill: Let the parfaits sit in the fridge for about 15 minutes before serving to help the layers set.
A simple, one-bowl cake that relies on the moisture of yogurt and the tartness of cherries.
Prep time: 15 mins | Cook time: 40-45 mins | Yield: 1 cake
Ingredients
The Wet Base:
3 large eggs
A pinch of salt
150 g (4/5 cup) sugar
200 g (approx. 3/4 cup) Greek yogurt or plain whole-milk yogurt
100 ml (approx. 1/2 cup) vegetable oil or melted butter
1 tsp vanilla extract
The Dry Ingredients:
250 g (approx. 2 cups) all-purpose flour
1 tbsp baking powder
The Fruit & Topping:
1.5 cups fresh or frozen pitted cherries (if using frozen, do not thaw)
Powdered sugar for dusting
Instructions
Prep: Preheat your oven to 350°F (180°C). Line a springform or rectangular baking pan with parchment paper.
Beat Eggs: In a large bowl, whisk the 3 eggs with a pinch of salt and the 150 g of sugar until the mixture is pale and slightly frothy.
Mix Liquids: Whisk in the yogurt, oil (or butter), and vanilla extract until well combined and smooth.
Fold in Dry: Sift in the flour and baking powder. Gently fold the dry ingredients into the wet mixture until just combined. Be careful not to overmix, as this keeps the cake light.
Assemble: Pour the thick batter into the prepared pan. Evenly distribute the cherries over the top, pressing some slightly into the batter.
Bake: Bake for 40 to 45 minutes, or until a toothpick inserted into the center comes out clean.
Finish: Allow the cake to cool for at least 15 minutes before removing from the pan. Dust generously with powdered sugar before serving.
Tips for a Better Cake
Room Temperature: For the best rise, ensure your eggs and yogurt are at room temperature before you start mixing.
Cherry Sinking: If you are worried about the cherries sinking to the bottom, toss them in a tablespoon of flour before adding them to the top of the batter.
Yogurt Swap: You can use flavored yogurt (like vanilla or lemon) to add an extra layer of flavor to the sponge.
This recipe focuses on maintaining the integrity of the nutrients (like choline and lutein) by not overcooking the eggs while adding healthy fats and antioxidants.
Prep time: 5 mins | Cook time: 5 mins | Yield: 1 serving
Ingredients
The Base:
2 to 3 large organic, pasture-raised eggs (higher in Vitamin D and Omega-3s)
1 tbsp grass-fed butter or avocado oil
The “Booster” Add-ins:
1/4 cup fresh spinach (for extra Vitamin K and Folate)
1 tbsp nutritional yeast (optional, for a B-vitamin and cheesy flavor boost)
A pinch of sea salt and cracked black pepper
1/4 avocado (served on the side for healthy monounsaturated fats)
Instructions
Whisk with Intention: Crack the eggs into a bowl. Whisk vigorously for about 30 seconds. This incorporates air, making them fluffier without needing to add milk or cream.
Low and Slow: Heat your skillet over medium-low heat. Add the butter. Once melted and bubbling slightly, pour in the eggs.
The Gentle Fold: Let the eggs sit for 20 seconds until the edges set. Use a silicone spatula to gently push the cooked eggs toward the center, letting the raw eggs flow to the edges.
Add Greens: When the eggs are halfway cooked (still looking wet), fold in the spinach and nutritional yeast. The residual heat will wilt the spinach perfectly without destroying its nutrients.
Finish Early: Remove the pan from the heat while the eggs still look slightly underdone. They will continue to cook on the plate (carry-over cooking), ensuring they stay “jammy” and nutrient-dense rather than rubbery.
Serve: Top with sliced avocado and a dash of black pepper.
How to Maximize the Benefits
Don’t Fear the Yolk: About 90% of an egg’s calcium, iron, and nearly all its fat-soluble vitamins (A, D, E, and K) are in the yolk. Eating only the whites means missing the brain-boosting choline.
Pair with Vitamin C: To help your body absorb the non-heme iron found in the egg and spinach, pair your breakfast with a few berries or a squeeze of lemon juice in your water.
Avoid High Heat: Cooking eggs at extremely high temperatures can oxidize the cholesterol in the yolk. Stick to medium or low heat for poaching, soft-boiling, or gentle scrambling.
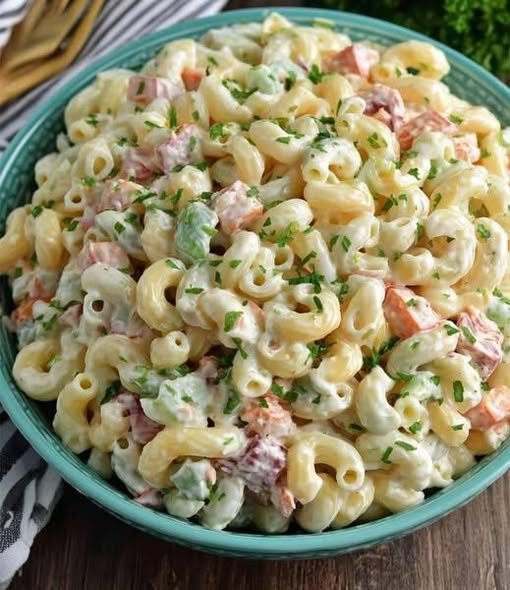
Prep time: 15 mins | Cook time: 7 mins | Total time: 22 mins (plus chilling) Yield: 6 servings | Net Carbs: ~3g per serving
Ingredients
The Base:
8 oz low-carb elbow macaroni (e.g., Great Low Carb Bread Co., Immi, or konjac-based)
The Dressing:
1 cup sugar-free mayonnaise (Avocado oil-based like Primal Kitchen is best)
2 tbsp apple cider vinegar
1 tbsp heavy cream (optional, for extra richness)
1 tbsp sugar-free Dijon mustard
1 tsp erythritol or monk fruit sweetener (optional)
1/2 tsp garlic powder
1/2 tsp onion powder
Salt and black pepper to taste
The Add-ins:
1/2 cup celery, finely chopped
1/4 cup red onion, finely chopped
1/4 cup carrots, shredded (omit or swap for jicama to further reduce carbs)
1 tbsp green onions, chopped
Optional: 1/2 tsp paprika for color
Instructions
Boil the Pasta: Bring a large pot of salted water to a boil. Cook the low-carb pasta according to package directions (usually 5–7 minutes). Do not overcook, as low-carb pasta can become mushy. Drain and immediately rinse with cold water to stop the cooking process.
Whisk the Dressing: In a large mixing bowl, combine the mayonnaise, apple cider vinegar, heavy cream, Dijon mustard, sweetener, garlic powder, and onion powder. Whisk until the mixture is smooth, creamy, and fully emulsified.
Prep the Veggies: Finely chop your celery and onions. Add them to the dressing bowl along with the shredded carrots.
Fold Together: Add the cooled, drained pasta to the dressing mixture. Using a spatula, gently fold the pasta until every piece is evenly coated. Be careful not to break the noodles.
The Chill Factor (Crucial): Cover the bowl and refrigerate for at least 1 hour. For the most authentic “island style” flavor, let it sit overnight; this allows the pasta to absorb the tang of the vinegar and the sweetness of the dressing.
Final Touch: Before serving, give it a quick stir. If it seems too dry (pasta absorbs moisture as it sits), fold in an extra tablespoon of mayo. Garnish with green onions or a dash of paprika.
Pro Tips for the Best Mac Salad
The “Double Dressing” Rule: Low-carb noodles are notorious for soaking up sauce. If you are making this a day ahead, consider making 1.5x the dressing recipe so it stays creamy until serving.
Texture Trick: If you find konjac-based pasta too “rubbery,” try a lupin-flour or almond-flour based elbow macaroni for a more traditional bite.
Plate Lunch Pairing: Serve this alongside Keto Kalua Pork or Grilled Teriyaki Chicken (using a sugar-free glaze) for a complete Hawaiian experience.
Storage: This keeps beautifully in an airtight container for up to 5 days in the fridge. Do not freeze, as the emulsion in the mayo will break and the pasta texture will degrade.
Whisk the Batter: In a large mixing bowl, whisk together the flour and the eggs. Gradually add in the milk and water, stirring constantly to combine. Add the salt and melted butter (plus sugar/vanilla if using) and whisk until the batter is completely smooth with no lumps.
Rest (Important): Let the batter sit for about 10–15 minutes. This allows the flour to fully hydrate, resulting in a much more tender crepe.
Heat the Pan: Lightly coat a non-stick frying pan or crepe pan with a tiny bit of butter or oil over medium heat.
The Pour: Pour about ¼ cup of batter into the center of the pan. Immediately tilt and rotate the pan in a circular motion so the batter coats the entire surface in a thin, even layer (just like the top-left image in your photo).
The Cook: Cook for about 1–2 minutes until the bottom is light golden and the edges start to lift. Gently flip it with a spatula and cook the other side for another 30–60 seconds.
Serve: Stack them on a plate and fold them into triangles as seen in your image.
Pro Tips for Success
Consistency: The batter should be thin, like heavy cream. If it feels too thick, whisk in an extra tablespoon of milk.
The First One: Don’t worry if the first crepe looks a bit messy! The first one is usually the “test” crepe to get the pan temperature just right.
Toppings: For a classic look, dust them with powdered sugar or drizzle with a little maple syrup.
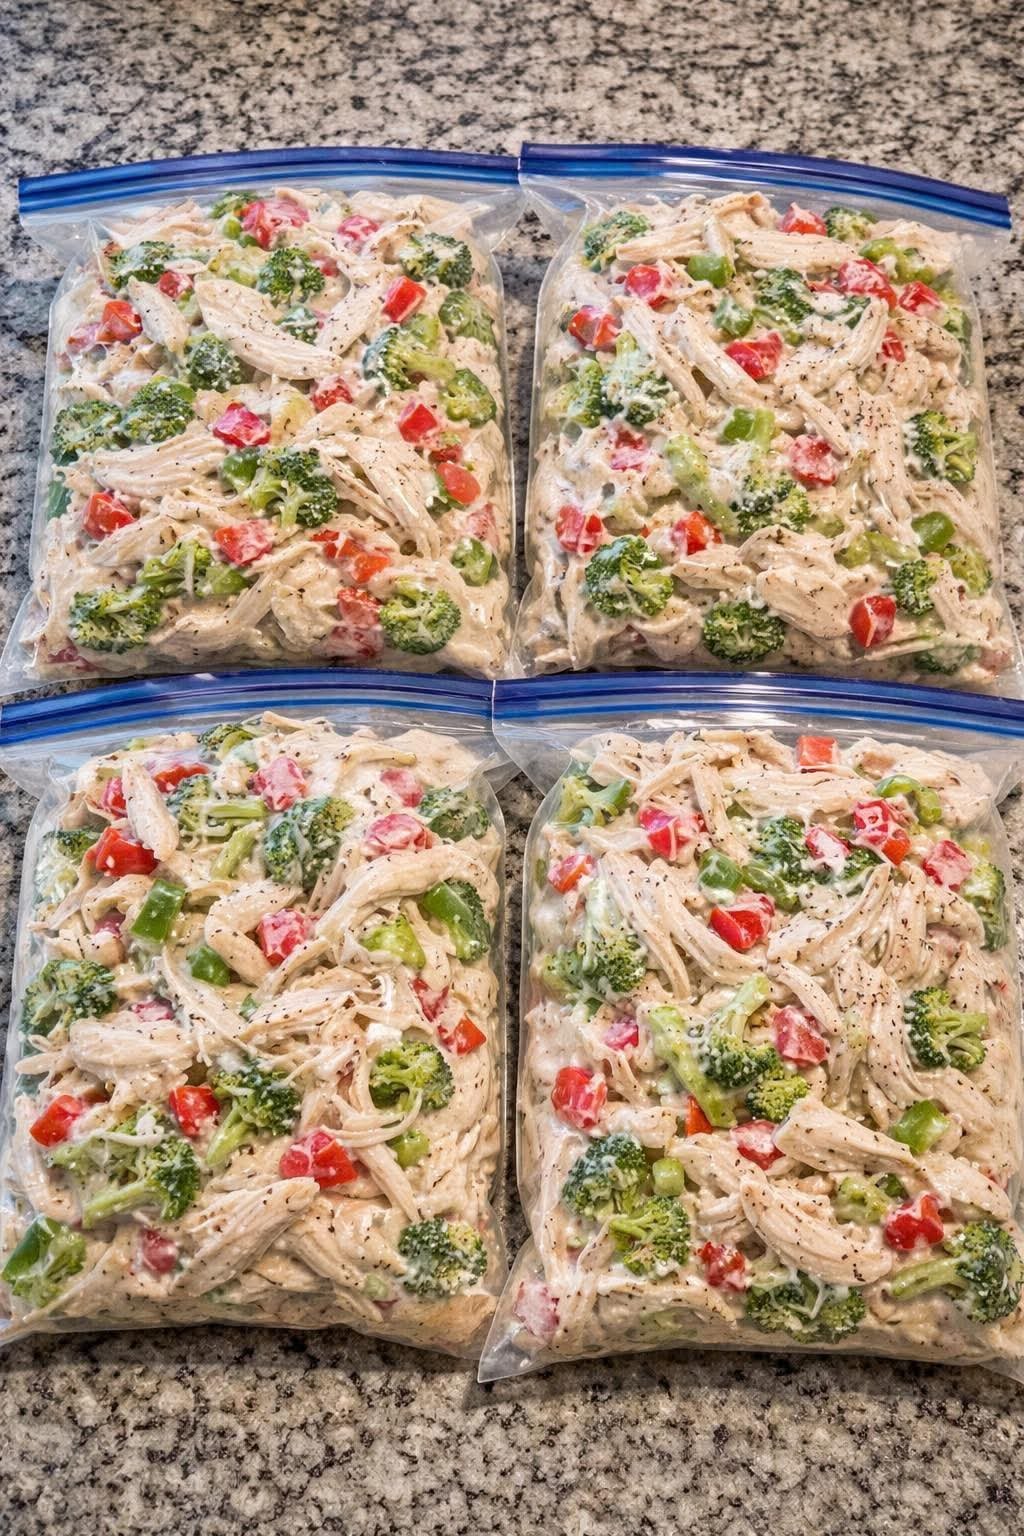
Protein: 2 lbs boneless, skinless chicken breasts (cooked and shredded).
Vegetables: * 2 large heads of broccoli (cut into small florets).
2 large red bell peppers (diced).
The Sauce:
1 cup Greek yogurt or sour cream.
1 can (10.5 oz) condensed cream of chicken soup (or a homemade white sauce).
1/2 cup grated Parmesan cheese.
1 tbsp garlic powder.
1 tsp onion powder.
Salt and black pepper to taste.
Optional: 1 tsp dried oregano or Italian seasoning.
Instructions
Prepare the Chicken: Boil or bake the chicken breasts until fully cooked. Use two forks to shred the meat into bite-sized strips. Let it cool completely before mixing.
Chop the Veggies: Wash and chop the broccoli and peppers. Ensure they are dry so the sauce doesn’t become too watery.
Mix the Sauce: In a large bowl, whisk together the Greek yogurt (or sour cream), cream of chicken soup, Parmesan cheese, and seasonings.
Combine: Add the shredded chicken, broccoli, and peppers to the bowl. Toss everything until the ingredients are evenly coated in the creamy sauce.
Bag it Up: Divide the mixture into four large gallon-sized freezer bags, as seen in your photo. Squeeze out as much air as possible before sealing.
How to Cook It Later
From Fresh/Refrigerated: Empty a bag into a large skillet. Cover and cook over medium heat for 10-12 minutes, stirring occasionally until the broccoli is tender and the sauce is bubbling.
From Frozen: Thaw in the refrigerator overnight, then follow the skillet instructions.
Serving Suggestion: This is excellent served over cooked rice, quinoa, or your favorite pasta.
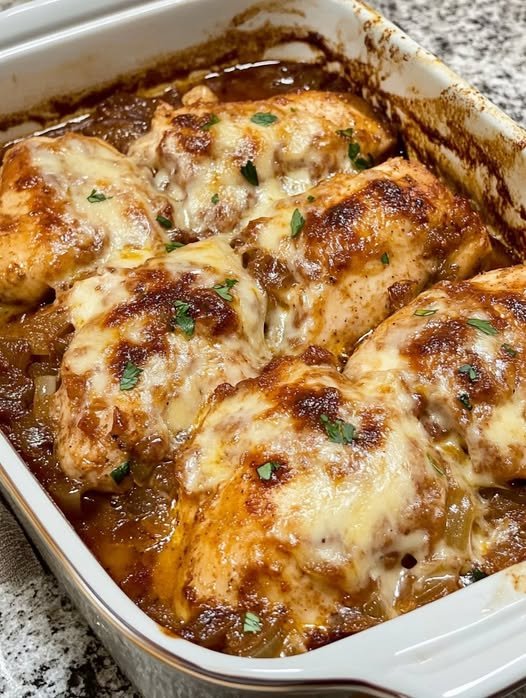
This French Onion Chicken Bake is the perfect marriage of two comfort food classics. Based on the details provided, here is the full, comprehensive recipe along with the best tips for perfecting those onions and making the dish work for your lifestyle.
French Onion Chicken Bake
Prep time: 10 mins | Cook time: 50 mins | Total time: 1 hour Yield: 4 servings
Ingredients
The Onions:
4 large onions, peeled and sliced (Sweet onions like Vidalia are preferred)
4 tbsp unsalted butter
4 cloves garlic, finely chopped
1 tsp fresh thyme
2/3 cup low-sodium beef broth
2 tbsp aged balsamic vinegar
The Chicken & Cheese:
4 boneless, skinless chicken breasts
1/2 tsp sea salt (adjust to taste)
1/2 tsp black pepper
1 cup shredded mozzarella cheese
1/2 cup grated Parmesan cheese
Instructions
Preheat and Prepare: Preheat your oven to 400°F (200°C). Lightly grease a 9×13 inch baking dish with cooking spray.
Sauté the Onions: In a large skillet, melt the butter over medium-high heat. Add the sliced onions and sauté for about 5 minutes, stirring occasionally until they soften.
Infuse Flavors: Reduce the heat to medium. Stir in the chopped garlic, black pepper, and fresh thyme. Cook for 1 more minute until fragrant.
Create the Jam: Pour in the beef broth and balsamic vinegar. Continue to simmer on medium heat for about 10 minutes. The liquid will reduce, and the onions will become dark, tender, and “jam-like” in consistency.
Assemble: Spread about one-third of the caramelized onion mixture into the bottom of your prepared baking dish. Place the chicken breasts on top of the onions and season them lightly with sea salt.
Layer and Cheese: Top each chicken breast evenly with the remaining caramelized onions. Generously sprinkle the mozzarella and Parmesan over the top.
Bake: Place in the oven and bake for 30 minutes, or until the chicken reaches an internal temperature of 165°F and the cheese is bubbly and golden brown.
Tips for Success
The Cheese Swap: For a more traditional French flavor, replace the mozzarella and Parmesan with Gruyere. If you want a sharper kick, mix in a little blue cheese with a mild melter like Fontina.
Keto Modification: To lower the carb count further, swap the balsamic vinegar for apple cider vinegar and a pinch of stevia. Serve with cauliflower mash instead of potatoes.
Make-Ahead Instructions: You can assemble the dish (onions and chicken) up to 24 hours in advance and store it covered in the fridge. Add the cheese just before baking, and add 5–10 minutes to the cook time since the dish is starting cold.
Wine Pairing: A Chardonnay with light oak notes or a crisp Pinot Noir pairs beautifully with the savory-sweet profile of the caramelized onions.
Prep time: 20 mins | Cook time: 25 mins | Serves: 3–4
Ingredients
Pastry: 1 sheet of store-bought puff pastry (thawed).
Protein: 2 cups cooked chicken breast, shredded or cubed.
Vegetables: 1/2 cup sliced red onions, 1/2 cup chopped lettuce or spinach, and 1/4 cup sliced pickles or peppers.
Creamy Sauce: 4 oz cream cheese (softened), 2 tbsp mayonnaise, 1 tsp garlic powder, and a pinch of dried dill or parsley.
Topping: 1 egg (beaten for egg wash) and a sprinkle of sesame seeds or black pepper.
Instructions
Prepare the Filling: In a large bowl, mix the softened cream cheese, mayonnaise, and spices until smooth. Fold in the cooked chicken and vegetables until everything is evenly coated.
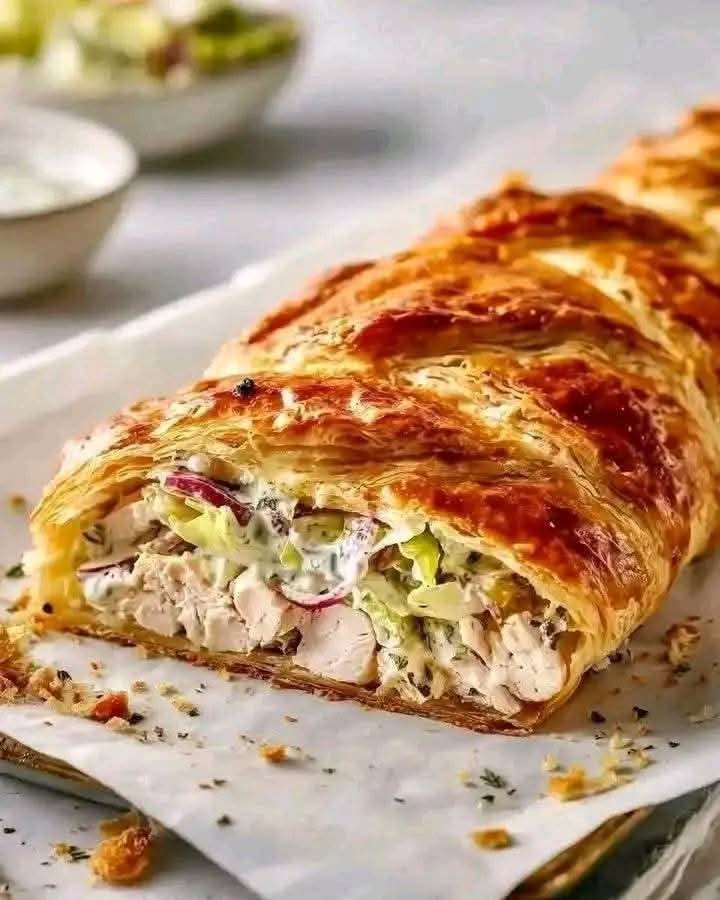
Prepare the Pastry: Lay the puff pastry sheet on a piece of parchment paper. Use a knife to cut diagonal strips (about 1 inch wide) along the two long sides of the pastry, leaving the center third solid for the filling.
Assemble: Spread the chicken mixture down the center of the pastry.
Braid: Fold the top and bottom ends of the pastry over the filling. Then, alternate folding the side strips over the center, overlapping them to create a “braided” look.
Bake: Brush the top of the pastry with the beaten egg. Bake in a preheated oven at 200°C (400°F) for 20–25 minutes, or until the pastry is puffed and deep golden brown.
Serve: Let it rest for 5 minutes before slicing so the creamy filling sets slightly.
Pro-Tips for Success
Cold Pastry: Keep your puff pastry in the fridge until you are ready to assemble. If it gets too warm, it won’t puff up as well.
Dry the Veggies: If using lettuce or watery vegetables, pat them dry with a paper towel first to prevent the bottom of the pastry from getting soggy.
Extra Cheese: Feel free to add a handful of shredded cheddar or mozzarella inside the braid for extra gooeyness!
Seasoning: 1 tsp salt, ½ tsp black pepper, and ½ tsp garlic powder
Optional: 1 tsp Dijon mustard (for extra depth)
Instructions
Prep the Oven and Pan: Preheat your oven to 375°F. Lightly coat a 9×13-inch baking dish with butter or non-stick cooking spray.
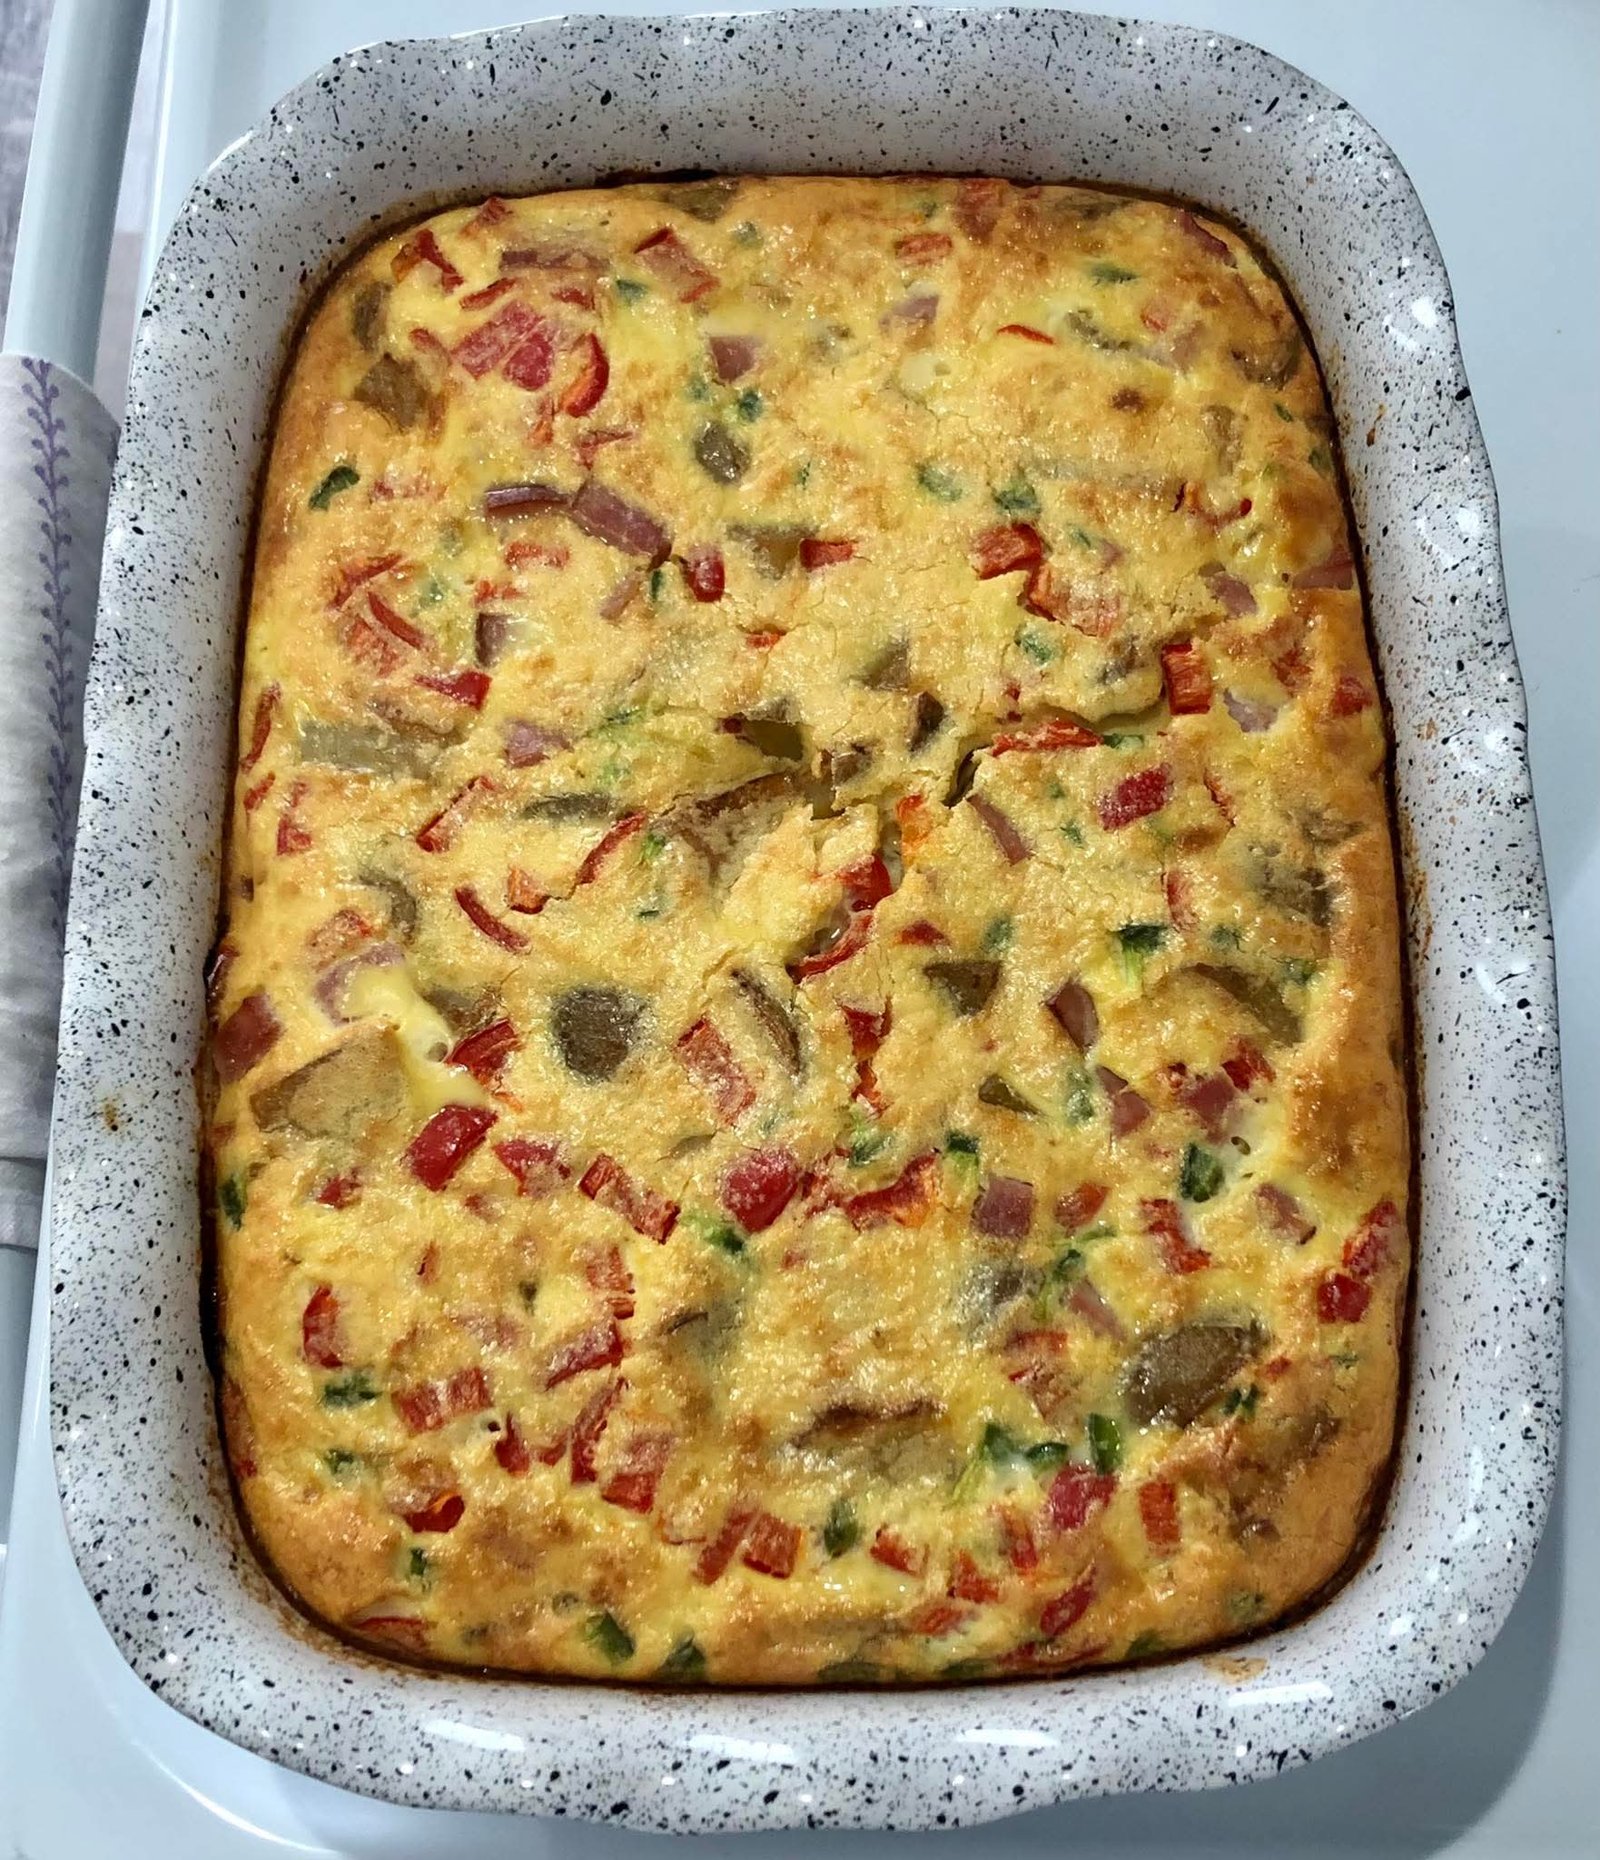
Layer the Base: Spread the potatoes evenly across the bottom of the dish. Sprinkle the diced ham, red bell pepper, and the white parts of the green onions over the potatoes. Top with 1 cup of the shredded cheese.
Whisk the Eggs: In a large mixing bowl, whisk together the eggs, milk, salt, pepper, garlic powder, and Dijon mustard (if using) until the mixture is light and well-combined.
Assemble: Pour the egg mixture slowly over the layers in the baking dish. Use a fork or spatula to gently press down any ingredients sticking out to ensure they are submerged. Sprinkle the remaining 1 cup of cheese over the top.
Bake: Bake for 40 to 50 minutes. You’ll know it’s done when the edges are golden brown and the center is set (it shouldn’t jiggle when you gently shake the pan).
Rest and Serve: Let the casserole sit for 5 to 10 minutes before slicing. This allows the eggs to finish setting so you get clean, beautiful squares. Garnish with the green parts of the onions.
Pro Tips
Make it Overnight: You can assemble the whole dish (except the top layer of cheese) the night before. Cover it with foil, refrigerate, and just pop it in the oven the next morning—you may need to add 5–10 minutes to the bake time.
Spice it Up: If you like a little heat, add a few dashes of your favorite hot sauce to the egg mixture before whisking.
Cheeseburger-stuffed pastries take the classic comfort food you love and wrap it in flaky, golden pastry for a fun, flavorful twist. Juicy, seasoned beef, melty cheese, and optional veggies are tucked inside buttery dough—perfect as a snack, appetizer, or main dish.
Food
Ingredients & Notes
Ground beef: Choose a mix with some fat for juiciness. Cook and season thoroughly.
Cheese: Cheddar is classic; mozzarella, American, or blends work too.
Onions & optional vegetables: Finely chop onions; cook any extra veggies first to avoid sogginess.
Seasonings: salt, black pepper, garlic powder, and paprika; optional mustard or ketchup for a true cheeseburger taste.
Pastry dough: Puff pastry gives flakiness; crescent dough is soft. Homemade dough works too.
Preparing the Filling
Brown beef in a skillet over medium heat.
Add onions and cook until soft.
Season with spices, remove excess fat, and let cool.
Stir in cheese after cooling.
Assembling the Pastries
Roll out dough and cut into equal portions.
Place filling in the center of each piece—don’t overfill.
Fold dough over, seal edges, and crimp with a fork.
Brush with egg wash for a golden finish.
Cooking Options
Baking: Preheat oven and bake until golden brown and crisp.
Discover more
Garlic
steaks
garlic
Beef
Steaks
Muffins
Stuffing
bread
cheese
beef
Frying (optional): Creates a rich, golden crust; monitor temperature carefully.
Flavor Variations
Bacon cheeseburger: Add cooked bacon.
Spicy: Mix in jalapeños, hot sauce, or chili powder; pepper jack cheese works well.
Vegetarian: Use plant-based ground meat or beans/vegetables; keep cheese and seasonings.
Serving Suggestions
Serve with ketchup, mustard, or creamy dips.
Pair with fries, salad, or roasted veggies.
Make smaller pastries for parties—they’re ideal finger food.
Storage & Reheating
Refrigerate: Airtight container for several days.
Discover more
garlic
beef
Stuffing Mixes
Muffins
Bread
filling
Steak
cheesy
Stuffing
Slow Cooker
Reheat: Bake to restore crispness; microwaving softens texture.
Freeze: Possible, though texture may change slightly.
Cheeseburger-stuffed pastries are proof that comfort food can be familiar and inventive—easy to make, crowd-pleasing, and endlessly customizable.



 Ingredients
 Instructions
 Serving Suggestions
 No-Beat German Apple Pie