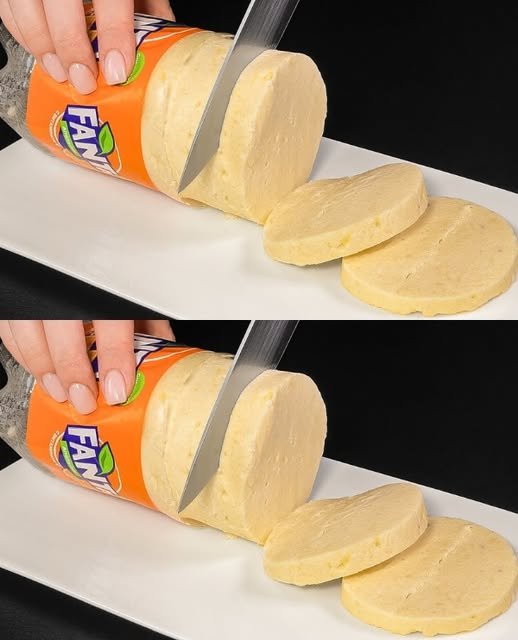
5-Minute Homemade “Bottle” Cheese

5-Minute Homemade “Bottle” Cheese

This recipe creates a semi-soft, sliceable cheese similar in texture to a mild provolone or a firm mozzarella block.

Ingredients

  • 2 liters of Full-fat milk (Whole milk works best for yield)

  • 1 tsp Salt (adjust to taste)

  • 50 ml White vinegar (or lemon juice)

  • 100 g Butter (unsalted preferred)

  • 200 g Mozzarella cheese, shredded or diced

  • Equipment: 1 empty plastic bottle (top cut off)

Instructions

  1. Curdle the Milk: Pour the 2 liters of milk into a large pot. Heat over medium heat until it almost reaches a boil. Just as it begins to foam, stir in the white vinegar.

  2. Separate the Curds: Continue stirring gently for 1–2 minutes. You will see the milk separate into white clumps (curds) and a yellowish liquid (whey). Turn off the heat.

  3. Strain: Pour the mixture through a fine-mesh strainer or cheesecloth to collect the curds. Press down firmly to remove as much liquid as possible. (You can discard the whey or save it for baking).

  4. Melt and Blend: Place a clean pot over low heat. Add the butter and let it melt. Add the strained curds, the salt, and the 200 g of mozzarella.

  5. Emulsify: Stir constantly until the mixture becomes a smooth, stretchy, and unified mass. For an extra smooth texture like the one in the photo, you can use an immersion blender while it’s still hot in the pot.

  6. Mold: While the cheese is still hot and pliable, pour/spoon it into your empty plastic bottle. Tap the bottle firmly on the counter to remove air bubbles.

  7. Chill: Let it cool to room temperature, then refrigerate for at least 3 hours (or until completely firm).

  8. Serve: Once set, you can either squeeze the cheese out or carefully slit the side of the plastic bottle with scissors to release the cheese log. Slice into rounds and enjoy!
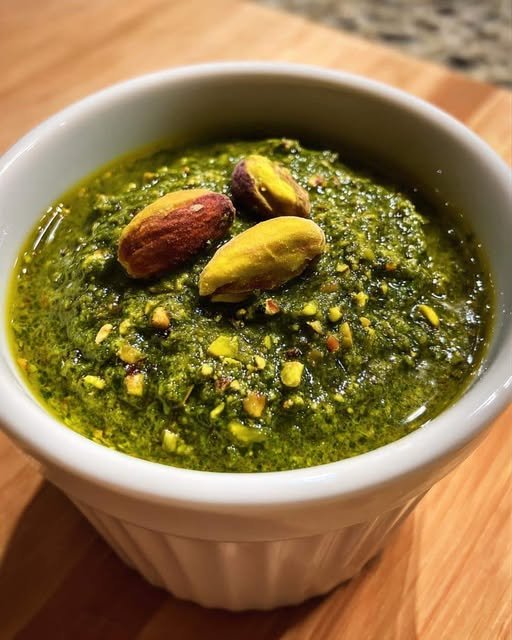

Pistachio Pesto

Pistachio Pesto

A creamy, nut-forward pesto that clings perfectly to pasta and doubles as a luxurious spread for sandwiches or grilled meats.

  • Prep time: 10 minutes

  • Cook time: 3 minutes (for toasting)

  • Total time: 13 minutes

  • Yield: Approximately 1 ½ cups

Ingredients

  • 1 cup shelled pistachios (no shells)

  • 2 cups fresh basil leaves, firmly packed

  • ½ cup extra virgin olive oil (high quality is best)

  • ½ cup grated Parmesan cheese (freshly grated is preferred)

  • 2 cloves garlic, peeled

  • ½ tsp salt (adjust to taste)

  • ¼ tsp black pepper (freshly cracked)

Instructions

  1. Toast the Nuts: Toss the shelled pistachios in a dry pan over medium heat for 2–3 minutes. Stir constantly until they are fragrant and smell heavenly; be careful as they can burn quickly.

  2. Combine the Base: In a food processor, combine the toasted pistachios, fresh basil, grated Parmesan, and garlic cloves.

  3. Pulse: Pulse the mixture until it reaches the consistency of coarse sand. Use a spatula to scrape down the sides of the bowl to ensure everything is evenly incorporated.

  4. Emulsify with Oil: Turn the processor back on and slowly drizzle the olive oil through the feed tube while it is running. This slow process helps create a smooth emulsion.

  5. Season: Add the salt and black pepper. Pulse a few more times to blend and achieve your desired texture—leave it slightly chunky for a rustic feel or process longer for a smooth paste.

  6. Taste Test: Try a spoonful and adjust the salt or oil if needed until it reaches your preference.


Pro-Tips & Substitutions

  • The Golden Rule: Never skip toasting the nuts; it is essential for unlocking the warm, buttery flavor.

  • Fixing Texture: If the pesto is too thick, drizzle in more olive oil. If it starts to separate, stir in a teaspoon of ice water to help it emulsify and “come back together”.

  • Swaps: If you run out of basil, you can use half baby spinach or arugula, though the color may be less vibrant. For a vegan version, substitute nutritional yeast for the Parmesan.

Storage Guidelines

  • Refrigerate: Keep in an airtight container for up to 5 days. To maintain the bright green color, pour a thin layer of olive oil over the top before sealing.

  • Freeze: Freeze in ice cube trays for up to 3 months. These “pesto cubes” can be tossed directly into hot pasta for a quick meal.

Anti-Inflammatory Cottage Cheese Veggie Bake

Anti-Inflammatory Cottage Cheese Veggie Bake

A nutrient-dense, high-protein breakfast or brunch that focuses on whole foods and vibrant flavors.

  • Prep time: 15 minutes

  • Cook time: 35–40 minutes

  • Servings: 4–6

Ingredients

  • 2 cups cottage cheese (small curd)

  • 4 large eggs, beaten

  • 1/2 cup almond flour (keeping it gluten-free)

  • 1 tsp turmeric (anti-inflammatory powerhouse)

  • 1/2 tsp ground black pepper (to aid turmeric absorption)

  • 1 tsp garlic powder

  • 2 cups fresh baby spinach, chopped

  • 1 red bell pepper, diced

  • 1 cup broccoli florets, finely chopped

  • 1/4 cup sliced green onions

  • Optional: 1/2 cup sliced mushrooms (as seen in your beautiful photo!)

Instructions

  1. Preheat & Prep: Set your oven to 375°F (190°C) and grease a 9×9-inch baking dish.

  2. Mix the Base: Whisk the cottage cheese, eggs, almond flour, turmeric, black pepper, and garlic powder in a large bowl.

  3. Add Veggies: Fold in the spinach, bell pepper, broccoli, and green onions until evenly distributed.

  4. Bake: Pour into the dish and bake for 35–40 minutes until the center is firm and the edges are golden.

  5. Rest: Let the bake sit for 10 minutes before slicing to ensure it holds its shape.


Why This Dish is a Winner

  • High Protein: Cottage cheese and eggs provide a substantial protein base to keep you full.

  • Anti-Inflammatory: Turmeric and fresh vegetables help reduce inflammation naturally.

  • Great for Beginners: As you mentioned, it’s a simple “mix and bake” process with minimal technical skill required.

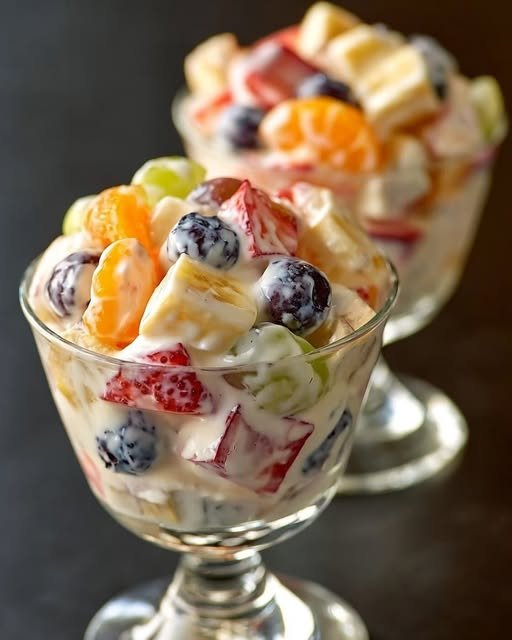
🍓🍌 Creamy Fruit Salad 🍊🍇

🍓🍌 Creamy Fruit Salad 🍊🍇
📝 Ingredients
1 banana, sliced 🍌
1 apple, diced 🍎
1 orange, peeled & segmented 🍊
½ cup grapes 🍇
½ cup strawberries, chopped 🍓
½ cup pineapple chunks 🍍
1 cup plain or vanilla yogurt 🥣
2 tbsp fresh cream or whipped cream 🍶
1 tbsp honey (optional) 🍯
👩‍🍳 Method
Wash and cut all fruits into bite-sized pieces 🔪
Add the fruits to a large bowl 🥗
In a separate bowl, mix yogurt, cream, and honey until smooth 🥣
Pour the creamy mixture over the fruits 🍶
Gently mix until well coated 🍴
Chill for 15–20 minutes and serve cold ❄️

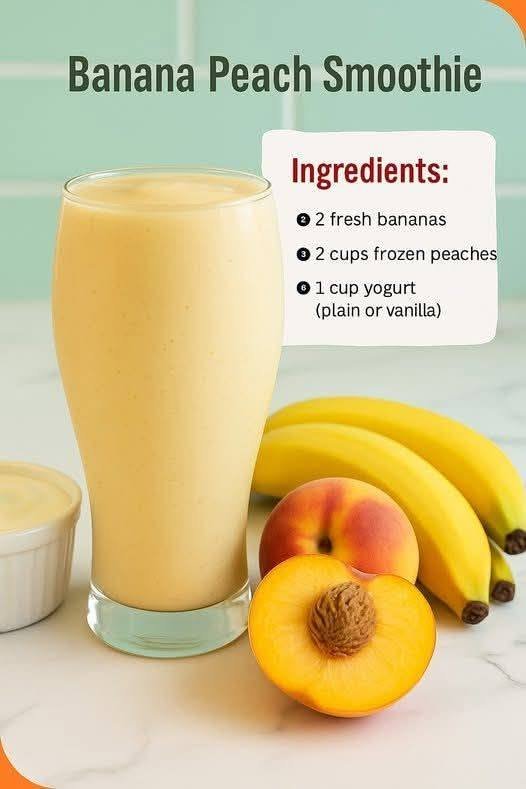
Banana Peach Smoothie

Banana Peach Smoothie

Ingredients

  • 2 Fresh Bananas: Best if they are ripe (with a few brown spots) for natural sweetness.

  • 2 Cups Frozen Peaches: Using frozen peaches gives the smoothie a thick, chilled texture without needing ice.

  • 1 Cup Yogurt: You can use plain or vanilla. Greek yogurt works great if you want extra protein and a thicker consistency.

  • Optional Liquid (as needed): 1/4 to 1/2 cup of milk, water, or orange juice if the mixture is too thick to blend.


Instructions

  1. Prep the Fruit: Peel the bananas and break them into smaller chunks to help your blender process them more easily.

  2. Layer the Ingredients: Add the yogurt to the blender first. Adding the liquid/soft ingredients at the bottom helps the blades move more efficiently. Follow with the banana chunks and finally the frozen peaches.

  3. Blend: Secure the lid and blend on high until the mixture is completely smooth and creamy.

  4. Adjust Consistency: If the smoothie is too thick, add a small splash of your preferred liquid and blend for another 5–10 seconds.

  5. Serve: Pour into a chilled glass and enjoy immediately while cold!


Tips for Success

  • Sweetness: If your peaches aren’t very sweet, you can add a teaspoon of honey or maple syrup.

  • Texture: If you prefer an even colder “soft-serve” texture, try slicing and freezing your bananas ahead of time as well.

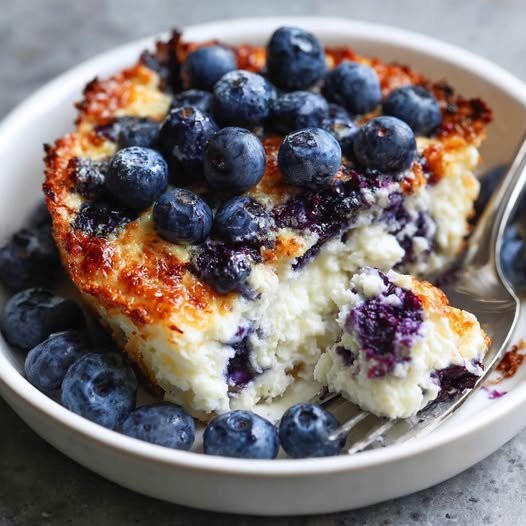
Blueberry Cottage Cheese Breakfast Bake

Blueberry Cottage Cheese Breakfast Bake

A high-protein, gluten-free morning ritual that tastes like a cross between a Dutch baby and a cheesecake.

  • Prep time: 10 minutes

  • Cook time: 35 minutes

  • Total time: 45 minutes

  • Servings: 4 large or 8 snack-sized portions

  • Protein: ~28g per large serving

Ingredients

  • 2 cups cottage cheese (4% milkfat/whole milk recommended for creaminess)

  • 3 large eggs

  • 1/4 cup honey or maple syrup

  • 1 tsp vanilla extract

  • Zest of 1 lemon (optional, for brightness)

  • 1/2 cup almond flour (or gluten-free all-purpose flour)

  • 1 tsp baking powder

  • 1/2 tsp ground cinnamon

  • 1/4 tsp salt

  • 2 cups fresh blueberries (if using frozen, do not thaw)

Instructions

  1. Preheat and Prep: Preheat your oven to 350°F (175°C). Grease an 8×8-inch baking dish with butter or non-stick cooking spray.

  2. Mix the Wet Base: In a large bowl, whisk together the cottage cheese, eggs, honey (or syrup), vanilla, and lemon zest.

    • Note: For a smoother, cake-like texture, you can pulse these ingredients in a blender for 30 seconds.

  3. Incorporate Dry Ingredients: In a separate small bowl, whisk the flour, baking powder, cinnamon, and salt. Gradually stir the dry mixture into the wet ingredients until just combined.

  4. Fold in the Berries: Gently fold in the blueberries using a spatula. If using frozen berries, work quickly to prevent the batter from turning purple.

  5. Bake: Pour the batter into your prepared dish and spread evenly. Bake for 30–35 minutes. You are looking for the edges to be golden brown and the center to be “set” (it shouldn’t jiggle like liquid when you move the pan).

  6. Cool and Set: Crucial Step: Let the bake rest for at least 5–10 minutes before slicing. This allows the proteins to firm up so you get clean slices.

  7. Serve: Enjoy warm. Top with a dollop of Greek yogurt, a drizzle of nut butter, or extra fresh berries.


Customization & Storage

  • The “Smoothie” Texture: If your kids aren’t fans of the “curds” in cottage cheese, blend the entire batter (except the blueberries) until completely smooth before baking. It will result in a texture similar to a firm custard.

  • Meal Prep: This is a dream for busy weeks. Slice the cooled bake into squares and store in an airtight container in the fridge for up to 4 days.

  • Reheating: To keep it from getting rubbery, reheat in a toaster oven or air fryer at 300°F for 5-8 minutes. If using a microwave, 30 seconds usually does the trick!

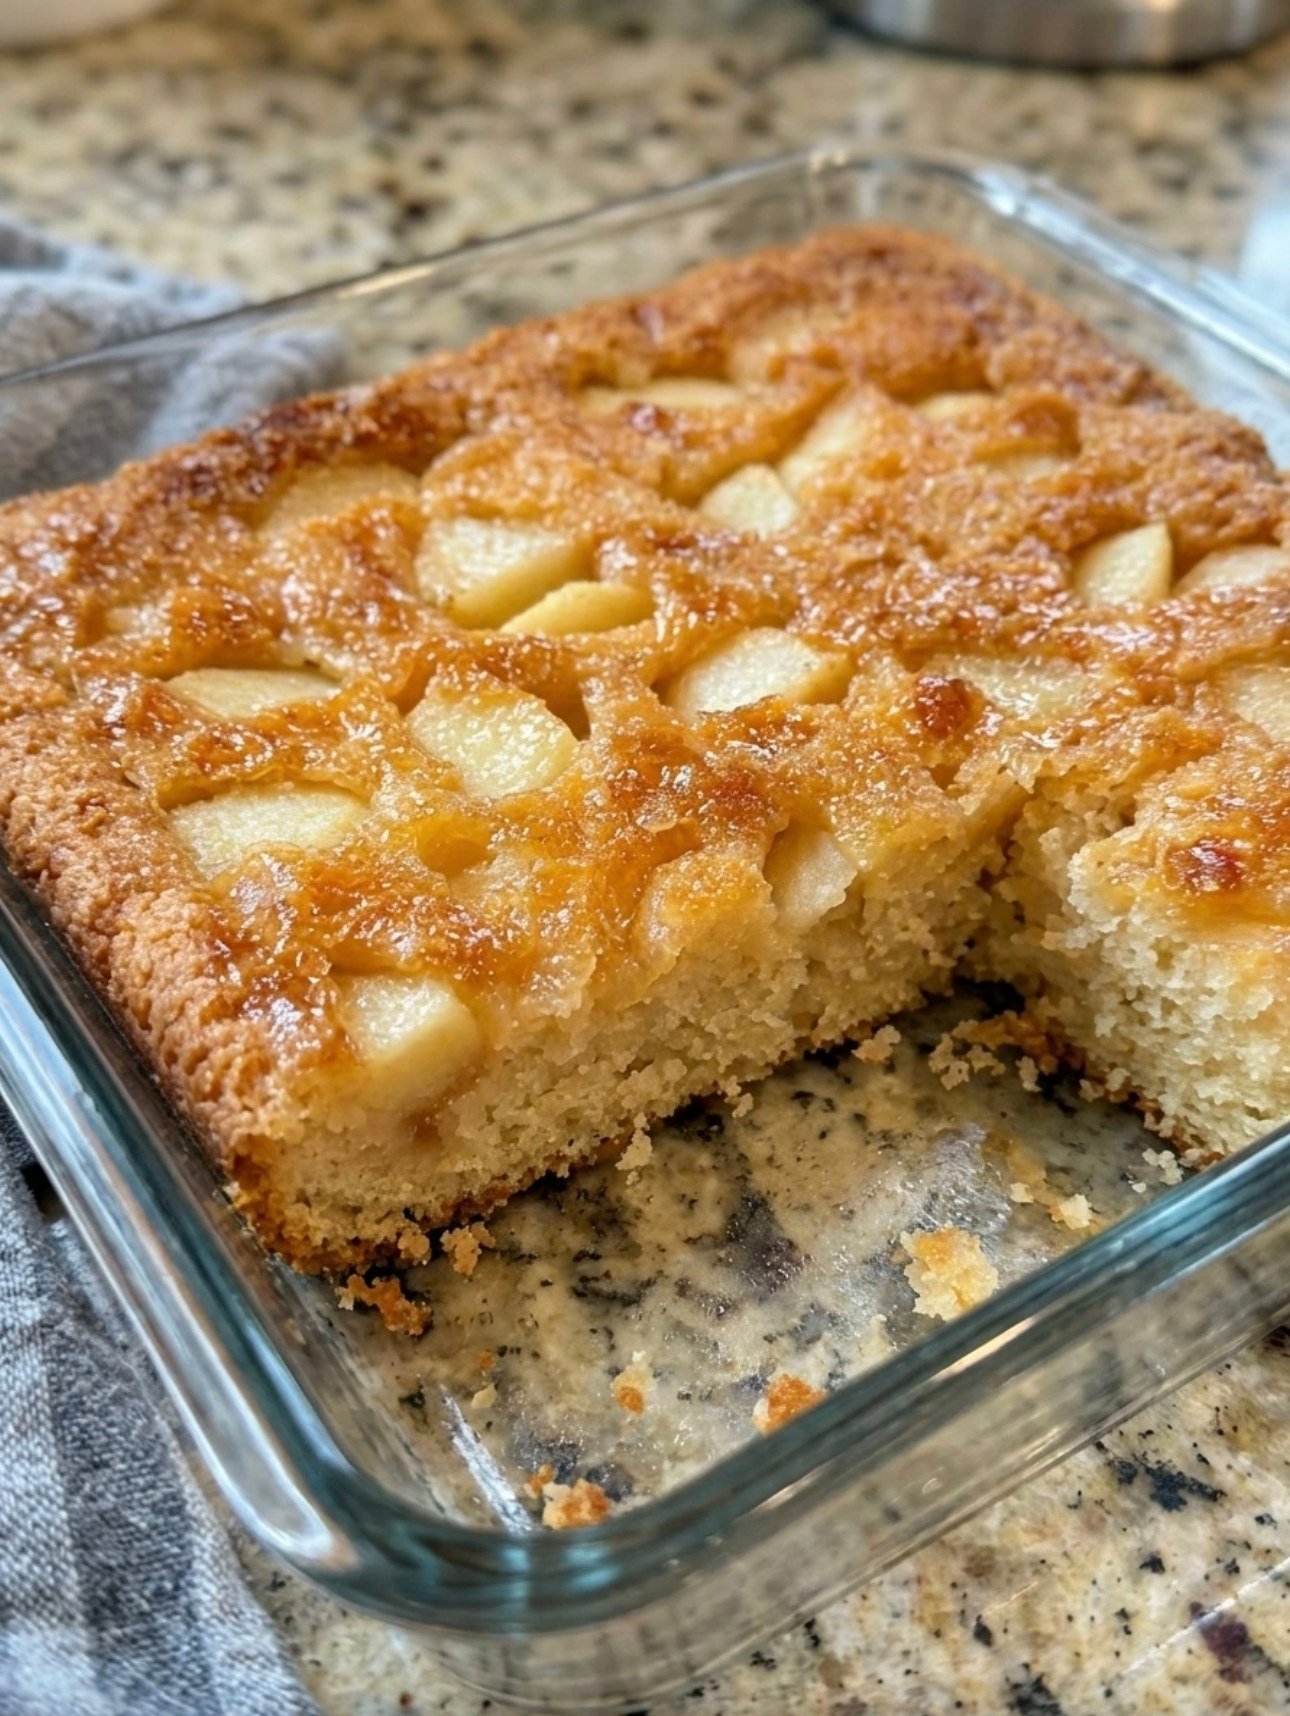
Apple Cinnamon Cake

Apple Cinnamon Cake

Ingredient Notes & Details

Apples
Use crisp baking apples like Honeycrisp, Granny Smith, or Fuji. They hold their shape and provide the perfect sweet-tart balance.

All-purpose flour
Gives structure while keeping the cake soft and fluffy.

Granulated sugar
Sweetens the cake while allowing the apple flavor to shine.

Brown sugar
Adds moisture and deep caramel notes to the cinnamon topping.

Ground cinnamon
The heart of this baked apple recipe — warm, comforting, and fragrant.

Eggs
Bind the batter and create a tender crumb.

Milk
Keeps the batter smooth and pourable.

Vegetable oil or melted butter
Adds richness and moisture.

Baking powder
Ensures a soft, fluffy rise.

Vanilla extract
Enhances the sweetness and spice.

Salt
Balances all the flavors.

Step-by-Step Instructions

Preheat and prepare your pan
Preheat your oven to 350°F (175°C). Grease and line an 8×8 or 9×9 baking pan with parchment paper.

Peel and dice the apples
Cut apples into small chunks so they bake evenly and melt into the cake.

Mix the dry ingredients
In a bowl, whisk flour, baking powder, salt, and cinnamon together.

Combine wet ingredients
In another bowl, whisk eggs, sugar, milk, oil, and vanilla until smooth.

Bring everything together
Slowly add dry ingredients to wet ingredients and mix just until combined.

Fold in the apples
Gently stir in the diced apples so they’re evenly distributed.

Make the cinnamon topping
Mix brown sugar and cinnamon. Sprinkle evenly over the batter.

Bake until golden and set
Bake for 35–45 minutes, or until a toothpick comes out clean.

Cool before slicing
Let the cake cool slightly before cutting for clean slices.

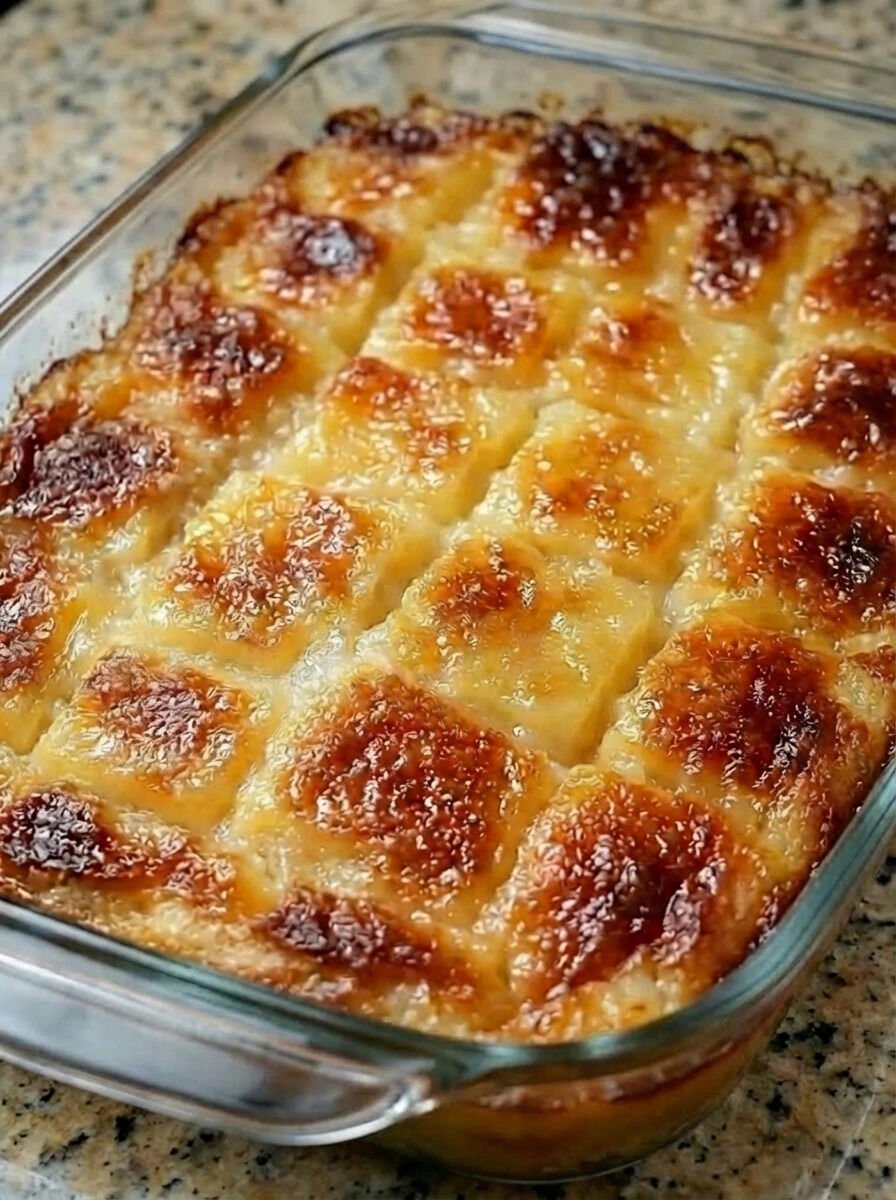
Pineapple Bake

Ingredient Notes & Details

Crushed pineapple
Use canned crushed pineapple in juice, not syrup.
Drain slightly but don’t remove all the liquid for moisture.

Sugar
Granulated sugar enhances the pineapple’s natural sweetness.
You can reduce slightly if you prefer it less sweet.

All-purpose flour
Helps thicken the mixture as it bakes.
Creates a soft, spoonable texture.

Butter
Melted butter adds richness and flavor.
Unsalted butter gives you better control over saltiness.

Eggs
Bind everything together and give structure.
Bring them to room temperature for best results.

Cheddar cheese
Sharp cheddar is traditional and adds savory contrast.
Grate it fresh for better melting.

Step-by-Step Instructions

Preheat the oven
Set your oven to 350°F (175°C).
Lightly grease a baking dish to prevent sticking.

Mix the pineapple base
In a large bowl, combine crushed pineapple, sugar, and flour.
Stir until smooth and evenly combined.

Add the eggs and butter
Mix in the beaten eggs and melted butter.
The mixture should look thick but pourable.

Fold in the cheese
Gently stir in shredded cheddar cheese.
Make sure it’s evenly distributed.

Transfer to baking dish
Pour the mixture into the prepared dish.
Smooth the top with a spatula.

Bake until golden
Bake for 45–50 minutes.
The top should be lightly golden and set in the center.

Cool slightly before serving
Let it rest for 10 minutes.
This helps it firm up and enhances flavor.

Knead Garlic Herb Bread

No-Knead Garlic Herb Dutch Oven Bread

A rustic, artisan-style loaf with a crackling crust and a soft, pillowy interior infused with fresh garlic.

  • Prep time: 10 minutes

  • Rise time: 8–12 hours (overnight)

  • Cook time: 45–50 minutes

  • Total time: ~13 hours

Ingredients

  • 500 g (approx. 4 cups) All-purpose flour

  • 1 packet (7 g) Dry active yeast

  • 2 tsp Salt

  • 3 cloves Fresh garlic, finely chopped

  • 1 tsp Dried rosemary or thyme (optional, for extra aroma)

  • 350 ml Warm water (approx. 105°F–110°F; not hot to the touch)

  • 2 tbsp Olive oil

Instructions

1. Mix the Dough

In a large mixing bowl, whisk together the flour, yeast, salt, chopped garlic, and optional herbs. Pour in the warm water and olive oil. Using a wooden spoon or spatula, mix until a shaggy, sticky dough forms and no dry flour remains. Do not be tempted to add more flour; the stickiness is what creates the airy crumb!

2. The Long Rise

Cover the bowl tightly with plastic wrap or a damp kitchen towel. Leave it on your counter at room temperature for 8 to 12 hours. The dough is ready when it has doubled in size and the surface is dotted with tiny bubbles.

3. Shape and Second Proof

Lightly flour a work surface and your hands. Gently turn the dough out. Do not knead. Simply fold the edges toward the center a few times to create a rough ball shape. Place the dough onto a sheet of parchment paper, cover loosely, and let it rest for 30–45 minutes.

4. Preheat the “Bakery.”

While the dough rests, place a Dutch oven (or a heavy-lidded pot) into the oven. Preheat the oven to 220°C (425°F) with the pot inside. Heating the pot is essential for creating the steam needed for a golden, crispy crust.

5. Bake

Carefully remove the hot pot from the oven. Using the parchment paper as a sling, lift the dough and drop it (paper and all) into the pot.

  • Step A: Cover with the lid and bake for 30 minutes.

  • Step B: Remove the lid and bake for another 15–20 minutes until the crust is a deep, burnished gold.

6. The Cool Down

Lift the bread out of the pot and transfer it to a wire rack. Wait at least 20 minutes before slicing. If you cut it too soon, the steam escapes and the bread can become gummy!


Flavor Variations to Try

  • The Cheesy Garlic: Fold in ½ cup of grated sharp cheddar or Gruyère during the initial mixing phase.

  • The Mediterranean: Swap the garlic for ¼ cup of chopped sun-dried tomatoes and a tablespoon of dried oregano.

  • The Spicy Kick: Add 1 teaspoon of red pepper flakes to the dry ingredients for a subtle heat that pairs perfectly with the garlic.

Storage Tip

Store leftovers in a paper bag at room temperature for up to 2 days for the best crust. If you need to store it longer, slice it and freeze it in a zip-top bag; it toasts up beautifully straight from the freezer!

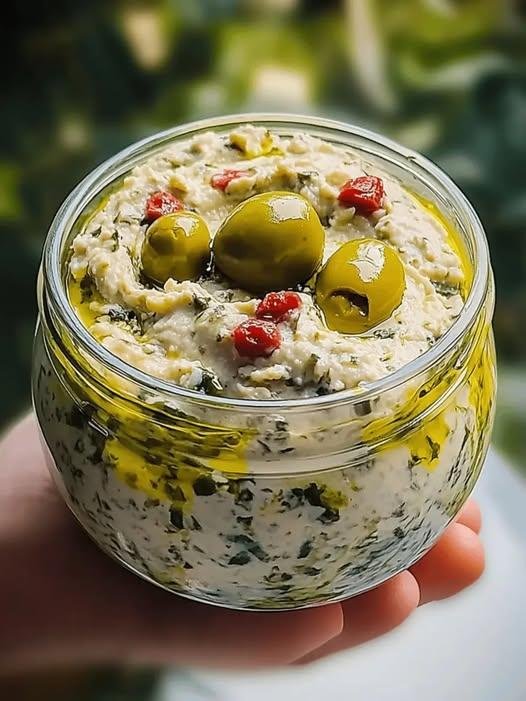
Green Olive Dip – Creamy, Tangy & Flavorful

A smooth and savory dip made with tangy green olives, creamy cheese, and fresh lemon juice. Perfect for parties, game nights, or as a quick appetizer.

Ingredients:

  • 1 cup pitted green olives (Castelvetrano, Manzanilla, or Kalamata green)
  • 8 oz (225g) cream cheese, softened
  • 1/2 cup sour cream or Greek yogurt
  • 1/4 cup mayonnaise
  • 2 cloves garlic, finely minced
  • 2 tbsp fresh lemon juice
  • Optional garnish: chopped parsley, chives, or a pinch of red pepper flakes

Instructions:

  1. Mix the base: In a medium bowl, beat the softened cream cheese, sour cream, and mayonnaise until smooth and creamy.
  2. Add flavor: Stir in the garlic and lemon juice.
  3. Fold in olives: Roughly chop the green olives and mix them into the creamy base.
  4. Customize: Add herbs (parsley, chives) or a little red pepper flakes if you want extra flavor.
  5. Chill & serve: Cover and refrigerate for at least 30 minutes before serving for best flavor.
  6. Enjoy: Serve with crackers, toasted crostini, pita chips, or fresh veggies.

 Q&A Section

Q1: Can I make this dip ahead of time?
👉 Yes! It tastes even better if made a few hours or a day before, since the flavors develop while chilling.

Q2: What type of olives works best?
👉 Castelvetrano olives are buttery and mild, while Manzanilla olives are briny. You can even mix different olives for a unique taste.

Q3: Can I make it healthier?
👉 Replace cream cheese with light cream cheese and mayonnaise with extra Greek yogurt.

See also  10-Minute No-Bake Chocolate Cheesecake

Q4: How long does it last in the fridge?
👉 Store in an airtight container for up to 3–4 days. Stir before serving.

Q5: Can I make it spicy?
👉 Yes! Add a dash of cayenne, red pepper flakes, or even a little jalapeño for a kick.

Q6: What pairs well with this dip?
👉 Crackers, sliced baguette, celery sticks, cucumber, carrot sticks, or pita bread.

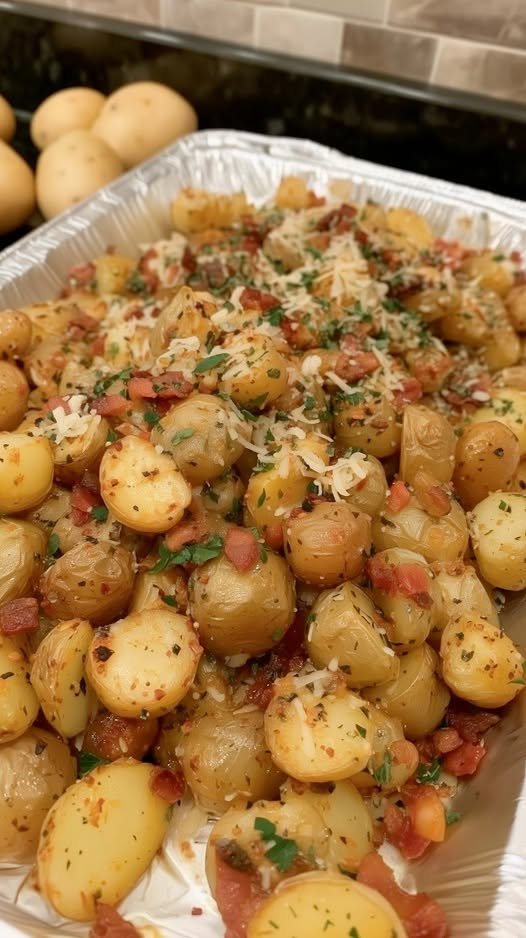
Crispy Parmesan Garlic Roasted Potatoes

Crispy Parmesan Garlic Roasted Potatoes

The ultimate “hero” side dish: golden-brown and crispy on the outside and buttery-soft on the inside.

  • Prep time: 10 minutes

  • Cook time: 30 minutes

  • Total time: 40 minutes

  • Servings: 6-8

Ingredients

  • 3 lbs small red-skinned potatoes, halved (keep the skins on!)

  • 2 tbsp refined olive oil

  • 5 cloves fresh garlic, finely crushed

  • 1 tsp dried thyme

  • ½ tsp dried oregano

  • ½ tsp dried basil

  • ⅓ cup finely shredded or grated aged Parmesan cheese

  • To taste: Coarse sea salt and freshly ground black pepper

  • 2 tsp unsalted butter, melted (for the finish)

  • 2 tsp fresh parsley, finely chopped (for garnish)

Instructions

  1. Preheat & Prep: Preheat your oven to 400°F (200°C). Lightly coat a large baking sheet with cooking spray or a thin layer of oil.

  2. Season the Potatoes: In a large mixing bowl, combine the halved potatoes, olive oil, crushed garlic, thyme, oregano, basil, and Parmesan cheese.

  3. Toss: Add a generous pinch of coarse salt and black pepper. Toss vigorously until every potato is evenly coated in the oil, herbs, and cheese.

  4. Arrange: Spread the potatoes onto the prepared sheet pan in a single layer. For the best results, try to place as many as possible cut-side down—this creates that “gourmet” crispy crust.

  5. Roast: Bake for a total of 30 minutes.

  6. Flip: At the 15-minute mark, use a spatula to flip the potatoes. This ensures they get golden-brown on all sides and prevents the garlic from burning.

  7. Final Touch: Once the potatoes are tender and crispy, remove them from the oven. Immediately drizzle with the melted butter and sprinkle with fresh parsley.

  8. Serve: Best enjoyed hot right off the pan!


Pro-Tips for Success

  • The Dry Secret: If you wash your potatoes right before cooking, pat them completely dry with a towel. Moisture creates steam, which leads to soggy potatoes rather than crispy ones.

  • Sheet Pan Space: Don’t crowd the pan! If the potatoes are piled on top of each other, they will steam. Use two pans if necessary to keep them in a single layer.

  • Leftovers: These stay good in the fridge for up to 5 days. To bring back the crunch, pop them in an air fryer at 350°F for 3–5 minutes.

Cheeseburger Biscuit Bites

Cheeseburger Biscuit Bites

  • Prep time: 15 minutes

  • Cook time: 15-18 minutes

  • Yields: 10-12 bites

Ingredients

  • Meat Filling: 1 lb lean ground beef

  • Dough: 1 can (16.3 oz) refrigerated flaky layers biscuits (usually 8 or 10 count)

  • Cheese: 1 ½ cups shredded cheddar cheese (or 10-12 small cubes of cheddar)

  • Seasoning: ½ tsp garlic powder, ½ tsp onion powder, salt and pepper to taste

  • Sauce: 2 tbsp ketchup, 1 tbsp yellow mustard, and 1 tsp Worcestershire sauce

  • Garnish: Dried parsley or sesame seeds (optional)


Instructions

  1. Preheat & Prep: Preheat your oven to 375°F (190°C). Lightly grease a standard 12-cup muffin tin with non-stick cooking spray.

  2. Brown the Beef: In a large skillet over medium-high heat, cook the ground beef until it is fully browned and no longer pink. Drain off any excess fat. Stir in the garlic powder, onion powder, salt, pepper, ketchup, mustard, and Worcestershire sauce. Mix well and remove from heat.

  3. Prepare the Biscuits: Take each refrigerated biscuit and pull it apart into two thinner rounds (or flatten them out with your palm). Press each piece into the bottom and up the sides of the muffin tin cups to create a “well” for the meat.

  4. Assemble:

    • Place a small amount of shredded cheese at the bottom of each biscuit cup.

    • Spoon about 2 tablespoons of the beef mixture into each cup.

    • Top generously with the remaining shredded cheese.

  5. Bake: Place the tin in the oven and bake for 12 to 15 minutes, or until the biscuit edges are golden brown and the cheese is melted and bubbly.

  6. Serve: Let them cool for about 5 minutes before removing them from the tin. Garnish with a sprinkle of parsley for that “pro” look shown in your photo.


Tips for Success

  • Extra Flavor: Add finely diced sautéed onions or pickles into the meat mixture if you like a “loaded” burger taste.

  • Crispy Bottoms: Ensure the meat is well-drained before filling the biscuits to prevent the bottom of the dough from getting soggy.

  • Storage: These stay fresh in the fridge for up to 3 days and reheat perfectly in an air fryer or oven to keep the biscuit crisp.

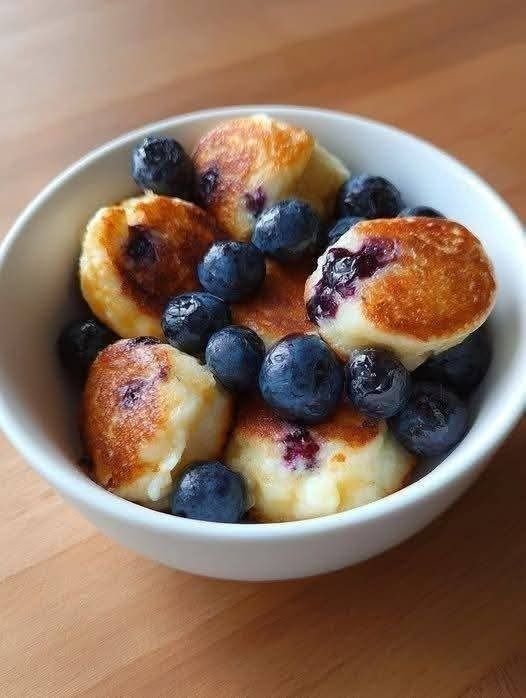
Blueberry Cottage Cheese Pancake Bites

 Blueberry Cottage Cheese Pancake Bites

Ingredients (Makes 10–12 Bites)

1 cup cottage cheese
2 large eggs
½ ripe banana, mashed
½ cup oat flour
(or almond flour for lower-carb option)
1 tbsp honey or maple syrup (optional)
1 tsp vanilla extract
1 tsp baking powder
Pinch of salt
½ cup fresh or frozen blueberries

Instructions

1. Make the Batter
Add cottage cheese, eggs, mashed banana, honey (if using), and vanilla to a blender or food processor.
Blend until smooth.
Pour mixture into a bowl and fold in oat flour, baking powder, and salt.
Gently stir in blueberries.
2. Air Fryer Method (Recommended)
Preheat air fryer to 350°F (175°C).
Lightly grease silicone molds or the air fryer basket.
Spoon batter into molds, filling each about ¾ full.
Air fry for 8–10 minutes, until set and lightly golden.
Cool slightly before removing.
3. Oven Method
Preheat oven to 375°F (190°C).
Grease a mini muffin tin or line with silicone cups.
Fill each cup about ¾ full.
Bake for 14–16 minutes, until puffed and a toothpick comes out clean.
Let cool for 5 minutes before serving.

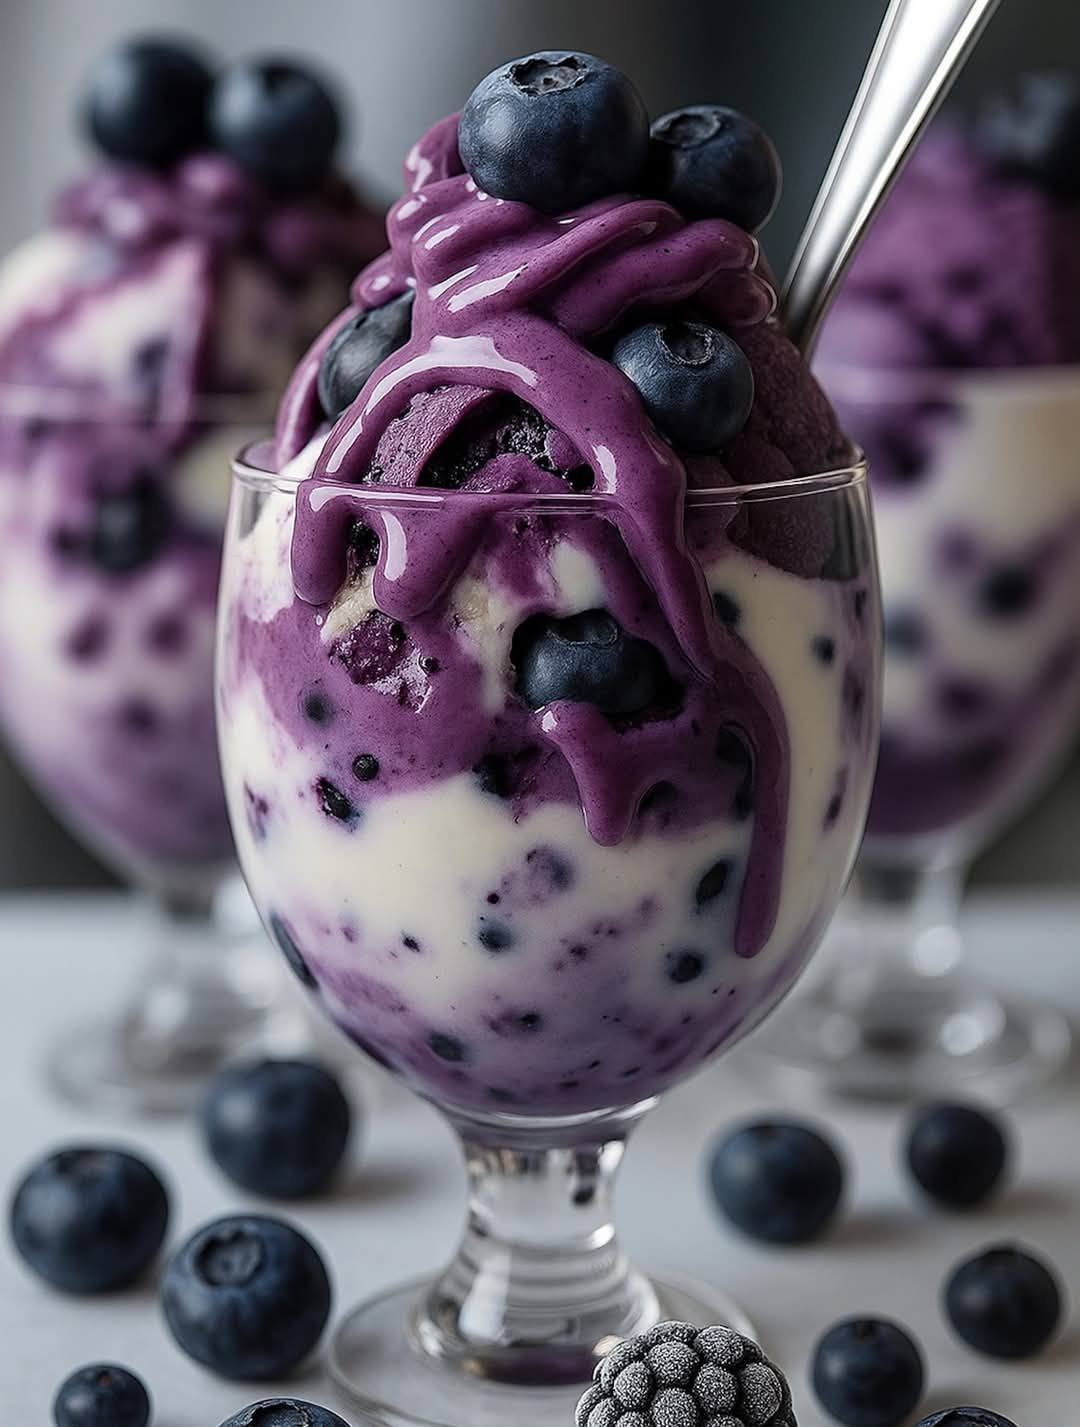
Creamy Blueberry Swirl Parfait

Creamy Blueberry Swirl Parfait

Ingredients

The Blueberry Swirl & Topping

  • 2 cups Frozen blueberries (thawed slightly for blending)

  • 1 tbsp Maple syrup or honey (optional)

  • 1 tsp Lemon juice

  • 1/2 cup Fresh blueberries (for garnish)

The Creamy Base

  • 2 cups Greek yogurt or Thick Vanilla Cream (for a vegan option, use coconut cream)

  • 1/2 tsp Vanilla extract

  • 1 tbsp Chia seeds (optional, for texture seen in the photo)


Instructions

  1. Prepare the Blueberry Coulis: In a blender or food processor, combine the frozen blueberries, lemon juice, and sweetener. Blend until completely smooth and thick. It should have a soft-serve consistency.

  2. Flavor the Cream: In a separate bowl, whisk together your yogurt (or cream) with the vanilla extract. Fold in the chia seeds if you want those small dark speckles visible in the glass.

  3. Layer the Glasses: * Start by dropping a few fresh blueberries into the bottom of two chilled glasses.

    • Add a thick layer of the white cream base.

    • Spoon in a layer of the purple blueberry mixture. Use a small spoon or skewer to gently swirl the two colors together against the glass.

    • Repeat the layers until the glass is full.

  4. The Topping: Top the parfait with a generous swirl of the remaining blueberry mixture. Finish by nesting several large, fresh blueberries on top as shown in the image.

  5. Serve: Serve immediately while chilled.


Tips for the Perfect Look

  • Texture: To get the “dripping” effect seen in the photo, ensure your blueberry mixture is thick but pourable. If it’s too thick, add a teaspoon of water; if too thin, blend in more frozen berries.

  • The Frosty Finish: For that “frosted” look on the berries at the bottom of the image, pop your fresh blueberries in the freezer for about 10 minutes before garnishing.

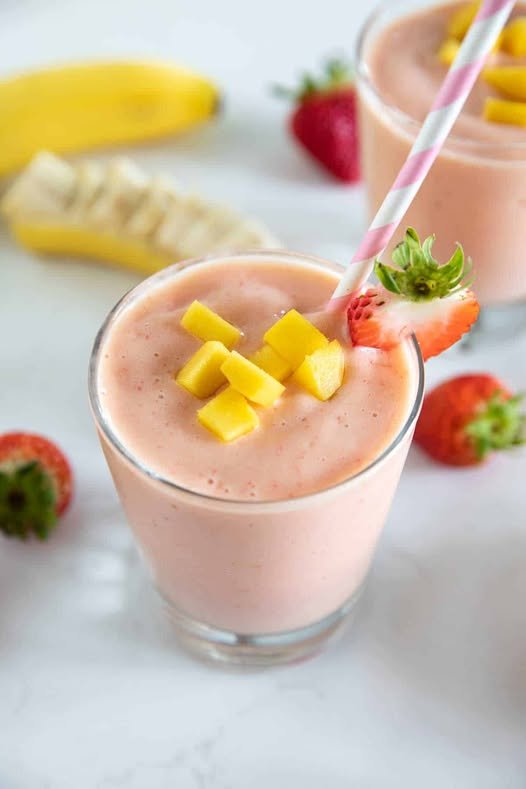
Strawberry Mango Banana Smoothie

Strawberry Mango Banana Smoothie

Ingredients

  • 1 cup frozen mango chunks

  • 1 cup fresh or frozen strawberries (hulled)

  • 1 medium ripe banana (fresh or frozen)

  • 1 cup milk of your choice (dairy, almond, oat, or coconut milk)

  • 1/2 cup Greek yogurt (optional, for extra creaminess and protein)

  • 1 tsp honey or maple syrup (optional, if you prefer it sweeter)

Instructions

  1. Prep the fruit: If using fresh strawberries, remove the green stems. If you have time, using frozen fruit will give you that thick, creamy texture seen in the picture.

  2. Combine: Place the banana, strawberries, mango, and yogurt into a high-speed blender.

  3. Add liquid: Pour in your milk of choice.

  4. Blend: Start on a low speed and gradually increase to high. Blend for about 45–60 seconds until completely smooth.

  5. Adjust: If the smoothie is too thick, add a splash more milk. If it’s too thin, add a few more frozen mango chunks or a couple of ice cubes.

  6. Serve: Pour into glasses and garnish with fresh mango dice and a strawberry slice, just like in your photo!


Tips for the Perfect Texture

  • Frozen is better: Using frozen fruit instead of ice ensures the flavor doesn’t get watered down.

  • Order matters: Always put your liquid in the blender first. This helps the blades move freely and prevents the fruit from getting stuck at the bottom.

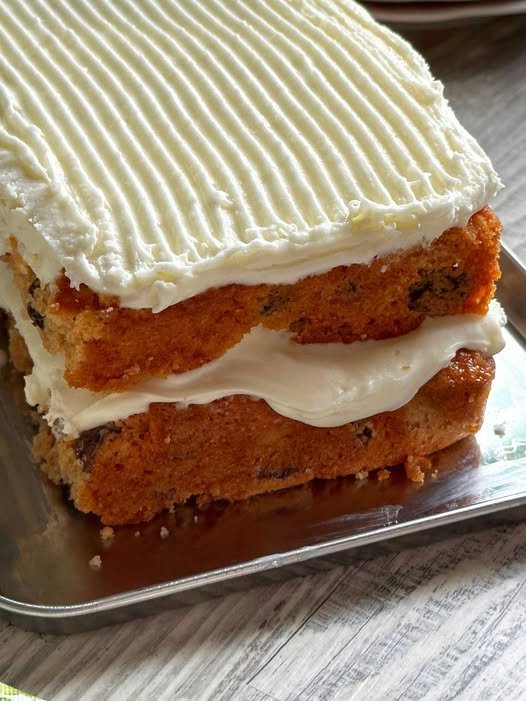
Spanish Bar Cake (Copycat Recipe)


A&P Spanish Bar Cake (Copycat Recipe)

Spanish Bar Cake (Copycat Recipe)

A nostalgic, spiced raisin cake layered with rich cream cheese frosting.

  • Yields: 8 to 10 servings

  • Prep time: 20 minutes

  • Cook time: 35–40 minutes

  • Inactive time: 1 hour (cooling)

Ingredients

For the Cake

  • 2 cups water

  • 3/4 cup raisins

  • 1/2 cup vegetable oil

  • 2 cups all-purpose flour

  • 1 cup granulated sugar

  • 1 1/2 teaspoons pumpkin pie spice

  • 1 teaspoon baking soda

  • 1/2 teaspoon fine salt

  • 1 large egg, lightly beaten

  • 3/4 cup walnuts, very finely chopped (optional)

For the Frosting

  • 8 ounces cream cheese, room temperature

  • 1/4 cup unsalted butter, room temperature

  • 2 1/4 cups powdered sugar

  • 1/4 teaspoon fine salt


Instructions

1. Prepare the Raisin Base

In a large saucepan, combine the water and raisins. Bring to a gentle boil and cook for 10 minutes to plump the fruit. Remove from heat and stir in the vegetable oil. Allow this mixture to cool completely to room temperature before proceeding.

2. Mix the Batter

Preheat your oven to 325°F (163°C). Grease an 8×8-inch baking pan and line the bottom with parchment paper. In a medium bowl, whisk together the flour, sugar, pumpkin pie spice, baking soda, and salt. Gradually stir the dry ingredients into the cooled raisin mixture. Fold in the beaten egg and walnuts (if using) until the batter is smooth.

3. Bake

Pour the batter into the prepared pan. Bake for 35 to 40 minutes, or until a toothpick inserted into the center comes out with just a few moist crumbs. Let the cake cool completely in the pan before removing.

4. Whip the Frosting

In a large bowl, beat the cream cheese and butter together until smooth and light (about 2–3 minutes). Gradually add the powdered sugar and salt, beating until the frosting is velvety and free of lumps.

5. Assemble the “Bar”

Carefully lift the cooled cake out of the pan and place it on a cutting board. Slice the cake in half (creating two 4×8-inch rectangles).

  • Place one layer on your serving tray and spread a thick layer of frosting over the top.

  • Place the second layer on top of the first.

  • Cover the top and sides (optional) with the remaining frosting.

  • Pro Tip: For the authentic Jane Parker look, use the tines of a fork to draw a grooved, wavy pattern across the top of the frosting.


Storage Tip

Because of the cream cheese frosting, this cake should be stored in the refrigerator. However, it tastes best when brought to room temperature for about 15 minutes before serving to let the spices shine!

Strawberry Vanilla Bean Ice Cream

Strawberry Vanilla Bean Ice Cream

Ingredients:
– 2 cups fresh strawberries, hulled and sliced
– 1 cup granulated sugar
– 1 vanilla bean, split and seeds scraped
– 2 cups heavy cream
– 1 cup whole milk
– 6 large egg yolks
Instructions:
1. In a saucepan, combine the strawberries, sugar, and vanilla bean seeds. Cook over medium heat until the strawberries are soft and the sugar has dissolved. Remove from heat and let it cool.
2. In a separate saucepan, heat the heavy cream and milk until it simmers. Remove from heat.
3. In a bowl, whisk the egg yolks. Slowly pour the hot cream mixture into the yolks, whisking constantly.
4. Return the mixture to the saucepan and cook over low heat, stirring constantly, until it thickens and coats the back of a spoon.
5. Strain the custard into a bowl and let it cool. Refrigerate until cold.
6. Churn the custard in an ice cream maker according to the manufacturer’s instructions.
7. During the last few minutes of churning, add the strawberry mixture.
8. Transfer the ice cream to a container and freeze until firm.
Prep Time: 20 minutes | Cooking Time: 20 minutes | Chilling Time: 4 hours | Total Time: 4 hours 40 minutes | Servings: 8
Enjoy ❤️

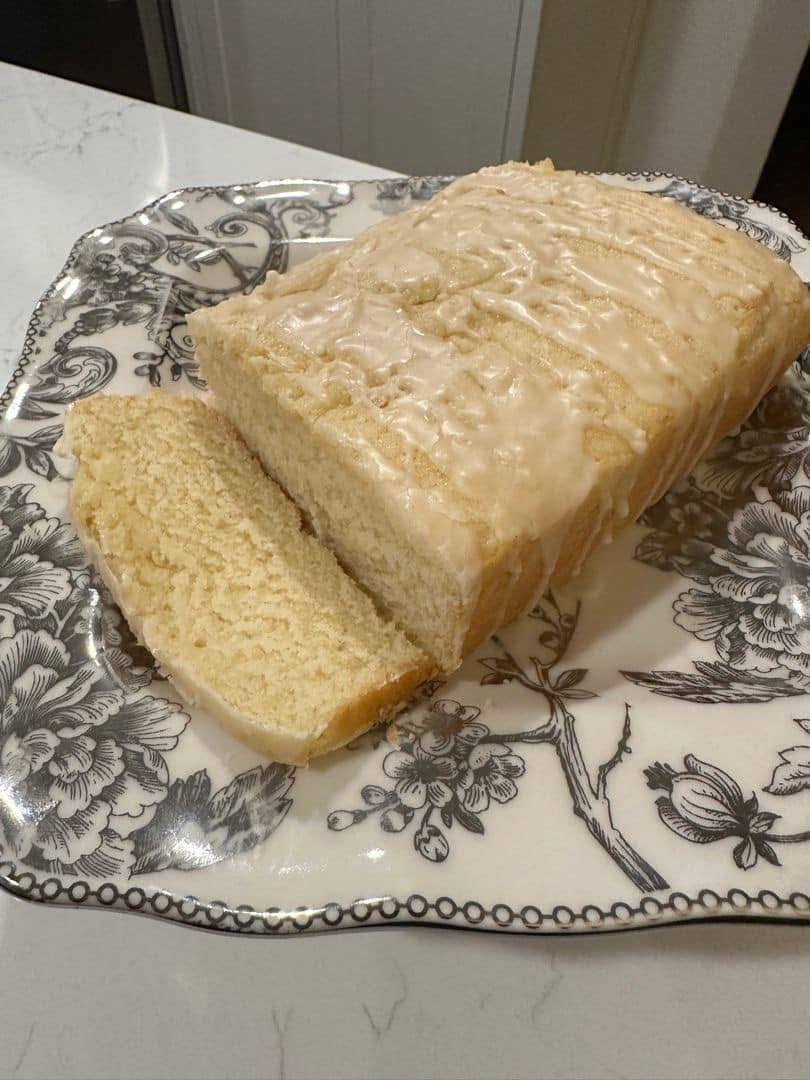
Homemade Glazed Lemon Loaf

🍋 Homemade Glazed Lemon Loaf

Ingredients

For the Cake:

  • 1 ½ cups All-purpose flour

  • 1 tsp Baking powder

  • ½ tsp Salt

  • 1 cup Granulated sugar

  • 1 tbsp Lemon zest (about 2 lemons)

  • ½ cup Unsalted butter (softened)

  • 2 Large eggs (room temperature)

  • ½ tsp Vanilla extract

  • 2 tbsp Fresh lemon juice

  • ½ cup Sour cream or plain Greek yogurt (this creates the moist texture seen in your photo)

For the Lemon Glaze:

  • 1 cup Powdered sugar

  • 2-3 tbsp Fresh lemon juice


Instructions

  1. Prep: Preheat your oven to 350°F (175°C). Grease a 9×5 inch loaf pan and line it with parchment paper for easy removal.

  2. Cream Butter & Sugar: In a large bowl, rub the lemon zest into the sugar with your fingers until fragrant. Add the softened butter and beat with a mixer until light and fluffy (about 3 minutes).

  3. Add Wet Ingredients: Beat in the eggs one at a time, then stir in the vanilla and 2 tablespoons of lemon juice.

  4. Dry Ingredients: In a separate bowl, whisk the flour, baking powder, and salt.

  5. Combine: Gradually add the dry ingredients to the butter mixture, alternating with the sour cream. Start and end with the flour. Do not overmix; stir just until the white streaks of flour disappear.

  6. Bake: Pour the batter into the prepared pan. Bake for 45–55 minutes, or until a toothpick inserted into the center comes out clean.

  7. Cool: Let the loaf cool in the pan for 15 minutes, then transfer to a wire rack to cool completely.

  8. Glaze: Whisk the powdered sugar and lemon juice until smooth. Once the cake is cool, pour the glaze over the top, letting it drip down the sides as shown in your image.


Tips for Success

  • Room Temperature: Ensure your eggs and sour cream are at room temperature to prevent the batter from curdling.

  • Zest First: Always zest the lemons before you juice them—it’s much easier!

  • Thicker Glaze: If you want a whiter, thicker glaze like the one in your photo, add the lemon juice one teaspoon at a time until you reach a heavy, glue-like consistency.

Million Dollar Spaghetti Casserole

Ingredients You’ll Need

  • Spaghetti – Cooked just until al dente so it holds up during baking.

  • Ground Beef – Adds heartiness and flavor to the sauce.

  • Marinara or Pasta Sauce – Use your favorite jarred or homemade version.

  • Cream Cheese – Softened to blend smoothly with other cheeses.

  • Ricotta Cheese – For that creamy middle layer.

  • Sour Cream – Adds tang and keeps the center soft and luscious.

  • Mozzarella Cheese – For that irresistible gooey top.

  • Butter – A few pats melt into the noodles for extra richness.

  • Garlic and Italian Seasoning – Essential flavor boosters.

Step-by-Step Instructions

  1. Cook the Pasta: Boil spaghetti until al dente, drain, and toss with a bit of butter.

  2. Brown the Beef: In a large skillet, cook the ground beef with garlic and seasoning until fully browned. Add the marinara sauce and simmer for a few minutes.

  3. Mix the Cheese Layer: In a bowl, stir together softened cream cheese, sour cream, and ricotta until creamy.

  4. Assemble the Casserole: In a greased baking dish, layer half the spaghetti, then spread the cheese mixture over it. Top with remaining pasta, pour meat sauce over the top, and sprinkle generously with mozzarella.

  5. Bake: Cover with foil and bake at 350°F (175°C) for 30 minutes. Remove foil and bake another 10–15 minutes until bubbly and golden.

Easy Chocolate Chip Cookies

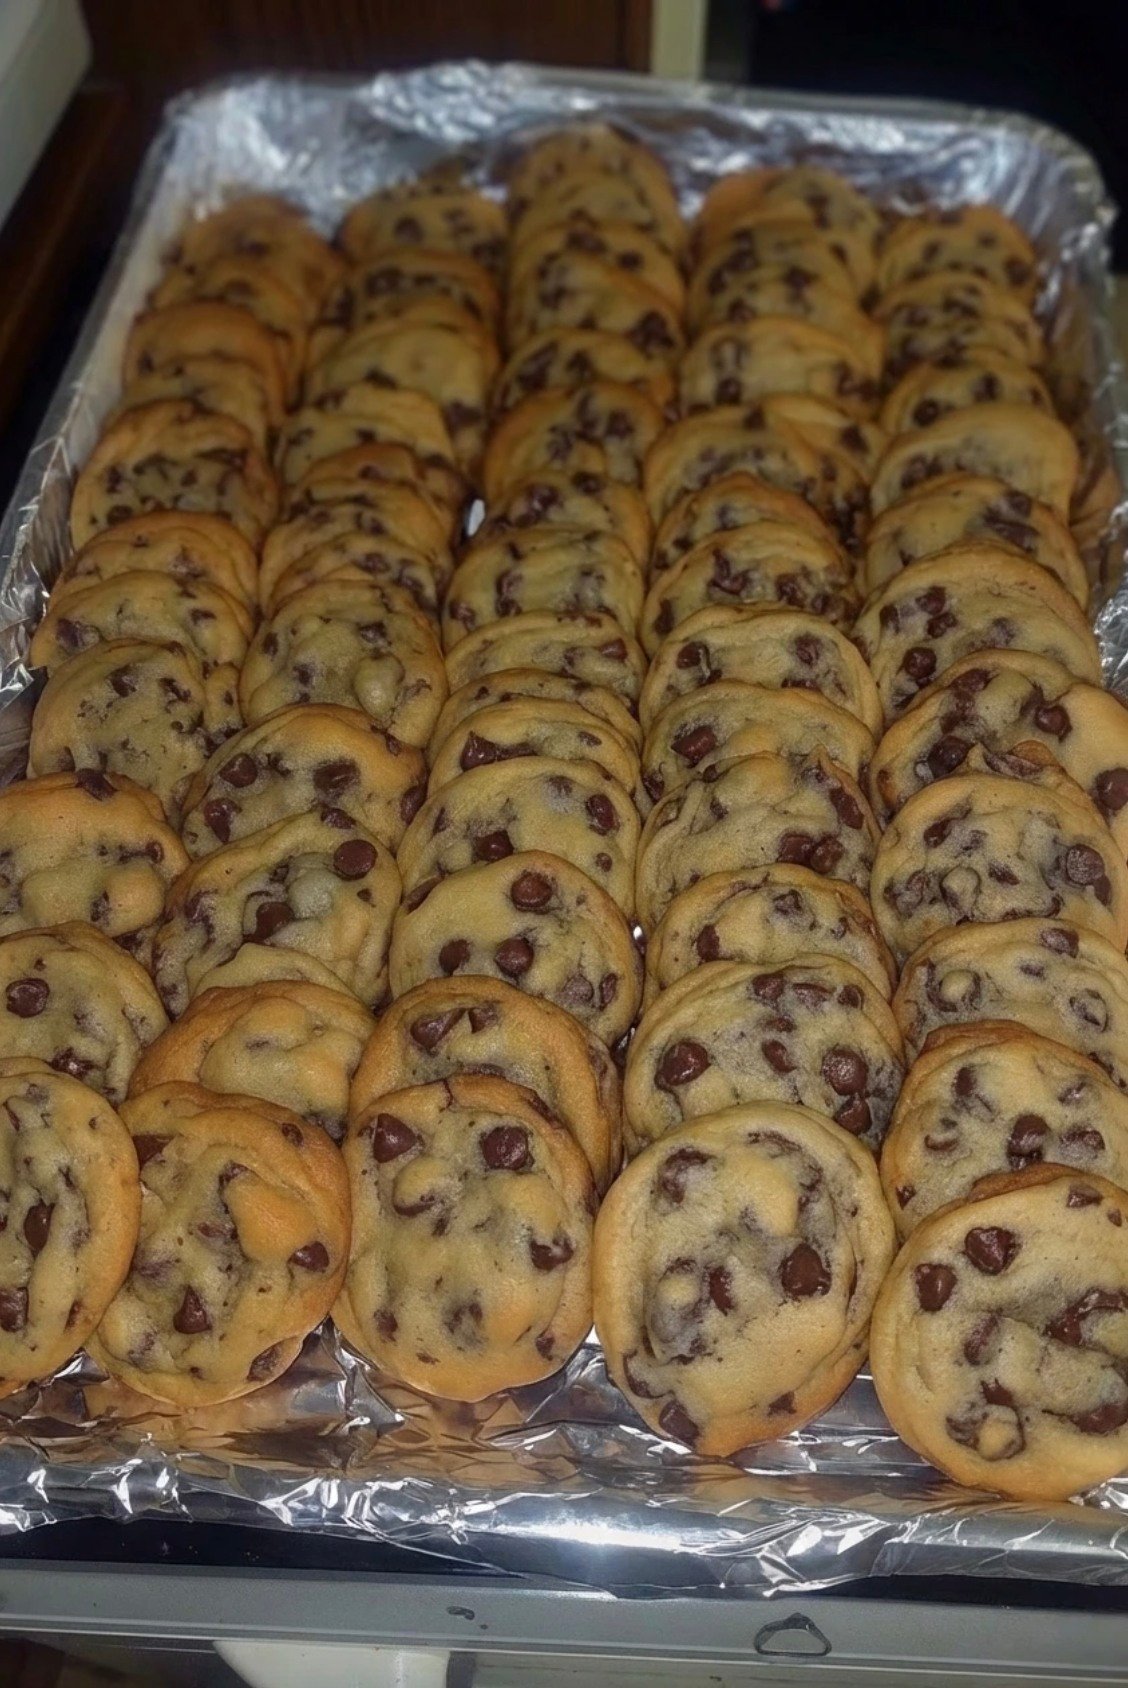
Easy Chocolate Chip Cookies

Ingredients

  • 4 tablespoons unsalted butter 56g, very soft with some melted spots (see notes)
  • 3 tablespoons granulated sugar 38g
  • 3 tablespoons light or dark brown sugar 38g
  • 1 large egg yolk 19g
  • ¾ teaspoon pure vanilla extract
  •  cup all-purpose flour 86g, spooned and leveled
  • ¼ teaspoon baking soda
  •  teaspoon salt
  •  cup chocolate chips plus extra for topping

Instructions

  • Preheat the oven to 350°F (175°C) and line a baking sheet with parchment paper.
  • In a medium bowl, combine the butter and both sugars using a silicone spatula, stirring for at least one minute until well blended. Add the egg yolk and vanilla, stirring until smooth.
  • Sprinkle the flour, baking soda, and salt over the butter mixture, then stir until just combined. Fold in the chocolate chips.
  • Scoop dough into mounds of about 2 tablespoons each, placing them a few inches apart on the baking sheet. You should have 5-6 dough balls. If desired, press a few extra chocolate chips onto the tops of the dough balls for added texture.
  • Arrange the dough balls to be higher rather than wider, which helps prevent them from spreading too much.
  • Bake for 9-12 minutes, until the edges start to turn golden brown and the centers are slightly under-baked.
  • Transfer the baking sheet to a wire rack to allow the cookies to cool and firm up before serving.

Round Seeded Bread Baked in Glass Dish!

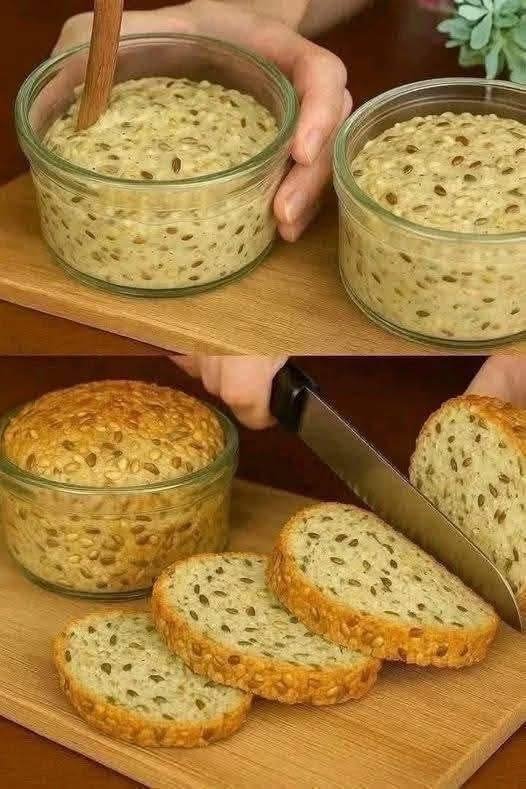
🍞 Round Seeded Bread (Baked in a Glass Dish)

🧾 Ingredients (1 round loaf)

Dry ingredients

  • 3 cups all-purpose flour (or bread flour)

  • 1 packet (2¼ tsp) active dry yeast

  • 1½ tsp salt

  • 1 tbsp sugar or honey

Seeds (use any mix you like)

  • 2 tbsp sunflower seeds

  • 1 tbsp sesame seeds

  • 1 tbsp pumpkin seeds

  • 1 tbsp flax or chia seeds

Wet ingredients

  • 1¼ cups warm water (about 110°F / 43°C)

  • 2 tbsp olive oil

Optional topping

  • Extra seeds for sprinkling


👩‍🍳 Instructions

1️⃣ Activate the yeast

  1. In a large bowl, mix warm water and sugar (or honey).

  2. Sprinkle yeast on top.

  3. Let sit 5–10 minutes until foamy.


2️⃣ Make the dough

  1. Add olive oil to the yeast mixture.

  2. Stir in flour, salt, and seeds.

  3. Mix until a shaggy dough forms.


3️⃣ Knead & first rise

  1. Knead by hand on a floured surface for 8–10 minutes
    (or 5 minutes with a stand mixer)

  2. Dough should be smooth and elastic.

  3. Place in a lightly oiled bowl, cover, and let rise 1–1½ hours, until doubled.


4️⃣ Shape & second rise

  1. Punch down dough and shape into a tight round loaf.

  2. Grease a round glass baking dish (8–9 inches).

  3. Place dough seam-side down in the dish.

  4. Cover and let rise 30–45 minutes.


5️⃣ Bake

  1. Preheat oven to 375°F (190°C).

  2. Lightly brush top with water or olive oil.

  3. Sprinkle extra seeds on top (optional).

  4. Bake 35–40 minutes, until:

    • Golden brown

    • Sounds hollow when tapped

    • Internal temp ~190–195°F (if you check)


6️⃣ Cool & serve

  • Let cool in the dish 10 minutes, then remove

  • Cool completely before slicing (important!)


❓ Q & A: Round Seeded Bread (Glass Dish)

Q: Can I bake bread in a glass dish safely?

A: Yes! Glass is great for even baking—just avoid sudden temperature changes.


Q: Do I need to adjust temperature for glass?

A: Slightly. Glass retains heat, so 375°F works better than higher temps.


Q: Why did my bread brown too fast on the bottom?

A: Glass holds heat longer. Try:

  • Placing dish on a baking sheet

  • Lowering oven temp by 25°F

  • Moving rack to the middle


Q: Can I use whole wheat flour?

A: Yes—replace up to 50% of the flour. Add 1–2 tbsp extra water if dough feels dry.


Q: How do I make the crust softer?

A: Brush with butter after baking and cover loosely while cooling.


Q: How do I make the crust crunchier?

A:

  • Brush top with water before baking

  • Place a small oven-safe dish of water on the bottom rack


Q: How long does it keep?

A:

  • Room temp: 2–3 days (wrapped)

  • Freeze slices: up to 2 months


Q: Can I make this no-knead?

A: Yes! Use less yeast (½ tsp), mix dough, and let rise 8–12 hours before baking.

Copycat Sweet Blueberry Biscuits

Copycat Sweet Blueberry Biscuits

Inspired by the North Carolina classic, these biscuits are flaky, sweet, and finished with a bright lemon-vanilla glaze.

  • Prep time: 15 minutes (+ 1 hour for freezing butter)

  • Bake time: 7–12 minutes

  • Yields: Approx. 6 large biscuits

Ingredients

For the Biscuits:

  • 2 cups All-purpose flour

  • 1/3 cup Granulated sugar

  • 4 tsp Baking powder

  • 1 tsp Salt

  • 5 tbsp Butter (cold or frozen)

  • 1 cup Cold milk

  • 3 oz Blueberries (fresh or dried)

  • 1 tbsp Butter, melted (for brushing)

For the Sweet Glaze:

  • 1 cup Powdered sugar

  • 1/8 cup Water (approx. 2 tbsp)

  • 1 tsp Vanilla extract

  • 1/2 tsp Lemon juice

  • 1 tsp Honey (optional, for extra depth)


Instructions

1. Prep the Butter and Oven

  • Pro-tip: Place your butter stick in the freezer for roughly one hour before starting.

  • Preheat your oven to 450°F (230°C).

2. Mix the Dough

  • In a large bowl, whisk together the flour, sugar, baking powder, and salt.

  • Gently fold in the cold milk and blueberries until a shaggy dough forms.

3. Incorporate the Butter

  • Remove the butter from the freezer and break or grate it into small chunks.

  • Turn the dough out onto a floured surface. Spread a portion of the frozen butter chunks over the dough.

  • Fold and Knead: Fold the dough over the butter, press down, and repeat the process until all the frozen butter is evenly distributed. This “folding” method creates the flaky layers.

4. Cut and Bake

  • Roll the dough out to a thickness of 1/4 to 1/2 inch (keep it slightly thick for taller biscuits).

  • Using a biscuit cutter, cut approximately 6 biscuits. Press straight down—don’t twist the cutter, or the edges will seal and won’t rise as high!

  • Place on a baking sheet and bake for 7 to 12 minutes, or until the tops are golden brown.

5. Finish and Glaze

  • Immediately after removing from the oven, brush the tops with 1 tablespoon of melted butter.

  • In a small bowl, whisk together the powdered sugar, water, vanilla, lemon juice, and honey until smooth.

  • Drizzle the glaze generously over the warm biscuits while they are still hot.


Helpful Tips

  • Fresh vs. Dried: If using fresh berries, be very gentle when folding so you don’t “bleed” the juice into the dough (unless you want purple biscuits!).

  • Cold is Key: The secret to the “melt-in-your-mouth” texture is keeping that butter frozen until it hits the hot oven; the steam from the melting butter is what creates the lift.

Cheesy Garlic Chicken Wraps

Ingredients

  • 2 large chicken breasts diced
  • 1 tbsp olive oil
  • 2 tsp garlic powder
  • 1 tsp onion powder
  • 1 tsp paprika
  • Salt and pepper to taste
  • 1 cup shredded cheddar cheese
  • 1/2 cup shredded mozzarella cheese
  • 4 large flour tortillas
  • 1/2 cup creamy garlic sauce store-bought or homemade
  • Fresh parsley chopped (optional, for garnish)

Instructions

  • Season the Chicken
  • In a large bowl, toss the diced chicken with olive oil, garlic powder, onion powder, paprika, salt, and pepper until well coated.
  • Cook the Chicken
  • Heat a non-stick skillet over medium heat. Add the seasoned chicken and cook for 6-8 minutes, stirring occasionally, until fully cooked and golden brown. Remove from heat and set aside.
  • Assemble the Wraps
  • Spread a spoonful of creamy garlic sauce onto each tortilla. Add the cooked chicken and sprinkle a generous amount of cheddar and mozzarella cheese over the top.
  • Melt and Crisp
  • Fold the tortillas over the filling to form wraps. Return them to the skillet and cook for 2-3 minutes per side until the cheese melts and the tortillas turn golden brown.
  • Serve and Enjoy
  • Slice in half, garnish with fresh parsley if desired, and serve warm. Enjoy the cheesy, garlicky goodness in every bite!

Creamy Sweet Banana Pudding

This recipe sounds like a dream—the combination of cream cheese and sweetened condensed milk gives it that “mousse-like” texture that sets it apart from traditional puddings.

Since you asked for full recipes, I have organized your notes into a clean, easy-to-follow format for your collection.


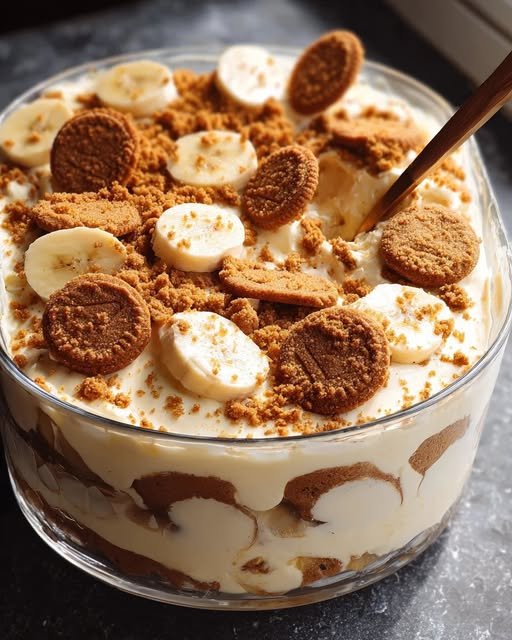
Creamy Sweet Banana Pudding

This recipe is exceptionally rich and creamy. Using instant pudding and room-temperature cream cheese ensures a smooth, thick consistency without any cooking required.

  • Prep time: 20 minutes

  • Chill time: 3–4 hours

  • Servings: 10–12

  • Shelf Life: Best eaten within 48 hours.

Ingredients

  • 1 (8-oz) block cream cheese, room temperature

  • 1 (14-oz) can sweetened condensed milk

  • 1 (5-oz) package instant vanilla pudding mix

  • 2 1/2 cups cold milk

  • 2 tsp vanilla extract

  • 8 oz heavy cream, whipped (or one 8-oz tub of Cool Whip)

  • 4 ripe bananas, sliced

  • 10 oz shortbread cookies (like Chessmen or Lorna Doone)

Instructions

  1. Cream the Base: In the bowl of a stand mixer fitted with the whisk attachment, beat the softened cream cheese and sweetened condensed milk until completely smooth. Scrape the sides of the bowl to ensure there are no lumps (about 2–3 minutes).

  2. Thicken the Pudding: Add the dry pudding mix, cold milk, and vanilla. Start on low speed for 30 seconds to avoid a mess, then increase to high. Beat for 4–5 minutes until the mixture is thick and smooth.

  3. Lighten the Texture: Gently fold half (4 oz) of your whipped cream into the pudding mixture until just combined. Set the other half aside for the topping.

  4. Layer the Dish: * Line the bottom of a 9×13 baking dish (or a trifle bowl) with a single layer of shortbread cookies.

    • Place the sliced bananas evenly over the cookie layer.

  5. Assemble: Spread the pudding mixture evenly over the bananas. Top the pudding with the remaining whipped cream, smoothing it to the edges.

  6. Garnish: Crumble any remaining cookies over the top or tuck whole cookies around the edges for decoration.

  7. Chill: Cover with plastic wrap and refrigerate for at least 3–4 hours before serving to allow the cookies to soften slightly and the flavors to meld.


Pro-Tips

  • Banana Ripeness: Use bananas that are yellow with just a few brown spots. If they are too green, they won’t be sweet enough; if they are too dark, they will become mushy too quickly.

  • Smoothness Hack: If your cream cheese is still a bit cold, microwave the unwrapped block for 15 seconds before mixing to prevent lumps.

Magic Custard Cake Loaf

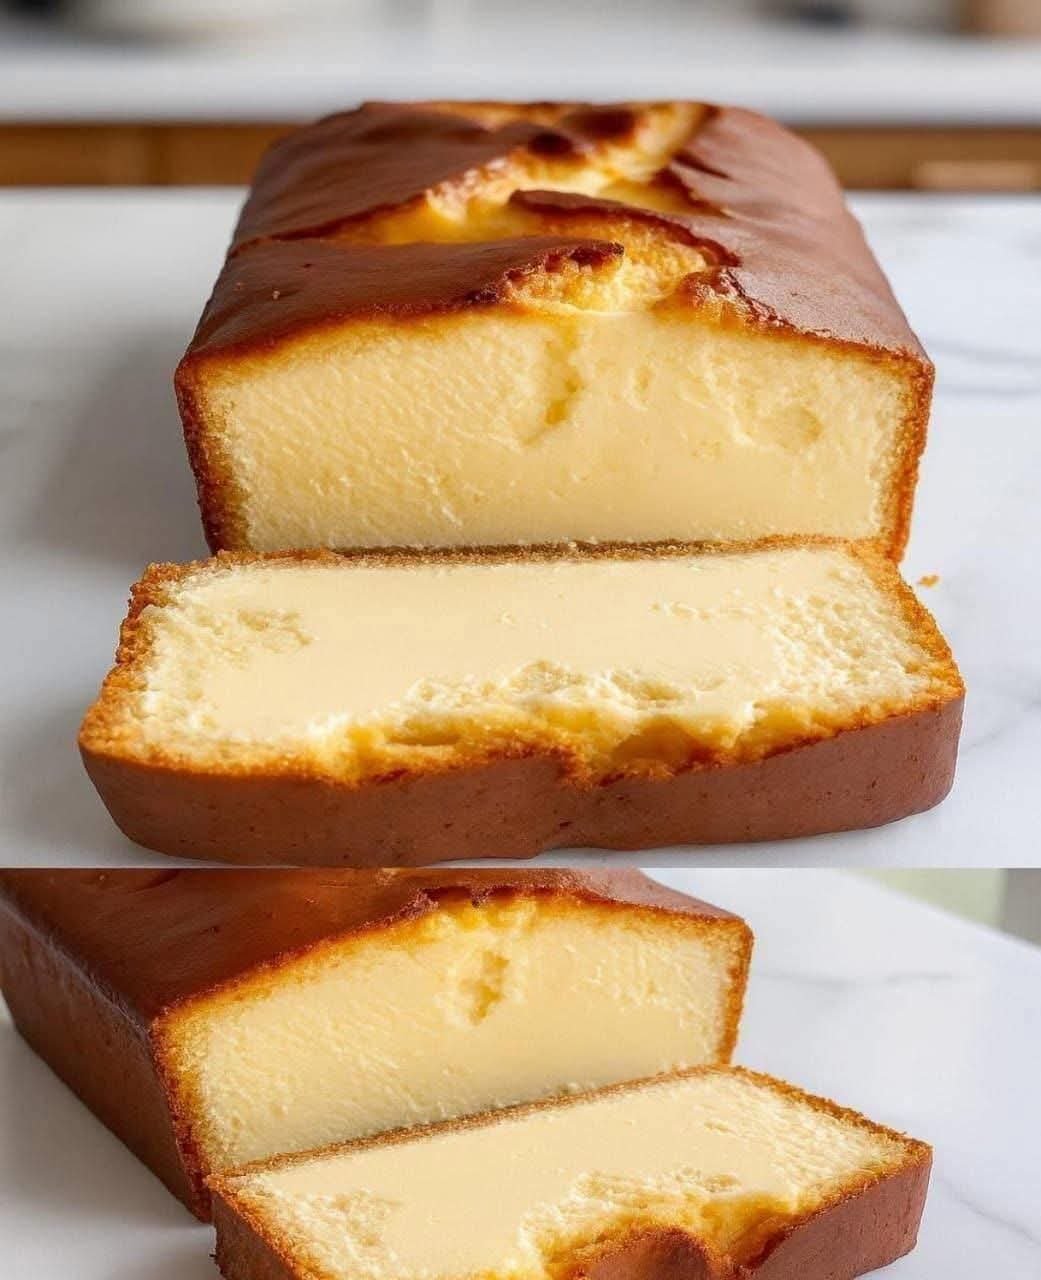
Magic Custard Cake Loaf

  • Yields: 1 loaf (approx. 8–10 servings)
  • Prep Time: 20 mins
  • Bake Time: 50–60 mins

Ingredients

  • 4 eggs (separated, at room temperature)
  • ¾ cup (150g) sugar
  • 1 stick (113g) unsalted butter, melted and slightly cooled
  • 1 tsp vanilla extract
  • ¾ cup (115g) all-purpose flour
  • 2 cups (500ml) milk, lukewarm
  • Optional: A pinch of salt or lemon zest for flavor

Instructions

  1. Prep: Preheat your oven to 160°C (325°F). Grease a standard 9×5 inch loaf pan and line it with parchment paper, leaving an overhang on the sides for easy removal.
  2. Whip Egg Whites: In a clean bowl, beat the egg whites until stiff peaks form. Set aside.
  3. Mix Yolks and Sugar: In a separate large bowl, beat the egg yolks and sugar until the mixture is pale and creamy (about 2 minutes).
  4. Combine Fats and Aromatics: Stir the melted butter and vanilla into the yolk mixture until smooth.
  5. Add Flour and Milk: Mix in the flour until just combined. Gradually whisk in the lukewarm milk until the batter is thin and smooth—it will look very watery, similar to crepe batter.
  6. Fold in Whites: Gently fold the stiff egg whites into the batter in three additions. Note: Do not over-mix; you want small “islands” of egg white floating on top to create the sponge layer.
  7. Bake: Pour the batter into the prepared loaf pan. Bake for 50–60 minutes. The cake is done when the top is golden and the center has a slight jiggle but is not liquid.
  8. Cool and Set: Allow the cake to cool completely in the pan at room temperature, then refrigerate for at least 2–3 hours (or overnight) to allow the custard layer to set before slicing.

Success Tips

  • Temperature Matters: Ensure your milk is lukewarm, not hot, to prevent curdling the eggs.
  • Don’t Rush the Chill: Slicing the cake while warm will cause the creamy custard layer seen in your photo to run.
  • Avoid Over-folding: If you fold the egg whites in too thoroughly, you will lose the distinct spongy top layer.