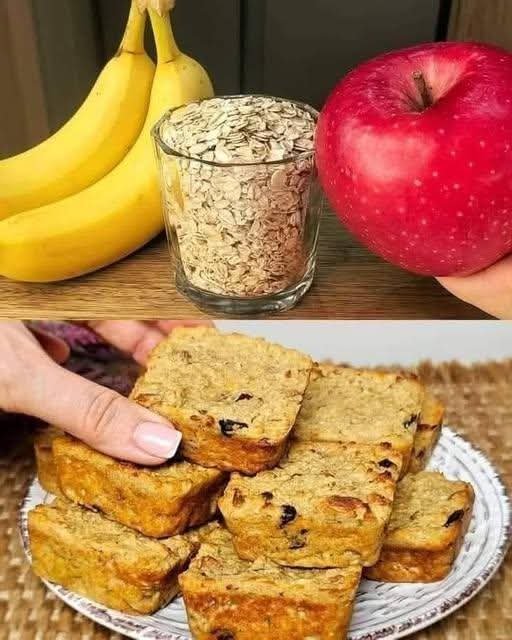
These soft and chewy peanut butter energy balls are quick to prepare and made with simple ingredients. They are perfect for snacks, lunchboxes, or a small sweet bite during the day.
📝 Ingredients
⅔ cup creamy peanut butter
1 cup old-fashioned oats (plus extra for rolling, if desired)
1½ tablespoons honey
¼ cup mini dark chocolate chips (optional)
1 tablespoon flax seeds or chia seeds (optional)
👩🍳 Step-by-Step Instructions
1️⃣ Mix the Base
In a medium mixing bowl, add:
Peanut butter
Honey
Stir well until smooth and evenly blended.
2️⃣ Add the Dry Ingredients
Add the oats to the peanut butter mixture. If using chocolate chips or seeds, add them now.
Mix thoroughly until everything is well combined and the mixture becomes thick and slightly sticky.
3️⃣ Chill the Mixture (Optional but Helpful)
Place the bowl in the refrigerator for 15–30 minutes. This helps the mixture firm up and makes shaping easier.
4️⃣ Shape the Balls
Scoop about 1 tablespoon of the mixture at a time. Roll it gently between your palms to form a small ball (about 2.5 cm / 1 inch wide).
If desired, roll each ball in dry oats for extra texture.
5️⃣ Set and Store
Place the balls on a tray or plate. Refrigerate for 30 minutes until firm.
Transfer to an airtight container.
📦 Storage
Refrigerator: up to 7 days
Freezer: up to 1 month
⭐ Helpful Tips
Use smooth peanut butter for easy mixing
Add a little extra oats if mixture feels too soft
Add a small splash of milk if mixture feels too dry
Prep time: 10 mins | Cook time: 20 mins | Servings: 4
Ingredients
Protein: 1 lb Ground Italian Sausage (mild or hot, depending on your preference).
Vegetables: 1 small onion (diced), 2 cloves garlic (minced), and 1 can (14.5 oz) diced tomatoes.
Broth: 4 cups chicken broth.
Creaminess: 8 oz cream cheese (softened and cubed) or 1 cup heavy cream.
Seasoning: 1 tsp dried oregano, ½ tsp red pepper flakes (optional), salt, and pepper to taste.
Garnish: Fresh chopped parsley or basil (as seen in your photo).
Instructions
Brown the Meat: In a large pot over medium-high heat, cook the ground sausage until browned and crumbled. Drain the excess fat, but leave a little for flavor.
Sauté Aromatics: Add the diced onion to the pot. Cook for 3–4 minutes until translucent, then stir in the garlic for about 30 seconds until fragrant.
Simmer: Pour in the chicken broth and the canned tomatoes (with их juices). Stir in the oregano and red pepper flakes. Bring the mixture to a gentle boil, then reduce heat and simmer for 10 minutes.
Make it Creamy: Lower the heat to medium-low. Add the cream cheese or heavy cream. Stir constantly until the cheese is completely melted and the broth is smooth and orange-tinted.
Serve: Ladle into bowls and top with plenty of fresh parsley or basil.
Pro-Tips for the Best Result
The “Orange” Glow: To get that vibrant color in the photo, ensure you use tomatoes with their juices and let the cream cheese fully emulsify into the broth.
Add Greens: If you want more texture, stir in two cups of fresh spinach at the very end until it wilts.
Cheese: A sprinkle of shredded Parmesan on top adds a nice salty bite.
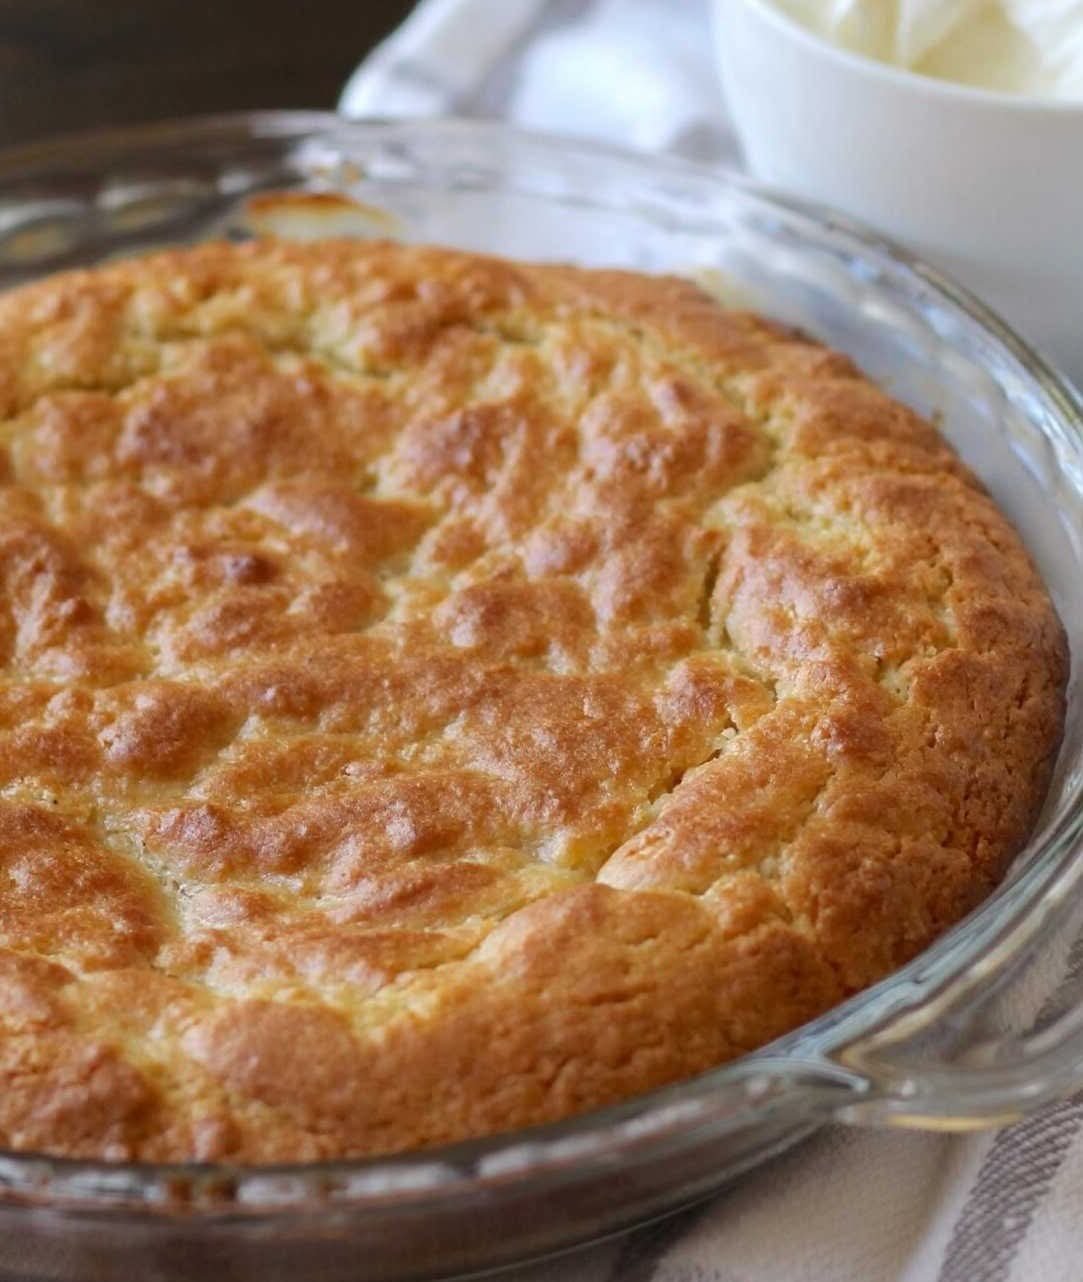
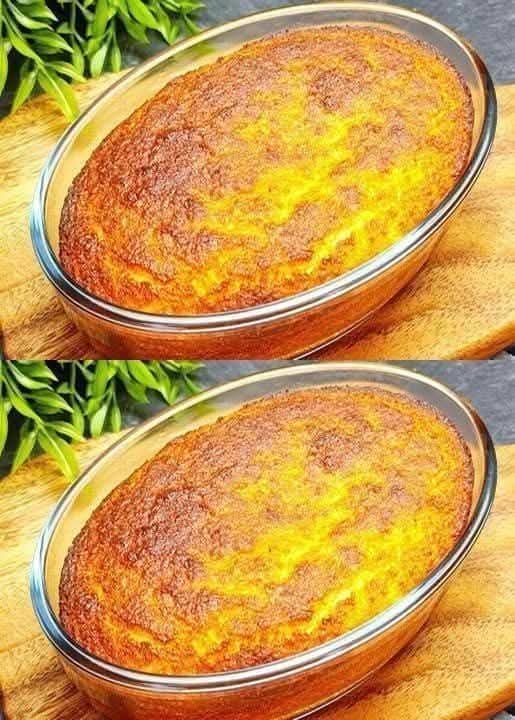
This apple sponge pie has a fluffy cake base topped with tender, lightly sweetened apples. It’s made with simple pantry ingredients and has a beautiful golden finish.
📝 Ingredients
For the Apple Topping
2 large apples, peeled and sliced
25 g butter
1 tablespoon lemon juice
20 g sugar
For the Sponge Batter
2 large eggs
130 g sugar
60 ml milk
150 g self-rising flour (or 150 g all-purpose flour + 1 teaspoon baking powder)
👩🍳 Step-by-Step Instructions
1️⃣ Prepare the Apples
Peel and core the apples.
Slice them evenly so they cook uniformly.
Heat a pan over medium heat and melt the butter.
Add the apple slices, lemon juice, and sugar.
Cook gently for 3–5 minutes, stirring lightly, until the apples soften and become lightly golden.
Remove from heat and allow them to cool slightly.
2️⃣ Make the Batter
In a large bowl, whisk the eggs and sugar together until pale and fluffy.
Add the milk and mix gently until combined.
3️⃣ Add the Flour
Sift the flour (and baking powder if using).
Fold it into the batter gently using a spatula.
Mix only until combined to keep the batter light and airy.
4️⃣ Assemble the Pie
Preheat oven to 180°C (350°F).
Line a round baking tin with parchment paper.
Pour the batter evenly into the tin.
Arrange the cooked apple slices on top in a neat pattern.
5️⃣ Bake
Bake for 30–35 minutes or until a toothpick inserted in the center comes out clean.
The surface should be golden in color.
6️⃣ Cool and Serve
Let the pie cool in the pan for 10 minutes, then remove carefully.
Serve warm or at room temperature.
Optional toppings: ✔ Light dusting of powdered sugar ✔ Spoon of whipped cream ✔ Vanilla ice cream
⭐ Helpful Tips
Slice apples evenly for even cooking
Do not overmix the batter
Let the pie cool slightly before slicing
Store in an airtight container for up to 2 days
✨ Optional Finish
For a shiny top, lightly brush the warm apples with a little apricot jam or honey after baking.
This homemade nougat is smooth, milky, and pleasantly chewy, filled with crunchy roasted peanuts and naturally sweet dried fruits. It’s simple to prepare and perfect for snacks, gifting, or dessert trays.
📝 Ingredients
500 g (about 3 cups) peanuts
50 g (¼ cup) black sesame seeds
10 g (2 teaspoons) white sesame seeds
2 pieces dried mango, chopped
1 handful dried cranberries
30 g (2 tablespoons) butter (or a small amount of corn oil)
200 g (7 oz) marshmallows
100 g (1 cup) milk powder
👩🍳 Step-by-Step Instructions
1️⃣ Prepare the Nuts and Fruits
Roast the peanuts in a dry pan or oven until lightly golden and fragrant.
Let them cool slightly, then rub off and remove the skins.
Chop the dried mango into small, bite-sized pieces.
Set aside the cranberries, sesame seeds, and chopped mango.
2️⃣ Melt the Base
Place a non-stick pan over low heat.
Add the butter and let it melt gently.
Add the marshmallows and stir continuously until they melt completely and become smooth and glossy.
3️⃣ Add the Milk Powder
Slowly add the milk powder to the melted marshmallow mixture.
Stir quickly and evenly until fully blended and thickened.
4️⃣ Mix in the Nuts and Fruits
Turn off the heat.
Add:
Roasted peanuts
Black sesame seeds
White sesame seeds
Chopped dried mango
Cranberries
Mix thoroughly until all ingredients are well coated with the creamy mixture.
5️⃣ Shape the Nougat
Transfer the warm mixture onto parchment paper or a silicone baking mat.
Cover with another sheet of parchment paper and press it into a flat rectangle (about 2–3 cm / 1 inch thick).
Smooth the surface using a spatula or rolling pin.
6️⃣ Cool and Set
Let the nougat cool at room temperature or place it in the refrigerator until firm.
7️⃣ Slice and Serve
Once fully set, use a sharp knife to cut into small rectangles or squares.
Clean the knife between cuts for neat edges.
📦 Storage Tips
Store nougat in an airtight container at room temperature for up to 2 weeks.
To prevent sticking, wrap pieces individually in parchment paper or lightly dust them with milk powder.
You can make classic onion rings or crispy onion ring chips using simple ingredients and proper frying or baking methods.
🍽️ Recipe 1: Classic Crispy Onion Rings
📝 Ingredients
2 large sweet onions
2 cups all-purpose flour
1 teaspoon baking powder
1 teaspoon salt
1 teaspoon garlic powder
1 large egg
1 cup cold club soda
1½ cups panko breadcrumbs
Vegetable oil (for frying)
👩🍳 Instructions
1. Prepare the Onions
Peel the onions and slice them into thick rings. Separate the rings gently and set aside.
2. Make the Batter
In a bowl, mix:
Flour
Baking powder
Salt
Garlic powder
In another bowl, whisk:
Egg
Cold club soda
Combine both mixtures to form a smooth batter.
3. Coat the Rings
Dip each onion ring into the batter, letting excess drip off. Roll in panko breadcrumbs until fully coated.
4. Fry
Heat vegetable oil in a deep pan to medium heat (about 175°C / 350°F). Carefully place onion rings into hot oil. Fry for 2–3 minutes per side until golden and crisp.
5. Drain and Serve
Remove and place on paper towels to remove excess oil. Serve hot with ketchup or creamy dip.
🌸 Recipe 2: Onion Ring Chips (Crispy Bloom-Style)
📝 Ingredients
2 large sweet onions
2 cups all-purpose flour
1 teaspoon paprika
½ teaspoon garlic powder
½ teaspoon smoked paprika
½ teaspoon salt
2 eggs
1 tablespoon olive oil
1 tablespoon grated Parmesan cheese (optional)
👩🍳 Instructions
1. Prepare the Onion
Cut off the top of the onion. Place root-side down and slice downward in sections without cutting fully through the base. Gently spread the layers apart.
2. Prepare the Coating
Mix flour, paprika, garlic powder, smoked paprika, and salt in a bowl. In another bowl, whisk eggs with olive oil.
3. Coat the Onion
Dip the onion into egg mixture, then into flour mixture. Make sure seasoning reaches between layers.
4. Fry or Bake
For Frying: Heat oil to medium temperature. Lower onion carefully into oil and fry until golden brown.
For Baking: Place onion on baking tray. Bake at 200°C (400°F) for 25–30 minutes until crisp.
5. Serve
Place on plate and serve with creamy sauce or ketchup.
These four smooth and flavorful sauces are inspired by popular restaurant-style dips. They are mild, sweet, tangy, and creamy—perfect for burgers, fries, wraps, and grilled foods.
📝 Common Creamy Base
(Used for Yum Yum, Hamburger, and French Sauce)
½ cup high-quality mayonnaise
Place the mayonnaise in a small mixing bowl and use it as the base for each sauce.
🍅 1. Yum Yum Sauce (Sweet & Tangy)
Ingredients
½ cup mayonnaise
1 teaspoon tomato paste
½ teaspoon garlic powder
½ teaspoon paprika
1 teaspoon sugar
Instructions
Add mayonnaise to a bowl.
Mix in tomato paste until smooth.
Add garlic powder, paprika, and sugar.
Stir until evenly blended and creamy.
Taste and adjust sweetness or seasoning if needed.
🥤 Beetroot Basil Seed Infused Water (Refreshing & Naturally Colored)
This infused water combines vegetables, citrus, and basil seeds to create a lightly flavored, cooling drink with a beautiful natural color and pleasant texture.
📝 Ingredients
6 cups filtered drinking water
1 small beetroot, peeled and thinly sliced
1 small cucumber, sliced
½ lemon, sliced
1 tablespoon basil seeds (sabja)
A handful of fresh mint leaves
👩🍳 Step-by-Step Preparation
1️⃣ Prepare the Basil Seeds
Place the basil seeds in a small bowl. Add about ½ cup clean water and let them soak for 15 to 30 minutes.
They are ready when they swell and form a soft, jelly-like coating around each seed. Once soaked, strain off any extra water and set aside.
2️⃣ Prepare the Fruits and Vegetables
Wash the beetroot, cucumber, lemon, and mint thoroughly.
Peel the beetroot and slice it thinly so it releases color and flavor more easily.
Slice the cucumber and lemon into thin rounds.
3️⃣ Assemble the Infused Water
Pour 6 cups of water into a large glass pitcher or jar.
Add ingredients in this order for best appearance and flavor:
Beetroot slices (for natural color)
Cucumber slices
Lemon slices
Mint leaves
Gently stir to mix.
4️⃣ Add the Basil Seeds
Add the soaked basil seeds to the pitcher. Stir gently so they spread evenly through the water.
These seeds give the drink a pleasant texture and make it more enjoyable to sip.
5️⃣ Chill and Infuse
Cover the pitcher and place it in the refrigerator for at least 2 hours.
For deeper color and fuller flavor, allow it to infuse overnight.
6️⃣ Serve
Stir gently before serving. Pour into glasses, making sure each serving includes some basil seeds and fruit slices. Serve cold for best taste.
🌿 Ingredient Purpose (Simple & Safe Explanation)
Beetroot: Adds natural color and mild sweetness
Cucumber: Provides freshness and light flavor
Lemon: Adds gentle citrus taste
Mint: Gives a cooling and clean aroma
Basil seeds: Add texture and make the drink more satisfying
⭐ Helpful Tips
Use glass containers instead of plastic for better flavor
Thin slices release flavor faster
Drink within 24 hours for best freshness
You can refill the pitcher once with water before discarding the ingredients
This chocolate mousse is smooth, fluffy, and rich in flavor, made with simple ingredients and gentle folding to keep it airy.
📝 Ingredients
1 cup (170 g) semi-sweet chocolate, finely chopped
3 tablespoons (45 ml) water
3 large eggs, separated
2 tablespoons (25 g) granulated sugar
¾ cup (180 ml) heavy cream (cold)
A small pinch of salt
👩🍳 Step-by-Step Instructions
1️⃣ Melt the Chocolate
Place the chopped chocolate and water into a heat-safe bowl. Melt using one of these methods:
Double boiler: Set the bowl over gently heated water and stir until smooth.
Microwave: Heat in 20-second intervals, stirring each time until fully melted.
Set aside and allow the chocolate to cool slightly so it is warm, not hot.
2️⃣ Add the Egg Yolks
Add the egg yolks to the melted chocolate one at a time, whisking well after each addition. The mixture should become smooth and glossy.
3️⃣ Whip the Cream
In a separate bowl, beat the cold heavy cream until stiff peaks form. This means the cream holds its shape when you lift the whisk.
Gently fold the whipped cream into the chocolate mixture using a spatula. Use light movements to keep the texture fluffy.
4️⃣ Whip the Egg Whites
In a clean, dry bowl, beat the egg whites with a pinch of salt until they become foamy. Slowly add the sugar and continue beating until stiff, shiny peaks form.
5️⃣ Fold the Mixture
Add the whipped egg whites to the chocolate mixture in two portions. Fold gently using a cut-and-fold motion until just combined. Do not stir, as this removes the air and makes the mousse heavy.
6️⃣ Chill and Set
Spoon the mousse into serving cups or glasses. Cover and refrigerate for at least 2 to 4 hours until set and creamy.
🌱 Bonus: Basil Seed Chocolate Mousse Topping
Basil seeds (Sabja) add a refreshing texture and visual beauty.
How to Prepare Basil Seeds
Soak 1 tablespoon basil seeds in ½ cup water for 15 minutes
They will swell and form a gel-like coating
Drain excess water before using
How to Use
✔ As a topping: Spoon soaked seeds over chilled mousse ✔ As a layer: Add seeds to the bottom of the glass before filling with mousse
A soft, buttery, and cheesy bread loaf stuffed with gooey mozzarella and infused with aromatic garlic butter. Perfect as a snack, side dish, or even a party appetizer.
Ingredients
For the Dough:
2 cups all-purpose flour
1 tsp sugar
1 tsp salt
1 tbsp olive oil
1 tsp instant yeast
¾ cup warm water (adjust as needed)
For the Filling:
1½ to 2 cups mozzarella cheese (grated or shredded)
(Optional): small bits of pepperoni, cooked bacon, or chopped veggies (bell pepper, onion, olives)
For Garlic Butter:
2 tbsp butter (melted)
3–4 garlic cloves (minced or grated)
½ tsp oregano or Italian seasoning
A pinch of salt
Optional Toppings:
Grated Parmesan
Chilli flakes
Dried herbs (basil, parsley, thyme)
Instructions
1. Prepare the Dough
In a large bowl, mix warm water, sugar, and yeast. Let it sit for 5–7 minutes until frothy.
Add flour, salt, and olive oil. Mix to form a soft dough.
Knead for about 8–10 minutes until smooth and elastic.
Cover the bowl with a damp cloth and let it rest for 1–1½ hours, or until doubled in size.
2. Make the Garlic Butter
Mix melted butter, minced garlic, salt, and oregano (or Italian seasoning).
Set aside to brush over the bread later.
3. Shape and Stuff the Bread
Once the dough has risen, punch it down to release air.
Divide it into two equal portions.
Roll out the first portion into a flat circle (like a pizza base).
Spread mozzarella and optional fillings evenly.
Place the second rolled-out dough layer on top and seal the edges tightly.
Brush generously with the garlic butter mixture.
4. Bake
Preheat oven to 375°F (190°C).
Transfer the bread to a parchment-lined baking tray.
Bake for 18–22 minutes, or until golden brown and puffy.
Once baked, brush with the remaining garlic butter and sprinkle with herbs, chili flakes, or Parmesan if desired.
5. Serve
Slice and serve warm!
Best enjoyed with marinara sauce, cheesy dip, or even soup.
Notes & Tips
Cheese Options: Mozzarella gives the best stretch, but you can mix it with cheddar or provolone for flavor.
Crispier Crust: Brush with olive oil instead of butter before baking.
Extra Garlicky: Roast garlic before adding to butter for a milder, sweeter flavor.
No oven? Cook covered in a skillet on low heat, flipping halfway until golden and the cheese melts.
Make Ahead: Prepare dough and refrigerate overnight for deeper flavor.
Servings
Makes 2 medium stuffed breads (serves 4–6 people).
Approximate Nutritional Info (Per Serving, 1/6th of loaf)
(Values may vary depending on toppings and cheese amount.)
Nutrient
Amount
Calories
280 kcal
Carbohydrates
30 g
Protein
10 g
Fat
12 g
Saturated Fat
6 g
Fiber
1 g
Sodium
400 mg
Calcium
180 mg
Health Benefits
Calcium & Protein: From cheese for bone and muscle health.
Garlic: Boosts immunity and heart health.
Homemade Bread: Fewer preservatives and customizable ingredients.
Olive Oil: Contains healthy monounsaturated fats.
(Enjoy in moderation—it’s indulgent comfort food!)
Frequently Asked Questions (Q&A)
Q1: Can I use store-bought pizza dough? Yes! It saves time and works perfectly—just let it rest for 20 minutes before shaping.
Q2: How do I store leftovers?
Keep in an airtight container in the fridge for up to 2 days. Reheat in the oven or air fryer for best texture.
Q3: Can I freeze it?
Yes, freeze baked bread for up to 1 month. Thaw and reheat before serving.
Q4: How can I make it spicy?
Add chili flakes to the filling or mix a bit of hot sauce into the garlic butter.
Q5: Can I make it vegan?
Use vegan cheese andplant-based butter, and skip dairy—the result will still be delicious.
Cornmeal: A pinch (for the bottom of the tray to add crunch)
The Toppings:
Pizza Sauce: 1/2 cup (tomato-based with herbs)
Mozzarella Cheese: 1.5 to 2 cups, shredded
Pepperoni: 15–20 slices (ensure they are thinly sliced)
Green Bell Pepper: 1 medium, sliced into long, thin strips
Instructions
Prep the Oven: Preheat your oven to 475°F (245°C). If you have a pizza stone, put it in now; otherwise, a standard baking sheet works great.
Prepare the Tray: Line your baking sheet or pizza pan with aluminum foil (as seen in your photo). Lightly grease the foil or sprinkle a little cornmeal on it to prevent sticking.
Stretch the Dough: Roll or stretch your dough into a wide circle. For that specific look, aim for a “medium-thin” thickness. Place it onto the foil.
Layer the Flavors: * Spread the sauce evenly, leaving about half an inch for the crust.
Sprinkle the mozzarella generously over the sauce.
Lay the pepperoni slices on top.
Arrange the green pepper strips in a starburst or radial pattern across the cheese and pepperoni.
Bake: Place the pizza in the oven for 10–12 minutes. You’ll know it’s done when the cheese is bubbly and starting to brown, and the pepperoni edges are slightly curled and crisp.
Rest & Serve: Let it sit for 2 minutes before slicing. This helps the cheese set so it doesn’t slide off when you cut it.
Pro-Tips for Success
Crispy Pepperoni: if you like them extra crispy, look for “cup and char” pepperoni at the deli.
Seasoning: A quick sprinkle of dried oregano or red pepper flakes right after it comes out of the oven adds a nice “pizzeria” aroma.
These High-Protein Cheesecake Jars are rich, creamy, and surprisingly close to classic cheesecake—without the heavy sugar, butter, or baking. Made with Greek yogurt and cottage cheese, they’re packed with protein and perfect for dessert, post-workout fuel, or a satisfying snack that won’t derail your goals. Best of all, they come together in minutes and set beautifully in the fridge.
If you’re looking for a cheesecake-style treat that supports weight loss, muscle recovery, or balanced eating, this recipe delivers big flavor with smart ingredients.
Ingredients
Base Cheesecake
1 cup low-fat or fat-free cottage cheese
1 cup plain Greek yogurt (non-fat or low-fat)
2–3 tablespoons sugar-free cheesecake or vanilla pudding mix OR
2 tablespoons honey or maple syrup + 1 teaspoon vanilla extract
1–2 tablespoons milk (as needed for blending)
Optional: 2 oz light cream cheese (for extra richness)
Add-Ins & Toppings
Fresh strawberries, sliced (blueberries, raspberries, or cherries also work well.)
Graham cracker crumbs (optional)
Sugar-free chocolate chips, caramel drizzle, or lemon zest (optional)
Instructions
Blend the cottage cheese first
Add the cottage cheese to a blender or food processor and blend until completely smooth. This step is essential for achieving a silky, cheesecake-like texture.
Build the cheesecake base
Add the Greek yogurt, pudding mix (or sweetener and vanilla), and 1 tablespoon of milk. Blend again until thick, creamy, and lump-free. Add more milk only if needed.
Adjust and customize
Taste the mixture and adjust sweetness if desired. For extra protein, blend in ½ scoop vanilla protein powder. For a richer texture, add the optional light cream cheese.
Assemble the jars
Spoon the cheesecake mixture evenly into four small jars or containers. Fold in chopped strawberries if you want fruit throughout, or leave the base plain.
Top and chill
Add fresh fruit, graham crumbs, or optional toppings. Cover and refrigerate for at least 1 hour to allow the cheesecake to thicken and set.
See alsoBanana Oatmeal Chocolate Cake with Walnuts
Pro Tips
Less milk = thicker cheesecake
Chill overnight for the best texture
Add a graham layer at the bottom for a crust-style jar
Lemon zest adds a bright, classic cheesecake flavor
Storage & Nutrition
Keeps 4–5 days refrigerated in sealed jars
Approx. 150–180 calories and 14–18 g of protein per jar
Lower sugar, high protein, and no baking required
Creamy, satisfying, and shockingly close to real cheesecake—these jars prove that healthy desserts don’t have to taste “healthy.” 😏
Salmon Bites with Broccoli is a delicious and healthy dish that combines tender, perfectly seasoned pieces of salmon with vibrant, crunchy broccoli. This simple yet flavorful meal is packed with protein, omega-3 fatty acids, and essential vitamins, making it a great choice for a nutritious lunch or dinner. The savory salmon pairs beautifully with the mild bitterness of the broccoli, creating a balanced, satisfying plate that’s both light and filling. Whether you’re cooking for yourself or serving it to guests, this dish is sure to impress with its vibrant colors and fresh flavors!
Ingredients:
For the Salmon Bites:
1 lb (450g) fresh salmon fillet, skin removed
2 tbsp olive oil
1 tbsp lemon juice
1 tsp garlic powder
1 tsp onion powder
1/2 tsp smoked paprika (optional)
Salt and pepper to taste
1 tbsp fresh dill or parsley (optional for garnish)
For the Broccoli:
2 cups fresh broccoli florets
1 tbsp olive oil
1/2 tsp garlic powder
Salt and pepper to taste
1 tbsp lemon zest (optional)
Instructions:
1. Prepare the Salmon:
Preheat the oven to 400°F (200°C).
Cut the salmon fillet into bite-sized pieces, about 1-2 inches each.
In a bowl, mix olive oil, lemon juice, garlic powder, onion powder, smoked paprika, salt, and pepper.
Toss the salmon bites in the mixture, ensuring they’re fully coated.
2. Prepare the Broccoli:
Steam or blanch the broccoli florets for 2-3 minutes until bright green and tender (but still crisp). Alternatively, you can sauté it.
See alsoMediterranean Greek Appetizer Board with Hummus and Grilled Pita
If sautéing: In a large pan, heat olive oil over medium heat and add the broccoli florets. Season with garlic powder, salt, and pepper, and cook for 5-7 minutes until tender.
3. Cook the Salmon Bites:
Lay the seasoned salmon pieces on a parchment-lined baking sheet in a single layer.
Bake for 10-12 minutes or until the salmon is cooked through (internal temperature should be 145°F or 63°C).
4. Combine and Serve:
Once the salmon bites are cooked, remove them from the oven.
Serve the salmon bites alongside the broccoli. Garnish with fresh dill or parsley, and add a squeeze of lemon juice over the top for extra flavor.
Tips:
For a crispy finish, you can also pan-sear the salmon bites in a hot skillet with a little olive oil for 2-3 minutes on each side after baking.
Feel free to add other vegetables like bell peppers or zucchini to make the dish even more colorful.
Salmon (per 3 oz portion)
Calories: 180-220 kcal
Protein: 22-25 g
Fat: 10-15 g
Omega-3 Fatty Acids: 1.5-2.5 g (depending on the type of salmon)
Carbohydrates: 0 g
Vitamin D: 570 IU (over 70% of daily value)
Vitamin B12: 2.5 µg (over 100% of daily value)
Selenium: 30-35 µg (about 50% of daily value
Enjoy your tasty and healthy Salmon Bites with Broccoli! Let me know if you need more details or adjustments.
Tender, flaky cod and golden baby potatoes come together in a luxurious rosemary cream sauce that feels restaurant-worthy but is easy enough for a weeknight. Infused with garlic, herbs, and a touch of Dijon, this one-pan-style dish is rich, comforting, and perfect for cooler evenings or an elevated family dinner.
Ingredients
For the Cod & Potatoes
2 cod fillets (about 6 oz each)
4–5 baby potatoes, halved
2 tbsp olive oil
1 tsp dried thyme
½ tsp paprika
Salt & black pepper, to taste
For the Rosemary Cream Sauce
2 tbsp butter
2 cloves garlic, minced
½ cup chicken or vegetable broth
1 cup heavy cream
1–2 tsp fresh rosemary, finely chopped
1 tsp Dijon mustard (optional but recommended)
Instructions
Prep the Potatoes Preheat oven to 400°F (200°C). Toss halved potatoes with olive oil, thyme, paprika, salt, and pepper. Arrange cut-side down on a baking dish or oven-safe skillet.
Roast Roast potatoes for 20–25 minutes, until lightly golden and fork-tender.
Season the Cod Pat cod fillets dry and season both sides with salt and pepper.
Make the Sauce In a skillet over medium heat, melt butter. Add garlic and sauté for 30 seconds until fragrant. Stir in broth, cream, rosemary, and Dijon. Simmer 3–4 minutes until slightly thickened.
Combine & Bake Nestle cod fillets among the potatoes. Pour rosemary cream sauce over everything.
Finish Cooking Return to the oven and bake for 12–15 minutes, until the cod flakes easily and the sauce is bubbling.
Serve Spoon sauce generously over the fish and potatoes. Garnish with extra rosemary if desired.
Notes
Cod is done when it reaches 145°F (63°C) internally.
Fresh rosemary gives the best flavor, but dried works in a pinch (use ½ tsp).
Sauce will thicken more as it rests.
Tips for Best Results
Dry the cod well before seasoning for better texture.
Don’t overbake—cod cooks fast.
For extra richness, finish with a squeeze of lemon or a sprinkle of Parmesan.
Servings
2 hearty servings
Easily doubled for 4 people
Estimated Nutritional Information (Per Serving)
Calories: ~520
Protein: ~38g
Fat: ~36g
Carbohydrates: ~18g
Fiber: ~3g
Sodium: ~480mg
(Estimates vary by ingredient brands.)
Benefits
High-protein, nutrient-rich cod
One-pan-style comfort meal
Elegant yet easy
Naturally gluten-free
Recipe Q & A
Q: Can I use another fish? A: Yes! Halibut, haddock, or sea bass work beautifully.
This is a beautiful, layered dessert drink that is perfect for hot days. The basil seeds provide a unique, jelly-like texture that is very satisfying.
Ingredients
2 teaspoons Basil Seeds (Sabja/Tukmaria)
1 cup Milk (Chilled)
2 tablespoons Rose Syrup (like Rooh Afza)
1 scoop Vanilla Ice Cream
1/4 cup Cooked Vermicelli (optional, for authentic texture)
Crushed pistachios or almonds (for garnish)
Preparation Steps
Soak the Seeds: Place the basil seeds in a bowl with about 1/2 cup of water. Let them sit for 15–30 minutes. You will see them swell and develop the translucent outer layer shown in your photo. Drain any excess water.
Prepare the Vermicelli (Optional): If using, boil cornstarch vermicelli or falooda sev until soft, drain, and set aside.
Layer the Glass: * Start by pouring the rose syrup into the bottom of a tall glass.
Add a layer of the soaked basil seeds.
Add the cooked vermicelli on top of the seeds.
Add the Liquid: Gently pour the chilled milk over the back of a spoon to keep the layers somewhat distinct.
The Topping: Place a large scoop of vanilla ice cream on top.
Garnish: Sprinkle with crushed nuts and an extra drizzle of rose syrup.
Quick Tips
Health Benefits: Basil seeds are known for their cooling properties in traditional medicine and are high in fiber.
Flavoring: If you don’t like rose, you can stir these seeds into lemonade, iced tea, or even a fruit smoothie.
Keto chicken patties are a delicious and nutritious option for anyone following a ketogenic lifestyle. These patties are low in carbohydrates and rich in protein and healthy fats, making them perfect for maintaining energy while enjoying flavorful meals. This complete guide covers ingredients, step-by-step instructions, nutrition facts, storage tips, and success tips to help you make perfectly juicy chicken patties every time.
🛒 Ingredients
For the Chicken Patties:
1 lb (450g) ground chicken (dark meat preferred for juiciness)
½ cup (50g) almond flour
¼ cup (30g) grated Parmesan cheese
1 large egg
½ tsp garlic powder
½ tsp onion powder
1 tsp Italian seasoning
Salt and pepper to taste
2 tbsp fresh parsley, chopped (optional)
2 tbsp olive oil or coconut oil (for frying)
Optional for Serving:
Lettuce leaves (for low-carb wraps)
Sliced avocado
Sugar-free mayonnaise or Greek yogurt
Sliced tomatoes (optional, within carb limits)
📊 Nutritional Information (per serving – 4 servings)
Calories: 260
Fat: 17g
Saturated Fat: 3g
Cholesterol: 120mg
Sodium: 250mg
Total Carbs: 3g
Fiber: 1g
Net Carbs: 2g
Protein: 24g
WW SmartPoints: 4
👩🍳 Instructions
Step 1: Prepare Ingredients
Measure and gather all ingredients to make the cooking process smooth and efficient.
Step 2: Mix the Patty Mixture
In a large bowl, combine ground chicken, almond flour, Parmesan cheese, egg, garlic powder, onion powder, Italian seasoning, salt, and pepper. Mix until well combined. The mixture should be moist but firm enough to shape.
Step 3: Shape the Patties
Divide mixture into equal portions (about ¼ cup each). Shape into round patties approximately 1 inch thick.
Step 4: Heat the Oil
Heat olive oil or coconut oil in a skillet over medium heat until hot but not smoking.
Step 5: Cook the Patties
Place patties in the skillet without overcrowding. Cook 5–7 minutes per side until golden brown and fully cooked (internal temperature should reach 165°F / 75°C).
Step 6: Drain and Rest
Transfer patties to a paper towel-lined plate and rest for a few minutes to retain juiciness.
🍽 Serving Suggestions
Serve in lettuce wraps with avocado and sugar-free mayo
Pair with garden salad or steamed vegetables
Enjoy as a burger substitute or protein snack
🧊 Storage Instructions
Refrigerate cooked patties in an airtight container for up to 3 days
Freeze uncooked patties between parchment paper for up to 3 months
Thaw overnight in refrigerator before cooking
💡 Tips for Best Results
✔ Use high-quality chicken for better flavor ✔ Customize seasoning (paprika, cumin, chili powder) ✔ Avoid overcrowding the pan ✔ Always check doneness with a thermometer
✅ Conclusion
Keto chicken patties are a versatile, flavorful, and satisfying option for low-carb meal planning. With simple ingredients and easy preparation, they fit perfectly into a ketogenic lifestyle and can be enjoyed in multiple ways.
🌱 Nutritional Benefits
These patties provide high-quality protein for muscle maintenance while almond flour and Parmesan contribute healthy fats and texture. They are naturally gluten-free and keto-friendly.
⭐ Final Thoughts
Homemade keto chicken patties are a practical and tasty way to stay on track with your health goals. Whether for lunch, dinner, or meal prep, this recipe delivers flavor, nutrition, and convenience in every bite.
This recipe transforms simple vegetables into a hearty, savory dish that is crispy on the outside and tender on the inside.
Ingredients
1 small cabbage (finely shredded)
1 onion (finely diced)
1 carrot (grated)
2 eggs (beaten)
4 tablespoons flour (all-purpose)
Spices: Salt, Black Pepper, Paprika, and Dried Garlic (to taste)
Olive oil (for frying)
Preparation Steps
Prep the Vegetables: Shred the cabbage thinly and grate the carrot. Dice the onion into small pieces.
Tip: If the cabbage is very firm, sprinkle it with a pinch of salt and massage it for a minute to soften the fibers.
Sauté (Optional but Recommended): Heat a drizzle of olive oil in a pan. Sauté the onion and carrot for 3–4 minutes until soft. Add the cabbage and cook for another 5 minutes until it wilts slightly. Let the mixture cool for a few minutes.
Create the Batter: In a large bowl, whisk the 2 eggs. Stir in the 4 tablespoons of flour and all your spices (salt, pepper, paprika, and garlic) until you have a smooth paste.
Combine: Fold your vegetable mixture into the egg and flour batter until everything is evenly coated.
Fry: Heat olive oil in a skillet over medium heat. Scoop large spoonfuls of the mixture into the pan and flatten them slightly with a spatula.
Cook to Perfection: Fry for about 3–4 minutes per side until they are a deep golden brown and crispy.
This “everything but the kitchen sink” protein bowl is designed to keep you full for hours while hitting those savory, tangy cravings.
Ingredients
Protein Base:
1 cup Cooked shredded chicken (rotisserie chicken works great here)
1 Large boiled egg, chopped
The “Cream” Factor:
½ cup Low-fat cottage cheese (small curd works best for texture)
1 tbsp Light mayo or plain Greek yogurt
The Crunch & Zing:
¼ cup Cucumber, finely diced
¼ cup Pickles or pickled jalapeños, chopped
Seasonings:
¼ tsp Garlic powder
Salt and black pepper to taste
Optional: 1 tsp Everything Bagel seasoning or a sprinkle of sharp cheddar
Instructions
Prep the Base: In a medium mixing bowl, combine the shredded chicken and the chopped boiled egg. Use a fork to slightly mash the egg if you prefer a more cohesive “salad” texture.
Add the Creaminess: Fold in the cottage cheese and the mayo (or Greek yogurt). Stir until the protein is evenly coated.
Mix in the Crunch: Add the diced cucumbers and your choice of pickles or jalapeños.
Season: Sprinkle in the garlic powder, salt, and pepper. Give it one final, thorough toss.
Chill & Set: For the best flavor, cover and refrigerate for at least 15 minutes. This allows the seasonings to meld and the cottage cheese to firm up slightly.
Serve: Enjoy it on its own, scooped into large romaine lettuce leaves, or as a high-protein dip with bell pepper slices or seed crackers.
This Creamy Mexicorn Dip is a lighter, smarter twist on a classic party favorite. It keeps everything you love—sweet corn, zesty tomatoes, fresh herbs, and rich creaminess—while using anti-inflammatory swaps that don’t sacrifice flavor. Avocado-oil mayo and Greek yogurt (or coconut yogurt for dairy-free) create a luscious base, while turmeric, cumin, garlic, and lime bring warmth and brightness. The result is a bold, crave-worthy dip that feels indulgent yet nourishing, perfect for gatherings, meal prep, or snacking straight from the fridge.
🛒 Ingredients
Base
2 cans Mexicorn, drained very well
1 can Rotel (regular or hot), drained
6–8 green onions, thinly sliced
1 bunch fresh cilantro, finely chopped
Creamy Element (Anti-Inflammatory Swaps)
¾ cup avocado-oil mayo (or olive-oil mayo)
¾ cup full-fat Greek yogurt or cultured coconut yogurt
Greek yogurt adds protein and probiotics
Coconut yogurt keeps the dip dairy-free
Cheese (Optional but Traditional)
1½ cups sharp cheddar cheese, shredded
Sharp cheese means more flavor with less quantity
Optional swap: aged goat cheese or omit entirely
Anti-Inflammatory Boosters
1–2 cloves garlic, minced
Juice of 1 fresh lime
½ teaspoon ground cumin
½ teaspoon smoked paprika
¼ teaspoon turmeric
Pinch of black pepper (activates turmeric)
Sea salt, to taste
Instructions
1. Prep everything first
Drain the Mexicorn and Rotel extremely well. This step is key—excess liquid will thin the dip and mute the flavors. If needed, let them sit in a strainer for a few extra minutes or gently press with a spoon.
See alsoMediterranean Irresistible Gluten-Free Zucchini Cookies
2. Make the creamy base
In a large mixing bowl, whisk together the avocado-oil mayo and Greek (or coconut) yogurt until smooth. Add the lime juice, garlic, cumin, smoked paprika, turmeric, and black pepper. Whisk again until the mixture is evenly blended and lightly golden from the spices.
3. Fold it all together
Using a spatula, gently fold in the drained corn, Rotel, green onions, and cilantro. If using cheese, add it now and stir just until combined. The goal is a thick, scoopable dip with evenly distributed ingredients.
4. Taste & adjust
Season with sea salt to taste. Add more lime juice for brightness, cumin for warmth, or smoked paprika for depth. This dip is very forgiving, so adjust it to your personal flavor preference.
5. Chill for best flavor
Cover and refrigerate for at least 30–60 minutes. Chilling allows the flavors to meld and deepen, making the dip even more delicious.
Serving Ideas
Serve with tortilla chips, seed crackers, cucumber slices, bell pepper strips, or as a spread in wraps and sandwiches. It also makes a fantastic topping for grilled chicken or roasted vegetables.
If you’re craving a savory chicken salad, you’ve come to the right place. This recipe for the ultimate Deli Chicken Salad is not only tasty but also simple to prepare. With a few fresh ingredients and easy steps, you’ll have a delicious salad perfect for lunches, picnics, or any occasion.
Ingredients:
Before getting started, gather the following ingredients to make this irresistible chicken salad:
Ingredients
Amount
Boneless chicken breasts, diced
500 grams
Boneless chicken thighs, diced
300 grams
Olive oil
2 tablespoons
Sea salt
1/2 teaspoon
Black pepper
1/4 teaspoon
Granulated onion
1/2 teaspoon
Mayonnaise
2/3 cup
Celery, diced
3 stalks
Extra salt and pepper
To taste
Instructions:
Follow these steps to create your flavorful Deli Chicken Salad:
Preheat the Oven: Set your oven to 350°F (175°C) and line a roasting pan with aluminum foil.
Discover more
Salt
beef
Garlic
cheese
garlic
Cheese
salt
burgers
Beef
Sausage
Season the Chicken: Toss the diced chicken breasts and thighs with olive oil, then sprinkle with sea salt, black pepper, and granulated onion to coat evenly.
Prepare for Baking: Arrange the chicken in the lined roasting pan and cover loosely with foil.
Bake: Cook the chicken for 25–30 minutes, or until the thickest pieces reach 165°F (74°C).
Cool: Remove from the oven and let the chicken rest for 10 minutes, then chill in the refrigerator for at least 1 hour.
Dice the Chicken: Cut the cooled chicken into pieces roughly 1/4 inch long and 1/2 inch wide.
Mix Salad: In a large bowl, combine the chicken, diced celery, and mayonnaise. Gently stir until well coated.
Chill: Cover and refrigerate for 1–2 hours, or overnight, so the flavors can meld.
Season to Taste: Before serving, check the seasoning and add extra salt or pepper if needed.
Serve: Enjoy your Deli Chicken Salad on sandwiches, over a bed of greens, or as you like!
Keto-Friendly Chocolate Mousse is a rich and creamy low-carb dessert made with simple ingredients and easy steps. This smooth and fluffy mousse delivers full chocolate flavor without added sugar or flour, making it a great option for low-carb lifestyles.
This recipe is quick to prepare and requires only a few basic ingredients. It works well for family desserts, special occasions, or whenever you want a chocolate treat that fits into your meal plan.
Traditional chocolate mousse usually contains sugar and high-carb ingredients. This version uses sugar-free chocolate, low-carb sweetener, and fresh cream to create a dessert that is light, smooth, and satisfying.
The texture is soft, airy, and creamy, giving it a classic mousse consistency. It looks elegant when served and tastes rich without being heavy.
One of the best features of this recipe is how flexible it is. You can adjust the sweetness, chocolate level, and toppings based on your preference.
This mousse stores well in the refrigerator, making it useful for preparing ahead of time. You can enjoy it over several days while keeping its creamy texture.
It is also a good dessert choice for guests, including those who are not following a low-carb plan. Many people enjoy it without realizing it is sugar-free.
For WW users, this dessert stays moderate in SmartPoints because the main ingredient is cream, while the sweetener and chocolate contain no added sugar.
The combination of fats and low carbohydrates helps keep the dessert filling and enjoyable as part of a balanced plan.
Step 1: Melt the chocolate Place the chocolate chips in a microwave-safe bowl. Heat in 20-second intervals, stirring each time, until smooth. Set aside to cool slightly.
Step 2: Whip the cream Add the cream and powdered sweetener to a chilled bowl. Beat until stiff peaks form. Do not overmix.
Step 3: Mix in the chocolate Slowly drizzle the melted chocolate into the whipped cream while mixing on low speed.
Step 4: Add extra chocolate flavor Gently fold in cocoa powder or shaved chocolate.
Step 5: Chill the mousse Divide into serving cups and refrigerate for 1 hour.
Step 6: Garnish and serve Top with whipped cream, berries, mint, or chocolate curls before serving.
🍽 Serving Suggestions
Serve alone or with low-carb berries such as raspberries or blackberries. It can also be used as a filling for keto crepes or low-carb cakes.
🧊 Storage
Store in an airtight container in the refrigerator for up to 4 days. Freezing is not recommended because the texture may change.
1 large banana (frozen is best for a thicker, creamier texture)
1/2 cup rolled oats (old-fashioned oats work best)
1 cup milk of choice (dairy, almond, or oat milk)
2 tbsp creamy peanut butter
1/2 cup Greek yogurt (plain or vanilla)
1/2 tsp vanilla extract
Optional: 1 tsp honey or maple syrup if you prefer it sweeter
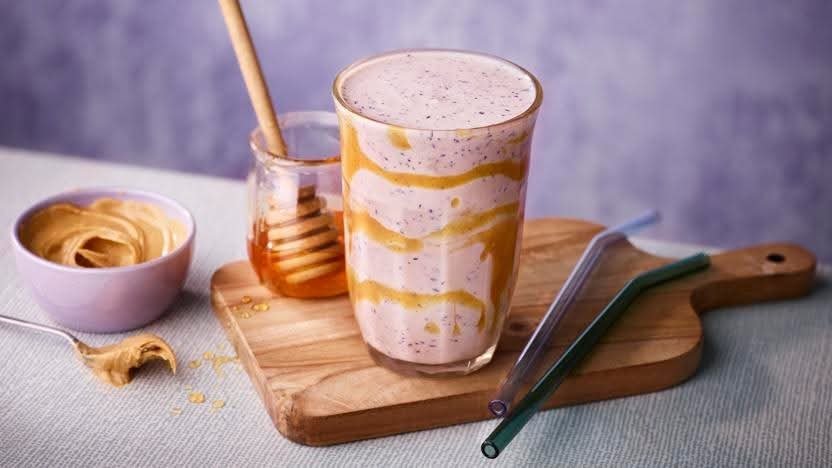
The Toppings (as seen in the photo):
Extra banana slices
A dollop of Greek yogurt or whipped cream
A drizzle of peanut butter
A sprinkle of raw rolled oats
Instructions
1. Prep the Oats (Optional but recommended)
If you want an ultra-smooth texture, pulse the dry oats in the blender first until they become a fine powder. This prevents any “chewy” bits in the drink.
2. Blend
Add the banana, peanut butter, milk, yogurt, and vanilla to the blender. If you are using a room-temperature banana, add 1/2 cup of ice to get that frosty consistency. Blend on high until completely smooth.
3. Adjust Consistency
Too thick? Add a splash more milk and pulse again.
Too thin? Add a few more frozen banana chunks or a tablespoon of oats.
4. Style Your Glass
Pour the smoothie into a tall glass. Top with a spoonful of yogurt, then artfully place two banana slices on top. Drizzle a bit of melted peanut butter over the top and finish with a pinch of oats.
Why this works
Oats: Provide slow-release energy to prevent a mid-morning crash.
Peanut Butter: Adds healthy fats and protein for satiety.
Banana: Naturally sweetens the drink and adds potassium.
1 can (14oz/400g) sweetened condensed milk, chilled
1 tsp pure vanilla extract
Pinch of salt
Instructions
1. Make the Blueberry Compote
In a small saucepan over medium heat, combine blueberries, sugar, and lemon juice. Simmer for about 10 minutes until the berries burst and the liquid thickens. Stir in the cornstarch slurry and cook for 1 more minute. Crucial Step: Let this cool completely in the fridge before adding it to the cream, or it will melt your ice cream!
2. Whip the Cream
In a large chilled bowl, beat the cold heavy cream until stiff peaks form. You want it firm enough to hold its shape but be careful not to over-beat it into butter.
3. Fold the Base
In a separate bowl, whisk together the sweetened condensed milk, vanilla, and salt. Gently fold a large spoonful of the whipped cream into the milk to lighten it. Then, very gently fold the rest of the whipped cream in until combined. Keep it airy!
4. The Swirl
Pour half of the cream mixture into a loaf pan or glass container (like the one in your photo). Drop spoonfuls of the cooled blueberry sauce on top. Add the remaining cream, then the rest of the sauce. Use a butter knife or skewer to gently swirl the purple sauce into the white cream.
5. Freeze
Cover with plastic wrap (press it against the surface to prevent ice crystals) and freeze for at least 6 hours, or ideally overnight.
Pro-Tips for Success
Chill Everything: Make sure your bowl, beaters, and condensed milk are cold. It helps the air bubbles stay trapped in the cream.
Texture: If you want a smoother swirl, you can strain the blueberry skins out of the sauce after cooking, but keeping them adds a nice rustic look.
Servings: 10 slices Total Time: 50 minutes Difficulty: Easy Calories per Serving: ~160 kcal Macros (Approx per Slice): Protein 6g • Carbs 5g net • Fat 8g • Fiber 2g
Intro
Nothing says cozy like a slice of moist, fragrant cranberry loaf, perfect for breakfast, a snack, or a guilt-free dessert. This loaf combines the tart sweetness of cranberries with the richness of almond flour and subtle hints of vanilla and cinnamon, creating a treat that’s comforting yet diet-friendly.
Perfect for Keto, low-carb, high-protein, low-calorie, and WW-friendly lifestyles, this cranberry loaf is naturally sweetened, portion-controlled, and packed with protein to keep you energized throughout the day. You can enjoy a slice without worrying about excess carbs or calories, making it ideal for meal prep or a quick breakfast option.
Our Keto Cranberry Loaf is simple to make, visually stunning with vibrant cranberry bursts, and ensures every bite is soft, flavorful, and satisfying. It’s a healthy twist on a classic loaf that fits perfectly into your clean-eating routine.
Look at the Recipe
Soft, moist loaf studded with tart cranberries for a beautiful texture
Sweet and slightly tangy flavor, balanced with vanilla and cinnamon
High-protein, low-carb, and keto-friendly, keeping calories and WW points low
Ingredients Needed
Dry Ingredients
1 ½ cups almond flour
2 tbsp coconut flour
1 tsp baking powder
½ tsp baking soda
½ tsp salt
1 tsp ground cinnamon
Wet Ingredients
3 large eggs
⅓ cup unsweetened almond milk
3 tbsp erythritol or preferred low-carb sweetener
1 tsp vanilla extract
2 tbsp melted coconut oil
Add-Ins
½ cup fresh or frozen cranberries (tossed in 1 tsp almond flour to prevent sinking)
Optional: 2 tbsp chopped walnuts for crunch
How to Make Our Cranberry Loaf
Preheat the oven to 350°F (175°C). Grease a 9×5-inch loaf pan or line with parchment paper.
Mix dry ingredients: In a bowl, combine almond flour, coconut flour, baking powder, baking soda, salt, and cinnamon.
Whisk wet ingredients: In another bowl, beat eggs, almond milk, sweetener, vanilla, and melted coconut oil until smooth.
Combine: Gradually add dry ingredients into the wet mixture, stirring until fully incorporated.
Fold in cranberries and optional walnuts.
Bake: Pour batter into prepared loaf pan. Bake for 35–40 minutes, or until a toothpick inserted into the center comes out clean.
Cool: Let the loaf cool completely before slicing to retain its structure.
Storage & Serving Suggestions
Storing: Keep at room temperature for 2 days in an airtight container, or refrigerate for up to 5 days.
Freezing: Wrap slices individually and freeze for up to 1 month. Thaw at room temperature or in the fridge.
Serving Pairings: Enjoy with a dollop of Greek yogurt, nut butter, or a warm cup of coffee or tea.
Tips & FAQs
Can I use frozen cranberries?
Yes! Toss them in a little almond flour to prevent sinking before folding into the batter.
Can I make this dairy-free?
Yes. Use coconut oil and almond milk. Optional toppings like yogurt can be replaced with plant-based alternatives.
How do I make it more protein-rich?
Add 1–2 scoops of vanilla or unflavored whey protein powder to the wet ingredients.
Can I sweeten it with honey or maple syrup?
For Keto/low-carb, stick to erythritol, monk fruit, or allulose. Using honey or maple syrup will increase carbs.
Why is my loaf crumbly?
Make sure to measure almond flour correctly and avoid overbaking. Cooling completely before slicing also prevents crumbling.