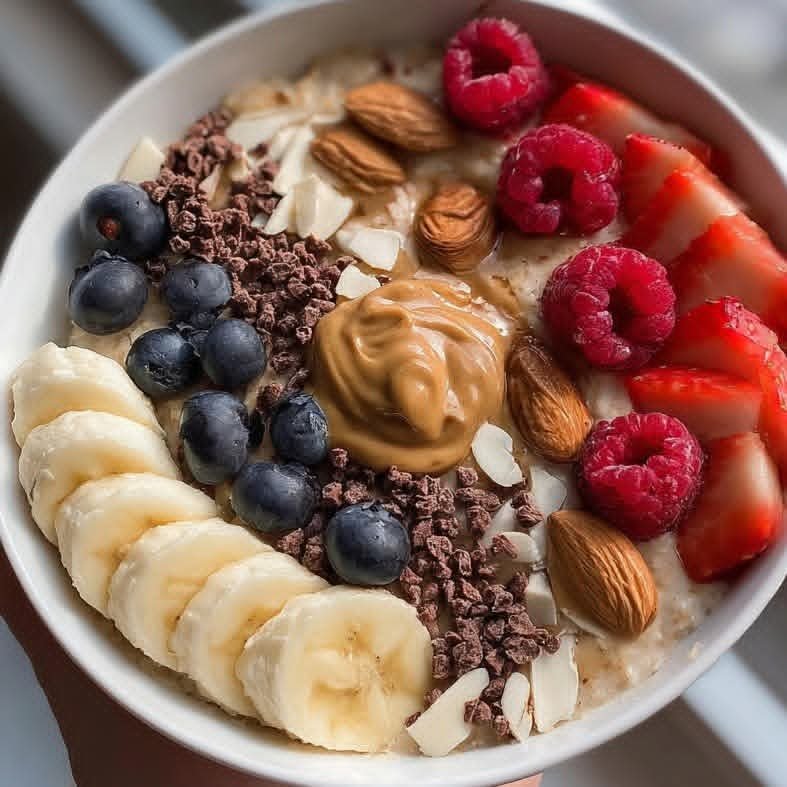
Berry Banana Oatmeal Bowl πŸŒπŸ«πŸ“

Berry Banana Oatmeal Bowl πŸŒπŸ«πŸ“

✨ Ingredients:

1 cup cooked oatmeal πŸ₯£

1 banana, sliced 🍌

A handful of blueberries 🫐

A few raspberries ❀️

Strawberries, sliced πŸ“

1 tbsp peanut butter πŸ₯œ

A few almonds 🌰

Coconut flakes πŸ₯₯

Cacao nibs 🍫

Honey or maple syrup drizzle 🍯

πŸ‘©β€πŸ³ Instructions:

Cook the oatmeal until warm and creamy πŸ₯£

Pour it into a bowl and smooth the top.

Add banana, blueberries, raspberries, and strawberries neatly on top πŸŒπŸ«πŸ“

Sprinkle with almonds, coconut flakes, and cacao nibs 🌰πŸ₯₯🍫

Finish with a spoonful of peanut butter and a drizzle of honey 🍯πŸ₯œ

Serve warm and enjoy ✨

Golden Vegetable & Cheese Fritters

Golden Vegetable & Cheese Fritters

Ingredients

  • The Liquid Base: 1 egg, 200 ml warm milk, 200 ml warm water.

  • The Yeast Mix: 10 g dry yeast, 20 g granulated sugar, 8 g salt.

  • The Flour: 540 g all-purpose flour (sifted).

  • The Garden Mix: 1 potato (finely diced), 1 red pepper (finely diced), 2 green peppers (finely diced), 1 onion (finely chopped), and a handful of fresh parsley (finely chopped).

  • The Cheese: 80 g Tulum cheese (or any crumbly, salty cheese like Feta).

  • For Frying: 400 ml vegetable oil.

Step-by-Step Instructions

  1. Activate the Yeast: In a large mixing bowl, combine the warm milk, warm water, sugar, and dry yeast. Whisk together and let it sit for about 5 minutes until it starts to foam.

  2. Form the Batter: Add the egg and salt to the yeast mixture. Gradually whisk in the flour until a thick, sticky dough forms.

  3. The Rise: Cover the bowl with plastic wrap or a clean towel and let it rest in a warm place for 45–60 minutes until it has doubled in size and looks bubbly and stretchy (as seen in the glass bowl in your photo).

  4. Add the Flavor: Once risen, deflate the dough slightly and stir in the diced potato, peppers, onion, parsley, and crumbled cheese. Mix well so the vegetables are evenly distributed.

  5. Heat the Oil: In a deep skillet or pot, heat the 400 ml of oil over medium heat.

  6. Fry until Golden: Use a spoon (or two) to drop small mounds of the dough into the hot oil. Fry in batches for 3–4 minutes per side. They will puff up beautifully.

  7. Drain: Once they reach a deep golden brown, remove them with a slotted spoon and place them on a paper towel to absorb any excess oil.


Recipe Q&A: Vegetable Fritters

Q: Do I need to cook the potato before adding it to the dough? A: No, but you must dice the potato very finely. Because the fritters are small and fried in hot oil, the tiny potato bits will steam and cook perfectly inside the dough while the outside crisps up.

Q: Can I use a different cheese if I can’t find Tulum? A: Yes! Feta cheese is a great substitute because it has a similar saltiness and crumbly texture. Sharp white cheddar or even crumbled goat cheese would also work well.

Q: Why is my dough too sticky to handle? A: This dough is meant to be very soft and stickyβ€”it shouldn’t be kneaded like bread. Using two oiled spoons to drop the batter into the pan is the easiest way to handle it without a mess.

Q: How do I know if my oil is the right temperature? A: Drop a tiny bit of batter into the oil; if it sizzles and rises to the surface immediately, the oil is ready. If it browns too quickly, turn the heat down slightly so the inside has time to cook through.

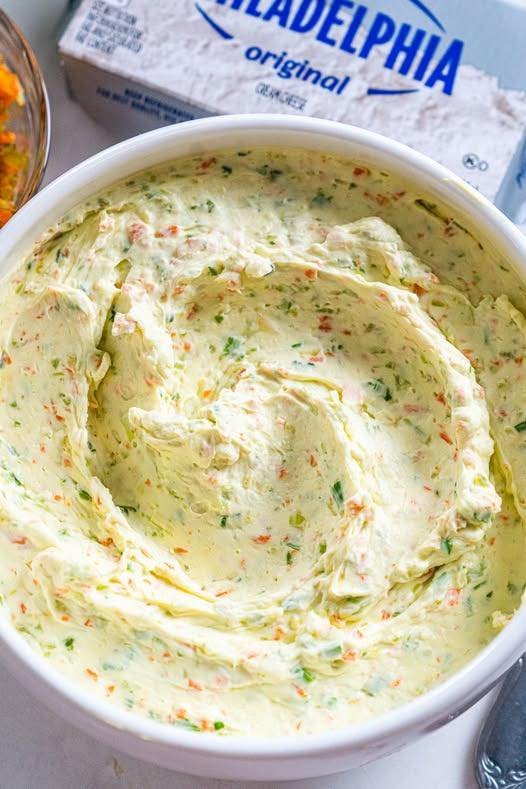
Homemade Garden Vegetable Spread

Homemade Garden Vegetable Spread

Ingredients

  • 2 blocks (225g each) cream cheese, softened to room temperature.

  • 1/4 cup carrots, very finely minced.

  • 1/4 cup bell pepper (any color), very finely minced.

  • 1/4 cup green onions, thinly sliced.

  • 1/4 cup cucumber, finely diced (remove the seeds first).

  • 1 teaspoon garlic powder.

  • 1/2 teaspoon onion powder.

  • Salt and black pepper to taste.

  • Optional: 1 tablespoon fresh dill or parsley for extra freshness.

Step-by-Step Instructions

  1. Prep the Vegetables: Use a sharp knife or a food processor to mince the carrots, peppers, and cucumbers as finely as possible. Pro Tip: If the cucumbers or peppers seem very watery, pat them dry with a paper towel before adding them to the cheese.

  2. Soften the Cheese: In a large mixing bowl, beat the softened cream cheese until it is completely smooth and fluffy. You can use a hand mixer or a sturdy spatula.

  3. Mix in Aromatics: Add the garlic powder, onion powder, salt, and pepper. Mix well to ensure the seasoning is distributed evenly.

  4. Fold in Vegetables: Gently fold in the minced carrots, peppers, green onions, and cucumbers. Stir until the vegetables are beautifully marbled through the cream cheese.

  5. Chill and Set: Transfer the spread to a glass jar or airtight container. Refrigerate for at least 1 hour before serving. This allows the flavors of the vegetables to infuse into the cream cheese.

  6. Serve: Spread generously over toasted bagels, crackers, or use it as a dip for fresh veggie sticks.


Recipe Q&A: Cream Cheese Spread

Q: How long will this homemade spread last in the fridge? A: Since it contains fresh vegetables, it is best enjoyed within 3–5 days. Keep it in an airtight container to maintain freshness.

Q: Can I use low-fat cream cheese? A: Yes, you can use “NeufchΓ’tel” or low-fat cream cheese. However, keep in mind that it has a higher water content, so the spread might be slightly softer and less rich than the full-fat version.

Q: Why is my spread getting watery after a day? A: This usually happens because vegetables like cucumbers and peppers release moisture over time. To prevent this, make sure to remove the seeds from the cucumber and pat all chopped veggies dry with a paper towel before mixing them in.

Q: Can I add a bit of heat to this? A: Absolutely! You can finely mince half a jalapeΓ±o (remove the seeds for less heat) or add a pinch of red chili flakes to the mixture for a spicy kick.

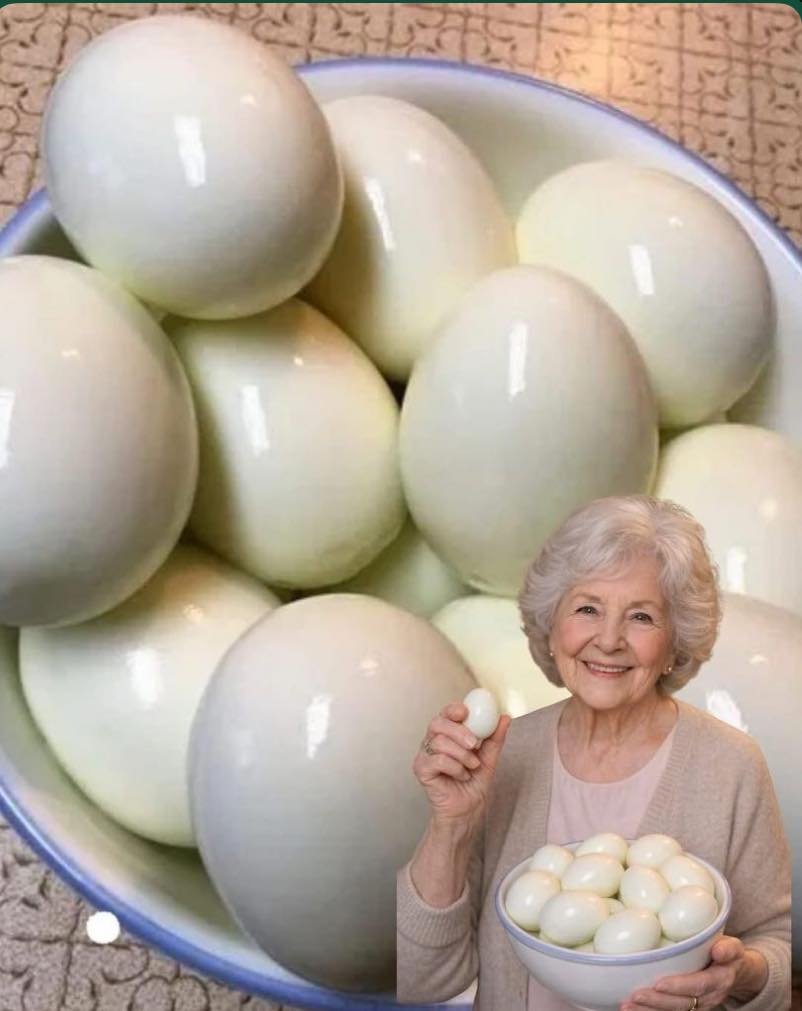
The Perfect Boiled Egg Guide


The Perfect Boiled Egg Guide

Timings (from a boiling start)

  • 6 Minutes: Liquid gold yolk, soft set white.

  • 7 Minutes: Jammy, custard-like yolk (perfect for sourdough toast).

  • 8 Minutes: Softly set yolk, fully firm white.

  • 10–12 Minutes: Classic hard-boiled (ideal for salads or meal prep).

Instructions

  1. Boil the Water: Fill a saucepan with enough water to cover the eggs by an inch. Bring to a rolling boil.

  2. Lower Gently: Use a slotted spoon to gently lower cold eggs into the water to prevent cracking. Turn the heat down slightly to a simmer.

  3. The Ice Bath: While they cook, prepare a bowl of ice and cold water.

  4. Shock Them: Once the timer goes off, immediately move the eggs to the ice bath for at least 5 minutes. This stops the cooking process and makes them much easier to peel.


Recipe Q&A: Boiled Egg Nutrition

Q: Does boiling an egg change its nutritional value compared to frying? A: Boiling is generally considered one of the healthiest ways to prepare eggs because it doesn’t require added fats or oils. It also keeps the yolk contained, which helps protect the delicate antioxidants like lutein from high-heat oxidation.

Q: Why do some hard-boiled eggs have a green ring around the yolk? A: That green ring is a harmless reaction between sulfur in the white and iron in the yolk. It usually happens when eggs are overcooked or not cooled quickly enough. Using the “ice bath” method mentioned above prevents this!

Q: Are boiled eggs really good for weight management? A: Yes! Because they are high in protein and healthy fats, they have a high “satiety index.” This means they make you feel full for longer, which can naturally reduce the urge to reach for processed snacks later in the day.

Q: Can I get enough Vitamin D just from eggs? A: While eggs are one of the few natural food sources of Vitamin D, one egg typically provides about 5–10% of your daily needs. They are a great supplement to your intake, especially when paired with other nutrient-dense foods.

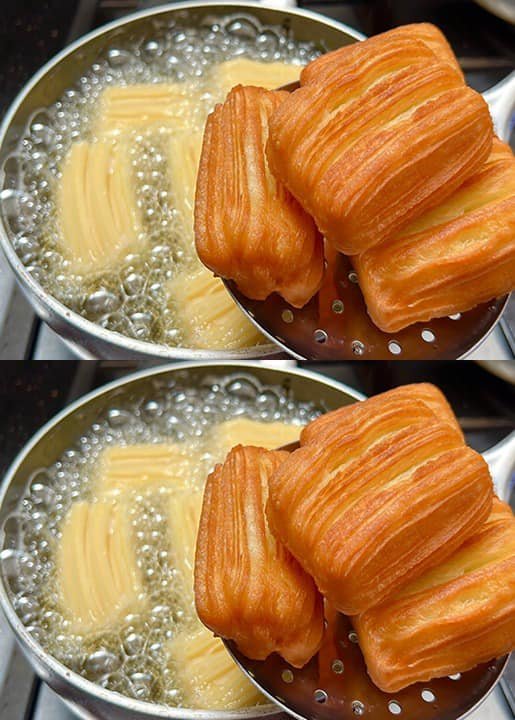
Crispy Golden Honey Fritters

Crispy Golden Honey Fritters

Ingredients

  • The Dough: 2 cups all-purpose flour, 2 large eggs, 1 cup water, 2 tablespoons butter, 1 tablespoon cornstarch, and 1 pinch of salt.

  • The Syrup: 2 cups sugar, 1 cup water, and 1 teaspoon lemon juice.

  • Oil for deep frying.

Step-by-Step Instructions

  1. Make the Syrup First: Combine sugar, water, and lemon juice in a pot. Boil for 10 minutes until it thickens slightly. Let it cool completelyβ€”this is key for keeping the fritters crispy.

  2. Prepare the Dough Base: In a saucepan, bring 1 cup of water, butter, and salt to a boil. Once the butter melts, dump in the flour all at once. Stir vigorously with a wooden spoon over low heat for 2–3 minutes until a smooth dough ball forms and pulls away from the sides.

  3. Cool and Add Eggs: Remove the dough from the heat and let it cool for 10 minutes. Add the eggs one at a time, mixing thoroughly after each addition until the dough is smooth and sticky. Mix in the cornstarch last for extra crunch.

  4. Shape: Transfer the dough into a piping bag fitted with a large star tip.

  5. The Frying Secret: Pipe 2-inch lengths of dough directly into cold or lukewarm oil, cutting the dough with oiled scissors.

  6. Fry: Turn the heat to medium. As the oil warms up, the fritters will rise and puff. Fry them, turning frequently, until they are a deep golden brown and feel very firm.

  7. Soak: Remove the hot fritters and drop them immediately into the cold syrup. Let them soak for 2–3 minutes, then drain and serve.


Recipe Q&A: Honey Fritters

Q: Why do I have to start with cold oil? A: Starting with cold or barely warm oil allows the fritters to expand and cook through evenly without burning the outside. It’s the secret to getting that characteristic “ridged” look and a very crispy shell.

Q: Can I make these without a piping bag? A: If you don’t have a star tip, the fritters won’t have the ridges, but they will still taste great. You can use a plastic freezer bag with the corner snipped off, or simply use two spoons to drop small mounds of dough into the oil.

Q: My fritters became soft after a few hours. How can I fix this? A: Softness usually happens if the syrup was too thin or if the fritters weren’t fried long enough. Make sure to fry them until they feel quite hard to the touch in the oil. Also, ensure the syrup is completely cold before adding the hot fritters.

Q: Can I flavor the syrup? A: Yes! You can add a splash of rose water, orange blossom water, or a pinch of cardamom to the syrup while it’s boiling for a more traditional Middle Eastern flavor profile.

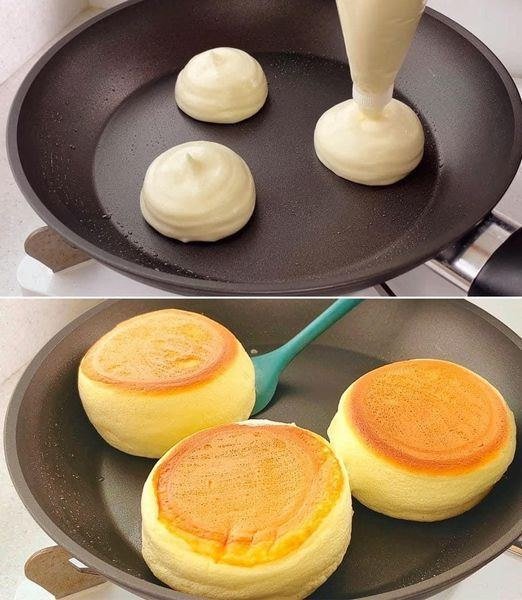
3-Ingredient SoufflΓ© Skillet Cakes

3-Ingredient SoufflΓ© Skillet Cakes

Ingredients

  • 2 large eggs (separated into whites and yolks)

  • 1 tablespoon whole milk

  • 2 tablespoons all-purpose flour

  • Optional: 1 tablespoon sugar (if you prefer them sweet)

Step-by-Step Instructions

  1. Prepare the Egg Yolks: In a small bowl, whisk the egg yolks with the milk until combined. Sift in the flour and whisk until you have a smooth, thick paste.

  2. Whisk the Egg Whites: In a separate, very clean bowl, beat the egg whites (and sugar, if using) until they reach stiff peaks. You should be able to hold the bowl upside down without the whites falling out.

  3. Combine Gently: Fold a small scoop of the egg whites into the yolk mixture to lighten it. Then, very gently fold the rest of the whites into the yolk mixture. Use a spatula and a “cut and fold” motion to keep as much air in the batter as possible.

  4. Heat the Pan: Lightly grease a non-stick skillet and set it over the lowest possible heat.

  5. Cook the Cakes: Spoon or pipe the batter into the pan to form tall mounds. Add a few drops of water to empty spaces in the pan (this creates steam) and cover with a lid immediately.

  6. Flip Carefully: Cook for about 4–5 minutes until the bottom is golden and the top looks set. Carefully flip them over, add another drop of water, cover, and cook for another 3 minutes.

  7. Serve: Transfer to a plate and serve immediately with a dusting of powdered sugar or a drizzle of honey.


Recipe Q&A: SoufflΓ© Skillet Cakes

Q: Why did my cakes deflate after I took them out of the pan? A: This is normal for soufflΓ©-style cakes, but if they collapse instantly, it usually means the egg whites weren’t beaten to stiff enough peaks or the batter was over-mixed, which popped the air bubbles.

Q: Can I make these without a lid? A: The lid is essential because it traps the steam and heat needed to “bake” the inside of these thick cakes. Without it, the bottom will burn before the center is cooked through.

Q: My cakes are raw in the middle; what did I do wrong? A: The heat was likely too high. These need a very low, slow cook. If the outside browns too fast, the inside won’t have time to set.

Q: Can I add flavorings like vanilla or cocoa? A: Yes! You can add a drop of vanilla extract to the yolk mixture. If you want chocolate cakes, replace one teaspoon of flour with cocoa powder.

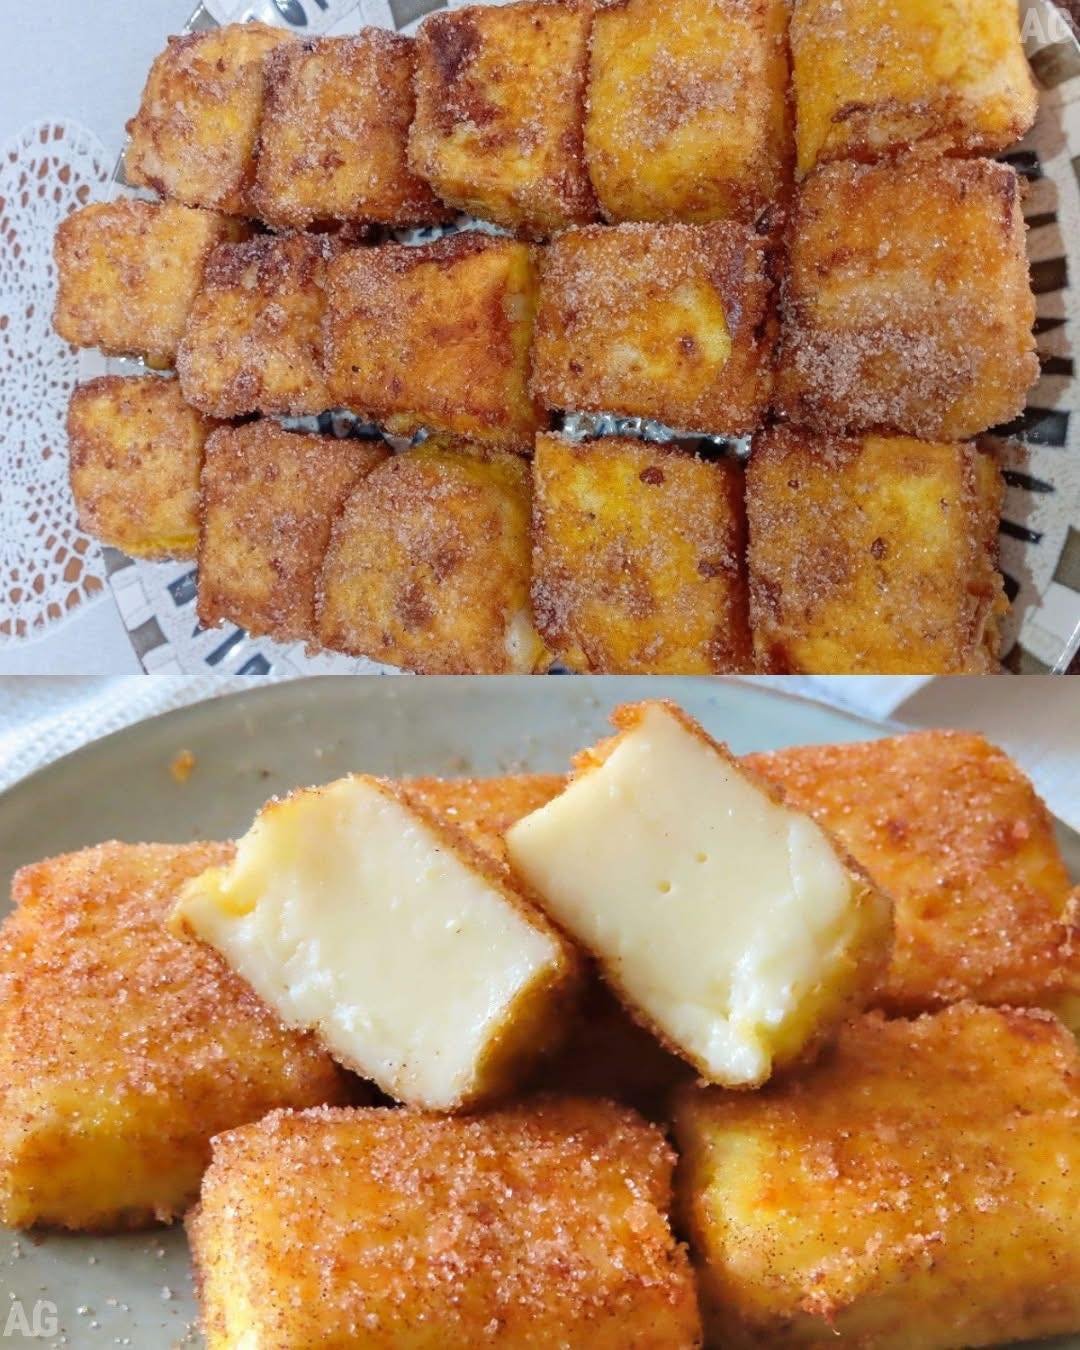
Creamy Fried Milk Cubes

Creamy Fried Milk Cubes

Ingredients

  • The Custard: 2 cups whole milk, 1/2 cup cornstarch, 1/2 cup sugar, 1 cinnamon stick, and a small piece of lemon peel.

  • The Coating: 2 large eggs (beaten), 1/2 cup all-purpose flour, 1/2 cup sugar mixed with 1 tablespoon ground cinnamon.

  • Oil for frying (neutral oil like sunflower or vegetable oil).

Step-by-Step Instructions

  1. Infuse the Milk: In a saucepan, combine 1.5 cups of the milk with the sugar, cinnamon stick, and lemon peel. Heat over medium until it starts to simmer, then remove from heat and let it sit for 10 minutes to infuse.

  2. Dissolve Cornstarch: In a small bowl, whisk the remaining 1/2 cup of cold milk with the cornstarch until completely smooth with no lumps.

  3. Thicken the Custard: Remove the cinnamon stick and lemon peel from the warm milk. Return the pan to low heat and slowly pour in the cornstarch mixture. Stir constantly with a whisk until the mixture becomes very thick and glossy (about 5 minutes).

  4. Set the Dough: Grease a square glass dish and pour the hot custard into it, smoothing the top. Cover with plastic wrap (touching the surface to prevent a skin from forming) and refrigerate for at least 3–4 hours (or overnight) until firm.

  5. Cut and Coat: Once set, turn the custard out onto a board and cut into equal squares or rectangles. Dredge each piece first in flour, then dip in the beaten eggs.

  6. Fry: Heat oil in a pan over medium-high heat. Fry the squares for about 2 minutes per side until they are golden brown and crispy.

  7. Sweet Finish: Immediately toss the hot fried milk in the cinnamon-sugar mixture until evenly coated. Serve warm or at room temperature.


Recipe Q&A: Fried Milk

Q: Why is my custard too soft to cut? A: This usually happens if the custard wasn’t cooked long enough on the stove or if it didn’t chill long enough in the fridge. It needs to reach a very thick, paste-like consistency before you take it off the heat.

Q: Can I make this without eggs? A: For an egg-free version, you can dip the custard squares in a thin slurry of flour and water before coating them in breadcrumbs or just flour, though the traditional texture comes from the egg wash.

Q: How do I get a smoother custard? A: Always dissolve the cornstarch in cold milk first. If you add it directly to hot milk, it will clump instantly. If you still see lumps, you can pass the mixture through a fine-mesh sieve before chilling.

Q: Can I air fry these? A: While frying gives the best traditional results, you can air fry them at 200Β°C for about 8–10 minutes. Spray them generously with oil first so the flour and cinnamon sugar can crisp up properly.

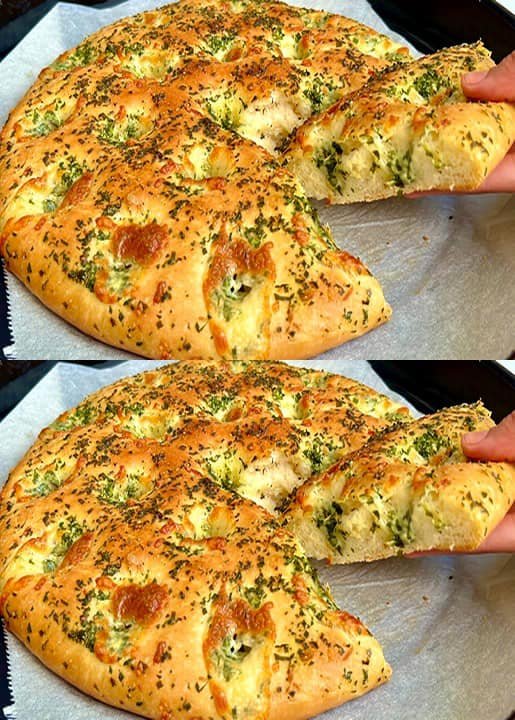
Fluffy Garlic & Herb Cheese Bread

Fluffy Garlic & Herb Cheese Bread

Ingredients

  • The Dough: 3 cups all-purpose flour, 1 cup warm water, 1 teaspoon sugar, 1 packet (7g) active dry yeast, 2 tablespoons olive oil, and 1 teaspoon salt.

  • The Topping: 3 tablespoons melted butter, 3 cloves minced garlic, 1 tablespoon chopped fresh parsley, 1 teaspoon dried oregano.

  • The Cheese: 1 cup shredded mozzarella or white cheddar.

Step-by-Step Instructions

  1. Activate Yeast: In a small bowl, combine warm water, sugar, and yeast. Let it sit for 5–10 minutes until it becomes foamy.

  2. Mix the Dough: In a large bowl, mix the flour and salt. Add the yeast mixture and olive oil. Stir until a shaggy dough forms.

  3. Knead and Rise: Knead the dough on a floured surface for about 5 minutes until smooth. Place it in a greased bowl, cover with a damp cloth, and let it rise in a warm spot for 1 hour (or until doubled in size).

  4. Shape: Punch down the dough and spread it out onto a parchment-lined baking sheet or into a round baking dish. Use your fingertips to poke deep dimples all over the surface.

  5. Add Flavor: Mix the melted butter, minced garlic, parsley, and oregano. Brush this mixture generously over the dough, ensuring it sinks into the dimples.

  6. Cheese & Bake: Sprinkle the shredded cheese evenly over the top. Bake in a preheated oven at 200Β°C (400Β°F) for 18–22 minutes until the crust is golden and the cheese is bubbly and browned in spots.

  7. Serve: Let it cool for 5 minutes before slicing into wedges or strips.


Recipe Q&A: Cheesy Garlic Bread

Q: Can I use instant yeast instead of active dry? A: Yes! If using instant yeast, you can skip the “activation” step and mix it directly into the dry ingredients. Just make sure your water is warm to help it rise.

Q: My bread didn’t rise; what happened? A: The most common reasons are using water that was too hot (which kills the yeast) or water that was too cold (which won’t activate it). The water should feel like a warm bath. Also, check the expiration date on your yeast packet.

Q: How do I get that extra-crispy bottom crust? A: For a crispier base, generously grease your baking pan with olive oil before pressing the dough into it. This essentially “fries” the bottom of the bread while it bakes.

Q: Can I make this dough in advance? A: Definitely. You can make the dough and let it rise slowly in the refrigerator overnight. This actually develops a deeper flavor in the bread. Just bring it to room temperature before shaping and baking.

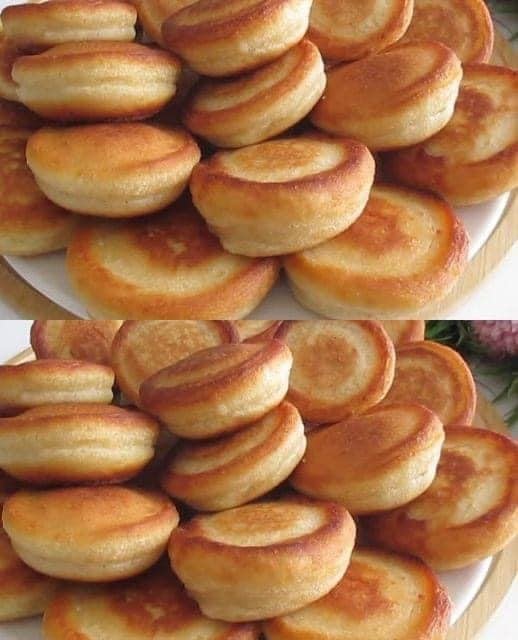
Fluffy Golden Yogurt Fritters

Fluffy Golden Yogurt Fritters

Ingredients

  • 2 cups Greek yogurt (or thick plain yogurt/kefir)

  • 1 large egg

  • 2 cups all-purpose flour (sifted)

  • 2 tablespoons sugar

  • 1/2 teaspoon salt

  • 1 teaspoon baking soda

  • 1 teaspoon vanilla extract

  • Oil for frying

Step-by-Step Instructions

  1. Prepare the Base: In a large mixing bowl, whisk the egg, sugar, salt, and vanilla extract together until well combined.

  2. Add Yogurt: Stir in the yogurt until the mixture is smooth.

  3. Incorporate Flour: Gradually add the sifted flour to the wet mixture, stirring gently. The goal is a thick, spoonable batterβ€”it should be much thicker than traditional pancake batter.

  4. The Secret Step: Finally, add the baking soda. Stir it in quickly but thoroughly. Once the soda is in, let the batter rest for 15 minutes. Do not stir the batter again after this rest, as you want to keep the air bubbles intact.

  5. Heat the Pan: Heat a generous amount of oil in a non-stick skillet over medium heat.

  6. Fry: Carefully spoon the batter into the hot oil. Fry for about 2–3 minutes per side until they are puffed up and deep golden brown.

  7. Drain: Place them on a paper towel to absorb any excess oil. Serve warm.


Recipe Q&A: Yogurt Fritters

Q: Why didn’t my fritters puff up? A: This is usually because the baking soda was old or the batter was over-mixed after the resting period. The reaction between the acidity in the yogurt and the baking soda creates the lift; if you stir it too much after it rests, you pop all the bubbles.

Q: Can I use low-fat yogurt? A: You can, but full-fat or Greek yogurt yields a much richer flavor and a sturdier texture. If your yogurt is very thin, you may need to add an extra tablespoon or two of flour to reach the right consistency.

Q: What is the best way to serve these? A: Traditionally, these are served with a dollop of sour cream and honey or jam. They are also excellent with fresh berries or a dusting of powdered sugar.

Q: Can I add fruit directly to the batter? A: Yes! Small pieces of diced apple or blueberries are popular additions. Just fold them in gently at the same time you add the flour.

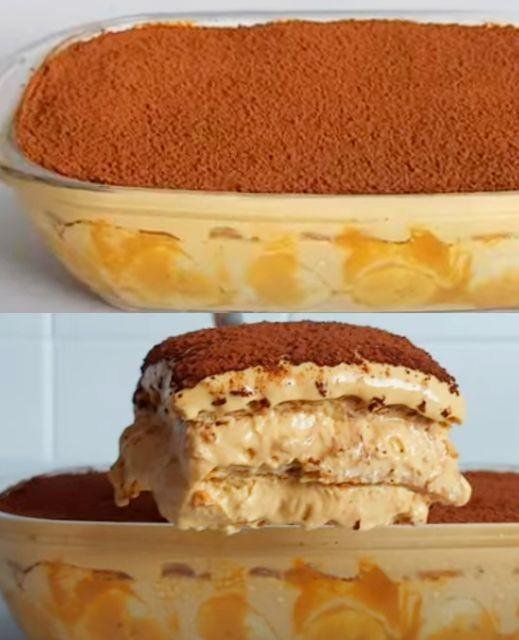
Layered Banoffee Dream

Layered Banoffee Dream

Ingredients

  • For the Base: 250g digestive biscuits (crushed) and 100g unsalted butter (melted).

  • The Caramel: 1 can (397g) Dulce de Leche or condensed milk boiled into toffee.

  • The Fruit: 3–4 large ripe bananas, sliced into rounds.

  • The Topping: 400ml heavy whipping cream, 2 tablespoons powdered sugar, and 1 teaspoon vanilla extract.

  • Garnish: 1 tablespoon cocoa powder (for dusting) or grated dark chocolate.

Step-by-Step Instructions

  1. Prepare the Crust: Mix the crushed biscuits with the melted butter until it resembles wet sand. Press the mixture firmly into the bottom of a rectangular or oval glass dish. Chill in the fridge for 20 minutes to set.

  2. Add the Caramel: Spread the Dulce de Leche evenly over the chilled biscuit base. If the caramel is too thick, warm it slightly to make it spreadable.

  3. Layer the Bananas: Arrange the sliced bananas in a dense layer over the caramel. For the best flavor, ensure the slices cover the entire surface.

  4. Whip the Cream: In a large bowl, whip the heavy cream, powdered sugar, and vanilla extract until stiff peaks form. Be careful not to over-whip.

  5. Assemble: Spread the whipped cream over the banana layer. Use a spatula to create a smooth surface or decorative peaks.

  6. The Finishing Touch: Use a fine-mesh sieve to dust the top generously with cocoa powder, just like in the photo.

  7. Chill: Let the dessert set in the refrigerator for at least 1–2 hours before serving to ensure clean slices.


Recipe Q&A: Banoffee Pie

Q: How do I prevent the bananas from turning brown? A: If you aren’t serving the pie immediately, toss the banana slices in a little lemon or lime juice before layering them. The acidity helps slow down the oxidation process.

Q: Can I use homemade caramel instead of store-bought? A: Absolutely. You can make a traditional toffee by simmering butter and brown sugar with condensed milk until thickened and golden. Just ensure it cools completely before adding it to the dish.

Q: Is there a way to make the whipped cream more stable? A: To keep the cream from sagging if the dish will be out for a while, you can add a tablespoon of instant vanilla pudding mix or a “cream stiffener” powder while whipping.

Q: Can this recipe be made in individual servings? A: Yes! This looks beautiful when layered in small glass jars or verrines for individual portions at a party.

Crispy Potato Nuggets

Crispy Potato Nuggets

Ingredients

  • 3 medium potatoes (Russet or Yukon Gold work best)

  • 1 large egg

  • 1/4 cup cornstarch (or all-purpose flour)

  • 1/4 cup breadcrumbs (plus extra for coating)

  • 2 tablespoons fresh parsley, finely chopped

  • 1/2 teaspoon garlic powder

  • Salt and black pepper to taste

  • Oil for frying (vegetable or canola)

Instructions

  1. Prepare the Potatoes: Peel the potatoes and cut them into chunks. Boil them in salted water until fork-tender (about 15–20 minutes). Drain well and mash them in a large bowl until completely smooth.

  2. Mix the Base: Add the egg, cornstarch, breadcrumbs, parsley, garlic powder, salt, and pepper to the mashed potatoes. Mix thoroughly until a soft dough forms. If the mixture feels too sticky, add an extra tablespoon of cornstarch.

  3. Shape the Nuggets: Take a small spoonful of the mixture and roll it into a ball, then flatten it slightly into a nugget or “tater tot” shape.

  4. Coat (Optional but Recommended): For extra crunch, roll each nugget in a shallow bowl of extra breadcrumbs until evenly coated.

  5. Fry: Heat about an inch of oil in a skillet over medium heat. Once the oil is shimmering, carefully add the nuggets in batches. Fry for 3–4 minutes per side until they reach a deep golden brown.

  6. Drain and Serve: Transfer the nuggets to a plate lined with paper towels to remove excess oil.

    Q: Can I make these ahead of time? A: Yes! You can shape the nuggets and even coat them in breadcrumbs, then store them in the refrigerator for up to 24 hours before frying. You can also freeze them in a single layer on a baking sheet; once frozen, transfer them to a bag for up to 3 months. Fry them directly from frozen, adding an extra minute or two to the cooking time.

    Q: Why did my nuggets fall apart in the oil? A: This usually happens if the mashed potatoes are too watery or if there isn’t enough binder (egg and cornstarch). Make sure to drain your potatoes very well after boiling. If the dough feels too loose, chilled mashed potatoes often hold their shape better than warm ones.

    Q: Can I bake these instead of frying? A: Absolutely. Arrange them on a parchment-lined baking sheet and lightly spray them with oil. Bake at 200Β°C (400Β°F) for about 20–25 minutes, flipping halfway through, until they are golden and crisp.

    Q: How do I make them extra flavorful? A: Feel free to mix in 1/4 cup of grated Parmesan or sharp cheddar cheese into the dough. You can also swap the parsley for cilantro or add a pinch of smoked paprika for a deeper, earthier flavor.

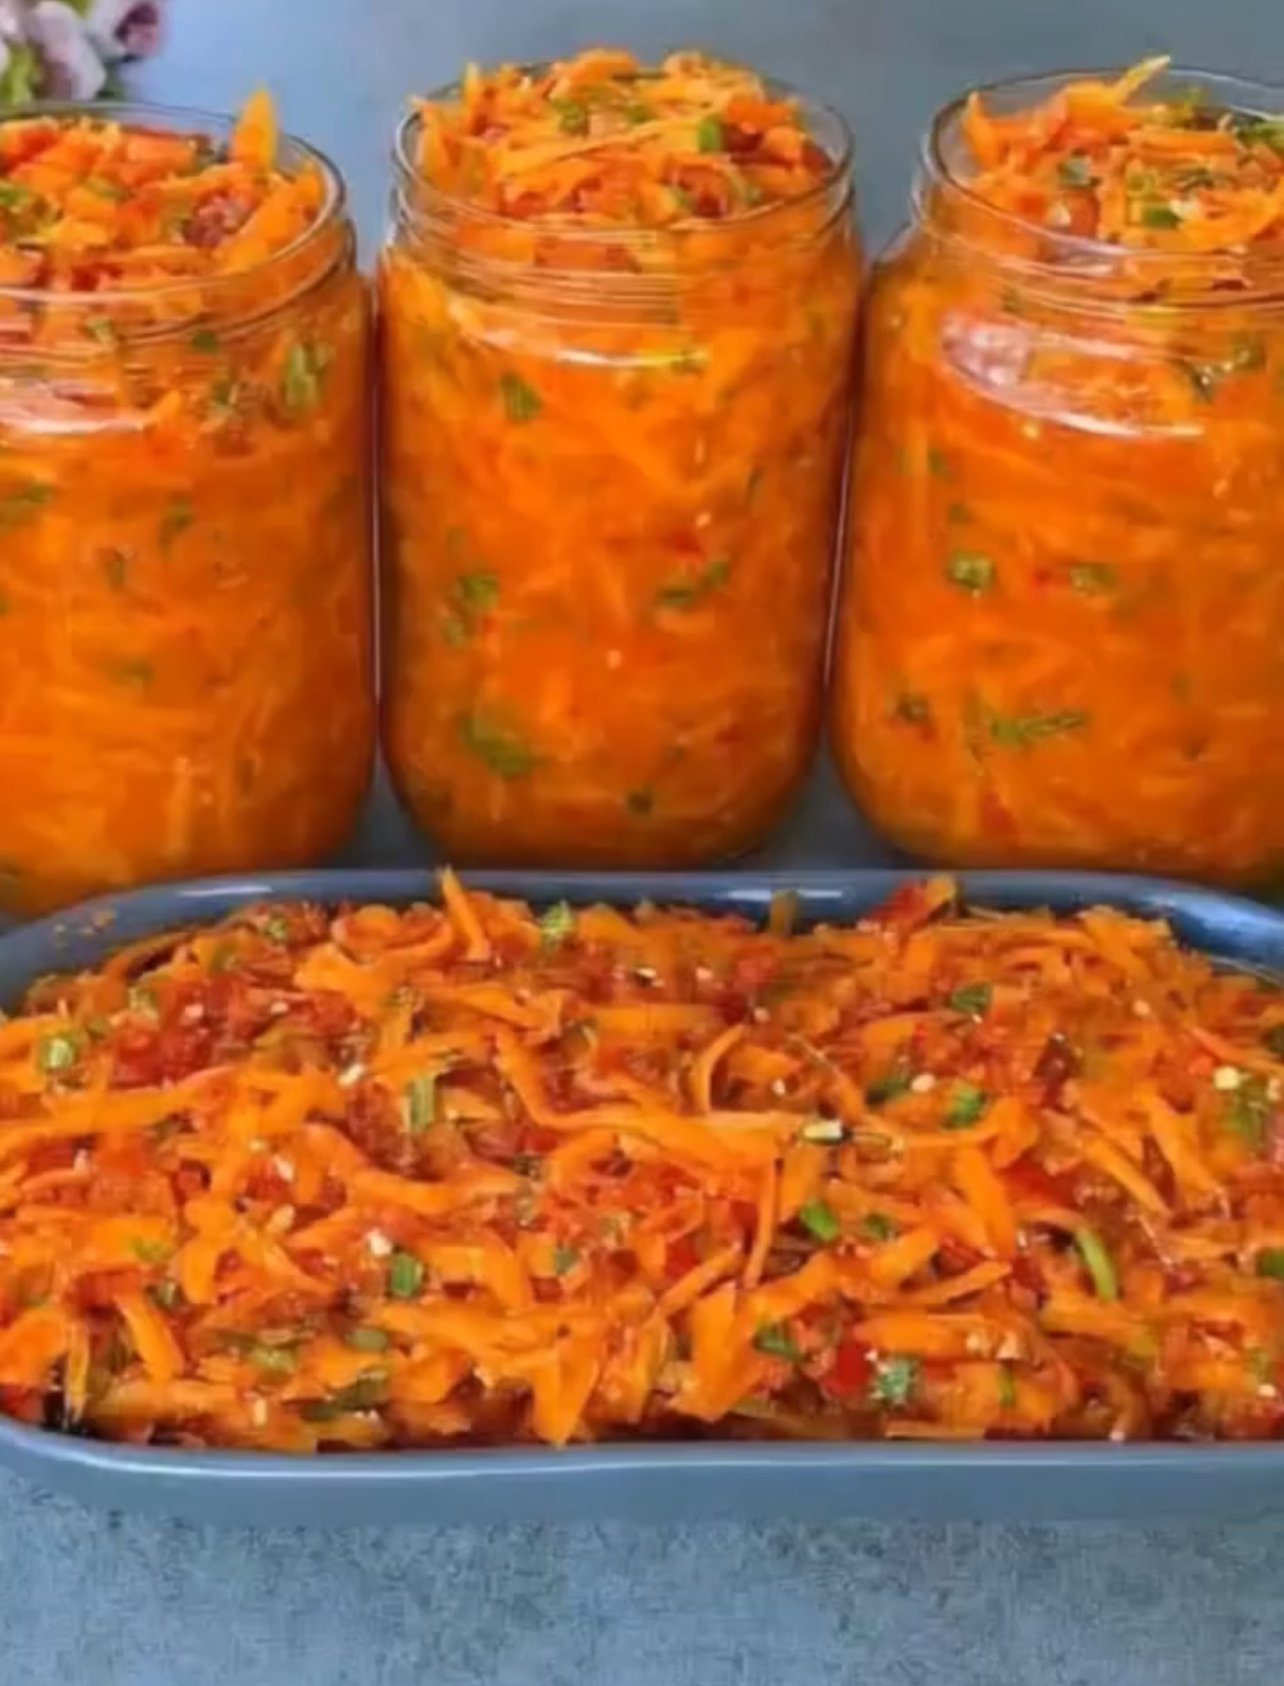
No-Cook Spicy Carrot Pickle

No-Cook Spicy Carrot Pickle (Instant Achaar)

πŸ“ Ingredients:

β€’4–5 medium carrots (grated or julienne)

β€’3–4 cloves garlic (finely chopped)

β€’2 green chilies (finely chopped)

β€’1 tbsp red chili flakes

β€’Β½ tsp turmeric powder

β€’1 tsp salt (adjust to taste)

β€’1 tbsp sugar (optional, for balance)

β€’2 tbsp lemon juice OR vinegar

β€’3 tbsp mustard oil (or any oil)

β€’1 tbsp fresh coriander (chopped)

βΈ»

πŸ‘©β€πŸ³ Step-by-Step Method:

Step 1: Prepare the carrots

Wash, peel, and grate or thinly slice the carrots. Put them in a large mixing bowl.

Step 2: Add aromatics

Add chopped garlic, green chilies, and fresh coriander to the carrots.

Step 3: Add spices

Sprinkle in:

β€’Red chili flakes

β€’Turmeric

β€’Salt

β€’Sugar (if using)

Mix everything well so spices coat the carrots evenly.

Step 4: Add tanginess

Pour in lemon juice or vinegar. This gives the pickle its signature tangy flavor.

Step 5: Add oil

Heat mustard oil slightly (optional but enhances flavor), let it cool a bit, then pour over the mixture.

Step 6: Mix thoroughly

Mix everything very well using a spoon or clean hands.

Step 7: Store

Transfer into clean, dry glass jars. Press down slightly so everything settles.

Step 8: Rest time

Let it sit for 4–6 hours at room temperature before eating.

For best taste, leave it overnight.

βΈ»

πŸ˜‹ Serving Tips:

β€’Serve with roti, paratha, or rice

β€’Use as a side with BBQ or fried food

β€’Can also be eaten as a crunchy salad!

βΈ»

❓ Q&A (Helpful Tips)

Q1: How long does this pickle last?

πŸ‘‰ It stays fresh for 1–2 weeks in the fridge if stored in a clean jar.

Q2: Can I skip mustard oil?

πŸ‘‰ Yes, you can use any oil, but mustard oil gives authentic achaar flavor.

Q3: Why is my pickle watery?

πŸ‘‰ Carrots release water naturally. Just mix again before serving.

Q4: Can I make it less spicy?

πŸ‘‰ Reduce green chilies and chili flakes according to your taste.

Q5: Can I add other vegetables?

πŸ‘‰ Yes! You can add cabbage, radish, or turnip for variation.

Q6: Is cooking required at all?

πŸ‘‰ No 😊 This is a completely no-cook recipe, which makes it quick and easy!Β­

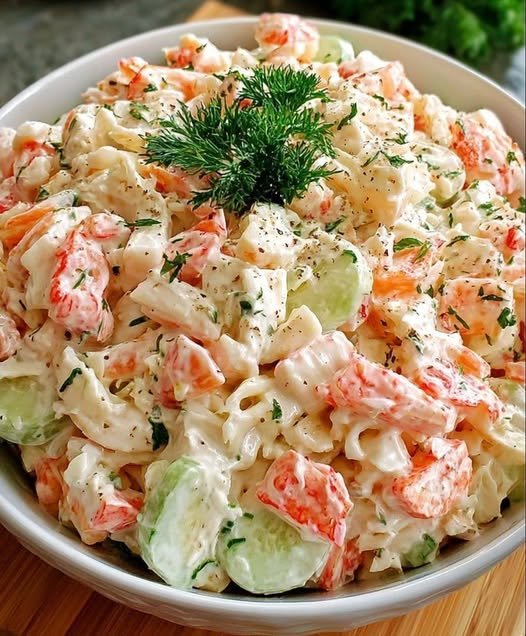
πŸ₯— The “2-Point” Seafood Salad Recipe

πŸ₯— The “2-Point” Seafood Salad Recipe

Ingredients:

  • Protein: 1 lb Imitation crab (chunked or shredded)

  • Crunch: 2 large cucumbers (peeled and sliced)

  • The “Cream”: Β½ cup non-fat Greek yogurt (this keeps the points low!) or light mayo.

  • Flavor Boosters: 1 tbsp fresh dill (chopped), 1 tsp garlic powder, salt, and black pepper to taste.

  • Optional: A squeeze of lemon juice or a splash of rice vinegar for tang.


πŸ‘©β€πŸ³ Quick Instructions:

  1. Prep: Slice your cucumbers and pat them dry with a paper towel (this prevents the salad from getting watery).

  2. Mix: In a large bowl, whisk together the yogurt/light mayo, dill, garlic powder, and lemon juice.

  3. Toss: Fold in the crab and cucumbers until everything is evenly coated.

  4. Chill: Let it sit in the fridge for at least 30 minutes to let those flavors meld together.


Why it works for beginners:

  • No Cooking: Perfect for when you don’t want to turn on the stove.

  • Customizable: You can add diced celery for extra crunch or a dash of Old Bay seasoning for a “seafood boil” vibe.

  • Meal Prep Friendly: It stays fresh in the fridge for 2–3 days.

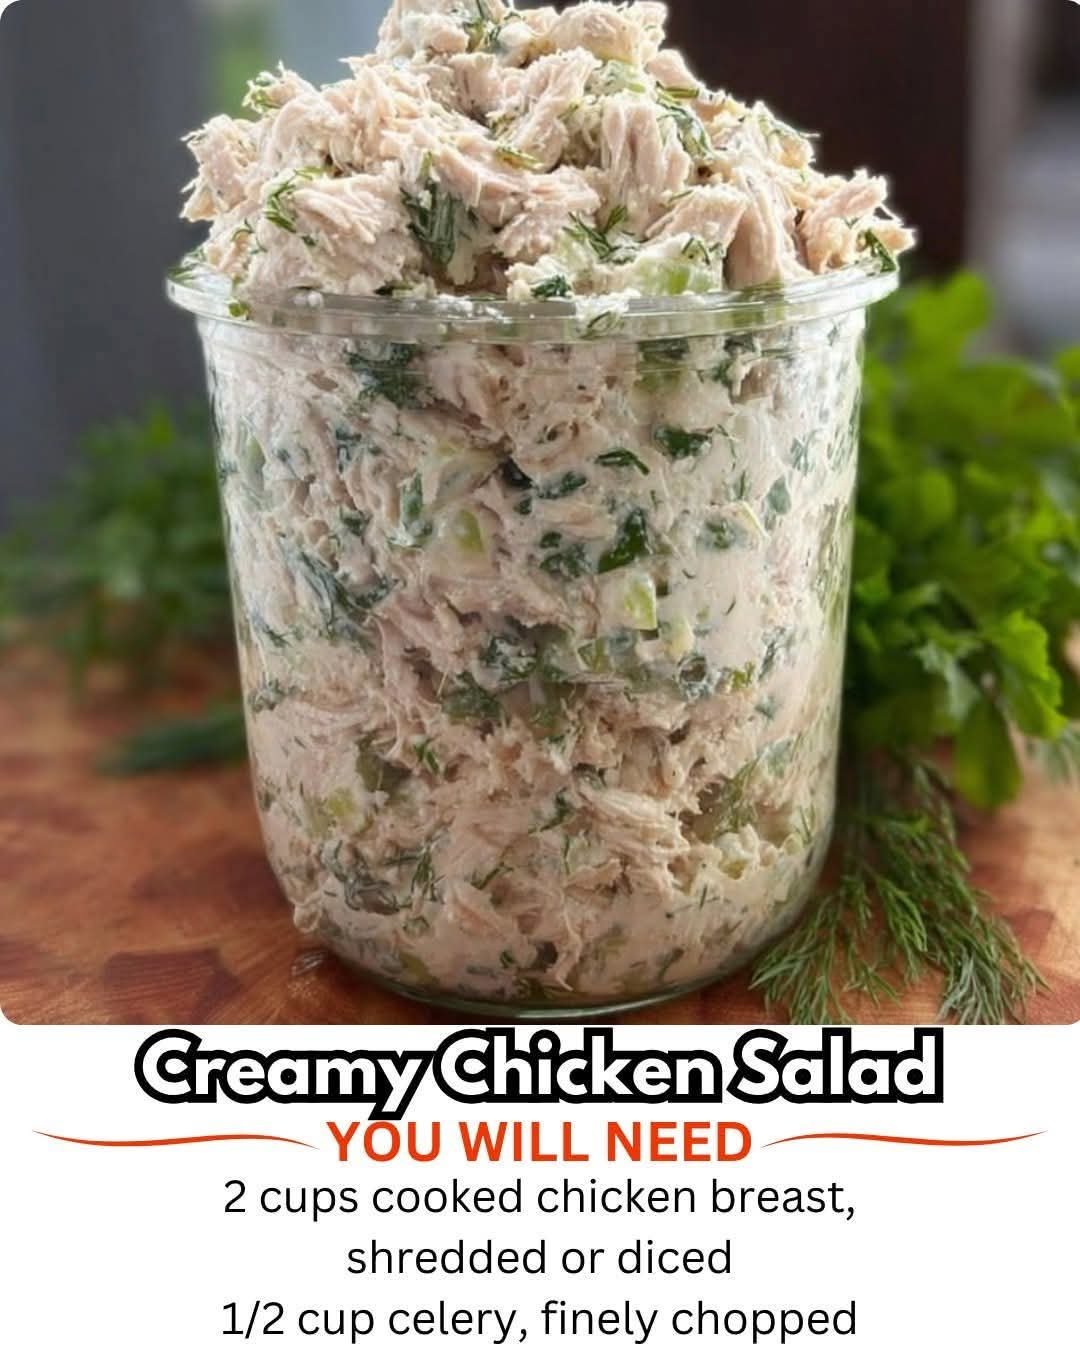
Creamy Chicken Salad

Creamy Chicken Salad

Ingredients:


3 cups cooked chicken, shredded or diced (rotisserie works great)

1/3 cup mayonnaise

1/3 cup plain Greek yogurt

1 tablespoon Dijon mustard

2 teaspoons fresh lemon juice

1 teaspoon honey (optional, for balance)

1/4 teaspoon garlic powder (optional)

2 stalks celery, finely chopped

1/3 cup red grapes, halved (or a small sweet apple, diced)

2 tablespoons red onion or scallions, finely chopped

2 tablespoons toasted sliced almonds or chopped pecans

1 tablespoon fresh dill or parsley, chopped

1/2 teaspoon kosher salt, plus more to taste

1/4 teaspoon black pepper


Directions:


1. In a roomy bowl, whisk together the mayonnaise, Greek yogurt, Dijon, lemon juice, honey, garlic powder, salt, and pepper until it’s velvety and smooth.

2. Fold in the chicken, gently turning until every bite is cozied up in that creamy dressing.

3. Add the celery, grapes, onion, nuts, and herbs, and toss softly so the crisp, juicy bits are evenly dotted throughout.

4. Taste and tweakβ€”add a pinch more salt, a crack of pepper, or a squeeze of lemon until it sings for you.

5. Cover and chill for 15 to 30 minutes to let the flavors mingle like old friends.

6. Spoon into crisp lettuce cups, pile onto toasted bread, or serve over a bed of greens for a bright, satisfying meal.

7. Store leftovers in an airtight container up to 3 days, and give it a quick stir before serving to wake everything back up.


Cooking Time: 15 minutes |

Servings: 4 | Calories: 290.

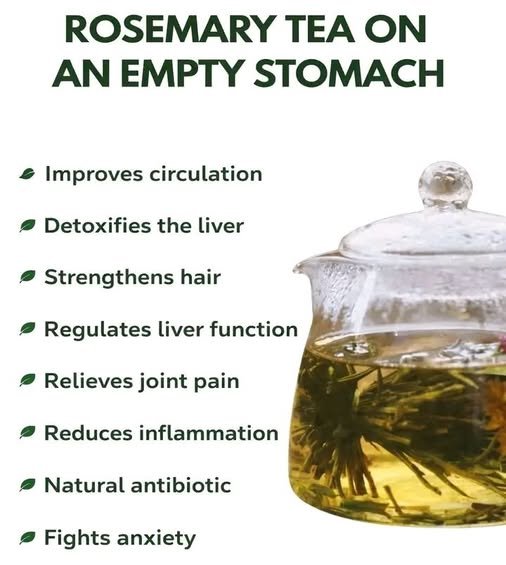
β˜• The Real Benefits of Rosemary Tea

β˜• The Real Benefits of Rosemary Tea

  • High in Antioxidants: Rosemary contains compounds like rosmarinic acid and carnosic acid, which help protect your cells from damage.

  • Anti-Inflammatory Properties: It is scientifically recognized for its ability to help lower inflammation in the body, which may indirectly help with mild joint discomfort.

  • Mental Clarity & Mood: There is promising research suggesting that the aroma and consumption of rosemary can improve focus and reduce cortisol (the stress hormone), helping with anxiety.

  • Digestive Aid: It can help with indigestion and bloating, which is likely why the “empty stomach” recommendation exists.


⚠️ A Reality Check on Common Claims

While rosemary is great, some of the claims in the image are a bit of an “AI-exaggeration” or medical oversimplification:

Claim The Reality
“Detoxifies the Liver” Your liver detoxifies itself! While rosemary supports liver health via antioxidants, “detox” is a marketing term. It supports function, it doesn’t “cleanse.”
“Natural Antibiotic” Rosemary has antimicrobial properties in a lab setting (petri dish), but drinking a cup of tea isn’t a substitute for antibiotics if you have a bacterial infection.
“Strengthens Hair” Applying rosemary oil topically to the scalp has shown results similar to Minoxidil for hair growth, but drinking the tea hasn’t been proven to have the same effect.

A Quick Tip for Safety

Rosemary is generally safe, but because it can act as a mild diuretic or interact with certain medications (like blood thinners or ACE inhibitors), it’s always a good idea to chat with a doctor if you plan on making it a daily high-dose habit.

Slow Cooker Hamburger Vegetable Soup

Slow Cooker Hamburger Vegetable Soup

This version is even faster to prep than the barley soup because the ground beef cooks quickly and the frozen/canned veggies are ready to go.

Ingredients

  • 1.5 lbs Ground Beef (lean is best)

  • 3 large Yukon Gold potatoes, peeled and diced

  • 1 can (14.5 oz) Diced Tomatoes (don’t drain)

  • 1 cup Frozen Corn

  • 1 cup Frozen Green Beans

  • 1/2 cup Frozen Peas

  • 2 Carrots, sliced

  • 1 Yellow onion, diced

  • 2 Tbsp Tomato paste

  • 4 cups Beef broth

  • 1 Tbsp Worcestershire sauce

  • 1 tsp Garlic powder

  • 1 tsp Dried oregano or Italian seasoning

  • Salt and Pepper to taste


Instructions

  1. Brown the Beef: In a skillet over medium-high heat, brown the ground beef with the diced onion until no longer pink. Drain the excess grease.

    • Tip for your salty preference: Season the beef generously with salt and pepper while it browns.

  2. Combine: Add the cooked beef/onion mixture to your crockpot.

  3. Add Everything Else: Toss in the potatoes, carrots, corn, green beans, peas, diced tomatoes, tomato paste, and all seasonings.

  4. Liquid: Pour in the beef broth and Worcestershire sauce. Stir well.

  5. Cook: Cover and cook on LOW for 6–7 hours or HIGH for 3–4 hours (until potatoes and carrots are fork-tender).

  6. Adjust Seasoning: Taste the broth before serving. Since you like it salty and savory, this is the time to add an extra splash of Worcestershire or a pinch more salt.

The Loaded “Twice-Air-Fried” Stuffed Potato

The Loaded “Twice-Air-Fried” Stuffed Potato

Prep time: 10 mins | Cook time: 45 mins | Serves: 2-4

Ingredients

  • 4 Medium Russet Potatoes (approx. 8 oz each)

  • 2 tbsp Olive Oil (or avocado oil)

  • 1 tsp Sea Salt

  • 4 tbsp Unsalted Butter (softened)

  • 1/4 cup Sour Cream (or Greek yogurt)

  • 1/2 cup Shredded Sharp Cheddar

  • 2 slices Cooked Bacon (crumbled)

  • Optional: Chopped chives or green onions for garnish


Instructions

Step 1: The Initial Air Fry

  1. Prep: Scrub potatoes and pat them completely dry. Poke each 5–6 times with a fork.

  2. Coat: Rub the skins thoroughly with oil and salt.

  3. Cook: Place in the air fryer basket (no crowding!). Air fry at 400Β°F for 35–40 minutes, flipping halfway through. They are done when a knife slides into the center like butter.

Step 2: The “Fluff & Mix”

  1. Slice: Carefully slice the top 1/3 off each potato (lengthwise) or just slice a deep “V” into the top.

  2. Scoop: Use a spoon to scoop out the fluffy white center into a bowl, leaving a thin “shell” of potato against the skin so it stays upright.

  3. Mash: In the bowl, mash the potato guts with butter, sour cream, and half of the cheese. Season with a pinch of extra salt and pepper.

Step 3: The Ultimate Crisp

  1. Stuff: Spoon the creamy mixture back into the potato skins.

  2. Top: Sprinkle the remaining cheese and the crumbled bacon on top.

  3. Second Fry: Put the stuffed potatoes back into the air fryer. Air fry at 375Β°F for 3–5 minutes until the cheese is bubbling and starting to brown.


3 Golden Rules for Success

  • Don’t Over-Mash: Use a fork or masher, not a hand mixer. If you over-process the insides, they become gummy instead of fluffy.

  • Temperature Check: If you have an instant-read thermometer, aim for an internal temp of 205Β°F before scooping.

  • The Foil Myth: Keep the foil away! Even for stuffed potatoes, the air fryer needs that direct heat to keep the skins from getting soggy once you add the moist filling.


Estimated Nutrition (Per Potato)

Calories Fat Carbs Protein
340 kcal 18g 36g 9g

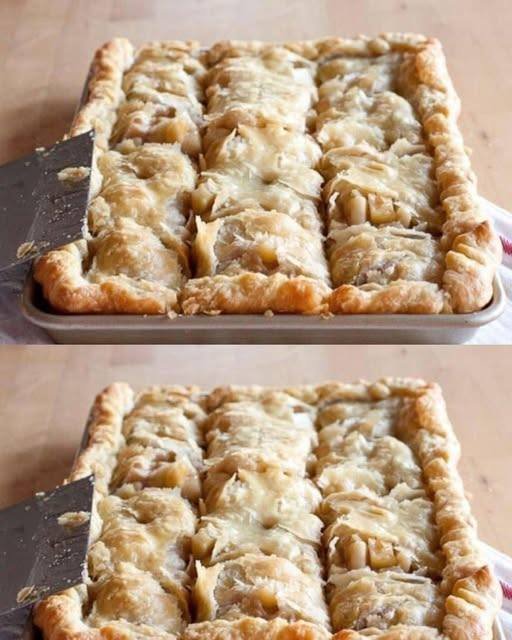
Apple Mountain Dew Dumplings (

Country Apple Dumplings

Prep time: 15 mins | Bake time: 35–45 mins | Yields: 16 dumplings


Ingredients

  • 2 cans (8 oz each) refrigerated crescent roll dough

  • 2 large Granny Smith apples (peeled, cored, and cut into 8 wedges each)

  • 1 cup unsalted butter (2 sticks)

  • 1 Β½ cups granulated sugar

  • 1 tsp ground cinnamon

  • 1 tsp vanilla extract

  • 1 can (12 oz) Mountain Dew (or similar lemon-lime soda)


Instructions

  1. Prep: Preheat your oven to 350Β°F (175Β°C) and grease a 9×13 inch baking dish.

  2. Wrap: Roll each apple wedge in one crescent roll triangle, starting from the wide end. Place them in the baking dish in two rows.

  3. The Sauce: Melt the butter in a saucepan. Stir in the sugar, cinnamon, and vanilla until just combined (it will be thick).

  4. Pour: Spoon the butter mixture over the dumplings.

  5. The Secret Step: Pour the Mountain Dew all around the edges and down the center of the pan (do not pour it directly over the top of the dough if you want them crispy).

  6. Bake: Bake for 35 to 45 minutes, or until the tops are golden brown and the pastry is cooked through.


Why it works

The bottom of the rolls becomes soft and “dumpling-like” from the soda and butter, while the tops stay flaky and crisp. It’s best served warm with a big scoop of vanilla bean ice cream!

Vegan Dole Pineapple Whip

🍍 5-Minute Vegan “Dole” Pineapple Whip

Creamy, Tropical, and Naturally Sweet

  • Prep time: 5 mins

  • Servings: 4

  • Diet: Vegan, Plant-Based, Gluten-Free

  • WW Points: 4 SmartPoints

πŸ›’ Ingredients

  • 2 cups Frozen pineapple chunks

  • 1 cup Full-fat coconut milk (for maximum creaminess)

  • 1 tbsp Maple syrup or agave (optional)

  • 1 tsp Vanilla extract

  • 1 pinch Salt

  • Optional Garnish: Fresh mint, shredded coconut, or a lime wedge.

πŸ‘©β€πŸ³ Quick Instructions

  1. Combine: Add the frozen pineapple, coconut milk, sweetener, vanilla, and salt into a high-speed blender.

  2. Blend: Process on high for 1–2 minutes. Use a tamper or stop to scrape down the sides until the mixture is thick and smooth like soft-serve.

  3. Adjust: Taste for sweetness. If it’s too thick to blend, add coconut milk 1 tablespoon at a time.

  4. Serve: For the classic look, pipe it into a bowl using a star-tipped pastry bag, or simply scoop and enjoy immediately!

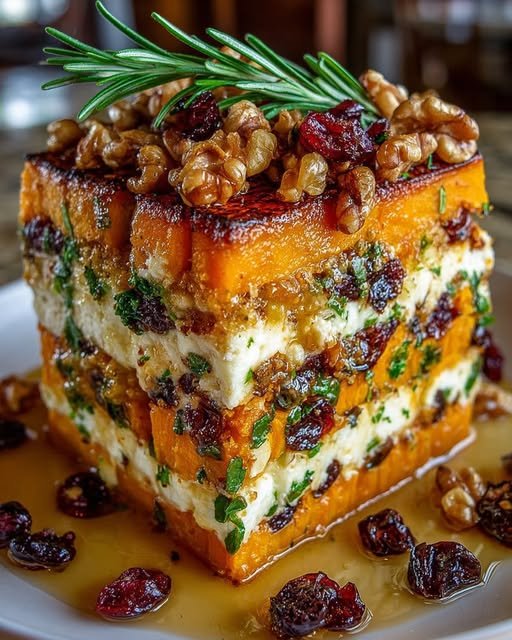
πŸ₯˜ Layered Winter Root Vegetable Lasagna

πŸ₯˜ Layered Winter Root Vegetable Lasagna

With Feta, Toasted Walnuts, and a Cranberry-Honey Glaze

A cozy, grain-free “patchwork” of seasonal flavors. Perfect as a vegetarian main or a showstopping holiday side.

  • Prep time: 20 mins

  • Cook time: 45 mins

  • Total time: 65 mins

  • Yields: 6 servings

  • Diet: Vegetarian, Gluten-Free


πŸ›’ Ingredients

The Vegetable Base:

  • 2 medium Sweet potatoes, thinly sliced (approx. 1/8 inch)

  • 2 cups Butternut squash, diced or thinly sliced

  • 2 medium Carrots, thinly sliced into rounds

  • 2 tbsp Olive oil

  • Salt and black pepper, to taste

The Filling & Crunch:

  • 1 cup Feta cheese, crumbled

  • Β½ cup Walnuts, toasted and chopped

The Cranberry-Honey Glaze:

  • Β½ cup 100% pure cranberry juice

  • 2 tbsp Honey

  • 1 tbsp Balsamic vinegar


πŸ‘©β€πŸ³ Instructions

1. Prep and Roast

Preheat your oven to 375Β°F (190Β°C). Grease a 9×9 inch baking dish or a small casserole dish with olive oil. In a large bowl, toss the sliced sweet potatoes, squash, and carrots with 1 tbsp of olive oil, salt, and pepper. Spread them on a baking sheet and roast for 15–20 minutes until just tender.

2. The Art of Layering

Start with a foundational layer of roasted sweet potatoes on the bottom of your prepared dish. Sprinkle a portion of the crumbled feta and chopped walnuts. Follow with a layer of squash, then carrots. Repeat the layersβ€”vegetables, feta, walnutsβ€”until the dish is full, finishing with a beautiful “patchwork” layer of sweet potatoes on top.

3. Simmer the Glaze

While the vegetables are roasting, combine the cranberry juice, honey, and balsamic vinegar in a small saucepan. Simmer over medium heat for 5–7 minutes until the liquid reduces into a thick, glossy glaze.

4. The First Bake

Drizzle about β…” of the glaze evenly over the assembled lasagna. Cover the dish tightly with foil to lock in moisture. Bake for 30 minutes.

5. The Finishing Touch

Remove the foil and drizzle the remaining glaze over the top. Return the dish to the oven, uncovered, for another 10–15 minutes. Look for the edges to be golden and the glaze to be bubbling and caramelized.

6. Rest and Serve

Let the lasagna rest for 10 minutes before slicing. This allows the layers to set so you get those perfect, clean “cake-like” slices.


πŸ’‘ Pro-Tips for Success

  • The Mandoline Advantage: For those perfectly even layers, use a mandoline slicer for the sweet potatoes and carrots. (Please use the safety guard!)

  • Make it Ahead: You can assemble the layers a day in advance and keep them in the fridge. Just add the glaze right before you pop it in the oven.

  • Vegan Swap: Replace the feta with a dairy-free almond-based “feta” or simply extra toasted pecans and a sprinkle of nutritional yeast.

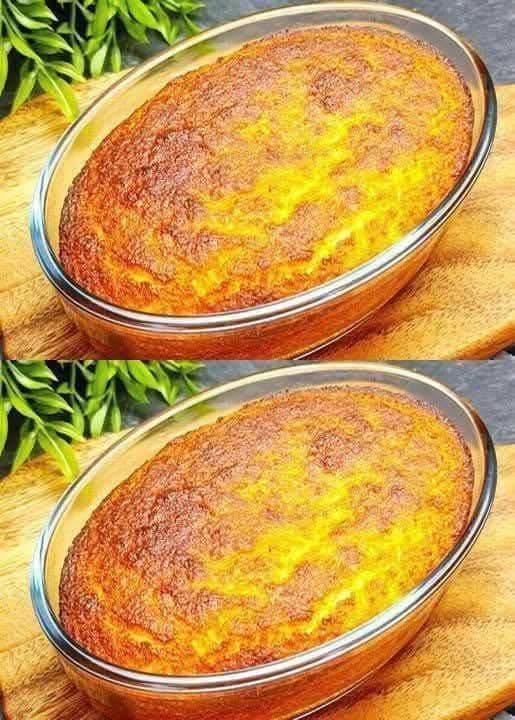
β€œBaked Cottage Cheese Eggs: High-Protein Breakfast Perfection”

Servings 4 servings (2 egg cups each)
Total Time 25 minutes
Difficulty Easy
Calories per Serving Approx. 150 Calories
Macros P: 18g / C: 5g / F: 7g / Fiber: 0g

πŸ’–Β Why This ZeroPoint Breakfast Is Your WW Secret Weapon

Breakfast is the most crucial meal for successfulΒ weight loss meals, and starting your day with pure protein is the best strategy for staying satisfied and on track. Most of us reach for scrambled eggs, but theseΒ Baked Cottage Cheese Egg CupsΒ offer something even better: massive protein content and incredible satiety for minimal (orΒ ZeroPoint) contribution!

This recipe transforms simple ingredientsβ€”eggs and cottage cheeseβ€”into a fluffy, savory, muffin-tin masterpiece. The cottage cheese melts and stabilizes the eggs, creating a custard-like texture that is miles better than a plain baked egg. It’s anΒ easy meal prep ideaΒ you can make ahead, grab, and go. This is a quick, wholesome,Β macro-friendlyΒ breakfast designed to fuel your busy day while keeping your SmartPoints (or PersonalPoints) budget safely in check.


✨ Look at the Recipe (WW Focus)

  • Sensory Appeal:Β A light, airy, and fluffy texture with a rich, savory, slightly tangy flavor, thanks to the baked cottage cheese.
  • Flavor Highlight:Β Savory herbs (chives, parsley) and a touch of black pepper elevate the simple egg and cheese base into a genuinely satisfying dish.
  • Key WW Benefit:Β Utilizes twoΒ ZeroPointΒ foods (eggs and nonfat cottage cheese) as the base, making it extremely high in protein for maximum fullness and adherence to the Weight Watchers plan.

πŸ›’Β Ingredients Needed

For the Baked Egg Cups

  • 1 cupΒ nonfat cottage cheeseΒ (ZeroPoint on many plans)
  • 8 largeΒ eggsΒ (ZeroPoint on many plans)
  • 2 Tbsp finely choppedΒ fresh chives
  • 1 Tbble choppedΒ fresh parsley
  • $1/4$ tspΒ garlic powder
  • Salt and freshly ground black pepper to taste
  • Optional: Nonstick cooking spray or silicone liners for the muffin tin

Optional ZeroPoint Add-ins (Add $1/4$ cup total)

  • Diced bell peppers
  • Chopped spinach (squeeze out excess water)
  • Diced mushrooms

πŸ”ͺΒ How to Make Our SmartPoints Egg Cups

  1. Prep the Batter:Β Preheat your oven to 375Β°F (190Β°C). Lightly spray a standard 12-cup muffin tin with nonstick spray, or line with silicone baking cups.
  2. Blend the Cottage Cheese:Β In a medium bowl, use an immersion blender, stand blender, or food processor toΒ blendΒ the nonfat cottage cheese until it is completely smooth and creamy. This prevents a chunky texture in the final product.
  3. Mix the Batter:Β Pour the blended cottage cheese into a large bowl.Β WhiskΒ the 8 eggs lightly and add them to the cheese. Add the chives, parsley, garlic powder, salt, and pepper. GentlyΒ stirΒ until just combined. You now have aΒ macro-friendly mealΒ batter!
  4. Fold in Fillings:Β If using optionalΒ ZeroPointΒ vegetables (like spinach or peppers), gentlyΒ foldΒ them into the mixture. Be careful not to over-mix.
  5. Bake:Β PourΒ the mixture evenly into the 8 or 10 prepared muffin cups (filling them about $3/4$ full).
  6. Cook:Β BakeΒ for 18 to 22 minutes, or until the egg cups are set in the center and lightly golden around the edges. This is an excellentΒ clean eatingΒ breakfast.
  7. Cool & Serve:Β Let the cups cool in the tin for 5 minutes before carefully removing them. They may deflate slightly upon cooling.

🧊 Storage & Serving Suggestions

  • Storing:Β Once completely cooled, the egg cups can be stored in an airtight container in the refrigerator for up toΒ 4 days. This is the perfectΒ easy meal prep idea.
  • Reheating:Β Reheat in the microwave for 30–60 seconds, or in a toaster oven for a few minutes until warm.
  • Freezing:Β Do not freeze. The cottage cheese can become rubbery and separate upon thawing.
  • Serving Pairings (WW-Approved):Β Serve with a side of fresh fruit (like berries or melonβ€”ZeroPoint) and a slice of whole-wheat toast (points calculated separately) for a complete and fillingΒ weight loss meal.

❓ Tips & FAQs

Q: What is the best way to keep these ZeroPoint/low-point?

A:Β Always useΒ nonfatΒ cottage cheese andΒ whole eggs. Avoid adding cheese (like cheddar or mozzarella), meat, or heavy cream to the recipe, as these will significantly increase the SmartPoints.

Q: How can I spice this recipe up?

A:Β Add a dash of hot sauce (ZeroPoint) before serving, or fold in a pinch of chili powder or smoked paprika before baking. You can also mix in some finely diced jalapeΓ±o for aΒ healthy twist.

Q: My cottage cheese mixture looks chunky before baking. What did I do wrong?

A:Β If you skip the blending step, the large curds of cottage cheese will remain chunky. The secret to the super-fluffy texture isΒ blending the cottage cheese until it is liquid smoothΒ before mixing in the eggs.

Q: Are these suitable for meal prep for a whole week?

A:Β Yes! Making a batch of 8 to 12 of these makes for a simple,Β macro-friendlyΒ breakfast every morning. Store them in the fridge and reheat as needed.

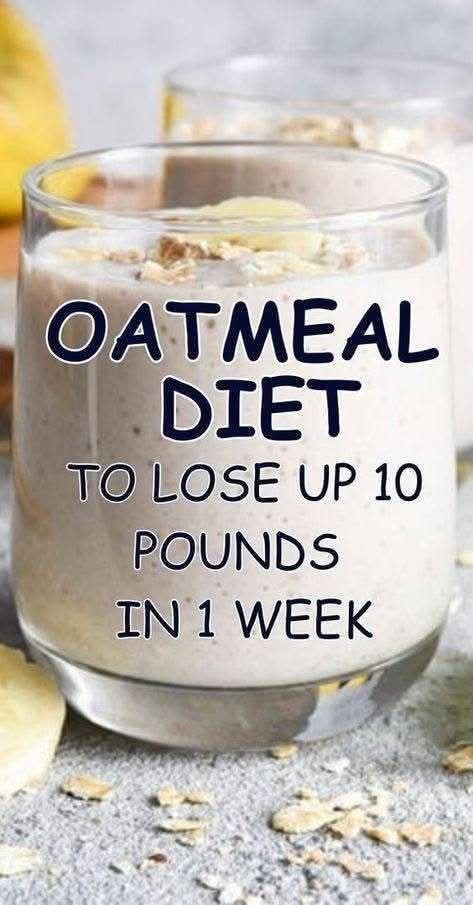
Banana Oatmeal Weight-Loss Smoothie

Banana Oatmeal Weight-Loss Smoothie

Description

A creamy, fiber-rich oatmeal smoothie made with oats, banana, and protein-boosting ingredients to keep you full for hours. Perfect for breakfast or a meal replacement when trying to manage calories.

Β Ingredients (1 Serving)

  • Β½ cup rolled oats

  • 1 medium banana

  • 1 cup unsweetened almond milk (or skim milk)

  • Β½ cup Greek yogurt (plain, non-fat)

  • 1 tablespoon chia seeds

  • Β½ teaspoon cinnamon

  • 1 teaspoon honey (optional)

  • Β½ cup ice cubes

Β Instructions

  1. Soften oats (optional but recommended):
    Soak oats in almond milk for 5–10 minutes for smoother texture.

  2. Add all ingredients to a blender.

  3. Blend until smooth and creamy.

  4. Pour into a glass and enjoy immediately.


πŸ’‘Β Tips for Best Results

  • βœ”Β UseΒ rolled oats, not instant flavored oats.

  • βœ”Β Add protein powder if using as a meal replacement.

  • βœ”Β For lower calories, skip honey.

  • βœ”Β Prep overnight oats in the fridge for quicker mornings.

  • βœ”Β Pair with light exercise for better results.

Β Servings

  • Makes:Β 1 serving

  • Can be doubled for 2 servings

Nutritional Information (Approx. Per Serving)

Nutrient Amount
Calories 350–400 kcal
Protein 18–22g
Carbohydrates 55g
Fiber 9–11g
Fat 8–10g
Sugar 18g (natural + optional honey)

(Values vary depending on ingredients used.)

Β Health Benefits

1️⃣ Keeps You Full Longer

Oats and chia seeds are high in fiber, helping reduce hunger cravings.

2️⃣ Supports Digestion

Soluble fiber improves gut health.

3️⃣ Helps Control Blood Sugar

Oats have a low glycemic index compared to refined carbs.

4️⃣ Boosts Metabolism

Protein from Greek yogurt supports muscle and fat burning.

5️⃣ Heart Healthy

Oats may help reduce LDL (bad cholesterol).

Β Q & A

Q1: Can I lose 10 pounds in one week with this?

Realistically, no. Safe weight loss is 1–2 pounds per week. Rapid loss is mostly water weight.

Q2: Can I drink this twice a day?

Yes, but ensure you’re getting enough protein, vegetables, and healthy fats throughout the day.

Q3: Can I use water instead of milk?

Yes, but it will be less creamy and slightly lower in protein.

Q4: Is this good for diabetics?

It can be, but skip honey and monitor portion size. Always consult a healthcare provider.

Q5: Can I make it vegan?

Yes. Use plant-based yogurt and milk.

No Flour, No Sugar Coconut Cake (5-Minute Recipe)

No Flour, No Sugar Coconut Cake (5-Minute Recipe)

A soft, lightly sweet coconut cake made with wholesome ingredients andΒ no refined sugar or flour. Perfect for quick cravings, low-carb lifestyles, or when you want dessertΒ now.


Why You’ll Love This Cake

  • No flour, no sugar

  • Naturally sweetened

  • Ready inΒ 5 minutes

  • One bowl, minimal cleanup

  • Gluten-free & low-carb friendly

  • Works for breakfast, snack, or dessert


Ingredients

Serves 4–6

  • 1Β½ cups unsweetened shredded coconut

  • 3 large eggs

  • Β½ cup coconut milk (or heavy cream)

  • 1 teaspoon baking powder

  • 1 teaspoon vanilla extract

  • 2–3 tablespoons honey, maple syrup, or sugar-free sweetenerΒ (optional, for mild sweetness)

  • Pinch of salt

πŸ‘‰Β Optional add-ins:

  • Lemon zest

  • Cinnamon

  • Sugar-free chocolate chips


Instructions

1. Mix the Batter

In a bowl, whisk together:

  • Eggs

  • Coconut milk

  • Vanilla

  • Sweetener (if using)

Fold in:

  • Shredded coconut

  • Baking powder

  • Salt

Mix until well combined.


2. Cook (Choose One Method)

πŸ”₯Β Microwave Method (Fastest)

  • Grease a microwave-safe dish

  • Pour in batter

  • Microwave onΒ HIGH for 4–5 minutes

  • Center should be set but moist

πŸ”₯Β Oven Method (More Golden Top)

  • Preheat oven toΒ 350Β°F (175Β°C)

  • Bake in greased dish forΒ 20–25 minutes


3. Cool Slightly & Serve

Let rest for 2–3 minutes before slicing.


Texture & Flavor Notes

  • Lightly crisp top

  • Moist, custardy center

  • Naturally coconut-forward

  • Not overly sweet (perfect for pairing)


Tips for Best Results

  • UseΒ fine shredded coconutΒ for smoother texture

  • Don’t overcook β€” coconut dries fast

  • Add a splash of cream if batter feels thick

  • For extra richness, add 1 tbsp melted butter or coconut oil


Serving Ideas

  • Dust with coconut flakes

  • Top with Greek yogurt

  • Serve with berries

  • Drizzle with melted dark chocolate

  • Add whipped cream for dessert vibes


Nutrition Information (Approx. per serving)

  • Calories: 210

  • Protein: 7g

  • Fat: 17g

  • Carbs: 6g

  • Sugar: 1–3g (depending on sweetener)

  • Gluten-free


Health Benefits

  • Naturally gluten-free

  • No refined sugar spikes

  • High in healthy fats

  • Satiating and filling

  • Great for low-carb & keto-style eating


Frequently Asked Questions

Q: Is this keto-friendly?
A: Yes, if you use a sugar-free sweetener or skip it entirely.

Q: Can I make it dairy-free?
A: Absolutely β€” use coconut milk only.

Q: Can I store leftovers?
A: Yes! Refrigerate up to 3 days. Reheat gently.

Q: Can I blend the coconut?
A: Yes β€” blending gives a smoother, cake-like texture.

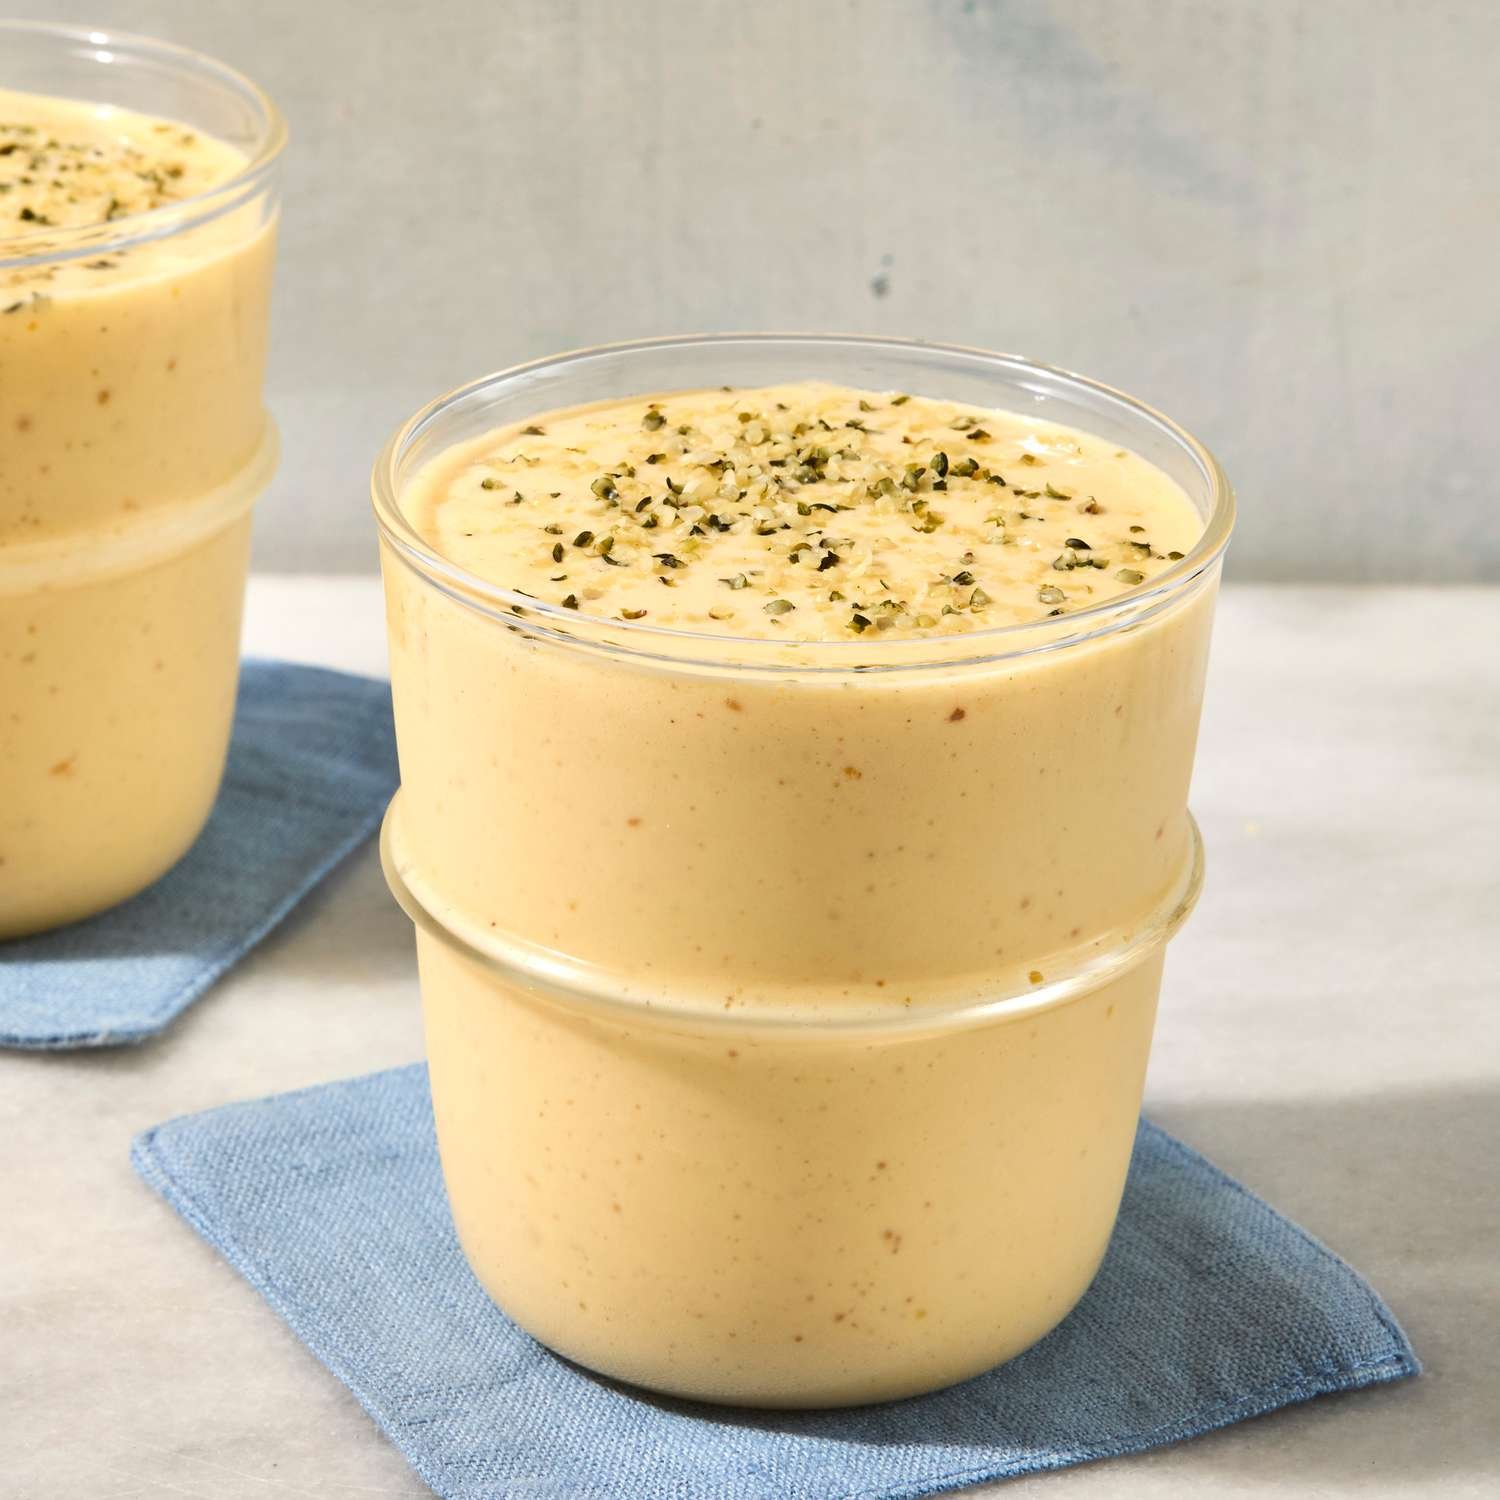
Tropical Mango & Hemp Smoothie

Tropical Mango & Hemp Smoothie

Prep time: 5 minutes | Servings: 1-2

Ingredients

Ingredient Amount
Frozen Mango Chunks 1.5 cups
Banana (Ripe) 1 medium
Greek Yogurt or Coconut Milk 1/2 cup
Unsweetened Almond Milk 1 cup (adjust for thickness)
Ground Turmeric 1/4 teaspoon
Fresh Ginger 1/2 inch knob (peeled)
Hemp Hearts (Seeds) 1 tablespoon (for topping)

Instructions

  1. Combine: Place the frozen mango, banana, yogurt, almond milk, turmeric, and ginger into a high-speed blender.

  2. Blend: Start on a low speed and gradually increase to high. Blend for about 45–60 seconds until the texture is completely smooth and creamy.

  3. Adjust: If the smoothie is too thick, add a splash more almond milk. If you prefer it colder or thicker, add a few ice cubes and blend again.

  4. Serve: Pour into a chilled glass.

  5. Garnish: Sprinkle the hemp hearts generously over the top, just like in the photo!


A Quick Tip for Flavor

To really make those colors pop and help your body absorb the turmeric, add a tiny pinch of black pepper to the blender. You won’t taste it, but it boosts the benefits of the turmeric significantly!

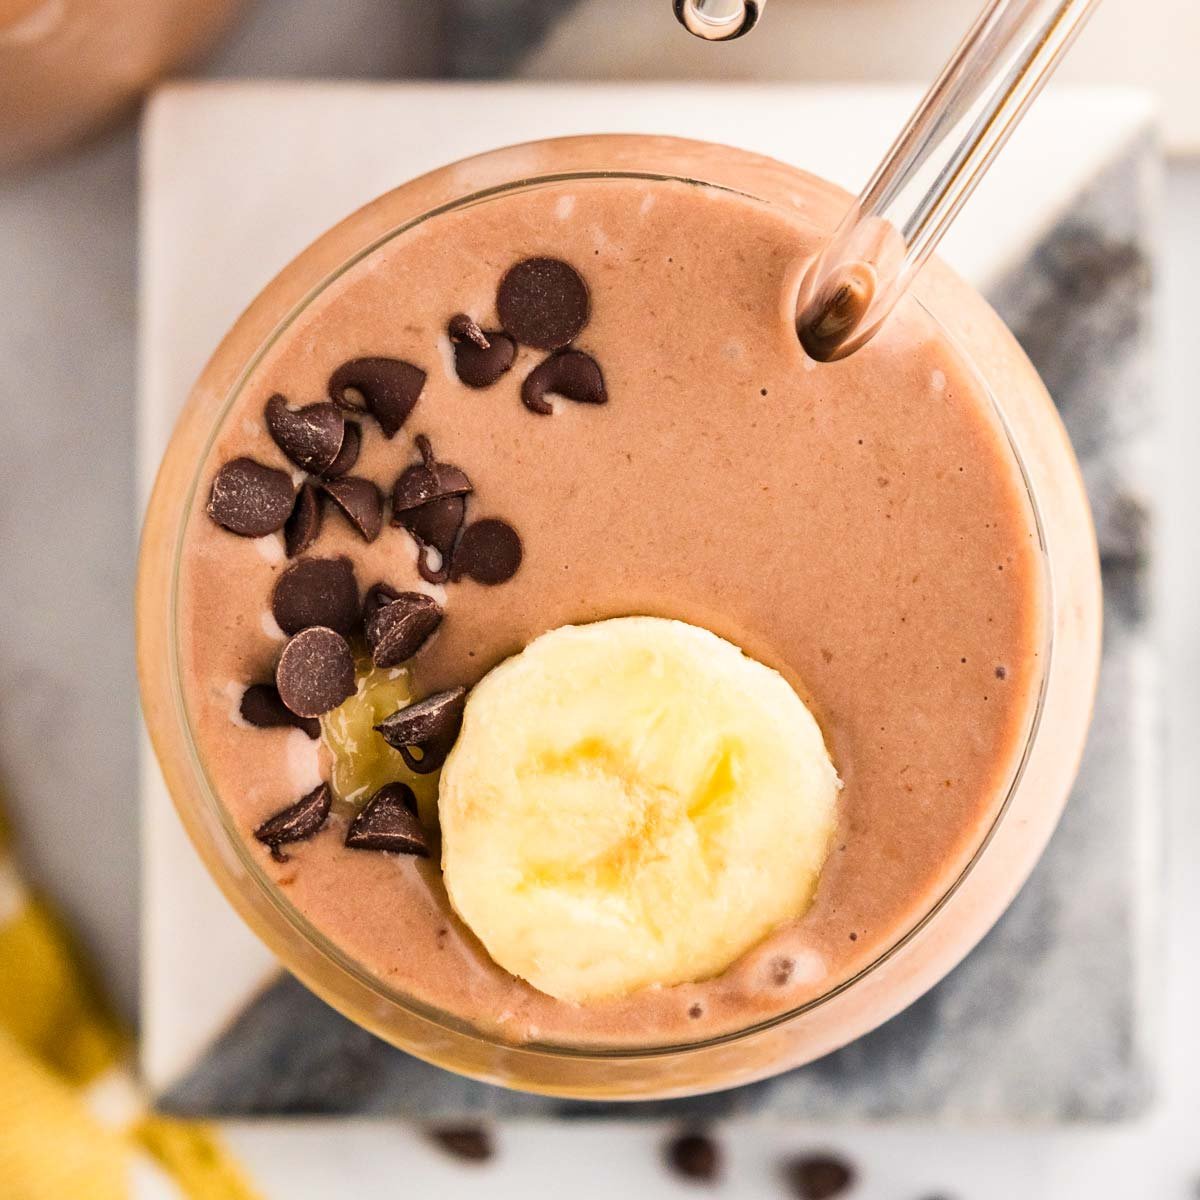
Creamy Chocolate Banana Smoothie

Creamy Chocolate Banana Smoothie

Yields: 1 serving | Prep time: 5 minutes

Ingredients

  • 1 large banana (frozen is best for a creamy texture)

  • 1 cup milk of choice (dairy, almond, or oat milk all work great)

  • 1 tbsp unsweetened cocoa powder

  • 1 tbsp peanut butter or almond butter (optional, for richness)

  • 1/2 tsp vanilla extract

  • 1 handful of ice (only if using a fresh banana)

  • Optional sweetener: 1-2 teaspoons of honey or maple syrup if you prefer it sweeter.

Toppings (as seen in the photo)

  • 1 banana slice

  • 1 tbsp dark chocolate chips or cacao nibs


Instructions

  1. Combine: Add the milk, banana, cocoa powder, nut butter, and vanilla into a high-speed blender.

  2. Blend: Start on a low speed and gradually increase to high. Blend for 45-60 seconds until the mixture is completely smooth and no chunks of fruit remain.

  3. Adjust: If the smoothie is too thick, add a splash more milk. If it’s too thin, add more frozen banana or a few ice cubes and blend again.

  4. Serve: Pour into a chilled glass.

  5. Garnish: Gently place the banana slice on top and sprinkle the chocolate chips around the edge to match the beautiful presentation in your photo.


Pro-Tips for the Best Texture

  • The Banana Secret: Peel your bananas before freezing them! Break them into chunks and keep them in a freezer bag so they are ready to go.

  • Boost the Protein: You can add a scoop of chocolate protein powder or a tablespoon of chia seeds for extra nutrients without changing the flavor much.