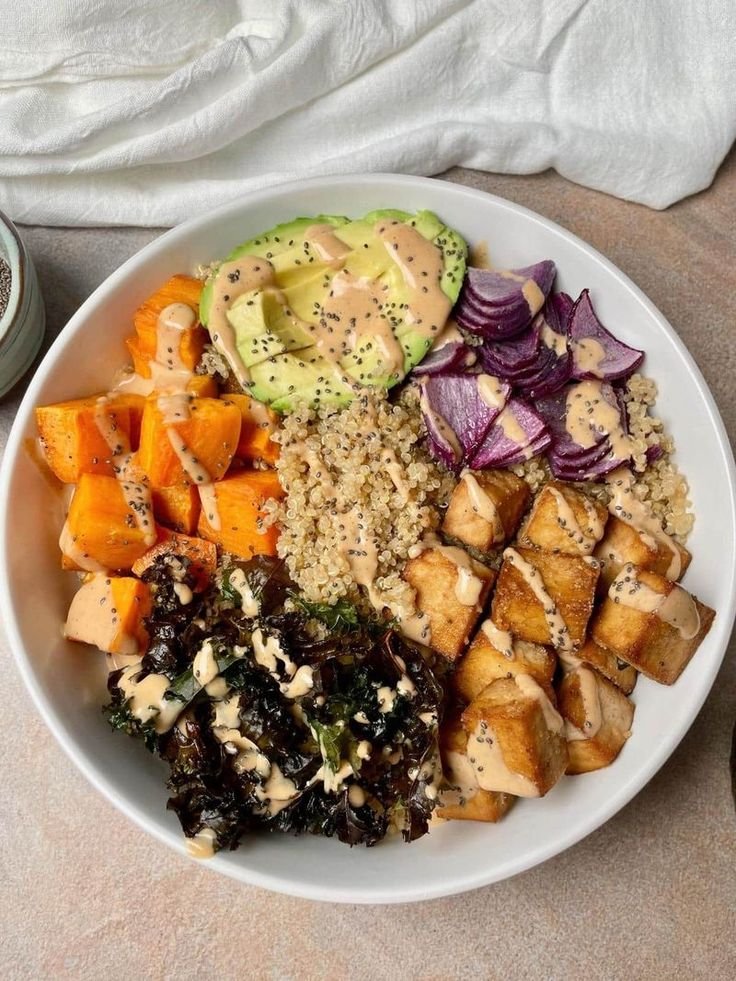
Roasted Sweet Potato & Crispy Tofu Buddha Bowl
This Roasted Sweet Potato & Crispy Tofu Buddha Bowl is a colorful, nourishing meal packed with plant-based protein, fiber, and fresh vegetables. Crispy seasoned tofu and caramelized sweet potatoes are paired with crunchy cucumbers, juicy tomatoes, leafy greens, and a bright lemon-tahini dressing for a balanced bowl that’s both satisfying and delicious.
Recipe Details
Prep Time: 15 minutes
Cook Time: 25 minutes
Total Time: 40 minutes
Servings: 4
Cuisine: Mediterranean-Inspired
Course: Lunch, Dinner, Main Course
Ingredients
For the Bowl
1 medium sweet potato, peeled and cubed
14 oz (400g) extra-firm tofu, pressed and cubed
4 cups mixed greens
1 cucumber, sliced
2 medium tomatoes, diced
½ red onion, thinly sliced
¼ cup fresh parsley, chopped
2 tablespoons olive oil
1 teaspoon smoked paprika
½ teaspoon garlic powder
½ teaspoon salt
¼ teaspoon black pepper
For the Lemon Tahini Dressing
3 tablespoons tahini
2 tablespoons fresh lemon juice
1 tablespoon olive oil
1 tablespoon water
1 teaspoon maple syrup or honey
1 small garlic clove, minced
Salt and pepper to taste
Instructions
Step 1: Roast the Sweet Potatoes
Preheat your oven to 425°F (220°C).
Toss the sweet potato cubes with 1 tablespoon olive oil, paprika, salt, and pepper. Spread them on a baking sheet and roast for 20–25 minutes until tender and lightly caramelized.
Step 2: Cook the Tofu
Pat the tofu dry and toss with the remaining olive oil, garlic powder, salt, and pepper.
Arrange on a baking sheet and bake for 20 minutes, flipping halfway through, until crispy and golden.
Step 3: Prepare the Dressing
In a small bowl, whisk together tahini, lemon juice, olive oil, water, maple syrup, garlic, salt, and pepper until smooth and creamy.
Step 4: Assemble the Buddha Bowls
Divide the mixed greens among four bowls.
Top with cucumber, tomatoes, red onion, parsley, roasted sweet potatoes, and crispy tofu.
Step 5: Finish and Serve
Drizzle the lemon tahini dressing over each bowl and serve immediately.
Notes & Tips
Recipe Notes
Pressing tofu for at least 15 minutes helps it become crispier.
Roasting brings out the natural sweetness of the sweet potatoes.
The dressing can be prepared a day in advance.
Frequently Asked Questions
What is a Buddha bowl?
A Buddha bowl is a balanced meal served in a bowl featuring vegetables, protein, healthy fats, and often grains.
Can I make this bowl vegan?
Yes. Use maple syrup instead of honey in the dressing.
How long does it keep?
Store components separately in airtight containers for up to 4 days.
Can I add grains?
Absolutely. Quinoa, brown rice, farro, or couscous are excellent additions.
What other proteins can I use?
Chickpeas, lentils, grilled chicken, or salmon work well in place of tofu.
Nutritional Information
Calories: 360
Protein: 16g
Carbohydrates: 29g
Fiber: 8g
Sugar: 8g
Fat: 21g
Saturated Fat: 3g
Sodium: 320mg