Natural Green Detox Drink (Gut-Friendly)

Natural Green Detox Drink (Gut-Friendly)

πŸ“ Ingredients

  • 1 cup fresh spinach or mint leaves
  • Β½ cucumber (chopped)
  • 1 green apple (for natural sweetness)
  • 1 tbsp lemon juice
  • 1 cup water or coconut water
  • Β½ tsp grated ginger
  • (Optional) 1 tsp honey

πŸ‘©β€πŸ³ Step-by-Step Recipe

1️⃣ Wash & Prepare

Wash all ingredients thoroughly.

Chop cucumber and apple into small pieces.

2️⃣ Add to Blender

Put spinach/mint, cucumber, apple, ginger, and water into a blender.

3️⃣ Blend Smoothly

Blend for 30–60 seconds until smooth.

4️⃣ Add Lemon

Add fresh lemon juice and blend again for a few seconds.

5️⃣ Strain (Optional)

If you prefer a smooth juice, strain it.

If you want more fiber (better for digestion), drink it as is.

6️⃣ Serve Fresh

Pour into a glass and drink immediately for maximum benefits.

πŸ’‘ How It Helps

  • Supports digestion
  • Keeps you hydrated
  • Provides fiber for gut health
  • Helps reduce bloating (mild effect)

❓ Q & A

Q1: Can this clean my colon in 10 minutes?

πŸ‘‰ No. That claim is false. Your body naturally cleans itself. This drink only supports digestion, not instant cleansing.

Q2: When should I drink it?

πŸ‘‰ Best time: Morning on an empty stomach or between meals.

Q3: Can I drink it daily?

πŸ‘‰ Yes, 3–4 times a week is ideal.

Q4: Can I skip apple?

πŸ‘‰ Yes, but taste will be less sweet. You can replace with a little honey.

Q5: Does it help in weight loss?

πŸ‘‰ It can support weight loss when combined with a healthy diet, but it’s not a magic solution.

Q6: Who should avoid it?

πŸ‘‰ People with sensitive stomachs, ulcers, or kidney issues should consult a doctor before regular use.

πŸ‚ Creamy Chicken with Orzo and Herbs (One-Pan Comfort Meal)

πŸ‚ Creamy Chicken with Orzo and Herbs (One-Pan Comfort Meal)

https://images.openai.com/static-rsc-4/m4IKfZMtriz9N5Y-_pvr_WuufWSbWUMxMd9aiQvxyf3efqAHS6tuvJFd3gJ7lEpJGzXHNndoVzpzc20LTmAuEvJvD-2v43F8jgKM8Hj4MuFzka5u7ATxuubakVnqdL1Ud28P4fesBWv1WRSqSwNUxu2X6JnyKHi7bFjIwP3j2JmjYYxmVZ31eVSLRz8tpWIa?purpose=fullsize
https://images.openai.com/static-rsc-4/NMKR_zneaZJM___yxPSCb2Fe84OdEsSc-KHBBzZ-P5hoUtEvNE1K45XkU4gAW4kEhzf8BnupJjrlEEpGU-YaUvO1llxCek7rpX-aY-PKA66rpQEU2-H-xQdviNOuGIAbRFdh-gOc5DEAAHyCDTPUZvgYWDKZaq2Urn2ak0EH_rMUhfJmf6iwD3MKRBLWJJgp?purpose=fullsize
https://images.openai.com/static-rsc-4/RfBMV5MkxD7IpoIW7TDxFMJKR1rTfV20Qta_piAbTC7Ck-g3r4qxFiNOtBws6YbxI00PiNvHReG6Bux8RYINgpdrH4mXOO3mKYmczXgncFm0PX2_m6xlWCw_Ar8aoPOLMEfzcfDYy4lo9LBeHsunIhLrr46uqJY_c8nCqL0kvLL2bvFeurg_Ox6RwteaOmdm?purpose=fullsize
https://images.openai.com/static-rsc-4/nTZ_-OHxEAkNxqpG4wR3xD8JtuO5GRnrfX6bXYOz7SLykkkpUZgXYN8BvXym0lyp7EGhrgfwxf6GJKRu-S9FI0hrlaycEp18nNbY0f9eZteRrDZrHETN4F7OuKyIQ8d1d5vNc0HLsOtG5ViHURyHCFc2V0Go-Joa86b6h-ngooRMkb_YgE7hZkq-tyyTa8jU?purpose=fullsize
https://images.openai.com/static-rsc-4/GVbhkZk-zDH6bNJXE7kgdIwK5L51_NCtivtn32uQZKVcsTB2nyFQ9nrD9mTtXgL-74aPLvAXm9rYZaASHtkVhDomIaksUQR18zmSKrmRzdD-4h_A6aoPVF5wicK2LdAGWxTNb4nwPx9Cww4qxuerJRtSiiTB_7HWCpevhA9OHk5th0iTIxbVi424M_CCR3Dt?purpose=fullsize
https://images.openai.com/static-rsc-4/NF9i2EX7c50I9PNAVPYdZSdRoC7ycDVpbYuv5zfFc6JzA_9we9jssWxEW5-FRbPtFbDBg6FVmwqWzRnAd3Tr-EpZ0PeRVJTmjcqTJxb8DDcXXM_dDBpxxJqhzURzLvJ1I4P_dm43a-uuJK5JPOWJVswUp7Ev69jIS4ObxwubUcfEBXOOweoL51745thgSh7e?purpose=fullsize
https://images.openai.com/static-rsc-4/p8TKAShTsRV1SpjQDKNxuLta8wVVB9OROWkqVIW2emKCtwWFbOIOAmb5WcmehjcOywdAajEFci41dY0SNO1iEs12a9hJ7sULZs3NzNaavhSpYjlpkXqZ8D0YJSn0EJMzAWu5-6VT4K0NgjqI7kvfFksWfQg1APvlNyzGsY1Be8RsNNsK5FMT_moIofBQMfPK?purpose=fullsize
https://images.openai.com/static-rsc-4/pqNhb5YO5-1l2DUYQJzJQfS6Du7NwFOTTheyZ_PFhnGTD73VZz-wy3xphUX-8_Z7EBIhOThgyVe5pVYSFwF5HnZi9jBSKwr5cAYVeTjQjwlY2JoQX_5AVPVu4IFbUnG_fgZ3xcUAlI8cdYvXlHtkMecgQ7y48ROsuAdVA-W0k4UGnwtyjFJG3Ld2NbGu32zV?purpose=fullsize

πŸ•’ Time & Servings

  • Prep Time: 15 minutes
  • Cook Time: 30–35 minutes
  • Servings: 4

πŸ›’ Ingredients

πŸ— Main

  • 2 tablespoons extra virgin olive oil
  • 1 pound (450g) boneless chicken breasts or thighs, cut into bite-sized pieces
  • 1 teaspoon yellow curry powder
  • Salt and black pepper, to taste

πŸ§… Base & Flavor

  • 1 medium yellow onion, finely chopped
  • 3 cloves garlic, minced

🍝 Orzo & Liquid

  • 1 cup orzo pasta
  • 2 cups chicken broth
  • 1 cup heavy cream (or half & half for lighter version)

🌿 Herbs & Finish

  • 1 teaspoon dried thyme
  • 1 teaspoon dried oregano
  • Β½ cup grated Parmesan cheese
  • 1–2 tablespoons fresh parsley, chopped
  • Juice of Β½ lemon (optional, for freshness)

πŸ‘©β€πŸ³ Instructions

1️⃣ Sear the Chicken

Heat olive oil in a large skillet over medium heat.
Add chicken, season with salt, pepper, and curry powder.
Cook for 5–7 minutes until golden and cooked through.
Remove and set aside.


2️⃣ Cook the Aromatics

In the same pan, add chopped onion. Cook for 3–4 minutes until soft.
Add garlic and cook for 30 seconds until fragrant.


3️⃣ Toast the Orzo

Add orzo to the skillet and stir for 1–2 minutes to lightly toast it.
(This adds a deeper flavor!)


4️⃣ Simmer

Pour in chicken broth and bring to a gentle simmer.
Cook for 8–10 minutes, stirring occasionally, until orzo is tender.


5️⃣ Make it Creamy

Reduce heat to low. Stir in heavy cream, thyme, oregano, and Parmesan cheese.
Mix until smooth and creamy.


6️⃣ Combine Everything

Return cooked chicken to the skillet.
Simmer for another 3–5 minutes until everything is well combined.


7️⃣ Finish & Serve

Turn off heat and add fresh parsley and a squeeze of lemon juice (optional).
Serve warm and enjoy the creamy goodness! 🍲✨


πŸ’‘ Tips for Best Results

  • Use chicken thighs for extra juicy flavor
  • Don’t overcook orzoβ€”it should be tender, not mushy
  • Add spinach or mushrooms for extra nutrition
  • Adjust cream for desired thickness

πŸ₯„ Serving Ideas

  • Pair with a fresh green salad πŸ₯—
  • Serve with warm garlic bread πŸ₯–
  • Add chili flakes for a spicy kick 🌢️

❀️ Storage

  • Store in fridge for up to 3 days
  • Reheat with a splash of milk or broth to keep it creamy

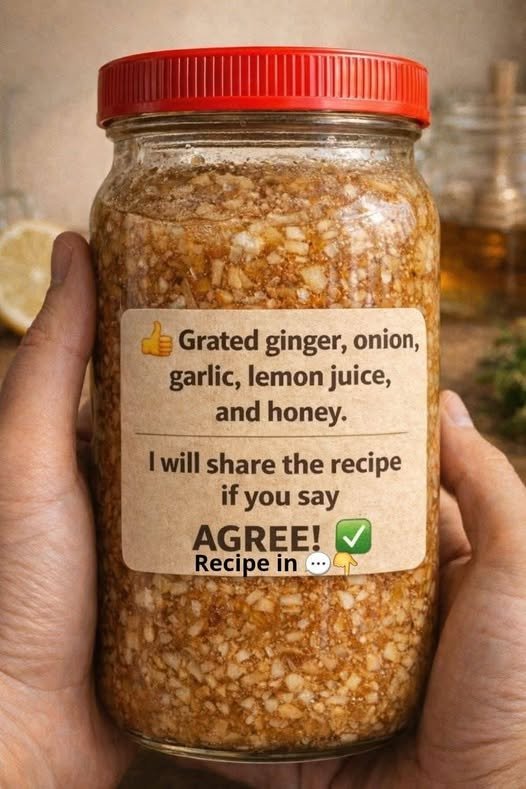
🍯 The General “Immunity” Tonic Recipe

🍯 The General “Immunity” Tonic Recipe

This ratio is flexible, but here is a standard way to prepare this mixture:

  • 1/2 cup Grated Ginger: High in gingerol; adds heat and zing.

  • 1/2 cup Finely Chopped Onion: Contains quercetin; red onion provides the most.

  • 1/4 cup Minced Garlic: Best if allowed to “rest” for 10 minutes after chopping to activate allicin.

  • Juice of 2 Lemons: Provides acidity and Vitamin C.

  • Raw Honey: Enough to submerge all the solids (usually 1–2 cups).

Preparation Steps

  1. Sanitize: Ensure your glass jar is bone-dry and very clean.

  2. Layer: Pack the grated ginger, onion, and garlic into the jar.

  3. Acidify: Pour the lemon juice over the top. The acidity helps preserve the mixture.

  4. Submerge: Pour the honey over everything. Use a clean spoon to poke out air bubbles. Crucial: Every bit of onion and garlic must be fully submerged under the honey.

  5. Infuse: Let it sit in a cool, dark place for 2–4 weeks. The honey will become very runny as it draws the juices out of the vegetables.


⚠️ Important Safety Tips

  • Storage: While many people keep this on the counter, storing it in the refrigerator is the safest way to prevent unwanted bacterial growth (like mold or botulism).

  • The “Bubbles” Check: If you see active bubbling, a foul smell, or a bulging lid, the mixture may have fermented improperly or grown bacteria. Toss it.

  • Infant Warning: Never give honey (or honey-based tonics) to infants under 1 year old due to the risk of botulism.

  • Not a Cure: This is a great supplement for a scratchy throat or a cold, but it doesn’t replace professional medical advice for serious infections!


πŸ§‚ Variation: The Savory “Fire Cider”

If you find the honey version too sweet, many people substitute the honey for Apple Cider Vinegar (with “the mother”). It creates a spicy, sour tonic that is great for digestion.

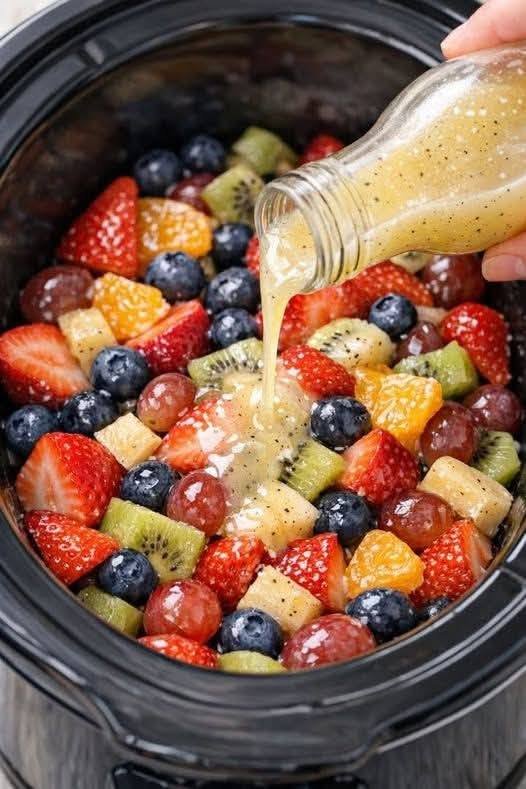
Fruit Salad and Poppy Seed Dressing

Ingredients Breakdown

Based on the photo, here is what you have:

  • Strawberries: Halved or quartered.

  • Blueberries: Whole.

  • Kiwi: Peeled and sliced into wedges.

  • Pineapple: Cut into bite-sized chunks.

  • Grapes: Red or purple, kept whole.

  • Mandarin Oranges: Peeled segments.


The Secret Sauce: Poppy Seed Dressing

The liquid being poured looks like a classic sweet-and-tangy dressing. Here is a quick ratio to recreate it:

Ingredient Amount
Honey (or Agave) 1/4 cup
Lime Juice (fresh) 2 tbsp
Poppy Seeds 1 tsp
Fresh Mint (optional) 1 tbsp, chopped

Pro-Tips for the Best Fruit Salad

  1. Add Citrus Last: The acid in lime or lemon juice helps prevent fruits like apples or bananas from browning, but it can also make softer berries get “mushy” if they sit too long.

  2. Drain the Juice: If using canned pineapple or oranges, drain them well so the salad doesn’t become a “fruit soup.”

  3. Chill Before Serving: Let the dressed fruit sit in the fridge for about 30 minutes to allow the flavors to meld.

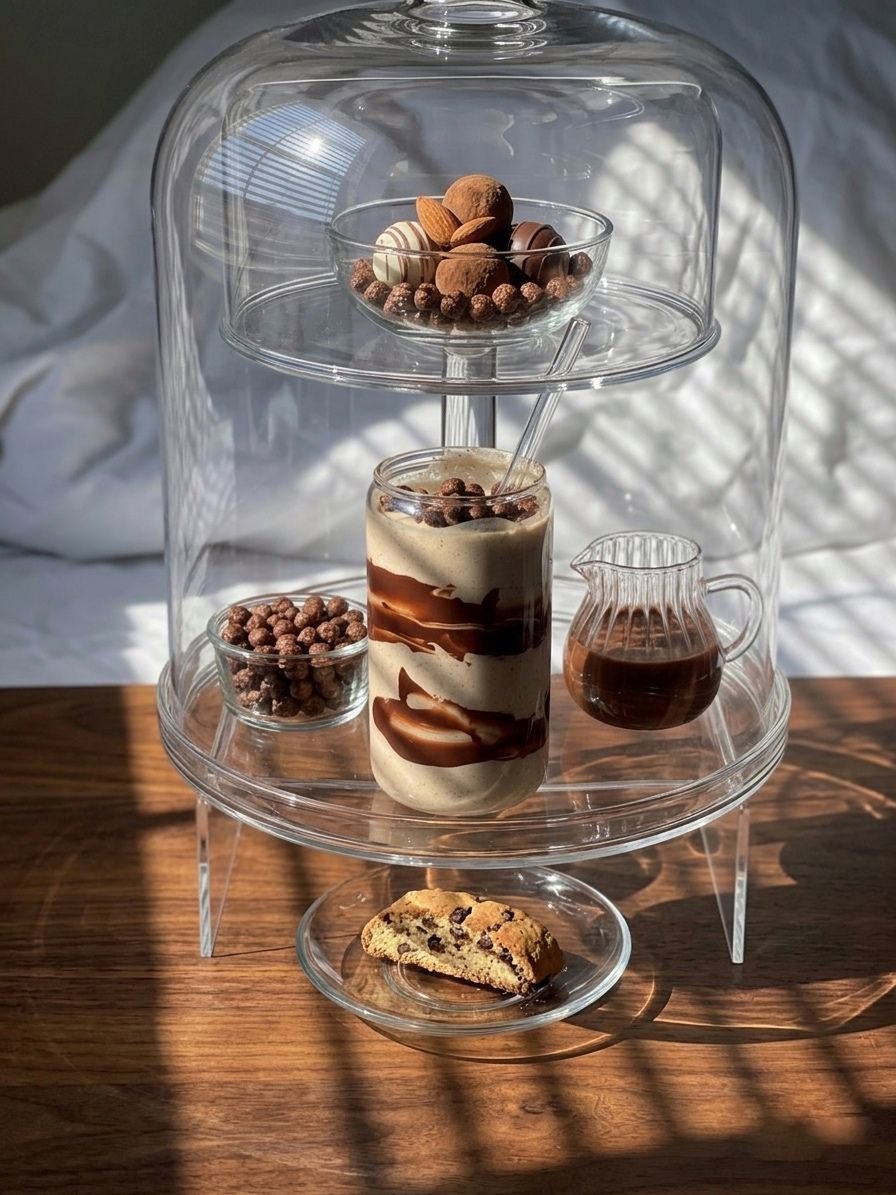
Layered Chocolate Coffee Cream Drink Recipe

Layered Chocolate Coffee Cream Drink Recipe

Ingredients

1 cup cold milk


2 tablespoons instant coffee or 1 shot freshly brewed espresso


2 tablespoons chocolate syrup


3 tablespoons whipped cream or heavy cream


1 tablespoon sugar (adjust to taste)


2 tablespoons chocolate cereal or chocolate pearls


2–3 chocolate truffles or chocolate balls (optional for garnish)


Ice cubes (optional if you want it chilled)


Preparation Steps

1. Prepare the coffee base

Dissolve instant coffee in 2 tablespoons of warm water, or brew a fresh espresso shot. Let it cool slightly so it blends smoothly with the milk.


2. Make the creamy mixture

In a glass or small blender, combine cold milk, sugar, and half of the cream. Mix well until smooth and slightly frothy. This gives the drink its soft, creamy texture.


3. Create the chocolate layers

Take a tall clear glass. Drizzle chocolate syrup along the inside walls of the glass so it creates decorative streaks. This also adds flavor in every sip.


4. Assemble the drink


Pour half of the milk mixture into the glass.


Add a layer of coffee.


Pour the remaining milk mixture on top slowly to keep the layers visible.


5. Add toppings

Top the drink with whipped cream. Sprinkle chocolate cereal or pearls over the cream for a crunchy texture. You can also place chocolate truffles or small chocolate balls on top for a dessert-style presentation.


Optional Serving Ideas

Serve with a straw and a long spoon so you can enjoy both the creamy drink and the toppings.


You can place the glass under a clear dome or cover when serving to give it a cafΓ©-style presentation, similar to the image.


Taste and Texture

This drink is:


Smooth and creamy from the milk and cream


Rich and sweet from the chocolate syrup


Slightly bold from the coffee


Crunchy on top from the chocolate pearls


It works perfectly as a dessert drink, an evening treat, or a special weekend refreshment.

Layered Chocolate Coffee Cream Drink Recipe

Ingredients

1 cup cold milk


2 tablespoons instant coffee or 1 shot freshly brewed espresso


2 tablespoons chocolate syrup


3 tablespoons whipped cream or heavy cream


1 tablespoon sugar (adjust to taste)


2 tablespoons chocolate cereal or chocolate pearls


2–3 chocolate truffles or chocolate balls (optional for garnish)


Ice cubes (optional if you want it chilled)


Preparation Steps

1. Prepare the coffee base

Dissolve instant coffee in 2 tablespoons of warm water, or brew a fresh espresso shot. Let it cool slightly so it blends smoothly with the milk.


2. Make the creamy mixture

In a glass or small blender, combine cold milk, sugar, and half of the cream. Mix well until smooth and slightly frothy. This gives the drink its soft, creamy texture.


3. Create the chocolate layers

Take a tall clear glass. Drizzle chocolate syrup along the inside walls of the glass so it creates decorative streaks. This also adds flavor in every sip.


4. Assemble the drink


Pour half of the milk mixture into the glass.


Add a layer of coffee.


Pour the remaining milk mixture on top slowly to keep the layers visible.


5. Add toppings

Top the drink with whipped cream. Sprinkle chocolate cereal or pearls over the cream for a crunchy texture. You can also place chocolate truffles or small chocolate balls on top for a dessert-style presentation.


Optional Serving Ideas

Serve with a straw and a long spoon so you can enjoy both the creamy drink and the toppings.


You can place the glass under a clear dome or cover when serving to give it a cafΓ©-style presentation, similar to the image.


Taste and Texture

This drink is:


Smooth and creamy from the milk and cream


Rich and sweet from the chocolate syrup


Slightly bold from the coffee


Crunchy on top from the chocolate pearls


It works perfectly as a dessert drink, an evening treat, or a special weekend refreshment.

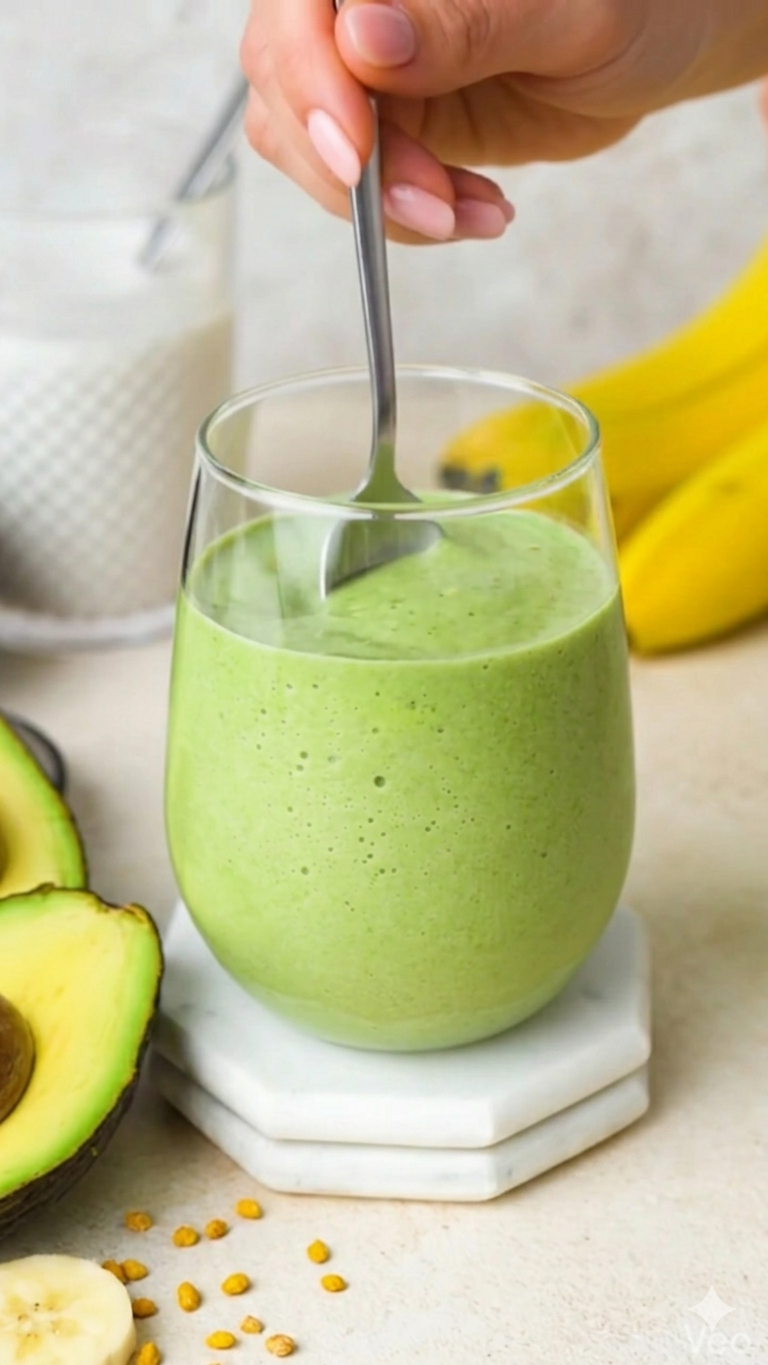
Creamy Avocado & Banana Green Smoothie

Creamy Avocado & Banana Green Smoothie

Ingredients

1/2 ripe avocado (pitted and peeled)


1 medium banana (frozen is best for a thicker texture)


1 cup spinach or kale (packed)


1 cup milk of choice (almond, oat, or coconut milk work great)


1 tablespoon honey or maple syrup (optional, for extra sweetness)


1/2 teaspoon vanilla extract


Toppings: Sliced banana, bee pollen (as seen in the video), or hemp seeds.


Instructions

Layer the Liquid: Pour your milk into the blender first. This helps the blades move freely and prevents sticking.


Add the Bases: Add the spinach, avocado, and frozen banana slices.


Sweeten & Flavor: Add your sweetener of choice and vanilla extract.


Blend: Start on a low speed and gradually increase to high. Blend for about 45–60 seconds until the green specks disappear and the mixture is perfectly smooth.


Garnish: Pour into a glass and top with fresh banana slices and a sprinkle of bee pollen.


Pro Tips for the Best Texture

The “Cold” Factor: Using a frozen banana removes the need for ice, which can sometimes water down the flavor.


Adjusting Consistency: If it’s too thick to sip, add a splash more milk. If you want it more like a “smoothie bowl,” add a few more chunks of frozen fruit.


Note: Bee pollen is a great superfood, but if you have a known allergy to bee stings or pollen, it’s best to swap it for chia seeds or granola!

Cabbage and Egg Breakfast Patties

Cabbage and Egg Breakfast Patties

These patties are naturally gluten-free and very low in points.

  • Prep time:Β 3 minutes

  • Cook time:Β 6 minutes

  • Servings:Β 1


Ingredients

  • Cabbage:Β 1 cup lightly packed, finely shredded

  • Eggs:Β 2 large, lightly beaten

  • Garlic:Β 1 clove, minced

  • Fats:Β 1 tbsp butter or olive oil (or a mix of both)

  • Seasoning:Β Salt and pepper to taste

  • Optional:Β A pinch of red chili flakes for heat.


Step-by-Step Instructions

  1. SautΓ© the Cabbage:Β Heat the butter or olive oil in a non-stick skillet over medium heat. Add the shredded cabbage and minced garlic. SautΓ© for about 2–3 minutes until the cabbage is slightly softened but still has a little bit of texture.

  2. Season the Eggs:Β While the cabbage is cooking, whisk your eggs in a small bowl with the salt and pepper.

  3. Combine in the Pan:Β Spread the sautΓ©ed cabbage evenly across the bottom of the pan. Pour the beaten eggs directly over the cabbage.

  4. Form the Patties:Β You can either cook this as one large omelet and fold it, or use a spatula to divide the mixture into 3–4 smaller β€œpatties” right in the pan as the egg starts to set.

  5. Flip and Brown:Β Cook for about 2 minutes until the bottom is golden brown. Flip carefully and cook for another 1–2 minutes until the eggs are fully set and the edges are crispy.

  6. Serve:Β Enjoy these hot! They are incredibly filling and perfect for someone who hasn’t eaten sugar in a year.


Pro-Tips for Your Social Media Page

  • Visual Appeal:Β To get that β€œHD quality” look for your photos, garnish with a little fresh green onion or parsley before snapping the picture.

  • Variation:Β For your husband or kids, you can sprinkle a little shredded cheese on top during the last minute of cooking.

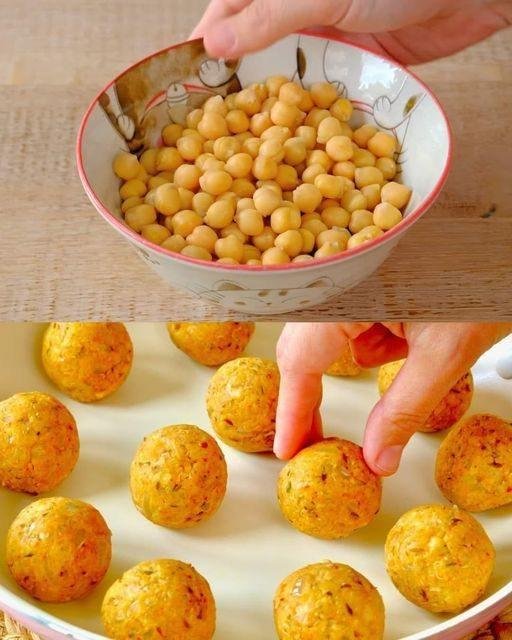
Baked Chickpea and Quinoa Balls

IngredientsΒ (Makes about 16 balls)

  • 1 cup cooked chickpeasΒ (or 1 can, drained and rinsed)
  • 1/2 cup cooked quinoa
  • 1/4 cup breadcrumbsΒ (use gluten-free if needed)
  • 2 cloves garlic, minced
  • 1/4 cup onion, finely diced
  • 2 tbsp fresh parsley, chopped
  • 1 tbsp ground flaxseedΒ (optional, for binding)
  • 1 tbsp nutritional yeastΒ (for a cheesy flavor)
  • 1 tsp ground cumin
  • 1/2 tsp smoked paprika
  • 1/4 tsp salt, or to taste
  • 1/4 tsp black pepper
  • 1-2 tbsp olive oil

Instructions

1.Β Preheat Oven:

  • Preheat your oven to 400Β°F (200Β°C) and line a baking sheet with parchment paper.

2.Β Prepare the Mixture:

  • In a food processor, combine chickpeas, cooked quinoa, breadcrumbs, garlic, onion, parsley, flaxseed, nutritional yeast, cumin, smoked paprika, salt, and black pepper.
  • Pulse until the mixture is well combined but still slightly chunky (avoid over-processing into a paste). If the mixture feels too dry, add a tablespoon of water or more olive oil to help it hold together.

3.Β Form the Balls:

  • Using your hands, roll the mixture into 1-inch balls and place them on the prepared baking sheet.

4.Β Bake:

  • Brush or lightly spray the balls with olive oil to help them crisp up.
  • Bake for 20-25 minutes, turning halfway through, until the chickpea and quinoa balls are golden brown and firm.

5.Β Serve:

  • Enjoy warm with a dipping sauce, over pasta, in a grain bowl, or as an appetizer. For an extra flavor boost, serve with marinara, vegan tzatziki, or tahini sauce.

Tips:

  • Storage: These freeze well! Let them cool, then store in an airtight container in the freezer for up to a month. Reheat in the oven to keep them crispy.
  • Make it Spicier: Add a pinch of cayenne pepper or chili flakes for a bit of heat.

Nutritional InformationΒ (Per Ball, approx.):

  • Calories: 40
  • Fat: 1.5g
  • Carbohydrates: 5g
  • Protein: 1.5g

TheseΒ Vegan Baked Chickpea and Quinoa BallsΒ are versatile, tasty, and perfect for a plant-based meal!

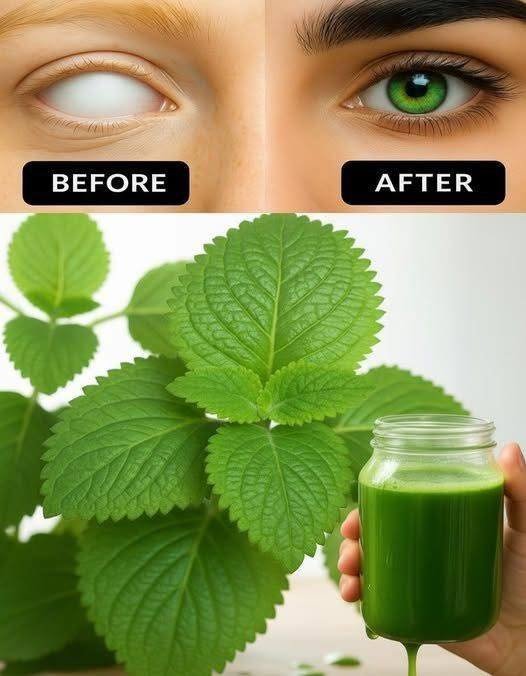
Perilla Leaf Green Juice

Perilla Leaf Green Juice

Β Description

Perilla leaf juice is a refreshing herbal drink made from freshΒ perilla leaves, blended with lemon, apple, and water. It is rich in antioxidants, vitamin A precursors, vitamin C, and anti-inflammatory compounds that can support immune health, digestion, and overall wellness.

The drink has aΒ fresh mint-basil flavorΒ with a slightly earthy taste.

Β Ingredients (2 Servings)

  • 1 cup freshΒ perilla leavesΒ (about 15–20 leaves)

  • 1 green apple (chopped)

  • Β½ cucumber

  • 1 tbsp lemon juice

  • 1 tsp honey (optional)

  • 1 cup cold water or coconut water

  • 3–4 ice cubes (optional)

Β Instructions

1️⃣ Wash the herbs

Rinse the perilla leaves thoroughly to remove dirt.

2️⃣ Prepare ingredients

Chop the apple and cucumber into small pieces.

3️⃣ Blend

Add the following to a blender:

  • Perilla leaves

  • Apple

  • Cucumber

  • Lemon juice

  • Water

Blend forΒ 30–40 secondsΒ until smooth.

4️⃣ Strain (optional)

Strain through a fine mesh if you prefer smoother juice.

5️⃣ Serve

Pour into a glass, add ice, and drink fresh.

Β Servings

2 servings

Β Nutritional Information (Approx per serving)

  • Calories: 55

  • Carbohydrates: 12 g

  • Fiber: 2 g

  • Vitamin C: ~30% DV

  • Vitamin A: ~20% DV

  • Potassium: ~200 mg

  • Antioxidants: High

Β Potential Benefits

πŸ‘Β Eye health support

Contains antioxidants and vitamin A precursors that help support normal eye function.

πŸ›‘Β Immune support

Rich in vitamin C and plant compounds.

πŸ”₯Β Anti-inflammatory properties

Perilla leaves containΒ rosmarinic acid, which may reduce inflammation.

❀️ Heart health

May help support healthy cholesterol levels.

🌿 Digestive support

Natural plant compounds may aid digestion.

Β Notes

  • Fresh perilla leaves give the best flavor.

  • The drink is slightly herbal and mint-like.

  • Best consumedΒ immediately after blending.

Tips

βœ”Β AddΒ gingerΒ for extra digestive benefits.
βœ”Β UseΒ coconut waterΒ instead of plain water for electrolytes.
βœ”Β AddΒ spinach or kaleΒ to boost nutrients.
βœ”Β Drink in theΒ morningΒ for best freshness.

Β Q&A

Q1: Can this drink restore eyesight?

No. ItΒ cannot cure blindness or restore lost vision. It may only support general eye health due to nutrients.

Q2: Can I drink it every day?

Yes, in moderate amounts (1 glass per day).

Q3: What does perilla taste like?

It tastes like a mix ofΒ mint, basil, and green tea.

Q4: Can I use dried perilla leaves?

Fresh leaves are recommended for better nutrients and taste.

Q5: Who should avoid it?

People withΒ plant allergies or those taking blood-thinning medicationΒ should consult a doctor.

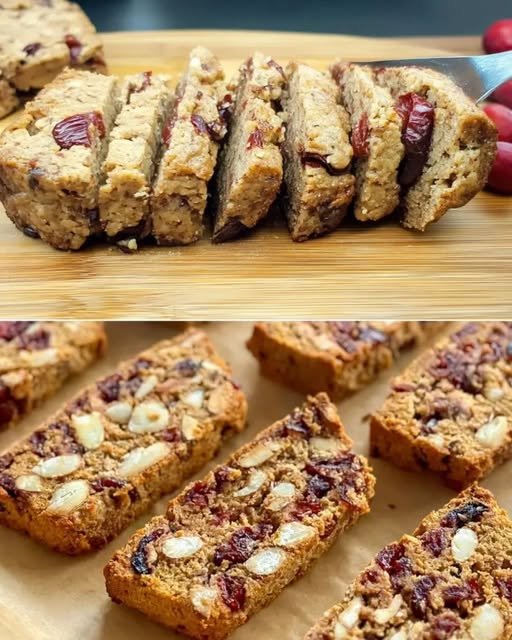
πŸŽ„ Sugar-Free, Oil-Free, Gluten-Free Holiday Biscotti

πŸŽ„Β Sugar-Free, Oil-Free, Gluten-Free Holiday Biscotti

Perfect for dunking in coffee or tea!

πŸ›’Β Ingredients

  • 2 cupsΒ Almond Flour (finely ground)

  • 1/2 cupΒ Erythritol or Monkfruit sweetener (or your preferred dry sugar substitute)

  • 2Β Large Eggs (room temperature)

  • 1 tspΒ Baking Powder

  • 1 tspΒ Vanilla Extract (or Almond Extract for extra flavor)

  • 1/2 cupΒ Dried Cranberries (look for juice-sweetened to keep it sugar-free)

  • 1/2 cupΒ Sliced or Whole Almonds

  • 1 pinchΒ Salt


πŸ₯£Β Preparation Method

  1. Dry Mix:Β In a large bowl, whisk together theΒ almond flour,Β sweetener,Β baking powder, andΒ salt. Stir in theΒ cranberriesΒ andΒ almonds.

  2. Wet Mix:Β In a separate small bowl, lightly beat theΒ eggsΒ with theΒ vanilla extract.

  3. Combine:Β Pour the egg mixture into the dry ingredients. Mix until a stiff dough forms. (Since there is no gluten, the dough will feel slightly more β€œsticky” and β€œnutty” than traditional wheat dough).

  4. The First Bake:Β On a parchment-lined baking sheet, shape the dough into a long, flat log (about 10 inches long and 3 inches wide). Bake atΒ 160Β°C (325Β°F)Β forΒ 25 minutesΒ until firm to the touch.

  5. The Slice:Β Remove from the oven and let it cool for at least 15 minutes. This is crucial! Use a serrated knife to cut the log into diagonal slices (about 1/2 inch thick).

  6. The Second Bake (The β€œCrunch”):Β Lay the slices flat on the baking sheet. Bake for anotherΒ 8–10 minutes per sideΒ atΒ 150Β°C (300Β°F)Β until they are golden and dry.


πŸ’‘Β Why this is a β€œCheat Code” Dessert

  • The Crunch:Β β€œBiscotti” literally means β€œtwice-cooked.” The second bake is what removes the moisture, allowing these to stay crispy without any oil.

  • Gift-able:Β Because they are dry and contain no butter/oil, they have a fantastic shelf lifeβ€”up to 2 weeks in an airtight jar!

Quick Tip:Β If your dough is too sticky to handle, wet your hands slightly with water before shaping the log!

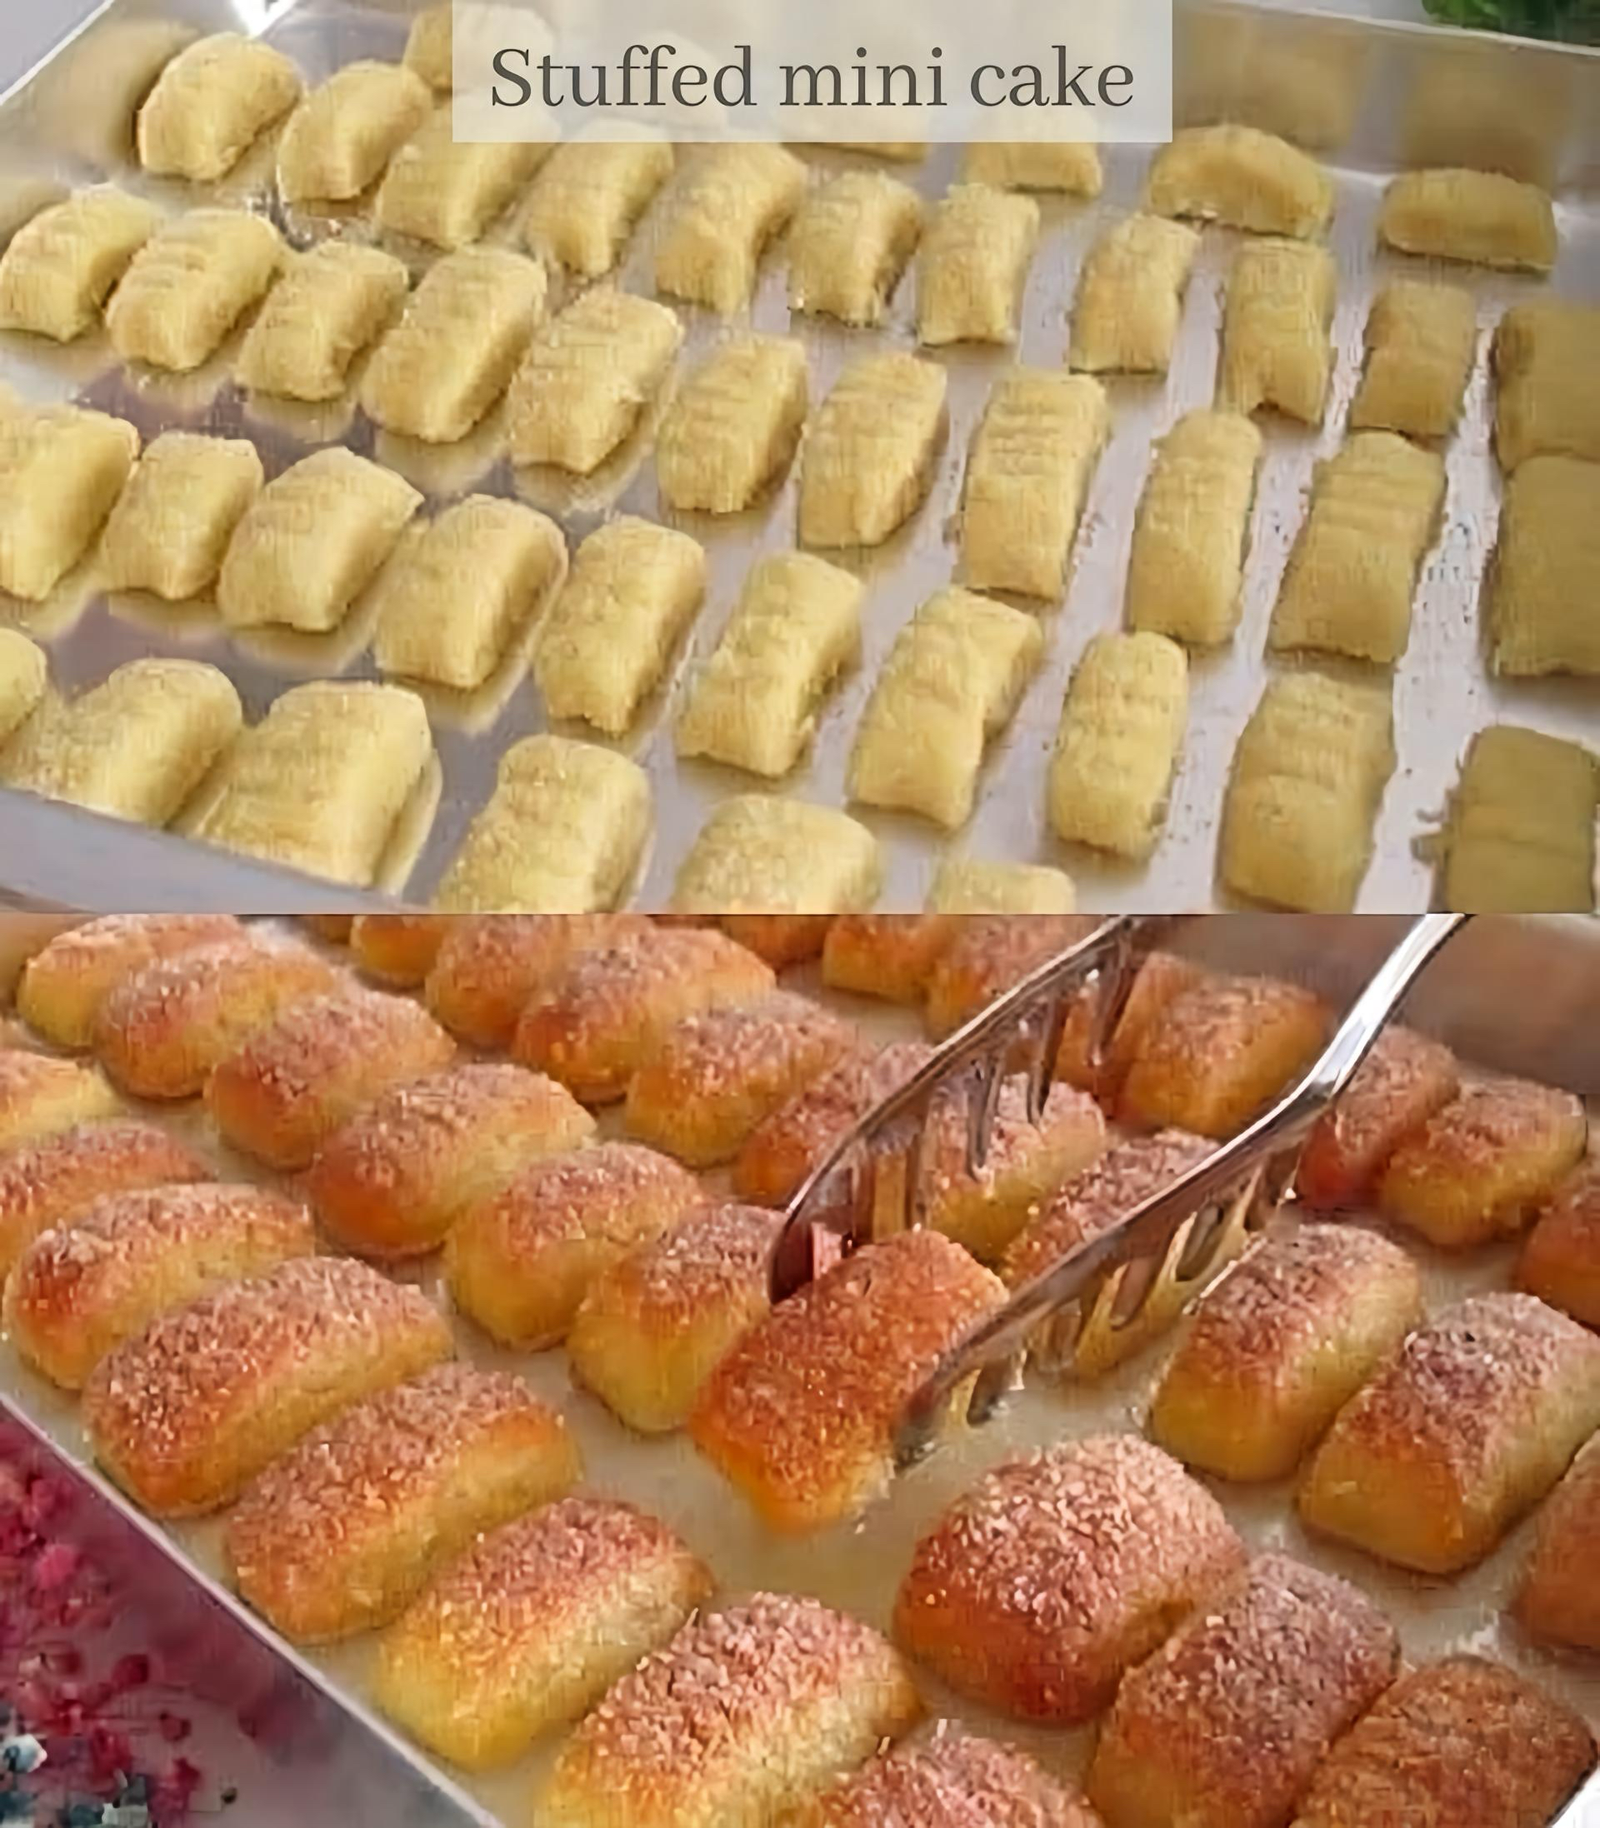
Stuffed Mini Cakes Recipe

Stuffed Mini Cakes Recipe

Ingredients

For the Syrup (Sherbet)

β€’ 2 Β½ cups Granulated sugar

β€’ 3 cups Water

β€’ 1 slice Lemon (or 1 tsp lemon juice)

For the Dough

β€’ 125g (approx. 1 stick) Unsalted butter, softened

β€’ Β½ cup Vegetable oil

β€’ 1 Egg

β€’ Β½ cup Fine semolina

β€’ Β½ cup Powdered sugar

β€’ 1 tsp Baking powder

β€’ 1 tsp Vanilla extract

β€’ 3 to 3 Β½ cups All-purpose flour (added gradually)

For the Stuffing

β€’ 1 cup Walnuts or pistachios, finely crushed

β€’ 1 tsp Ground cinnamon (optional)

Step-by-Step Instructions

1. Prepare the Syrup First

The secret to the perfect texture is pouring cold syrup over hot cakes.

β€’ Combine sugar, water, and lemon in a pot.

β€’ Bring to a boil, then simmer on low for 10–12 minutes.

β€’ Remove from heat and let it cool completely to room temperature.

2. Make the Dough

β€’ In a large bowl, cream together the softened butter, oil, egg, and powdered sugar.

β€’ Stir in the semolina, vanilla, and baking powder.

β€’ Slowly add the flour one cup at a time. Knead until you have a soft, non-sticky dough that holds its shape easily.

3. Shape and Stuff

β€’ Pinch off a piece of dough about the size of a walnut and roll it into a ball.

β€’ The Texture: Press the ball onto the fine side of a clean box grater or a specialized texturing mat to flatten it into an oval.

β€’ Place a teaspoon of crushed nuts in the center.

β€’ Carefully roll the dough up into a log shape. The “ribbed” pattern from the grater should be on the outside.

β€’ Place the cakes on a baking tray lined with parchment paper.

4. Bake

β€’ Bake in a preheated oven at 180Β°C (350Β°F) for about 25–30 minutes or until they reach a beautiful golden brown color (as seen in the bottom image).

5. The Soak

β€’ As soon as you take the hot tray out of the oven, pour the completely cooled syrup over the hot cakes.

β€’ Let them sit for at least 2–3 hours (or overnight) to absorb the syrup.

β€’ Garnish with desiccated coconut or ground nuts before serving.

Q&A for Success

β€’ Q: Why did my cakes fall apart?

β€’ A: Usually, this means there wasn’t enough flour or the syrup was poured while it was still too hot.

β€’ Q: Can I make these without semolina?

β€’ A: You can, but they won’t have the signature “cakey” bite. Semolina is what helps them soak up the syrup without turning into mush.

β€’ Q: How do I store them?

β€’ A: Keep them in an airtight container at room temperature for 2 days, or in the fridge for up to a week.

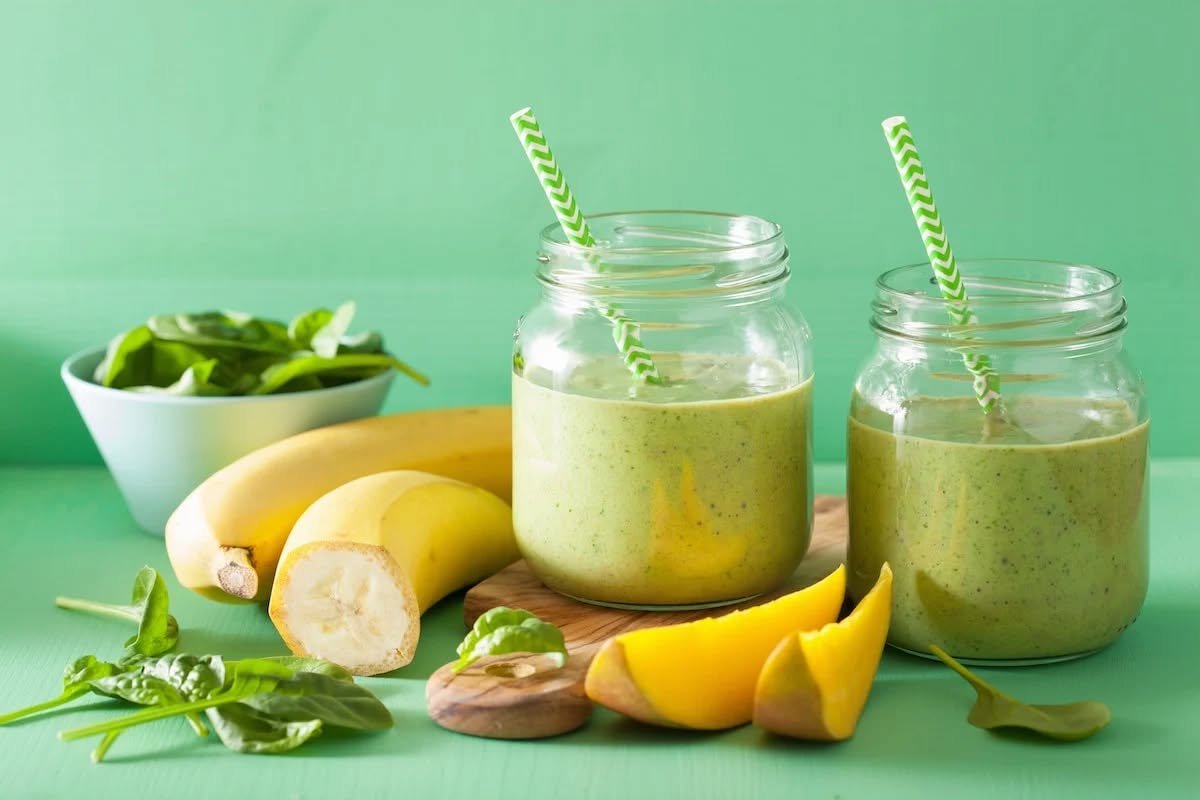
Tropical Green Power Smoothie

Tropical Green Power Smoothie

This recipe balances the creaminess of banana, the natural sweetness of mango, and the nutrient density of fresh spinach.

Ingredients:

  • 1 cup fresh baby spinach:Β Packed with vitamins and minerals.

  • 1 medium banana:Β Provides creamy texture and natural energy (use a frozen banana for a thicker, frostier consistency).

  • 1/2 cup fresh or frozen mango chunks:Β Adds a delicious tropical sweetness and extra fiber.

  • 1/2 cup unsweetened almond milk (or water/coconut water):Β Keeps the calorie count low while providing necessary liquid for blending.

  • Optional boost:Β A squeeze of fresh lime juice or a small piece of ginger for extra zest and metabolism-supporting flavor.

Instructions:

  1. Add liquid first:Β Pour your chosen liquid (almond milk, water, or coconut water) into the blender. Adding liquid first helps the blades move freely.

  2. Add the greens:Β Add the fresh spinach. If you have a lower-powered blender, you might want to blend the liquid and spinach together first to ensure a perfectly smooth consistency.

  3. Add the fruit:Β Add the banana and the mango chunks.

  4. Blend:Β Start the blender on a low speed and gradually increase to high. Blend for 45–60 seconds, or until the mixture is completely smooth and creamy.

  5. Serve:Β Pour into a glass and enjoy immediately while chilled.


A Few Quick Tips for Success:

  • Mind the portions:Β Even with healthy, whole-food ingredients, smoothies can be calorie-dense if they become too large. Stick to one serving as a snack or a light meal.

  • Keep it balanced:Β To make this a more complete meal, consider adding a scoop of your favorite protein powder or a tablespoon of chia seeds for healthy fats and extra satiety.

  • Consistency is key:Β Enjoying this as part of a balanced diet filled with whole foods is the best approach for long-term health.

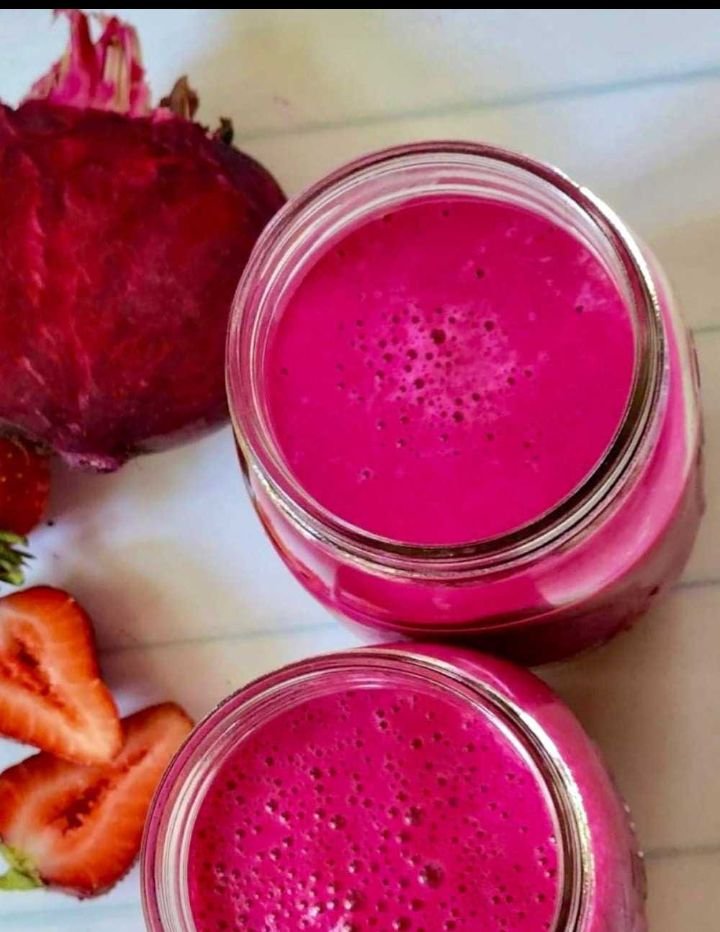
Healthy Beet & Strawberry Smoothie

Healthy Beet & Strawberry Smoothie

This recipe is refreshing, naturally sweet, and incredibly satisfying.


Ingredients

1 cup fresh beetroot (peeled and chopped into small chunks)

1 cup strawberries (washed, hulled, and frozen)

1 cup yogurt (low-fat or full-fat)Juice

Β½ banana (preferably frozen for extra creaminess)

Β½ cup orange juice

Instructions

Prep the Fruit: If you haven’t already, wash and hull your strawberries, then freeze them ahead of time. This helps achieve that thick, chilly smoothie texture.


Prepare the Beet: Peel your fresh beetroot and chop it into small, manageable pieces.Dairy & Eggs

Combine: Place the chopped beets, frozen strawberries, yogurt, frozen banana, and orange juice into your blender.


Blend: Secure the lid and blend on high until the mixture is completely smooth and vibrant.

Serve: Pour into your favorite glass and enjoy immediately while fresh.Orange Juice


Tips for Success


Blend well: Because you are using raw beets, make sure to blend for an extra minute or use a high-powered blender to ensure the beets are fully pulverized into a silky texture.


Adjust consistency: If the smoothie is too thick, simply add a splash more orange juice or your preferred milk until you reach your desired consistency.Juice


Beet stains: Raw beets are highly pigmented. To avoid staining your fingers or countertops, you can wear kitchen gloves while peeling and chopping, and use a non-porous cutting board.

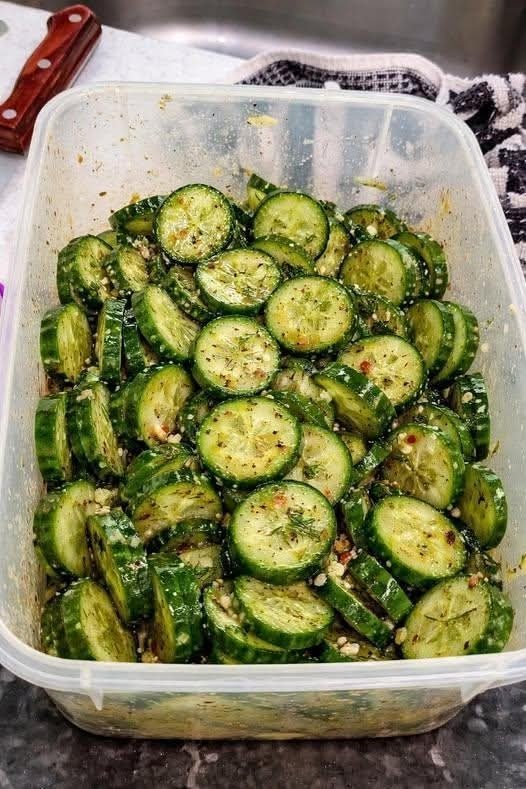
Zesty Cucumber “Bang”

Zesty Cucumber “Bang”

Prep time: 10 mins | Yields: 4 servings

Ingredients

  • 4–6 Mini Cucumbers (Persian or cocktail cucumbers work best for that extra crunch)

  • 2 tbsp Rice vinegar or Apple cider vinegar

  • 1 tbsp Soy sauce (or coconut aminos for a gluten-free option)

  • 1 tbsp Everything Bagel Seasoning (or sesame seeds)

  • 2 cloves Garlic, minced

  • Β½ tsp Red pepper flakes (adjust for your spice preference)

  • Β½ tsp Dried dill or fresh chopped cilantro

  • Optional: A few drops of sesame oil for aroma.


Instructions

  1. Slice the Cucumbers: Wash the cucumbers and slice them into thin rounds (about ΒΌ inch thick). For a more authentic “smacked” texture, you can lightly press down on the cucumbers with the flat side of a knife before slicing to help them soak up the dressing.

  2. Mix the Dressing: In a large bowl (or directly in a storage container), whisk together the vinegar, soy sauce, minced garlic, red pepper flakes, and your choice of herbs.

  3. Toss and Season: Add the sliced cucumbers to the bowl. Toss thoroughly until every slice is well-coated in the liquid. Sprinkle the Everything Bagel Seasoning or sesame seeds over the top and toss one final time.

  4. Marinate (The Secret Step): While you can eat these immediately, letting them sit in the fridge for 15–20 minutes allows the cucumbers to release a little juice, which mixes with the spices to create a delicious savory brine.

  5. Serve: Enjoy chilled. These stay perfectly crunchy for up to 2 days in an airtight container.


πŸ’‘ Why This Snack Works

  • High Volume: You can eat a large portion of this for very few calories, making it excellent for mindless snacking while working or relaxing.

  • Hydrating: Since cucumbers are mostly water, this snack helps keep you hydrated throughout the day.

  • Bold Flavor: The garlic and vinegar provide a punchy flavor profile that satisfies savory cravings.

Guava & Citrus Fiber Bowl (Blood-Sugar–Friendly Recipe)

Guava & Citrus Fiber Bowl (Blood-Sugar–Friendly Recipe)

This refreshing bowl combines guava with protein and healthy fats to help support steady energy levels. It’s naturally sweet, rich in fiber, and quick to prepareβ€”perfect for breakfast or a light snack.

Ingredients (Serves 2)

  • 2 ripe guavas, diced (seeds removed if preferred)
  • Β½ cup plain Greek yogurt (unsweetened)
  • 1 tablespoon chia seeds
  • 1 tablespoon chopped almonds or walnuts
  • Β½ teaspoon cinnamon
  • 1 teaspoon fresh lime or lemon juice
  • Optional: a few berries (like blueberries or strawberries)

Instructions
Start by washing and slicing the guavas into small cubes. Guava skin is edible and rich in nutrients, so you can leave it on if you like. If the seeds are too hard for your preference, scoop them out gently.

In a bowl, add the plain Greek yogurt and stir until smooth. This provides protein, which helps slow down how quickly natural sugars are absorbed into the bloodstream.

Add the chopped guava on top of the yogurt. Sprinkle in chia seeds and nuts for extra fiber and healthy fats. These ingredients work together to support more stable blood sugar levels compared to eating fruit alone.

Next, dust the mixture with cinnamon. Cinnamon is often used in blood-sugar–friendly recipes because it may help improve insulin sensitivity slightly, though it’s not a treatment.

Drizzle fresh lime or lemon juice over the bowl to brighten the flavor and balance the sweetness. If you’d like, add a handful of berries for extra antioxidants and color.

Mix lightly or enjoy layered.

Tips & Benefits
Guava is high in vitamin C and fiber, which can support digestion and overall health. Pairing it with protein (like yogurt) and fats (like nuts or seeds) helps reduce blood sugar spikes.

For a dairy-free option, substitute Greek yogurt with unsweetened coconut or almond yogurt. Keep portions moderate if you’re monitoring carbohydrate intake.

The Golden Wellness Tonic

The Golden Wellness Tonic

A soothing blend for general vitality and comfort.

Ingredients

  • 1 cup Warm water (not boiling, to preserve nutrients)

  • 2 tbsp Raw Apple Cider Vinegar (with “the mother”)

  • 1 tbsp Organic Honey (local is best)

  • Β½ tsp Freshly grated ginger or ginger juice

  • 1 pinch Cayenne pepper (optional, for a metabolic kick)

  • 1 tsp Fresh lemon juice

Step-by-Step Instructions

  1. Prepare the Base: Pour the warm water into a mug. Ensure it is warm to the touch but not so hot that it scalds, as extreme heat can neutralize the beneficial enzymes in the honey and vinegar.

  2. Add the Actives: Stir in the Apple Cider Vinegar and Lemon Juice. These provide a boost of acidity that many find helpful for digestion.

  3. Infuse the Spice: Add the grated ginger. If you don’t like pulp, you can squeeze the ginger juice into the cup through a small strainer.

  4. Sweeten: Add the honey and stir until completely dissolved. The honey acts as a natural prebiotic and makes the vinegar much more palatable.

  5. Finish: Add the pinch of cayenne pepper if you want to support circulation.

  6. Consume: Drink this slowly in the morning on an empty stomach, about 20 minutes before breakfast.


Questions & Answers

Q: Can this replace my current medications? A: No. This is a dietary supplement meant to support a healthy lifestyle. You should never stop taking prescribed medications for conditions like depression or nerve pain without consulting your doctor.

Q: Why take it in the morning? A: Taking a tonic on an empty stomach allows the nutrients to be absorbed more efficiently and can help “wake up” your digestive system for the day.

Q: Is it safe for everyone? A: Generally, yes, but people with stomach ulcers or severe acid reflux should be cautious with vinegar. Also, honey should never be given to infants under one year old.

Q: How long until I feel “better”? A: Natural tonics aren’t “magic pills.” They work best when combined with a balanced diet, regular sleep, and exercise. Most people notice a difference in their energy levels within 1–2 weeks of consistent use.

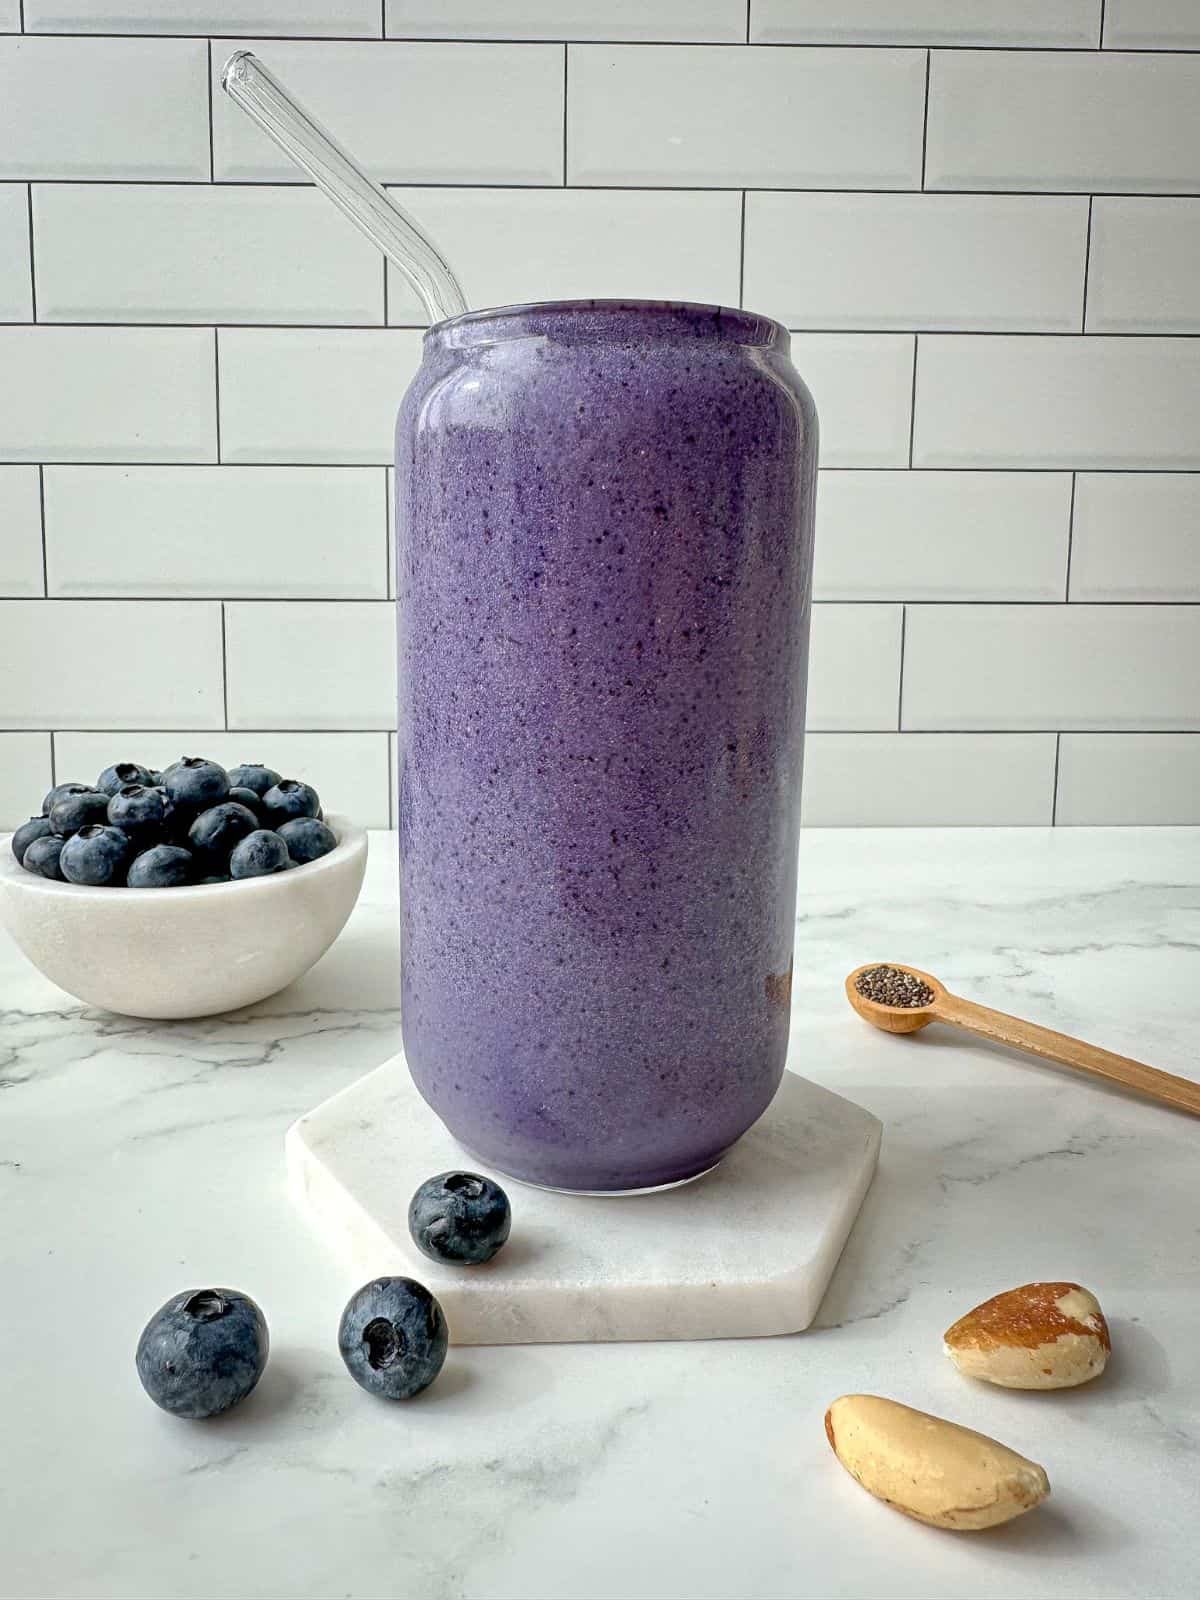
Blueberry & Brazil Nut Power Smoothie

Blueberry & Brazil Nut Power Smoothie

This recipe yields one large serving (about 16–20 oz).


Ingredients

  • 1 Β½ cups Frozen blueberries (frozen is key for that thick, frosty texture)

  • 2 Brazil nuts (rich in selenium)

  • 1 tbsp Chia seeds

  • 1 cup Unsweetened almond milk (or your preferred milk)

  • Β½ cup Greek yogurt (plain or vanilla) for creaminess

  • Optional: 1 tsp honey or maple syrup if you prefer it sweeter

Instructions

  1. Layer the Liquid: Pour your milk into the blender first. Adding liquids first helps the blades move freely and prevents “air pockets.”

  2. Add the Solids: Add the Greek yogurt, Brazil nuts, and chia seeds.

  3. The Fruit: Add the frozen blueberries last.

  4. Blend: Start on a low speed and gradually increase to high. Blend for about 45–60 seconds until the Brazil nuts are completely pulverized and the texture is velvety smooth.

  5. Serve: Pour into a glass (like the “can-style” glass in the photo) and enjoy with a straw.


Nutritional Highlights

  • Blueberries: Packed with antioxidants and Vitamin C.

  • Brazil Nuts: One of the best natural sources of Selenium, which supports thyroid health.

  • Chia Seeds: Provides a healthy dose of Omega-3 fatty acids and fiber to keep you full longer.

Pro-Tip

If you find the smoothie is too thick, add an extra splash of milk. If it’s too thin, add a few more frozen blueberries or a couple of ice cubes and blend again.

Berry Cacao Smoothie Recipe

Ingredients

  • Frozen Base: 1 Β½ cups frozen mixed berries (blueberries, blackberries, and strawberries).

  • Creaminess: 1 frozen banana (peeled and sliced before freezing) or Β½ an avocado for a lower-sugar option.

  • Liquid: Β½ to 1 cup unsweetened almond milk or coconut water (add slowly to keep it thick).

  • Flavor & Protein: 1 tablespoon raw cacao powder and 1 scoop of your favorite chocolate or vanilla protein powder (optional).

  • Sweetener: 1 teaspoon maple syrup or 1 pitted date (optional, depending on the sweetness of your fruit).

Toppings (as seen in the image)

  • A handful of fresh or frozen blueberries.

  • Sliced strawberries.

  • A sprinkle of cacao powder or shaved dark chocolate.

  • A spoonful of chocolate granola or cacao nibs for crunch.


Instructions

  1. Layer the Blender: Place your liquid in first, followed by the cacao powder and protein powder. This prevents the powder from sticking to the lid.

  2. Add Frozen Fruit: Add the frozen berries and frozen banana/avocado on top.

  3. Blend: Start on a low speed and gradually increase. If you want that thick, “soft-serve” consistency shown in the jar, use a tamper to push the frozen fruit down into the blades or stop and stir frequently.

  4. Adjust: If it’s too thick to blend, add liquid one tablespoon at a time.

  5. Assemble: Pour into a glass or mason jar. Top with the extra berries and cacao shavings to match the photo!


Pro Tip: For the best texture, use fruit that is completely frozen. This gives it that “diamond” textured look in the jar rather than a runny juice consistency.

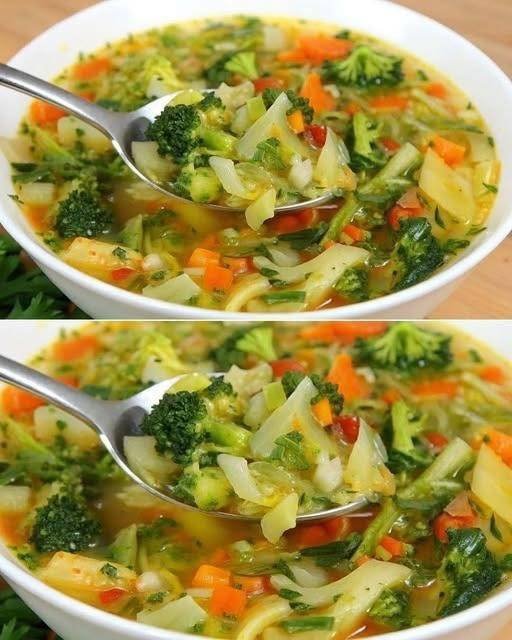
Rainbow Garden Vegetable Soup

Rainbow Garden Vegetable Soup

Prep time: 15 mins | Cook time: 30 mins | Servings: 6–8

Ingredients

Category Ingredients
The Base 1 tbsp Olive Oil, 1 medium Onion (diced), 2 cloves Garlic (minced)
The Colors 2 large Carrots (diced), 2 stalks Celery (sliced), 1 cup Broccoli florets
The Hearty Bits 1 large Potato (cubed), 1 cup Green Cabbage (shredded)
The Liquid 6–8 cups Low-sodium Vegetable Broth or Filtered Water
The Seasoning 1 tsp Sea Salt, Β½ tsp Black Pepper, 1 tsp Dried Oregano
The Fresh Finish ΒΌ cup Fresh Parsley (chopped), a squeeze of fresh Lemon juice

Step-by-Step Instructions

  1. SautΓ© the Foundation:

    In a large pot, heat the olive oil over medium heat. Add the onion and celery. SautΓ© for about 5 minutes until the onions are soft and translucent. Stir in the minced garlic and cook for 1 minute more until fragrant.

  2. Add Hearty Vegetables:

    Add the diced carrots and cubed potatoes to the pot. Stir them into the aromatics for 2–3 minutes. This light “toasting” helps the vegetables hold their shape and stay firm during the simmering process.

  3. Simmer the Broth:

    Pour in the vegetable broth or water. Add the salt, pepper, and dried herbs. Bring the mixture to a gentle boil, then reduce the heat to low. Cover and simmer for 15 minutes, or until the potatoes are just beginning to soften.

  4. Add the Delicate Greens:

    Stir in the shredded cabbage and the small broccoli florets. These cook quickly and stay vibrant if added toward the end. Simmer for an additional 5–7 minutes until the broccoli is tender but still bright green.

  5. Adjust and Brighten:

    Taste the broth and add a little more salt or pepper if needed. Stir in the fresh parsley and a squeeze of fresh lemon juice just before turning off the heat. This adds a “pop” of brightness that balances the savory broth.

  6. Serve:

    Ladle the soup into bowls, ensuring a good mix of all the colorful vegetables in every serving.


πŸ’‘ Pro-Tips for Your Page

  • Uniformity: Cutting the vegetables into similar small sizes ensures that every spoonful has a bit of everything and cooks evenly.

  • Make it a Meal: For extra protein, you can add a can of rinsed cannellini beans or chickpeas during step 3.

  • Storage: This soup keeps beautifully in the fridge for up to 4 days, and the flavors often deepen by the second day!

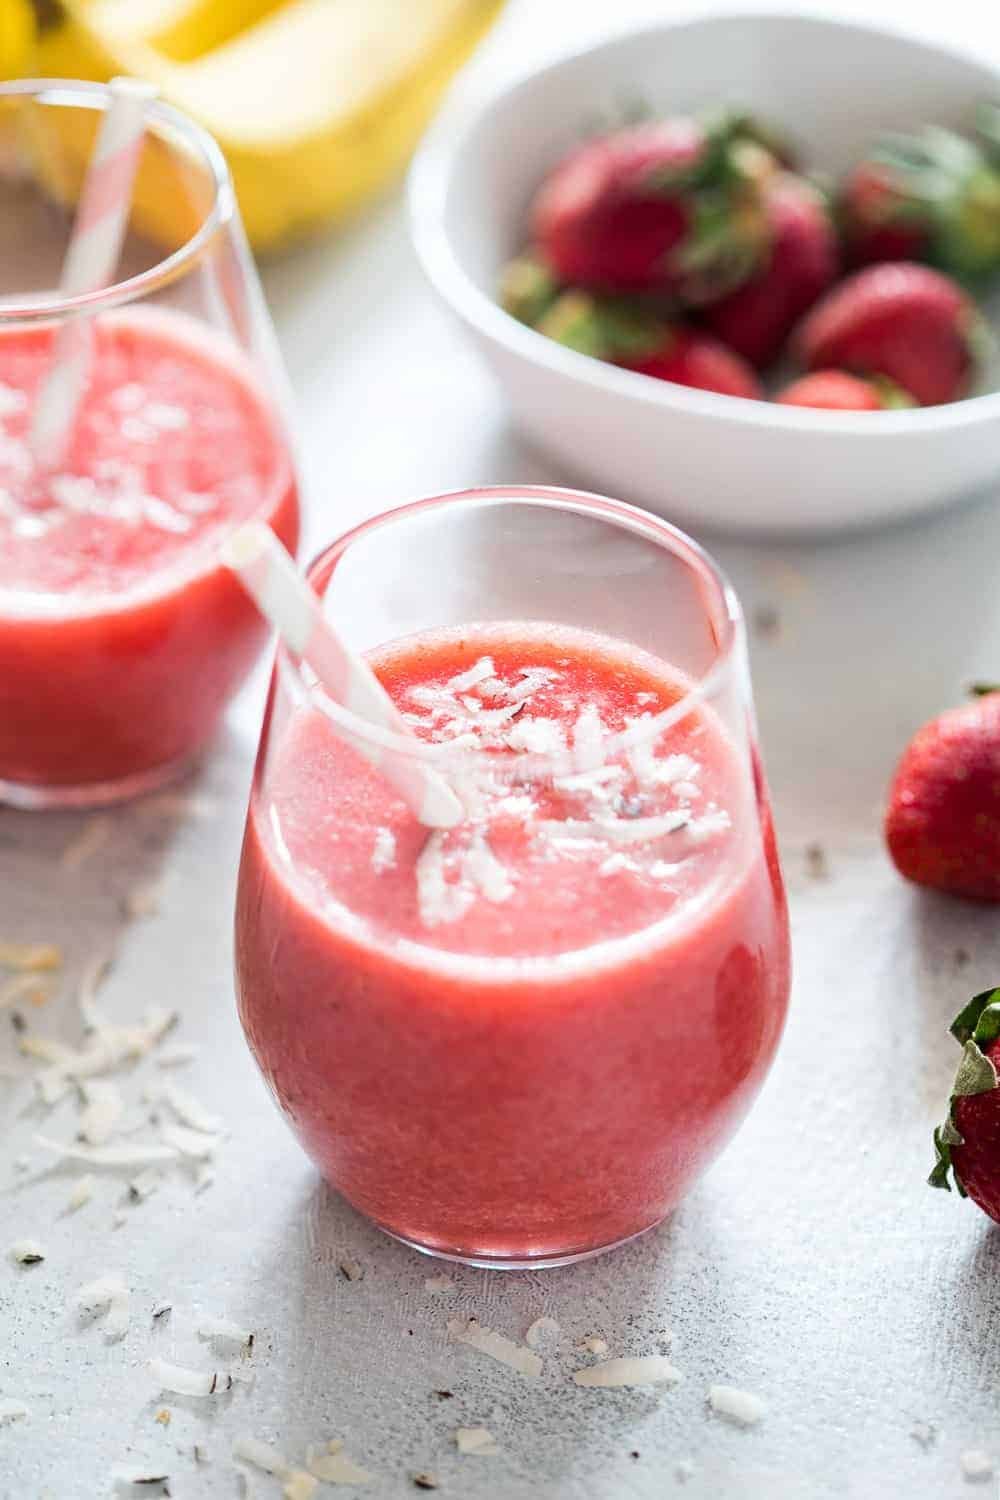
Refreshing Strawberry Coconut Smoothie

Refreshing Strawberry Coconut Smoothie

Ingredients

Item Quantity
Frozen Strawberries 1.5 cups
Coconut Milk (canned or carton) 1 cup
Banana (fresh or frozen) 1 medium
Honey or Maple Syrup 1-2 tsp (optional)
Shredded Coconut For garnish

Instructions

  1. Prep the Fruit: If you’re using a fresh banana, peel it and break it into chunks. Using a frozen banana will make the smoothie extra thick and creamy.

  2. Combine: Add the strawberries, banana, and coconut milk into your blender.

  3. Sweeten: Taste a small amount of the mixture. If your strawberries are a bit tart, add your choice of honey or maple syrup.

  4. Blend: Start on a low speed and gradually increase to high. Blend until the texture is completely smooth and there are no large fruit chunks left.

  5. Serve: Pour the smoothie into glasses.

  6. Garnish: Sprinkle a generous amount of shredded coconut on top, just like in your photo!


Pro Tips for the Best Texture

  • For a “Milkshake” Feel: Use full-fat canned coconut milk. It contains more natural healthy fats which create a velvety mouthfeel.

  • For a Lighter Version: Use coconut water or refrigerated coconut milk (the kind found in cartons).

  • Stay Cold: Use at least one frozen fruit component so you don’t have to add ice, which can sometimes water down the flavor.

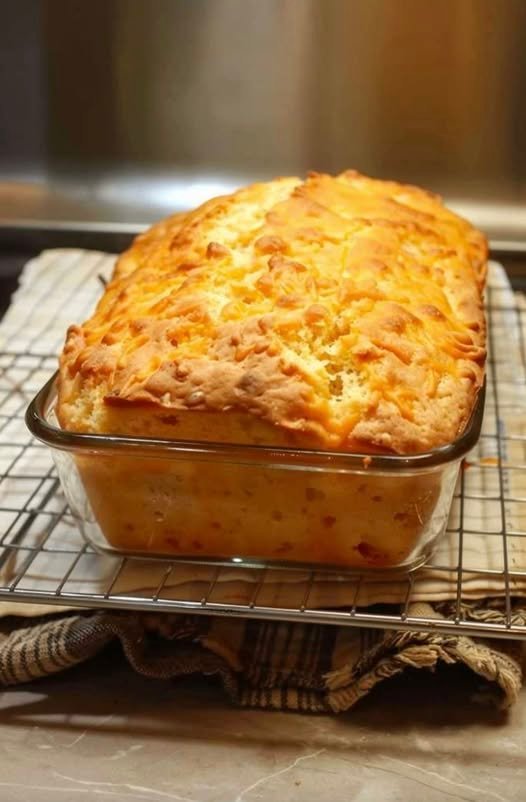
Homemade Cheddar Quick Bread

Homemade Cheddar Quick Bread

Prep time: 10 mins | Bake time: 45 mins | Yields: 1 Loaf

Ingredients

The Dry Base:

  • 2 cups All-purpose flour

  • 1 tbsp Baking powder

  • Β½ tsp Salt

  • 1 tsp Garlic powder (optional, but highly recommended)

  • 1 Β½ cups Shredded sharp cheddar cheese (plus extra for the top)

The Wet Mix:

  • 1 cup Milk

  • 1 Large egg

  • ΒΌ cup Unsalted butter (melted)

  • 1 tbsp Honey or sugar

Optional Topping:

  • ΒΌ cup Extra shredded cheddar

  • 1 tbsp Fresh chopped parsley


Instructions

  1. Prep: Preheat your oven to 175Β°C (350Β°F). Grease a 9Γ—5 inch loaf pan thoroughly with butter or non-stick spray.

  2. The Flour/Cheese Toss: In a large bowl, whisk together the flour, baking powder, salt, and garlic powder. Stir in the 1 Β½ cups of shredded cheese.

    • Pro-Tip: Coating the cheese in the flour prevents the shreds from sinking to the bottom of the pan during baking.

  3. Wet Ingredients: In a separate medium bowl, whisk together the milk, egg, melted butter, and honey until smooth.

  4. Combine: Pour the wet mixture into the dry ingredients. Stir gently using a spatula until just combined.

    • Note: The batter will be thick and lumpy. Do not overmix, or the bread will become tough!

  5. Bake: Spread the batter evenly into the prepared loaf pan. Sprinkle the extra ΒΌ cup of cheese and the parsley over the top.

  6. Check for Doneness: Bake for 40–45 minutes. The bread is ready when the top is a deep golden brown and a toothpick inserted into the center comes out clean.

  7. Cool: Let the bread rest in the pan for 10 minutes before transferring it to a wire rack to cool completely.


✨ Customization Ideas

This bread is incredibly versatile. To make it a more substantial meal, try folding in:

  • Spicy Kick: Β½ cup of diced jalapeΓ±os.

  • Savory Crunch: ΒΌ cup of cooked, crumbled bacon bits.

  • Herb Twist: Swapping parsley for fresh chives or rosemary.

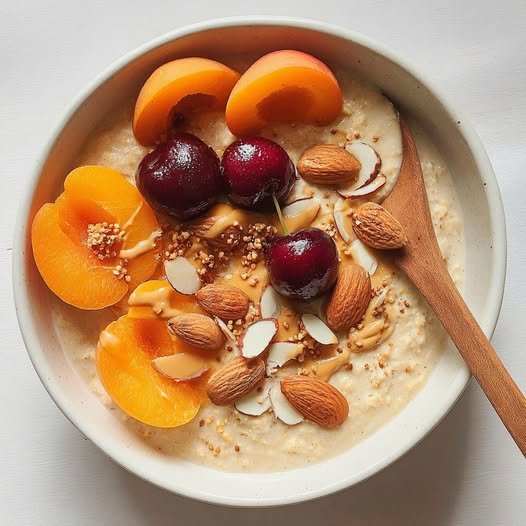
Creamy Almond & Stone Fruit Porridge

Creamy Almond & Stone Fruit Porridge

Prep time: 5 mins | Cook time: 10 mins | Servings: 1

Ingredients

The Base:

  • 1/2 cup Rolled oats (or steel-cut for more texture)

  • 1 cup Almond milk (or your preferred milk)

  • 1/2 tsp Vanilla extract

  • A pinch of Sea salt

The Toppings:

  • 2 Fresh apricots, halved and pitted

  • 3-4 Fresh cherries

  • 1 tbsp Creamy almond butter

  • A handful of whole and sliced almonds

  • 1 tsp Hemp seeds or amaranth grain (for that fine crunch seen in the photo)

  • Optional: A drizzle of maple syrup or honey


Instructions

  1. Cook the Oats: In a small saucepan, combine the oats, milk, vanilla, and salt. Bring to a gentle simmer over medium heat.

  2. Thicken: Stir frequently for about 5–8 minutes until the oats have absorbed the liquid and become creamy. If it gets too thick, add a splash more milk.

  3. Prepare the Fruit: While the oats cook, slice your apricots in half and remove the pits. Wash the cherries, leaving the stems on for that aesthetic “cafΓ©” look.

  4. Assemble: Pour the hot porridge into a wide bowl.

  5. Layer the Flavors: * Place the apricot halves on one side.

    • Nestle the cherries in the center.

    • Scatter the whole and sliced almonds generously across the other side.

    • Drizzle the almond butter in a circular motion over the fruit and oats.

    • Finish with a sprinkle of hemp seeds or grains for texture.


Pro Tip

For extra flavor, you can lightly toast the almonds in a dry pan for 2 minutes before adding them to the bowl. It brings out a smoky, nutty aroma that pairs beautifully with the fresh apricots.

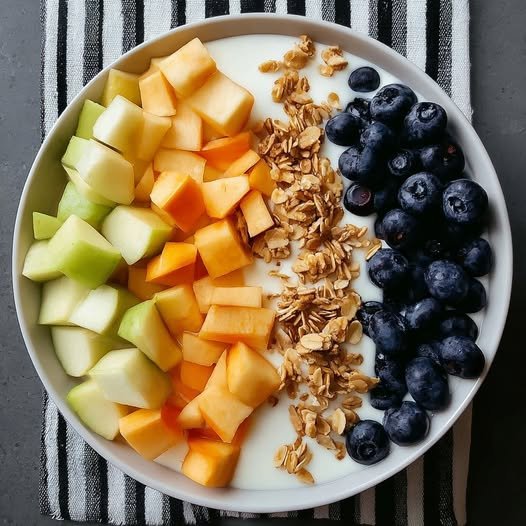
Fruit & Yogurt Power Bowl

Fruit & Yogurt Power Bowl

Prep time: 10 minutes

Servings: 1

Ingredients

  • Base: 1 cup Greek yogurt (plain or vanilla works best for the white background).

  • Green Section: Β½ Granny Smith apple or green melon (honeydew), cubed.

  • Orange Section: Β½ cup Cantaloupe or papaya, cubed.

  • Crunch: 3 tbsp Honey-toasted granola or rolled oats.

  • Blue Section: Β½ cup Fresh blueberries.


Preparation Steps

  1. The Base: Spoon the yogurt into a shallow wide bowl. Use the back of the spoon to smooth the surface until it is perfectly flat and level.

  2. The “Blue” Side: Carefully pile the blueberries on the right third of the bowl. Keep them in a tight, rounded cluster.

  3. The “Crunch” Divider: Sprinkle a vertical line of granola down the center. This acts as a “buffer” between the wet fruit and the berries.

  4. The Warm Colors: On the left side, place the orange fruit (cantaloupe) in the middle column.

  5. The Cool Colors: Finish by placing the green fruit (apple or melon) on the far left edge.

  6. The Finishing Touch: If you want a bit more sweetness, drizzle a thin line of honey or agave nectar specifically over the granola line.


Tips for the Perfect Look

  • Uniformity: Try to cut your cantaloupe and green fruit into cubes of roughly the same size (about 1.5 cm).

  • Dry the Fruit: After washing the blueberries, pat them completely dry. This prevents blue juice from “bleeding” into the white yogurt.

  • Yogurt Choice: A thicker yogurt, like Icelandic skyr or Greek yogurt, holds the weight of the fruit better so they don’t sink.

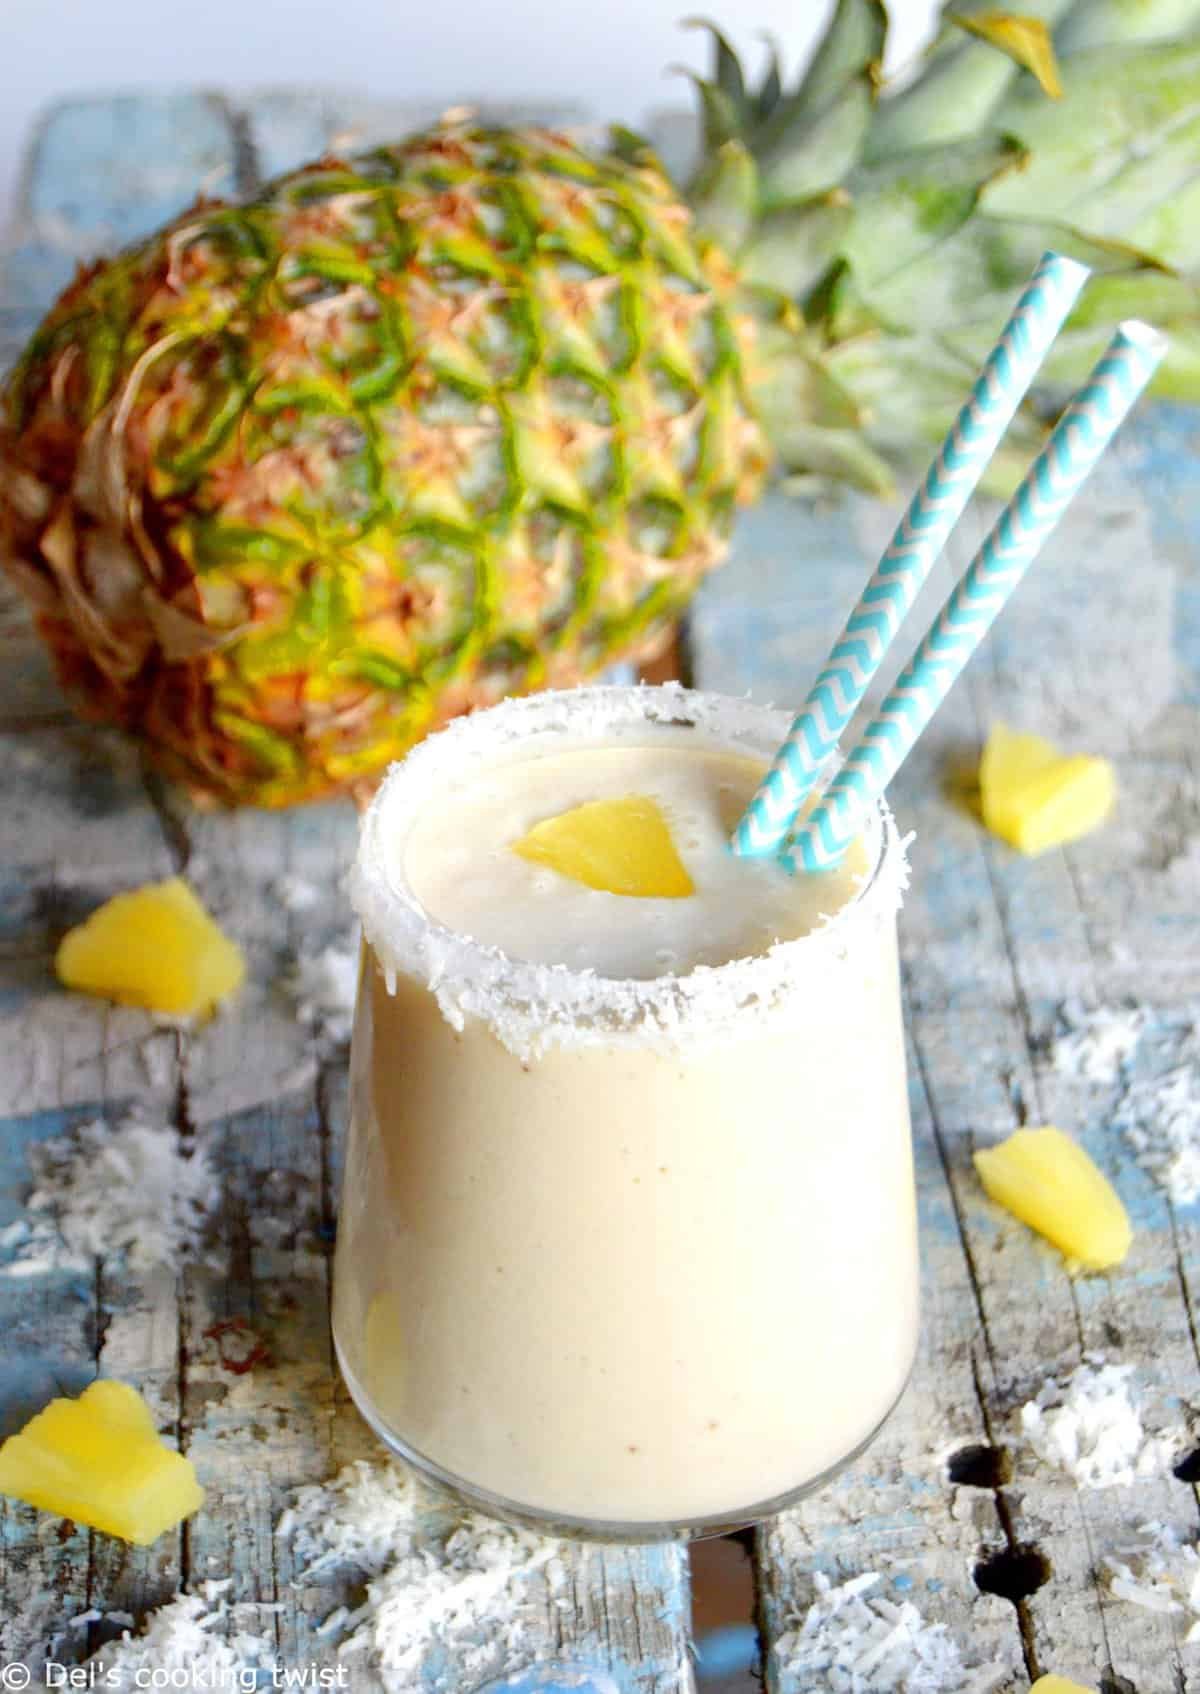
Tropical Pineapple Coconut Smoothie

Tropical Pineapple Coconut Smoothie

Prep time: 5 minutes | Servings: 1-2

Ingredients

  • Frozen Pineapple: 2 cups (using frozen chunks makes it extra thick and frosty).

  • Coconut Milk: 1 cup (canned full-fat coconut milk gives the creamiest texture, but carton coconut milk works for a lighter version).

  • Banana: 1 ripe banana (adds natural sweetness and a smooth base).

  • Honey or Maple Syrup: 1-2 teaspoons (optional, depending on how sweet your fruit is).

  • Shredded Coconut: For the rim and garnish.

  • Ice: A handful (only if using fresh pineapple instead of frozen).


Instructions

  1. Prep the Glass: Dip the rim of your glass into a bit of honey or water, then press it into a small plate of shredded coconut to create that snowy rim seen in the photo.

  2. Blend: Add the pineapple, coconut milk, banana, and sweetener into a high-speed blender.

  3. Process: Blend on high until the mixture is completely smooth and creamy. If it’s too thick, add a splash more coconut milk.

  4. Serve: Pour into your prepared glass.

  5. Garnish: Top with a small piece of fresh pineapple and a sprinkle of shredded coconut. Add two fun straws to complete the look!


Pro-Tips for the Best Texture

  • Creaminess: For an even richer “milkshake” feel, you can add 1/4 cup of Greek yogurt.

  • Brightness: A small squeeze of fresh lime juice can help balance the sweetness and bring out the tropical flavors.

  • Pineapple Core: If you are using a whole fresh pineapple, don’t throw away the core! It contains bromelain and blends up easily in a powerful blender.