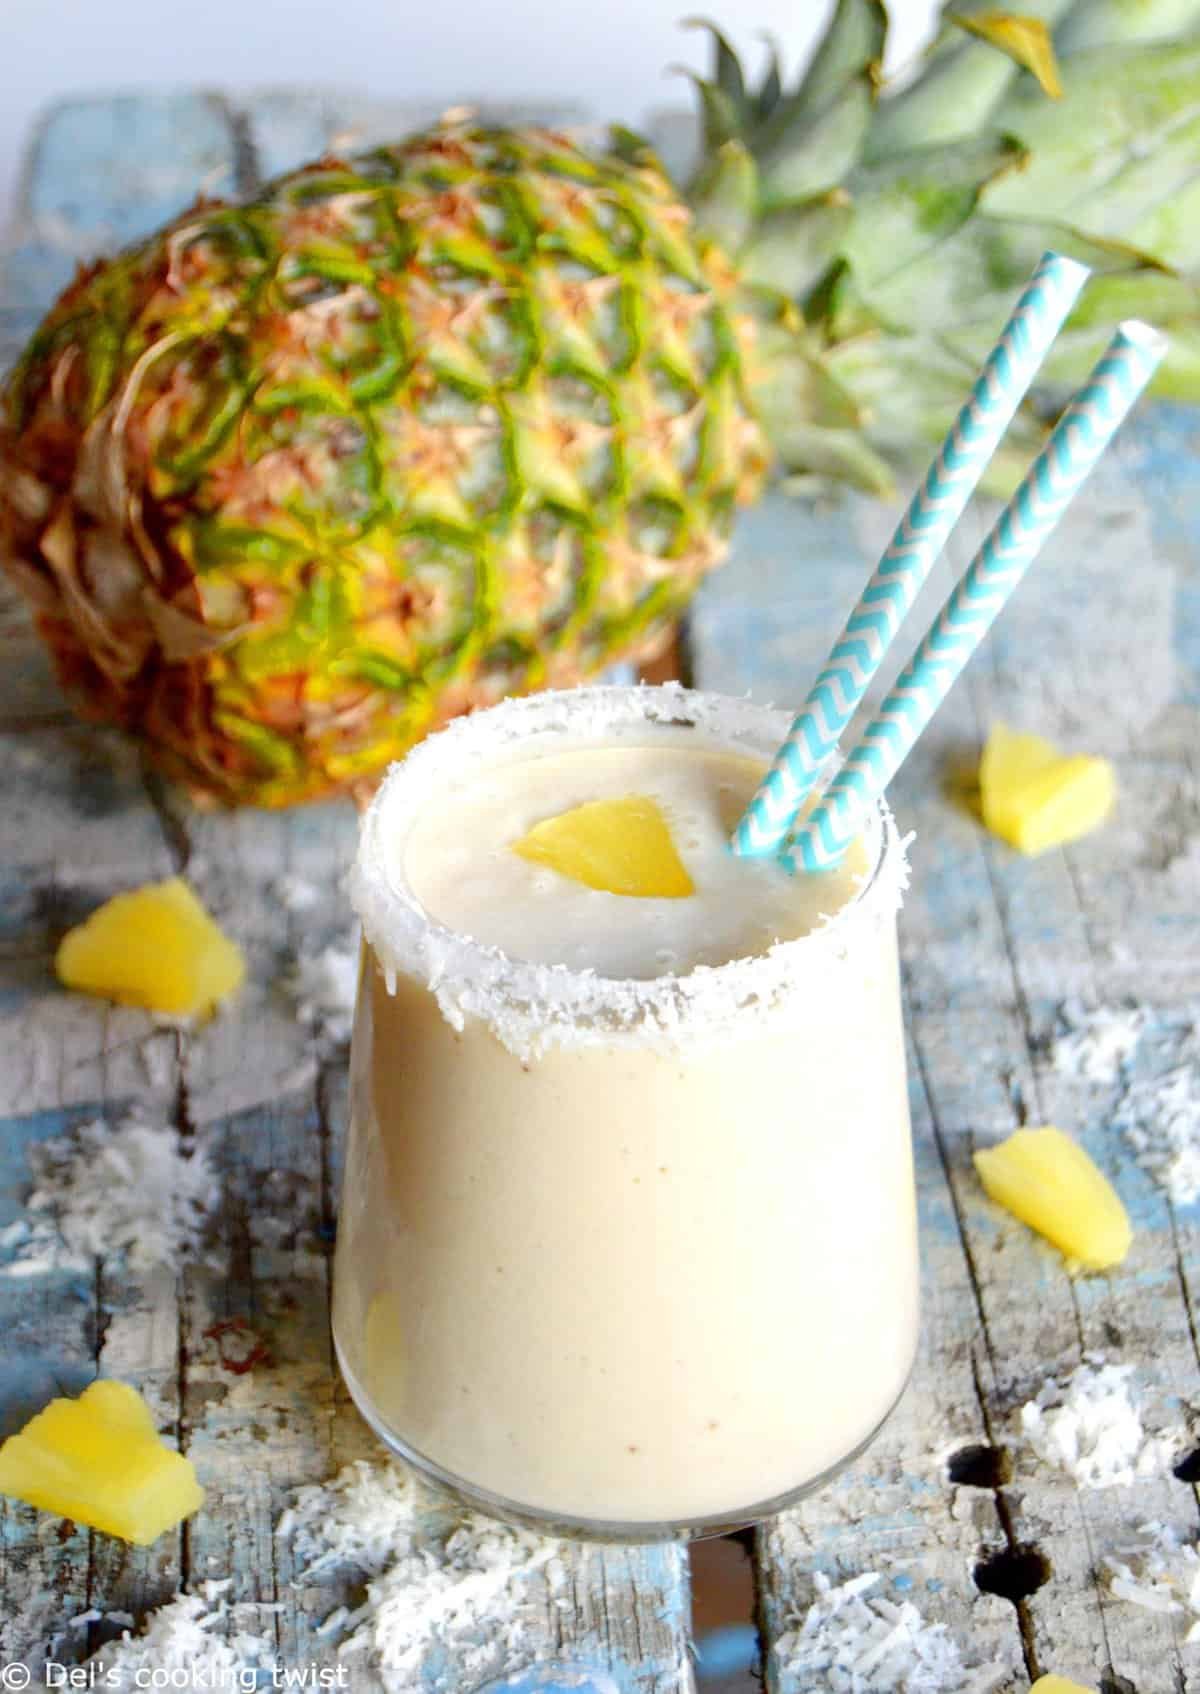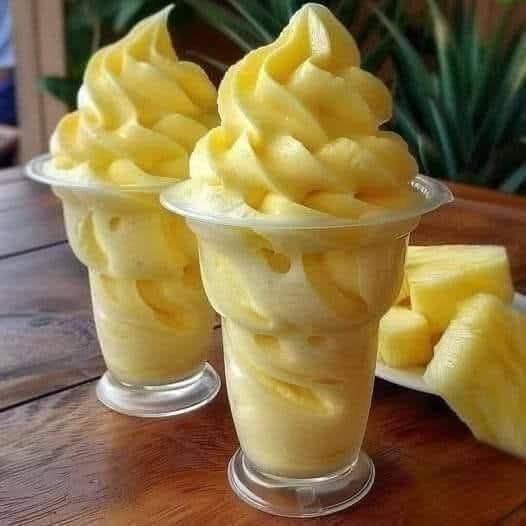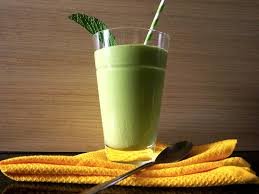
1 cup Frozen pineapple chunks (adds sweetness and chill)
1/2 Large banana (fresh or frozen for extra creaminess)
1/2 Green apple (sliced, skin on for fiber)
1 tbsp Fresh lemon juice (brightens the flavor)
1 cup Coconut water or plain water (adjust for desired thickness)
Optional: A small knob of fresh ginger for a spicy kick.
Instructions
Liquid First: Pour your coconut water (or water) into the blender. Adding liquid first helps the blades move freely and prevents “air pockets.”
Add the Greens: Toss in the kale and lemon juice. If you don’t have a high-speed blender, blend just the liquid and kale first until completely smooth to avoid “leafy” bits.
The Fruit Base: Add the pineapple, banana, and green apple slices.
Blend: Start on a low speed and gradually increase to high. Blend for about 45ā60 seconds until the texture is silky and vibrant green.
Adjust: If itās too thick, add a splash more liquid. If you want it colder, add a handful of ice and pulse.
Tips for the Perfect Pour
The “Cold” Secret: Using frozen pineapple and banana eliminates the need for ice, which can sometimes water down the flavor.
Substitutions: Not a fan of kale? You can swap it for baby spinach for a milder taste while keeping that gorgeous color.
1 large banana (frozen is best for that thick, creamy texture)
1 cup milk of choice (dairy, almond, or oat milk all work great)
1/4 cup Greek yogurt (plain or vanilla for extra creaminess)
1/2 tsp vanilla extract
1 tsp maple syrup or honey (optional, depending on banana ripeness)
A pinch of cinnamon
For the topping:
1 fresh banana slice
A drizzle of caramel sauce (or almond butter for a healthier swap)
Instructions
Prep the Fruit: If you havenāt already, peel and slice your banana. Using a frozen banana will give you that “milkshake” consistency shown in the photo.
Blend: Place the banana, milk, yogurt, vanilla, and cinnamon into a blender.
Liquify: Blend on high speed until completely smooth. If itās too thick, add a splash more milk; if it’s too thin, add a few ice cubes.
Assemble: Pour the smoothie into a glass or mason jar.
Garnish: Carefully place a banana slice on top and use a spoon to drizzle a small amount of caramel sauce in a zig-zag pattern, just like the picture!
Tips for the Perfect Smoothie
The Brown Spots Matter: Use bananas with a few brown spots on the peel. They are much sweeter and blend better than green ones.
Boost the Protein: You can add a scoop of vanilla protein powder or a tablespoon of chia seeds without changing the flavor much.
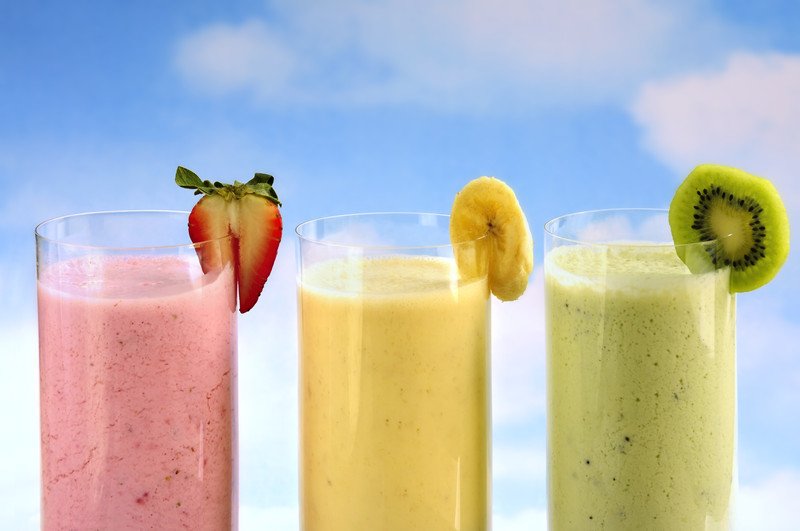
1 cup frozen strawberries, ½ cup Greek yogurt, ¼ cup milk (dairy or plant-based)
Pineapple Base
1 cup frozen pineapple chunks, ½ cup coconut milk (or orange juice), 1 tsp honey or maple syrup
Garnish
Fresh strawberry slices, pineapple cubes
Instructions
Blend the Strawberry Layer: Add the strawberries, yogurt, and milk to a blender. Pulse until completely smooth and thick. Pour this into a separate bowl or glass and set aside. (Quick tip: Rinse the blender quickly so the colors stay vibrant!)
Blend the Pineapple Layer: Add the pineapple, coconut milk, and sweetener to the blender. Blend until creamy.
The “Swirl” Effect: * Pour about half of the strawberry mixture into your serving glass.
Carefully pour the pineapple mixture on top.
Use a spoon or a straw to gently swirl the two colors togetherādon’t over-mix, or it will turn a solid coral color!
Finish: Top with a fresh strawberry half and a pineapple wedge as seen in your photo.
Pro Tips for the Perfect Look
Keep it Thick: Use frozen fruit instead of ice. This ensures the layers stay separated longer and the flavor isn’t watered down.
Adjusting Consistency: If the blend is too thick, add liquid 1 tablespoon at a time. If it’s too thin, add more frozen fruit.
Add the grated ginger. Let it sit for 3ā5 minutes so the flavor releases.
Add mint leaves and gently press them with a spoon to release the aroma.
Pour in cold water and mix well.
Add honey if you prefer a lightly sweet taste.
Drop in ice cubes and lemon slices. Stir and serve immediately.
How It Works (Healthy Explanation)
This drink hydrates the body, boosts digestion, increases vitamin C intake, and may support natural metabolism. Lemon supports detoxification, ginger may help digestion, and mint soothes the stomach. Itās not a miracle fat burner, but it can support a healthy routine when paired with a balanced diet.
Ā Q&A (350 Words Total Including Recipe Above)
Q1: Does this drink really burn fat?
It can assist your body by improving hydration, digestion, and metabolism, but no drink alone burns fat dramatically. Sustainable weight loss comes from combining such drinks with healthy eating and activity.
Q2: How many times should I drink it?
Once daily is enoughāpreferably in the morning on an empty stomach or 30 minutes before breakfast.
Q3: Can I drink it at night?
Yes, but ginger may feel stimulating for some people. If you are sensitive, drink it earlier in the day.
Q4: How long should I use this drink?
You can safely use it for 2ā4 weeks. Take a break afterward if needed.
Q5: Can it help reduce belly fat?
It may help reduce bloating and improve digestion. Real belly fat reduction requires a calorie deficit over time.
Q6: Who should avoid it?
People with citrus allergies, acid reflux, or stomach ulcers should limit lemon and ginger. Pregnant individuals should moderate ginger.
Q7: Can I store this drink?
Fresh is best. But you can prepare a larger batch and refrigerate for up to 24 hours.
Q8: Can I add cucumber?
Yes! Cucumber can improve hydration and enhance the detox effect.
If you want, I can also createĀ a stronger version,Ā a warm version, orĀ a 7-day plan.
This recipe is packed with antioxidants, healthy fats, and fiber to keep you energized.
Ingredients
Liquid:Ā 1 cup unsweetened almond milk (or any milk of your choice).
Fruit:Ā 1/2 cup frozen blueberries and 1/2 cup fresh or frozen strawberries.
Greens:Ā 1 handful of fresh baby spinach (adds color and nutrients without changing the taste).
Creaminess & Protein:Ā 1 tablespoon almond butter or a small handful of raw almonds.
Sweetener (Optional):Ā 1-2 pitted dates or 1/2 a frozen banana for extra thickness.
Toppings:Ā Extra blueberries, a strawberry slice, and a sprinkle of sliced almonds.
Instructions
Layer the Ingredients:Ā Add the almond milk to your blender first (this helps it blend smoother), followed by the spinach, almond butter, and finally the frozen berries.
Blend:Ā Start on a low speed and gradually increase to high. Blend forĀ 45ā60 secondsĀ until the spinach is completely pulverized and the texture is creamy.
Adjust Consistency:Ā If itās too thick, add a splash more almond milk. If itās too thin, add a few ice cubes or more frozen fruit.
Serve:Ā Pour into a glass or mason jar. Top with fresh berries and almonds as seen in your image for that perfect āinsta-worthyā look!
Quick Tips for the Best Result
Freeze your fruit:Ā Using frozen blueberries and strawberries gives the smoothie a thick, milkshake-like consistency without needing ice.
Boost it:Ā Feel free to add a teaspoon of chia seeds or flax seeds for extra Omega-3s.
1 ½ Frozen bananas (peel them before freezing for the best texture)
1 cupĀ Unsweetened almond milk (or milk of choice)
1 tbspĀ Natural peanut butter
1-2 tbspĀ Unsweetened cocoa powder (depending on how dark you like it)
1 scoopĀ Chocolate protein powder (optional, for a meal replacement)
1 tspĀ Maple syrup or 1 pitted date (optional, if you want it sweeter)
A pinchĀ of Sea salt (to make the chocolate pop)
The Toppings (As seen in the photo)
Banana slices
Cacao nibsĀ (for that crunch)
A drizzle of peanut butterĀ (warm it up for 10 seconds to get that perfect āpourā)
Instructions
Layer the Liquid:Ā Pour your milk into the blender first. This prevents the frozen fruit from getting stuck at the bottom.
Add the Rest:Ā Throw in the frozen bananas, peanut butter, cocoa powder, and salt.
Blend:Ā Start on a low speed and gradually increase to high. If itās too thick, add an extra splash of milk. If you want it thicker (like a smoothie bowl), add a few ice cubes.
Style It:Ā Pour into a glass. Carefully place your banana slices on top, sprinkle the cacao nibs, and use a spoon to drizzle the peanut butter in a circular motion.
Pro Tips for the Perfect Texture
The Banana Secret:Ā Using room-temperature bananas will make a ājuice.ā UsingĀ frozenĀ bananas creates that creamy, milkshake-like consistency seen in your image.
Cacao vs. Cocoa:Ā The photo shows cacao nibs. If you donāt have them, mini dark chocolate chips work just as well for that bit of texture.
1 lb Ground Breakfast Sausage (hot, mild, or maple)
2 cups Baking Mix (like Bisquick)
1 lb (4 cups) Sharp Cheddar Cheese, shredded
1/2 cup Whole Milk (adjust slightly for consistency)
Optional: 1/2 tsp Garlic Powder or a pinch of Cayenne for extra kick.
Instructions
Prep the Sausage: In a large skillet, brown the ground sausage over medium-high heat until fully cooked. Drain the grease thoroughlyāthis is the secret to keeping the muffins from getting soggy.
Mix: In a large bowl, combine the cooked sausage, baking mix, and shredded cheese. Stir in the milk gradually until a thick, tacky dough forms.
Scoop: Grease a muffin tin (or use liners). Spoon the mixture into the cups, filling them nearly to the top.
Bake: Bake at 350°F (175°C) for 20 to 25 minutes, or until the tops are golden brown and the cheese is bubbly.
Cool: Let them rest in the tin for 5 minutes before removing. This helps them set so they don’t crumble.
š” Pro Tips for Grandma-Level Quality
Shred Your Own Cheese: Pre-shredded cheese is coated in potato starch to prevent clumping, which can make these a bit dry. Shredding a block of sharp cheddar makes them much meltier.
The “Dip” Factor: These are incredible served with a side of warm maple syrup for a sweet/salty vibe, or a bowl of country gravy.
Make Ahead: These freeze beautifully! Just pop them in the microwave for 30ā45 seconds for a quick weekday breakfast.
½ apple or a few berries (optional, natural sweetness)
Pinch of salt
Ā Instructions (5ā7 minutes)
Ā Whisk eggs, cottage cheese, cinnamon, and salt. Ā Cook in a non-stick pan over medium heat, stirring gently (like soft scrambled eggs). Ā Remove from heat and top with chia seeds and flaxseeds. Ā Add a few berries or apple slices if you want natural sweetness.
Crispy, cheesy, savory little bites layered with ham, cheese, and buttery glaze ā baked to golden perfection. Perfect for parties, snacks, or high-protein meal prep. Ā Prep & Cook Time
When you are living aĀ keto lifestyle, finding the perfect appetizer for a social gathering can be a challenge. Enter theĀ Keto Cheese Ball. This recipe is the gold standard for high-fat, low-carb snacking, combining rich cream cheese with sharp cheddar and savory seasonings to create a bold flavor profile that even your non-keto friends will devour.
ThisĀ low-carb recipeĀ is designed to satisfy those savory cravings without the hidden sugars or fillers found in store-bought spreads. Because it is packed with healthy fats and quality protein, it helps keep you satiated and energized, making it a staple for anyone focused onĀ clean eatingĀ and weight management.
Whether you are hosting a game night or looking for aĀ simple keto meal prepĀ snack to keep in the fridge, this cheese ball is a total lifesaver. It is quick to assemble, incredibly budget-friendly, and offers that classic āeverything bagelā vibe without the carb-heavy bread.
Look at the Recipe
Creamy & Crunchy:Ā A silky, rich interior coated in a layer of crunchy pecans and fresh herbs.
Umami Explosion:Ā Sharp cheddar, garlic, and a hint of Worcestershire create a deeply savory bite.
Fat-Fueled Fuel:Ā Specifically formulated to meet your macros with a high fat-to-carb ratio.
1 tsp Worcestershire sauce (check for sugar-free brands)
Salt and black pepper to taste
The Coating
½ cup Pecans (finely chopped)
¼ cup Fresh parsley (minced)
2 slices Bacon (cooked crispy and crumbled)
How to Make Our Keto Cheese Ball
Combine the Base:Ā In a large mixing bowl,Ā beatĀ the softened cream cheese until smooth.
Add Flavor:Ā FoldĀ in the shredded cheddar cheese, garlic powder, onion powder, paprika, and Worcestershire sauce. Use a spatula to ensure the spices are evenly distributed throughout theĀ keto cheese mixture.
Shape and Chill:Ā Form the mixture into a large ball.Ā WrapĀ tightly in plastic wrap and refrigerate for at least 1 hour (or overnight) to allow the flavors to marry and the shape to firm up.
Prepare the Coating:Ā On a shallow plate or cutting board,Ā tossĀ together the chopped pecans, fresh parsley, and crumbled bacon.
Roll and Serve:Ā Remove the cheese ball from the plastic wrap.Ā RollĀ the ball in the nut and herb mixture, pressing gently so the coating adheres to the entire surface.
Serve:Ā Let it sit at room temperature for 15 minutes before serving for the best spreading consistency.
Storage & Serving Suggestions
Storing:Ā Store in an airtight container in the refrigerator for up to 5 days.
Reheating:Ā Do not heat! This is a cold appetizer, though it should be served slightly softened.
Freezing:Ā You can freeze the cheese ball (without the nut coating) for up to 2 months. Thaw in the fridge overnight before rolling in fresh toppings.
Serving Pairings:Ā Serve with cucumber slices, celery sticks, bell pepper āchips,ā or your favoriteĀ keto-friendly crackers.
Tips & FAQs
What are the best keto crackers to use?Ā For aĀ low-carb snack, look for flax seed crackers, almond flour crisps, or even homemade parmesan whisps.
Can I make this dairy-free?Ā While you can use almond-based cream cheese and vegan shreds, the macros will change significantly. Ensure your dairy-free alternatives are not high in potato starch.
How do I keep the cheese ball from getting too soft?Ā Always start with cold, freshly shredded cheese and ensure you chill the ball for at least an hour before serving. This maintains the structural integrity of yourĀ keto appetizer.
Can I use different nuts?Ā Absolutely! Walnuts or slivered almonds are excellentĀ low-carbĀ alternatives to pecans.
All the flavor of classic cinnamon sugar donuts, baked into fluffy, guilt-free muffins!
Servings:Ā 12 muffins
Total Time:Ā 25 minutes
Difficulty:Ā Easy
Calories per Muffin:Ā ~120 kcal
Macros (Per Muffin):Ā 7g Protein / 4g Net Carbs / 8g Fat / 2g Fiber
Introduction
Craving a warm, cozy treat without blowing your healthy goals? TheseĀ Cinnamon Sugar Donut MuffinsĀ taste just like a classic bakery donut ā soft, tender, and coated in that irresistible cinnamon āsugarā blend ā but with a clean, macro-friendly twist.
Made with almond flour, Greek yogurt, and a touch of vanilla, these muffins bring comfort to your morning coffee, post-workout snack, or sweet afternoon pick-me-up. Whether youāre followingĀ Keto,Ā SlimmingĀ ,Ā Weight Watchers, or aĀ Mediterranean-inspired, high-proteinĀ lifestyle, these fit perfectly into your plan.
They deliver all the joy of a donut ā minus the guilt, sugar crash, and carb overload.
Look at the Recipe
Texture & Visual:Ā Fluffy, golden, cake-like muffins with a melt-in-your-mouth coating.
Flavor Highlight:Ā Warm cinnamon spice and sweet vanilla comfort.
Diet Benefit:Ā Naturally gluten-free, low in carbs, high in protein, and made with wholesome fats.
Ingredients Needed
For the Muffins
2 cups almond flour
2 tbsp coconut flour
1 ½ tsp baking powder
½ tsp baking soda
½ tsp salt
2 large eggs
ā cup Greek yogurt (or sour cream)
¼ cup unsweetened almond milk
¼ cup granulated erythritol (or sugar substitute of choice)
1 tsp vanilla extract
1 tbsp melted butter or olive oil (Mediterranean version)
For the Cinnamon āSugarā Coating
2 tbsp melted butter (or olive oil for Mediterranean twist)
¼ cup erythritol (or stevia blend)
1 ½ tsp ground cinnamon
How to Make Our Cinnamon Sugar Donut Muffins
Preheat oven to 350°F (175°C). Line a 12-cup muffin tin with paper liners or grease lightly.
Mix dry ingredients:Ā In a large bowl, whisk together almond flour, coconut flour, baking powder, baking soda, salt, and sweetener.
Add wet ingredients:Ā Stir in eggs, Greek yogurt, almond milk, vanilla, and melted butter. Mix until smooth and thick.
Fill muffin cups: Divide batter evenly among muffin cups, filling each about ¾ full.
Bake:Ā Bake for 15ā18 minutes, or until a toothpick inserted comes out clean and tops are golden.
Cool slightly:Ā Let muffins rest for 5 minutes before removing.
Coat:Ā Brush each muffin with melted butter and roll in the cinnamon āsugarā mixture.
Storage & Serving Suggestions
Store:Ā Keep in an airtight container at room temperature for 2 days or refrigerate up to 5 days.
Freeze:Ā Freeze muffins (uncoated) for up to 1 month. Reheat and coat fresh for the best texture.
Serve With:
A hot cup of coffee or matcha for a cozy breakfast.
Fresh fruit or Greek yogurt for a balanced snack.
Drizzle with almond butter for extra protein and richness.
Tips & FAQs
1. Can I make this Slimming -friendly?
Yes! Use fat-free Greek yogurt and light butter spray. Each muffin is roughlyĀ 1ā2 syns, depending on your ingredients.
2. How many Weight Watchers points are these?
AroundĀ 2ā3 WW points per muffin, using fat-free yogurt and zero-calorie sweetener.
3. Can I make them dairy-free?
Absolutely ā replace Greek yogurt with coconut yogurt and butter with olive oil or coconut oil.
4. Can I use oat flour or whole-wheat flour instead?
Yes, for Mediterranean-style ā though it increases carbs slightly, it adds fiber and a nutty flavor.
5. How do I make them extra fluffy?
Donāt overmix! A quick fold of wet into dry ingredients gives the best light texture.
Macros (Per Piece):Ā 2g Protein / 3g Net Carbs / 8g Fat / 1g Fiber
Introduction
Nothing says comfort like the sweet crunch ofĀ Homemade Turtle CandyĀ ā those irresistible bites of buttery caramel, toasted pecans, and rich chocolate. This version keeps all the decadence of the original but trims out the sugar and heaviness, making itĀ guilt-free yet completely satisfying.
OurĀ healthier Turtle Candy recipeĀ uses sugar-free chocolate, creamy low-carb caramel, and heart-healthy pecans for a treat that fits intoĀ Keto, Slimming , Weight Watchers, High-Protein, and MediterraneanĀ lifestyles. Itās a perfect balance of sweetness, crunch, and smooth chocolate indulgence ā and best of all, itās quick, easy, and requires no special equipment.
Keep a batch in the fridge for when you need a little something sweet ā because healthy living should still taste like joy.
Look at the Recipe
Texture & Visual:Ā Gooey caramel center with crisp pecans and glossy chocolate on top.
Flavor Highlight:Ā Buttery caramel sweetness and roasted nut depth with rich dark chocolate.
Diet Benefit:Ā Low in carbs, free of refined sugar, and made with healthy fats and natural ingredients.
Ingredients Needed
For the Base
1 cup whole pecan halves (toasted lightly for best flavor)
For the Low-Carb Caramel
¼ cup unsalted butter
¼ cup heavy cream (or coconut cream for dairy-free Mediterranean style)
¼ cup allulose or monk fruit sweetener
½ tsp vanilla extract
Pinch of sea salt
For the Chocolate Topping
½ cup sugar-free dark chocolate chips (or 85% dark chocolate)
1 tsp coconut oil or olive oil (for smooth melting)
How to Make Our Homemade Turtle Candy with Pecans and Caramel
Toast the pecans:Ā Preheat your oven to 350°F (175°C). Arrange pecans on a baking sheet and toast for 5ā6 minutes until fragrant. Let cool.
Make the caramel:Ā In a small saucepan over medium heat, melt butter and sweetener. Stir constantly until golden and bubbly (about 4ā5 minutes). Slowly add cream, whisking until smooth. Add vanilla and salt. Remove from heat and let cool slightly.
Assemble the turtles:Ā On a parchment-lined tray, arrange 3ā4 pecans in small clusters (like turtle ālegsā). Spoon a small dollop of caramel over each cluster.
Melt the chocolate:Ā Combine chocolate and coconut oil in a bowl. Microwave or melt gently over a double boiler until smooth.
Top and set:Ā Spoon melted chocolate over each caramel-pecan cluster, covering the caramel completely.
Chill:Ā Place the tray in the fridge for 20ā30 minutes to firm up. Once set, peel off and store in an airtight container.
Storage & Serving Suggestions
Store:Ā Keep refrigerated for up to 2 weeks or freeze up to 2 months.
Serve:Ā Enjoy straight from the fridge for a firm snap or let them rest at room temperature for 5 minutes for a softer bite.
Gift Idea:Ā Wrap a few turtles in parchment and tie with twine ā perfect for healthy homemade holiday treats.
Tips & FAQs
1. Can I make this Slimming -friendly?
Yes! Use light butter and count the nuts and cream according to your syn values ā usually 2ā3 syns per turtle.
2. How many Weight Watchers points are these?
Each piece is aroundĀ 2ā3 WW points, depending on your chocolate and butter choices.
3. Can I make dairy-free or vegan turtles?
Absolutely ā substitute coconut cream for heavy cream and use vegan butter or coconut oil.
4. How can I make them Mediterranean-style?
Use dark chocolate (85%+ cocoa), olive oil instead of butter, and a sprinkle of sea salt flakes on top.
5. Can I use store-bought sugar-free caramel?
Yes, but homemade gives better flavor control and avoids unnecessary additives.
Warm, buttery, and packed with cinnamon-sugar and crunchy walnuts ā these homemade rolls are bakery-style soft and perfect for breakfast or dessert.
Ā Dough Ingredients:
1 cup (240ml) warm milk (not hot)
2 ¼ tsp (7g) active dry yeast
¼ cup (50g) sugar
1 large egg
¼ cup (60g) melted butter
3 cups (375g) all-purpose flour
1 tsp (4g) salt
Ā Filling:
1/3 cup (80g) softened butter
1/2 cup (80g) sugar
Cinnamon to taste (about 1ā2 tbsp)
¾ cup chopped walnuts
Ā Cream Cheese Frosting:
4 oz (115g) cream cheese, softened
2 tbsp butter, softened
1 cup (120g) powdered sugar
½ tsp vanilla extract
1ā2 tbsp milk (to adjust consistency)
Ā Instructions
Ā Activate the Yeast
In a bowl, combine warm milk and yeast. Let sit 5ā10 minutes until foamy. Stir in sugar, egg, and melted butter.
Ā Make the Dough
Add flour and salt. Mix until a soft dough forms. Knead for 8ā10 minutes (by hand or mixer) until smooth and elastic.
Place in a greased bowl, cover, and let rise for 1ā1½ hours until doubled in size.
Ā Prepare the Filling
Mix sugar and cinnamon together. Set aside.
Roll dough into a large rectangle (about 9Ć14 inches).
Spread softened butter evenly over the surface.
Sprinkle cinnamon-sugar mixture evenly.
Top with chopped walnuts.
Ā Roll & Slice
Roll tightly from the long side into a log.
Slice into 9ā12 rolls.
Place in a greased baking dish.
Cover and let rise again for 30ā45 minutes.
Ā Bake
Preheat oven to 180°C (350°F).
Bake 20ā25 minutes, until golden brown.
Ā Make Frosting
Beat cream cheese and butter until smooth.
Add powdered sugar and vanilla.
Add milk gradually until creamy and spreadable.
Spread over warm rolls.
Ā Tip:Ā For extra soft rolls, pour 2ā3 tablespoons warm cream over the rolls right before baking.
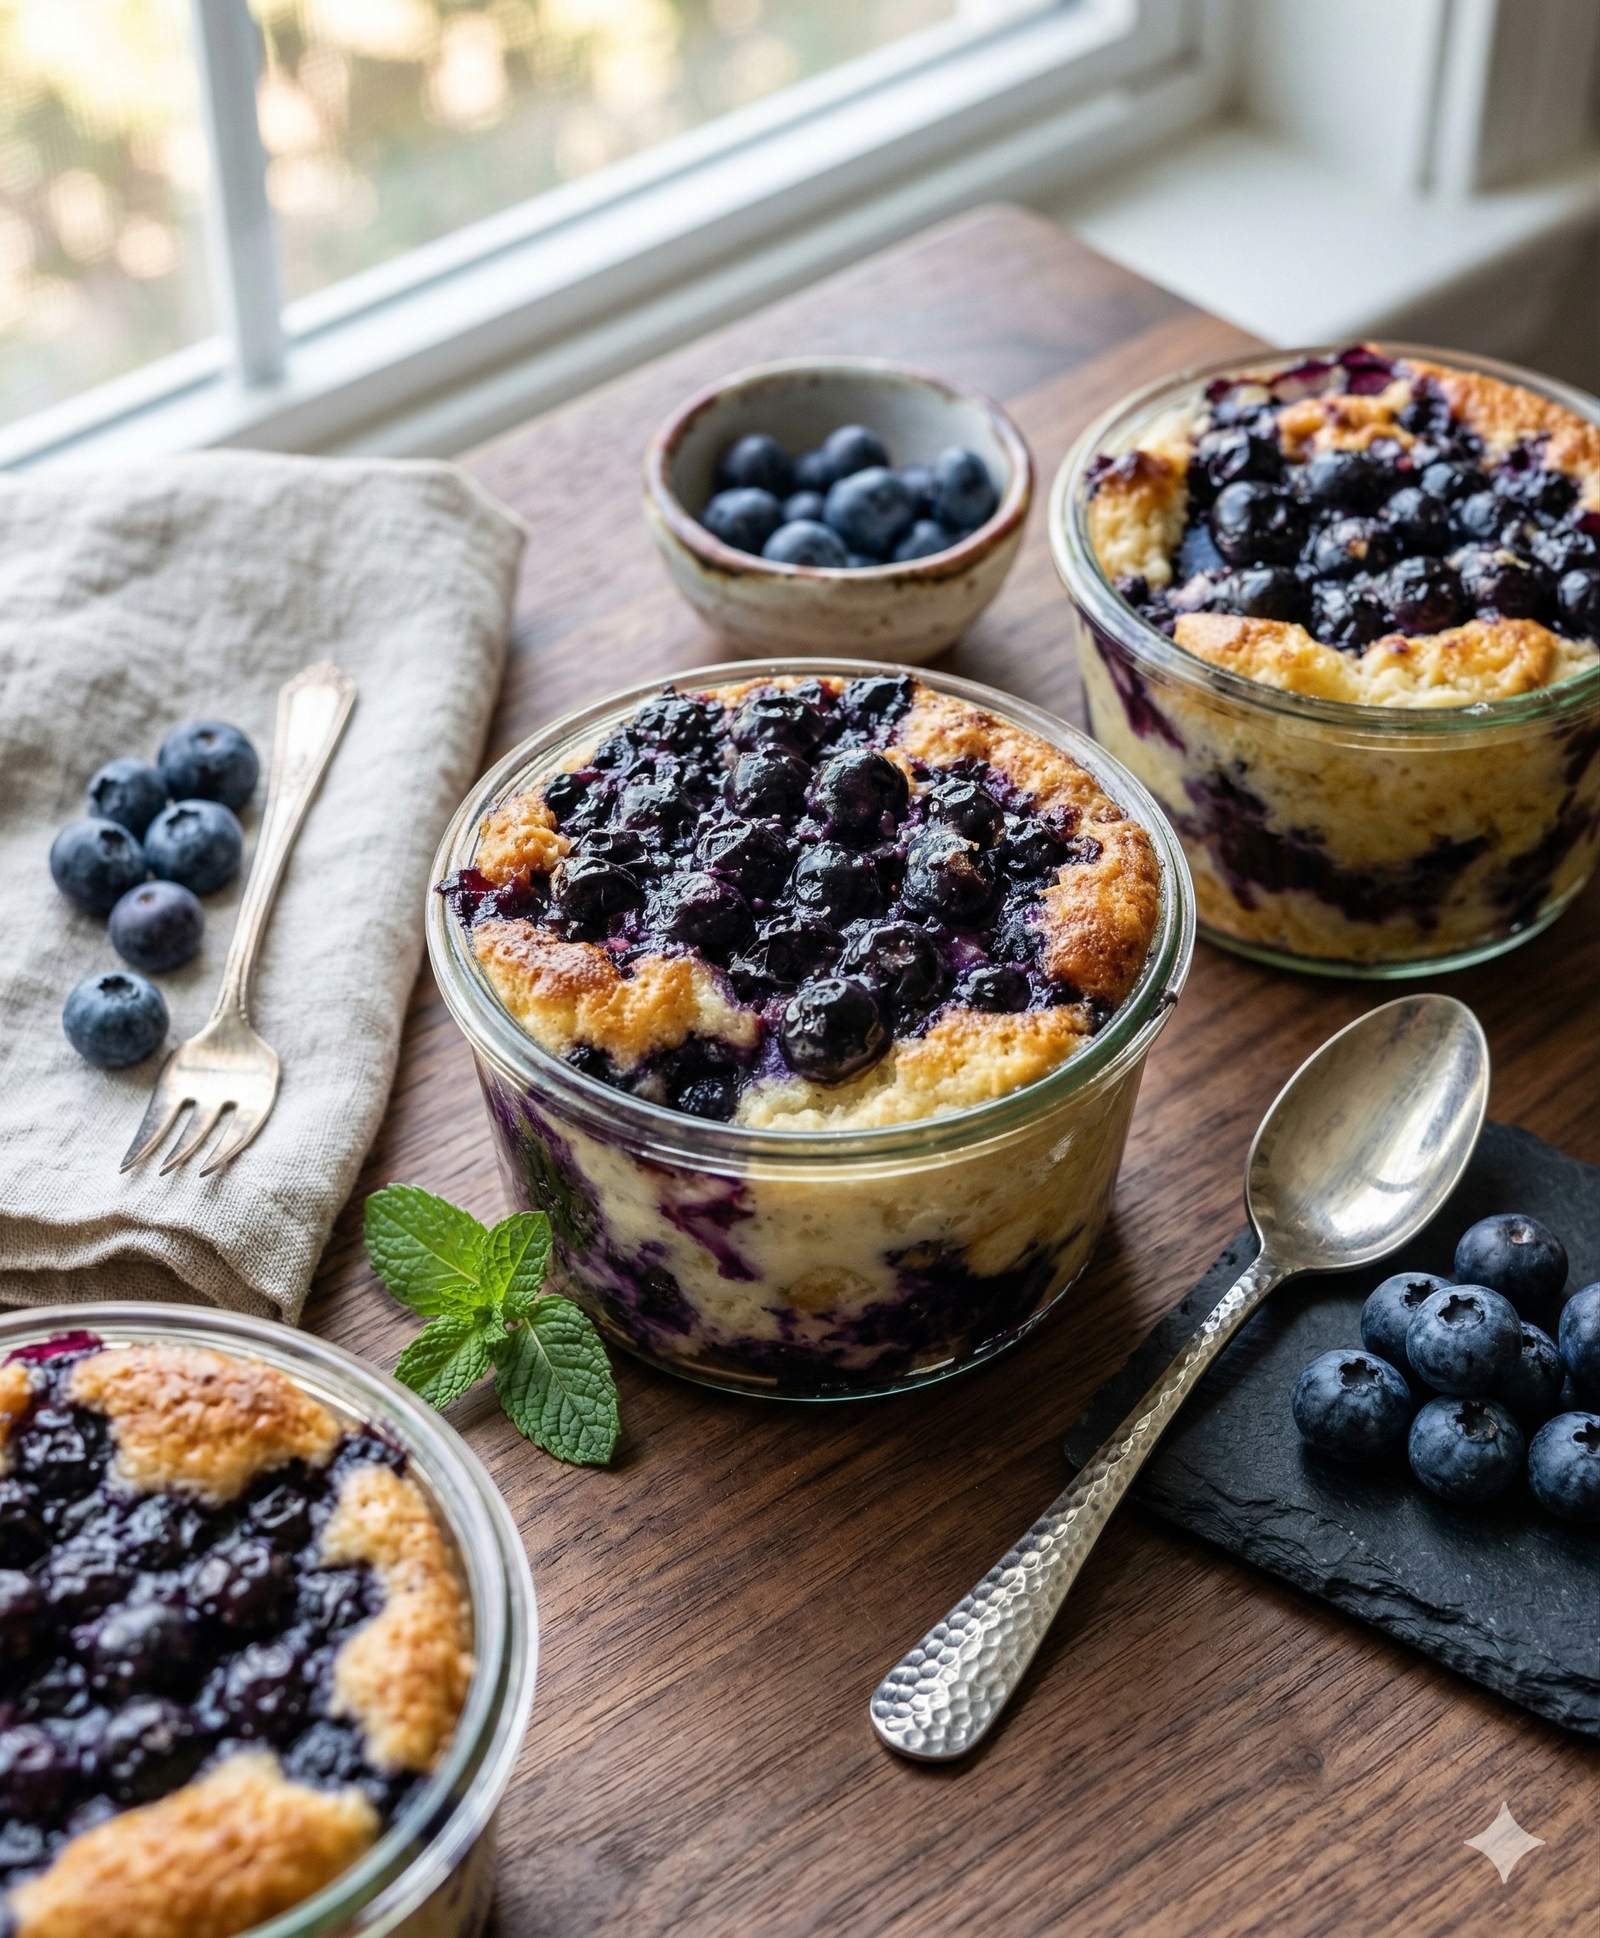
High-Protein, WW-Friendly, and Low Sugar ā Creamy baked yogurt with a juicy blueberry base and a lightly golden top
Servings & Timing
Yield:Ā 1 large serving or 2 smaller cups
Prep Time:Ā 10 minutes
Cook Time:Ā 22ā26 minutes
Total Time:Ā 35 minutes
Dietary Badges:Ā High-Protein, WW-Friendly, Low Sugar, Gluten-Free (if using GF protein powder/granola)
Ingredients
Blueberry Layer
1 cup fresh blueberries
1ā2 tbsp sugar-free syrup or monk fruit sweetener, to taste
1 tbsp water
Optional: zest or squeeze of lemon
Protein Yogurt Layer
¾ cup nonfat plain Greek yogurt
¾ cup fat-free cottage cheese, blended until smooth
½ scoop vanilla or unflavored protein powder
1ā2 tbsp sugar-free syrup or monk fruit sweetener
½ tsp vanilla extract
1 tbsp cornstarch
Light Crunch Topping (Optional)
2 tbsp high-protein granola or crushed high-protein cereal
Pinch of cinnamon
Serving Suggestions
Enjoy warm or chilled. Perfect on its own or topped with extra fresh blueberries.
Notes:
Use fully cooled blueberry base to prevent curdling in yogurt layer.
Can be made in ramekins, oven-safe jars, or a small baking dish.
Brief Introduction
If you love a protein-packed breakfast or a healthy dessert, theseĀ Baked Blueberry Greek Yogurt CupsĀ are for you. Creamy and rich like a cheesecake but lighter, they combine juicy blueberries with a smooth, high-protein yogurt layer. I created these for a busy morning when I wanted a satisfying, low-sugar breakfast I could make ahead. The lightly golden top and optional crunchy topping give it a fun texture that makes this treat feel indulgent without the guilt.
Step-by-Step Cooking Guide
1. Make the Blueberry Base
Combine blueberries, sweetener, and water in a small saucepan.
Cook over low heat for 3ā4 minutes until berries soften and release their juices.
Remove from heat and allow to cool slightly; the mixture will thicken as it rests.
Tip:Ā For extra brightness, add a teaspoon of lemon juice or a pinch of zest.
2. Prepare the Protein Yogurt
Blend the cottage cheese until smooth to remove any lumps.
In a bowl, whisk together the blended cottage cheese, Greek yogurt, protein powder, sweetener, vanilla, and cornstarch.
Mix until thick, smooth, and pourable, with a cheesecake-batter consistency.
Tip:Ā Ensure the blueberry mixture has cooled so it doesnāt affect the yogurt layerās texture.
3. Assemble the Cups
Lightly grease oven-safe glass jars or ramekins.
Spoon the blueberry mixture evenly into the bottom of each dish.
Pour the protein yogurt mixture on top of the berries.
Sprinkle lightly with the optional crunchy topping.
Tip:Ā Use a spatula to smooth the yogurt layer for a clean, professional look.
4. Bake
Bake at 350°F (175°C) for 22ā26 minutes.
Centers should be set but slightly jiggly; tops should be lightly golden and puffed.
Let cool for 5ā10 minutes before serving.
Tip:Ā For a chilled version, refrigerate for 30ā60 minutes after baking.
Ingredient Details & Substitutions
Cottage Cheese:Ā Blending removes texture for a smooth custard. Use low-fat if desired.
Protein Powder:Ā Any whey or plant-based protein works. Adjust sweetener if using flavored powder.
Cornstarch:Ā Helps the yogurt layer set without baking into a solid. Arrowroot powder works as a substitute.
Sweetener:Ā Sugar-free syrup or monk fruit can be swapped for stevia or erythritol blends.
Crunchy Topping:Ā Optional, but adds texture. Nuts, seeds, or granola work.
Recipe Variations & Serving Suggestions
Flavor Twists: Add ½ tsp cinnamon or nutmeg to the yogurt layer.
Berry Swap:Ā Use raspberries, blackberries, or mixed berries instead of blueberries.
Vegan Option:Ā Replace Greek yogurt and cottage cheese with a thick, unsweetened plant-based yogurt and silken tofu; use plant-based protein powder.
Serving Ideas:Ā Great with fresh fruit, a drizzle of sugar-free syrup, or a sprinkle of chia seeds.
Storage & Make-Ahead Tips
Refrigeration:Ā Store in an airtight container for up to 3 days.
Freezing:Ā Not recommended, as texture may change.
Make-Ahead:Ā Blueberry base can be made 1 day ahead; assemble and bake the next morning.
Nutrition Facts (Approximate per large serving)
Calories:Ā 260ā280
Protein:Ā 47ā50 g
Fat:Ā 2ā3 g
Net Carbs:Ā ~15 g
WW SmartPoints:Ā 2ā3 points
Dietary Highlights:Ā High-protein, low-sugar, WW-friendly, gluten-free (if protein powder is GF).
Frequently Asked Questions (FAQs)
Q: Can I use frozen blueberries?
A: Yes, thaw slightly and drain excess liquid before cooking to avoid a watery base.
Q: Can I skip the cornstarch?
A: You can, but the yogurt layer will be softer and less custard-like.
Q: Can this be doubled?
A: Yes, double all ingredients and bake in a larger dish; bake time may need 3ā5 minutes longer.
Q: Can I make these dairy-free?
A: Use plant-based yogurt and silken tofu; adjust protein powder if needed.
Q: Can I add extra sweetener?
A: Taste before assembling; adjust to your preference.
Optional Personal Notes
I developed theseĀ Baked Blueberry Greek Yogurt CupsĀ as a healthier alternative to cheesecake cups. After a few trials, I found that blending the cottage cheese gives a creamy texture without curdling and keeps the protein content high. The optional topping adds a touch of fun without ruining the low-sugar profile. Itās my go-to make-ahead breakfast for busy mornings or a post-workout treat.
Call-to-Action:Ā Try this recipe, leave a comment with your favorite berry swap, and share your version with friends. These cups are flexible, delicious, and perfect for anyone chasing high-protein, low-sugar meals.
This recipe serves 2 as a main dish or 4 as a side.
Ingredients
The Base:
2 large avocados, diced into bite-sized chunks
4 hard-boiled eggs, peeled and halved or quartered
1 cup cherry tomatoes, halved
1/4 small red onion, thinly sliced
2 tbsp fresh cilantro or parsley, finely chopped
The Zesty Dressing:
1/2 fresh lemon (juiced)
2 tbsp extra virgin olive oil
1/2 tsp sea salt
1/4 tsp cracked black pepper
Optional: A pinch of red chili flakes for a tiny kick
Instructions
Prep the Eggs: Place your eggs in a pot of cold water. Bring to a boil, then cover and remove from heat. Let them sit for 9ā10 minutes for a perfect firm yolk. Cool them in an ice bath, peel, and slice.
Assemble the Bowl: In a large shallow bowl, gently toss the diced avocado, halved cherry tomatoes, and sliced red onions.
Add the Protein: Carefully nestle the egg slices into the salad. (Adding them last keeps the yolks from smearing and keeps the salad looking beautiful).
Whisk & Drizzle: In a small jar or bowl, whisk together the lemon juice, olive oil, salt, and pepper. Drizzle the dressing evenly over the salad.
Garnish: Sprinkle with the fresh cilantro (or parsley) and an extra crack of black pepper if you like that bold look from the video.
Pro Tips for the Best Salad
Avocado Choice: Use avocados that are slightly firm to the touch so they hold their shape when tossed.
Serve Immediately: Because of the avocado and the fresh lemon juice, this salad is best enjoyed right after it’s made.
Add-ins: Feel free to add some cucumber slices for extra crunch or a sprinkle of feta cheese for a salty finish.
This sounds like the ultimate “comfort food hack.” There is something incredibly satisfying about turning leftoversāwhich can sometimes be a bit sad and lumpyāinto a crispy, golden appetizer that looks intentional.
Iāve reorganized your recipe into a cleaner, more “scannable” format so you can easily reference it while your hands are covered in potato mixture.
š§ Cheesy Mashed Potato Muffins
Crispy on the outside, fluffy on the inside, and the perfect use for leftovers.
Prep: Preheat your oven to 200°C (400°F). Generously grease a mini muffin pan with cooking spray or butter.
Mix: In a large bowl, combine the chilled potatoes, egg, cheddar, chives, flour, and spices. Stir until the mixture is uniform.
Coat: Roll the mixture into 1-inch balls. Roll each ball in the grated Parmesan until fully coated.
Shape: Place balls into the muffin tin cavities. Press down slightly to ensure they take the shape of the pan.
Bake: Bake for 15ā20 minutes. Youāre looking for a deep golden-brown crust and a visible crunch.
Cool & Serve: Let them sit for 5 minutes (this helps them set so they don’t fall apart). Serve warm!
š” Pro-Tips for Success
The “Chilled” Factor: Using cold mashed potatoes is key. If the potatoes are warm, the starch hasn’t set, and your muffins might turn into a “potato puddle” rather than a puff.
The Mix-In Matrix: * Loaded: Add crumbled bacon and a dollop of sour cream on top after baking.
Spicy: Fold in canned diced jalapeƱos and use Pepper Jack cheese.
Veggie: Swap 50% of the potato for mashed cauliflower for a lighter bite.
Storage Hack: These are perfect for meal prep. Freeze them solid on a baking sheet first, then toss them into a freezer bag. This prevents them from sticking together into one giant potato brick!
This Savory Puff Pastry Meat & Cheese Roll is the ultimate comfort foodācombining the buttery, flaky crunch of golden pastry with a rich, seasoned meat filling and a molten cheese core. Whether served as a centerpiece for a family brunch or sliced into appetizers for a party, this dish is guaranteed to disappear in minutes.
Ingredients
1 sheet Puff Pastry (thawed)
300g Minced Meat (Beef, Chicken, or Pork)
100g Grated Cheese (Mozzarella or Cheddar)
2 Hard-boiled Eggs (finely chopped)
1 Medium Onion (finely chopped)
1 bunch Fresh Parsley (chopped)
Seasoning: 1 tsp dried basil, salt, and black pepper to taste.
Assemble the Roll: Unroll the puff pastry onto a piece of parchment paper. Spread the meat mixture evenly across the dough, leaving a 2cm border at the edges. Generously sprinkle the grated cheese over the meat.
Roll and Seal: Starting from the long edge, carefully roll the pastry into a tight log. Pinch the ends to seal in the juices.
The Golden Finish: Place the roll seam-side down on a baking tray. Brush the top thoroughly with the beaten egg wash. Use a sharp knife to score light diagonal vents across the top.
Bake: Slide into a preheated oven at 200°C (400°F) for 20ā25 minutes until the pastry is puffed and deep golden brown.
Allow it to rest for 5 minutes before slicing to ensure the cheese stays perfectly set inside each decadent bite.
A crusty, rustic loaf that relies on time and fermentation rather than elbow grease.
Prep time:Ā 10 mins
Rise time:Ā 3 hrs 10 mins
Cook time:Ā 35 mins
Yield:Ā 1 Loaf (approx. 15 servings)
Ingredients
1 ½ tsp active dry yeast
4 ½ cups all-purpose flour (divided)
½ cup warm water (approx. 100°F / 38°C)
1 (12 oz)Ā can or bottle of beer (room temperature works best)
1 ½ tsp fine salt
Extra flourĀ for dusting
1 tbspĀ cornmeal (for the baking sheet)
Instructions
Activate the Yeast: In a large bowl, stir together the yeast, ½ cup of the flour, and the warm water. Cover the bowl and let it sit in a warm spot for 30 minutes until slightly bubbly.
Mix the Dough:Ā Stir in the beer, salt, and the remainingĀ 4 cupsĀ of flour. Mix until the flour is fully incorporated. The dough will be thick, sticky, and should pull away from the sides of the bowl.
First Rise:Ā Cover the bowl again and let the dough rise in a warm spot forĀ 2 hours, or until it has doubled in size.
Shape:Ā Scrape the dough onto a well-floured surface using a spatula. Dust the top of the dough generously with flour and gently shape it into an oval or round loaf.
Second Rise:Ā Sprinkle a baking sheet with cornmeal. Transfer the loaf to the sheet, sprinkle a little more flour on top, and cover loosely with a clean kitchen towel. Let it rise for anotherĀ 30ā40 minutes.
Prepare the Oven:Ā Preheat your oven toĀ 425°F (220°C). To get that ābakery crust,ā place a small loaf pan filled with warm water on the bottom rack to create steam.
Score and Bake:Ā Use a sharp knife or razor to slash a long slit down the center of the loaf. Place the baking sheet on the rack above the water pan. Bake forĀ 35 minutesĀ or until the crust is deep golden brown.
Cool:Ā Transfer to a wire rack.Ā Resist the urge to cut it immediately!Ā Letting it cool completely ensures the middle finishes setting and doesnāt become gummy.
A Quick Tip for Success
The type of beer you use will change the flavor profile significantly:
Lagers/Pilsners:Ā Result in a mild, classic bread flavor.
Stouts/Porters:Ā Create a darker, maltier, and slightly sweeter loaf.
IPAs:Ā Can sometimes leave a bitter aftertaste due to the hops, so stick to maltier brews if youāre unsure!