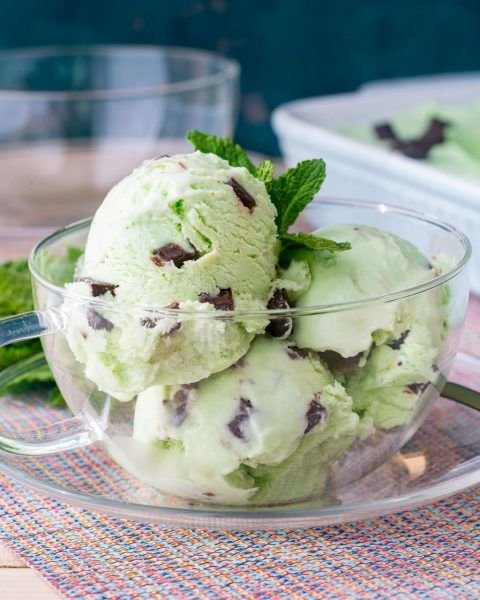
No-Churn Mint Chocolate Chip Ice Cream

Ingredients

  • 2 cups Heavy whipping cream (cold)

  • 1 can (14 oz) Sweetened condensed milk

  • 1 tsp Peppermint extract (start with less if you prefer a subtle mint)

  • 3–4 drops Green food coloring (optional, for that classic look)

  • 1 cup Semi-sweet chocolate chips or chopped dark chocolate

  • Fresh mint leaves (for garnish)


Instructions

  1. Prep the Base: In a large chilled bowl, pour in the cold heavy whipping cream. Use a hand mixer or stand mixer to beat the cream on medium-high speed until stiff peaks form. Be careful not to over-beat it into butter!

  2. Flavor and Color: In a separate medium bowl, stir together the sweetened condensed milk, peppermint extract, and green food coloring until the color is uniform.

  3. The Fold: Gently fold about a cup of the whipped cream into the condensed milk mixture to lighten it up. Then, pour that mixture back into the main bowl of whipped cream. Use a spatula to fold gently in a circular motion. This keeps the air in the mixture, ensuring the ice cream is fluffy rather than a solid block of ice.

  4. Add Texture: Fold in your chocolate chips or chunks.

  5. Freeze: Pour the mixture into a 9×5-inch loaf pan or an airtight container. Smooth the top with a spatula.

  6. Set: Cover with plastic wrap (press it against the surface to prevent ice crystals) and freeze for at least 6 hours, though overnight is best.

Serving Tip: Let the container sit on the counter for 5 minutes before scooping to get that perfect, silky texture seen in your photo. Garnish with a sprig of fresh mint and enjoy!

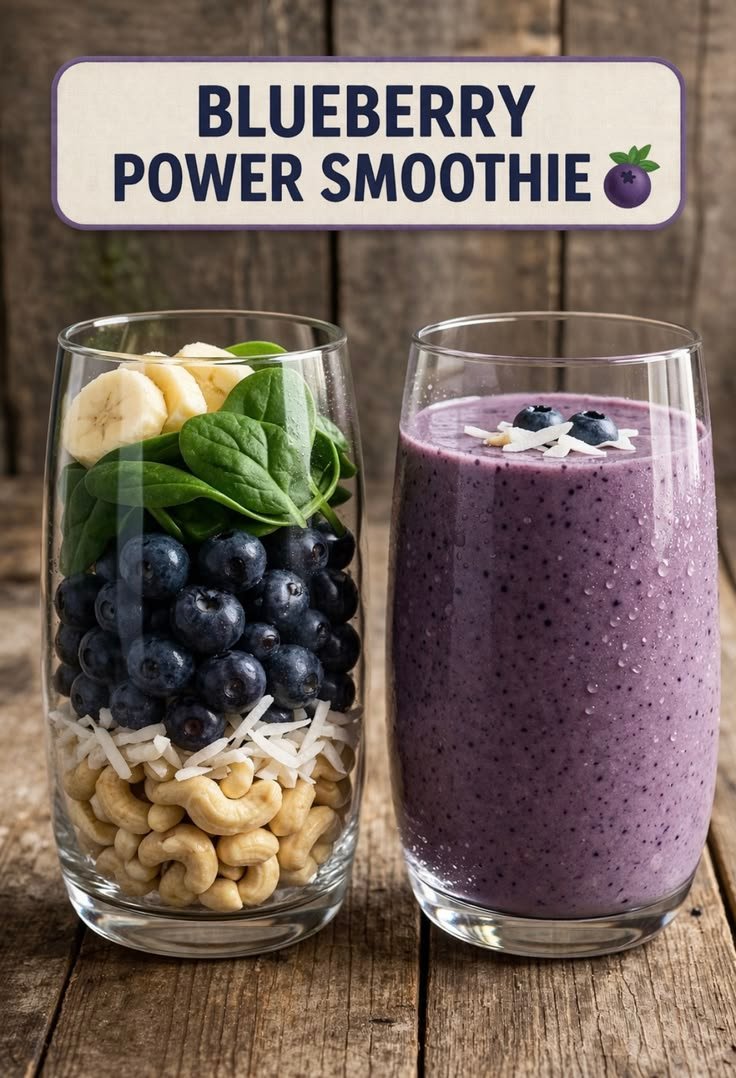
Blueberry Power Smoothie.

Blueberry Power Smoothie.

ingredients

To recreate this smoothie, you will need the following fresh components:

  • 1 cup Fresh or frozen blueberries (antioxidant-rich base)

  • 1 Large ripe banana (sliced for creaminess and potassium)

  • 1/2 cup Raw cashews (provides healthy fats and a buttery texture)

  • 1 packed cup Fresh baby spinach (for iron and fiber)

  • 2 tbsp Shredded coconut (unsweetened)

  • 1 cup Liquid base (unsweetened almond milk, coconut water, or plain water)

  • Optional: A dash of cinnamon or a teaspoon of honey if you prefer extra sweetness.


Preparation Steps

  1. Soak the Cashews: For the smoothest consistency, soak your raw cashews in warm water for about 15 minutes, then drain. This helps them blend into a silkier cream.

  2. Layer the Blender: Start by pouring your liquid base into the blender first. This prevents the solid ingredients from getting stuck at the bottom.

  3. Add Solids: Add the spinach, banana slices, blueberries, and soaked cashews. Sprinkle in half of the shredded coconut.

  4. Blend: Secure the lid and blend on high speed for 45–60 seconds. You want to ensure the spinach and cashews are completely pulverized until the mixture is a deep, uniform purple.

  5. Serve: Pour into a tall glass. Top with the remaining shredded coconut and a few extra blueberries for a beautiful finish.


Why This Works

This smoothie is a “power” blend because it avoids a simple sugar crash. The fats from the cashews and the fiber from the spinach slow down the absorption of the natural fruit sugars, keeping you full and focused throughout your morning. Enjoy your refreshing, homemade boost!

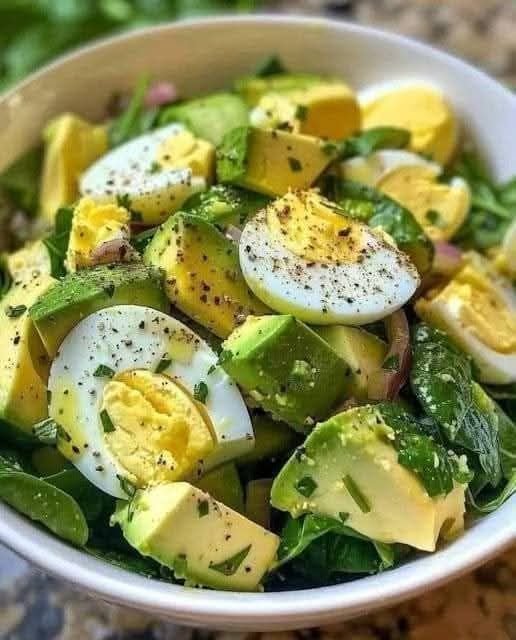
AVOCADO AND SPINACH EGG SALAD

AVOCADO AND SPINACH EGG SALAD: A NUTRITIOUS AND CREAMY DELIGHT
Ingredients:
2 ripe avocados, diced
4 hard-boiled eggs, chopped
4 cups fresh spinach, chopped
Only polite members will say thank you for the recipe Must express something to keep getting my recipes…Thank you
FULL RECIPE
Avocado and Spinach Egg Salad:
Ingredients:
2 ripe avocados, diced
4 hard-boiled eggs, chopped
4 cups fresh spinach, chopped
Instructions:
Prepare the Ingredients:
Start by boiling the eggs. Once they’re hard-boiled, chop them into bite-sized pieces.
Dice the ripe avocados and chop the spinach into smaller pieces for easy mixing.
Combine the Ingredients:
In a large mixing bowl, combine the diced avocados, chopped hard-boiled eggs, and chopped spinach.
Mix and Serve:
Gently toss the ingredients together. For added flavor, you can season with salt, pepper, and a squeeze of lemon juice if desired.
Serve immediately for a creamy and nutritious salad!
This salad is packed with healthy fats and protein, making it a great choice for skin and hair health, just as you’ve experienced! Enjoy!

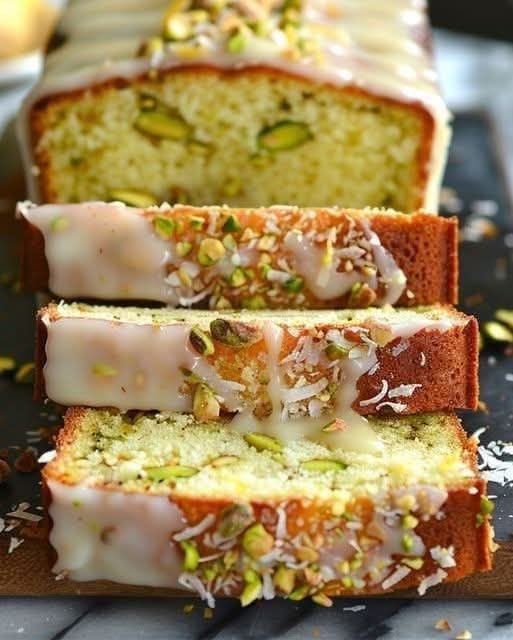
Heavenly Lemon Coconut Pistachio Cake!

Heavenly Lemon Coconut Pistachio Cake!
Ingredients:
1 ½ cups all-purpose flour
1 tsp baking powder
½ tsp baking soda
¼ tsp salt
½ cup unsalted butter, room temperature
1 cup granulated sugar
2 large eggs
½ cup sour cream
¼ cup lemon juice
1 tbsp lemon zest
1 tsp vanilla extract
½ cup shredded coconut
½ cup chopped pistachios
Directions:
Preheat your oven to 350°F (175°C). Grease and flour a loaf pan.
In a medium bowl, whisk together the flour, baking powder, baking soda, and salt.
In a large bowl, beat the butter and sugar until light and fluffy. Add the eggs, one at a time, beating well after each addition.
Stir in the sour cream, lemon juice, lemon zest, and vanilla extract until well combined.
Gradually add the dry ingredients to the wet ingredients, mixing just until combined.
Fold in the shredded coconut and chopped pistachios.
Pour the batter into the prepared loaf pan and smooth the top with a spatula.
Bake for 50-60 minutes, or until a toothpick inserted into the center comes out clean.
Allow the cake to cool in the pan for 10 minutes, then transfer to a wire rack to cool completely.
Prep Time: 15 minutes | Cooking Time: 55 minutes | Total Time: 70 minutes
Kcal: 320 kcal per slice | Servings: 8

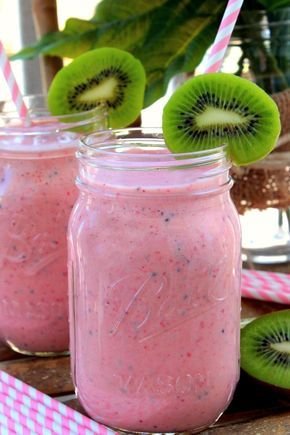
🍓 Creamy Strawberry Kiwi Smoothie

🍓 Creamy Strawberry Kiwi Smoothie

Prep time: 5 minutes | Servings: 2

Ingredients

  • 2 cups Frozen strawberries (gives it that thick, chilled texture)

  • 2 ripe Kiwis (peeled and sliced)

  • 1 cup Greek yogurt or Coconut yogurt (for that creamy “Mason jar” look)

  • 1 cup Milk of your choice (Almond, Oat, or Dairy)

  • 1-2 tbsp Honey or Maple syrup (optional, depending on fruit sweetness)

  • Garnish: Extra kiwi slices and fun straws!


Instructions

  1. Prep the Fruit: Peel your kiwis. If you want a smoother drink, ensure the strawberries are slightly thawed for 2 minutes before blending, though frozen is best for thickness.

  2. Layer the Blender: Add the liquid first (milk), followed by the yogurt, then the fruit. This helps the blender blades move more efficiently.

  3. Blend: Start on a low speed and gradually increase to high. Blend for about 45–60 seconds until the strawberry seeds are finely distributed and the mixture is silky.

  4. Taste Test: Sip a small amount. If it’s too tart, add a touch more sweetener. If it’s too thick, splash in a little more milk.

  5. Serve: Pour into glass jars. Slit a kiwi slice halfway through and slide it onto the rim of the glass just like in your photo!


💡 Pro-Tips for the Best Texture

  • The Speckle Factor: To get those beautiful little black specks from the kiwi without turning the whole drink brown, pulse the kiwi at the very end rather than blending it for the full minute.

  • Go Green: Want a nutritional boost? Throw in a handful of spinach. It will change the color to a muted green, but the strawberry and kiwi flavors will completely hide the taste.

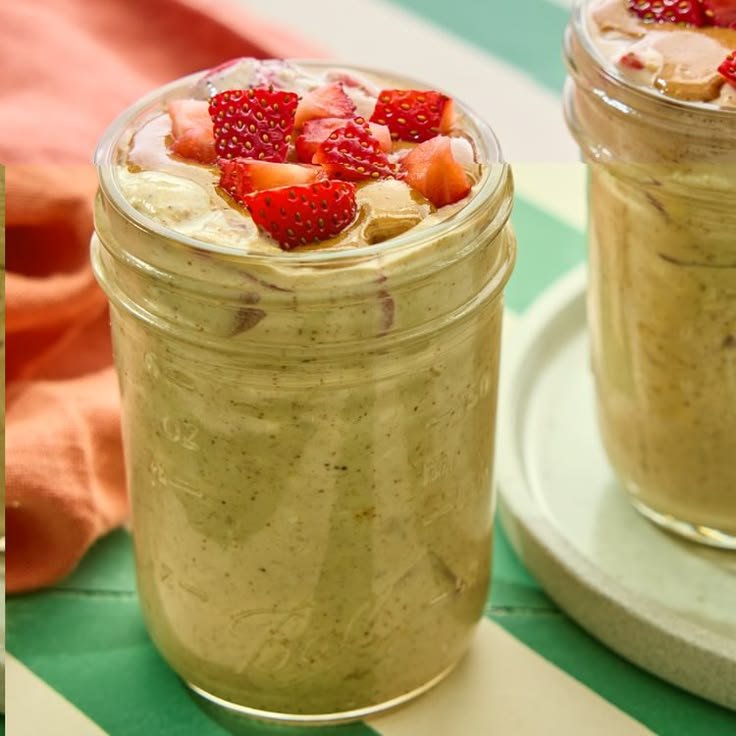
Strawberry & Almond Butter Overnight Oats

Strawberry & Almond Butter Overnight Oats

Ingredients

  • Base: 1/2 cup rolled oats (old-fashioned)

  • Liquid: 2/3 cup unsweetened almond milk (or milk of choice)

  • Protein Boost: 1/3 cup plain Greek yogurt

  • Healthy Fats: 1 tbsp almond butter (plus extra for drizzling)

  • Seeds: 1 tbsp chia seeds

  • Fruit: 1/2 cup fresh strawberries, chopped

  • Sweetener: 1 tsp maple syrup or honey (optional)

  • Flavor: 1/4 tsp vanilla extract and a pinch of salt


Instructions

  1. Combine the Base: In a wide-mouth glass jar (like the one in your photo), mix the rolled oats, chia seeds, and a pinch of salt. The chia seeds are essential for that thick, pudding-like texture.

  2. Add Wet Ingredients: Stir in the Greek yogurt, almond milk, vanilla extract, and your chosen sweetener. Mix well until no dry clumps of oats remain.

  3. Swirl in the Nut Butter: Gently fold in the almond butter. You can leave it slightly marbled or mix it thoroughly for a consistent nutty flavor.

  4. Layer the Fruit: Fold in half of the chopped strawberries. Save the rest for a fresh topping in the morning.

  5. Chill: Seal the jar and refrigerate for at least 6 hours, though overnight is best. This gives the oats time to soften and absorb the flavors.

  6. Serve: Give it a quick stir. If it’s too thick, add a splash of milk. Top with the remaining strawberries and an extra drizzle of almond butter.


Tip: If you prefer a crunchier texture, add a few sliced almonds or granola right before eating!

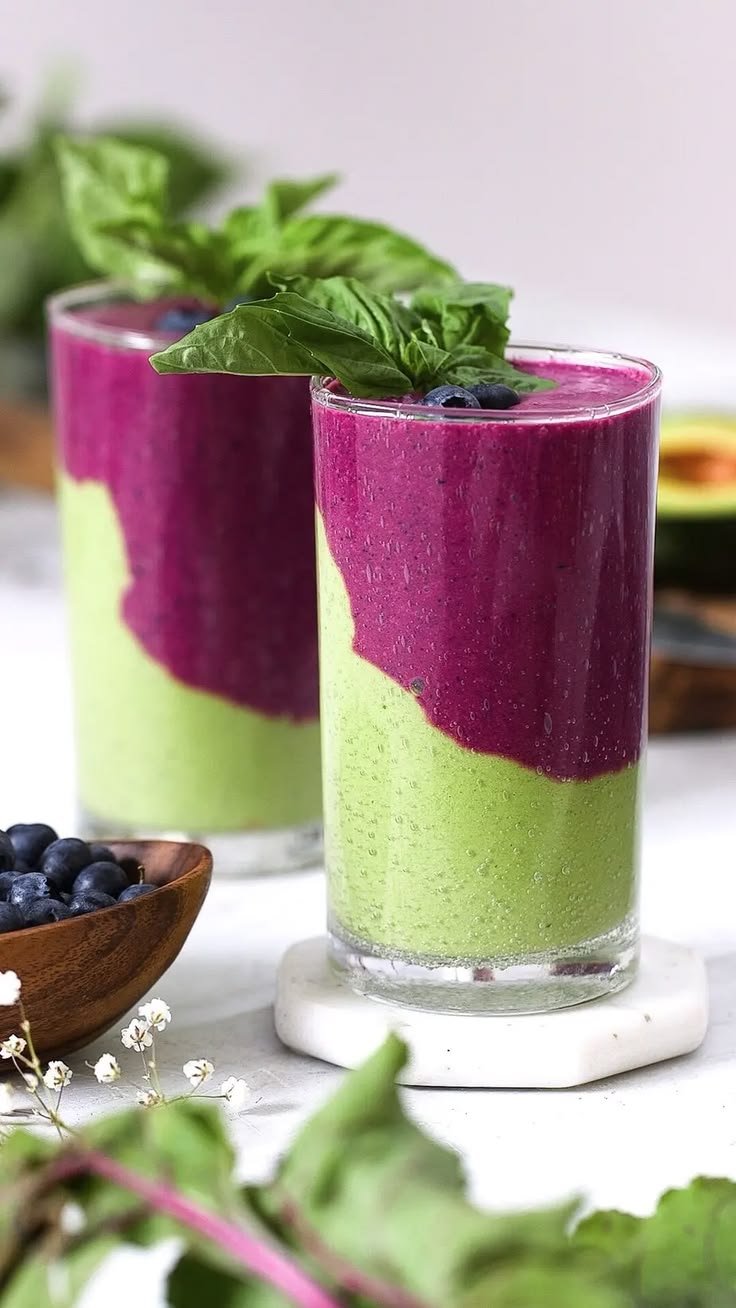
Beet, Berry & Basil Avocado Layered Smoothie

Beet, Berry & Basil Avocado Layered Smoothie

This recipe makes two servings of a vibrant, refreshing, and creamy breakfast or snack.

The Green Layer (Avocado & Basil)

  • 1 ripe avocado, pitted and peeled

  • 1 cup frozen mango or pineapple chunks (for sweetness and texture)

  • 1 handful fresh basil leaves

  • 1 cup coconut water or almond milk

  • 1 tbsp lime juice

The Purple Layer (Beet & Berry)

  • 1 medium beet (steamed, peeled, and chilled)

  • 1 cup frozen mixed berries (blueberries and raspberries work best)

  • ½ cup Greek yogurt or silken tofu

  • ½ cup pomegranate juice or water

  • 1 tsp honey or maple syrup (optional)


Instructions

  1. Prepare the Green Layer: Place all avocado layer ingredients into a high-speed blender. Blend until completely smooth. It should have a thick, spoonable consistency. If it’s too thin, add a few more frozen mango chunks. Divide this mixture equally between two glasses, tilting the glass slightly to create an angled “wave” effect. Place the glasses in the freezer for 5 minutes to set.

  2. Prepare the Purple Layer: Rinse the blender well. Add the chilled beet, berries, yogurt, and juice. Blend until velvety.

  3. The Assembly: Carefully spoon the purple mixture over the green layer. Using a spoon helps break the fall of the liquid so the colors don’t bleed into each other immediately.

  4. The Garnish: Top with fresh blueberries and a sprig of basil for that aromatic finish.

Pro Tip: Using frozen fruit instead of ice ensures your smoothie stays flavorful and maintains that perfect layered “stack” without melting too quickly!

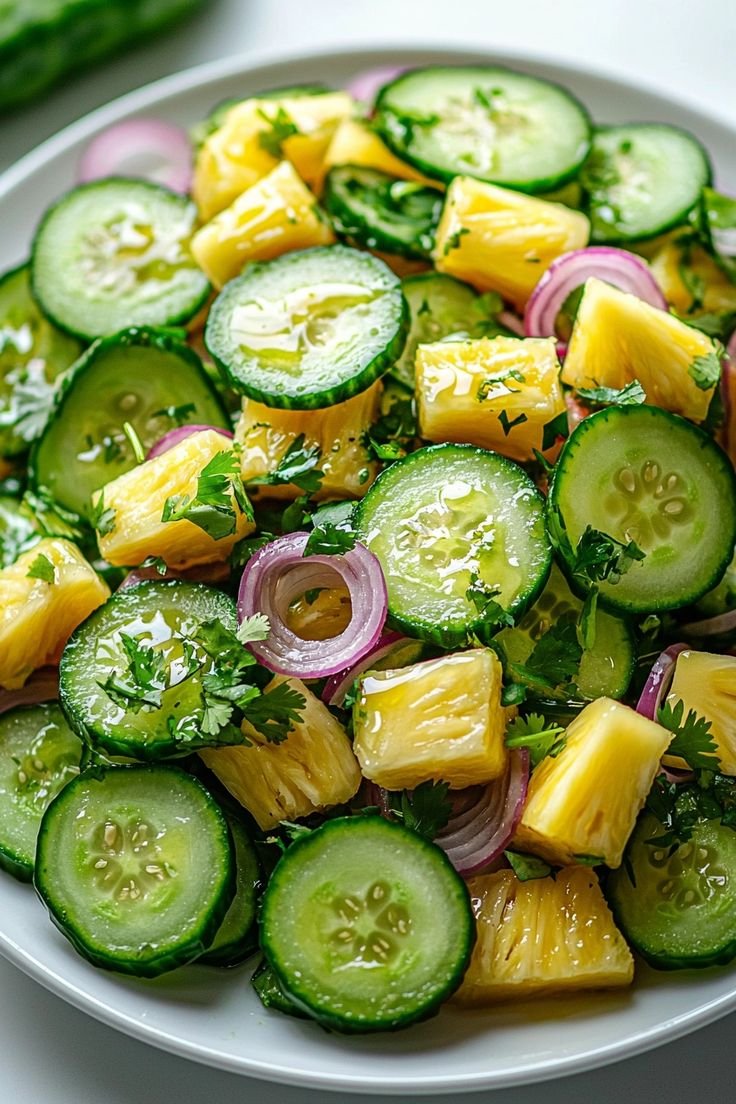
Pineapple Cucumber Salad

Pineapple Cucumber Salad need

Ingredients

  • 1 large English Cucumber: Sliced into thin rounds or half-moons.

  • 2 cups Fresh Pineapple: Cut into bite-sized chunks (fresh is best for texture!).

  • 1/2 small Red Onion: Thinly sliced into slivers or rings.

  • 1/4 cup Fresh Cilantro: Roughly chopped (substitute mint if you prefer).

  • 1 tbsp Jalapeño: Finely minced (optional, for a subtle kick).

For the Zesty Dressing:

  • Juice of 2 Limes: Freshly squeezed.

  • 1 tbsp Extra Virgin Olive Oil.

  • 1 tsp Honey or Agave Nectar.

  • 1/2 tsp Sea Salt & Black Pepper: To taste.


Instructions

  1. Prep the Produce: Start by slicing your cucumber. If using a standard cucumber, you may want to peel it partially to create a striped pattern. Chop your pineapple into uniform chunks so every bite has a mix of flavors.

  2. Tame the Onion (Optional): If you find raw red onion too sharp, soak the slices in cold water for 5 minutes, then drain. This keeps the crunch but removes the “bite.”

  3. Whisk the Dressing: In a small glass jar or bowl, whisk together the lime juice, olive oil, sweetener, salt, and pepper until the honey is fully dissolved.

  4. Toss and Combine: In a large mixing bowl, combine the cucumber, pineapple, onion, and cilantro. Pour the dressing over the top and toss gently to coat.

  5. Chill and Serve: While you can eat this immediately, letting it sit in the fridge for 15–20 minutes allows the juices to meld beautifully.

Pro Tip: Sprinkle a little chili lime seasoning on top right before serving to add a beautiful pop of color and extra zing!

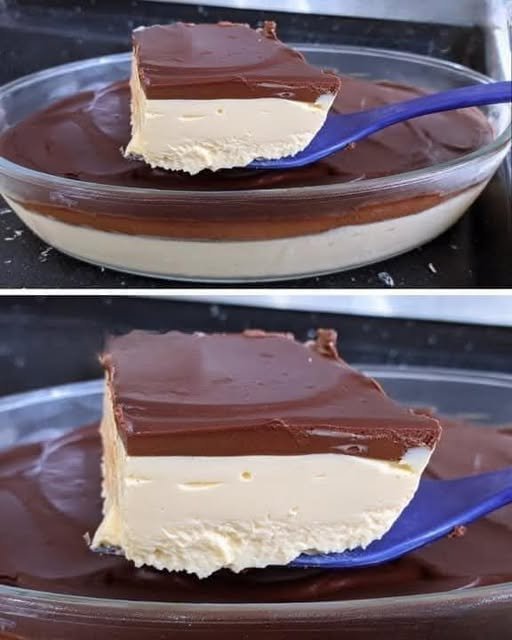
Chocolate Cream Layered Pudding: A Delectable Dessert Delight

Creamy & Rich Chocolate Layered Pudding

This no-bake dessert features a velvety, cloud-like cream base topped with a decadent, glossy chocolate ganache. It’s the ultimate treat for dinner parties, celebrations, or a weekend indulgence.


Ingredients

For the Cream Layer:

  • 1 cup Heavy Whipping Cream (chilled)

  • 1 cup Sweetened Condensed Milk

  • 1/2 cup Cream Cheese (softened to room temperature)

  • 1 tsp Vanilla Extract

For the Chocolate Ganache:

  • 1 cup Dark Chocolate (finely chopped or high-quality chips)

  • 1/2 cup Heavy Cream

Optional Garnishes:

  • Dark chocolate shavings

  • Crushed hazelnuts or pistachios

  • Fresh raspberries or strawberries


Instructions

1. Prepare the Cream Base

  • Whip: In a chilled mixing bowl, whip the heavy cream using an electric mixer until soft peaks form. Set aside.

  • Blend: In a separate bowl, beat the softened cream cheese, condensed milk, and vanilla extract together until the mixture is completely smooth and free of lumps.

  • Fold: Gently fold the whipped cream into the cream cheese mixture using a spatula. Mix until just combined to keep the texture light and airy.

2. Set the First Layer

  • Assemble: Pour the cream mixture into a large glass serving dish or individual dessert ramekins.

  • Smooth: Use an offset spatula to level the top.

  • Chill: Refrigerate for at least 30 minutes to allow the surface to firm up.

3. Create the Chocolate Ganache

  • Heat: Place the heavy cream in a small saucepan over low heat. Bring it to a simmer (do not let it reach a rolling boil).

  • Melt: Pour the hot cream over the chopped chocolate. Let it sit undisturbed for 2–3 minutes, then whisk gently starting from the center until it turns into a smooth, shiny glaze.

  • Cool: Let the ganache sit at room temperature for about 5–10 minutes so it’s not piping hot when poured.

4. The Final Assembly

  • Layer: Carefully pour the chocolate ganache over the chilled cream layer.

  • Final Chill: Return the pudding to the refrigerator for at least 2 hours (or overnight) to set completely.


Expert Tips for Success

  • Avoid Lumps: Ensure your cream cheese is truly at room temperature before mixing. If it’s cold, it won’t blend smoothly with the condensed milk.

  • Clean Layers: For a professional look, wipe the edges of your glass dish with a damp paper towel after pouring each layer.

  • The “Snap”: Using dark chocolate (60% cocoa or higher) balances the sweetness of the condensed milk perfectly and provides a richer flavor profile.

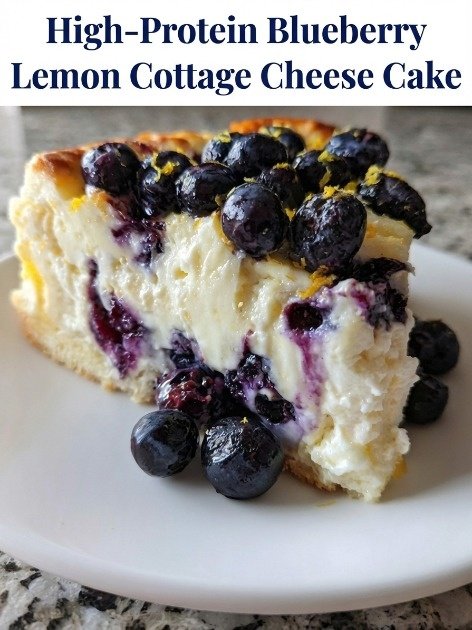
🍰 High-Protein Blueberry Lemon Cottage Cheese Cake

🍰 High-Protein Blueberry Lemon Cottage Cheese Cake

Ingredients:

  • 2 cups low-fat cottage cheese (blended until smooth)

  • 3 large eggs

  • 1/2 cup Greek yogurt (plain or vanilla)

  • 1/4 cup honey or maple syrup (or a keto-friendly sweetener)

  • 1 tsp vanilla extract

  • Zest of 1 lemon + 1 tbsp fresh lemon juice

  • 1/4 cup oat flour or almond flour (for structure)

  • 1 cup fresh blueberries


📝 Instructions

  1. Prep: Preheat your oven to 175°C (350°F). Grease a small springform pan or line it with parchment paper.

  2. Blend: Put the cottage cheese in a blender and process until it’s completely smooth—no lumps! This is the secret to that “cheesecake” texture.

  3. Mix: In a bowl, whisk the eggs, then fold in the blended cottage cheese, Greek yogurt, sweetener, vanilla, lemon zest, and lemon juice.

  4. Fold: Gently stir in the flour and about half of the blueberries.

  5. Bake: Pour the batter into the pan and top with the remaining blueberries. Bake for 35–45 minutes until the edges are golden and the center has a slight jiggle.

  6. Chill: Let it cool completely at room temperature, then refrigerate for at least 3 hours (or overnight) to set.


✨ Pro-Tips for Content Creators

  • The Texture Shot: When you film the “first bite,” make sure the cake is cold. Cottage cheese-based cakes can look a bit soft if they aren’t fully chilled, but they get that perfect dense crumb after a few hours in the fridge.

  • Color Contrast: For the best visual appeal, add a little extra fresh lemon zest right before serving (just like in your photo). The bright yellow against the deep purple blueberries looks amazing on camera.

  • Flavor Boost: If the blueberries are a bit tart, you can toss them in a teaspoon of sweetener before dropping them onto the batter to prevent them from sinking too deep.

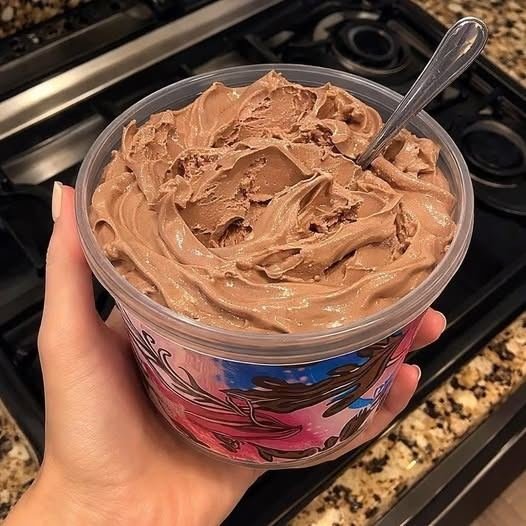
Creamy Chocolate Whipped Dessert

This Creamy Chocolate Whipped Dessert is the ultimate quick indulgence for chocolate lovers. Light, airy, and irresistibly smooth, it strikes the perfect balance between a rich chocolate mousse and a silky frosting. The beauty of this dessert lies in its simplicity—just a handful of ingredients come together to create something that feels luxurious yet effortless. Whether you’re craving something sweet after dinner or need a last-minute dessert for guests, this recipe delivers every time.

🛒 Ingredients

Table of Contents

  • 1 cup heavy whipping cream (cold)
  • ½ cup chocolate spread or melted chocolate (cooled)
  • 2 tablespoons powdered sugar (optional)
  • ½ teaspoon vanilla extract
  • Pinch of salt

👩‍🍳 Instructions

Begin by pouring the cold heavy whipping cream into a clean mixing bowl. Using a hand mixer or whisk, beat the cream on medium speed until it starts to thicken. Continue whipping until soft peaks form—this means the cream should hold its shape but still be soft and slightly droopy when lifted.

Next, gently add the chocolate spread or cooled melted chocolate into the whipped cream. Fold or mix it in slowly to maintain the airy texture. Avoid overmixing, as this can deflate the cream and make it dense instead of fluffy.

Once combined, add the powdered sugar if you prefer a sweeter taste. Stir in the vanilla extract and a pinch of salt. The salt enhances the chocolate flavor and balances the sweetness beautifully. Mix briefly until everything is smooth and well incorporated.

Spoon the mixture into serving bowls, dessert glasses, or a container. At this stage, the dessert will have a soft, mousse-like consistency. For a thicker and more set texture, refrigerate it for 1–2 hours before serving.

See also  Cheesy Breadsticks

🍓 Serving Suggestions

Serve chilled for the best flavor and texture. You can elevate this dessert by topping it with chocolate chips, crushed nuts, or fresh berries like strawberries or raspberries. It also pairs wonderfully with biscuits, waffles, or even as a cake filling.

💡 Tips

  • Always use cold cream for best whipping results
  • Make sure melted chocolate is fully cooled before mixing
  • For a richer flavor, use dark chocolate instead of milk chocolate

This dessert is quick, versatile, and guaranteed to satisfy your chocolate cravings with every creamy bite!

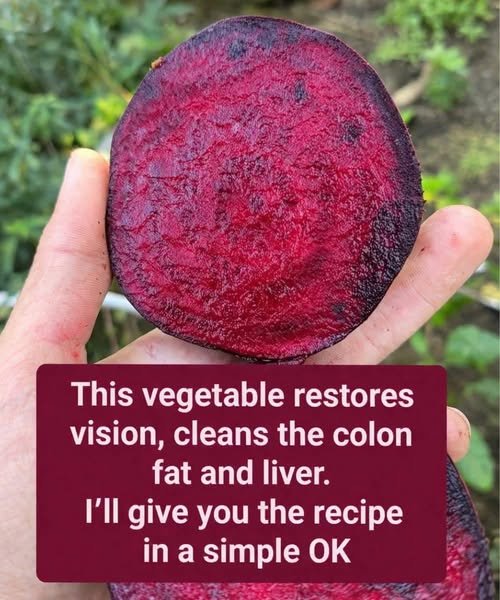
🌿 The Hidden Treasure in Beet Greens: Lutein & Zeaxanthin

🌿 The Hidden Treasure in Beet Greens: Lutein & Zeaxanthin

If you’ve been throwing away beet leaves, it’s time to stop!

Beet greens are rich in lutein and zeaxanthin—powerful nutrients that act like natural sunglasses for your eyes. They help block harmful blue light and protect the macula, the part of your eye responsible for sharp vision.

👉 Adding beet greens to your diet can help protect your eyesight in the long run.


👁️ 1. Helps Prevent Eye Diseases

Beetroot is full of antioxidants and natural compounds called betalains.
These help fight oxidative stress, which damages eye cells.

This may reduce the risk of:

  • Age-related macular degeneration (AMD)
  • Cataracts
  • Vision loss over time

❤️ 2. Improves Blood Flow to the Eyes

Beetroot contains natural nitrates, which turn into nitric oxide in your body.

This helps to:

  • Open blood vessels
  • Improve circulation
  • Deliver more oxygen and nutrients

👉 Better blood flow = healthier eyes and less strain.


🌙 3. Supports Night Vision

Beetroot provides nutrients that help your body produce vitamin A.

Vitamin A helps make rhodopsin, a protein that allows you to see in low light.

👉 Helpful if you struggle with night driving or dim lighting.


🥗 How to Get Maximum Benefits

✔ Don’t throw away the leaves
Cook beet greens with a little olive oil for better absorption.

✔ Eat smart
Raw or lightly steamed is best—avoid overcooking.

✔ Try a healthy juice
Mix beetroot, carrot, and orange for a powerful drink full of

  • Vitamin A
  • Antioxidants
  • Immunity boosters

⭐ Final Thoughts

Beetroot is not just good for your heart—it’s also great for your eyes. 👁️

Using both the root and the leaves can

  • Protect vision
  • Improve blood flow
  • Support long-term eye health

👉 A small change in your diet today can help keep your eyesight strong for years.

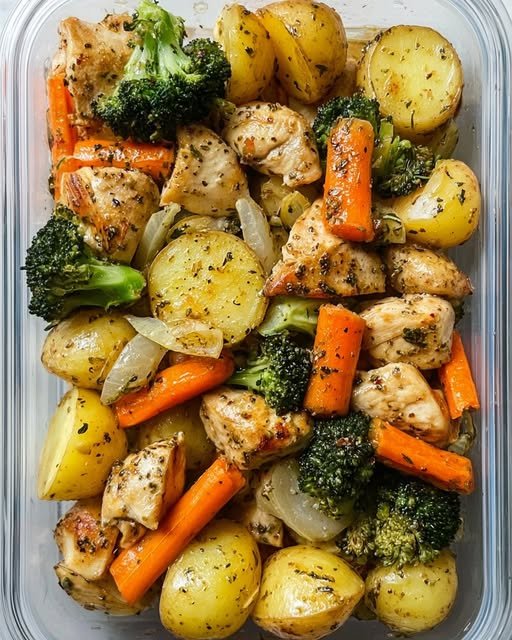
Sheet Pan Lemon Herb Chicken and Vegetables

Ingredients

  • Chicken: 500g Chicken breast or thighs, cut into bite-sized chunks.

  • Vegetables: * 2 cups Baby potatoes (halved)

    • 1 large Carrot (thickly sliced)

    • 1 head of Broccoli (cut into florets)

    • 1 Onion (wedged or roughly chopped)

  • The Marinade:

    • 3 tbsp Olive oil

    • 2 tbsp Lemon juice

    • 3 cloves Garlic (minced)

    • 1 tsp Dried Oregano

    • 1 tsp Dried Thyme or Rosemary

    • Salt and Black Pepper (to taste)

    • Optional: A pinch of red chili flakes for a kick.


Method

1. Prepare the Marinade

  • In a small bowl, whisk together the olive oil, lemon juice, minced garlic, oregano, thyme, salt, and pepper.

2. Season the Ingredients

  • Preheat your oven to 200°C (400°F).

  • In a large mixing bowl, toss the chicken chunks, potatoes, carrots, and onions with half of the marinade. Ensure everything is well-coated.

  • Note: Keep the broccoli aside for now as it cooks much faster than the potatoes.

3. The First Roast

  • Spread the chicken and root vegetables (potatoes, carrots, onions) in a single layer on a large baking sheet.

  • Roast for 15–20 minutes.

4. Add the Greens

  • Remove the tray from the oven. Add the broccoli florets to the tray and drizzle the remaining marinade over them.

  • Toss everything gently on the pan to combine.

  • Return to the oven for another 10–12 minutes, or until the chicken is cooked through and the potatoes are golden and fork-tender.


Pro-Tips

  • Even Cooking: Cut the potatoes and carrots into smaller pieces so they cook at the same rate as the chicken.

  • Extra Flavor: Garnish with fresh parsley and an extra squeeze of fresh lemon juice right before serving.

  • Meal Prep: This recipe keeps very well in airtight containers for up to 4 days, making it ideal for busy weekdays.

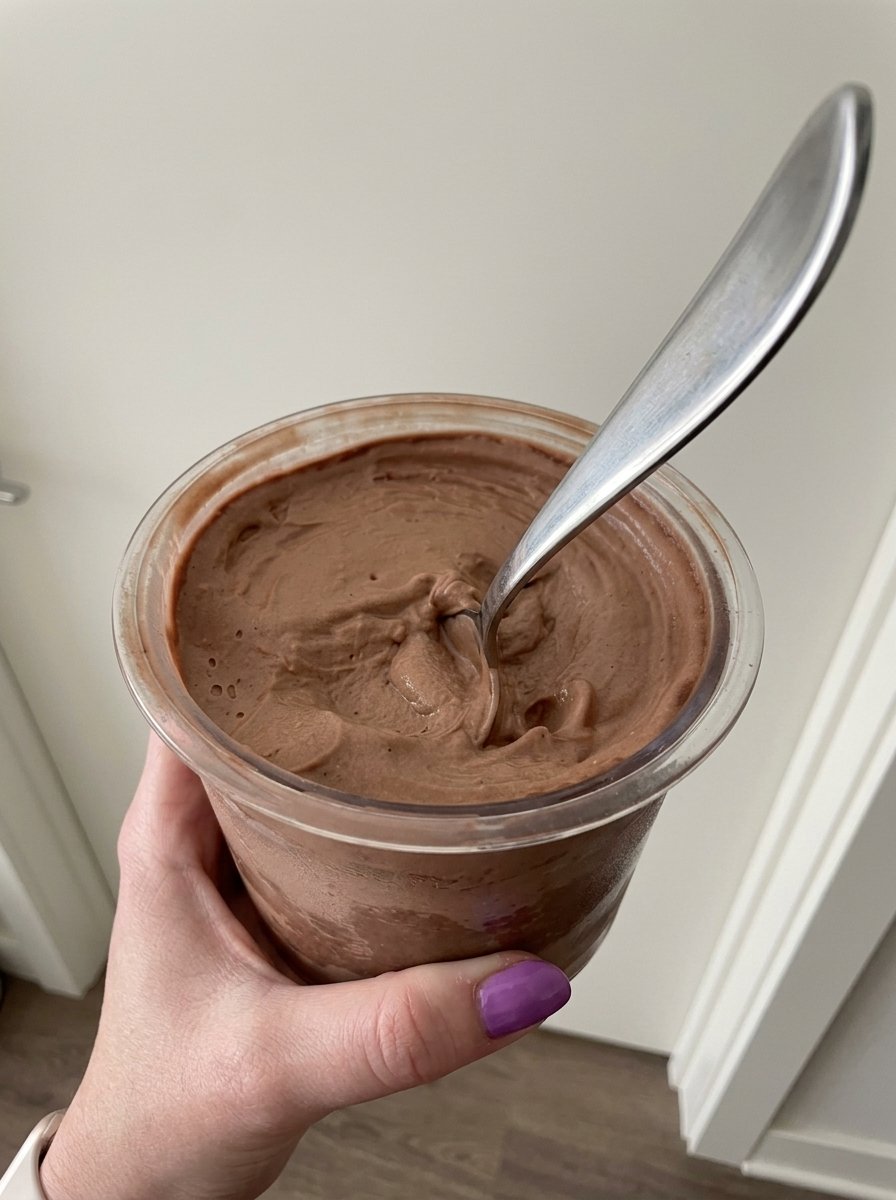
Homemade Chocolate Protein Fluff

Homemade Chocolate Protein Fluff

Prep time: 5 mins | Freeze time: 12–24 hours | Servings: 1-2

🛒 Ingredients

  • 1.5 cups Milk of choice (Dairy, Almond, or Oat) 🥛

  • 1 scoop Chocolate Protein Powder 🍫

  • 1 tbsp Cocoa Powder (for extra richness) 🫘

  • 1 tsp Vanilla Extract ✨

  • Pinch of Sea Salt 🧂

  • Optional: 1 tsp Maple syrup or honey if you prefer it sweeter 🍯


👩‍🍳 Step-by-Step Instructions

  1. Mix the Base ➡️ In a container or blender, combine your milk, protein powder, cocoa powder, vanilla, and salt.

  2. Combine Well ➡️ Whisk or blend until the mixture is completely smooth with no clumps. 🌪️

  3. The First Freeze ➡️ Pour the mixture into a freezer-safe pint container. Place it in the freezer for at least 12 to 24 hours until it is solid. ❄️

  4. The Spin ➡️ Once frozen, place your container into your creamery machine (like a Ninja Creami) and select the “Lite Ice Cream” or “Protein Pint” setting. 🔄

  5. Check the Texture ➡️ If it looks a bit crumbly after the first spin, don’t worry!

  6. The Re-Spin ➡️ Add a splash (1 tablespoon) of extra milk to the center and hit the “Re-spin” button. 🥛 ➡️ 🔄

  7. Final Result ➡️ You should now have a thick, “soft-serve” consistency that holds its shape on a spoon, just like in the video! 🍦✨


❓ Common Questions & Answers

Q: Can I make this without a machine? A: ➡️ It is difficult to get this exact “fluffy” texture without a high-speed creamery machine, but you can blend the frozen cubes in a powerful food processor for a similar “nice cream” result.

Q: Why is my mixture crumbly? A: ➡️ This usually happens if the base is very cold or low in fat. Simply adding a tiny bit of liquid and re-spinning always fixes it! 🧪

Q: Can I add “mix-ins” like chocolate chips? A: ➡️ Yes! After the final spin, make a hole in the middle, add your chips or crushed cookies, and use the “Mix-in” setting on your machine. 🍪

Apple Cider Vinegar & Ginger Morning Tonic

Apple Cider Vinegar & Ginger Morning Tonic

This tonic is a popular wellness drink often shared in digital culinary communities. It combines fermented apple cider vinegar with warming spices and citrus to create a pungent, refreshing morning ritual. It is designed to be consumed on an empty stomach to “wake up” the digestive system.


The Full Recipe

  • Prep time: 2 minutes

  • Servings: 1

Ingredients:

  • 2 tablespoons Apple Cider Vinegar (Raw, unfiltered, with “the mother”)

  • 1 tablespoon Freshly squeezed lemon juice

  • 1/2 teaspoon Fresh grated ginger (or a pinch of ground ginger)

  • 1 teaspoon Raw honey or Stevia (optional, for sweetness)

  • 1 pinch Cayenne pepper (optional, for a metabolic kick)

  • 10 oz Lukewarm water (Avoid boiling water, as it can kill the beneficial bacteria in the vinegar)

Instructions:

  1. Combine: In a large glass, add the apple cider vinegar and lemon juice.

  2. Infuse: Stir in the grated ginger and honey until the honey is fully dissolved.

  3. Dilute: Pour in the lukewarm water.

  4. Mix: Stir well and drink immediately, ideally through a straw to protect your tooth enamel.


Reported Benefits

  • Digestive Aid: The acetic acid in the vinegar may help increase stomach acidity to assist in breaking down food.

  • Blood Sugar Management: Some studies suggest that vinegar can improve insulin sensitivity after high-carb meals.

  • Anti-Inflammatory Properties: Ginger and lemon are rich in antioxidants that help combat oxidative stress in the body.

  • Hydration: Starting the day with 10–12 ounces of water helps rehydrate the body after sleep.


Common Questions & Answers

Q: Can I drink this multiple times a day? A: It is generally recommended to limit this to 1–2 times per day. Excessive vinegar consumption can lead to low potassium levels or digestive upset.

Q: Does it have to be “with the mother”? A: Yes. The “mother” contains the beneficial proteins, enzymes, and friendly bacteria that give the vinegar its cloudy appearance and most of its health properties.

Q: Will this cure my joint pain or depression? A: No. While it can be part of a healthy lifestyle, it is not a medical treatment for clinical conditions. These claims in social media images are often exaggerated.


Important Things to Remember

  • Protect Your Teeth: Vinegar is highly acidic. Never drink it straight. Always dilute it in water and consider rinsing your mouth with plain water afterward to prevent enamel erosion.

  • Listen to Your Body: If you experience stomach pain, heartburn, or nausea after drinking this, discontinue use or reduce the amount of vinegar to 1 teaspoon.

  • Consult a Doctor: If you are on medication for diabetes or heart disease (specifically diuretics), talk to your doctor before adding daily apple cider vinegar to your routine, as it can interact with certain drugs.

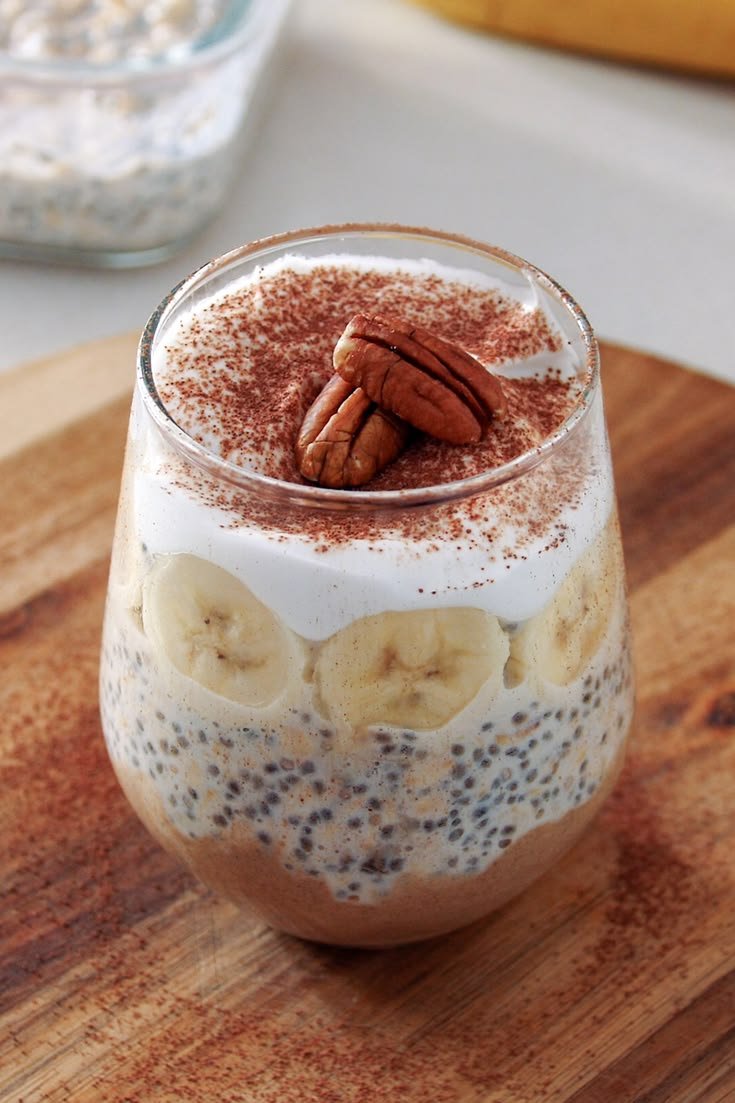
Banoffee Overnight Oats

Banoffee Overnight Oats

🍌 Ingredients
The Oats:

1/2 cup Rolled oats

3/4 cup Unsweetened almond or oat milk

1 tbsp Chia seeds

1/2 tsp Vanilla extract

1 pinch Sea salt

Milky Date Caramel:

4-5 Soft Medjool dates (pitted)

2 tbsp Warm milk of choice

1/2 tbsp Almond butter (optional, for richness)

Toppings:

1/2 Sliced banana

2 tbsp Greek yogurt or coconut cream

1 tsp Cocoa powder (for dusting)

2 Pecan halves

🥣 Instructions
Prep the Oats: In a jar or glass, combine the rolled oats, chia seeds, milk, vanilla, and salt. Stir well to ensure the chia seeds don’t clump. Cover and refrigerate for at least 4 hours, preferably overnight.

Make the Date Caramel: Soak the pitted dates in hot water for 5 minutes to soften. Drain, then blend the dates with the warm milk and almond butter until completely smooth and “caramel-like” in consistency.

Assemble the Layers: * Take your chilled oats and stir in half of the date caramel.

Press the banana slices against the inside of the glass for that classic “Banoffee” look.

Spoon the remaining date caramel over the oats.

Final Flourish: Top with a generous dollop of yogurt or coconut cream. Dust with cocoa powder and garnish with the pecans for a satisfying crunch.

Pro Tip: If your date caramel is too thick, add an extra splash of milk one teaspoon at a time until it reaches a pourable consistency. Enjoy cold!

Mexican Oregano Wellness Tea

Mexican Oregano Wellness Tea

This is the most common “recipe” associated with the claims in your image. It’s soothing, aromatic, and great for digestion.

  • Prep time: 2 mins

  • Steep time: 5 mins

  • Servings: 1

Ingredients

  • 1 to 2 large fresh Mexican Oregano leaves (washed)

  • 1 cup boiling water

  • Optional: 1 tsp honey or a squeeze of fresh lime

Instructions

  1. Bruise the Leaf: Gently tear or bruise the fresh leaf with your fingers to release the essential oils.

  2. Steep: Place the leaf in a mug and pour the boiling water over it.

  3. Cover: Cover the mug with a saucer. This prevents the beneficial aromatic oils from escaping with the steam.

  4. Wait: Let it sit for about 5 minutes.

  5. Enjoy: Remove the leaf and add honey if you prefer a sweeter taste.

📋 Recipe Notes & Tips

  • Fresh is Best: This specific variety is much more potent when used fresh rather than dried.

  • Potency: One leaf is usually enough! The flavor is very strong—much more intense than the Mediterranean oregano you find on pizza.

  • Cooking: You can also finely mince one leaf and add it to black beans, stews, or fatty meats. It helps “cut” the heaviness and aids digestion.

💡 Benefits & Nutritional Info

Mexican Oregano contains compounds like carvacrol and thymol, which are known for:

  • Antioxidant Properties: Helping the body fight oxidative stress.

  • Digestive Support: Traditionally used to reduce bloating and gas.

  • Respiratory Comfort: The aromatic vapors can help clear nasal passages (similar to eucalyptus).

Component Level
Calories ~2 kcal per leaf
Vitamin C Trace amounts
Vitamin A High (in the form of carotenoids)
Fiber Low (if consumed as tea)

❓ Common Q&A

Q: Can I eat the leaf raw?

A: Yes, but it is very pungent and has a fuzzy, thick texture that some find unpleasant. Steeping it is usually preferred.

Q: Can I drink this every day?

A: For most people, a cup of herbal tea is safe. However, if you are pregnant, breastfeeding, or on medication, always check with a doctor first, as concentrated herbs can interact with certain treatments.

Q: Does it actually cure anxiety and insomnia?

A: No. While the ritual of drinking warm tea can be relaxing (which helps with sleep), it is not a clinical treatment for anxiety disorders.

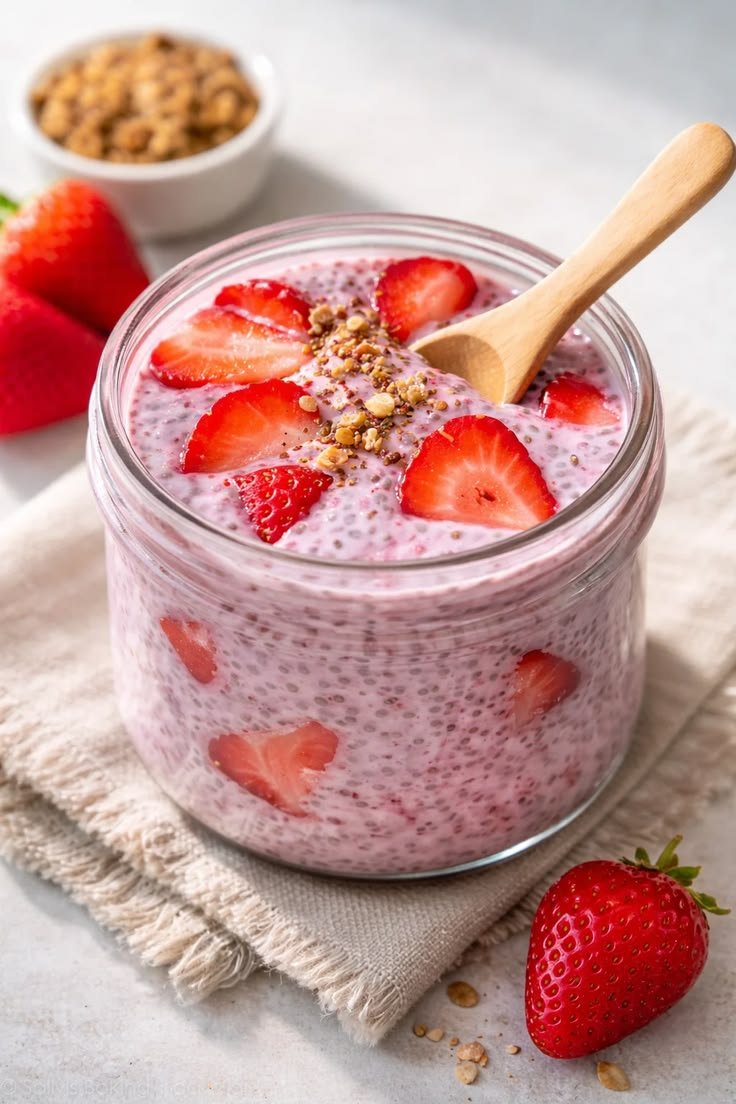
High-Protein Strawberry Chia Seed Pudding

High-Protein Strawberry Chia Seed Pudding


Ingredients

  • Chia Seeds: 1/4 cup (the base for that perfect gel texture).

  • Milk of Choice: 1 cup (Almond, soy, or dairy all work great).

  • Protein Powder: 1 scoop (Vanilla or Strawberry flavor).

  • Greek Yogurt: 1/4 cup (Plain or vanilla for extra creaminess and protein).

  • Fresh Strawberries: 1/2 cup mashed + extra for slicing.

  • Sweetener: 1 tsp maple syrup or honey (optional).

  • Toppings: Granola, hemp seeds, or bee pollen.


Instructions

1. Mix the Base

In a medium bowl or a large glass jar, whisk together your milk, protein powder, and Greek yogurt until the powder is fully dissolved and no clumps remain.

2. Incorporate the Fruit & Seeds

Add the mashed strawberries and chia seeds to the mixture. Stir vigorously for about a minute. If you want that vibrant pink color throughout, ensure the strawberry mash is well-distributed.

3. Let it Set

Cover the jar and let it sit for 10 minutes at room temperature, then give it one final stir to prevent the seeds from clumping at the bottom. Refrigerate for at least 2 hours, though overnight is best for the thickest consistency.

4. Assemble & Serve

When ready to eat, layer the pudding with fresh strawberry slices. Top it off with a sprinkle of granola for crunch and a dash of hemp seeds or bee pollen for an extra nutrient boost.


Pro Tip: If you prefer a completely smooth texture, you can blend all the ingredients (except the toppings) in a high-speed blender before chilling!

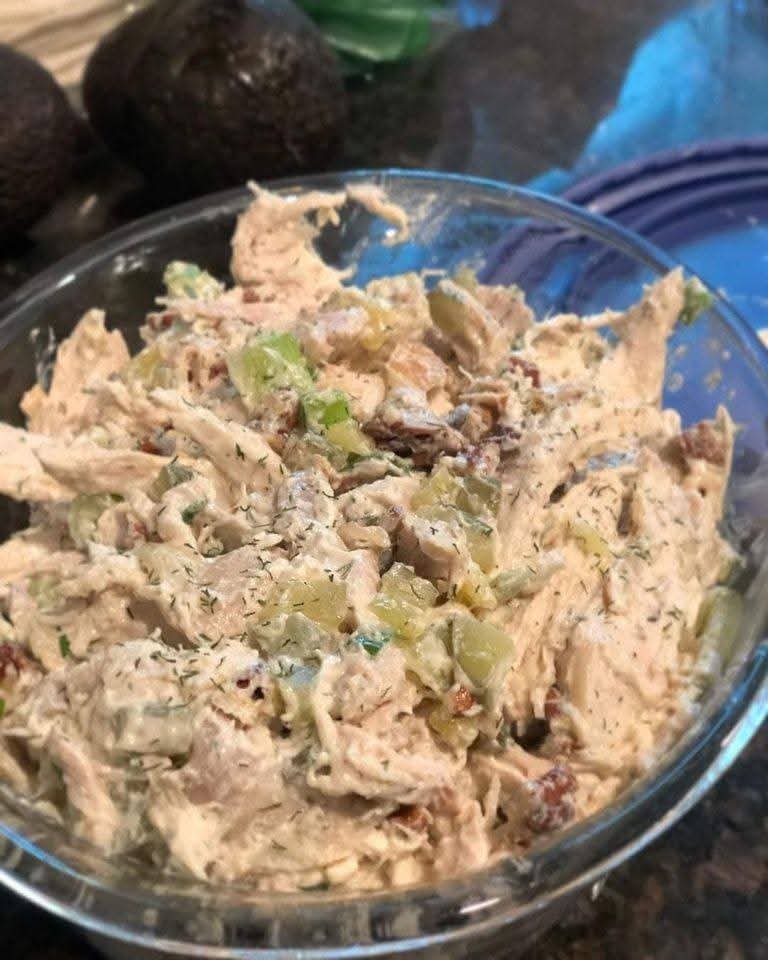
Healthy Dill Pickle Chicken Salad

Healthy Dill Pickle Chicken Salad
Prep Time 10 10 minutes MINS

Cook Time 12minutes MINS

Total Time 22minutes MINS

Approximate Serving Size: 3/4 cup

SERVINGS 6

This healthy Dill Pickle Chicken Salad is a delicious low-carb chicken salad recipe. A similar and healthy Chick-fil-A chicken salad alternative, you can enjoy the salty and creamy recipe as a dip, on a sandwich, or as a salad topping.

Equipment
Instant Pot 6 qt
Kitchen Knife
Cutting Board
Ingredients :

1 pound chicken breast about 2 breasts
▢1/3 cup vinegar I use white
▢3/4 cup plain Greek yogurt I prefer 2%
▢3/4 cup cottage cheese
▢1 tsp garlic
▢1 tsp black pepper
▢1 tbsp fresh chives chopped (or 1 tsp dried)
▢1/2 tbsp fresh dill chopped (or 1/2 tsp dried)
▢1 tbsp fresh parsley chopped (or 1 tsp dried)
▢1 cup dill pickles chopped, please see note in post about using 1/2 pickles and 1/2 cucumbers
Instructions
Instant Pot Directions:
Add the chicken and vinegar to the Instant Pot insert. 1 pound chicken breast, 1/3 cup vinegar
Close the lid and turn the pressure valve to sealing. Cook the chicken on high pressure using the manual or pressure cook setting for 10-12 minutes. Let the pressure release naturally for at least 10 minutes before doing a quick release.
In a food processor or blender, mix the Greek yogurt, cottage cheese, garlic, and pepper until smooth. 3/4 cup plain Greek yogurt, 3/4 cup cottage cheese, 1 tsp garlic, 1 tsp black pepper
Remove the lid from the food processor or blender, then add the chicken to the food processor. You may need to break the chicken breasts in half so that they fit.
Use the food processor or blender to shred the chicken and mix it with the sauce. It will only take about 5-15 seconds to shred the chicken.
Take off the lid and remove the blade. Fold the chives, dill, parsley, and dill pickles into the dip. Garnish and serve with sliced veggies to dip. 1 tbsp fresh chives, 1/2 tbsp fresh dill, 1 tbsp fresh parsley, 1 cup dill pickles
Stove Top Directions:
Add the chicken and vinegar to a saucepan. 1 pound chicken breast, 1/3 cup vinegar
Cover the saucepan with a lid and cook the chicken at medium-high temperature for 15-20 minutes until the chicken is cooked through.
In a food processor or blender, mix the Greek yogurt, cottage cheese, garlic, and pepper until smooth. 3/4 cup plain Greek yogurt, 3/4 cup cottage cheese, 1 tsp garlic, 1 tsp black pepper
Remove the lid from the food processor or blender, then add the chicken to the food processor. You may need to break the chicken breasts in half so that they fit.
Use the food processor or blender to shred the chicken and mix it with the sauce. It will only take about 5-15 seconds to shred the chicken.
Take off the lid and remove the blade. Fold the chives, dill, parsley, and dill pickles into the dip. Garnish and serve with sliced veggies to dip. 1 tbsp fresh chives, 1/2 tbsp fresh dill, 1 tbsp fresh parsley, 1 cup dill pickles
Slow Cooker Directions:
Add the chicken and vinegar to your slow cooker. 1 pound chicken breast, 1/3 cup vinegar
Cover the slow cooker with the lid and cook the chicken on high heat for 2-3 hours, low heat for 4-5 hours, or until the chicken is cooked through.
In a food processor or blender, mix the Greek yogurt, cottage cheese, garlic, and pepper until smooth. 3/4 cup plain Greek yogurt, 3/4 cup cottage cheese, 1 tsp garlic, 1 tsp black pepper
Remove the lid from the food processor or blender then add the chicken to the food processor. You may need to break the chicken breasts in half so that they fit.
Use the food processor or blender to shred the chicken and mix it with the sauce. It will only take about 5-15 seconds to shred the chicken.
Take off the lid and remove the blade. Fold the chives, dill, parsley, and dill pickles into the dip. Garnish and serve with sliced veggies to dip. 1 tbsp fresh chives, 1/2 tbsp fresh dill, 1 tbsp fresh parsley, 1 cup dill pickles
Notes
21-Day Fix container counts for the entire recipe: 6 red containers, and 1 green container. Per serving: 1 red container, 1/6 green container.

Weight Watchers: One serving of this recipe (about 3/4 cup) is 0 2023 Points, 1 Blue Plan Point, 2 Green Plan Points, and 1 Purple Plan Point when you use fat-free Greek yogurt and fat-free cottage cheese.

Nutrition
Calories: 135kcal | Carbohydrates: 3g | Protein: 23g | Fat: 3g | Saturated Fat: 1g | Cholesterol: 51mg | Sodium: 423mg | Potassium: 326mg | Fiber: 1g | Sugar: 2g | Vitamin A: 169IU | Vitamin C: 2mg | Calcium: 64mg | Iron: 1mg
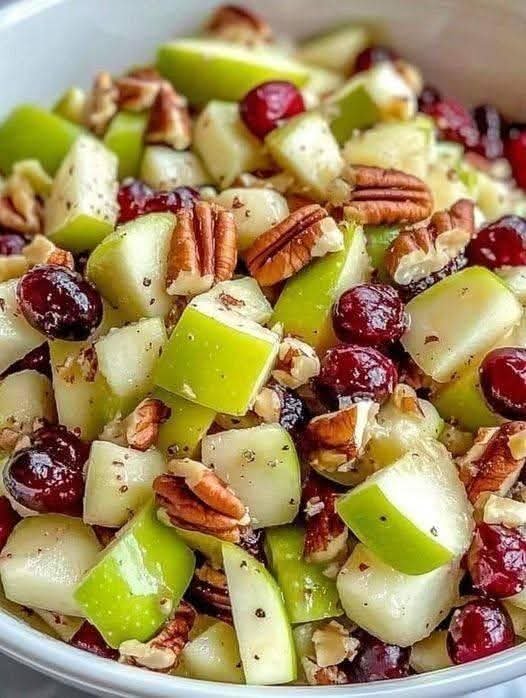
Apple Salad with Honeycrisp Apples, Celery, Grapes, Pecans, and Dried Cranberries

Apple Salad with Honeycrisp Apples, Celery, Grapes, Pecans, and Dried Cranberries
Don’t Lose This
I love this quick & easy recipe.

Ingredients
3 apples (chopped)
3 cups chopped lettuce or kale
½ cup pecans
⅓ cup dried cranberries
¼ cup crumbled feta (optional)
Honey Dijon Dressing
2 tbsp olive oil
1 tbsp honey
1 tbsp Dijon mustard
1 tbsp lemon juice (or apple cider vinegar)
Salt & pepper to taste
Instructions
Toss apples, greens, pecans, and cranberries in a large bowl.
Whisk dressing ingredients until smooth.
Pour over salad, toss gently, and top with feta.
Serve immediately.

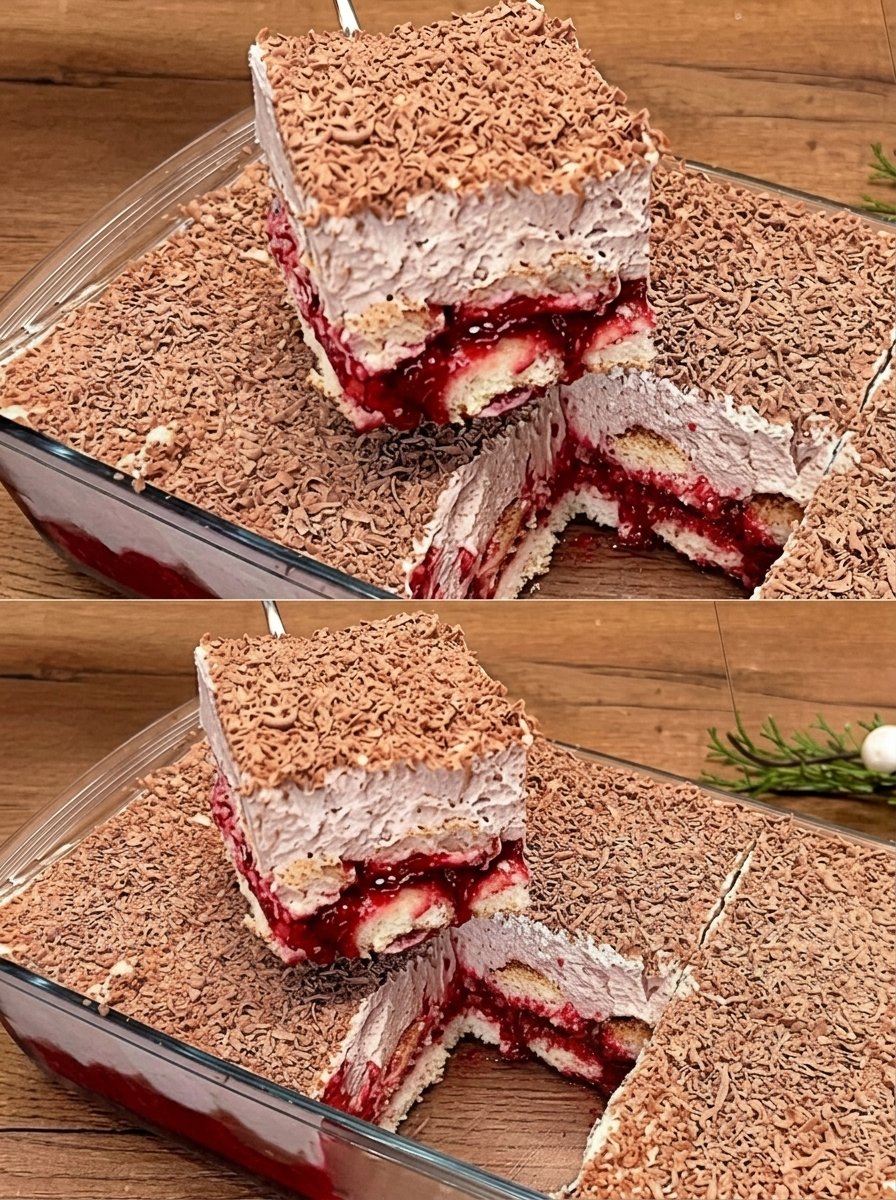
No-Bake Raspberry Chocolate Cream Dessert

No-Bake Raspberry Chocolate Cream Dessert

This layered delight is best served chilled, allowing the biscuits to soften into a cake-like texture.

🛒 Ingredients

  • 2 packs Digestive biscuits or Graham crackers 🍪

  • 2 cups Fresh or frozen raspberries (sweetened slightly) 🍓

  • 2 cups Heavy whipping cream (cold) 🥛

  • 1 cup Cream cheese (softened) 🧀

  • 1/2 cup Powdered sugar 🤍

  • 1 tsp Vanilla extract

  • 1/2 cup Chocolate shavings or grated chocolate 🍫

  • 1/4 cup Milk (for dipping the biscuits)


👩‍🍳 Step-by-Step Instructions

  1. Prepare Raspberry Layer: Mash the raspberries with a spoon. If they are very tart, stir in a tablespoon of sugar. Set aside. 🍓 ➡️

  2. Make the Cream: In a large bowl, whip the heavy cream, powdered sugar, and vanilla until stiff peaks form. In a separate bowl, beat the cream cheese until smooth, then gently fold it into the whipped cream. 🥣 ➡️

  3. First Layer: Quickly dip biscuits into the milk (just a second!) and line the bottom of a glass dish. ➡️

  4. Fruit Layer: Spread half of the mashed raspberries evenly over the biscuit base. ➡️

  5. Cream Layer: Spread half of the cream mixture over the raspberries. ☁️ ➡️

  6. Repeat: Add another layer of milk-dipped biscuits, the remaining raspberries, and the rest of the cream. ➡️

  7. Topping: Generously cover the top with chocolate shavings or grated chocolate for that beautiful finish. 🍫 ➡️

  8. Chill: Cover and refrigerate for at least 4–6 hours (overnight is best!). This allows the layers to set so you can cut perfect squares. ⏱️ ➡️


❓ Common Questions (Q&A)

Q: Can I use other fruits?A: Absolutely! Strawberries, blueberries, or even a layer of lemon curd would work beautifully with this cream base. 🥭 ➡️ 🫐

Q: How do I get clean slices?A: Make sure the dessert is very cold. Wipe your knife with a warm, damp cloth between every single cut to keep the layers looking sharp. 🔪 ✨

Q: My cream is too runny. What happened?A: Ensure your heavy cream is ice-cold before whipping and that you beat the cream cheese separately first to remove lumps before combining them. 🥛

Q: Can I make this more “chocolatey”?A: You can fold 2 tablespoons of cocoa powder into the cream mixture or use chocolate-flavored biscuits for the base layers! 🍫


Enjoy every creamy bite!

Healing Garden Vegetable Soup

A gentle, nourishing soup that’s easy on the stomach and full of natural goodness.

 Ingredients

  • 1 onion, chopped

  • 1–2 tbsp olive oil

  • 2 leeks, cleaned and chopped

  • 2 celery stalks, chopped

  • 1 carrot, diced

  • 1 red bell pepper, diced

  • 1 zucchini, diced

  • 2 potatoes, diced

  • 2 garlic cloves, minced

  • 6 cups vegetable broth (or water + bouillon)

  • 1 tsp dried thyme or Italian seasoning

  • Salt & black pepper to taste

  • Fresh parsley for garnish

  • Optional: squeeze of lemon juice

 Instructions

  1. Sauté aromatics
    Heat olive oil in a large pot over medium heat. Add onion, leeks, and garlic. Cook 3–4 minutes until softened.

  2. Add vegetables
    Stir in celery, carrot, red pepper, zucchini, and potatoes. Cook 2–3 minutes.

  3. Add broth & seasonings
    Pour in vegetable broth. Add thyme, salt, and pepper.

  4. Simmer
    Bring to a boil, then reduce heat and simmer 20–25 minutes, until vegetables are tender.

  5. Finish & serve
    Adjust seasoning. Add fresh parsley and a squeeze of lemon if desired. Serve warm.

 Description

This light vegetable soup is comforting, hydrating, and easy to digest. It’s packed with fiber-rich vegetables, antioxidants, and natural anti-inflammatory ingredients like garlic, celery, and olive oil. Perfect when you want something soothing, especially for sensitive stomach days.

Notes & Tips

✔ Chop vegetables evenly for consistent cooking
✔ For extra protein, add white beans or lentils
✔ Blend half the soup for a creamier texture
✔ Store in fridge up to 4 days
✔ Freezes well up to 2 months

Servings

  • Makes: 4–6 servings

  • Serving size: About 1½ cups

 Nutritional Information (Approx. per serving)

  • Calories: 150–180

  • Carbohydrates: 30g

  • Fiber: 5–7g

  • Protein: 3–4g

  • Fat: 4–6g

  • Sodium: Depends on broth used

 Health Benefits

  • Supports digestion – High fiber helps regulate digestion

  • Hydrating – Broth-based soups support hydration

  • Low calorie & filling – Great for weight management

  • Rich in antioxidants – From carrots, peppers, and garlic

  • Heart-friendly – Olive oil contains healthy fats

Q & A

Q: Can I make this soup for weight loss?
Yes! It’s low-calorie, high-fiber, and very filling.

Q: Is it good for bloating?
Yes — especially when eaten warm. You can skip potatoes if sensitive to starch.

Q: Can I add protein?
Absolutely. Add beans, shredded chicken, or tofu.

Q: Can I make it in a slow cooker?
Yes. Cook on LOW for 6–7 hours or HIGH for 3–4 hours.

Q: Is it freezer-friendly?
Yes, just cool completely before freezing.

Cucumber salad

Ingredients

2 large cucumbers (thinly sliced)

1 tbsp apple cider vinegar

Juice of 1 lemon

1 tbsp olive oil

1 clove garlic (minced)

½ tsp chili flakes (optional)

Salt & black pepper (to taste)

1 tbsp fresh dill or parsley (optional)

🔥 Instructions

1. Prep cucumbers

Wash and slice cucumbers thinly

Place in a bowl

2. Make dressing

Mix apple cider vinegar, lemon juice, olive oil, garlic, salt, and pepper

3. Combine

Pour dressing over cucumbers

Toss well to coat

4. Add extras

Sprinkle chili flakes and fresh herbs

5. Chill & serve

Let sit for 10–15 minutes before serving

🍽️ Servings

Serves: 2–3 people

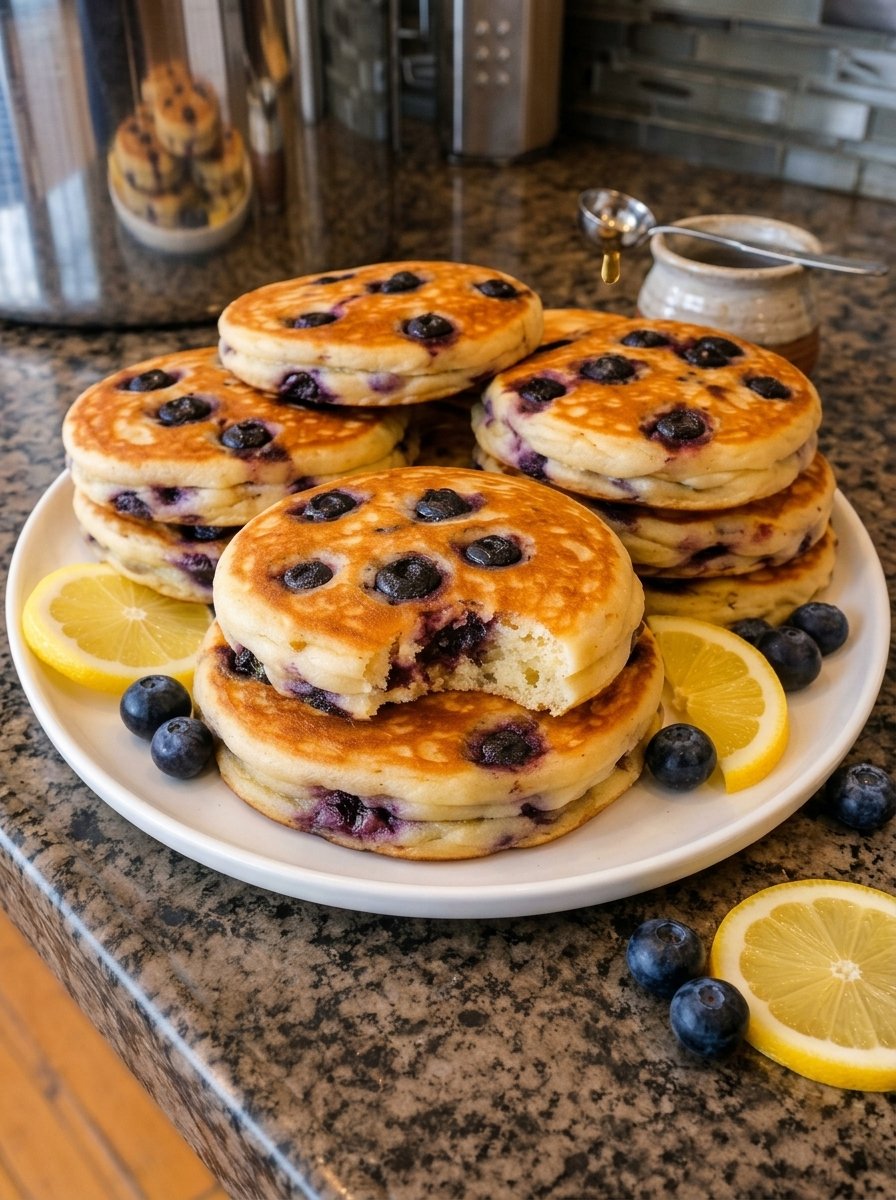
Fluffy Lemon Blueberry Buttermilk Pancakes

Fluffy Lemon Blueberry Buttermilk Pancakes

The secret to this height is a thick batter and not over-mixing the flour!

🛒 Ingredients

  • 2 cups All-purpose flour 🌾

  • 2 tbsp Sugar 🤍

  • 2 tsp Baking powder

  • 1/2 tsp Baking soda

  • 1/2 tsp Salt 🧂

  • 2 cups Buttermilk (room temperature) 🥛

  • 2 Large eggs 🥚

  • 4 tbsp Unsalted butter (melted and cooled) 🧈

  • 1 tsp Vanilla extract

  • 1 tbsp Lemon zest (optional, for that bright flavor) 🍋

  • 1 ½ cups Fresh blueberries 🫐

  • Oil or butter for the griddle


👩‍🍳 Step-by-Step Instructions

  1. Whisk Dry Ingredients: In a large bowl, whisk together the flour, sugar, baking powder, baking soda, and salt. 🥣 ➡️

  2. Mix Wet Ingredients: In a separate medium bowl, whisk the buttermilk, eggs, melted butter, vanilla, and lemon zest until smooth. ➡️

  3. Combine: Pour the wet ingredients into the dry ingredients. Stir gently with a spatula just until combined. Stop while you still see a few lumps! Over-mixing makes pancakes tough. ➡️

  4. Rest the Batter: Let the batter sit for 5–10 minutes. You will see bubbles forming; this makes them extra fluffy. ⏱️ ➡️

  5. Heat the Pan: Heat a non-stick skillet or griddle over medium heat. Lightly grease with a little butter or oil. 🍳 ➡️

  6. Cook: Pour about 1/3 cup of batter onto the griddle. Gently press a handful of blueberries into the top of each pancake while the bottom cooks. 🫐 ➡️

  7. Flip: Wait until bubbles form on the surface and the edges look set and dry (about 2–3 minutes). Flip carefully and cook the other side until golden brown (about 1–2 minutes). ➡️

  8. Serve: Stack them high and serve with maple syrup, honey, or a squeeze of fresh lemon! 🍯 ➡️


❓ Common Questions (Q&A)

Q: Can I use frozen blueberries? A: Yes! Do not thaw them first, or they will turn your batter purple. Add them directly to the pancake on the griddle just like fresh ones. ❄️

Q: I don’t have buttermilk. What can I use? A: Mix 2 cups of regular milk with 2 tablespoons of lemon juice or white vinegar. Let it sit for 5 minutes until it curdles slightly before using! 🥛🍋

Q: Why are my pancakes flat? A: This usually happens if your baking powder is old or if you over-mixed the batter. Stir just until the flour disappears to keep that airy structure. 📈

Q: How do I keep them warm while cooking the rest? A: Place a wire rack on a baking sheet in the oven at its lowest setting (around 90°C or 200°F). Transfer the finished pancakes there to stay crisp and warm! 🌡️


Enjoy your delicious breakfast! ✨🥞

The Easiest No-Knead Soft Flatbread

The Easiest No-Knead Soft Flatbread

This recipe creates a flexible, fluffy bread that works perfectly for wraps, dipping into soups, or making quick personal pizzas.

🛒 Ingredients

  • 2 cups Warm water (not boiling!) 💧

  • 1 tbsp Sugar 🤍

  • 1 tbsp Dry yeast

  • 4 cups All-purpose flour 🌾

  • 1 tsp Salt 🧂

  • 2 tbsp Vegetable oil (optional, for the dough surface) 🫒


👩‍🍳 Step-by-Step Instructions

  1. Activate Yeast: In a large bowl, mix the warm water, sugar, and yeast. Let it sit for about 5–10 minutes until it becomes frothy. 🫧 ➡️

  2. Mix the Dough: Add the flour and salt to the bowl. Stir with a sturdy spoon until a sticky dough forms. There is no need to knead; just ensure all the flour is hydrated. ➡️

  3. First Rise: Cover the bowl with a damp cloth or plastic wrap. Let it rest in a warm spot for about 1 hour or until it has doubled in size. 📈 ➡️

  4. Shape: Turn the dough onto a floured surface. Gently divide it into 10–12 equal pieces. Roll each piece into a smooth ball and then flatten into a disc using your fingers or a rolling pin. ➡️

  5. Second Rest: Place the discs on a baking tray lined with parchment paper. Cover and let them rest for another 15–20 minutes. ➡️

  6. Bake: Preheat your oven to 220°C (425°F). Bake for 10–15 minutes until they puff up and the tops are beautifully golden brown. 🥧 ➡️

    • Alternative: You can also cook these on a hot, dry skillet over medium heat for 2 minutes per side!

  7. Keep Soft: As soon as they come out of the oven, stack them and wrap them in a clean kitchen towel. The steam will keep them soft and pliable. ➡️


❓ Common Questions (Q&A)

Q: Can I use whole wheat flour? A: Yes! You can replace up to half of the all-purpose flour with whole wheat. You may need an extra tablespoon of water as whole wheat absorbs more liquid. 🌾

Q: Why didn’t my bread puff up? A: Usually, this is because the oven wasn’t hot enough or the yeast was old. Make sure your oven is fully preheated before putting the tray in! 🔥

Q: How do I store these? A: Once completely cool, store them in a zip-top bag at room temperature for 2 days or freeze them for up to 3 months. Reheat in a toaster or skillet for that “just baked” taste! 🧊

Q: Can I add toppings? A: Absolutely! Before baking, you can brush the tops with a little water and sprinkle on sesame seeds, dried herbs, or even a little sea salt. ✨


Happy baking! 🥖🧤