Pineapple Loaf Cake

Ingredients

  • 2 cups flour
  • 1 cup sugar 🍬
  • 2 eggs πŸ₯š
  • Β½ cup butter, melted 🧈
  • 1 cup pineapple chunks 🍍
  • Β½ cup pineapple juice
  • 1 tsp baking powder
  • 1 tsp vanilla extract

πŸ‘©β€πŸ³ Step-by-Step Instructions

πŸ₯£ 1. Prepare the Batter

  • In a bowl, whisk eggs, sugar, melted butter, pineapple juice, and vanilla.

🍍 2. Add Dry Ingredients

  • Add flour and baking powder.
  • Mix until smooth.
  • Fold in pineapple chunks gently.

🍞 3. Fill the Pan

  • Grease a loaf pan.
  • Pour batter into the pan.
  • Add extra pineapple pieces on top for decoration.

πŸ”₯ 4. Bake

  • Bake at 350Β°F (175Β°C) for 40–45 minutes until golden brown.

✨ 5. Cool & Serve

  • Let the loaf cool for 10 minutes.
  • Slice and enjoy soft, juicy pineapple goodness πŸπŸ’›

❓Q/A

❓Can I use canned pineapple?

βœ… Yes! Drain it slightly before using.

❓How do I keep the cake moist?

βœ… Pineapple juice helps keep it soft and moist.

❓Can I add nuts?

βœ… Absolutely! Walnuts or pecans taste amazing in this loaf.

Spinach & Cheese Turkish Pide

Spinach & Cheese Turkish Pide πŸ₯¬πŸ§€

πŸ›’ Ingredients

  • 2 cups flour
  • 1 tsp instant yeast
  • ΒΎ cup warm water
  • 1 tbsp olive oil
  • 1 tsp salt
  • 2 cups spinach (chopped)
  • 1Β½ cups mozzarella cheese
  • 2 garlic cloves (minced)

πŸ‘©β€πŸ³ Step-by-Step Instructions

1️⃣ Make the Dough

  • In a bowl, mix warm water and yeast. Let it sit for 5 minutes until slightly foamy.
  • Add flour, olive oil, and salt.
  • Mix until a dough forms.

➑️ Knead the dough for about 8–10 minutes until smooth and soft.
➑️ Cover the bowl with a towel and let the dough rise for 1 hour until doubled in size.


2️⃣ Prepare the Filling

  • Heat a small pan with a few drops of olive oil.
  • Add minced garlic and cook for 30 seconds.
  • Add chopped spinach and cook until wilted.

➑️ Remove from heat and let it cool slightly.
➑️ Mix in most of the cheese, keeping a little for topping.


3️⃣ Shape the Pide

  • Divide dough into 2 equal pieces.
  • Roll each piece into a long oval shape.

➑️ Place spinach filling in the center.
➑️ Fold the edges inward to create the classic boat shape.
➑️ Pinch both ends tightly.


4️⃣ Add Cheese & Bake

  • Sprinkle remaining cheese on top.
  • Place on a baking tray lined with parchment paper.

πŸ”₯ Bake at 220Β°C / 425Β°F for 15–18 minutes until golden brown and bubbly.

➑️ The crust should look crispy and deeply golden.


5️⃣ Serve

  • Let cool for 5 minutes before slicing.
  • Serve warm with yogurt sauce or tea. β˜•

πŸ’‘ Tips

  • Don’t overfill the pide or it may open while baking.
  • Brush crust edges with olive oil for extra shine.
  • Fresh mozzarella gives the best cheesy texture.

❓Q/A

❓Can I use frozen spinach?

βœ… Yes, just thaw it and squeeze out extra water first.

❓How do I keep the crust crispy?

βœ… Bake on a preheated tray or pizza stone for a crispier bottom.

Creamy Spinach Stuffed Salmon

Ingredients

  • 4 salmon fillets
  • 2 cups fresh spinach πŸ₯¬
  • 1 cup mozzarella cheese πŸ§€
  • 2 tbsp cream cheese
  • 2 garlic cloves (minced) πŸ§„
  • 1 tbsp olive oil
  • Salt & black pepper

πŸ‘©β€πŸ³ Step-by-Step Instructions

πŸ”ͺ 1. Prepare the Salmon

  • Slice each salmon fillet in the middle to create a pocket.
  • Season with salt and black pepper.

πŸ₯¬ 2. Make the Filling

  • Heat olive oil in a pan.
  • Add garlic and spinach. Cook for 2–3 minutes until spinach softens.
  • Mix in cream cheese and mozzarella until creamy.

πŸ§€ 3. Stuff the Salmon

  • Fill each salmon pocket with the creamy spinach mixture.

πŸ”₯ 4. Cook

  • Heat a skillet over medium heat.
  • Cook salmon for 4–5 minutes per side until golden and fully cooked.

πŸ‹ 5. Serve

  • Serve hot with lemon wedges, rice, or roasted veggies.

❓Q/A

❓Can I bake this instead?

βœ… Yes! Bake at 400Β°F (200Β°C) for about 15–18 minutes.

❓What cheese works best?

βœ… Mozzarella gives a creamy melt, but parmesan also tastes amazing.

❓How do I know salmon is done?

βœ… The salmon should flake easily with a fork.

Matcha Pistachio Cranberry Ring Cookies

Ingredients

  • 1 cup all-purpose flour
  • 1 tbsp matcha powder 🍡
  • Β½ cup butter, softened 🧈
  • β…“ cup sugar
  • 1 tsp vanilla extract
  • ΒΌ cup chopped pistachios πŸ’š
  • ΒΌ cup dried cranberries πŸ’
  • Powdered sugar for topping

πŸ‘©β€πŸ³ Step-by-Step Instructions

πŸ₯£ Step 1: Prepare the Dough

  • In a bowl, mix softened butter and sugar until creamy.
  • Add vanilla extract and stir well.

🍡 Step 2: Add Dry Ingredients

  • Add flour and matcha powder.
  • Mix until a soft dough forms.

πŸ’š Step 3: Fold in Toppings

  • Gently mix in chopped pistachios and dried cranberries.

🍩 Step 4: Shape the Cookies

  • Take small portions of dough and shape them into rings.
  • Place them on a baking tray lined with parchment paper.

πŸ”₯ Step 5: Bake

  • Bake at 350Β°F (175Β°C) for 12–15 minutes until the edges are lightly golden.

❄️ Step 6: Cool & Finish

  • Let cookies cool completely.
  • Dust lightly with powdered sugar for a bakery-style look.

πŸ’‘ Tips

  • Chill the dough for 15 minutes if it feels sticky.
  • Use high-quality matcha for the best green color.
  • Store in an airtight container for freshness.

❓ Q/A

❓ Can I use almonds instead of pistachios?

βœ… Yes, almonds or walnuts work great too.

❓ Why are my cookies dry?

βœ… Overbaking can dry them out, so bake just until lightly golden.

Crispy Potato & Carrot Patties

Ingredients

  • 3 medium potatoes (grated) πŸ₯”
  • 1 large carrot (grated) πŸ₯•
  • 3 eggs πŸ₯š
  • 3 tbsp flour
  • Salt & black pepper to taste
  • 2 tbsp chopped parsley 🌿
  • Oil for frying

πŸ‘©β€πŸ³ Step-by-Step Instructions

πŸ₯” Step 1: Prepare the Vegetables

  • Grate the potatoes and carrot into a large bowl.
  • Squeeze out extra water from the potatoes using your hands or a clean towel. πŸ’§

πŸ₯š Step 2: Mix Everything

  • Add eggs, flour, salt, black pepper, and parsley.
  • Mix well until everything is combined. πŸ₯£

πŸ”₯ Step 3: Shape the Patties

  • Take a small amount of mixture and shape into round patties with your hands.

🍳 Step 4: Fry

  • Heat a little oil in a pan over medium heat.
  • Fry each patty for about 3–4 minutes per side until golden brown and crispy. ✨

🧻 Step 5: Drain

  • Place cooked patties on paper towels to remove extra oil.

🍽️ Step 6: Serve

  • Serve hot with yogurt sauce, ketchup, or sour cream. πŸ˜‹

πŸ’‘ Tips

  • Removing potato water helps make the patties crispy.
  • Add a little cheese for extra flavor πŸ§€

❓Q/A

❓Can I bake these instead of frying?

βœ… Yes! Bake at 400Β°F (200Β°C) for 20–25 minutes, flipping halfway.

❓Can I store leftovers?

βœ… Keep in the fridge for up to 3 days and reheat in a pan.

❓What can I serve with them?

βœ… They pair perfectly with salad, eggs, or grilled chicken πŸ₯—πŸ—

Crispy Cream-Filled Puff Pastry Dessert

Ingredients

  • 1 sheet puff pastry
  • 2 cups whipped cream or whipped topping
  • 2 tbsp powdered sugar
  • ΒΌ cup chocolate chips 🍫
  • Extra powdered sugar for topping

πŸ‘©β€πŸ³ Step-by-Step Instructions

πŸ₯ Step 1: Prepare the Pastry

  • Place the puff pastry sheet on a baking tray lined with parchment paper.
  • Cut into 3 equal rectangles.
  • Use a fork to poke holes all over the pastry. 🍴

πŸ”₯ Step 2: Bake

  • Bake at 390Β°F (200Β°C) for about 15–18 minutes until golden and crispy.
  • Let the pastry cool completely. ❄️

🍦 Step 3: Make the Cream Filling

  • In a bowl, mix whipped cream with powdered sugar.
  • Fold in chocolate chips gently. 🍫

✨ Step 4: Assemble the Dessert

  • Place one pastry layer on a tray.
  • Spread a thick layer of cream filling.
  • Add the second pastry layer and repeat.
  • Finish with the last pastry layer on top.

❄️ Step 5: Chill

  • Refrigerate for 1–2 hours so it sets nicely.

🍰 Step 6: Decorate & Serve

  • Dust generously with powdered sugar before serving.
  • Slice carefully with a sharp knife and enjoy! πŸ˜‹

πŸ’‘ Tips

  • Chill the pastry before baking for extra crispiness.
  • Use mini chocolate chips for smoother layers.

❓Q/A

❓Can I use custard instead of whipped cream?

βœ… Yes! Vanilla custard tastes amazing in this dessert.

❓How long does it stay fresh?

βœ… Keep refrigerated for up to 3 days.

❓Can I add fruit?

βœ… Absolutely! Strawberries or blueberries work great πŸ“πŸ«

Creamy Garlic Parmesan Chicken Wings

Ingredients

  • 8 chicken wings or drumettes
  • 1 tbsp olive oil
  • 1 tsp garlic powder
  • Salt & black pepper to taste
  • Β½ cup heavy cream
  • Β½ cup grated parmesan cheese
  • 2 garlic cloves (minced)
  • Fresh parsley for garnish 🌿

πŸ‘©β€πŸ³ Step-by-Step Instructions

πŸ”₯ Step 1: Season the Chicken

  • Pat the chicken dry with paper towels.
  • Add olive oil, garlic powder, salt, and black pepper.
  • Toss well until fully coated.

πŸ— Step 2: Cook the Chicken

  • Bake at 400Β°F (200Β°C) for about 35–40 minutes until golden and crispy.
    ➑️ You can also air fry for 22–25 minutes.

πŸ§„ Step 3: Make the Creamy Parmesan Sauce

  • In a small pan, sautΓ© minced garlic for 1 minute.
  • Pour in heavy cream and stir gently.
  • Add parmesan cheese and mix until smooth and creamy. πŸ§€

✨ Step 4: Coat the Chicken

  • Pour the creamy parmesan sauce over the hot chicken wings.
  • Sprinkle parsley on top for extra flavor and color. 🌿

🍽️ Step 5: Serve

  • Serve warm with extra dipping sauce on the side.
  • Perfect with fries, salad, or roasted veggies! πŸ˜‹

πŸ’‘ Tips

  • For extra crispiness, broil the wings for 2–3 minutes at the end.
  • Fresh parmesan melts smoother than pre-shredded cheese.

❓Q/A

❓Can I use chicken thighs instead?

βœ… Yes! Boneless thighs work great with this creamy sauce.

❓How do I store leftovers?

βœ… Keep in an airtight container in the fridge for up to 3 days.

❓Can I make it spicy?

βœ… Add chili flakes or hot sauce for a spicy kick 🌢️

2-Ingredient Pineapple Soft Serve

2-Ingredient Pineapple Soft Serve

Creamy, fruity, and refreshing β€” this easy pineapple soft serve tastes like tropical ice cream with only 2 ingredients! 😍🍦

πŸ›’ Ingredients

  • 2 cups frozen pineapple chunks 🍍
  • Β½ cup coconut milk πŸ₯₯

πŸ‘©β€πŸ³ Detailed Step-by-Step Instructions

❄️ Step 1: Freeze the Pineapple

  • If using fresh pineapple:
    • Peel and cut into chunks.
    • Spread pieces on a tray so they don’t stick together.
    • Freeze for at least 4 hours until completely solid.

πŸ‘‰ Fully frozen pineapple creates the thick soft-serve texture.


πŸŒͺ️ Step 2: Add to Blender

  • Place frozen pineapple into a blender or food processor.
  • Pour in the coconut milk.

πŸ‘‰ Start with less liquid first. You can always add more later.


πŸ₯„ Step 3: Blend Slowly

  • Blend on low speed first.
  • The mixture will look crumbly at the beginning β€” this is normal.
  • Stop occasionally and scrape down the sides with a spoon or spatula.

πŸ‘‰ This helps everything blend evenly.


🍦 Step 4: Make It Creamy

  • Continue blending until the texture becomes:
    • Smooth
    • Thick
    • Creamy like soft-serve ice cream 😍
  • If too thick:
    • Add 1 tablespoon coconut milk at a time.

⚠️ Don’t add too much liquid or it will become runny.


πŸŒ€ Step 5: Serve

  • Scoop into bowls or glasses.
  • For a fancy swirl look:
    • Put mixture into a piping bag.
    • Pipe in circles like ice cream shop soft serve. ✨
  • Serve immediately before melting. πŸ˜‹

πŸ’‘ Tips

βœ… Freeze pineapple in small chunks for easier blending.
βœ… A tiny pinch of salt makes the pineapple taste sweeter.
βœ… Add a little vanilla for extra flavor.


❓Q&A

❓Can I use another milk?

βœ… Yes! Almond milk or oat milk also works.

❓Can I freeze leftovers?

βœ… Yes, but let it soften for 10 minutes before eating again.

❓Do I need added sugar?

βœ… Usually no β€” pineapple is naturally sweet enough.

Sweet and spicy pineapple shrimp skewers

Sweet & Spicy Pineapple Shrimp Skewers

These sweet and spicy pineapple shrimp skewers are juicy, smoky, and packed with bold flavor. The shrimp are coated in a sweet chili-style marinade, then grilled with fresh pineapple until slightly caramelized and perfectly charred.

They’re light, flavorful, and perfect for summer dinners, cookouts, or quick weeknight meals.

Prep Time & Servings

Prep Time: 15 minutes

Marinate Time: 15–30 minutes

Cook Time: 10 minutes

Total Time: 40 minutes

Servings: 4

Ingredients

1 pound shrimp, peeled and deveined

2 cups fresh pineapple chunks

1 tablespoon olive oil

2 garlic cloves, minced

2 tablespoons honey

1 tablespoon soy sauce

1 tablespoon lime juice

1 teaspoon sriracha or chili sauce

Β½ teaspoon paprika

Salt and black pepper

Optional Add-Ins

Bell peppers

Red onion

Cilantro

Chili flakes

Sesame seeds

Instructions

1. Make the Marinade

In a bowl, whisk together:

olive oil

garlic

honey

soy sauce

lime juice

sriracha

paprika

salt

pepper

2. Marinate the Shrimp

Add the shrimp to the bowl and toss well.

Let them marinate for about 15–30 minutes.

3. Assemble the Skewers

Thread onto skewers:

shrimp

pineapple chunks

You can also add peppers or onions if you like.

4. Grill the Skewers

Heat a grill or grill pan over medium-high heat.

Cook the skewersΒ  for about:

2–3 minutes per side

Until the shrimp are pink and lightly charred.

The pineapple should become slightly caramelized.

5. Serve

Serve warm with:

rice

quinoa

salad

grilled vegetables

lime wedges

Helpful Tips

Don’t overcook the shrimp or they’ll become rubbery

Fresh pineapple gives the best flavor and caramelization

Soak wooden skewers in water first so they don’t burn

Add extra chili sauce if you want more heat

Nutritional Information

Calories: 260

Protein: 24g

Carbohydrates: 18g

Fiber: 2g

Fat: 10g

Saturated Fat: 1g

Sodium: 420mg

Creamy spinach artichoke pasta

Creamy Spinach Artichoke Pasta

This creamy spinach artichoke pasta is rich, cozy, and full of flavor while still being easy enough for a weeknight dinner. Tender pasta gets tossed in a creamy garlic parmesan sauce with spinach and artichokes for that classic spinach-artichoke dip flavor everyone loves.

It’s comforting, creamy, and comes together in about 30 minutes.

Prep Time & Servings

Prep Time: 10 minutes

Cook Time: 20 minutes

Total Time: 30 minutes

Servings: 4–5

Ingredients

12 oz pasta (penne, rigatoni, or fettuccine)

2 tablespoons olive oil

3 garlic cloves, minced

2 cups fresh spinach

1 can artichoke hearts, drained and chopped

1 cup heavy cream or half-and-half

Β½ cup cream cheese

Β½ cup parmesan cheese

Β½ teaspoon Italian seasoning

Salt and black pepper

Optional Add-Ins

Grilled chicken

Mushrooms

Sun-dried tomatoes

Chili flakes

Mozzarella cheese

Instructions

1. Cook the Pasta

Bring a large pot of salted water to a boil.

Cook the pasta until al dente according to package directions.

Before draining, save about Β½ cup pasta water.

2. Cook the Garlic & Vegetables

Heat olive oil in a large skillet over medium heat.

Add garlic and cook for about 30 seconds until fragrant.

Add:

spinach

artichokes

Cook for 2–3 minutes until the spinach softens.

3. Make the Creamy Sauce

Lower the heat slightly and stir in:

heavy cream

cream cheese

parmesan cheese

Italian seasoning

salt

pepper

Stir until smooth and creamy.

If the sauce feels too thick, add a little reserved pasta water.

4. Toss Everything Together

Add the cooked pasta to the skillet.

Toss until the pasta is fully coated in the creamy sauce.

Taste and adjust seasoning if needed.

5. Serve

Serve warm with:

extra parmesan

black pepper

fresh parsley

chili flakes if you like heat

Helpful Tips

Don’t overcook the spinach or it loses texture

Use freshly grated parmesan for the smoothest sauce

Add grilled chicken if you want extra protein

Pasta water helps make the sauce silky and glossy

Nutritional Information

Calories: 610

Protein: 18g

Carbohydrates: 48g

Fiber: 4g

Fat: 38g

Saturated Fat: 19g

Sodium: 520mg

French Onion Meatloaf Bake

French Onion Meatloaf Bake

A juicy meatloaf loaded with rich onion flavor, topped with melted cheese, and baked until golden and bubbly β€” perfect comfort food! πŸ˜‹

πŸ›’ Ingredients

  • 1Β½ lbs ground beef
  • 1 onion, thinly sliced
  • 1 cup shredded mozzarella or Swiss cheese
  • 1 egg
  • Β½ cup breadcrumbs
  • 2 tbsp ketchup
  • 1 tsp garlic powder
  • Salt & black pepper to taste
  • 1 tbsp butter

πŸ‘©β€πŸ³ Step-by-Step Instructions

πŸ”₯ Step 1: Cook the Onions

  • Melt butter in a pan over medium heat.
  • Add sliced onions and cook slowly for 12–15 minutes until soft and caramelized.
  • Stir occasionally so they don’t burn.

πŸ₯£ Step 2: Make the Meatloaf Mixture

  • In a large bowl combine:
    • Ground beef
    • Egg
    • Breadcrumbs
    • Ketchup
    • Garlic powder
    • Salt & pepper
  • Mix gently until combined. Do not overmix.

πŸ– Step 3: Shape the Meatloaf

  • Place mixture into a baking dish or loaf pan.
  • Shape into a loaf.
  • Spread half the caramelized onions on top.

πŸ§€ Step 4: Add Cheese

  • Sprinkle shredded cheese generously over the top.
  • Add remaining onions over the cheese.

πŸ”₯ Step 5: Bake

  • Bake at 375Β°F (190Β°C) for about 45–55 minutes until fully cooked.
  • Broil for 2–3 minutes at the end for extra golden melted cheese.

🌿 Step 6: Serve

  • Let rest for 5 minutes.
  • Garnish with fresh parsley and serve warm. 😍

πŸ’‘ Tips

  • Swiss cheese gives the best French onion flavor.
  • Serve with mashed potatoes or roasted veggies.
  • Add a splash of beef broth for extra juiciness.

❓Q&A

❓Can I use turkey instead of beef?

βœ… Yes! Ground turkey works great for a lighter version.

❓How do I store leftovers?

βœ… Keep refrigerated in an airtight container for up to 3 days.

❓Can I freeze it?

βœ… Yes, freeze slices individually for easy meals later.

Crispy Butter Toast Bites

Ingredients

  • 4 thick bread slices 🍞
  • 3 tbsp butter 🧈
  • 2 tbsp sweetened condensed milk
  • 1 tsp honey 🍯
  • Pinch of salt

πŸ‘©β€πŸ³ Instructions

πŸ”₯ Step 1: Prepare Bread

  • Cut thick bread slices into large pieces.
  • Lightly toast them in a pan or oven.

🧈 Step 2: Make Butter Mixture

  • In a small bowl, mix melted butter, condensed milk, honey, and a tiny pinch of salt.

🍞 Step 3: Coat the Bread

  • Brush the butter mixture generously over the bread slices.

πŸ”₯ Step 4: Toast Again

  • Place bread back in pan or oven.
  • Toast until edges become crispy and golden brown ✨

🍯 Step 5: Serve

  • Drizzle extra honey on top.
  • Serve warm for best taste 😍

πŸ’‘ Tips

βœ… Use brioche or thick milk bread for soft texture
βœ… Don’t over-toast or bread may become too hard
βœ… Best served hot and fresh


❓Q/A

❓Can I add cheese?

βœ… Yes, mozzarella or cream cheese tastes amazing.

❓Can I make it sweeter?

βœ… Add extra honey or powdered sugar.

❓Can I air fry it?

βœ… Yes, air fry at 350Β°F for 5–6 minutes.


🌟 Why You’ll Love It

✨ Crispy outside & soft inside
✨ Rich buttery flavor
✨ Quick and easy snack
✨ Perfect with tea or coffee β˜•πŸž

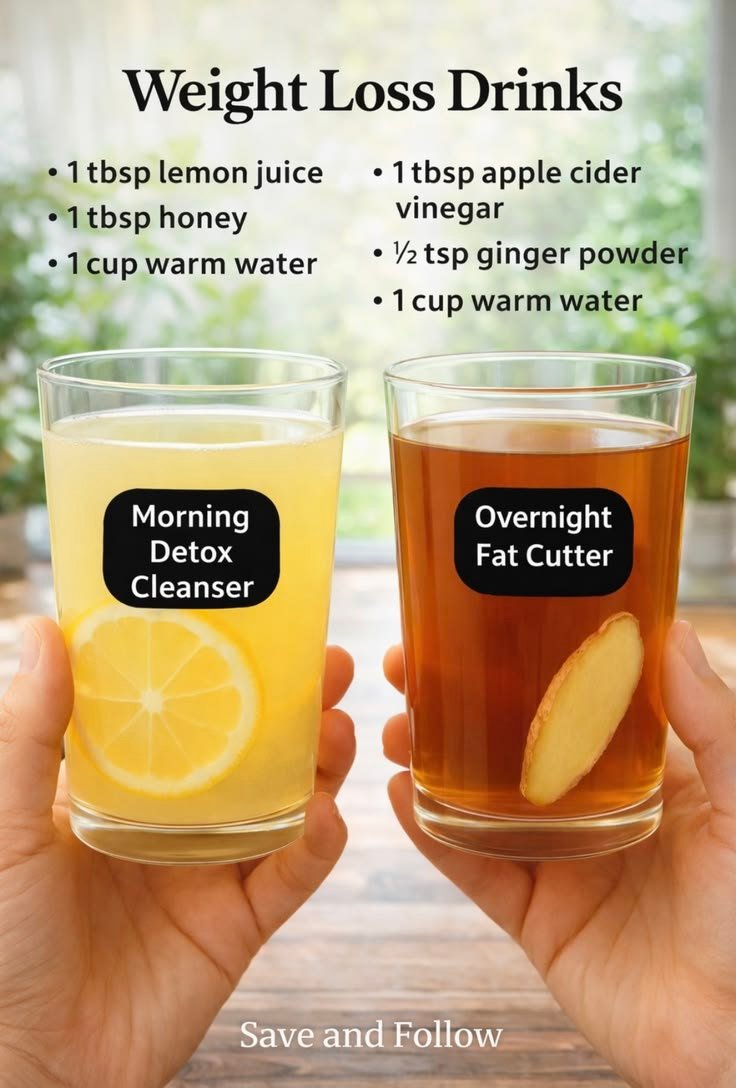
πŸ‹ Evening Lemon Detox Drink

Ingredients

  • 2 cups warm water πŸ’§
  • 1 lemon or lime (sliced) πŸ‹
  • 1 tbsp honey 🍯
  • 1 tsp grated ginger
  • 1 tbsp apple cider vinegar
  • Pinch of cinnamon (optional)

πŸ‘©β€πŸ³ Instructions

πŸ”₯ Step 1: Warm the Water

  • Heat water until warm but not boiling.

πŸ‹ Step 2: Add Ingredients

  • Pour warm water into a mug.
  • Add lemon or lime slices.
  • Stir in honey, ginger, and apple cider vinegar.

πŸ₯„ Step 3: Mix Well

  • Stir everything together for 1 minute.
  • Let it sit for 2–3 minutes.

β˜• Step 4: Serve

  • Drink warm in the evening before bedtime ✨

πŸ’‘ Tips

βœ… Use fresh lemon for best flavor
βœ… Add mint leaves for freshness 🌿
βœ… Drink alongside healthy meals and exercise


❓Q/A

❓Can I drink it daily?

βœ… Yes, 1 cup daily is enough.

❓Can I use cold water?

βœ… Warm water works best for this recipe.

❓Can I skip apple cider vinegar?

βœ… Yes, but it adds extra tangy flavor.


🌟 Why You’ll Love It

✨ Refreshing and soothing
✨ Easy 5-minute drink
✨ Light citrus flavor
✨ Cozy nighttime wellness drink πŸ‹

Cranberry Pistachio Icebox Cookies

Ingredients

  • 1 cup butter 🧈
  • 3/4 cup powdered sugar
  • 1 tsp vanilla extract
  • 2 cups all-purpose flour
  • 1/2 cup dried cranberries
  • 1/2 cup pistachios πŸ’š
  • Pinch of salt

πŸ‘©β€πŸ³ Instructions

πŸ₯£ Step 1: Make the Dough

  • In a large bowl, mix butter and powdered sugar until creamy.
  • Add vanilla extract and mix well.

🌾 Step 2: Add Dry Ingredients

  • Add flour and salt slowly.
  • Mix until soft dough forms.

🫐 Step 3: Add Cranberries & Pistachios

  • Fold cranberries and pistachios into the dough evenly.

πŸ₯ Step 4: Shape the Dough

  • Divide dough into 2 parts.
  • Roll each into a log shape.
  • Wrap tightly in plastic wrap.

❄️ Step 5: Chill

  • Refrigerate for at least 2–3 hours until firm.

πŸ”ͺ Step 6: Slice Cookies

  • Remove dough from fridge.
  • Slice into round cookies.

πŸ”₯ Step 7: Bake

  • Place cookies on baking tray.
  • Bake at 350Β°F (175Β°C) for 12–15 minutes until edges are light golden.

πŸͺ Step 8: Cool & Serve

  • Let cookies cool for 10 minutes.
  • Enjoy with tea or coffee β˜•βœ¨

πŸ’‘ Tips

βœ… Chill dough well for perfect slices
βœ… Don’t overbake for soft buttery texture
βœ… Add white chocolate chips for extra flavor 🀍


❓Q/A

❓Can I freeze the dough?

βœ… Yes, freeze for up to 2 months.

❓Can I use almonds instead of pistachios?

βœ… Yes, almonds or walnuts work great.

❓How long do they stay fresh?

βœ… Store in airtight container for up to 1 week.


🌟 Why You’ll Love It

✨ Buttery and soft
✨ Sweet cranberry flavor
✨ Crunchy pistachios
✨ Perfect holiday-style cookies πŸͺπŸ’š

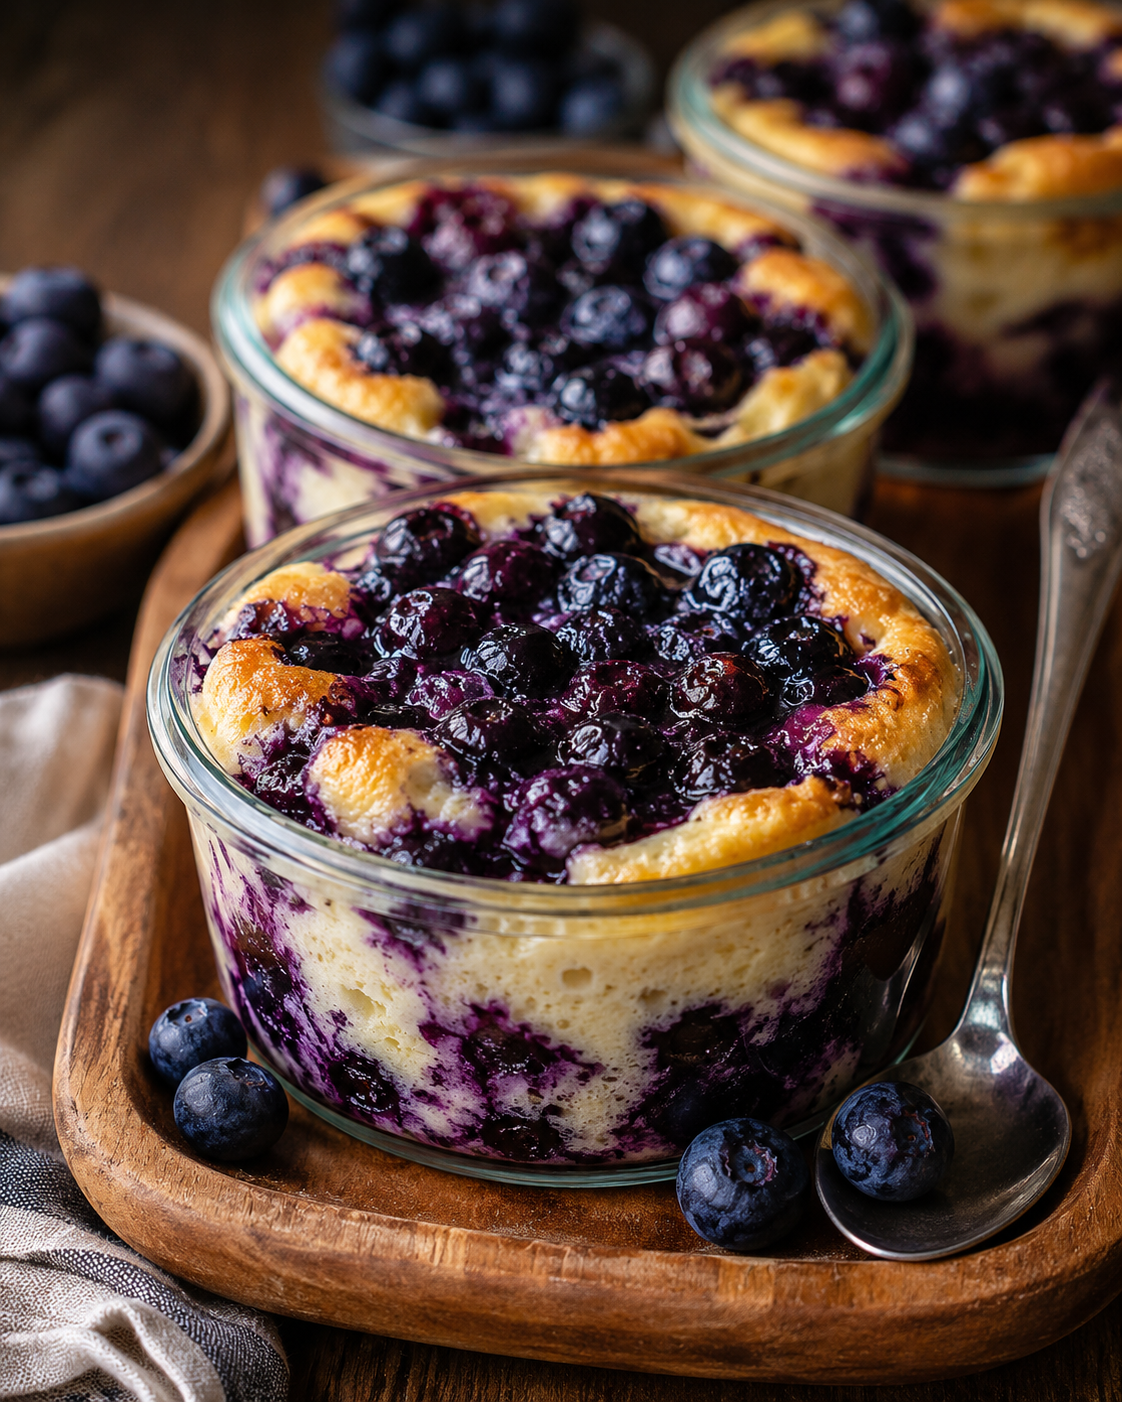
Blueberry Cream Cheese Cake

Ingredients

  • 2 cups blueberries 🫐
  • 2 packs cream cheese
  • 3 eggs
  • 1/2 cup sugar
  • 1 tsp vanilla extract
  • 1/4 cup almond flour or all-purpose flour

πŸ‘©β€πŸ³ Step-by-Step Recipe

πŸ₯£ Step 1: Prepare Batter

  • In a large bowl, add cream cheese and sugar.
  • Mix until smooth and creamy.
  • Add eggs one at a time.
  • Stir in vanilla extract.

🫐 Step 2: Add Blueberries

  • Fold blueberries gently into the batter.
  • Add almond flour and mix lightly.

🍰 Step 3: Prepare Pan

  • Grease a round baking pan lightly.
  • Pour the batter into the pan evenly.

πŸ”₯ Step 4: Bake

  • Bake at 350Β°F (175Β°C) for 40–45 minutes.
  • Top should look lightly golden.
  • Center should be slightly soft.

❄️ Step 5: Cool & Serve

  • Let the cake cool completely.
  • Chill for 1 hour for best texture.
  • Slice and enjoy 🫐✨

πŸ’‘ Tips

βœ… Use fresh blueberries for juicy flavor
βœ… Chill before cutting for cleaner slices
βœ… Add lemon zest for extra freshness πŸ‹


❓Q/A

❓Can I use frozen blueberries?

βœ… Yes, but do not thaw them first.

❓How do I store it?

βœ… Keep refrigerated for up to 4 days.

❓Can I make it low carb?

βœ… Yes, use almond flour and a sugar substitute.


🌿 Why You’ll Love It

✨ Creamy and rich
✨ Bursting with blueberries
✨ Easy homemade dessert
✨ Perfect for breakfast or dessert

Creamy Cucumber Crab Salad

Ingredients

  • 2 cups shredded cabbage
  • 1 cucumber (thinly sliced)
  • 1 cup imitation crab sticks (sliced)
  • 1 small carrot (shredded)
  • 2 green onions (chopped)
  • Β½ cup mayonnaise
  • 2 tbsp yogurt or sour cream
  • 1 tsp lemon juice
  • Salt & black pepper to taste

πŸ‘©β€πŸ³ Step-by-Step Recipe

πŸ”Ή Step 1: Prepare the Vegetables

πŸ₯’ Thinly slice the cucumber.

πŸ₯¬ Shred the cabbage finely.

πŸ₯• Grate the carrot and chop green onions.


πŸ”Ή Step 2: Prepare the Dressing

πŸ₯£ In a bowl mix:

  • Mayonnaise
  • Yogurt or sour cream
  • Lemon juice
  • Salt & pepper

Mix until creamy and smooth.


πŸ”Ή Step 3: Combine Everything

🍴 Add cabbage, cucumber, crab sticks, carrot, and green onions into a large bowl.

πŸ₯„ Pour the dressing over the salad.

Mix gently until everything is coated well.


πŸ”Ή Step 4: Chill the Salad

❄️ Refrigerate for 15–20 minutes before serving for best flavor.


πŸ”Ή Step 5: Serve

✨ Serve cold on a plate or bowl.

πŸ₯— Perfect as a light lunch, side dish, or summer salad.


πŸ’‘ Tips

βœ”οΈ Use fresh crunchy cucumbers for best texture.
βœ”οΈ Add sesame seeds for extra flavor.
βœ”οΈ You can replace crab sticks with cooked chicken or shrimp.


❓Q/A

❓Can I make this salad ahead of time?

βœ… Yes, store it in the fridge for up to 1 day.

❓Can I use Greek yogurt instead of mayo?

βœ… Yes, it makes the salad lighter and healthier.


πŸ₯— Nutritional Benefits

✨ Fresh and refreshing
✨ Rich in vitamins and fiber
✨ Light yet filling meal
✨ Perfect healthy summer salad πŸ˜‹

Carrot Cake Bars with Cream Cheese Frosting

Ingredients

For the Cake Bars

  • 2 cups grated carrots
  • 2 eggs
  • 1/2 cup brown sugar
  • 1/3 cup oil
  • 1 cup flour
  • 1 tsp cinnamon
  • 1 tsp baking powder
  • 1/2 cup chopped walnuts or pecans

For the Frosting

  • 4 oz cream cheese
  • 2 tbsp butter
  • 1 cup powdered sugar
  • 1 tsp vanilla extract

πŸ‘©β€πŸ³ Step-by-Step Instructions

πŸ₯£ Step 1: Prepare the Batter

  • Preheat oven to 350Β°F (175Β°C).
  • In a bowl, whisk eggs, sugar, and oil until smooth.
  • Add grated carrots and mix well.

🌾 Step 2: Add Dry Ingredients

  • Add flour, cinnamon, and baking powder.
  • Stir until combined.
  • Fold in chopped nuts.

🍰 Step 3: Bake

  • Line a baking tray with parchment paper.
  • Pour batter evenly into the tray.
  • Bake for 25–30 minutes until a toothpick comes out clean.

❄️ Step 4: Make Frosting

  • Beat cream cheese and butter until creamy.
  • Add powdered sugar and vanilla.
  • Mix until smooth and fluffy.

🍴 Step 5: Frost & Slice

  • Let cake cool completely.
  • Spread frosting evenly on top.
  • Sprinkle extra nuts and carrot shreds for decoration.
  • Slice into bars and serve.

πŸ’‘ Tips

  • πŸ₯• Use freshly grated carrots for best texture.
  • ❄️ Chill bars for 20 minutes before slicing neatly.
  • 🌰 Add raisins for extra sweetness.

❓Q/A

Q: Can I make these ahead of time?
βœ… Yes! Store in the fridge for up to 4 days.

Q: Can I freeze them?
βœ… Yes, freeze unfrosted bars for up to 2 months.

Keto Garlic Cheese Crisps

Keto Garlic Cheese Crisps

Ingredients

  • 1 cup Mozzarella cheese (shredded)

  • Β½ cup Parmesan cheese (grated)

  • 1 large Egg

  • 1 teaspoon Garlic powder

  • 1 tablespoon Fresh parsley (finely chopped) or 1 teaspoon dried parsley

  • A pinch of black pepper

Instructions

  1. Prep the Oven: Preheat your oven to 400Β°F (200Β°C). Line a large baking sheet with parchment paper or a silicone baking mat so the cheese doesn’t stick.

  2. Mix the Batter: In a medium bowl, combine the shredded mozzarella, grated parmesan, garlic powder, parsley, and black pepper. Stir them together. Add the egg and mix thoroughly until a thick, uniform batter forms.

  3. Form the Crisps: Scoop out spoonfuls of the mixture and place them onto the prepared baking sheet, leaving about 2 inches of space between each one. Use the back of a spoon to gently flatten each mound into a round disc shape.

  4. Bake to Perfection: Place the baking sheet in the oven and bake for 10 to 12 minutes. Watch them closelyβ€”they are done when the centers are fully melted and bubbling, and the edges turn a beautiful, deep golden brown.

  5. Cool and Serve: Remove the pan from the oven. Let the crisps sit on the baking sheet for 5 minutes. They will feel soft at first but will become wonderfully crispy as they cool down. Transfer to a plate and enjoy!

Tip: Serve these as a standalone snack, or use them as a crunchy, low-carb dipping chip for marinara sauce!

Soft Vanilla Cake Recipe

Soft Vanilla Cake Recipe
This soft vanilla cake is light, rich, and perfect for tea time or family gatherings. The cake has a golden top with a smooth and tender center, just like the one shown in the image. It is simple to prepare and uses everyday kitchen ingredients.

Ingredients

  • 2 cups all-purpose flour

  • 1 cup sugar

  • 1 cup milk

  • Β½ cup butter, softened

  • 3 eggs

  • 1 tablespoon baking powder

  • 1 teaspoon vanilla essence

  • A small pinch of salt

Instructions

  1. Preheat your oven to 180Β°C (350Β°F). Grease a loaf pan or round cake pan lightly with butter and dust with a little flour.

  2. In a large bowl, beat the butter and sugar together until smooth and creamy. This step helps create a soft texture.

  3. Add the eggs one at a time and mix well after each addition. Stir in the vanilla essence for a sweet aroma.

  4. In another bowl, combine the flour, baking powder, and salt. Gradually add the dry mixture to the wet mixture while pouring in the milk little by little. Mix gently until the batter becomes smooth without overmixing.

  5. Pour the batter into the prepared pan and spread it evenly.

  6. Bake for about 35–40 minutes or until the top becomes golden and a toothpick inserted in the center comes out clean.

  7. Remove the cake from the oven and allow it to cool for 10–15 minutes before slicing.

Serve this delicious cake with tea, coffee, or fresh fruit. The texture stays soft and moist, making it perfect for breakfast, dessert, or an evening snack.

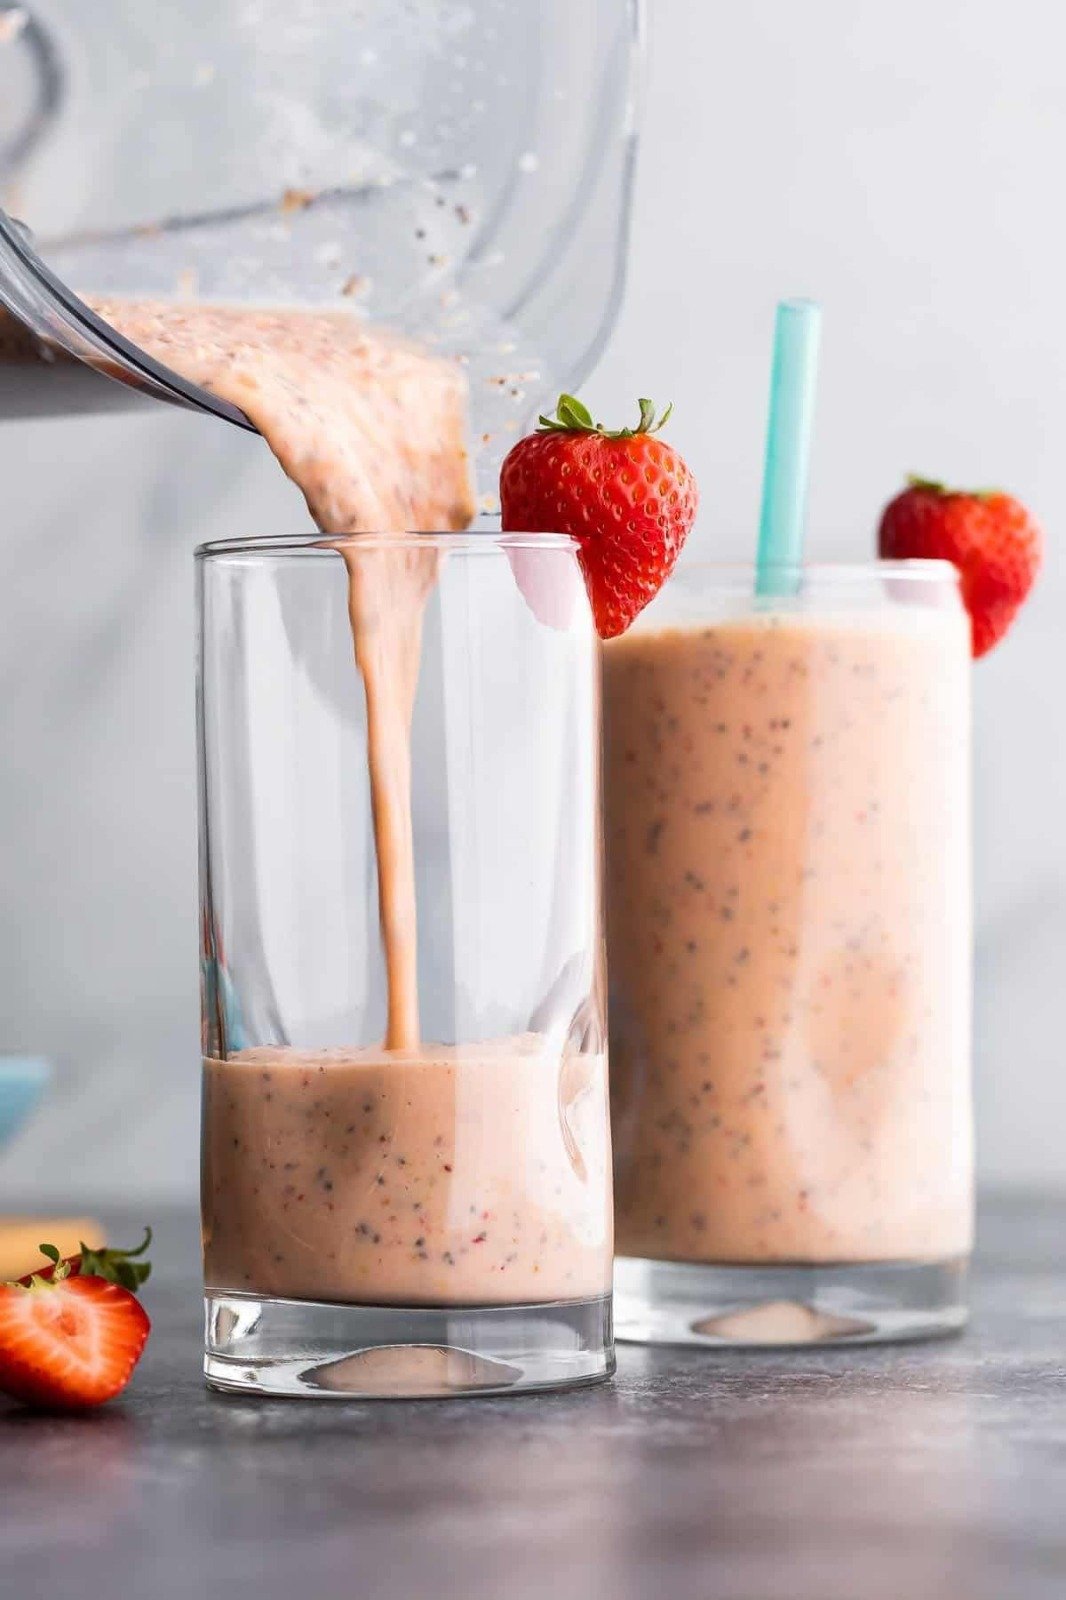
Berry Cranberry Smoothie

Berry Cranberry Smoothie

Simple Ingredients

  • 1 cup frozen cranberries

  • 1 cup frozen strawberries

  • 1/2 cup unsweetened plant-based milk (such as coconut milk or almond milk)

  • 1/2 cup cranberry juice or pomegranate juice (with no added sugar)

  • 1 tablespoon pure maple syrup (adjust to taste for sweetness)

  • 4 to 5 ice cubes

Easy Instructions

  1. Load the Blender: Place the frozen cranberries, frozen strawberries, and ice cubes into the bottom of a high-powered blender.

  2. Add Liquids and Sweetener: Pour the unsweetened plant milk and cranberry or pomegranate juice over the frozen fruit. Drizzle in the pure maple syrup.

  3. Blend Until Smooth: Secure the blender lid tightly. Blend on high speed for 1 to 2 minutes. Continue blending until the mixture is completely smooth, thick, and creamy, with no whole berry pieces remaining.

  4. Serve Immediately: Taste the smoothie. If you prefer a sweeter drink, add a tiny splash more of maple syrup and pulse briefly. Pour the bright red smoothie into a tall glass, garnish with a few extra berries if desired, and enjoy fresh.

Vibrant Berry-Peach Smoothie Bowl

Vibrant Berry-Peach Smoothie Bowl

Ingredients

  • For the Smoothie Base:

    • 1 cup frozen strawberries or mixed berries

    • 1 ripe banana (frozen for extra creaminess)

    • cup Greek yogurt (plain or vanilla)

    • cup milk of your choice (almond, oat, or dairy)

  • For the Toppings (as pictured):

    • fresh peach or nectarine, thinly sliced

    • Handful of fresh blueberries

    • 3–4 fresh strawberries, sliced

    • A small handful of whole almonds

    • 2 tbsp granola

    • 1 tbsp coconut flakes

    • A pinch of chia seeds

Instructions

  1. Blend the Base: Place the frozen strawberries, banana, Greek yogurt, and milk into a high-speed blender. Blend on high until completely smooth and thick. If the mixture is too thick to blend, add an extra splash of milk, but keep it thick enough to hold up the toppings.

  2. Pour: Transfer the thick smoothie blend into a wide breakfast bowl, smoothing out the top surface with the back of a spoon.

  3. Arrange the Toppings: Create beautiful, neat rows across the top of your bowl:

    • Line up the peach slices along one side.

    • Place a row of fresh blueberries right next to the peaches.

    • Arrange the sliced strawberries down the center.

    • Fill the remaining side with a layer of granola, coconut flakes, and whole almonds.

  4. Garnish and Serve: Sprinkle a pinch of chia seeds over the strawberries for a nutritional boost and a pop of texture. Enjoy immediately with a spoon!

Blueberry Oatmeal Granola Bars

Ingredients

  • 2 cups rolled oats
  • 1 cup fresh or frozen blueberries
  • 1/3 cup honey or maple syrup
  • 1/2 cup peanut butter or almond butter
  • 1 tsp vanilla extract
  • 1 tbsp chia seeds (optional)

πŸ‘©β€πŸ³ Instructions

πŸ₯£ Step 1: Prepare the Mixture

  • In a large bowl, mix rolled oats and chia seeds.
  • Add peanut butter, honey, and vanilla extract.
  • Stir until everything is fully combined.

🫐 Step 2: Add Blueberries

  • Gently fold in the blueberries.
  • Try not to crush them too much to keep juicy berry layers.

πŸͺ Step 3: Shape the Bars

  • Line a baking dish or tray with parchment paper.
  • Press half of the oat mixture firmly into the tray.
  • Spread blueberries evenly.
  • Add the remaining oat mixture on top and press lightly.

πŸ”₯ Step 4: Bake

  • Bake at 350Β°F (175Β°C) for about 25–30 minutes until golden brown.

❄️ Step 5: Cool & Slice

  • Let the bars cool completely.
  • Slice into bars and enjoy!

πŸ’‘ Tips

  • πŸ₯Ά Store in the fridge for up to 5 days.
  • 🍯 Add extra honey for sweeter bars.
  • πŸ₯œ Use almond butter for a nutty flavor.

❓Q/A

Q: Can I use frozen blueberries?
βœ… Yes, frozen blueberries work perfectly.

Q: Are these bars good for breakfast?
βœ… Absolutely! They are filling and great for busy mornings.

20 minutes healthy jar pasta salad

20-Minute Healthy Jar Pasta Salad

This healthy jar pasta salad is fresh, colorful, and perfect for meal prep. Everything gets layered into jars so the salad stays crisp and flavorful for days. It’s packed with pasta, crunchy vegetables, protein, and a light homemade dressing that makes it taste fresh and satisfying without feeling heavy.

Perfect for lunches, busy weekdays, road trips, or easy grab-and-go meals.

Prep Time & Servings

Prep Time: 20 minutes

Cook Time: 10 minutes

Total Time: 20 minutes

Servings: 4 jars

Ingredients

For the Salad

3 cups cooked pasta, cooled

1 cup cherry tomatoes, halved

1 cucumber, diced

1 bell pepper, diced

Β½ cup chickpeas

ΒΌ red onion, sliced

Β½ cup feta cheese

ΒΌ cup olives, sliced

2 cups chopped romaine or spinach

For the Dressing

ΒΌ cup olive oil

Juice of 1 lemon

1 tablespoon red wine vinegar

1 teaspoon Dijon mustard

1 garlic clove, minced

Salt and black pepper

Optional Add-Ins

Grilled chicken

Tuna

Avocado

Sun-dried tomatoes

Fresh basil

Roasted chickpeas

Instructions

1. Cook the Pasta

Cook pasta according to package directions.

Drain and rinse under cold water so it cools quickly.

2. Make the Dressing

In a small bowl or jar, whisk together:

olive oil

lemon juice

vinegar

Dijon mustard

garlic

salt

pepper

It should taste bright and fresh.

3. Layer the Jars

Add ingredients in this order:

1. Dressing

2. Chickpeas and onions

3. Cucumbers and peppers

4. Tomatoes and olives

5. Pasta

6. Feta cheese

7. Lettuce or spinach on top

Keeping the greens at the top helps them stay fresh.

4. Chill

Seal the jars and refrigerate until ready to eat.

Shake before serving or pour into a bowl.

Helpful Tips

Use short pasta like rotini or penne

Let the pasta cool before layering

Wide-mouth jars work best

Add avocado right before serving

Nutritional Information

Calories: 390

Protein: 13g

Carbohydrates: 38g

Fiber: 6g

Fat: 20g

Saturated Fat: 5g

Sodium: 430mg

Spicy Tuna Avocado Nori Wraps

Spicy Tuna Avocado Nori Wraps

These spicy tuna avocado nori wraps are fresh, crunchy, and packed with flavor. They’re filled with tuna, creamy avocado, crisp cucumber, greens, and sprouts all wrapped in nori sheets for a light but satisfying meal.

They come together quickly, don’t require cooking, and are perfect for lunch, meal prep, or a healthy snack when you want something refreshing but filling.

Prep Time & Servings

Prep Time: 15 minutes

Cook Time: 0 minutes

Total Time: 15 minutes

Servings: 2–3 wraps

Ingredients

3 nori sheets

1 can tuna, drained

1 avocado, sliced

1 cucumber, julienned

1 cup sprouts or shredded lettuce

1 tablespoon mayonnaise or Greek yogurt

1 teaspoon sriracha

1 teaspoon soy sauce or coconut aminos

Sesame seeds

Optional Add-Ins

Carrots

Green onions

Pickled ginger

Chili flakes

Brown rice

Instructions

1. Make the Tuna Filling

In a bowl, mix together:

tuna

mayonnaise or Greek yogurt

sriracha

soy sauce

Taste and adjust spice if needed.

2. Prep the Wraps

Lay a nori sheet flat on a cutting board or clean surface.

Add:

cucumber

sprouts or lettuce

avocado

spicy tuna mixture

Sprinkle with sesame seeds.

3. Roll Everything UpΒ 

Carefully roll the nori tightly like a wrap or burrito.

If needed, lightly wet the edge of the nori to help seal it.

4. Slice & Serve

Cut in half and serve immediately.

You can enjoy them with:

soy sauce

spicy mayo

chili oil

extra avocado

Helpful Tips

Don’t overfill the wraps or they’ll be hard to roll

Use very dry cucumber so the nori stays crisp

Eat them fresh for the best texture

Add rice if you want a more filling meal

Nutritional Information

Calories: 260

Protein: 18g

Carbohydrates: 10g

Fiber: 5g

Fat: 17g

Saturated Fat: 3g

Sodium: 390mg

Creamy Mandarin Orange Fluff Salad

Creamy Mandarin Orange Fluff Salad

πŸ›’ Ingredients

  • 2 cups mandarin orange segments 🍊
  • 1 cup whipped topping
  • 1 cup cottage cheese or cream cheese
  • 1 small can crushed pineapple, drained
  • 1 cup mini marshmallows
  • 1 tsp vanilla extract

πŸ‘©β€πŸ³ Step-by-Step Recipe

πŸ₯£ Step 1: Mix the Creamy Base

➑️ In a large bowl, combine:

  • whipped topping
  • cottage cheese or softened cream cheese
  • vanilla extract

Mix until smooth and creamy ✨


🍍 Step 2: Add Fruits

➑️ Gently fold in:

  • mandarin oranges 🍊
  • crushed pineapple 🍍
  • mini marshmallows

Mix carefully so the oranges stay whole.


❄️ Step 3: Chill

➑️ Cover the bowl and refrigerate for 1–2 hours.
➑️ This helps the flavors blend together perfectly 🀀


🌟 Serving Tips

βœ… Serve cold for best taste
βœ… Top with extra orange slices before serving
βœ… Perfect for holidays and summer parties β˜€οΈ


❓Q/A

❓Can I make it ahead?

βœ… Yes! It tastes even better after chilling overnight.

❓Can I use fresh oranges?

βœ… Absolutely β€” peeled fresh mandarins work great.