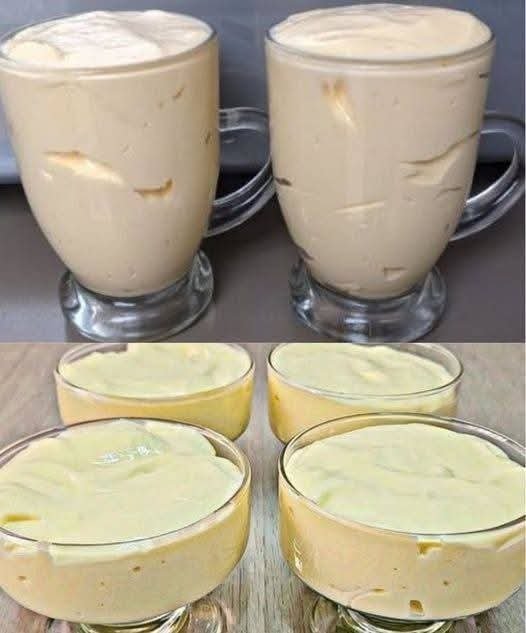
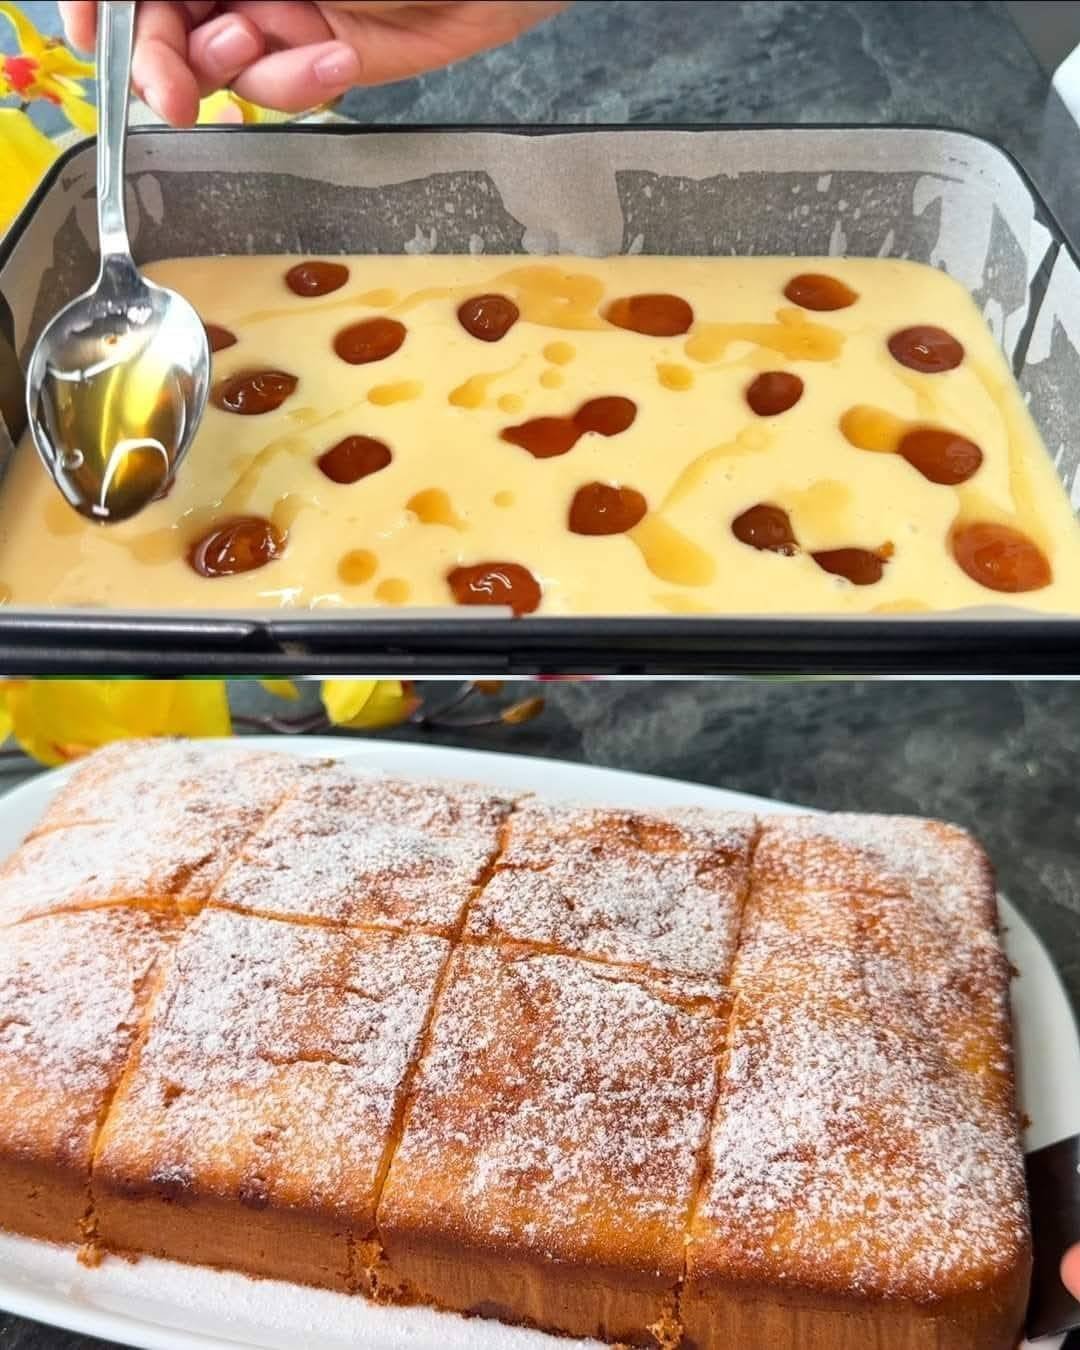
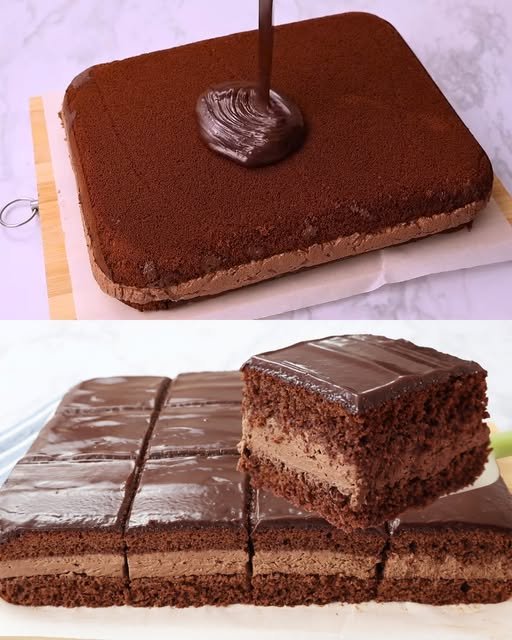
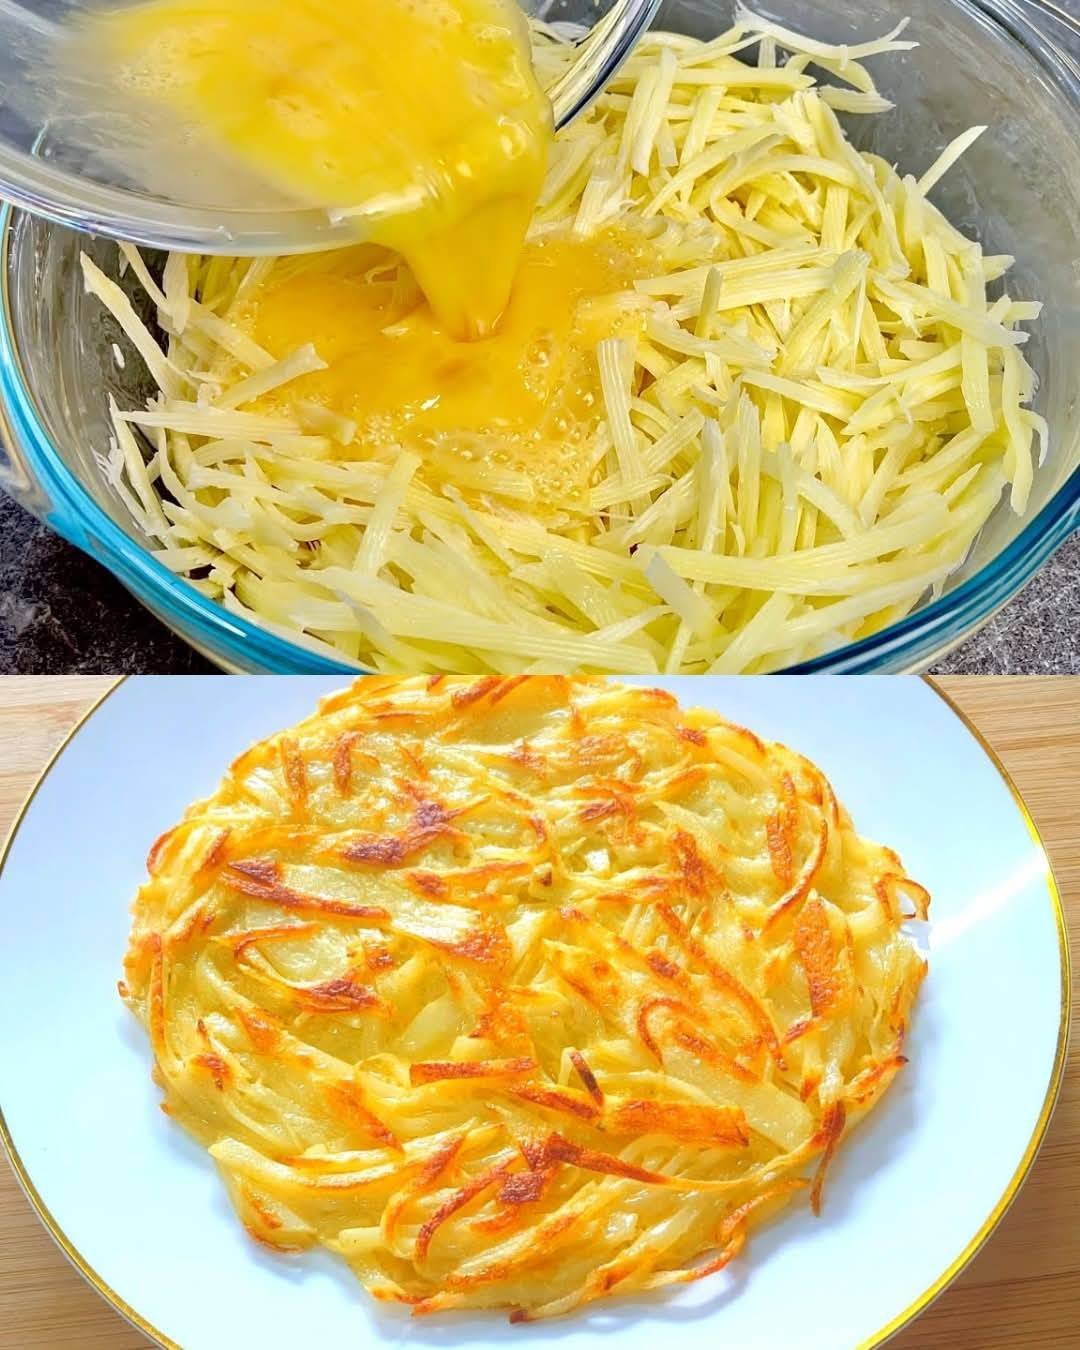
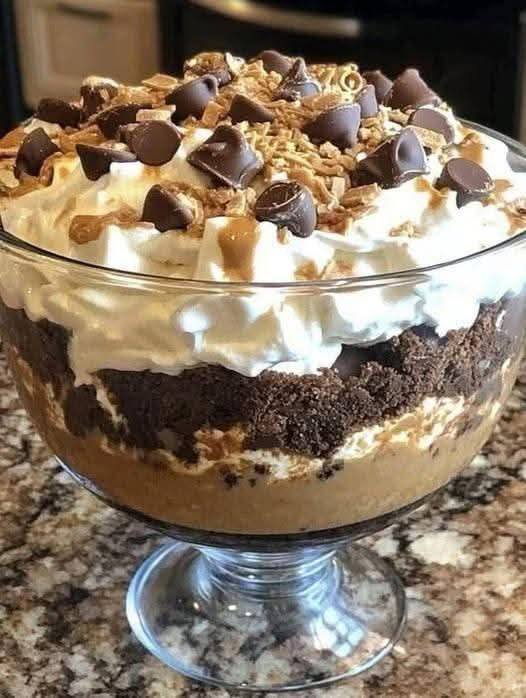
Fat Bomb Fluff ( Low-Carb Dessert)

Fat Bomb Fluff ( Low-Carb Dessert)

Description

Fat Bomb Fluff is a rich, creamy, no-bake keto dessert that tastes like a cross between cheesecake fluff and cookie dough ice cream. It’s high in healthy fats, low in carbs, and incredibly satisfying—perfect for curbing sweet cravings while staying keto or low-carb. Serve it chilled, frozen, or straight from the bowl.

 Ingredients

  • 8 oz cream cheese, softened

  • ½ cup unsalted butter, softened

  • ½ cup powdered erythritol or monk fruit sweetener (to taste)

  • 1 tsp vanilla extract

  • 1 cup heavy whipping cream, cold

  • ¾–1 cup sugar-free chocolate chips

  • Optional add-ins:

    • Pinch of salt (enhances flavor)

    • 1–2 tbsp peanut butter or almond butter

    • 1–2 tbsp cocoa powder (for chocolate version)

 Instructions

  1. In a large bowl, beat cream cheese and butter until smooth and fluffy (2–3 minutes).

  2. Add sweetener, vanilla, and salt. Beat again until fully combined.

  3. In a separate bowl, whip the heavy cream until stiff peaks form.

  4. Gently fold the whipped cream into the cream cheese mixture in batches.

  5. Fold in chocolate chips and any optional add-ins.

  6. Serve immediately or chill for 30–60 minutes for a firmer texture.

 Servings

  • 6 servings

  • Serving size: ~¾ cup

Nutritional Information (Per Serving – Approx.)

  • Calories: 270–290

  • Fat: 26–28g

  • Protein: 3–4g

  • Net Carbs: 2–3g

  • Sugar: 0g

(Values may vary depending on brands used)

 Benefits

  • ✅ Keto & low-carb friendly

  • ✅ No baking required

  • ✅ High-fat for satiety

  • ✅ Helps curb sugar cravings

  • ✅ Customizable flavors

  • ✅ Can be frozen or eaten chilled

 Recipe Notes

  • Use powdered sweetener, not granulated, to avoid grainy texture.

  • Let cream cheese and butter fully soften before mixing.

  • Fold whipped cream gently to keep the fluff airy.

  • Chill longer if you prefer an ice-cream-like consistency.

 Tips & Variations

  • Frozen Treat: Freeze in individual portions for 1–2 hours.

  • Chocolate Lover: Add cocoa powder and extra chocolate chips.

  • Cookie Dough Style: Add vanilla + chopped keto cookies.

  • Dairy-Free: Use dairy-free cream cheese, butter, and coconut cream.

  • Extra Protein: Mix in unflavored or vanilla collagen powder.


Q & A

Q: Is Fat Bomb Fluff keto-friendly?
A: Yes! It’s low in net carbs and high in fats, perfect for keto diets.

Q: Can I freeze it?
A: Absolutely. Freeze for a firmer texture—let it sit 5–10 minutes before serving.

Q: How long does it last?
A: Up to 5 days in the fridge or 2 months in the freezer (airtight container).

Q: Can I make it less sweet?
A: Yes, reduce sweetener or add a pinch of salt to balance flavors.

Q: Can I use flavored cream cheese?
A: You can, but check carb counts carefully.

Creamy Orange Sunshine Smoothie

Creamy Orange Sunshine Smoothie

Prep time: 5 minutes | Servings: 2 smoothies

🛒 Ingredients

To achieve that bright color and thick, frothy consistency, you will need:

Ingredient Amount Notes
Oranges 2 large Peeled and deseeded (Navel or Valencia work best).
Frozen Banana 1 medium Essential for the thick, creamy texture shown.
Greek Yogurt $1/2$ cup Use Plain or Vanilla for added creaminess and protein.
Milk of Choice $1/2$ cup Almond milk, coconut milk, or dairy milk.
Vanilla Extract 1 tsp This provides the “creamsicle” flavor.
Honey or Maple Syrup 1 tbsp Optional, depending on the sweetness of your oranges.
Ice $1/2$ cup Optional, for a frostier finish.

🥣 Instructions

  1. Prepare the Fruit: Peel the oranges and remove as much of the white pith as possible to avoid bitterness. Ensure your banana is pre-frozen for the best results.

  2. Combine: Add the liquid ingredients (milkyogurtvanilla, and sweetener) to the blender first.

  3. Layer: Add the orange segments and frozen banana on top.

  4. Blend: Start on a low setting and gradually increase to high. Blend for 60 seconds until the mixture is perfectly smooth and no orange fibers remain.

  5. Garnish: Slice an extra orange into thin rounds. Cut a small slit in each slice and place them on the rim of the glasses as shown in the image.

💡 Tips for Success

  • The “Cream” Factor: For an even richer taste, replace the milk with a splash of heavy cream or full-fat coconut milk.

  • Boost the Color: If your oranges are pale, add a tiny pinch of turmeric. It won’t change the flavor but will make the orange color pop.

  • High Fiber: If you prefer a lighter texture, you can use $1/2$ cup of fresh orange juice instead of whole oranges, though you’ll lose the beneficial fiber.

No-Sugar, 3-Ingredient Low-Calorie Dessert

No-Sugar, 3-Ingredient Low-Calorie Dessert

Introduction

This dessert is perfect for those who want a guilt-free, naturally sweet treat without any added sugar. It’s made with just three wholesome ingredients and is packed with fiber and natural sweetness. You can enjoy it as a quick snack, post-workout treat, or a light dessert.

Prep Time: 5 minutes

Chill Time: 30 minutes (optional)

Total Time: 35 minutes

Servings: 2

Ingredients

2 ripe bananas (or 1 cup mashed ripe banana)

¼ cup unsweetened cocoa powder

2 tablespoons peanut butter (or almond butter for variation)

(Optional toppings: crushed nuts, unsweetened coconut flakes, or dark chocolate shavings (sugar-free))

Instructions

Mash the Bananas

In a bowl, mash the bananas until smooth. The riper the bananas, the sweeter the dessert.

Add Cocoa Powder and Peanut Butter

Mix in the unsweetened cocoa powder and peanut butter, stirring until well combined and creamy.

 Chill or Serve

You can enjoy it immediately or refrigerate for 30 minutes for a thicker, mousse-like texture.

 Optional Toppings

Garnish with chopped nuts, coconut flakes, or dark chocolate shavings if desired.

Tips for the Best Low-Calorie Dessert

Sweeter Taste:

Use extra ripe bananas for natural sweetness.

Nut-Free Option:

Swap peanut butter for Greek yogurt or sunflower seed butter.

Chilled Mousse:

Let it sit in the fridge for a thicker, mousse-like consistency.

Chocolate Intensity:

Adjust cocoa powder based on how rich you want it.

Make it a Popsicle:

Freeze the mixture in popsicle molds for a frozen treat!

Nutrition Facts (Per Serving, Approximate)

Calories: ~150 kcal

Carbohydrates: ~25g

Protein: ~4g

Fat: ~5g

Fiber: ~4g

Natural Sugars: ~12g

Chef’s Key to Exceptional Egg Salad: Techniques for Achieving Creamy Perfection

Egg salad may seem simple, but any seasoned chef will tell you: the difference between an ordinary bowl and an unforgettable one comes down to technique. This humble dish relies on a balance of texture, seasoning, and method. When done right, egg salad becomes silky, rich, and luxurious—the kind you want to eat straight from the bowl.

Here’s how chefs elevate this classic comfort food into something exceptional.

1. Start With Perfectly Cooked Eggs

The foundation of a creamy egg salad is a tender, velvety egg—never rubbery whites, never chalky yolks.

Chef’s Technique:

  • Place eggs in a pot.
  • Cover with cold water by at least one inch.
  • Bring to a boil slowly over medium heat.
  • Once the water reaches a full boil, turn off the heat, cover, and let the eggs sit for 10–11 minutes.
  • Immediately transfer to an ice bath for 5 minutes.

This prevents that gray ring around the yolk and ensures they peel beautifully.

2. Grate, Don’t Chop

Most home cooks roughly chop their eggs. Chefs often use a different method:

Use the small side of a grater or press eggs through a mesh cooling rack.

This technique creates:

  • An ultra-fine texture
  • Even distribution of yolk richness
  • That signature restaurant-level creaminess

This is the trick that transforms good egg salad into silky egg salad.

3. Build a Balanced, Creamy Base

The classic mistake is adding too much mayonnaise in an attempt to make the salad creamy. True creaminess comes from combining:

  • Mayonnaise for richness
  • Mustard for acidity
  • A touch of sour cream or Greek yogurt for extra silkiness
  • A tiny splash of pickle brine or lemon juice for brightness

This creates a layered flavor profile and prevents the salad from tasting flat.

4. Season Like a Chef

Eggs crave seasoning. Without it, even the best technique falls flat.

Chefs add:

  • A generous pinch of Kosher salt
  • Fresh black pepper
  • Smoked paprika or regular paprika for depth
  • Fresh dill or chives for fresh, aromatic notes

Optional but chef-approved:

  • A small spoon of finely minced shallot
  • Celery for crisp texture
  • A little Dijon for tang

5. Let It Rest

Texture and flavor improve dramatically after 20–30 minutes in the refrigerator.

Resting time allows:

  • Flavors to meld
  • Excess moisture to absorb
  • The salad thickens naturally

This is why restaurant egg salad always tastes “more put together.”

Restaurant-Quality Creamy Egg Salad Recipe

Ingredients (Serves 4)

For the eggs:

  • 8 large eggs

Creamy base:

  • 1/3 cup mayonnaise
  • 1 tbsp Dijon mustard
  • 1 tbsp sour cream or Greek yogurt
  • 1–2 tsp pickle brine or lemon juice

Mix-ins & seasoning:

  • 1/4 cup finely diced celery
  • 1 tbsp minced shallot (optional)
  • 1 tbsp chopped fresh dill or chives
  • 1/2 tsp salt
  • 1/4 tsp black pepper
  • Pinch of smoked or regular paprika

Instructions

1. Cook the Eggs

  1. Place eggs in a pot and cover with cold water.
  2. Heat over medium until the water comes to a full boil.
  3. Turn off heat, cover, and let sit for 10–11 minutes.
  4. Transfer eggs to an ice bath for 5 minutes.
  5. Peel once cool.

2. Prepare the Eggs

  • Grate the eggs using the small side of a box grater, OR press them through a metal rack for fluffy, even pieces.

3. Make the Creamy Dressing

In a large bowl, whisk together:

  • Mayonnaise
  • Dijon
  • Sour cream/Greek yogurt
  • Pickle brine or lemon juice
  • Salt, pepper, and paprika

4. Combine

  • Fold in the grated eggs, celery, and shallot.
  • Finish with fresh herbs.
  • Mix gently to keep the mixture airy.

5. Chill and Serve

  • Refrigerate for 20–30 minutes to enhance creaminess.
  • Serve on toasted bread, crackers, croissants, or in lettuce cups.

Final Thoughts

The secret to extraordinary egg salad isn’t a long list of ingredients—it’s professional technique. Perfectly cooked eggs, grated texture, balanced acidity, and a short resting time transform a simple, everyday recipe into something luxurious and memorable.

Master these steps, and you’ll never go back to ordinary egg salad again.

Garlic ButterChicken Bites with Creamy ParmesanPasta

Ingredients:

For the Chicken Bites:
1 lb boneless, skinless chicken
breasts, cut into bite-sized pieces
2 tablespoons olive oil
4 tablespoons unsalted butter
4 cloves garlic, minced
Salt and pepper to taste
1 teaspoon Italian seasoning
Fresh parsley, chopped (for garnish)
For the Creamy Parmesan Pasta:
12 oz fettuccine or pasta of your
choice

2 tablespoons butter
2 cloves garlic, minced
1 cup heavy cream
1 cup grated Parmesan cheese
1/2 cup chicken broth
Salt and pepper to taste
Extra garlic butter (optional, for
drizzling))

Instructions:

Cook the Pasta: Boil a large pot of
salted water and cook the pasta
according to package instructions
until al dente. Drain and set aside.
Cook the Chicken Bites: In a large
skillet, heat olive oil over medium-
high heat. Add the chicken bites,


seasoning with salt, pepper, and
Italian seasoning. Cook until golden
brown and cooked through, about 6- 8 minutes. Remove the chicken from the skillet and set aside.


Make the Garlic Butter Sauce: In the
same skillet, reduce the heat to
medium and add the butter. Once
melted, add the minced garlic and
sauté for about 30 seconds until
fragrant. Return the cooked chicken
to the skillet and toss to coat in the
garlic butter sauce.
Prepare the Creamy Parmesan
Sauce: In a separate skillet, melt 2
tablespoons of butter over medium
heat. Add the minced garlic and
sauté for another 30 seconds. Stir in
the heavy cream and chicken broth,
bringing the mixture to a gentle
simmer. Gradually whisk in the
grated Parmesan cheese until
smooth, and season with salt and pepper to taste.
Combine Pasta and Sauce: Toss the
cooked pasta in the creamy
Parmesan sauce, ensuring it’s well
coated.
Serve: Plate the creamy Parmesan
pasta and top with the garlic butter
chicken bites. Drizzle with extra
garlic butter if desired and garnish
with fresh parsley

Prep Time: 10 minutes
Cooking Time: 20 minutes
Total Time: 30 minutes

Enjoy!

🌮 Cheesy Baked Chicken Roll-Ups

This recipe is known for its creamy filling and crispy baked shell.

📝 Ingredients

Component Item Quantity Notes
For the Filling Cooked Chicken, shredded 2 cups Rotisserie chicken works great!
Cream Cheese, softened 8 oz
Shredded Cheese 1 cup Colby Jack, Monterey Jack, or a Mexican blend.
Salsa (red or green) 1/4 cup Mild or hot, to your taste.
Sour Cream or Plain Greek Yogurt 1/4 cup
Ground Cumin 1/2 tsp
Chili Powder 1/2 tsp Can substitute with garlic powder/onion powder.
Salt and Pepper To taste
For the Roll-Ups Flour Tortillas (6-8 inches) 8-10 Taco or fajita size.
Cooking Spray or Olive Oil For brushing
Extra Shredded Cheese A little Optional, for topping.


👩‍🍳 Instructions

1. Prepare for Baking

  • Preheat Oven: Preheat your oven to $425^\circ\text{F}$ ($220^\circ\text{C}$).

  • Prep Pan: Line a baking sheet with parchment paper or spray it with cooking spray.

2. Make the Filling

  • In a large bowl, combine the softened cream cheeseshredded cheesesalsasour cream/yogurtcuminchili powder, and salt/pepper.

  • Mix well until everything is creamy and well-combined.

3. Mix in Chicken

  • Stir the shredded cooked chicken into the cream cheese mixture until it is evenly distributed.

4. Prep and Fill Tortillas

  • Warm Tortillas: To make them easier to roll without cracking, lightly warm the tortillas in the microwave for about 10-20 seconds (stacked between damp paper towels).

  • Fill: Spoon about 2-3 tablespoons of the chicken mixture onto the lower third of a warmed tortilla. Spread it in a line, leaving a little space on the sides.

  • Roll: Roll the tortilla up tightly and place it seam-side-down on the prepared baking sheet. Repeat with the remaining tortillas.

5. Bake

  • Lightly spray or brush the tops of the rolled tortillas with olive oil or cooking spray.

  • (Optional): Sprinkle the tops with a little extra shredded cheese for a more browned, cheesy finish.

  • Cook: Bake for 15-20 minutes, or until the roll-ups are golden brown and crispy, and the cheese is melted and bubbly.

6. Serve

  • Let them cool slightly before serving with your favorite toppings like extra salsa, sour cream, guacamole, or a sprinkle of fresh cilantro/parsley.

Creamy Cucumber Chickpea Salad

Creamy Cucumber Chickpea Salad — Complete Recipe
Ingredients:
For the Salad:
1 can (15 oz / 400g) chickpeas, rinsed and drained
1 large cucumber, sliced or chopped
¼ cup red onion, finely diced
2 tbsp fresh dill, chopped (or to taste)
Optional: ¼ cup chopped fresh parsley
Salt & black pepper, to taste
For the Creamy Dressing:
½ cup plain Greek yogurt (or use dairy-free yogurt)
1 tbsp olive oil
1–2 tsp lemon juice (or vinegar)
1 clove garlic, finely minced or grated
Salt & pepper, to taste
Instructions:
Prep the veggies: Slice cucumber, dice red onion, and chop dill and parsley.
Make the dressing: In a bowl, whisk together yogurt, olive oil, lemon juice, garlic, salt, and pepper.
Mix it all together:
In a large bowl, combine chickpeas, cucumber, red onion, and herbs.
Pour the dressing over and toss well to coat everything evenly.
Chill (optional): Refrigerate for 15–30 minutes for best flavor.
Serve: Top with extra dill or black pepper before serving.

Creamy Chicken & Cheese Bundles

Chicken and Cheese Bake Recipe

Conversation with Gemini

Need full recipe and dont use any harmful words


That looks like a delicious, flaky Chicken and Cheese Croissant Bake (often called a Chicken Crescent Bundle). It’s the ultimate comfort food—crispy puff pastry on the outside and a creamy, cheesy chicken filling on the inside.


Here is a simple, reliable recipe to recreate what you see in the video.


Creamy Chicken & Cheese Bundles

Prep time: 15 mins | Cook time: 20 mins | Servings: 4–8


Ingredients

Pastry: 1 tube of refrigerated crescent roll dough or 1 sheet of thawed puff pastry.


Chicken: 2 cups cooked chicken, shredded (rotisserie chicken works perfectly).


Cheese: 1 cup shredded mozzarella or cheddar (plus extra for topping).


Creamy Base: 4 oz softened cream cheese and 2 tbsp milk.


Seasoning: ½ tsp garlic powder, salt, and pepper to taste.


Finish: 1 egg (beaten) for an egg wash.


Instructions

Preheat & Prep: Preheat your oven to 375°F (190°C). Line a baking sheet with parchment paper or lightly grease it.


Make the Filling: In a medium bowl, mix the shredded chicken, softened cream cheese, shredded cheese, milk, and seasonings. Stir until everything is well combined and creamy.


Assemble the Bundles:


If using crescent rolls: Lay two triangles together to form a rectangle and press the seam to seal. Place a large scoop of the chicken mixture in the center.


If using puff pastry: Cut the sheet into 4 large squares. Place the mixture in the center.


Fold & Seal: Bring the corners of the dough over the chicken mixture and pinch the edges together firmly so the filling doesn’t leak out.


The Golden Finish: Place the bundles on the baking sheet. Brush the tops generously with the beaten egg wash. This is what gives it that beautiful golden-brown shine seen in your video.


Bake: Bake for 18–22 minutes, or until the pastry is puffed and deep golden brown.


Pro Tips for Success

Steam: As you see in the video, these are best served piping hot! Let them rest for just 2 minutes after taking them out so the cheese sets slightly.


Crunch: You can sprinkle poppy seeds or “everything bagel” seasoning on top of the egg wash before baking for extra texture.

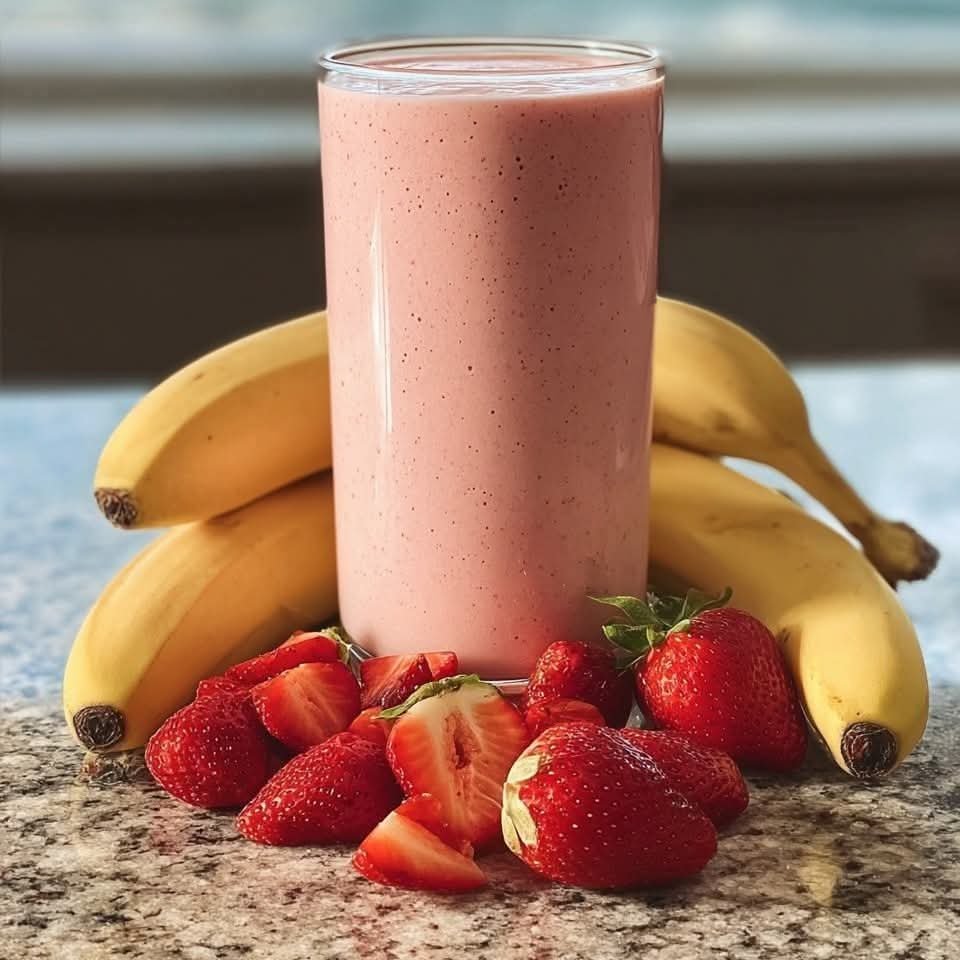
Strawberry Banana Smoothie Recipe

Strawberry Banana Smoothie Recipe

Ingredients:

  • 1 banana (fresh or frozen)

  • 1 cup strawberries (fresh or frozen)

  • 1/2 cup Greek yogurt (plain or vanilla)

  • 1/2 cup milk (any kind – dairy or plant-based like almond, oat, or soy)

  • 1–2 teaspoons honey or maple syrup (optional, depending on sweetness preference)

  • 1/2 teaspoon vanilla extract (optional, for flavor depth)

  • 1/2 cup ice cubes (optional, if using fresh fruit and you want it colder/thicker)

Toppings (Optional, as seen in image):

  • Banana slices

  • Granola

  • Chopped nuts or cacao nibs


Instructions:

  1. Prepare fruit: Peel the banana and hull the strawberries if they’re fresh. Frozen fruit works great and adds thickness.

  2. Blend ingredients: Add the banana, strawberries, Greek yogurt, milk, sweetener (if using), vanilla, and ice (if desired) into a blender.

  3. Blend until smooth: Blend on high until the mixture is creamy and smooth. Scrape down the sides if needed and blend again briefly.

  4. Taste and adjust: Taste the smoothie and add more sweetener or milk as needed.

  5. Serve: Pour the smoothie into a glass.

  6. Top it off: Garnish with banana slices, a sprinkle of granola, and chopped nuts or cacao nibs.

Protein Balls

Protein Balls

Ingredients:

  • Oats: 1 cup

  • Peanut butter: 1/2 cup

  • Chocolate chips: 1/4 cup

  • Cocoa powder: 1 tbsp

  • Honey or maple syrup (optional for sweetness): 2 tbsp

  • Protein powder (optional for extra protein boost): 1 scoop

  • Chia seeds or flax seeds (optional for added nutrition): 1 tbsp

Instructions:

  1. In a bowl, combine oats, peanut butter, chocolate chips, cocoa powder, and protein powder.

  2. Add in honey or maple syrup if you prefer a sweeter taste.

  3. Mix everything together until fully combined. If it’s too thick, add a small splash of milk to make it easier to mix.

  4. Scoop out small portions and roll them into balls (about 1 inch in diameter).

  5. Place the balls on a baking sheet lined with parchment paper.

  6. Chill them in the refrigerator for 30 minutes to set.

Notes:

  • Feel free to customize these with your favorite add-ins such as dried fruit, seeds, or nuts.

  • These balls are no-bake and can be stored in the fridge for up to a week.

Tips:

  • If you don’t have chocolate chips, you can substitute with cacao nibs or chopped dark chocolate.

  • For a vegan version, use maple syrup and a plant-based protein powder.

  • To make the texture smoother, use creamy peanut butter.

Servings: Makes about 12 balls, depending on size.


Nutritional Information (per ball):

  • Calories: ~120 (depends on the exact ingredients used)

  • Protein: ~4g (depends on protein powder used)

  • Carbs: ~15g

  • Fat: ~6g

Benefits:

  • These protein balls are an easy way to get a quick energy boost.

  • Great for a post-workout snack or a quick breakfast on the go.

  • Packed with fiber and healthy fats from oats and peanut butter.

Q&A for Protein Balls:

Q: Can I use almond butter instead of peanut butter?
A: Yes, almond butter works great if you prefer it over peanut butter.

Q: Can I make these without protein powder?
A: Yes! The protein powder is optional, but it does help with the protein content. You can still enjoy them without it.

Enjoy making your delicious protein balls! Let me know if you need any other details!

Cheesy Herb Bread Bake (10-Minute Prep)

Cheesy Herb Bread Bake (10-Minute Prep)

Description

This ultra-comforting Cheesy Herb Bread Bake is crisp and golden on the outside, soft and melty inside, and bursting with garlic, herbs, and cheese. It comes together in just 10 minutes of prep, bakes beautifully in a loaf pan, and disappears fast at parties. Perfect as a side dish, appetizer, or cozy dinner companion.

Ingredients

  • 1 loaf crusty bread or French bread (about 12–14 oz), cubed or sliced

  • 2 cups shredded mozzarella cheese

  • 1 cup shredded cheddar or Gruyère

  • 3 large eggs

  • 1 cup whole milk or half-and-half

  • 3 tbsp melted butter

  • 2 cloves garlic, finely minced

  • 1 tbsp fresh dill or parsley, chopped (plus more for topping)

  • 1 tsp dried thyme or Italian seasoning

  • ½ tsp salt

  • ½ tsp black pepper

Instructions

  1. Preheat oven to 375°F (190°C). Grease a loaf pan.

  2. Layer bread evenly in the pan.

  3. In a bowl, whisk eggs, milk, butter, garlic, salt, pepper, and herbs.

  4. Pour mixture evenly over bread.

  5. Sprinkle cheeses generously on top.

  6. Bake uncovered for 30–35 minutes until bubbly and deeply golden.

  7. Rest 5 minutes, garnish with herbs, and serve warm.

Tips & Notes

  • Use day-old bread for best texture.

  • Swap dill for chives or rosemary if preferred.

  • For extra richness, add ¼ cup sour cream to the egg mixture.

  • Want a crispier top? Broil for the last 2 minutes.

 Servings

6–8 servings

Nutritional Information (per serving, approx.)

  • Calories: 290

  • Protein: 14g

  • Fat: 18g

  • Carbohydrates: 18g

  • Calcium: 25% DV

 Benefits

  • High in protein & calcium

  • Comforting yet simple ingredients

  • Crowd-pleasing and kid-friendly

  • Great way to use leftover bread

 Recipe Q & A

Q: Can I make this ahead of time?
Yes! Assemble, cover, and refrigerate up to 12 hours. Bake fresh.

Q: Can I freeze it?
Absolutely. Freeze after baking, reheat covered at 350°F.

Q: Can I add extras?
Yes—crispy bacon, caramelized onions, or sautéed mushrooms are excellent additions.

Q: What should I serve it with?
Soups, salads, roasted chicken, or as a standalone appetizer.

Discover the Magic of Ginger & Lemon for Weight Loss

Believe it or not, some people are shedding those extra pounds without the need for strict dieting. They are doing it by incorporating a simple, natural blend of ginger and lemon into their daily routine. This dynamic duo not only boosts metabolism but also reduces bloating, supporting natural fat burning. And the best part? It’s easy to make, tastes refreshing, and can easily become your new daily habit!

The Winning Combination of Ginger and Lemon

✅ Ginger works wonders by speeding up your metabolism, curbing your appetite, and enhancing digestion.

✅ Lemon, on the other hand, is packed with vitamin C, aids in flushing out toxins, and helps break down fat.

Together, these two powerhouses assist your body in burning more calories, staying energized, and trimming down, especially around the belly area!

Morning & Night Fat-Burning Drink (Lemon & Ginger Water)

Ingredients:

  • 1–2 slices of fresh ginger (or ½ tsp grated)
  • Juice from ½ fresh lemon
  • 1 cup hot (not boiling) water
  • Optional: 1 tsp raw honey or a pinch of cinnamon

Instructions:

  1. Add ginger to a cup of hot water. Let it steep for 5–10 minutes.
  2. Mix in the lemon juice.
  3. Optional: For added flavor and benefits, include honey or cinnamon.
  4. Enjoy it warm.

When to Enjoy It

✅ Morning (before breakfast):
Jumpstarts your metabolism and aids digestion.

✅ Evening (before bed):
Supports overnight fat burning, aids digestion, and helps in detoxification.

You can also drink it between meals to curb cravings and reduce bloating.

Witness the Transformation Over Time

When paired with:

  • Consistent water intake
  • Lighter meal choices
  • Some light movement or a casual walk

This simple drink can assist you in naturally shedding those unwanted pounds without the need for starvation or calorie counting.

Numerous individuals have reported losing up to 5–10 kg in just a month by staying dedicated!

Final Words

Bid farewell to strict diets and pills! This ginger and lemon drink serves as a natural, healthy, and sustainable way to aid weight loss while improving your overall well-being. Simply sip, stay active, and allow your body to work its wonders.

Give it a try for 30 days, and witness the fantastic transformation your body undergoes!

Enjoy the journey to a healthier, happier you!

Apple Banana Smoothie Recipe

Apple Banana Smoothie Recipe

Ingredients (2 servings):

  • 1 medium apple, cored and chopped (skin on for extra fiber)

  • 1 ripe banana, sliced

  • 1 cup milk (dairy or plant-based like almond, oat, or soy)

  • ½ cup plain or vanilla yogurt

  • 1 tablespoon honey or maple syrup (optional, for sweetness)

  • ½ teaspoon ground cinnamon

  • 4–5 ice cubes

Topping & Garnish:

  • Pinch of cinnamon powder

  • Apple and banana slices for decoration

Instructions:

  1. Prepare fruits: Wash the apple thoroughly, core it, and cut into chunks. Slice the banana.

  2. Blend: In a blender, combine apple chunks, banana slices, milk, yogurt, honey (if using), cinnamon, and ice cubes.

  3. Blend until smooth: Process on high speed until creamy and lump-free.

  4. Taste & adjust: If you prefer it sweeter, add more honey or syrup. For a thicker texture, add extra banana or yogurt.

  5. Serve: Pour into a glass, sprinkle cinnamon on top, and garnish with apple and banana slices.

  6. Enjoy immediately for the best flavor and freshness.


Q&A Section

Q1: Can I make this smoothie without yogurt?
Yes! You can replace yogurt with extra milk or a splash of coconut milk for creaminess.

Q2: What type of apple works best?
Sweet varieties like Fuji, Gala, or Honeycrisp blend well, but tart apples like Granny Smith give a refreshing tang.

Q3: Can I make it vegan?
Absolutely! Use almond, soy, or oat milk and dairy-free yogurt. Replace honey with maple syrup or skip sweetener entirely.

Q4: How can I make it more filling?
Add 2 tablespoons of rolled oats or 1 tablespoon of peanut butter for extra fiber and protein.

Q5: Is it okay to prepare in advance?
It’s best fresh, but you can store it in the fridge for up to 8 hours in a sealed container. Stir before drinking, as separation may occur.

Q6: Can I freeze it?
Yes. Pour into ice cube trays, freeze, and blend when needed for a quick smoothie.


Tip: This smoothie is rich in potassium, fiber, and vitamin C — perfect for breakfast or a post-workout drink.


If you want, I can also give you a high-protein version of this Apple Banana Smoothie.

Healthy Roasted Pumpkin (Blood-Sugar Friendly Version)

Healthy Roasted Pumpkin (Blood-Sugar Friendly Version)

 Description

This roasted pumpkin recipe highlights pumpkin’s natural fiber and antioxidants. When prepared without added sugar, pumpkin can be part of a diabetes-friendly meal because fiber slows glucose absorption.

Ingredients

  • 2 cups pumpkin or winter squash, peeled & cubed

  • 1 tablespoon olive oil

  • ½ teaspoon cinnamon (optional)

  • ¼ teaspoon black pepper

  • ¼ teaspoon salt

  • Optional: garlic powder or herbs

 Instructions

  1. Preheat oven to 200°C (400°F)

  2. Toss pumpkin cubes with olive oil and seasonings

  3. Spread evenly on a baking tray

  4. Roast for 25–30 minutes, turning once

  5. Serve warm

 Notes

  • Do not add sugar, honey, or syrup

  • Portion control is important

  • Best eaten with protein or healthy fat

Tips

  • Pair with lentils, beans, eggs, or yogurt

  • Avoid deep frying

  • Smaller portions help prevent sugar spikes

  • Roasting is better than boiling for flavor

 Servings

  • 2 servings

 Nutritional Info (per serving, approx.)

  • Calories: 80–90 kcal

  • Carbohydrates: 12 g

  • Fiber: 3 g

  • Sugar: 4 g (natural)

  • Fat: 4 g

  • Protein: 2 g

 Benefits

  • High in fiber → slows sugar absorption

  • Rich in beta-carotene & antioxidants

  • Supports digestion

  • Helps with fullness and weight management

  • Low glycemic load when portion-controlled

 Q & A

Q: Does pumpkin cure diabetes?
A: ❌ No. No food can cure diabetes.

Q: Can people with diabetes eat pumpkin?
A: ✅ Yes, in moderate portions and without added sugar.

Q: Is pumpkin better than potatoes?
A: Often yes, because it has more fiber and a lower glycemic impact.

Q: Can teenagers eat this safely?
A: ✅ Yes, as part of a balanced diet.

Q: Why do people say it “eats sugar”?
A: That is false marketing language, not science.

Slow-Cooker Pot Roast Recipe

Ingredients:

For the Roast:

  • 3 lbs chuck roast (well-marbled)
  • Salt and pepper (to taste)
  • 2 tbsp olive oil

Aromatics & Veggies:

  • 1 large onion, sliced
  • 4 cloves garlic, minced
  • 4 large carrots, cut into 2-inch pieces
  • 1 lb baby potatoes, halved

Braising Liquid:

  • 2 cups  beef  broth
  • 1 cup red wine (optional, but recommended)
  • 2 tbsp tomato paste
  • 1 tbsp Worcestershire sauce
  • 1 tsp dried thyme
  • 1 tsp dried rosemary
  • bay leaves

 Gravy Thickener (Optional):

Keto Recipes Cookbook
  • 2 tbsp cornstarch + 2 tbsp water

Instructions: 

Discover more
garlic
Beef
Slow Cooker
Garlic
gravy
slow cooker
beef
Gravy
Slow-Cooker
cream

Sear the Roast:

  • Season the chuck roast with salt/pepper.
  • Heat olive oil in a skillet over medium-high. Sear for 3-4 mins per side until crusted.

Layer in the Slow Cooker:

  • Place onioncarrots, and potatoes in slow cooker.
  • Set the seared roast atop the veggies.

Add Braising Liquid:

  • Sprinkle garlic over the roast.
  • Whisk beef brothwinetomato pasteWorcestershirethymerosemary, and bay leaves. Pour around roast.

Cook:

  • Cover. Low: 8-10 hrs / High: 4-5 hrs until fork-tender (203°F internal).

Optional Gravy:

  • Remove roast/veggies; cover.
  • Strain liquid into saucepan. Simmer.
  • Mix cornstarch and water; whisk into liquid. Boil for 2-3 mins until thickened.

Serve:

  • Slice the roast against the grain. Serve with veggies and gravy.

Classic Southern Fried Cornbread (Hoecakes)

Classic Southern Fried Cornbread (Hoecakes)

Crispy on the outside, tender on the inside, and perfect for soaking up pot liquor.


Ingredients

  • 1 cup Yellow cornmeal (fine or medium-ground)

  • ½ cup All-purpose flour (optional, for a softer structure)

  • 1 tsp Baking powder

  • ½ tsp Salt

  • 1 tbsp Sugar (optional, for those who prefer a hint of sweetness)

  • 1 large Egg

  • ¾ cup Buttermilk (provides the classic tang and tenderness)

  • 2 tbsp Melted butter or vegetable oil (for the batter)

  • Vegetable oil or bacon grease (for frying)


Instructions

  1. Prep the Dry Mix: In a medium mixing bowl, whisk together the cornmeal, flour, baking powder, salt, and sugar.

  2. Mix the Wet Ingredients: In a separate small bowl, beat the egg, then stir in the buttermilk and the 2 tablespoons of melted butter or oil.

  3. Combine: Pour the wet ingredients into the dry ingredients. Stir until just combined into a thick, spoonable batter. Do not overmix.

  4. Heat the Skillet: Place a cast-iron skillet over medium heat. Add enough oil or bacon grease to cover the bottom (about 1/4 inch deep). Heat until the oil is shimmering and a tiny drop of batter sizzles immediately upon contact.

  5. Fry: Carefully spoon the batter into the hot oil to form small rounds (about 2–3 inches wide). Do not overcrowd the pan; work in batches if necessary.

  6. Flip: Fry for 2–3 minutes until the edges are dark golden brown and bubbles appear on the surface. Flip carefully and fry the other side for another 2 minutes.

  7. Drain: Transfer the hot cornbread to a plate lined with paper towels to remove any excess grease.


Top Tips for Success

  • The Sizzle Factor: If the cornbread is coming out greasy, your oil isn’t hot enough. Make sure it’s shimmering before the first drop of batter hits the pan.

  • The Fat: For the most “authentic” grandma-style flavor, use bacon grease for frying. It adds a smoky depth that vegetable oil can’t match.

  • Serving: These are best served piping hot alongside a bowl of pinto beans, collard greens, or beef stew.

Cheesy Spinach & Chicken Casserole

(High Protein • Low Carb • Diabetic-Friendly)

📋 Ingredients

  • 1 cup cooked shredded chicken breast
  • 1 cup spinach leaves (fresh or frozen, squeezed dry)
  • ¼ cup chopped bell peppers (optional for color)
  • 2 tbsp cottage cheese or Greek yogurt
  • ¼ cup shredded mozzarella
  • 1 tbsp grated parmesan
  • ½ tsp garlic powder
  • Pinch of Italian seasoning
  • Salt & pepper to taste

👩‍🍳 Instructions

1️⃣ Preheat

Preheat oven or air fryer to 375°F (190°C).


2️⃣ Mix the Filling

In a bowl, combine:

  • Shredded chicken
  • Spinach
  • Bell peppers
  • Cottage cheese or Greek yogurt
  • Half of the mozzarella
  • Parmesan
  • Garlic powder
  • Italian seasoning
  • Salt & pepper

Mix until creamy and well combined.


3️⃣ Transfer to Baking Dish

Spread mixture into a small greased baking dish or ramekin (perfect for 1–2 servings).


4️⃣ Add Cheese on Top

Sprinkle remaining mozzarella over the top for that melty, golden finish.


5️⃣ Bake

Bake 12–15 minutes, or until:

  • Cheese is melted
  • Edges are bubbly
  • Top is lightly golden

(Air fryer: 8–10 minutes at 375°F.)


🍽 Serve

Enjoy on its own or pair with:

  • A side salad
  • Roasted veggies
  • Cauliflower rice (low carb!)

💡 Optional Add-Ins (Still Low Carb!)

  • 1 tbsp cream cheese for extra creaminess
  • Red pepper flakes for heat
  • Mushrooms or broccoli
  • A sprinkle of paprika on top

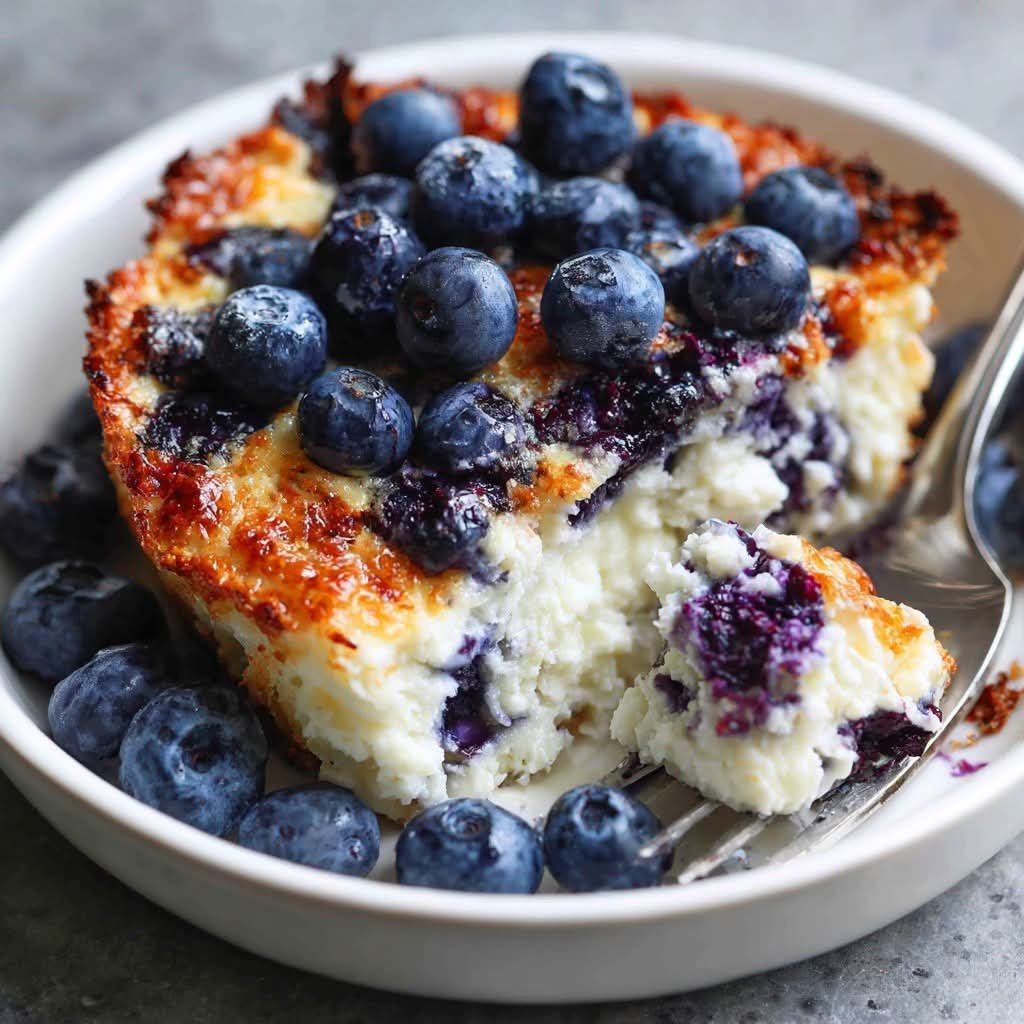
3-Ingredient Keto Yogurt Cake: No Sugar and No Flour

Servings: 8

Total Time: 50 minutes

Difficulty: Easy

Calories per Serving: 115 kcal

Macros: Protein 6 g / Net Carbs 6 g / Fat 7 g / Fiber 0 g


When you are following a keto or low-carb lifestyle, finding a dessert that feels light, airy, and truly indulgent can be a challenge. Most traditional cakes rely on heavy almond flour or coconut flour, which can sometimes feel dense. This Keto Yogurt Cake is a total game-changer. It uses just three simple ingredients to create a custard-like, soufflé-style treat that melts in your mouth without the carb heavy-lifting.

This recipe is the ultimate solution for those busy weeknights when you want something sweet but want to stay on track with your macros. Because it contains no added sugar and no flour, it’s a gentle way to satisfy a dessert craving while keeping your blood sugar stable. It is naturally high in protein thanks to the eggs and yogurt, making it a functional snack as much as a dessert.

The beauty of this dish lies in its simplicity. By whisking together these three basic staples, you transform humble ingredients into a sophisticated, elegant cake that looks like it came from a French bakery. It’s clean eating at its finest—nourishing, wholesome, and incredibly easy to whip up.


Look at the recipe.

  • Sensory Appeal: A silky, smooth, custard-like interior with a lightly golden, delicate top.
  • Flavor Highlight: Bright, tangy notes from the yogurt balanced by the rich, creamy essence of the eggs.
  • Key Keto Benefit: A flourless, low-calorie treat that provides a high-protein punch with minimal impact on daily carb counts.

Ingredients Needed

  • 400 g Plain Greek Yogurt: Ensure you use a full-fat, keto-friendly variety. If using “sweetened” versions, look for those sweetened with stevia or monk fruit to keep it low carb.
  • 4 Large Eggs: Room temperature eggs will incorporate more smoothly into the batter.
  • 40 g Cornstarch: Sifted to ensure a lump-free, velvety texture. (Note: While cornstarch is used sparingly here for structure, for strict keto, you may substitute with arrowroot powder).

How to Make Our Keto Yogurt Cake

Whisk the Base: Preheat your oven to 340°F (170°C) and line a 6-inch cake pan with parchment paper. In a large mixing bowl, combine the 400 g of yogurt and the 4 eggs. Whisk vigorously until the mixture is completely smooth and the eggs are fully integrated.

Sift and Fold: Add the 40 g of sifted cornstarch to the wet mixture. Fold gently with a spatula or whisk until no white streaks remain. This ensures your keto yogurt cake remains light and doesn’t become gummy.

Bake to Perfection: Pour the batter into your prepared pan. Bake for 35 to 45 minutes. The cake should be set on the edges but still have a slight, delicate jiggle in the center. Remove from the oven and allow it to cool completely in the pan; this is a crucial step as the cake sets and develops its creamy texture while cooling. For the best experience, chill in the fridge for at least 2 hours before serving.


Storage & Serving Suggestions

Storing: Keep this cake in an airtight container in the refrigerator. It stays fresh and delicious for up to 4 days. In fact, many find the flavor improves after a night in the fridge.

Reheating: This cake is best served cold or at room temperature. We do not recommend reheating it in the microwave, as the high heat can change the delicate protein structure of the eggs and yogurt.

Serving Pairings: Serve a slice with a handful of fresh raspberries or a dollop of sugar-free whipped cream. It also pairs beautifully with a hot cup of keto-friendly coffee or herbal tea for a light afternoon snack.


Tips & FAQs

Can I use flavored yogurt? Yes! You can use keto-friendly vanilla or lemon-flavored yogurt to add extra depth to the cake without needing extra extracts. Just ensure there are no added sugars in the ingredient list.

Why did my cake sink in the middle? Like a soufflé, this cake rises in the oven and will naturally settle as it cools. This is normal! The result is a dense, creamy, fudge-like consistency that is absolutely delicious.

Is cornstarch keto-friendly? In this small amount spread across 8 servings, the carb count remains low (approx. 5-6 g net carbs per slice). However, if you are strictly avoiding corn, you can experiment with 20 g of coconut flour, though the texture will be slightly more “cake-like” and less “custard-like.”

How do I get a golden top? If your cake is cooked through but looks pale, you can turn on the broiler for the last 1–2 minutes of baking. Watch it closely to avoid burning!

Burn Belly Fat Like Crazy

INGREDIENTS
A small piece of ginger washed and diced into thin stripes
A cup of water
Freshly squeezed juice of half a lemon
Roasted jeera (cumin) powder

INSTRUCTIONS
Add the ginger and water in a blender and mix it well till it forms a smooth mixture.
Now pour this out into a glass and add the lemon juice.
Mix this well.
Add a pinch of roasted jeera powder and mix it well again.
Your ginger lemon water is ready to drink.

ASimple”RiceMethod”ThatLiquifiesFatEvery24Hours


It’s true… I sank from 207 to a lean 135… And I’ll never forget the look on my doctor’s face when I walked into his office for my annual exam.

He stuttered out, “Are you doing that Exotic Rice Hack I told you about?”

So I told him I’d been doing it for a few months now, and it completely changed my life and health.

The best part? People are noticing and asking what I’m doing differently.

This is the first time in a very long time I’ve felt this good about myself.

So maybe this can help you too?

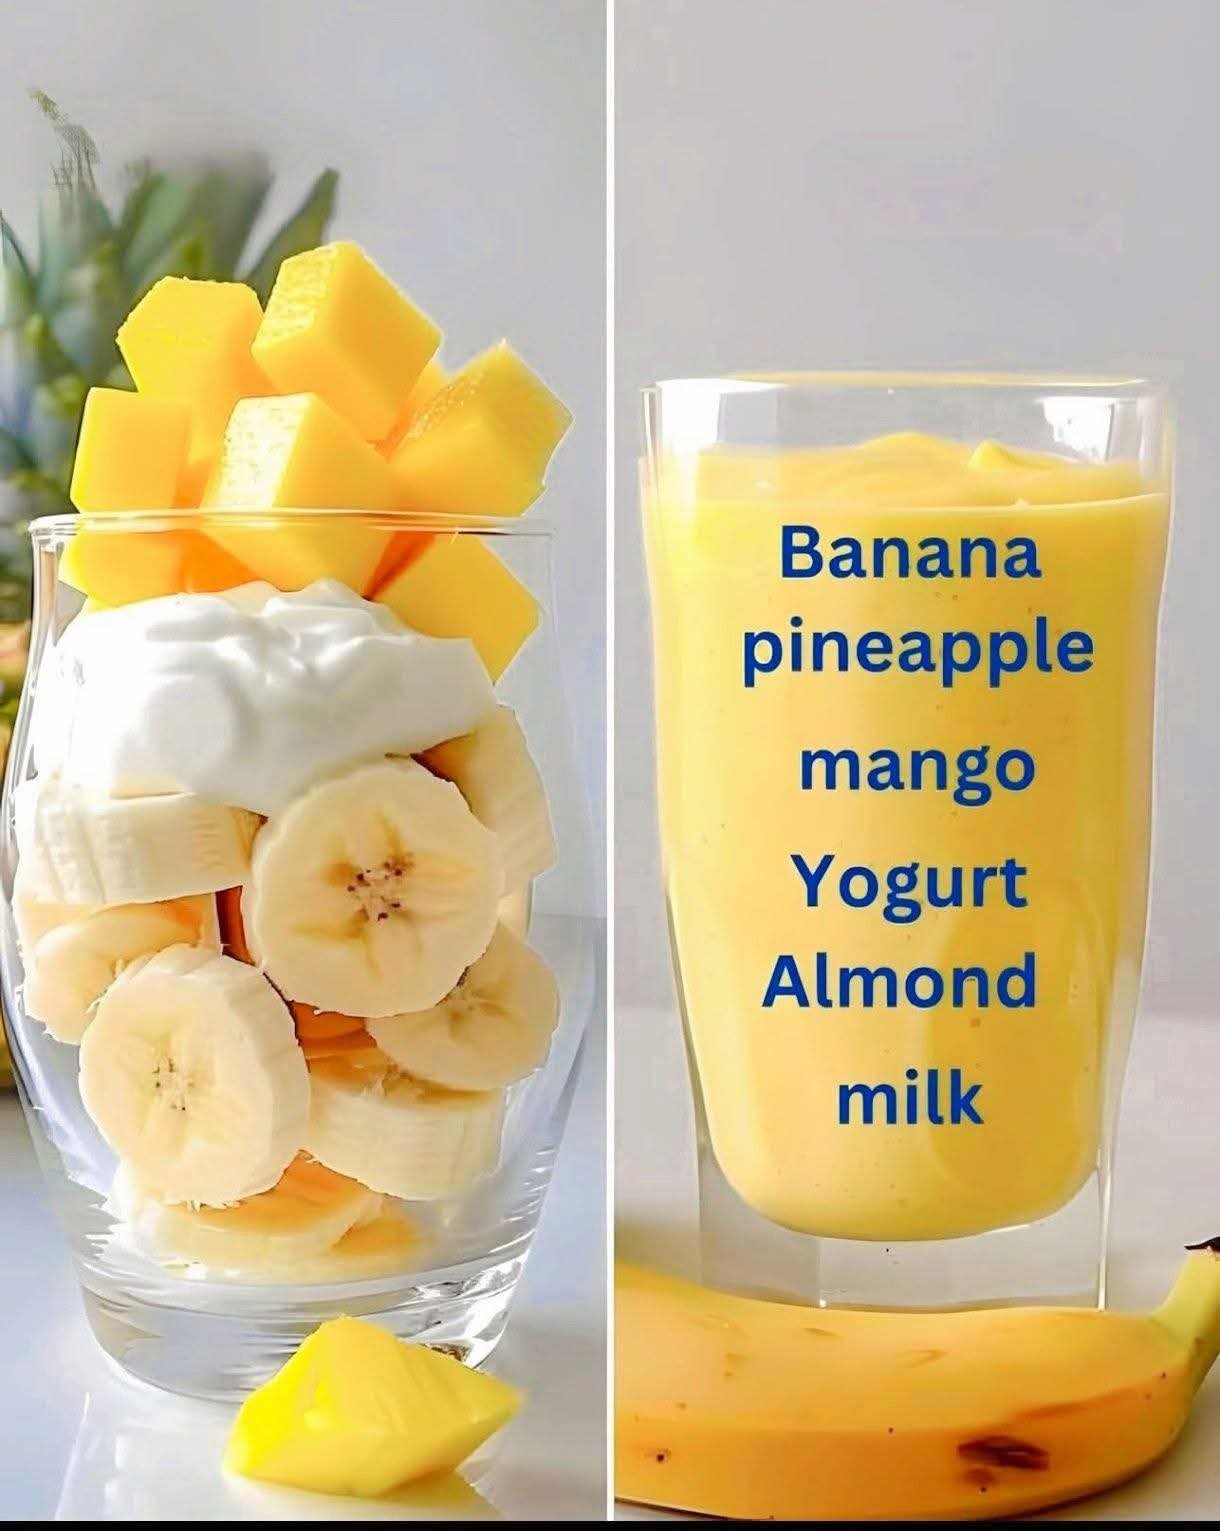
Tropical Sunshine Smoothie

Ingredients

  • 1 medium banana (frozen slices work best for a thicker texture)

  • 1/2 cup fresh or frozen mango chunks

  • 1/2 cup fresh or frozen pineapple chunks

  • 1/2 cup Greek yogurt (plain or vanilla)

  • 1 cup unsweetened almond milk (adjust for your preferred thickness)

  • Optional: A drizzle of honey or maple syrup if you prefer extra sweetness.


Instructions

  1. Prep the Fruit: If you aren’t using pre-frozen fruit, slice the banana and chop the mango and pineapple into small cubes.

  2. Layer the Blender: Add the liquid (almond milk) first to help the blades move easily. Then, add the yogurt, followed by the banana, mango, and pineapple.

  3. Blend: Start on a low speed and gradually increase to high. Blend for about 45–60 seconds or until the mixture is completely smooth and creamy.

  4. Adjust Consistency: If the smoothie is too thick, add a splash more almond milk. If it’s too thin, add a few more pieces of frozen fruit or a couple of ice cubes.

  5. Serve: Pour into a tall glass and enjoy immediately.

Quick Tips for the Best Result

  • Natural Sweetness: Use a very ripe banana (with a few brown spots) to get the most natural sweetness without needing added sugar.

  • Texture: Using at least one frozen fruit (like the banana or mango) gives the smoothie a “soft-serve” consistency similar to the one in your photo.

Healthy Oat Pancakes (Ready in 5 Minutes!)

Healthy Oat Pancakes (Ready in 5 Minutes!)
If you want a fast breakfast that feels cozy and still fits a healthy routine, these oat pancakes are a great option. They come together in a blender, cook in minutes, and give you a soft, satisfying stack without refined sugar or flour. They’re naturally sweet from banana, full of fiber, and easy to customize with fruit, nuts, or spices.
Time
Prep: 2 minutes
Cook: 3 minutes
Total: 5 minutes
Ingredients (Serves 2)
1 cup rolled oats
1 ripe banana
2 eggs
1/4 cup milk (any kind)
1/2 teaspoon baking powder
Pinch of salt
1/2 teaspoon vanilla (optional)
Cinnamon to taste (optional)
Instructions
1. Add oats to a blender and pulse until you get a fine flour-like texture.
2. Add banana, eggs, milk, baking powder, salt, vanilla, and cinnamon. Blend until smooth.
3. Heat a nonstick pan over medium. Lightly oil it if needed.
4. Pour small circles of batter. Cook for about 1 to 2 minutes until bubbles appear.
5. Flip and cook another minute until golden.
6. Serve warm with fruit, peanut butter, or a drizzle of honey (if you don’t mind adding a bit of natural sweetness).
Tips
If the batter feels thick, add a splash of milk.
For extra protein, add a tablespoon of Greek yogurt or protein powder.
Let the batter sit for 1 minute to thicken before cooking if you want fluffier pancakes.
Use a ripe banana for better sweetness and smoother blending.
Cook on medium heat so they don’t brown too fast.

Cheesy Beef and Potato Casserole Recipe

Cheesy Beef and Potato Casserole Recipe

Ingredients

Serves 6-8

  • 4 medium potatoes (peeled and cut into chunks)
  • Water (enough to boil potatoes)
  • 1 tsp (5 g) salt (for boiling potatoes)
  • 1 medium onion (finely chopped)
  • 1-2 tbsp olive oil (for cooking)
  • 1-2 cloves garlic (minced)
  • 1 carrot (diced)
  • 2 stalks celery (diced)
  • 450 g (1 lb) ground beef
  • Salt and black pepper (to taste)
  • ½ tsp (2.5 g) smoked paprika
  • 1 zucchini (thinly sliced)
  • 150 g (⅓ lb) cherry tomatoes (halved)
  • 28 g (2 tbsp) butter
  • 28 g (2 tbsp or 1 oz) all-purpose flour
  • 240 ml (1 cup) milk
  • Fresh dill (chopped, to taste)
  • 113 g (4 oz) mozzarella cheese (shredded)

Step-by-Step Instructions

1. Cook the Potatoes

Start by peeling and cutting the potatoes into evenly sized chunks to ensure even cooking. Place the potatoes in a large pot and add enough water to cover them. Add 1 teaspoon of salt to the water, then bring it to a boil over medium-high heat. Allow the potatoes to cook for 20-30 minutes until they are fork-tender.

Once the potatoes are cooked, drain the water and mash them until smooth. Set the mashed potatoes aside while you prepare the rest of the casserole.

2. Prepare the Meat Filling

In a large skillet, heat 1-2 tablespoons of olive oil over medium heat. Add the finely chopped onion and sauté until it becomes translucent, about 3-4 minutes. Stir in the minced garlic and cook for another minute until fragrant.

See also  Quick and Easy No-Oven Yogurt Pancakes

Next, add the diced carrot and celery to the pan, cooking for 5-7 minutes until softened. These vegetables add both flavor and texture to the casserole.

Add the ground beef to the pan, breaking it up with a spatula as it cooks. Continue to cook until the beef is browned and no longer pink. Season the mixture with salt, black pepper, and ½ teaspoon of smoked paprika for a subtle smoky depth.

Once the beef is cooked through, stir in the thinly sliced zucchini and halved cherry tomatoes. Cook for an additional 5 minutes until the vegetables are soft and everything is well combined. Set the meat and vegetable mixture aside.

3. Prepare the White Sauce

In a small saucepan, melt 28 grams (2 tablespoons) of butter over medium heat. Once melted, stir in the flour and cook for 1-2 minutes to form a roux. This step helps thicken the sauce while adding a rich, nutty flavor.

Gradually whisk in the milk, ensuring there are no lumps. Continue to cook the sauce, stirring constantly, until it thickens to a creamy consistency, about 5 minutes. Season the sauce with salt and pepper, then stir in the freshly chopped dill for a bright, herby flavor. Set the sauce aside.

4. Assemble the Casserole

Preheat your oven to 180°C (350°F).

In a large casserole dish, spread the mashed potatoes evenly across the bottom, creating a thick, comforting base. Next, spoon the meat and vegetable mixture over the mashed potatoes, ensuring an even layer.

Pour the prepared white sauce over the top of the beef and vegetables, allowing it to seep through the layers and bind everything together. Finally, sprinkle the shredded mozzarella cheese evenly over the entire casserole, adding a layer of cheesy goodness that will melt to perfection in the oven.

5. Bake the Casserole

Place the assembled casserole in the preheated oven and bake for 20-25 minutes, or until the cheese is melted, golden, and bubbly. The edges should be slightly crisp, with the center hot and delicious.

6. Serve

Once the casserole is finished baking, remove it from the oven and allow it to cool for a few minutes before slicing. This will help the layers set, making it easier to serve. Garnish with extra fresh dill if desired, and enjoy this cheesy, hearty meal.

Nutrition Information (per serving)

  • Calories: 380
  • Total Fat: 20g
  • Saturated Fat: 10g
  • Cholesterol: 80mg
  • Sodium: 550mg
  • Total Carbohydrates: 25g
  • Dietary Fiber: 3g
  • Sugars: 5g
  • Protein: 24g

Tips for the Best Casserole

    1. Choose the Right Potatoes: Russet or Yukon Gold potatoes work best for mashing, giving the dish a fluffy, creamy texture.
    2. Ground Beef Substitutes: You can substitute ground beef with ground turkey or chicken for a leaner version, or even use plant-based ground meat for a vegetarian option.
    3. Make Ahead: This casserole can be prepared ahead of time. Simply assemble it, cover with plastic wrap, and store in the refrigerator for up to 24 hours before baking.
  1. Add More Cheese: If you’re a cheese lover, feel free to add extra mozzarella or even mix in some cheddar for a sharper flavor.

Creamy Peanut Butter Fudge

Creamy Peanut Butter Fudge

This is a rich, melt-in-your-mouth fudge that uses the heat from the melted butter and peanut butter to “cook” the powdered sugar into a smooth, fudge-like consistency.

  • Prep time: 10 minutes

  • Chill time: 1–3 hours

  • Yields: One 8×8 inch pan (approx. 36-64 squares)

Ingredients

  • 1 lb (16 oz) Powdered sugar (Sifted)

  • 1 ¼ cups Unsalted butter

  • 1 ½ cups Creamy peanut butter

  • ½ tsp Kosher salt

  • 1 ½ tsp Vanilla extract

Instructions

  1. Prepare the Sugar: Sift the powdered sugar through a fine-mesh strainer into a large, heat-proof bowl. This ensures there are no lumps in your finished fudge.

  2. Melt and Combine: In a medium saucepan, combine the unsalted butter and creamy peanut butter. Place over medium heat. Whisk constantly until the mixture is fully combined and small bubbles begin to appear around the edges (about 3 to 5 minutes).

  3. Season: Remove the pan from the heat. Immediately stir in the kosher salt and the vanilla extract.

  4. Mix: Pour the hot peanut butter mixture directly over the sifted powdered sugar. Using a sturdy spatula, mix vigorously until the sugar is completely incorporated and the mixture is glossy and smooth.

  5. Set: Line an 8×8-inch baking pan with plastic wrap (leave some overhang on the sides for easy lifting). Pour the fudge into the pan and smooth the top. Fold the excess plastic wrap over the top to cover it.

  6. Chill: Refrigerate for 1 to 3 hours. You want it firm enough to hold its shape when sliced, but not so cold that it becomes brittle and cracks.

  7. Slice and Serve: Lift the fudge out of the pan using the plastic wrap. Cut into small cubes. If it feels too hard to cut, let it sit on the counter for 10 minutes to soften slightly.

Spicy Korean Popcorn Chicken

Spicy Korean Popcorn Chicken

Spicy Korean Popcorn Chicken 1f5251f414
Ingredients:
For the Popcorn Chicken:
1 lb chicken breast
1 cup all-purpose flour
¼ cup cornstarch
1 tsp garlic powder
½ tsp white pepper
1½ tsp salt
1 tsp chicken bouillon powder
2 tbsp water
Cooking oil for frying
For the Gochujang Sauce:
¼ cup gochujang (Korean chili paste)
½ cup ketchup
1 tbsp sesame oil
Sesame seeds for garnish
Instructions:
Popcorn Chicken:
Cut the chicken breast into bite-sized pieces.
In a bowl, mix together the flour, cornstarch, garlic powder, white pepper, salt, and chicken bouillon powder.
Toss the chicken pieces with ¼ cup of the flour mixture and 2 tbsp water until they are well coated.
Heat cooking oil in a frying pan over medium heat.
Fry the chicken pieces in batches until they are golden brown and crispy, ensuring not to overcrowd the pan.
Remove the chicken from the pan and let it drain on a cooling rack.
Gochujang Sauce:
In a large bowl, mix together the gochujang paste, ketchup, and sesame oil.
Add the fried chicken to the sauce and toss until the pieces are evenly coated.
Sprinkle sesame seeds over the chicken before serving.

🥞 Fluffy Pancakes (Tall & Soft)

Ingredients

  • 2 cups all-purpose flour
  • 2 tbsp sugar
  • 2 tsp baking powder
  • ½ tsp baking soda
  • ½ tsp salt
  • 1¾ cups buttermilk (or milk + 1½ tbsp lemon juice)
  • 2 large eggs
  • ¼ cup melted butter (or oil)
  • 1 tsp vanilla extract

Instructions

  1. Mix Dry
    • In a bowl, whisk flour, sugar, baking powder, baking soda, and salt.
  2. Mix Wet
    • In another bowl, whisk buttermilk, eggs, melted butter, and vanilla.
  3. Combine
    • Gently mix wet into dry just until combined.
    • Batter should be thick and slightly lumpy (don’t overmix!).
  4. Rest
    • Let batter rest 5–10 minutes for extra fluffiness.
  5. Cook
    • Heat a lightly greased skillet or griddle over medium-low heat.
    • Scoop ¼–⅓ cup batter per pancake.
    • Cook until bubbles form (2–3 minutes).
    • Flip and cook 1–2 minutes until golden.

🔥 Secrets for Extra Thickness

  • Use buttermilk (or milk + lemon)
  • Keep heat medium-low
  • Don’t press pancakes after flipping
  • Thick batter = tall pancakes

🍯 Serving Ideas

  • Butter + maple syrup
  • Honey & berries
  • Chocolate chips or banana slices in batter
  • Cream cheese glaze or Nutella