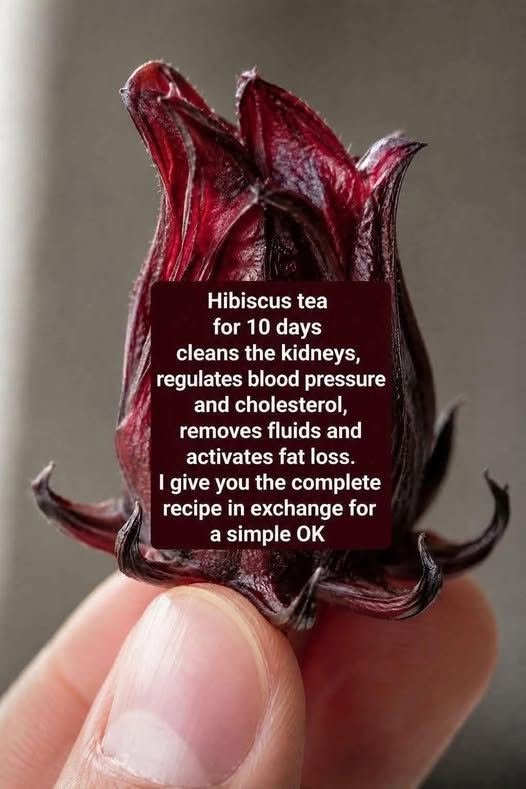
Creamy Seafood Salad: A Refreshing, Flavor-Packed Delight

Creamy Seafood Salad: A Refreshing, Flavor-Packed Delight

This Creamy Seafood Salad is a refreshing and satisfying dish that brings together tender shrimp, flaky crab, and a medley of crisp vegetables in a rich, tangy dressing. Perfect for warm-weather lunches, light dinners, or as an elegant appetizer, this salad is as versatile as it is delicious. Serve it on a bed of lettuce, stuffed into a buttery croissant, or scooped up with crackers—it is guaranteed to be a hit.

The combination of fresh seafood, crunchy celery and bell pepper, and a creamy, zesty dressing creates a balanced and flavorful dish that is both comforting and sophisticated. Whether you are hosting a summer gathering, preparing a quick lunch, or looking for a crowd-pleasing potluck dish, this seafood salad is sure to impress.


Why You Will Love This Recipe

  • Rich and Creamy: A tangy, herb-infused dressing coats every bite.

  • Packed with Seafood: Shrimp, crab, and optional scallops make this salad hearty and satisfying.

  • Fresh and Crunchy: Celery, red onion, and bell pepper add crisp texture and brightness.

  • Quick and Easy: Ready in just 30 minutes with minimal cooking required.

  • Versatile: Serve as a salad, sandwich, dip, or appetizer.

  • Make-Ahead Friendly: The flavors meld beautifully as it chills.


Creamy Seafood Salad

Prep Time: 15 minutes | Cook Time: 5 to 10 minutes (if cooking seafood) | Chill Time: 30 minutes | Total Time: 30 to 60 minutes
Servings: 4 to 6

This creamy seafood salad combines tender shrimp, flaky crab, crisp vegetables, and a tangy dressing. It is perfect for sandwiches, salads, or as a dip.

Ingredients

  • 250g cooked shrimp, peeled and deveined

  • 150g cooked crab meat (or imitation crab, flaked)

  • 150g cooked scallops or firm white fish chunks (optional)

  • ½ cup celery, finely chopped

    • ¼ cup red onion, finely chopped

    • ¼ cup red bell pepper, diced

    • 2 to 3 tablespoons fresh parsley, chopped

    • ½ cup mayonnaise

    • 2 tablespoons sour cream or Greek yogurt

    • 1 teaspoon Dijon mustard

    • 1 teaspoon lemon juice (fresh)

    • ½ teaspoon Old Bay seasoning (optional)

    • Salt and black pepper, to taste

    • 1 hard-boiled egg, chopped (optional)

    • Lettuce leaves or croissant/bread rolls, for serving

    Instructions

    Step 1: Prep the Seafood
    If using raw seafood, cook shrimp, scallops, or fish in boiling water or steam until opaque and cooked through. Let cool, then chop into bite-sized pieces. If using pre-cooked seafood, simply chop into uniform pieces.

    Step 2: Combine the Vegetables and Herbs
    In a large mixing bowl, add the chopped celery, red onion, red bell pepper, and parsley. Toss gently to combine.

    Step 3: Mix the Dressing
    In a small bowl, whisk together the mayonnaise, sour cream (or Greek yogurt), Dijon mustard, lemon juice, Old Bay seasoning (if using), salt, and pepper. Taste and adjust seasoning as needed.

    Step 4: Assemble the Salad
    Add the seafood and chopped egg (if using) to the bowl with the vegetables. Pour the dressing over the top and gently fold until everything is evenly coated. Be careful not to break the seafood pieces.

    Step 5: Chill
    Cover and refrigerate for at least 30 minutes to let the flavors meld.

  • Step 6: Serve
    Serve over a bed of lettuce, in sandwich rolls, or with crackers. Garnish with extra parsley or a lemon wedge if desired.


    Tips for the Perfect Seafood Salad

    • Use High-Quality Seafood: Fresh, high-quality seafood makes a noticeable difference. If using imitation crab, look for a good-quality brand.

    • Chop Uniformly: Cut seafood and vegetables into similar-sized pieces for even distribution and a pleasant texture.

    • Do Not Overmix: Gently fold the ingredients together to keep the seafood pieces intact and the salad light.

    • Chill Thoroughly: Allowing the salad to chill for at least 30 minutes (or up to 2 hours) lets the flavors meld and the dressing thicken.

    • Adjust Seasoning: Taste the dressing before adding to the salad. Old Bay seasoning adds a classic seafood flavor, but you can omit or substitute with paprika and cayenne.

    • Serve Cold: This salad is best served chilled, straight from the refrigerator.


    Variations and Substitutions

    • Lighter Dressing: Substitute half of the mayonnaise with plain Greek yogurt.

    • Add Heat: Add a pinch of cayenne pepper or a dash of hot sauce.

    • Herb Variations: Try fresh dill, chives, or tarragon instead of parsley.

    • Add Avocado: Fold in diced avocado just before serving.

    • Gluten-Free: This recipe is naturally gluten-free; serve with gluten-free crackers or lettuce wraps.

    • Dairy-Free: Use dairy-free mayonnaise and omit the sour cream.


    What to Serve with Seafood Salad

    This versatile salad can be enjoyed in many ways:

    • Lettuce Wraps: Serve in crisp lettuce cups for a low-carb option.

    • Sandwich: Pile onto croissants, brioche buns, or toasted sourdough.

Zero Point Egg Salad

Zero Point Egg Salad

Ingredients

  • 6 Large Eggs: Hard-boiled and peeled.

  • 1/3 cup Plain Non-Fat Greek Yogurt: Provides the creamy base.

  • 1 tbsp Dijon Mustard: Adds depth and a bit of “zing.”

  • 2 tbsp Fresh Chives or Green Onions: Finely chopped.

  • 1/2 tsp Smoked Paprika: For a subtle, savory kick.

  • Salt and Black Pepper: To taste.

  • Optional: A squeeze of lemon juice or a dash of hot sauce for extra brightness.


Instructions

  1. Prep the Eggs: Place your eggs in a single layer in a saucepan. Cover with water and bring to a boil. Once boiling, cover and remove from heat for 10–12 minutes. Transfer to an ice bath immediately to ensure easy peeling.

  2. Dice: Once cooled, peel the eggs. You can chop them into bite-sized chunks or mash them with a fork depending on your preferred texture. For a lower-fat version, some people choose to discard half of the yolks, though keeping them adds richness.

  3. Mix the Dressing: In a medium bowl, whisk together the Greek yogurt, Dijon mustard, paprika, salt, and pepper.

  4. Combine: Gently fold the chopped eggs and chives into the yogurt mixture until evenly coated.

  5. Serve: Enjoy immediately or chill for 30 minutes to let the flavors meld.

Pro Tip: Serve this in large romaine lettuce leaves or scooped into hollowed-out bell peppers to keep the entire meal at zero points!

Cheesy Vegetable Egg Rolls

Cheesy Vegetable Egg Rolls are a fantastic way to pack fiber and protein into a delicious, handheld snack or meal. They are crispy on the outside, tender on the inside, and full of vibrant color! 🥕🌿


🥗 Ingredients

  • 2 cups Zucchini (grated and squeezed dry) 🥒

  • 1 cup Carrots (finely grated) 🥕

  • 1 cup Mozzarella or Cheddar cheese (shredded) 🧀

  • 2 large Eggs 🥚

  • ½ cup Green onions (finely chopped) 🧅

  • ½ cup All-purpose flour (or almond flour for a different texture) 🌾

  • ½ tsp Garlic powder 🧄

  • ¼ tsp Black pepper 🧂

  • 1 tbsp Olive oil (for pan-frying) 🍳

  • Optional: Fresh parsley or cilantro 🌿


👩‍🍳 Step-by-Step Instructions

1️⃣ Prep the Vegetables: Grate the zucchini and carrots. ➡ Crucial Step: Place the grated zucchini in a clean kitchen towel and squeeze out as much liquid as possible. This prevents the rolls from becoming soggy.

2️⃣ Mix the Base: In a large glass bowl, combine the squeezed zucchini, grated carrots, shredded cheese, and chopped green onions. 🥣

3️⃣ Add Binding Ingredients: Crack the two eggs into the bowl. Add the garlic powder and black pepper. ➡ Mix thoroughly with a fork until the eggs are well incorporated. 🥚

4️⃣ Incorporate Flour: Fold in the flour gradually. The mixture should be thick enough to hold its shape but still moist. 🥄

5️⃣ Shape the Rolls: Take a generous spoonful of the mixture and shape it into a log or “roll” using your hands or two spoons. 🥖

6️⃣ Cook to Golden Perfection: Heat olive oil in a non-stick skillet over medium heat. ➡ Carefully place the rolls in the pan. ➡ Fry for 3–4 minutes per side, turning gently, until they are golden brown and the cheese is melted inside. 🍳

7️⃣ Drain and Serve: Place the cooked rolls on a paper towel to remove any excess oil. Serve warm with your favorite dipping sauce! 🍽️


💡 Tips & Notes

  • Drain Well: The secret to the texture is removing the water from the zucchini. 🥒

  • Low-Carb Swap: You can use almond flour or coconut flour if you prefer to avoid wheat flour. 🥥

  • Add Spice: If you enjoy a kick, add a pinch of red chili flakes to the batter. 🌶️


Q & A

Q: Can I bake these instead of frying? 🧐 A: Yes! ➡ Place them on a parchment-lined baking sheet and bake at 400°F (200°C) for about 15–20 minutes, turning halfway through until crispy. 🥨

Q: How do I keep them from falling apart in the pan? 🍳 A: Make sure your pan is hot before adding the rolls, and don’t crowd the pan. Let the first side cook completely to form a “crust” before trying to flip them. 🛡️

Q: Can I store these for later? 🥡 A: These stay fresh in the fridge for up to 3 days. ➡ To regain the crunch, reheat them in an air fryer or dry skillet rather than the microwave. 🌡️


Health Benefits

  • High Fiber: Loaded with fresh zucchini and carrots for digestive health. 🥕

  • Protein Packed: Eggs and cheese provide a great energy boost. 🥚

  • Kid-Friendly: A wonderful way to encourage the whole family to eat more greens! 🧒

Category: Healthy Vegetable Recipes | Easy Daily Recipes 🥗✨

Healthy Avocado Power Bowl

Healthy Avocado Power Bowl

This bowl is a nutritional powerhouse, featuring heart-healthy monounsaturated fats, high fiber for digestion, and essential vitamins like B6, C, E, and K.


Ingredients

  • 1 large ripe avocado (sliced or cubed)

  • ½ cup cooked brown rice or quinoa (provides complex carbs)

  • ½ cup cucumber (chopped for crunch)

  • ½ cup cherry tomatoes (halved)

  • 1 large boiled egg or 3 oz grilled tofu (for protein)

  • 1 tsp extra virgin olive oil

  • 1 squeeze fresh lemon juice

  • 1 pinch sea salt and cracked black pepper


Instructions

  1. Prepare the Base: Place your warm or chilled cooked rice (or quinoa) into a medium serving bowl.

  2. Prep the Avocado: Cut the avocado in half, remove the pit, and carefully slice the flesh into even pieces.

  3. Assemble the Bowl: Arrange the avocado slices, chopped cucumber, halved cherry tomatoes, and your choice of protein (egg or tofu) over the grain base.

  4. Dress the Dish: Drizzle the olive oil and fresh lemon juice evenly over the ingredients.

  5. Season: Lightly sprinkle with a pinch of salt and black pepper to taste.

  6. Serve: Mix gently to incorporate the flavors and enjoy immediately.


Tips & Notes

  • Calorie Conscious: If you are monitoring your total daily intake, use half an avocado and save the other half (stored with the pit and a bit of lemon juice) for the next day.

  • Boost the Fiber: Add a handful of leafy greens like spinach or arugula for extra volume and nutrients.

  • Texture Hack: Toast your quinoa slightly in the pan before boiling to add a nutty depth to the bowl.

  • Avoid Sugary Add-ons: Keep the dressing simple with oil and lemon to maintain the low-sugar benefits of the meal.


Nutritional Information (Per Serving)

  • Calories: ~350

  • Healthy Fats: ~22g

  • Fiber: ~10g

  • Protein: ~12g

  • Sugar: ~2g

Common Questions

  • Is avocado good for blood sugar? Yes, because the high fiber and healthy fats slow down digestion, which helps prevent sharp glucose spikes.

  • Can teens eat this daily? Absolutely! It provides the steady energy needed for growth and focus.

  • How often should I eat it? Including avocado in your meals 3–5 times per week is a healthy habit for most people.

Classic Fluffy Pancakes

Classic Fluffy Pancakes

These pancakes are light, airy, and perfectly golden with a melt-in-your-mouth texture. Whether for a lazy weekend breakfast or a cozy brunch, they are a guaranteed crowd-pleaser.


Ingredients

  • 1 ½ cups (190g) all-purpose flour

  • 3 ½ tsp baking powder

  • 1 tbsp sugar (adjust to taste)

  • ¼ tsp salt

  • 1 ¼ cups (300ml) milk (room temperature)

  • 1 large egg (room temperature)

  • 3 tbsp unsalted butter, melted (plus extra for cooking)

  • 1 tsp vanilla extract


Instructions

  1. Mix Dry Ingredients: In a large mixing bowl, whisk together the flour, baking powder, sugar, and salt.

  2. Combine Wet Ingredients: In a separate bowl, whisk the milk, egg, melted butter, and vanilla until smooth.

  3. Make the Batter: Pour the wet ingredients into the dry mixture. Gently whisk until just combined. Do not overmix—small lumps are perfectly fine and actually help keep the pancakes fluffy.

  4. Heat the Pan: Place a non-stick skillet or griddle over medium heat. Lightly grease with a small amount of butter.

  5. Cook: Pour about ¼ cup of batter per pancake onto the skillet. Cook for 2–3 minutes, until bubbles form on the surface and the edges look set. Flip and cook for another 1–2 minutes until golden brown.

  6. Serve: Stack them high and top with butter, maple syrup, or fresh berries.


Tips for Success

  • The Fluff Factor: If your pancakes are coming out flat, ensure your baking powder is fresh. Also, remember the “lumpy batter” rule—overworking the gluten makes for a chewy, tough pancake.

  • Temperature Control: If the outside is burnt but the inside is gooey, your pan is too hot. Lower the heat and give them a bit more time.

  • Keep Them Warm: If cooking for a group, keep finished pancakes on a wire rack in a $200°F$ ($95°C$) oven to stay crisp and warm.

Nutritional Info (Per Pancake)

Calories Protein Carbs Fat Sugar
~130 4g 16g 5g

Vegetable Cream Cheese Spread

This Vegetable Cream Cheese Spread is the perfect way to add a burst of garden-fresh flavor and a satisfying crunch to your day. Whether you’re looking for a vibrant bagel topper or a creamy dip for your favorite snacks, this recipe is a versatile winner! 🌿✨


🥗 Ingredients

  • 8 oz (225 g) cream cheese, softened 🧀

  • 2 tbsp mayonnaise or Greek yogurt (optional for extra creaminess) 🥣

  • ¼ cup finely chopped red bell pepper 🫑

  • ¼ cup finely chopped carrots 🥕

  • 2 tbsp finely chopped green onions 🧅

  • ¼ cup finely chopped cucumber (be sure to remove seeds first) 🥒

  • 2 tbsp finely chopped celery 🥬

  • 2 tbsp chopped fresh parsley or dill 🌿

  • ½ tsp garlic powder (optional) 🧄

  • Salt and pepper to taste 🧂

  • A squeeze of lemon juice (optional, for a bright finish) 🍋


👩‍🍳 Detailed Preparation Steps

  1. Prepare the Vegetables: ➡️ Start by finely chopping all your fresh vegetables. Since excess water can make the spread runny, place the chopped cucumbers on a paper towel and gently pat them dry to remove extra moisture.

  2. Whisk the Base: ➡️ In a medium-sized mixing bowl, beat the softened cream cheese until it is completely smooth and free of lumps. If you are using mayonnaise or Greek yogurt, stir it in now and mix until the base is light and fluffy.

  3. Combine Everything: ➡️ Fold in the chopped bell peppers, carrots, green onions, celery, and herbs. Add the garlic powder, salt, pepper, and a splash of lemon juice. Stir well until the vegetables are evenly distributed throughout the cream cheese.

  4. The Chilling Phase: ➡️ Cover the bowl tightly with plastic wrap or transfer the mixture to an airtight container. Place it in the refrigerator for at least 1 hour. This allows the flavors of the fresh herbs and veggies to infuse into the cream cheese for the best taste.

  5. Serving: ➡️ Once chilled, give it a quick stir. Spread it generously onto toasted bagels, crackers, or use it as a delicious center for veggie wraps. 🥯


💡 Expert Tips for Success

  • Texture Choice: ➡️ If you prefer a very smooth, dip-like consistency, you can pulse the mixture a few times in a food processor. For a more traditional spread with a nice “bite,” stick to mixing by hand.

  • The Right Veggies: ➡️ Stick to “hard” vegetables like the ones listed. Avoid using very watery items like tomatoes, as they will release juice over time and make your spread soggy. 🚫🍅

  • Make Ahead: ➡️ This is a fantastic meal-prep option! It stays fresh and delicious in the fridge for up to 5 days.


❓ Questions & Answers

Q: Can I make this dairy-free? A: Yes! You can easily swap the traditional cream cheese for your favorite plant-based cream cheese alternative and use a vegan-friendly mayo. 🌱

Q: Is this suitable for a low-carb lifestyle? A: Absolutely. This spread is naturally low in carbohydrates and high in flavor, making it a great choice when paired with celery sticks or low-carb crackers. 🥒

Q: Can I freeze the leftovers? A: It is not recommended to freeze this spread. Cream cheese tends to change texture and become grainy once thawed. It is best enjoyed fresh from the refrigerator. 🧊

Q: How do I keep it from getting watery? A: The secret is in the “prep” step! Ensuring your cucumber and peppers are patted dry before mixing is the best way to keep the spread thick and creamy. 🧻

Savory Spinach and Feta Puff Pastry Braid,

Savory Spinach and Feta Puff Pastry Braid,

  • Prep time: 15 minutes

  • Bake time: 25 minutes

  • Yields: 1 large loaf


Ingredients

  • Pastry: 1 sheet frozen puff pastry (thawed)

  • Filling: 2 cups fresh spinach (chopped), 1 cup crumbled feta cheese, ½ cup ricotta cheese, 1 garlic clove (minced)

  • Flavor Boost: ¼ cup sun-dried tomatoes (chopped), 1 tsp dried oregano, salt, and pepper

  • Finish: 1 egg (beaten for egg wash), 1 tbsp fresh parsley, and a pinch of red pepper flakes


Instructions

  1. Prep the Oven: Preheat your oven to 200°C (400°F). Line a large baking sheet with parchment paper.

  2. Make the Filling: In a medium bowl, mix the spinach, feta, ricotta, garlic, sun-dried tomatoes, and oregano. Season lightly with salt and pepper (remember, feta is naturally salty!).

  3. Prepare the Dough: Roll out the puff pastry into a large rectangle on the parchment paper. Visually divide the pastry into three vertical columns.

  4. The Braid: Spread the filling down the center column. Using a knife, cut 1-inch wide diagonal strips down the two side columns. Fold the strips over the filling, alternating sides to create a “braid” or “criss-cross” pattern. Tuck the ends under to seal.

  5. The Golden Glow: Brush the entire pastry generously with the beaten egg wash. Sprinkle the fresh parsley and red pepper flakes over the top.

  6. Bake: Slide the tray into the oven and bake for 20–25 minutes until the pastry is puffed and deep golden brown.

Detailed Golden Milk Recipe

Detailed Golden Milk Recipe

This warm, comforting drink is perfect for any time of day and is designed to maximize the absorption of turmeric’s beneficial properties.

Ingredients:

  • 1 ½ cups unsweetened almond milk (or any milk of your choice) 🥛

  • 1 tsp ground turmeric powder 🧡

  • ¼ tsp ground ginger or a small piece of fresh ginger, grated 🫚

  • ¼ tsp ground cinnamon 🍂

  • 1 pinch black pepper (essential for turmeric absorption!) 🧂

  • 1 tbsp coconut oil or grass-fed butter 🥥

  • Sweetener to taste: 1-2 drops of liquid stevia or a sugar-free syrup (optional) ✨


🥣 Preparation Steps

  1. Combine Ingredients: ➡️ Pour the milk into a small saucepan over medium-low heat. Add the turmeric, ginger, cinnamon, and black pepper.

  2. Add Healthy Fats: ➡️ Whisk in the coconut oil or butter. Adding a healthy fat is crucial because turmeric is fat-soluble, meaning it needs fat to be properly processed by your body.

  3. Heat Gently: ➡️ Heat the mixture for about 5 to 7 minutes. Be careful not to let it reach a full boil; a gentle simmer is best to preserve the nutrients.

  4. Whisk for Texture: ➡️ Use a whisk or a milk frother to blend everything together until the liquid is smooth and slightly frothy on top.

  5. Strain and Sweeten: ➡️ Remove from heat. If you used fresh ginger, pour the milk through a fine-mesh strainer into your favorite mug. Stir in your preferred sugar-free sweetener at this stage.

  6. Enjoy: ➡️ Sprinkle a tiny bit of extra cinnamon on top and drink while warm. ☕


❓ Common Questions & Answers

Q: Why is there black pepper in a sweet drink? A: Black pepper contains piperine, which has been shown to increase the absorption of curcumin (the good stuff in turmeric) by up to 2,000%! You only need a tiny pinch. 📈

Q: Can I drink this every day? A: Yes! Many people enjoy a cup in the evening to help with relaxation and to support a healthy inflammatory response overnight. 🌙

Q: Is this suitable for a low-carb lifestyle? A: Absolutely. By using unsweetened nut milk and a sugar-free sweetener, this drink fits perfectly into a low-carb or keto-friendly routine. 🥑

Q: Can I make a large batch? A: Yes, you can double or triple the recipe and store it in a glass jar in the fridge for up to 3 days. Just shake well and reheat gently on the stove when you’re ready for more. 🧊


💡 Pro Tip

For an extra flavor boost, you can add a tiny drop of pure vanilla extract. It pairs beautifully with the warm spices! 🍦

🥪 Loaded Club Sandwich + Crispy Fries

🥪 Loaded Club Sandwich + Crispy Fries
🛒 Ingredients
🥪 Sandwich

3 slices toasted bread (white, sourdough, or whole wheat)

6–8 slices roasted turkey or chicken

4 slices crispy bacon

2 slices cheddar or Swiss cheese

Lettuce leaves 🥬

Tomato slices 🍅

2 tbsp mayonnaise

1 tsp Dijon mustard (optional)

Salt & pepper

🍟 Fries

3–4 large potatoes (cut into fries)

Oil for frying or baking

Salt, paprika, garlic powder

👨‍🍳 Instructions
🍟 1. Make the Fries

Fry method: Soak cut potatoes in cold water (30 mins), dry, then fry at 175°C (350°F) until golden.

Oven method: Toss in oil + seasoning, bake at 220°C (425°F) for 30–35 mins, flipping halfway.

🥪 2. Build the Club

Toast all 3 bread slices.

Spread mayo (and mustard) on each slice.

Layer bottom slice: lettuce → turkey → cheese → tomato.

Add middle bread slice.

Add bacon + more turkey + lettuce.

Top with final bread slice.

👉 Slice into triangles and secure with toothpicks for that classic club look.

🍽️ Serve It Up

Plate with hot crispy fries on the side. Add pickles or coleslaw for that true deli feel 😍

🔥 Pro Tips

Use thick-cut bacon for extra crunch

Add avocado for a creamy upgrade 🥑

Try garlic aioli instead of mayo for a flavor boost

Double fry fries for restaurant-level

Raspberry & Beet Smoothie

Ingredients

  • 1 cup frozen raspberries (adds chill and thickness)

  • 1 medium red beet (steamed, peeled, and cooled)

  • 1 medium ripe banana (frozen is best for a creamy texture)

  • 1 cup unsweetened almond milk (or your preferred dairy-free milk)

  • 1/2 cup Greek yogurt or coconut yogurt for a vegan option

  • 1 tbsp chia seeds or hemp hearts (plus more for garnish)

  • 1 tsp maple syrup or honey (optional, to taste)


Instructions

  1. Prep the Beet: If using a raw beet, steam it until fork-tender, peel the skin, and let it cool completely. You can also use pre-cooked, vacuum-sealed beets for a quicker prep.

  2. Combine: Place the beet, frozen raspberries, banana, yogurt, and plant milk into a high-speed blender.

  3. Blend: Start on a low setting to break up the frozen fruit, then increase to high. Blend for about 45–60 seconds until the mixture is completely smooth and vibrant.

  4. Adjust: If the consistency is too thick, splash in a little more milk. Taste and add sweetener if you prefer a dessert-like profile.

  5. Serve: Pour into a glass and top with a sprinkle of hemp hearts or chia seeds for a lovely crunch. Enjoy immediately!

Bacon and Egg Breakfast Tacos

Bacon and Egg Breakfast Tacos

Yields: 4 tacos | Prep time: 10 mins | Cook time: 15 mins


Ingredients

  • Tortillas: 4 small flour tortillas (slightly charred).

  • Protein: 6 strips of thick-cut bacon, chopped; 4 large eggs.

  • Dairy: 2 tbsp milk or heavy cream; ½ cup shredded Monterey Jack or Cheddar cheese.

  • Produce: Fresh cilantro (chopped), ¼ white onion (finely diced).

  • Seasoning: Salt and black pepper to taste.

  • Optional: Your favorite salsa or hot sauce.


Instructions

  1. Crisp the Bacon: Place the chopped bacon in a cold skillet over medium heat. Fry until the fat has rendered and the pieces are golden and crispy. Remove the bacon with a slotted spoon and drain on paper towels, but keep about 1 tablespoon of the bacon drippings in the pan for extra flavor.

  2. Prepare the Eggs: In a small bowl, whisk the eggs with the milk, salt, and pepper until well combined.

  3. Scramble: Pour the egg mixture into the skillet with the reserved bacon fat. Cook over medium-low heat, gently folding the eggs with a spatula until they are soft and creamy. Just before they finish, fold in the shredded cheese so it begins to melt.

  4. Toast the Tortillas: While the eggs cook, warm your tortillas directly over a low gas flame for 10 seconds per side (or in a dry pan) until they develop slight char marks and become pliable.

  5. Assemble: Layer the cheesy scrambled eggs into the center of each warm tortilla. Generously top with the crispy bacon bits, diced raw onions, and a handful of fresh cilantro.

Cheesy Hamburger Potato Casserole

Cheesy Hamburger Potato Casserole

Ingredients

  • 1 lb Lean ground beef

  • 5-6 Medium Yukon Gold potatoes (peeled and thinly sliced)

  • 1 Small onion (diced)

  • 2 cups Shredded sharp cheddar cheese

  • 1 can (10.5 oz) Condensed cream of mushroom or chicken soup

  • 1/2 cup Whole milk

  • 1/2 cup Sour cream

  • 1 tsp Garlic powder

  • Salt & Black pepper to taste

  • Fresh parsley for garnish


Instructions

  1. Prep the Oven: Preheat your oven to 375°F (190°C) and lightly grease a 9×13 inch baking dish.

  2. Brown the Beef: In a large skillet over medium-high heat, cook the ground beef and diced onion until the meat is fully browned. Drain any excess fat. Season with salt, pepper, and garlic powder.

  3. Make the Sauce: In a medium bowl, whisk together the condensed soup, milk, and sour cream until smooth. This creates the creamy base that binds the layers.

  4. Layer the Dish: * Place half of the sliced potatoes in the bottom of the baking dish.

    • Spread the cooked beef mixture evenly over the potatoes.

    • Pour half of the soup mixture over the beef and sprinkle with 1 cup of cheese.

    • Repeat the layers with the remaining potatoes and sauce.

  5. Bake: Cover the dish tightly with aluminum foil. Bake for 45 minutes.

  6. The Cheesy Finish: Remove the foil, sprinkle the remaining 1 cup of cheese on top, and bake uncovered for another 15–20 minutes until the potatoes are tender and the top is golden and bubbly.

  7. Serve: Let it rest for 5–10 minutes to set. Garnish with fresh parsley and enjoy!

Crispy Baked Hot Honey Lemon Feta Chicken

Crispy Baked Hot Honey Lemon Feta Chicken Cutlets with Italian Herb Crust
Ingredients

For the Chicken
4 chicken cutlets (or chicken breasts sliced thin)
1 teaspoon salt
1/2 teaspoon black pepper
1 teaspoon garlic powder
1 teaspoon paprika
2 tablespoons olive oil
For the Italian Herb Crust
1 cup panko breadcrumbs
1/3 cup grated Parmesan cheese
1 teaspoon dried basil
1 teaspoon dried oregano
1 teaspoon dried parsley
1/2 teaspoon onion powder
1 egg, beaten
For the Hot Honey Lemon Feta Sauce
150 g feta cheese
1/2 cup Greek yogurt
1–2 tablespoons hot honey
1 tablespoon lemon juice
1 clove garlic
1 tablespoon olive oil
1/2 teaspoon black pepper
Directions
Preheat oven to 200°C (400°F) and line a baking tray with parchment paper. Lightly brush with olive oil.
Season chicken cutlets with salt, black pepper, garlic powder, and paprika.
Dip each cutlet into beaten egg, then coat thoroughly in the panko, Parmesan, and herb mixture, pressing to adhere.
Arrange coated chicken on the prepared baking tray. Drizzle or lightly spray with olive oil for extra crispiness.
Bake for 18–22 minutes, flipping halfway through, until golden brown and fully cooked.
In a blender, combine feta cheese, Greek yogurt, hot honey, lemon juice, garlic, olive oil, and black pepper. Blend until smooth and creamy.
Serve crispy baked chicken cutlets drizzled with the hot honey lemon feta sauce.
Nutritional Information (Per Serving Approx.)
Calories: 510 kcal
Protein: 46g
Fat: 24g
Carbohydrates: 26g
Fiber: 2g
Sugar: 7g

Creamy Mushroom Soup

Creamy Mushroom Soup

Ingredients

  • 2 tablespoons butter

  • 1 tablespoon olive oil

  • 1 onion, finely chopped

  • 2 cloves garlic, minced

  • 1 lb mushrooms, sliced (cremini, white, and shiitake work beautifully)

  • 1/4 cup all-purpose flour

  • 4 cups vegetable or chicken broth

  • 1 cup heavy cream

  • 1/2 teaspoon dried thyme (optional)

  • Salt and black pepper, to taste

  • Fresh parsley, for garnish

Instructions

1. Build the flavor base
In a large heavy-bottomed pot, heat the butter and olive oil over medium heat. Once the butter melts and begins to foam slightly, add the finely chopped onion. Cook for about 4–5 minutes until soft and translucent. Stir occasionally so it doesn’t brown. Add the minced garlic and cook for another 30 seconds, just until fragrant.

2. Sauté the mushrooms
Add the sliced mushrooms to the pot. At first, they may seem like a lot, but they will shrink as they cook. Stir well to coat them in the butter mixture. Cook for 8–10 minutes, allowing the mushrooms to release their moisture and begin to brown. This step is key for deep, rich flavor. Add thyme, salt, and pepper.

3. Create the creamy base
Sprinkle the flour evenly over the mushroom mixture. Stir continuously for 1–2 minutes to cook out the raw flour taste. Gradually pour in the broth, stirring constantly to prevent lumps. Bring the soup to a gentle simmer and cook for about 10 minutes, until slightly thickened.

4. Blend for smoothness (optional)
For a silky texture, use an immersion blender to partially or fully blend the soup. If you prefer a chunkier, rustic feel, skip this step.

5. Finish with cream
Stir in the heavy cream and simmer gently for another 3–5 minutes. Taste and adjust seasoning as needed.

Serve & Enjoy

Ladle into bowls and garnish with fresh parsley. Serve with crusty bread or toasted sourdough for the ultimate comfort meal.

Rich, creamy, and full of earthy mushroom goodness — this soup feels like a warm hug in a bowl.

Hearty Chicken and Vegetable Stew

Hearty Chicken and Vegetable Stew

Escape the chill and indulge in a deliciously comforting Hearty Chicken and Vegetable Stew. This classic, one-pot wonder is packed with tender chicken, colorful vegetables, and a rich, savory broth that’s sure to become a family favorite.

Prep Time: 10 minutes

Cook Time: 35 minutes

 Total Time: 45 minutes

Ingredients:

1 lb chicken breast or thighs, cooked and shredded

2 tbsp olive oil

1 large onion, chopped

3 cloves garlic, minced

3 carrots, sliced

3 medium potatoes, cubed

1 cup frozen peas

4 cups chicken broth

1 cup water

2 tbsp tomato paste

1 tsp dried thyme

1 tsp dried rosemary

Salt and pepper to taste

Fresh thyme or parsley (for garnish)

Directions:

Sauté Aromatics: In a large pot, heat olive oil over medium heat. Add chopped onion and cook until soft, about 5 minutes. Add garlic and cook for another minute until fragrant.

Add Vegetables and Broth: Add carrots, potatoes, chicken broth, and water. Stir in tomato paste, thyme, rosemary, salt, and pepper. Bring to a boil, then reduce heat and simmer for 20 minutes, or until the vegetables are tender.

Add Chicken and Peas: Stir in shredded chicken and frozen peas. Let simmer for another 5–10 minutes until everything is heated through and well combined.

Serve: Ladle the stew into bowls and garnish with fresh thyme or parsley. Serve hot with crusty bread on the side!

Flavor Profile:

Rich and Savory Broth: A comforting and flavorful base for the stew.

Tender Chicken: Fall-apart tender and juicy, with a hint of herbs and spices.

Colorful Vegetables: A medley of sweet and savory vegetables adds natural sweetness and texture.

Benefits

Comforting and Satisfying: Perfect for a chilly evening or a special occasion.

Nutritious and Wholesome: Packed with protein, fiber, and vitamins.

Easy to Make: Simple ingredients and minimal prep time make this recipe a breeze.

Customizable: Add your favorite ingredients or spices to make it your own.

Calories: ~300 kcal per serving

🥤 High-Protein Pistachio Smoothie

🥤 High-Protein Pistachio Smoothie

This recipe delivers a nutty, “pistachio gelato” flavor profile while maintaining a balanced nutritional boost.

Ingredients

  • 1 cup Unsweetened almond milk (or milk of choice)

  • 1 scoop Vanilla whey or plant-based protein powder

  • 1/4 cup Shelled pistachios (unsalted/raw preferred)

  • 1/2 Frozen banana (for creaminess)

  • 1/4 cup Greek yogurt (plain or vanilla)

  • 1/2 tsp Vanilla extract

  • 1 pinch Sea salt (enhances the nuttiness)

  • Optional: 1 tsp honey or maple syrup for extra sweetness

  • Ice: A handful to reach your desired thickness


Instructions

  1. Prep the Nuts: If you have a high-speed blender, you can toss the pistachios in raw. If your blender is lower power, soak the pistachios in warm water for 10 minutes beforehand to ensure a silky texture.

  2. Combine: Add the liquid base to your blender first to prevent the powder from sticking to the bottom. Add the frozen banana, Greek yogurt, protein powder, vanilla, and salt.

  3. Blend: Start on a low speed and gradually increase to high. Blend for 45–60 seconds until the green flecks of pistachio are fully integrated and the mixture is smooth.

  4. Adjust: If the smoothie is too thick, splash in more milk. If you want it frostier, add a few more ice cubes and pulse.

  5. Serve: Pour into a chilled glass. Top with a sprinkle of crushed pistachios and a few cacao nibs or a dusting of cinnamon for a gourmet touch.


Nutritional Tip

Pistachios are a complete protein source, meaning they contain all nine essential amino acids. Combined with the protein powder, this smoothie is an excellent post-workout recovery meal!

Banana Pudding Soft Serve Cone

Banana Pudding Soft Serve Cone

Ingredients

  • The Base: 2 cups heavy cream, 1 cup whole milk, ¾ cup granulated sugar, and a pinch of salt.

  • The Flavor: 2 ripe bananas (mashed), 1 tsp vanilla extract, and 1 packet of instant vanilla pudding mix.

  • The Crunch: 1 cup crushed vanilla wafers or shortbread cookies.

  • The Vessel: Fresh waffle cones.


 Preparation

  1. Infuse the Base: In a large bowl, whisk together the heavy cream, milk, sugar, and salt until the sugar is fully dissolved. Stir in the vanilla extract.

  2. Blend the Banana: Take your mashed bananas and whisk them into the liquid base. For a smoother texture, you can use a blender to ensure the banana is completely incorporated.

  3. Thicken: Add the instant vanilla pudding mix to the liquid. Use a hand mixer on low speed for 2 minutes. This creates that iconic “custard-like” consistency seen in the image.

  4. Churn: Pour the mixture into your ice cream maker. Follow the manufacturer’s instructions, usually churning for 20–25 minutes until it reaches a “soft serve” consistency.

  5. Assembly: While the ice cream is still soft, use a piping bag with a large star tip to swirl the mixture into the waffle cones.

  6. The Topping: Immediately generous dust the tops with your crushed vanilla wafers or shortbread crumbles.

The Ultimate Banana Banoffee Milkshake

The Ultimate Banana Banoffee Milkshake


Ingredients

  • For the Base:

    • 4 large scoops of premium vanilla bean ice cream

    • 2 ripe bananas (frozen slices work best for thickness)

    • 1/2 cup whole milk (adjust for desired consistency)

    • 2 tbsp salted caramel sauce

    • 1/2 tsp vanilla extract

  • For the Toppings:

    • Heaping amounts of whipped cream

    • 1 fresh banana, sliced into rounds

    • 2 tbsp crushed digestive biscuits or graham crackers

    • 1 tbsp toffee bits or shaved dark chocolate

    • Extra caramel sauce for drizzling


Instructions

  1. Prep the Glasses: Drizzle salted caramel sauce down the inside walls of two tall milkshake glasses. For a “pro” look, place the glasses in the freezer for 5 minutes beforehand so the sauce stays in place.

  2. Blend the Base: In a high-speed blender, combine the ice cream, frozen banana slices, milk, vanilla extract, and caramel sauce. Blend on high until the mixture is smooth and thick.

    Tip: If it’s too thick to pour, add milk one tablespoon at a time. If it’s too thin, add another scoop of ice cream.

  3. Assemble: Pour the milkshake into your prepared glasses, leaving about an inch of space at the top.

  4. The “Cloud” Topping: Pipe a generous, high swirl of whipped cream onto each glass.

  5. Garnish: Sprinkle the crushed biscuits and toffee/chocolate bits over the cream. Top each with a fresh banana slice and a final light drizzle of caramel.

Tropical Coconut Cream Smoothie

Tropical Coconut Cream Smoothie

Ingredients

  • 1 cup Unsweetened coconut milk (canned for extra creaminess, or carton for a lighter version)

  • 1/2 cup Frozen coconut meat or 1 frozen banana (for that thick, frosty texture)

  • 1/4 cup Greek yogurt or silken tofu (adds protein and body)

  • 1 tbsp Shredded coconut (unsweetened)

  • 1 tsp Honey or maple syrup (optional, to taste)

  • 1/2 tsp Vanilla extract

  • A pinch of sea salt (to bring out the flavors)

  • 1/2 cup Ice cubes

For the Garnish:

  • Toasted coconut flakes

  • A sprinkle of crushed almonds or walnuts


Instructions

  1. Prep the Base: Pour the coconut milk into your blender. Adding the liquid first helps the blades move more efficiently and prevents sticking.

  2. Add the Texture: Toss in the frozen coconut meat (or banana), yogurt, and shredded coconut. If you’re using frozen fruit, you may not need as much ice.

  3. Enhance the Flavor: Add the vanilla extract, your sweetener of choice, and that tiny pinch of salt.

  4. Blend: Start the blender on a low speed to break up the frozen chunks, then ramp it up to high for 45–60 seconds until the mixture is completely smooth and aerated.

  5. Adjust: If the smoothie is too thick, splash in a little more coconut water or milk. If it’s too thin, add a few more ice cubes and blend again.

  6. Serve: Pour into a chilled glass. Top with a generous amount of toasted coconut flakes and crushed nuts for a satisfying crunch, just like in the photo.

Enjoy your homemade tropical escape!

Creamy Strawberry Dream Smoothie

Creamy Strawberry Dream Smoothie

Prep time: 5 minutes | Servings: 2


Ingredients

  • 2 cups Frozen Strawberries: Using frozen berries is the secret to that thick, frost-like texture.

  • 1 Fresh Banana: This adds natural sweetness and a silky mouthfeel.

  • 1 cup Milk of Choice: Dairy, almond, or oat milk all work beautifully.

  • ½ cup Greek Yogurt: Provides a protein boost and extra creaminess.

  • 1 tbsp Honey or Maple Syrup: Optional, depending on the sweetness of your berries.

  • ½ tsp Vanilla Extract: To enhance the fruit flavors.


Instructions

  1. Layer the Liquid: Add your milk and yogurt to the blender first. Placing liquids at the bottom helps the blades spin freely and prevents the frozen fruit from getting stuck.

  2. Add the Solids: Toss in the fresh banana, followed by the frozen strawberries.

  3. Blend: Start on a low speed to break up the large frozen chunks, then gradually increase to high. Blend for about 45–60 seconds until the mixture is completely smooth and uniform in color.

  4. Adjust Consistency: If the smoothie is too thick to pour, add an extra splash of milk. If you want it thicker, add a few more frozen berries or a handful of ice.

  5. Serve: Pour into chilled glasses. Garnish with a fresh strawberry slice on the rim and a colorful straw, just like in your photo.


Pro Tip: For an even more vibrant pink color and a nutritional kick, you can add a small slice of raw beet or a teaspoon of pitaya (dragon fruit) powder!

Creamy Chicken, Corn, and Asparagus Chowder

Creamy Chicken, Corn, and Asparagus Chowder

  • Prep time: 15 minutes

  • Cook time: 20 minutes

  • Servings: 4


Ingredients

  • 2 cups Cooked chicken breast, cubed

  • 1 lb Fresh asparagus, trimmed and cut into 1-inch pieces

  • 2 cups Sweet corn (fresh, frozen, or canned)

  • 1 medium Onion, finely diced

  • 2 cloves Garlic, minced

  • 3 cups Chicken broth

  • 1 cup Heavy cream or half-and-half

  • 2 tbsp Butter

  • 2 tbsp All-purpose flour

  • Salt & Black pepper to taste

  • Optional: A pinch of dried thyme or red pepper flakes


Instructions

  1. Sauté the Base: In a large pot or Dutch oven, melt the butter over medium heat. Add the onion and cook until translucent (about 5 minutes). Stir in the garlic and cook for another minute until fragrant.

  2. Thicken: Sprinkle the flour over the onions and stir constantly for 1–2 minutes to create a light roux. This ensures your soup has a velvety texture.

  3. Simmer: Gradually pour in the chicken broth while whisking to prevent lumps. Bring the liquid to a gentle boil.

  4. Add Veggies: Drop in the asparagus and corn. Reduce heat to low and simmer for about 5–8 minutes, or until the asparagus is tender but still bright green.

  5. Finish: Stir in the cubed chicken and heavy cream. Heat through for 2–3 minutes (do not let it reach a rolling boil once the cream is added to avoid curdling).

  6. Season: Season generously with salt and cracked black pepper.

Serve hot in a deep bowl with saltine crackers or crusty bread for dipping.

Overnight Oats with Chia and Dates

Overnight Oats with Chia and Dates

Ingredients

  • Base: 1/2 cup rolled oats, 1 tablespoon chia seeds, 1 cup milk of choice (dairy or almond works great).

  • Sweetener: 1 teaspoon honey or maple syrup, and a dash of vanilla extract.

  • Toppings: 2–3 pitted dates (sliced), a handful of sliced almonds, and a sprinkle of extra dry oats or granola for crunch.


Instructions

  1. Mix the Base: In a glass jar or container, combine the rolled oats, chia seeds, milk, vanilla, and your chosen liquid sweetener. Stir well to ensure the chia seeds are evenly distributed and not clumping at the bottom.

  2. Soak: Seal the container and place it in the refrigerator for at least 4 hours, though overnight is best. This allows the oats to soften and the chia seeds to create a creamy, pudding-like texture.

  3. Layer the Texture: In the morning, give the oats a quick stir. If the mixture is too thick, add a splash of milk to loosen it up.

  4. Add Toppings: As seen in your photo, layer the sliced dates and almonds on top. The dates provide a natural, caramel-like sweetness, while the almonds add a necessary toasted crunch.

  5. Serve: Enjoy it cold straight from the jar, or transfer it to a bowl.


Why it Works

The chia seeds are the secret here; they can absorb up to 10 times their weight in liquid, providing a boost of fiber and healthy fats. Combined with the slow-release energy of the oats and the natural potassium in dates, this meal keeps you full and focused until lunch. Enjoy your healthy creation!

Apple Pie Smoothie Recipe

Apple Pie Smoothie Recipe

This creamy blend is packed with fiber and warm spices to keep you energized.

Ingredients

  • 1 medium apple: Cored and chopped (keep the skin on for extra fiber).

  • 1/4 cup rolled oats: Provides that hearty, cookie-like texture.

  • 1 cup milk of choice: (Dairy, almond, or oat milk all work beautifully).

  • 1/4 cup Greek yogurt: Adds creaminess and a protein boost.

  • 1/2 tsp ground cinnamon: Plus a cinnamon stick for garnish.

  • 1 tbsp walnut pieces: For healthy fats and a nutty depth.

  • 1 tsp maple syrup or honey: (Optional, depending on the sweetness of your apple).

  • A handful of ice cubes: To make it chilled and frothy.


Instructions

  1. Prep the Apple: Wash the apple thoroughly. Chop it into small chunks, discarding the core and seeds.

  2. Combine: Place the chopped apple, rolled oats, walnuts, and cinnamon into your blender.

  3. Add Liquids: Pour in your choice of milk and the Greek yogurt. If you prefer a sweeter drink, add your maple syrup or honey now.

  4. Blend: Start the blender on a low speed to break up the oats and nuts, then increase to high. Blend for about 45–60 seconds until completely smooth and frothy.

  5. Adjust: If the smoothie is too thick, add a splash more milk. If you want it colder, toss in the ice and pulse again.

  6. Serve: Pour into a mason jar (just like the photo!). Garnish with a cinnamon stick and a sprinkle of extra oats or crushed walnuts.

Enjoy your refreshing, wholesome treat!

Bang Bang Salmon Made Perfect in Just 15 Minutes

Bang Bang Salmon Made Perfect in Just 15 Minutes

Total Time: 15 minutes (5 minutes prep | 10 minutes cook)
Servings: 4

If you love meals that are quick, flavorful, and just a little indulgent, Bang Bang Salmon will become your new weeknight favorite. This dish takes tender, flaky salmon fillets and coats them in a creamy, sweet, and spicy Bang Bang sauce that’s downright addictive. Best of all, the whole recipe comes together in just 15 minutes—from pan to plate—making it perfect for busy days when you want something that feels special but requires almost no effort.

Ingredients

For the Salmon:

4 salmon fillets (about 6 oz each)

1 tablespoon olive oil

Salt and black pepper, to taste

½ teaspoon paprika

½ teaspoon garlic powder

For the Bang Bang Sauce:

⅓ cup mayonnaise

3 tablespoons sweet chili sauce

1–2 teaspoons sriracha sauce (adjust to taste)

1 teaspoon honey

Optional Garnish:

Green onions, thinly sliced

Sesame seeds

Instructions

Prep the Salmon

Start by patting the salmon fillets dry with paper towels. Removing excess moisture helps achieve a crisp, golden exterior. Season both sides with salt, black pepper, paprika, and garlic powder.

Heat the Pan

In a large skillet, heat olive oil over medium-high heat. Once hot, place the salmon fillets skin-side down (if they have skin) and cook for 4–5 minutes, undisturbed, until the skin crisps and the edges start to turn opaque.

Flip and Finish

Carefully flip the fillets using a spatula and cook for another 3–4 minutes, depending on thickness. The salmon should flake easily with a fork but remain slightly pink and juicy inside. Avoid overcooking—it continues to cook slightly after removing from heat.

Alternatively, you can bake the salmon at 400°F (200°C) for 10–12 minutes, or air-fry it for about 8–9 minutes for a lighter texture.

Make the Bang Bang Sauce

While the salmon cooks, whisk together mayonnaise, sweet chili sauce, sriracha, and honey in a small bowl. Taste and adjust the spice level to your liking—add more sriracha for heat or extra honey for balance.

Combine

Once the salmon is cooked, drizzle or brush the Bang Bang sauce generously over the top while the fillets are still warm. This helps the sauce melt slightly and coat the surface evenly.

Garnish and Serve

Top the salmon with sliced green onions and sesame seeds for a touch of freshness and crunch. Serve immediately with your favorite sides—steamed jasmine rice, couscous, roasted broccoli, or a crisp salad all work beautifully.

Tips

Choose quality salmon: Fresh or frozen (and thawed) wild-caught salmon gives the best flavor and texture. If using frozen, pat dry thoroughly after thawing to remove moisture.

Don’t move the salmon too soon: Let it cook undisturbed for the first few minutes to develop that crisp sear.

Check doneness: Salmon is perfectly cooked when it reaches an internal temperature of 125–130°F (52–54°C) for medium and flakes easily with a fork.

Control the heat: If the pan gets too hot, reduce the heat slightly—olive oil can burn easily, and you don’t want a bitter taste.

Sauce timing: Always add the sauce after cooking. Adding it too early can cause the sugars to burn.

Variations:

Greek-Inspired: Swap mayonnaise for Greek yogurt and add a squeeze of lemon juice for a tangier, lighter sauce.

Extra Spicy: Stir in crushed red pepper flakes or a dash of harissa paste for a bolder Mediterranean heat.

Citrus Twist: Add orange or lime zest to the sauce for brightness and depth.

Garlic Lovers’ Version: Mix a bit of minced garlic or roasted garlic paste into the sauce for extra punch.

Baked Version: For a hands-off approach, brush the sauce on before baking and let it caramelize slightly in the oven.

Asian-Mediterranean Fusion: Add a touch of soy sauce or sesame oil to the sauce and serve over rice noodles or jasmine rice.

Serving Ideas:

Over Grains: Serve on top of a bowl of quinoa, bulgur, or couscous, and drizzle any extra sauce over it.

With Vegetables: Pair with roasted asparagus, zucchini, or a Mediterranean salad with olives and cherry tomatoes.

As Tacos or Wraps: Flake the cooked salmon and serve in pita wraps or lettuce cups with fresh cucumber and extra sauce.

For Brunch: Place on avocado toast with a fried egg and a drizzle of sauce for a gourmet twist.

Q&A

Q: Can I make this recipe ahead of time?
A: You can prep the sauce in advance—it keeps well in the fridge for up to 5 days. Cook the salmon fresh, as reheating can dry it out.

Q: What can I substitute for mayonnaise?
A: Greek yogurt is a great substitute if you want a lighter version. You can also use half yogurt and half mayo for a creamy but tangy balance.

Q: Is it possible to grill the salmon?
A: Absolutely. Brush the salmon with olive oil and seasonings, then grill for about 3–4 minutes per side. Add the Bang Bang sauce after removing it from the grill to avoid burning.

Q: Can I use another fish?
A: Yes, this recipe works beautifully with cod, halibut, or even shrimp. Adjust the cooking time depending on thickness.

Q: How spicy is this dish?
A: It’s mild to medium heat as written. You control the spice level by adjusting the amount of sriracha—start with one teaspoon and increase gradually.

Q: What sides go best with Bang Bang Salmon?
A: Mediterranean-style sides like lemon couscous, roasted potatoes, or a cucumber salad balance the richness of the sauce perfectly.

Nutrition

(Per Serving)

Calories: ~410

Protein: 34g

Fat: 26g

Carbohydrates: 8g

Sugar: 6g

Fiber: <1g

Sodium: ~420mg

(Nutrition may vary depending on the amount of sauce used and the size of the fillets.)

Conclusion

In just 15 minutes, Bang Bang Salmon gives you a restaurant-quality meal bursting with flavor, texture, and color. The combination of crispy salmon and creamy, spicy-sweet sauce creates a perfect harmony that feels indulgent yet fresh. It’s the kind of dish that satisfies both your craving for comfort food and your desire to eat something balanced and wholesome.

Bedtime Lemon Mint Drink

Bedtime Lemon Mint Drink” (Claimed Blood Sugar Support Tea)

This image is promoting a simple lemon–mint drink as a way to “lower sugar before sleeping.” Let’s turn it into a clear, realistic recipe—with honest notes about what it can (and can’t) do.

 Ingredients (1 serving)

  • 1 cup warm water (not boiling)
  • 2–3 slices fresh lemon
  • 5–7 fresh mint leaves
  • Optional:
    • ½ tsp grated ginger
    • 1 tsp apple cider vinegar
    • Pinch of cinnamon

 Instructions

  1. Warm the water until comfortably hot (not boiling).
  2. Add lemon slices and lightly crush mint leaves to release oils.
  3. Stir in optional ingredients if using.
  4. Let steep for 5–7 minutes.
  5. Drink 20–30 minutes before bedtime.

 Description

This is a light herbal infusion with citrus and mint. It’s hydrating, low-calorie, and soothing before sleep—but it is not a medical treatment for blood sugar control.

 Tips

  • Use fresh ingredients for best flavor and aroma.
  • Avoid adding sugar or honey if your goal is stable blood sugar.
  • If you have acid reflux, reduce lemon or skip vinegar.
  • Drink it warm—not hot—to avoid irritation before bed.

Servings

  • Makes 1 serving
  • Can be doubled or tripled, but best consumed fresh

Nutritional Info (Approx. per serving)

  • Calories: 5–10
  • Carbs: ~2g
  • Sugar: ~1g (natural from lemon)
  • Fat: 0g
  • Protein: 0g

 Potential Benefits

  • 💧 Hydration before sleep
  • 🌿 May aid digestion (mint & ginger)
  • 🍋 Vitamin C from lemon
  • 🧘 Relaxing bedtime ritual

⚠️ Important:
There is no strong scientific evidence that this drink significantly lowers blood sugar overnight. Managing blood sugar is more about:

  • Balanced meals
  • Regular activity
  • Medical guidance (if diabetic)

 Q&A

Q: Can this replace diabetes medication?
👉 No. Never replace prescribed treatment with home remedies.

Q: Does lemon lower blood sugar?
👉 Lemon has a low glycemic impact, but it doesn’t directly “lower” blood sugar in a meaningful clinical way.

Q: Is it safe to drink every night?
👉 Yes for most people, but:

  • Avoid if you have GERD/acid reflux
  • Be cautious with apple cider vinegar (can irritate stomach)

Q: Best time to drink it?
👉 20–30 minutes before bed for relaxation benefits.

Q: Can I add honey?
👉 You can, but it defeats the “low sugar” goal.