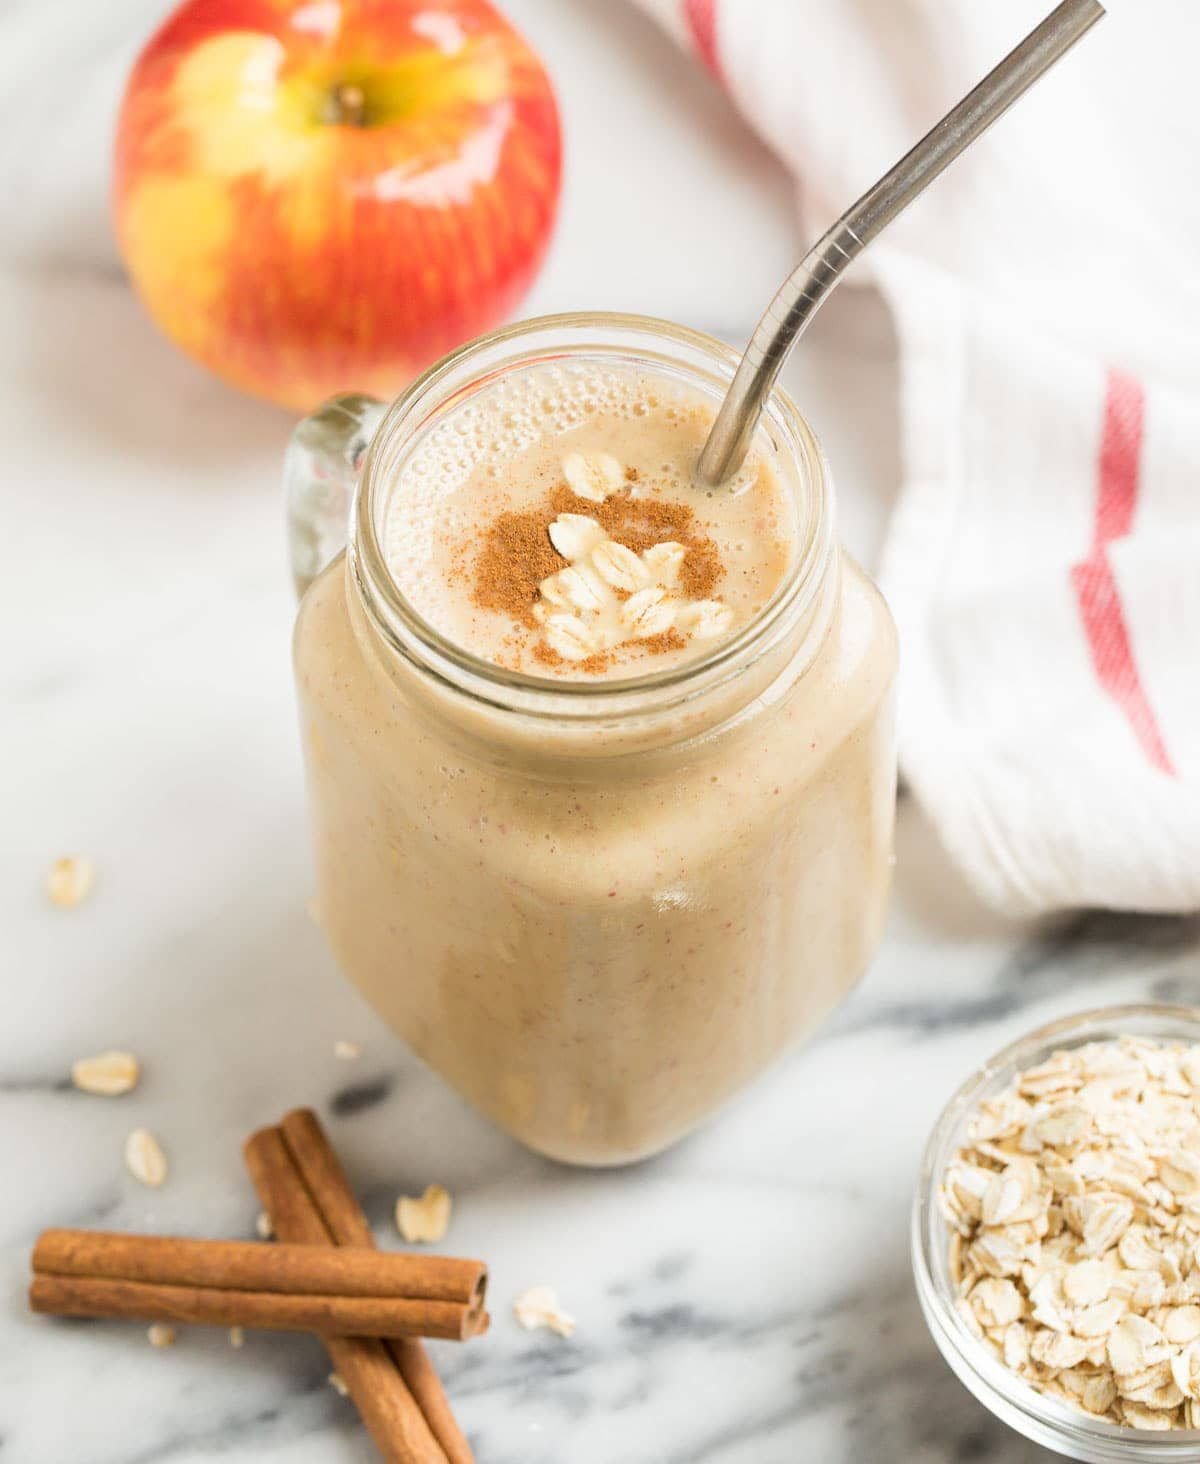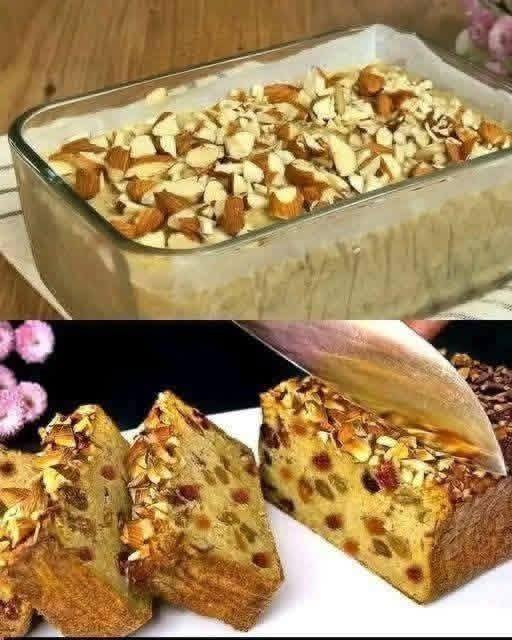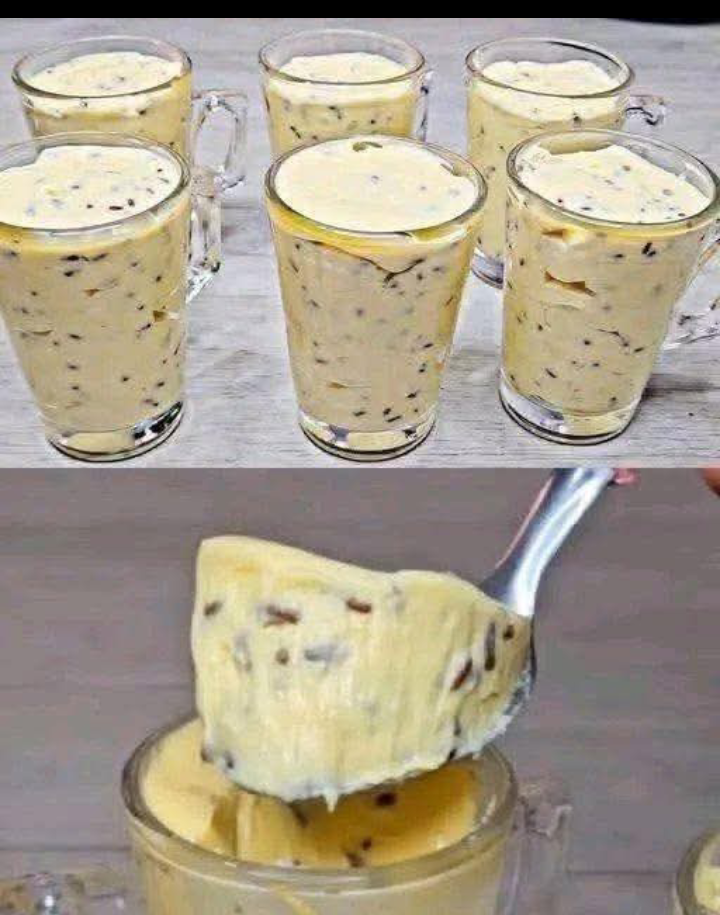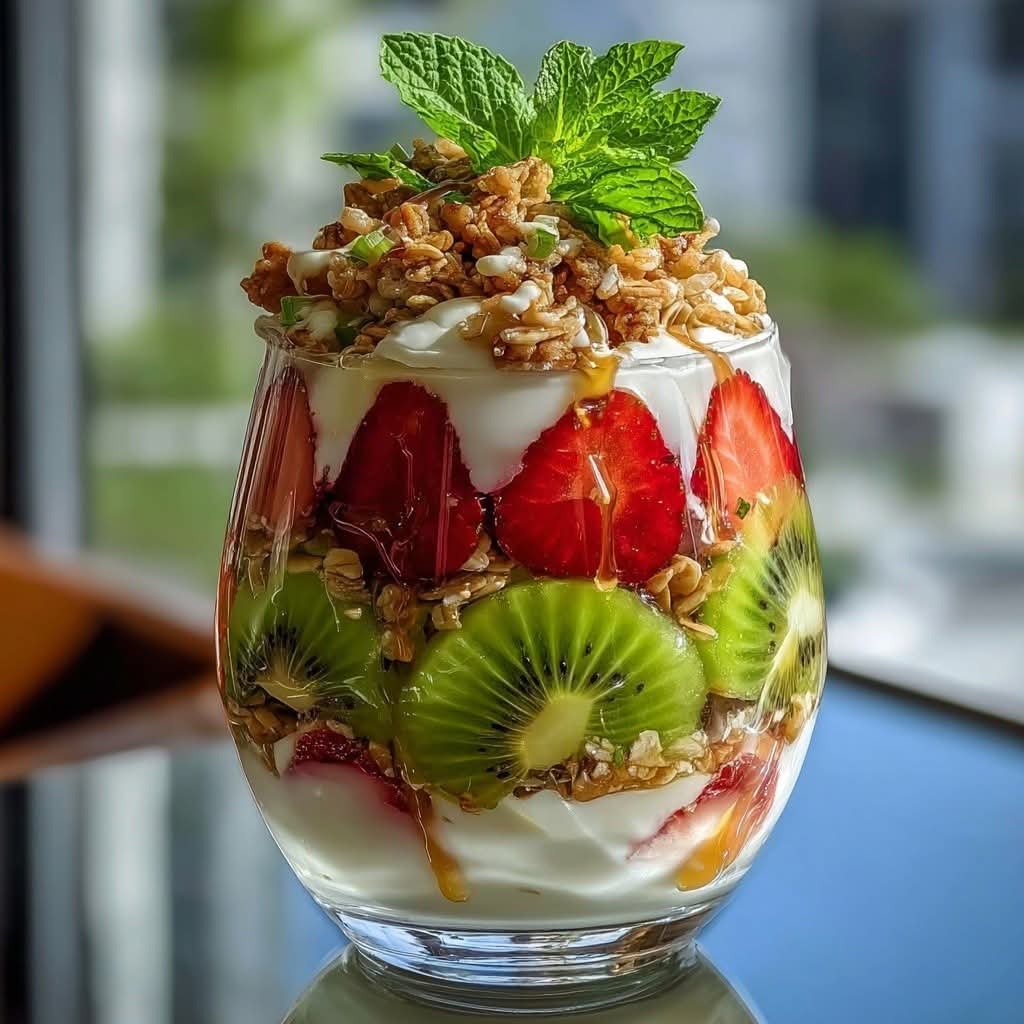
Savory Cheese & Herb Pull-Apart Bread

Savory Cheese & Herb Pull-Apart Bread

 Description

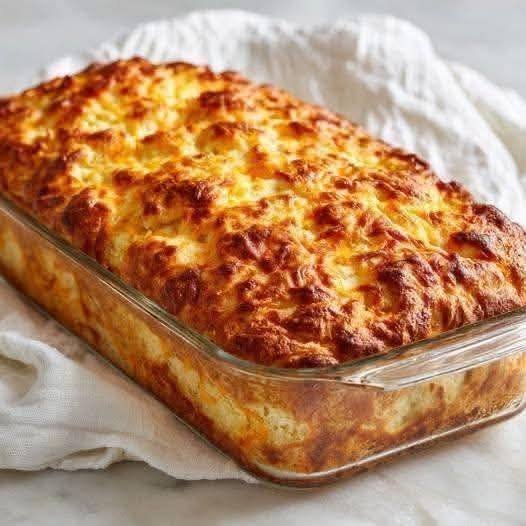
Savory Cheese & Herb Pull-Apart Bread is a warm, buttery, crowd-pleasing appetizer made from a crusty loaf sliced in a crosshatch pattern, filled with garlic herb butter and generous amounts of melted cheese. As it bakes, the cheese melts deep into the crevices while the crust turns golden and crisp. Each piece pulls apart easily, making it perfect for sharing at gatherings, holidays, or cozy family dinners.

Ingredients

For the Bread:

  • 1 large round or oval crusty loaf (sourdough or Italian bread)

  • ½ cup (1 stick) unsalted butter, melted

  • 3 cloves garlic, minced

  • 1 tbsp fresh parsley, finely chopped

  • 1 tsp fresh thyme (or ½ tsp dried)

  • 1 tsp fresh rosemary (or ½ tsp dried)

  • 2 cups shredded mozzarella cheese

  • ½ cup freshly grated Parmesan cheese

  • ½ tsp salt

  • ¼ tsp black pepper

Optional Add-Ins:

  • ½ tsp red pepper flakes (for heat)

  • ½ cup shredded cheddar, provolone, or Gruyère

  • 1 tbsp olive oil (for extra richness)

 Instructions

1️⃣ Preheat

Preheat oven to 375°F (190°C). Line a baking sheet with foil.

2️⃣ Slice the Bread

Using a serrated knife, cut the bread diagonally in one direction, then repeat in the opposite direction to create a crosshatch pattern.
Do not cut all the way through — leave about ½ inch at the bottom intact.

3️⃣ Make the Herb Butter

In a bowl, mix melted butter, garlic, parsley, thyme, rosemary, salt, and pepper.

4️⃣ Fill the Bread

Gently open the cuts and drizzle the herb butter evenly throughout the bread.
Stuff mozzarella and Parmesan into all the crevices.

5️⃣ Bake

Wrap loosely in foil and bake for 15 minutes.
Unwrap and bake an additional 10–15 minutes until cheese is melted and golden.

6️⃣ Serve

Garnish with extra herbs and serve immediately while warm and gooey.

 Servings

  • Serves: 6–8 people

  • Prep Time: 10 minutes

  • Cook Time: 25–30 minutes

  • Total Time: ~40 minutes

 Tips for Best Results

  • ✔ Use day-old bread for better structure.

  • ✔ Don’t overcut the loaf — keep the base intact.

  • ✔ For extra crispiness, broil for 1–2 minutes at the end (watch closely).

  • ✔ Let rest 5 minutes before serving to prevent cheese from sliding out.

  • ✔ Add cooked bacon bits for a heartier version.

 Nutritional Information (Approximate per serving, based on 8 servings)

  • Calories: 320–380 kcal

  • Protein: 12g

  • Carbohydrates: 28g

  • Fat: 20g

  • Saturated Fat: 11g

  • Fiber: 1g

  • Sodium: 450–550mg

Values vary depending on bread and cheese used.

 Benefits of This Recipe

  • ✔ Great for entertaining and sharing

  • ✔ Customizable with different cheeses and herbs

  • ✔ Quick and easy to prepare

  • ✔ Comfort food that pairs well with soups, pasta, and salads

  • ✔ Can be adapted to vegetarian-friendly diets

Q & A

Q: Can I make this ahead of time?
A: Yes! Assemble the bread, wrap tightly, and refrigerate up to 24 hours. Bake when ready.

Q: Can I freeze it?
A: You can freeze it unbaked. Wrap tightly and freeze up to 1 month. Bake from frozen, adding 10–15 extra minutes.

Q: What’s the best cheese combination?
A: Mozzarella for melt + Parmesan for flavor is classic. Add Gruyère for richness.

Q: How do I reheat leftovers?
A: Wrap in foil and reheat at 350°F for 10–15 minutes.

Q: Can I make it dairy-free?
A: Yes, use plant-based butter and dairy-free shredded cheese alternatives.

Flour-Free, Zero-Carb Flatbread

Flour-Free, Zero-Carb Flatbread

Description: This Zero-Carb Flatbread is a game-changer for those following a low-carb or ketogenic diet. Made without any flour, it’s both quick to prepare and delicious! You can enjoy this flatbread in many ways, whether rolled, stacked, or paired with your favorite dips or dishes. It’s the perfect guilt-free alternative to regular bread.

Ingredients:

  • 1 cup of shredded mozzarella cheese

  • 2 oz cream cheese

  • 1 large egg

  • 1 tablespoon of almond flour (optional, for texture)

  • 1/2 teaspoon baking powder

  • A pinch of salt (to taste)

  • 1 tablespoon of melted butter or ghee (for cooking)

Instructions:

  1. In a microwave-safe bowl, combine the mozzarella cheese and cream cheese. Microwave for 45 seconds to 1 minute until the cheeses are melted and soft.

  2. Stir the cheese mixture until smooth, then add in the egg, almond flour (optional), baking powder, and salt. Mix everything together until well combined.

  3. Heat a non-stick pan over medium heat and lightly grease with butter or ghee.

  4. Pour the cheese batter into the pan, spreading it out evenly into a flat circle or oval shape.

  5. Cook for 2-3 minutes on each side until golden brown and crispy.

  6. Remove from the pan, and serve while warm! Enjoy it rolled or with your favorite dips.

Notes:

  • If you prefer, you can make these flatbreads in the oven as well. Simply bake at 350°F (175°C) for 8-10 minutes.

  • For extra flavor, you can add garlic powder, herbs, or chili flakes to the mixture before cooking.

  • You can also add a filling like cheese or vegetables in the middle and fold it to make a simple wrap.

Tips:

  • Make sure to stir the cheese mixture well to avoid lumps.

  • Adjust the salt according to your taste preference.

  • You can store leftovers in an airtight container in the fridge for up to 2-3 days. Reheat them in a pan before serving.

Servings: 4-6 servings

Nutritional Info (per serving):

  • Calories: 160

  • Protein: 12g

  • Fat: 12g

  • Carbs: 1g (if using almond flour)

  • Fiber: 0g

  • Sugar: 1g

Benefits:

  • Zero-carb: A perfect bread substitute for those on a keto or low-carb diet.

  • High in protein and healthy fats.

  • Quick to make, satisfying, and versatile for various dishes.

  • Flour-free, making it gluten-free and suitable for those with gluten intolerance.

Q&A:

Q: Can I make this flatbread without almond flour? A: Yes! Almond flour is optional. The bread will still turn out great without it, but adding it may improve the texture.

Q: Can I freeze the flatbread? A: Yes, you can freeze it. After cooking, let the flatbreads cool completely. Wrap them in parchment paper and store them in a freezer bag. Reheat in a pan or microwave when ready to use.

🧀 3-Ingredient Zero-Flour Cheese Crisps

Ingredients

  • 1 cup shredded mozzarella or cheddar
  • 1 egg
  • ½ tsp baking powder

(Optional: garlic powder or chili flakes)


Instructions

  1. Preheat oven to 180°C (350°F).
  2. Mix cheese + egg + baking powder.
  3. Drop spoonfuls on baking tray (lined).
  4. Bake 10–12 minutes until golden & crisp.

Let cool → they get crunchy!


✅ Why Good for Diabetics

✔ Almost zero carbs
✔ High protein & fat → steady sugar
✔ No flour, no sugar
✔ Keeps you full longer


🌟 Flavor Ideas

  • Add spinach or coriander
  • Add cumin + chili for desi taste
  • Add sesame seeds

🥒 Another 2-Ingredient Option

Cucumber Yogurt Snack

  • Thick Greek yogurt
  • Cucumber slices

Add salt-free chaat masala → refreshing & low carb.

🥣 Tuscan White Bean Soup

A hearty, comforting Italian-style soup packed with beans, veggies, and herbs.

📝 Ingredients (Serves 4–5)

  • 2 tbsp olive oil
  • 1 small onion, chopped
  • 2 carrots, diced
  • 2 celery stalks, diced
  • 3 cloves garlic, minced
  • 2 cans (400g each) white beans, drained & rinsed (cannellini or navy beans)
  • 1 can diced tomatoes
  • 4 cups vegetable or chicken broth
  • 1 tsp dried oregano
  • ½ tsp dried thyme
  • Salt & black pepper to taste
  • 2 cups fresh spinach or kale
  • ½ tsp chili flakes (optional)
  • 2 tbsp grated Parmesan (optional, for serving)

👩‍🍳 Instructions

1️⃣ Sauté Veggies
Heat olive oil in a pot. Add onion, carrots, celery. Cook 5 minutes until soft.
Add garlic and cook 1 minute.

2️⃣ Add Beans & Broth
Stir in white beans, diced tomatoes, broth, oregano, thyme, salt & pepper.

3️⃣ Simmer
Bring to a boil, then simmer 20 minutes.

4️⃣ Make it Creamy
Mash some beans with a spoon or blend 1 cup of soup and return to pot.

5️⃣ Add Greens
Stir in spinach/kale and cook 3 minutes until wilted.

6️⃣ Serve
Top with Parmesan and drizzle olive oil.


🌟 Tips

  • Add shredded chicken for extra protein.
  • Blend half the soup for extra creaminess without cream.
  • Serve with toasted whole-grain bread.

🥗 Approx Nutrition (per serving)

  • Calories: ~230
  • Protein: ~10g
  • Fiber: ~8g
  • Fat: ~6g

Chicken Spinach and Mushroom Low-Carb Oven Dish

Chicken Spinach and Mushroom Low-Carb Oven Dish
A creamy, savory, high-protein bake that fits perfectly into low-carb, keto, and diabetic-friendly meal plans. Tender chicken breasts are layered with spinach, mushrooms, seasoned cream cheese, and melted mozzarella for a comforting yet healthy one-pan dinner.

Ingredients
6 thin-sliced chicken breasts
1 small bag fresh baby spinach
1 cup sliced mushrooms (optional but recommended for flavor)
1 container green onion cream cheese, about 8 ounces
8 ounces shredded mozzarella cheese
1 quarter cup olive oil
1 half cup chicken broth
1 dash black pepper
1 dash herb and garlic seasoning
1 teaspoon garlic powder (optional)
Salt to taste

Instructions

Prepare the chicken
Preheat your oven to 375 degrees Fahrenheit, or 190 degrees Celsius. Lightly grease a baking dish with olive oil. Place the thin-sliced chicken breasts in a single layer inside the dish. Drizzle a small amount of olive oil over the chicken and season both sides with black pepper, herb and garlic seasoning, and salt if needed.

Layer the vegetables
Spread the baby spinach evenly over the chicken. Add the sliced mushrooms on top. The spinach will shrink during baking, so do not worry if it looks like too much at first.

Add the cream cheese mixture
Soften the green onion cream cheese slightly so it spreads more easily. Drop spoonfuls of cream cheese across the spinach and mushrooms. As it bakes, it will melt into a creamy sauce that coats the chicken and vegetables.

Add liquids and cheese
Pour the chicken broth evenly around the dish to help create moisture and prevent burning. Sprinkle the shredded mozzarella cheese generously over the entire surface.

Bake the dish
Cover the baking dish with foil and bake for 25 minutes. Remove the foil and continue baking for another 15 to 20 minutes, or until the cheese is bubbling and lightly golden and the chicken is fully cooked through. For extra browning, broil for two minutes at the end.

Rest and serve
Allow the dish to rest for five minutes before serving so the sauce thickens slightly. Serve warm.

Serving ideas
Enjoy with cauliflower rice, steamed broccoli, a fresh salad, or zucchini noodles for a complete low-carb meal.

Protein packed red lentil and spinach wraps

Protein-Packed Red Lentil and Spinach Wraps

These wraps are wholesome, flavorful, and high in plant-based protein thanks to red lentils and chickpeas. Fresh spinach adds nutrition and color, while a creamy lemon-tahini dressing ties everything together. They’re great for lunch, meal prep, or a healthy on-the-go meal.

⏱ Time

Prep time: 15 minutes

Cook time: 20 minutes

Total time: 35 minutes

Ingredients

For the lentil filling:

1 cup red lentils, rinsed

2 cups vegetable broth (or water)

1 tbsp olive oil

1 small onion, finely chopped

2 cloves garlic, minced

1 tsp cumin powder

½ tsp paprika (optional, mild)

½ tsp turmeric

Salt & black pepper, to taste

For the wrap:

4 large whole wheat tortillas (or spinach wraps)

2 cups fresh spinach leaves

1 cup cooked chickpeas (optional, for extra protein & texture)

½ cup shredded carrots or cucumber (optional, for crunch)

For the lemon-tahini sauce:

3 tbsp tahini

2 tbsp lemon juice

1 tbsp olive oil

1–2 tbsp water (to thin)

½ tsp garlic powder

Pinch of salt

Instructions

1. Cook red lentils:

In a pot, bring red lentils and broth to a boil. Reduce heat and simmer 12–15 minutes until soft and creamy. Drain excess liquid if needed.

2. Prepare filling base:

In a pan, heat olive oil, add onion and garlic, sauté until golden. Stir in cumin, paprika, and turmeric. Add cooked lentils and mash slightly. Season with salt and pepper.

3. Make lemon-tahini sauce:

Whisk tahini, lemon juice, olive oil, garlic powder, salt, and water until smooth and pourable.

4. Assemble wraps:

Warm tortillas. Spread lentil mixture in the center, top with spinach, chickpeas, carrots/cucumber, and drizzle with lemon-tahini sauce.

5. Roll & serve:

Fold sides, roll tightly into wraps, and slice in half. Serve immediately or wrap in foil for later.

Notes & Tips

Add avocado slices for creaminess.

Swap spinach with kale or arugula.

These wraps can be meal-prepped—just store filling and sauce separately to avoid soggy tortillas.

For a heartier version, add crumbled feta or grilled chicken if not strictly vegan.

❓ frequently asked questions FAQ

Q: Can I use green or brown lentils instead of red?

A: Red lentils cook fastest and turn creamy, but green/brown work too (they’ll be firmer).

Q: Are these wraps freezer-friendly?

A: The lentil filling freezes well, but it’s best to assemble fresh wraps.

Q: How can I make them spicier?

A: Add chili flakes, cayenne, or harissa paste to the lentil filling.

Nutritional Information

Calories: ~370

Protein: 17 g

Carbs: 48 g

Fat: 11 g

Fiber: 11 g

Sodium: ~320 mg

🍌 Mango Banana Smoothie Recipe

🍌 Mango Banana Smoothie Recipe

Prep time: 5 minutes | Servings: 1 large or 2 small

Ingredients


Instructions

  1. Prep: If you are using fresh fruit instead of frozen, add ½ cup of ice to ensure the smoothie is cold and thick.

  2. Layer: Add the liquid to your blender first (this helps the blades move freely), followed by the yogurt, then the frozen mango and banana.

  3. Blend: Start on the lowest setting and quickly increase to high. Blend for 45–60 seconds until the mixture is completely smooth with no visible fruit chunks.

  4. Check: If the smoothie is too thick to pour, add another splash of milk and pulse.

  5. Serve: Pour into a glass jar. To match the photo, serve it with a gold or metal straw and place a few fresh banana slices and mango cubes on the side.


Quick Customizations

  • Tropical Twist: Swap the milk for pineapple juice or coconut water.

  • Protein Boost: Add a scoop of vanilla protein powder (you may need an extra ¼ cup of liquid if you do this).

  • Green Version: Toss in a handful of fresh baby spinach; the mango and banana are sweet enough to hide the taste completely!

Healthy Vanilla Bean Protein Smoothie

Healthy Vanilla Bean Protein Smoothie

🥤 Ingredients

Category Item Amount
Liquid Base Unsweetened Almond or Oat Milk 1 ½ cups
Protein Vanilla Bean Protein Powder (Whey or Pea) 1 scoop
Healthy Fats Almond Butter or Cashew Butter 1 tbsp
Fiber/Thickener Frozen Banana (sliced) 1 large
Flavor Vanilla Bean Paste (or extract) ½ tsp
Optional Chia Seeds or Ground Flax 1 tsp

Toppings (as seen in the photo)

  • Granola: A sprinkle of low-sugar clusters.

  • Drizzle: A touch of melted dark chocolate or sugar-free chocolate syrup.

  • Cream: A dollop of Greek yogurt or coconut whipped cream.


🥣 Instructions

  1. Freeze Your Fruit: For that thick, “milkshake” consistency seen in the photo, ensure your banana is completely frozen before blending.

  2. Layer the Blender: Add the milk first, followed by the protein powder, nut butter, and vanilla. Add the frozen banana last.

  3. Blend: Start on a low speed and gradually increase to high until the texture is silky smooth.

  4. The “Swirl”: Before pouring, take your chocolate drizzle and run it along the inside of the glass.

  5. Assembly: Pour the smoothie into the glass. Top with a spoonful of yogurt/cream, then finish with the granola clusters and an extra slice of fresh banana if you have one left over.


💡 Pro-Tip for Texture

If you want it even thicker (spoonable like the image suggests), add 3-4 ice cubes or reduce the milk by ¼ cup. This turns it from a drink into a “smoothie bowl” in a mug!

Tropical Pineapple Cream Smoothie

Tropical Pineapple Cream Smoothie

Prep time: 5 minutes | Servings: 1

Ingredients

Category Ingredient Amount
The Base Frozen Pineapple Chunks 2 cups
The Cream Coconut Milk (canned or carton) 1/2 cup
The Sweetener Honey or Agave Syrup 1 tbsp (optional)
The Texture Frozen Banana (for extra creaminess) 1/2 banana
Toppings Whipped Cream & Fresh Pineapple To taste

Instructions

  1. Prep the Fruit: For that thick, “soft-serve” consistency seen in the photo, ensure your pineapple and banana are fully frozen before starting.

  2. Blend: Add the coconut milk, frozen pineapple, frozen banana, and sweetener to a high-speed blender.

  3. Process: Start on a low speed and gradually increase. You may need to use a tamper or stop to scrape down the sides, as the mixture will be very thick.

  4. Assemble: Pour into a chilled glass.

  5. Garnish: Add a dollop of whipped cream on top, a fresh pineapple wedge on the rim, and a gold straw to match the aesthetic!


Pro-Tips for the Perfect Texture

  • The “Frosty” Look: If your smoothie is too liquidy, add more frozen pineapple or a few ice cubes.

  • The Color: The small brown flecks in the image suggest the use of a natural sweetener like flax seeds or dates. If you want a nutritional boost, toss in 1 tablespoon of ground flax seeds before blending.

  • Dairy-Free: Use coconut whipped cream to keep the entire recipe vegan and dairy-free.

🍓 Creamy Strawberry Avocado Smoothie

🍓 Creamy Strawberry Avocado Smoothie

Prep time: 5 minutes | Servings: 1

Ingredients

Item Amount
Frozen Strawberries 1 ½ cups
Ripe Avocado ½ medium (pitted and peeled)
Milk of choice 1 cup (dairy, almond, or oat)
Greek Yogurt ¼ cup (for extra protein and tang)
Honey or Maple Syrup 1–2 tsp (optional, to taste)
Vanilla Extract ¼ tsp

Instructions

  1. Prep the Base: Place your milk and Greek yogurt into the blender first. Adding liquids first helps the blades spin more freely.

  2. Add the Stars: Scoop in the avocado and add the frozen strawberries. If you are using fresh strawberries, add a handful of ice cubes to get that chilled, thick consistency.

  3. Sweeten: Add your sweetener of choice and the vanilla extract.

  4. Blend: Start on a low speed and gradually increase to high. Blend for about 45–60 seconds until the mixture is completely smooth and pale pink.

  5. Serve: Pour into a glass and garnish with fresh strawberry slices, just like the picture!


A Quick Tip for Success

The Avocado Secret: Make sure your avocado is perfectly ripe (it should give slightly when pressed). If it’s underripe, it won’t blend as smoothly and may have a slightly “grassy” taste.

Tropical Avocado & Mango Cream Smoothie

Tropical Avocado & Mango Cream Smoothie

Prep time: 5 minutes | Servings: 1 large glass

Ingredients

  • 1 cup Frozen mango chunks (plus a few fresh ones for topping)

  • 1/2 Ripe avocado (makes it ultra-creamy)

  • 1/2 Frozen banana (for sweetness and texture)

  • 1 cup Coconut milk or Almond milk (shown in the carafe in your photo)

  • 1 tbsp Fresh lime juice (adds a necessary “zing”)

  • 1 tsp Honey or maple syrup (optional, depending on fruit ripeness)

  • Garnish: 1 Lime wheel and extra mango cubes

Instructions

  1. Layer the Liquid: Pour your milk of choice into the blender first. This helps the blades move freely.

  2. Add the Solids: Add the avocado, frozen mango, and banana. Squeeze in the fresh lime juice.

  3. Blend: Start on a low speed and gradually increase to high. Blend for about 45–60 seconds until the texture is completely velvety.

  4. Adjust: If it’s too thick, add a splash more milk. If you want it colder, add a handful of ice and pulse.

  5. Assemble: Pour into a glass mug. Top with fresh mango chunks and slide a lime wheel onto the rim just like in your picture.


Why This Combo Works

  • Avocado: Provides heart-healthy monounsaturated fats and acts as a natural thickener.

  • Lime: The acidity cuts through the richness of the avocado and mango, brightening the whole flavor profile.

  • Banana: Using it frozen replaces the need for ice, ensuring your smoothie isn’t “watered down.”

Pro Tip: If you want an extra protein boost, a scoop of vanilla collagen or pea protein blends seamlessly into these tropical flavors.

Copycat Red Lobster Shrimp Scampi

A few months ago, my husband would not stop talking about a shrimp dish he had at Red Lobster. After weeks of hearing about it, I finally told him to stop describing it and let me try making it at home.

Turns out… it’s ridiculously easy. Now he doesn’t need to spend forty bucks at a chain restaurant to get his fix.

Shrimp cooks in minutes, and the sauce is just butter, garlic, white wine, and lemon. Sounds fancy, but really you’re just throwing things into a pan and letting them reduce. Best part? Only one skillet to wash.


⭐ Why This Recipe Works

  • Ready in 30 minutes or less

  • One-pan cleanup

  • Tastes like the restaurant version

  • Fancy enough for date night, easy enough for weeknight

  • Kids and picky eaters love it

The secret is Old Bay seasoning. That’s what gives it that classic seafood flavor. Without it, it’s just regular shrimp scampi — still good, but not the same.


🧾 Ingredients

  • 1 lb extra-large shrimp, peeled and deveined

  • ½ tsp kosher salt

  • ¼ tsp black pepper

  • 2 tsp Old Bay seasoning (divided)

  • 1 Tbsp olive oil

  • 4 cloves garlic, minced

  • 1½ cups white wine (or chicken broth)

  • Juice of 1 lemon

  • ½ cup unsalted butter, room temperature

  • 1 Tbsp fresh parsley, chopped

  • Grated Parmesan cheese, for serving


👩‍🍳 Instructions

  1. Season the Shrimp
    Pat shrimp dry. Season both sides with salt, pepper, and 1 tsp Old Bay.

  2. Cook Shrimp
    Heat olive oil in a large skillet over medium-high heat.
    Add shrimp and cook 2–3 minutes per side until pink and curled.
    Remove shrimp to a plate.

  3. Make the Sauce
    In the same skillet, add garlic and cook 1 minute until fragrant.
    Pour in wine and lemon juice. Scrape up the browned bits from the pan.
    Bring to a boil, then reduce heat and simmer 5 minutes.

  4. Finish the Sauce
    Add butter chunks and remaining 1 tsp Old Bay.
    Stir until butter melts and sauce is smooth.

  5. Return Shrimp
    Add shrimp back to the skillet and toss to coat.
    Taste and adjust salt and pepper if needed.

  6. Serve
    Sprinkle with parsley and serve hot with grated Parmesan.


🍝 How to Serve

  • Over linguine or angel hair pasta

  • Over rice

  • With crusty bread to soak up the sauce

  • With steamed broccoli or asparagus

  • With a simple green salad

My favorite way? In a bowl with bread. That garlic butter sauce is everything.


💡 Tips from Experience

  • Don’t overcrowd the pan — cook shrimp in batches if needed

  • Garlic burns fast — 1 minute is enough

  • Let the wine reduce for full flavor

  • Room temperature butter makes a smoother sauce

  • Fresh lemon juice tastes best


🧊 Using Frozen Shrimp

Frozen shrimp works great and is cheaper.

To thaw:

  • Overnight in fridge, or

  • Cold water bath for 15–30 minutes

Never thaw in warm water or microwave — shrimp turns mushy.


🥶 Storage & Reheating

  • Store in fridge up to 3 days

  • Reheat gently on low power in microwave

  • Shrimp toughens if overheated

Honestly, it’s so fast to make that it’s better fresh.


🔄 Variations

  • Add red pepper flakes for heat

  • Add cherry tomatoes with garlic

  • Add a splash of cream at the end

  • Use chicken broth instead of wine

  • Skip pasta for low-carb option


⭐ Final Thoughts

This copycat shrimp scampi is fast, fancy-feeling, and always a hit. It’s cheaper than going out and honestly tastes better fresh from your own kitchen.

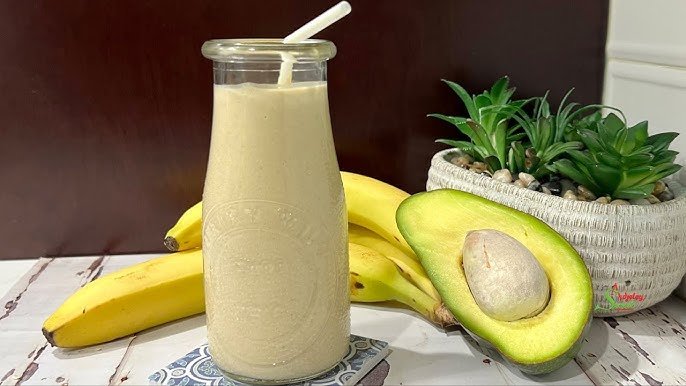
Creamy Avocado & Banana Smoothie

Creamy Avocado & Banana Fuel Smoothie

Prep time: 5 minutes | Servings: 1


Ingredients

  • 1/2 Medium Avocado: Ripe (should be soft to the touch).

  • 1 Frozen Banana: Sliced (frozen gives it a colder, thicker texture).

  • 2 tbsp Whole Almonds: Or 1 tbsp of almond butter for an even smoother finish.

  • 1 cup Liquid: Unsweetened almond milk, oat milk, or coconut water work best.

  • Optional: A drizzle of honey or 1-2 pitted dates if you prefer it sweeter.


Instructions

  1. Prep the Almonds: If you have a high-speed blender, you can toss the whole almonds right in. If your blender is less powerful, soak the almonds in water for 15 minutes beforehand or use almond butter to avoid “gritty” bits.

  2. Layer the Blender: Add the liquid first, followed by the avocado and banana slices. This helps the blades spin freely and prevents stalling.

  3. Blend: Start on a low speed to break up the frozen banana and nuts, then crank it up to high for 45–60 seconds until the mixture is completely velvety and pale green.

  4. Adjust: If it’s too thick (more like a smoothie bowl), add an extra splash of liquid.


Quick Nutritional Tip

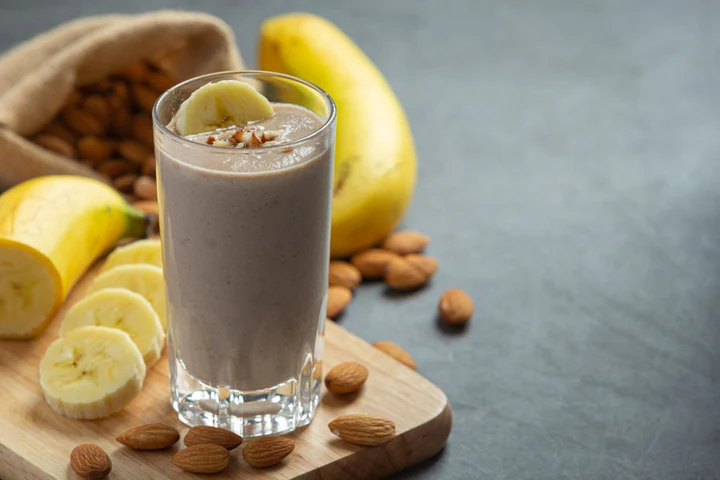
This smoothie is rich in monounsaturated fats (the heart-healthy kind) and potassium. Because it’s quite dense, it’s very satiating and works great as a meal replacement or a post-workout recovery drink.

Old-Fashioned War-Time Cake

Old-Fashioned War-Time Cake


This Old-Fashioned War-Time Cake is a beautifully simple, egg-free and dairy-free spice cake born out of necessity but loved for its rich flavor and moist texture. Made with warm spices, plump raisins, and pantry staples, this vintage dessert is surprisingly tender and perfectly sweet without frosting. It’s the kind of nostalgic, no-fuss recipe that feels like a comforting slice of history in every bite — wholesome, economical, and absolutely delicious.
Prep Time: 15minutes 
Cook Time: 35minutes 
Total Time: 1hour 

Ingredients

Boiled Fruit Base

  • 1 cup raisins
  • 1 cup water
  • ½ cup granulated sugar
  • ½ cup brown sugar
  • ½ cup unsalted butter or shortening for traditional version

Dry Ingredients

  • 1 ½ cups all-purpose flour
  • 1 tsp baking soda
  • ½ tsp salt
  • 1 tsp ground cinnamon
  • ¼ tsp ground cloves
  • ¼ tsp ground nutmeg

Optional Add-Ins

  • ½ cup chopped walnuts or pecans
  • ½ cup chopped dates

Instructions

  • Prepare the Fruit Mixture
  • In a saucepan, combine raisins, water, sugars, and butter.
  • Bring to a gentle boil over medium heat.
  • Let simmer for 5 minutes, stirring occasionally.
  • Remove from heat and allow to cool for about 10 minutes.
  • Preheat & Prepare Pan
  • Preheat oven to 350°F (175°C).
  • Grease an 8×8-inch baking pan or line with parchment paper.
  • Mix Dry Ingredients
  • In a separate bowl, whisk together:
  • Flour
  • Baking soda
  • Salt
  • Cinnamon, cloves, and nutmeg
  • Combine Batter
  • Once the raisin mixture has cooled slightly (warm is fine, but not hot),
  • gradually stir in the dry ingredients.
  • Mix until just combined — do not overmix.
  • Fold in nuts or dates if using.
  • Bake
  • Pour batter into prepared pan.
  • Bake for 30–35 minutes, or until a toothpick inserted in the center comes out clean.
  • Cool & Serve
  • Let cool in the pan for 15–20 minutes.
  • Slice and serve plain or dust with powdered sugar.

🫓 Soft Pocket Flatbread (Stovetop Pita)

Ingredients

  • 3 cups all-purpose flour
  • 1 tsp salt
  • 1 tbsp sugar
  • 1 tbsp instant yeast
  • 1 tbsp olive oil
  • 1 cup warm water (plus 2–3 tbsp if needed)

Instructions

1. Make the Dough

  1. In a bowl, mix flour, salt, sugar, and yeast.
  2. Add olive oil and warm water.
  3. Knead 8–10 minutes until smooth and soft.
  4. Cover and let rise 1 hour (until doubled).

2. Shape

  1. Divide into 8 balls.
  2. Roll each into a thin circle (about 6–7 inches).

3. Cook

  1. Heat a dry pan on medium-high.
  2. Place dough circle in pan.
  3. Cook until bubbles form → flip.
  4. It should puff up and make a pocket.
  5. Cook 1 more minute until lightly golden.

Stack in a towel to keep soft.


Tips for Perfect Puff

✔ Pan must be hot
✔ Roll evenly (not too thick)
✔ Don’t flip too early


No-Yeast Quick Version

Replace yeast + sugar with:

  • 1 tsp baking powder
  • ¾ cup yogurt + ¼ cup water

Rest dough 15 minutes, then cook.


Serving Ideas

  • Chicken shawarma
  • Egg & cheese breakfast pita
  • Garlic butter flatbread
  • With hummus or curry

“Fluffy Egg Muffins — A Quick, Healthy, and Make-Ahead Breakfast Idea”

  • Servings: 6–8 muffins
  • Total Time: 20 minutes
  • Difficulty: Easy
  • Calories per Muffin: ~110 kcal
  • Macros (Per Muffin): 9g Protein / 2g Net Carbs / 7g Fat / 1g Fiber

Introduction

These Healthy Egg Muffins are a game-changer for busy mornings, meal prep, or on-the-go snacks. Packed with protein, vegetables, and a hint of cheese, they’re fluffy, flavorful, and customizable to your diet preferences.

Perfect for Keto, Slimming , Weight Watchers, High-Protein, and Mediterranean lifestyles, these muffins are low in carbs, high in nutrients, and entirely freezer-friendly — making your weekly meal planning effortless.

Whether you’re looking for a quick breakfast, a lunchbox addition, or a protein-packed snack, these muffins deliver flavor, convenience, and nutrition in every bite.


Look at the Recipe

  • Texture & Visual: Fluffy, golden on top, tender inside with colorful vegetable bits.
  • Flavor Highlight: Savory eggs enhanced with cheese, herbs, and fresh vegetables.
  • Diet Benefit: High in protein, low-carb, gluten-free, and easily adapted for Mediterranean diets.

Ingredients Needed

Base Ingredients

  • 6 large eggs
  • ½ cup Greek yogurt or cottage cheese (for added protein and fluffiness)
  • ¼ cup shredded cheese (cheddar, feta, or mozzarella)
  • ½ tsp salt
  • ¼ tsp black pepper

Vegetable Mix (Choose your favorites)

  • ½ cup diced bell peppers
  • ¼ cup chopped spinach or kale
  • 2 tbsp chopped onion
  • 2 tbsp cherry tomatoes, halved
  • 1–2 tbsp fresh herbs (parsley, chives, or basil)

Optional Add-Ins

  • ¼ cup cooked bacon or ham cubes (Keto/High-Protein)
  • 1 tsp paprika or chili flakes for spice
  • 1 tsp olive oil for greasing

How to Make Our Healthy Egg Muffins

  1. Preheat oven & prep pan:
    Preheat your oven to 375°F (190°C). Grease a 6–8 cup muffin tin with olive oil or line with silicone liners.
  2. Whisk eggs:
    In a large bowl, whisk eggs, Greek yogurt, salt, and pepper until smooth.
  3. Add vegetables & cheese:
    Fold in the diced bell peppers, spinach, onion, tomatoes, herbs, and shredded cheese. Add optional meat or spices if using.
  4. Fill muffin cups:
    Pour the mixture evenly into muffin cups, filling about ¾ full.
  5. Bake:
    Bake for 15–18 minutes, or until muffins are set and lightly golden on top.
  6. Cool & serve:
    Allow muffins to cool for 5 minutes before removing from tin. Serve warm or store for meal prep.

Storage & Serving Suggestions

  • Store: Refrigerate in an airtight container for up to 4 days.
  • Freeze: Freeze individually wrapped muffins for up to 2 months. Reheat in microwave or oven before eating.
  • Serving Ideas:
    • Pair with avocado slices or a side salad for a balanced breakfast.
    • Serve as a snack with hummus or tzatziki for Mediterranean flair.
    • Enjoy for a post-workout protein boost.

Tips & FAQs

1. Can I make this Slimming -friendly?
Yes! Use fat-free Greek yogurt or cottage cheese and omit cheese if desired. Each muffin is roughly 1–2 syns depending on ingredients.

2. How many Weight Watchers points per muffin?
Approximately 2–3 WW points per muffin when using low-fat cheese and yogurt.

3. Can I make these dairy-free?
Yes — replace Greek yogurt and cheese with coconut yogurt and dairy-free cheese.

4. How can I make it Keto-friendly?
Stick to full-fat cheese, Greek yogurt, and low-carb vegetables like spinach and peppers.

5. Can I add more vegetables or proteins?
Absolutely! Egg muffins are highly versatile — zucchini, mushrooms, or cooked chicken all work well.

Mexicorn and Cheese Fiesta Dip

Mexicorn and Cheese Fiesta Dip
Get ready for a creamy, cheesy dip packed with bold flavors, perfect for your next party or game day! This Mexicorn and Cheese Fiesta Dip is bursting with sweet corn, melty cheese, and a little kick of spice. Dip into the fiesta!
Ingredients:
2 cups frozen corn, thawed (or canned, drained)
1 cup shredded cheddar cheese
1 cup shredded Monterey Jack cheese
1 cup sour cream
½ cup mayonnaise
½ cup cream cheese, softened
¼ cup red onion, finely diced
½ cup diced tomatoes
1 small jalapeño, sliced or diced (optional for heat)
¼ cup green onions, chopped
½ teaspoon garlic powder
½ teaspoon paprika
Salt and black pepper, to taste
Directions:
Preheat the Oven:
Preheat your oven to 375°F (190°C). Lightly grease a baking dish.
Mix the Base:
In a large bowl, mix the sour cream, mayonnaise, and cream cheese until smooth and creamy.
Add the Good Stuff:
Stir in the corn, cheddar cheese, Monterey Jack cheese, red onion, diced tomatoes, jalapeño, green onions, garlic powder, paprika, and salt and pepper. Make sure everything is well combined.
Bake:
Spread the mixture evenly into the prepared baking dish.
Bake, uncovered, for 18–22 minutes until the dip is hot, bubbly, and golden on top.
Serve:
Let the dip cool slightly before serving. Serve it warm with tortilla chips, crackers, or veggies.
Pro Tip:
For an extra fiesta twist, squeeze some lime juice over the dip or sprinkle a little Tajín or chili powder on top before serving. It adds an extra burst of flavor!
Enjoy!
This Mexicorn and Cheese Fiesta Dip is the ultimate crowd-pleaser—creamy, cheesy, and full of bold fiesta flavors! It’s perfect for any occasion, so gather your friends and di

Cranberry & Spinach Stuffed Chicken with Brie for Cozy Nights

Cranberry & Spinach Stuffed Chicken with Brie for Cozy Nights

Ingredients
For the Chicken
4 large boneless skinless chicken breasts
1 tbsp olive oil
½ tsp salt
¼ tsp black pepper
½ tsp garlic powder
½ tsp dried thyme
For the Filling
1 cup fresh spinach, chopped
½ cup dried cranberries
4–6 slices Brie cheese
1 clove garlic, minced
1 tbsp olive oil
Optional Glaze
1 tbsp honey
1 tsp Dijon mustard
Directions
Preheat oven to 375°F (190°C).
Carefully cut a pocket into the side of each chicken breast without slicing all the way through.
In a skillet, heat 1 tbsp olive oil over medium heat. Sauté garlic and spinach for 1–2 minutes until wilted. Remove from heat and stir in dried cranberries.
Stuff each chicken breast with sautéed spinach mixture and slices of Brie. Secure with toothpicks if needed.
Rub outside of chicken with olive oil and season with salt, pepper, garlic powder, and thyme.
Sear chicken in an oven-safe skillet over medium-high heat for 2–3 minutes per side until golden.
Transfer skillet to oven and bake 18–22 minutes, or until internal temperature reaches 165°F (74°C).
If using glaze, brush honey and Dijon over chicken during the last 5 minutes of baking.
Let rest 5 minutes before slicing and serving.
Flavor & Texture
Tender chicken filled with creamy melted Brie, sweet-tart cranberries, and savory spinach creates a rich, comforting dish perfect for cozy evenings or special dinners. The optional honey Dijon glaze adds a subtle sweet and tangy finish.
Nutritional Information
(Per Serving – Approximate, serves 4)
Calories: 520
Protein: 48 g
Carbs: 14 g
Fat: 30 g
Fiber: 2 g

Spinach Artichoke Dip Pull-Apart Bread

Spinach Artichoke Dip Pull-Apart Bread
Ingredients
1 round loaf of sourdough bread (about 1 lb)
1 tbsp olive oil
2 cups baby spinach, chopped
1 cup canned artichoke hearts, drained and chopped
1/2 cup cream cheese, softened
1/4 cup sour cream
1/4 cup mayonnaise
1 garlic clove, minced
1/2 tsp salt
1/4 tsp black pepper
1/4 tsp red pepper flakes (optional)
1 cup shredded mozzarella
1/4 cup grated Parmesan
Directions
Preheat Oven:
Preheat to 180°C (350°F). Line a baking sheet with foil or parchment.
Sauté Veggies:
Heat olive oil in a skillet. Sauté spinach until wilted, then stir in chopped artichokes and cook for 1–2 minutes more. Let cool slightly.
Mix Dip:
In a bowl, mix cream cheese, sour cream, mayo, garlic, salt, pepper, and red pepper flakes. Fold in mozzarella, Parmesan, and sautéed spinach-artichoke mix.
Prepare Bread:
Slice the bread in a crosshatch pattern, making sure not to cut all the way through. Gently stuff the dip mixture into the cracks.
Bake:
Wrap the loaf in foil and bake for 15 minutes. Uncover and bake another 10–15 minutes until the top is golden and cheese is melted.
Serve:
Serve warm and gooey, perfect for pulling apart!
Nutritional Info (per serving)
Serves 6–8
Calories: 340
Protein: 10g
Fat: 21g
Carbs: 26g
Fiber: 2g
Sugar: 2g/

Shrimp Avocado Salad

Shrimp Avocado Salad

High Protein | Low Carb | Diabetic-Friendly
INGREDIENTS:
1 cup cooked shrimp
1 ripe avocado, diced
1 cup cherry tomatoes, halved
1/4 cup red onion, chopped
Fresh cilantro, chopped
Juice of 1 lime
Salt & pepper to taste
INSTRUCTIONS:
Cook shrimp: If not pre-cooked, sauté in a pan with olive oil, salt & pepper (3–4 mins per side). Cool.
Prep veggies: Dice avocado, halve tomatoes, chop onion and cilantro.
Combine: In a large bowl, mix shrimp, avocado, tomatoes, onion, and cilantro.
Add flavor: Squeeze lime juice, season with salt & pepper. Gently toss.
Serve: Enjoy fresh or chill for 15–20 minutes to blend flavors.
NUTRITION (PER SERVING):
Calories: 280 | Protein: 25g | Carbs: 8g | Fat: 18g

🥞 Soft Rolled Crepes Recipe

Ingredients

For the batter

  • 2 eggs
  • 2 cups milk
  • 1 cup all-purpose flour
  • 2 tbsp sugar (optional for sweet crepes)
  • 2 tbsp melted butter or oil
  • Pinch of salt
  • ½ tsp vanilla extract (optional)

For filling ideas

  • Nutella or chocolate spread
  • Banana slices
  • Cream cheese + sugar
  • Jam or honey
  • Cottage cheese + sugar

Instructions

  1. Make the batter
    • Whisk eggs and milk.
    • Add flour, sugar, salt, butter, and vanilla.
    • Mix until smooth.
    • Rest batter 10–15 minutes.
  2. Cook crepes
    • Heat a lightly oiled non-stick pan.
    • Pour a thin layer of batter and swirl.
    • Cook 1 minute each side until lightly golden.
  3. Fill & roll
    • Spread filling on crepe.
    • Add banana or jam.
    • Roll tightly.
  4. Serve
    • Drizzle with chocolate, honey, or powdered sugar.

🌟 Tips

  • Batter should be thin like heavy cream. Add milk if thick.
  • Use low-medium heat so crepes stay soft.
  • Stack cooked crepes under a towel to keep warm.

🌶️ Baked Chili Rellenos

🌶️ Baked Chili Rellenos

If you love traditional chile rellenos but want to skip the deep frying, Baked Chili Rellenos are the perfect solution. Roasted peppers are stuffed with a melty cheese filling, topped with a flavorful homemade sauce, and baked until bubbly and golden. You still get all the smoky, cheesy goodness—without the mess or excess oil.

This casserole-style version of a Mexican classic is ideal for weeknight dinners, family gatherings, or when you have fresh seasonal peppers to use up.


🧾 Ingredients

For the Peppers:

  • 4 large Anaheim or pasilla chilies

  • 2 cups shredded cheese blend (cheddar, Monterey Jack, and cotija)

For the Sauce:

  • ½ cup crushed tomatoes

  • 1 (4 oz) can diced green chilies

  • ¼ cup chicken broth

  • ½ cup diced onion

  • 2 cloves garlic, minced

  • ½ teaspoon garlic powder

  • 1 tablespoon dried oregano


👩‍🍳 Instructions

Step 1: Roast the Chilies

Grill or broil the chilies until the skins are blistered and charred (about 10–15 minutes, turning occasionally). Place them in a sealed bag or covered bowl and let steam for 10 minutes. Peel off the skins, slit lengthwise, and remove seeds.


Step 2: Prepare the Cheese Filling

Mix the cheeses together in a bowl. Reserve about ½ cup for topping later.


Step 3: Stuff the Peppers

Fill each chili with the cheese mixture and gently close them. Place seam-side down in a lightly greased baking dish.


Step 4: Make the Sauce

In a saucepan, combine crushed tomatoes, diced green chilies, chicken broth, onion, garlic, oregano, and garlic powder. Bring to a boil, then reduce heat and simmer for 10 minutes.


Step 5: Assemble & Bake

Pour the sauce over the stuffed peppers. Sprinkle with the reserved cheese.
Bake at 375°F (190°C) for 25 minutes, until bubbly and lightly golden.


Step 6: Serve & Enjoy

Let rest for 5 minutes before serving. Top with:

  • Sour cream

  • Fresh cilantro

  • Sliced avocado


❤️ Why You’ll Love This Recipe

✔ Healthier than fried rellenos
✔ Easy to prepare
✔ Crowd-pleasing comfort food
✔ Vegetarian-friendly
✔ Perfect as a main or side dish


💡 Tips for Best Results

  • Use fresh Anaheim or pasilla peppers for mild heat and tender texture

  • Fully char skins for easy peeling and better flavor

  • Lightly grease the dish to prevent sticking

  • Let rest before serving for clean portions


🔄 Variations

  • Spicy: Add diced jalapeños or chipotle powder

  • Veggie-packed: Mix in sautéed mushrooms, spinach, or corn

  • Meaty: Add shredded chicken or cooked chorizo

  • Green sauce: Replace tomato sauce with tomatillo sauce


🍽️ What to Serve With It

  • Warm tortillas (corn or flour)

  • Mexican rice

  • Refried beans

  • Pico de gallo or fresh salsa

  • Street corn salad


🧊 Storage & Reheating

Fridge: Up to 4 days
Freezer: Up to 2 months
Reheat: Bake at 350°F for 10 minutes or microwave (texture will soften slightly)


⭐ Final Thoughts

Baked Chili Rellenos prove that comfort food doesn’t need to be deep-fried to be delicious. With roasted peppers, gooey cheese, and a rich sauce, this dish delivers big flavor with simple preparation. It’s perfect for family dinners, potlucks, or cozy nights at home.

Banana Mousse in 5 Minutes

Banana Mousse in 5 Minutes

Table of Contents

Banana Mousse is one of those desserts that feels elegant yet comes together with surprisingly simple ingredients. Smooth, creamy, and naturally fruity, this quick mousse delivers a light texture with rich banana flavor and a delicate sweetness balanced by milk and butter. It is perfect when you want a chilled dessert that looks impressive but requires minimal cooking skills. The gelatin helps create a soft, airy consistency that sets beautifully in the fridge, making it ideal for serving at gatherings or as a refreshing after-dinner treat. Despite the name “5 minutes,” most of the time is hands-off chilling, while the preparation itself is quick and beginner-friendly. Whether you serve it in small glasses, molds, or layered with biscuits for a fancier presentation, this mousse offers a classic homemade dessert experience that appeals to both kids and adults. Once you make it, you will find it becomes a go-to recipe for easy entertaining and quick sweet cravings.

Prep Time: 5–10 minutes
Cooking Time: 10 minutes
Chilling Time: 3–4 hours
Total Time: About 4 hours
Yield: 6–8 servings

Ingredients

3 ripe bananas

25 g butter

70 g sugar (for the banana mix)

700 ml milk

150 g sugar (for the milk)

30 g gelatin

70 ml water

Instructions

Peel bananas and mash them until smooth using a fork or blender.

In a saucepan, melt butter over low heat and add mashed bananas.

See also  Roasted Carrots in an Air Fryer

Stir in 70 g sugar and cook gently for 2–3 minutes until slightly thick and fragrant.

In a separate bowl, sprinkle gelatin over 70 ml water and let it bloom for 5 minutes.

Heat milk in another pot and add 150 g sugar, stirring until dissolved. Do not boil.

Add the bloomed gelatin into the warm milk mixture and stir until fully melted.

Combine the warm banana mixture with the milk mixture and whisk until smooth.

Strain the mixture if you want an extra silky mousse texture.

Pour into serving glasses or molds and allow to cool at room temperature briefly.

Refrigerate for at least 3–4 hours until fully set, then serve chilled.

Tips

Use ripe bananas with brown spots for stronger flavor and natural sweetness.

Avoid boiling milk after adding gelatin since high heat can weaken its setting ability.

Stir continuously when heating bananas to prevent sticking or burning.

Straining the mixture removes lumps and creates a professional finish.

If you want a lighter mousse, gently fold in whipped cream before chilling.

Pour into small cups for quicker setting and easy portion control.

Chill molds lightly before pouring to help the mousse set evenly.

Taste the mixture before setting to adjust sweetness if needed.

Use clear glasses for a layered or decorated presentation.

Let mousse sit at room temperature for a few minutes before serving for the best texture.

Variations

Add vanilla extract for a warm, bakery-style aroma.

Mix in cocoa powder for a banana chocolate mousse version.

Layer with crushed biscuits or sponge cake for a trifle-style dessert.

Replace part of the milk with coconut milk for a tropical twist.

See also  Air Fryer Salmon

Top with caramel sauce or honey for extra richness.

Fold in chopped nuts for texture contrast.

Add cinnamon or nutmeg for a spiced variation.

Make mini mousse cups topped with whipped cream and banana slices.

Use plant-based milk and vegan gelatin alternatives for a dairy-free version.

Create a two-layer mousse by adding a strawberry or mango puree layer.

Q&A

Can I reduce the sugar?

Yes, adjust according to banana ripeness and taste preference.

What if I do not have gelatin?

Agar-agar can be used, but follow package instructions.

Can I freeze banana mousse?

Freezing changes texture, so refrigeration is best.

How long does it last?

Store in the fridge up to 3 days in an airtight container.

Can I use condensed milk instead of sugar and milk?

Yes, but reduce added sugar accordingly.

Why did my mousse not set?

The milk may have been too hot or gelatin insufficiently dissolved.

Can I make it ahead?

Yes, it is perfect for preparing a day in advance.

Is blending necessary?

Not required, but blending gives a smoother consistency.

Can I add fruit chunks?

Yes, small fruit pieces add flavor and texture.

How do I unmold neatly?

Dip the mold briefly in warm water before turning out.

Nutrition

(approx per serving)

Calories: 210–240
Carbohydrates: 35g
Protein: 5g
Fat: 6g
Fiber: 2g
Sugar: 25g

Conclusion

Banana Mousse in 5 Minutes is a wonderful reminder that delicious desserts do not need complicated steps or fancy ingredients. With its silky texture and comforting banana flavor, it offers a perfect balance between lightness and sweetness while remaining easy enough for everyday preparation. The combination of bananas, milk, and gentle gelatin setting creates a mousse that is creamy without feeling heavy, making it suitable for family meals, festive occasions, or simple weekend treats. Its versatility also means you can easily adapt the recipe with different flavors, toppings, or textures depending on your mood or available ingredients. Whether served plain in elegant glasses or layered with fruits and biscuits for a more decorative look, this mousse delivers consistent results and crowd-pleasing taste. Once chilled and set, each spoonful feels smooth, airy, and satisfying, making it a dessert you will likely return to whenever you want something quick, reliable, and homemade.

Refreshing Turmeric & Ginger Wellness Elixir

Refreshing Turmeric & Ginger Wellness Elixir

A bright, zesty, and warming drink to kickstart your morning or wind down your evening.


Ingredients

  • 2 large Lemons (juiced, with some zest)

  • 2-inch piece Fresh ginger root (peeled and sliced or grated)

  • 1 tsp Turmeric powder (Curcuma) or a 1-inch piece of fresh turmeric root

  • 4 cups Water (filtered)

  • Optional: A pinch of black pepper (this significantly improves the absorption of turmeric)

  • Optional: 1 tsp Raw honey or Stevia for a touch of sweetness


Step-by-Step Instructions

  1. Prepare the Roots: Peel your fresh ginger and turmeric (if using fresh root). Slice them thinly or grate them to release the maximum amount of juices and oils.

  2. Boil the Water: In a medium saucepan, bring 4 cups of water to a gentle boil.

  3. Infuse: Once boiling, add the ginger, turmeric, and lemon zest to the water. Reduce the heat to low and let it simmer for 10 to 15 minutes. The longer it simmers, the more potent and spicy the flavor will be.

  4. Add the Lemon: Remove the saucepan from the heat. Stir in the fresh lemon juice. Tip: Adding the lemon at the end preserves the Vitamin C, which can be sensitive to high heat.

  5. The Secret Step: Add a tiny pinch of black pepper. The piperine in pepper helps your body absorb the curcumin in the turmeric much more effectively.

  6. Strain: Pour the mixture through a fine-mesh strainer into a glass pitcher or individual mugs to remove the pieces of ginger and zest.

  7. Sweeten (Optional): If you find the flavor too sharp, stir in a little honey or a sugar-free sweetener while the drink is still warm.


How to Enjoy It

  • Hot: Perfect as a soothing tea before bed or on a cold morning.

  • Cold: Pour it over ice for a refreshing, spicy lemonade alternative throughout the day.

  • Storage: This can be kept in the refrigerator for up to 3 days.

Crispy Mediterranean Salmon & Feta Patties

Crispy Mediterranean Salmon & Feta Patties

A refreshing, nutrient-dense recipe that is as beautiful to look at as it is to eat!


Ingredients

For the Patties:

  • 1 can (14.75 oz) Salmon, drained and flaked (or 2 cups cooked fresh salmon)

  • 2 cloves Garlic, minced

  • ⅓ cup Feta cheese, crumbled

  • 1 cup Fresh spinach, finely chopped

  • ¼ cup Red onion, finely diced

  • 1 Large egg, beaten (to bind the mixture)

  • ½ cup Breadcrumbs (panko or whole wheat)

  • 1 tbsp Fresh dill or parsley, chopped

  • 1 tsp Lemon zest

  • To taste: Salt and black pepper

For Cooking:

  • 2 tbsp Olive oil


Step-by-Step Instructions

  1. Prep the Base: In a large mixing bowl, combine the flaked salmon, minced garlic, crumbled feta, chopped spinach, and diced red onion.

  2. Add the Binders: Stir in the beaten egg, breadcrumbs, fresh herbs, and lemon zest. Season with a small pinch of salt (the feta is already salty!) and black pepper.

  3. Mix Thoroughly: Use a fork or your hands to mix everything together until the ingredients are evenly distributed and the mixture holds its shape when pressed.

  4. Form the Patties: Divide the mixture into 6 equal portions. Roll each into a ball and then gently flatten them into patties about 1-inch thick.

  5. The Chill (Optional): If you have time, place the patties in the refrigerator for 20 minutes. This helps them stay together perfectly during frying.

  6. Sear to Golden Perfection: Heat the olive oil in a large non-stick skillet over medium heat. Carefully place the patties in the pan and cook for 4–5 minutes per side until they are golden brown and crispy on the outside.

  7. Serve: Enjoy these warm with a squeeze of fresh lemon juice or a side of creamy tzatziki sauce.


Why You’ll Love This Recipe

  • Nutrient-Packed: Between the omega-3s in the salmon and the iron in the spinach, this is a powerhouse meal.

  • Flavor Harmony: The saltiness of the feta perfectly balances the brightness of the lemon and fresh herbs.

  • Meal-Prep Friendly: These patties reheat beautifully in an air fryer or oven, making them great for busy weekdays.