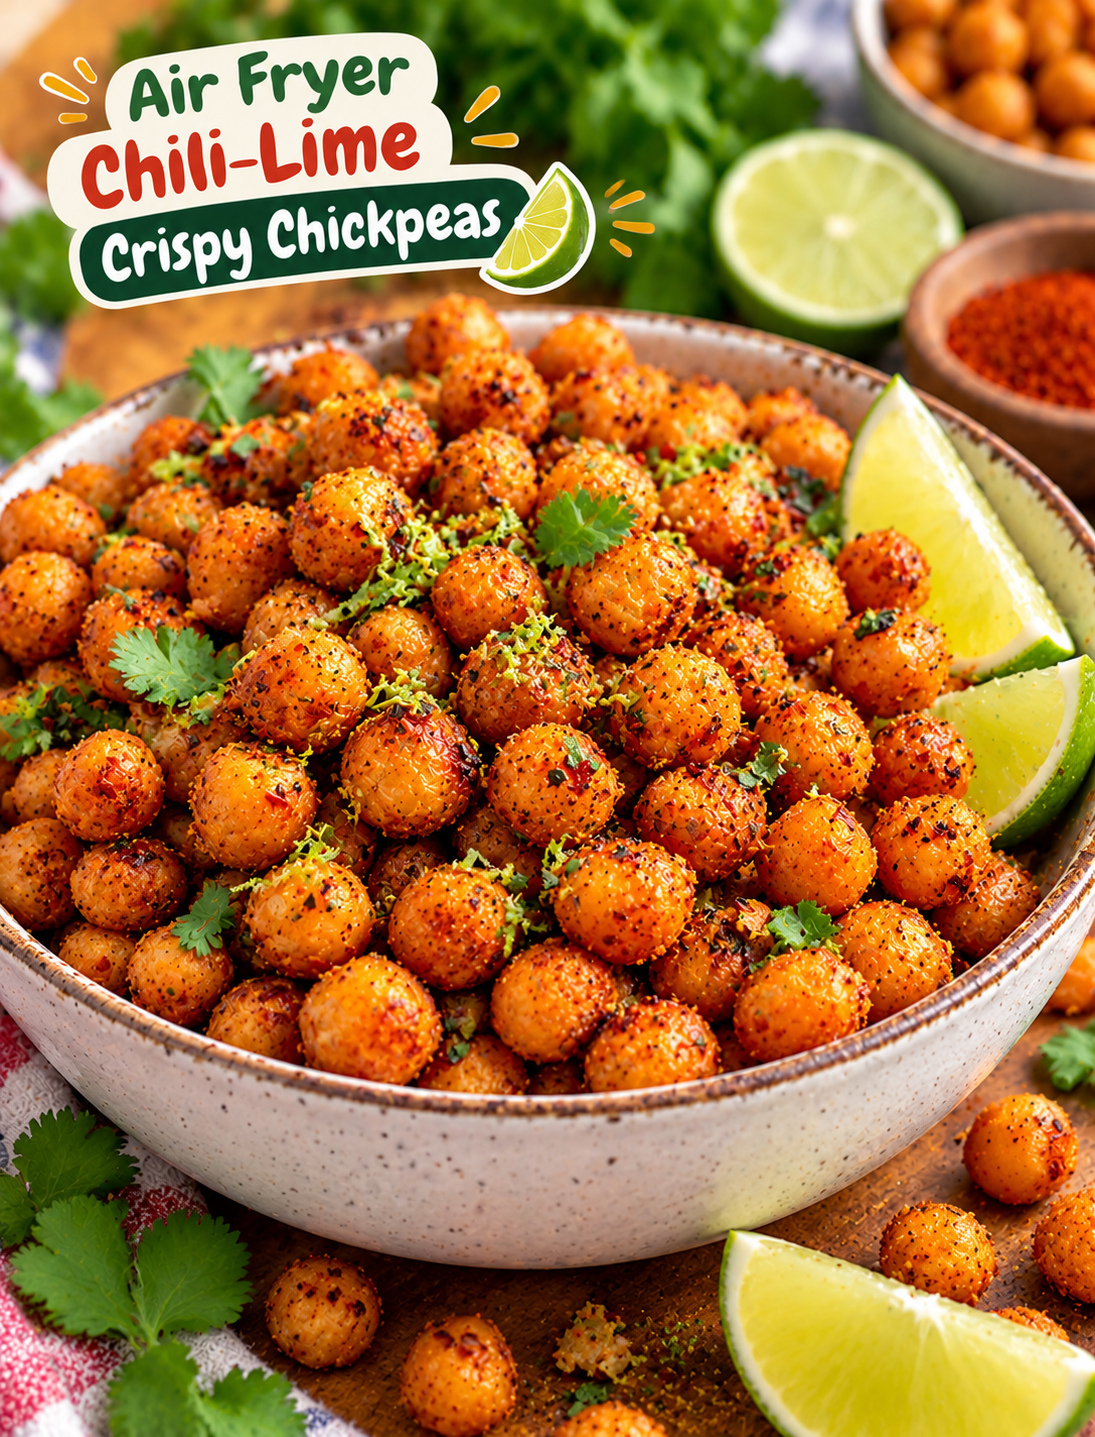
Looking for a crunchy snack that is easy to make and full of bold flavor? These Air Fryer Chili-Lime Crispy Chickpeas are a delicious choice for busy afternoons, movie nights, or healthy snack cravings. They turn simple canned chickpeas into golden, crunchy bites with a zesty lime finish and a little chili heat.
The air fryer helps remove moisture from the chickpeas while creating a crisp outer texture with very little oil. A simple seasoning blend of chili powder, smoked paprika, garlic, and fresh lime zest gives every bite a bright, savory flavor.
These crunchy chickpeas are also easy to customize. Add extra chili powder for more heat, use smoked paprika for a deeper flavor, or finish with fresh lime juice for a refreshing citrus taste.
You can enjoy them straight from the bowl, sprinkle them over salads, or serve them as a crunchy topping for soups and grain bowls. If you love easy homemade snacks, this recipe is a simple way to make chickpeas more exciting.
Why You Will Love This Recipe
- Quick preparation: Use canned chickpeas to reduce preparation time and make this snack with simple pantry ingredients.
- Crunchy texture: Air frying helps create a crisp outside without deep frying.
- Bold chili-lime flavor: Chili powder, garlic, and lime create a delicious balance of spicy and tangy flavors.
- Simple ingredients: Most ingredients are easy to find at American grocery stores.
- Easy to customize: Adjust the spice level, citrus flavor, and seasoning to match your taste.
- Versatile snack: Enjoy them alone or use them as a crunchy salad and soup topping.
- Meal-prep friendly: Prepare a batch for convenient snacking, then store it properly to maintain quality.
Ingredients You Will Need
You only need a few basic ingredients to make these crispy chickpeas. Drying the chickpeas properly is the most important preparation step for achieving a crunchy result.
Main Ingredients
- Canned chickpeas – 2 cans (15 ounces each): Chickpeas, also called garbanzo beans, create the crunchy base for this snack. Drain and rinse them before cooking.
- Olive oil – 1 tablespoon: A small amount helps the seasoning stick and encourages even browning.
- Chili powder – 1 teaspoon: Adds a mild spicy flavor and warm color.
- Smoked paprika – ½ teaspoon: Gives the chickpeas a smoky, savory taste.
- Garlic powder – ½ teaspoon: Adds a rich garlic flavor without extra moisture.
- Ground cumin – ¼ teaspoon: Provides a warm, earthy flavor that pairs well with chili and lime.
- Salt – ½ teaspoon: Enhances the natural flavor of the chickpeas.
- Black pepper – ¼ teaspoon: Adds a little extra seasoning.
- Fresh lime zest – 1 teaspoon: Gives the snack a bright citrus aroma.
- Fresh lime juice – 1 teaspoon: Adds a refreshing tangy finish after cooking.
Optional Ingredients
- ¼ teaspoon cayenne pepper for extra heat
- 1 tablespoon chopped fresh cilantro
- A pinch of onion powder
- Extra lime zest for serving
- A little extra smoked paprika
Ingredient tip: Fresh lime zest provides strong citrus flavor without adding much moisture. Add most of the lime juice after cooking so the chickpeas stay crisp longer.
Kitchen Tools You Need
Gather these kitchen tools before starting:
- Air fryer
- Colander or strainer
- Clean kitchen towel or paper towels
- Large mixing bowl
- Measuring spoons
- Small spoon or spatula
- Airtight storage container
A clean kitchen towel is especially useful because thoroughly drying the chickpeas helps improve their texture.
How to Make Air Fryer Chili-Lime Crispy Chickpeas
Follow these simple steps to prepare crunchy chickpeas with a spicy citrus coating.
Step 1: Drain and Rinse the Chickpeas
Open both cans of chickpeas and pour them into a colander.
Drain the liquid completely, then rinse the chickpeas under cool running water.
Shake the colander gently to remove excess water. This step removes the canning liquid and prepares the chickpeas for drying.
Step 2: Dry the Chickpeas Thoroughly
Spread the rinsed chickpeas over a clean kitchen towel or a layer of paper towels.
Gently pat them dry until there is no visible moisture on the surface.
Remove any loose chickpea skins that come off easily, but do not spend too much time removing every skin.
Let the chickpeas air-dry for another 5–10 minutes if they still feel damp.
Helpful tip: Moisture is one of the main reasons chickpeas turn soft instead of crispy. Take extra time with this step for better results.
Step 3: Add Olive Oil
Transfer the dried chickpeas to a large mixing bowl.
Add one tablespoon of olive oil and toss gently until the chickpeas are lightly coated.
Make sure the oil covers the chickpeas evenly without leaving excess oil at the bottom of the bowl.
A light coating is enough to help the chickpeas brown and hold their seasoning.
Step 4: Prepare the Chili-Lime Seasoning
In a small bowl, combine chili powder, smoked paprika, garlic powder, ground cumin, salt, black pepper, and lime zest.
Mix the ingredients until the seasoning looks evenly blended.
If you prefer a spicier snack, add a small amount of cayenne pepper.
Step 5: Season the Chickpeas
Sprinkle the seasoning mixture over the oiled chickpeas.
Toss gently with a spoon until the spices cover the chickpeas evenly.
Avoid crushing the chickpeas while mixing because broken pieces may cook faster than whole ones.
Step 6: Preheat the Air Fryer
Preheat your air fryer to 390°F (200°C) for approximately 3 minutes if your model recommends preheating.
Make sure the air fryer basket is clean and dry.
For the best results, cook the chickpeas in batches if your basket is small. A single layer allows hot air to circulate around the chickpeas.
Step 7: Air Fry Until Golden and Crispy
Transfer the seasoned chickpeas to the air fryer basket.
Spread them into a single layer without overcrowding.
Air fry at 390°F (200°C) for approximately 12–16 minutes.
Shake the basket every 4–5 minutes to help the chickpeas cook evenly.
Start checking around the 12-minute mark. They should look golden, dry, and lightly crisp on the outside.
If they still feel soft, continue cooking for another 2–4 minutes while checking frequently.
Cooking time may vary depending on chickpea size, moisture level, and air fryer model.
Step 8: Add Fresh Lime Juice
Remove the chickpeas from the air fryer and transfer them to a mixing bowl.
Add one teaspoon of fresh lime juice and toss gently.
Use only a small amount because excess liquid can soften the crispy coating.
Taste one chickpea and adjust the seasoning with extra salt, lime zest, or chili powder if needed.
Step 9: Cool and Serve
Spread the chickpeas on a plate or tray and allow them to cool for approximately 5 minutes.
They may become slightly crispier as they cool.
Finish with extra lime zest or chopped fresh cilantro if desired.
Serve immediately for the best crunchy texture.
Air Fryer Cooking Time and Temperature
Use this guide as a starting point when preparing your chickpeas.
| Cooking Detail | Recommendation |
|---|---|
| Temperature | 390°F (200°C) |
| Preparation Time | 10–15 minutes |
| Cooking Time | 12–16 minutes |
| Cooling Time | 5 minutes |
| Total Time | 27–36 minutes |
| Serving Size | 4 servings |
Cooking tip: Every air fryer works differently. Check the chickpeas around 12 minutes and add extra cooking time if they still feel soft.
Expert Tips for the Best Results
Follow these tips to get a better crunch and balanced chili-lime flavor.
- Dry the chickpeas well: Remove as much surface moisture as possible before adding oil.
- Use a light amount of oil: Too much oil can make the chickpeas greasy instead of crisp.
- Avoid overcrowding: Cook in batches when necessary so hot air can circulate.
- Shake the basket regularly: Moving the chickpeas helps prevent uneven browning.
- Add lime juice after cooking: This protects the crunchy texture during air frying.
- Use fresh lime zest: It adds strong citrus flavor without making the seasoning wet.
- Watch the final minutes: Small chickpeas can become too dark if cooked for too long.
- Cool before storing: Let the chickpeas cool completely before placing them in a container.
Variations and Substitutions
You can change the seasoning to create different flavors while keeping the same basic cooking method.
1. Extra Spicy Chickpeas
Add ¼–½ teaspoon of cayenne pepper to the seasoning mixture. This creates a stronger heat that works well with fresh lime.
2. Smoky Paprika Chickpeas
Increase the smoked paprika to one teaspoon and reduce the chili powder slightly. This creates a deeper smoky flavor with mild heat.
3. Garlic Parmesan Chickpeas
Replace the chili powder with extra garlic powder and add finely grated Parmesan after cooking. Toss gently while the chickpeas are still warm.
4. Mexican-Inspired Chickpeas
Use chili powder, cumin, garlic powder, and lime zest. Finish with fresh cilantro for a bright, savory snack.
5. Lemon Pepper Chickpeas
Replace the chili powder with lemon pepper seasoning and use fresh lemon zest instead of lime zest. This creates a lighter citrus flavor.
6. Sweet and Spicy Chickpeas
Add a small pinch of brown sugar to the seasoning mixture along with chili powder and smoked paprika. The slight sweetness balances the spicy flavor.
What to Serve with Chili-Lime Crispy Chickpeas
These crunchy chickpeas are delicious on their own, but they also work well with everyday meals.
- Fresh green salads: Sprinkle them over mixed greens for extra crunch.
- Grain bowls: Add them to rice bowls, quinoa bowls, or roasted vegetable bowls.
- Creamy soups: Use them as a crunchy topping for tomato or vegetable soup.
- Wraps and sandwiches: Add a small handful for extra texture.
- Hummus platters: Serve with hummus, cucumber slices, carrots, and pita bread.
- Snack boards: Pair them with nuts, fresh vegetables, and your favorite dips.
For a simple snack platter, serve the chickpeas with lime wedges and a bowl of creamy yogurt dip.
How to Store and Reheat
Proper storage helps maintain the flavor and texture of your homemade snack.
Room Temperature Storage
Allow the chickpeas to cool completely before storing.
Place them in a clean, dry, airtight container and keep them in a cool, dry place for the best short-term crunch.
Avoid sealing them while warm because trapped steam can make them soft.
Refrigeration
Refrigeration is not ideal for maintaining their crunchy texture because moisture can soften the chickpeas.
If you prefer refrigerated storage, use an airtight container and re-crisp them before serving.
Reheating in the Air Fryer
Spread the chickpeas in a single layer inside the air fryer basket.
Reheat at 350°F (175°C) for approximately 3–5 minutes.
Check them frequently and allow them to cool briefly before serving.
Can You Freeze Them?
Freezing cooked crispy chickpeas is not recommended because thawing can change their texture.
For the best crunch, prepare smaller batches and enjoy them soon after cooking.
Common Mistakes to Avoid
Avoid these mistakes to get better results every time.
- Skipping the drying step: Wet chickpeas release steam and may remain soft.
- Using too much oil: Excess oil can make the coating greasy.
- Overcrowding the basket: Chickpeas need space for proper air circulation.
- Adding lime juice before cooking: Extra moisture can affect the final texture.
- Forgetting to shake the basket: Uneven cooking can leave some chickpeas soft.
- Cooking at very low heat: The chickpeas may dry slowly without developing a crisp exterior.
- Storing them while warm: Trapped steam can soften the chickpeas.
- Ignoring the final cooking minutes: Chickpeas can darken quickly near the end of cooking.
Frequently Asked Questions
1. Can I use canned chickpeas for this recipe?
Yes. Drain, rinse, and dry canned chickpeas thoroughly before seasoning and air frying.
2. What temperature is best for crispy chickpeas?
Start at 390°F (200°C) and cook for approximately 12–16 minutes, shaking the basket regularly.
3. Why are my air fryer chickpeas not crispy?
Excess moisture, overcrowding, and insufficient cooking time can prevent chickpeas from becoming crunchy.
4. Do I need to remove chickpea skins?
No. Removing loose skins can help, but it is not necessary to peel every chickpea.
5. Can I make chili-lime chickpeas without oil?
Yes. You can omit the oil, but the chickpeas may brown less evenly and the seasoning may not stick as well.
6. How long do crispy chickpeas stay crunchy?
They are best shortly after cooling; storage conditions and humidity affect how long they remain crisp.
7. Can I use lemon instead of lime?
Yes. Fresh lemon zest and juice create a similar citrus flavor with a slightly different taste.
8. Are crispy chickpeas good for salad toppings?
Yes. Their crunchy texture and chili-lime seasoning make them a flavorful topping for fresh salads and grain bowls.
Final Thoughts
These Air Fryer Chili-Lime Crispy Chickpeas are a simple way to turn everyday pantry ingredients into a flavorful homemade snack. The crunchy texture, smoky spices, mild chili heat, and fresh lime create a delicious combination in every handful.
You can adjust the seasoning to make them mild, spicy, smoky, or extra tangy. They are also easy to serve with salads, soups, wraps, and snack platters.
For the best results, dry the chickpeas thoroughly, avoid overcrowding the air fryer, and add fresh lime juice after cooking.
If you try this recipe, let us know in the comments: Do you prefer your chickpeas extra spicy or extra tangy?