Hearty Grilled Steak Salad with Avocado & Fresh Vegetables

This recipe showcases a beautifully composed steak salad that balances fresh, crisp vegetables with tender, juicy slices of perfectly grilled steak. It’s an ideal meal for those seeking a balance between indulgence and healthy eating. Packed with lean protein, healthy fats, and a variety of fresh vegetables, this steak salad is a satisfying and nutritious option for lunch or dinner. Let’s break down the components and discuss what makes this dish such a great choice.

1. Grilled Steak
Ingredients:

Steak (flank, ribeye, or sirloin)
Olive oil
Salt and pepper
Garlic powder or fresh garlic
Optional: a squeeze of lemon juice or balsamic vinegar for extra flavor
Why It Works: The steak is the centerpiece of this salad, providing a rich and flavorful protein source. Seasoned simply with olive oil, salt, pepper, and garlic, the steak is grilled to perfection, achieving a juicy, tender texture with a caramelized crust. Steak is an excellent source of high-quality protein, which helps build and repair tissues, and it’s rich in iron, an essential mineral that supports healthy blood cells and oxygen transport.

The grilling method gives the steak a smoky flavor, while the simplicity of the seasoning allows the natural taste of the meat to shine. Slicing the steak thinly ensures that each bite is tender and easy to eat, perfectly complementing the crunchy vegetables beneath it.

Pro Tip: Let the steak rest for about 5 minutes after grilling to ensure the juices redistribute, making the meat more tender and flavorful. For added depth, marinate the steak for an hour in olive oil, garlic, and a splash of balsamic vinegar before grilling.

2. Fresh Avocado Slices
Ingredients:

Ripe avocado
Salt and pepper for seasoning
Lemon or lime juice (optional)
Why It Works: Avocado adds a creamy, buttery element to the salad, providing healthy fats that help you stay full longer and support heart health. Avocados are rich in monounsaturated fats, which are known to improve cholesterol levels, and they’re also packed with fiber, potassium, and vitamins C, E, and K. Their mild, creamy texture balances the bold flavors of the steak, making every bite rich and satisfying.

Pro Tip: Sprinkle the avocado slices with a bit of lemon or lime juice to enhance their flavor and prevent them from browning. Season lightly with salt and pepper for extra taste.

3. Crisp Leafy Greens
Ingredients:

Lettuce (green leaf or romaine)
Optional: mixed greens, spinach, or arugula
Why It Works: The foundation of the salad is made up of fresh, crisp lettuce, providing a light and crunchy texture. Lettuce is low in calories and high in water content, making it a hydrating and refreshing base. It also offers a dose of fiber, which helps with digestion and keeps you feeling satisfied without adding excess calories.

Green leafy vegetables are a powerhouse of nutrients, including vitamins A and K, and antioxidants that help protect your body from inflammation and oxidative stress. The subtle flavor of the lettuce allows the other components of the salad to stand out.

Pro Tip: For added texture and flavor, mix in some peppery arugula or baby spinach, which also provides additional nutrients like iron and folate.

4. Cherry Tomatoes
Ingredients:

Cherry tomatoes (halved)
Salt and pepper
Why It Works: Cherry tomatoes bring a burst of sweetness and acidity to the salad, balancing the richness of the steak and avocado. These small, juicy tomatoes are packed with vitamins C and K, as well as lycopene, a powerful antioxidant that supports heart health and may help reduce the risk of certain cancers.

The pop of color from the tomatoes adds visual appeal to the plate, making it not only nutritious but also beautiful to serve. The acidity of the tomatoes complements the savory steak and creamy avocado, adding a refreshing contrast in each bite.

Pro Tip: Lightly season the tomatoes with salt and pepper to enhance their natural sweetness and flavor.

5. Onion Rings
Ingredients:

White or red onion, thinly sliced
Why It Works: Onions add a crisp, sharp bite to the salad, which contrasts well with the other more tender components. Whether using white or red onions, their slightly sweet and pungent flavor complements the richness of the steak and avocado. Onions also provide a dose of vitamin C and antioxidants, making them a great addition to this nutrient-dense meal.

Pro Tip: If you prefer a milder onion flavor, soak the sliced onions in cold water for about 10 minutes before adding them to the salad. This will reduce their pungency while keeping their crisp texture.

Nutritional Benefits of the Steak Salad
This steak salad offers a perfect balance of nutrients, making it both satisfying and healthy:

Protein: The steak provides a high-quality protein source, essential for muscle repair and overall health.
Healthy Fats: The avocado adds heart-healthy fats, which help with satiety and the absorption of fat-soluble vitamins.
Vitamins and Antioxidants: The fresh vegetables (lettuce, tomatoes, and onions) provide an array of vitamins, antioxidants, and fiber, supporting immune function and digestive health.
Low in Carbohydrates: This salad is low in refined carbohydrates, making it a great option for those on low-carb or ketogenic diets while still providing essential nutrients from vegetables.
How to Make the Perfect Steak Salad at Home
Grill the Steak: Season your choice of steak (ribeye, flank, or sirloin) with olive oil, salt, pepper, and garlic powder. Grill over medium-high heat until cooked to your desired doneness (about 4-5 minutes per side for medium-rare). Let it rest for 5 minutes before slicing thinly.

Prepare the Vegetables: While the steak is grilling, slice the avocado, halve the cherry tomatoes, and thinly slice the onions. Wash and dry the lettuce or mixed greens.

Assemble the Salad: In a large bowl or plate, arrange the lettuce, cherry tomatoes, avocado slices, and onion rings. Top with the grilled steak slices.

Dress the Salad: Lightly drizzle olive oil and a splash of lemon juice or balsamic vinegar over the salad. Season with salt and pepper to taste.

Final Thoughts: A Hearty and Healthy Steak Salad
This steak salad is not only visually stunning but also packed with nutrients that make it a well-balanced meal. The combination of juicy, flavorful steak, creamy avocado, fresh vegetables, and a light dressing creates a dish that is satisfying, filling, and nutrient-dense. Whether you’re looking for a protein-packed lunch or a light yet hearty dinner, this salad hits all the right notes. Plus, it’s easy to customize by adding your favorite greens or topping it with extras like feta cheese or a boiled egg.

Give this steak salad a try and enjoy a healthy, delicious meal that leaves you feeling full and energized!

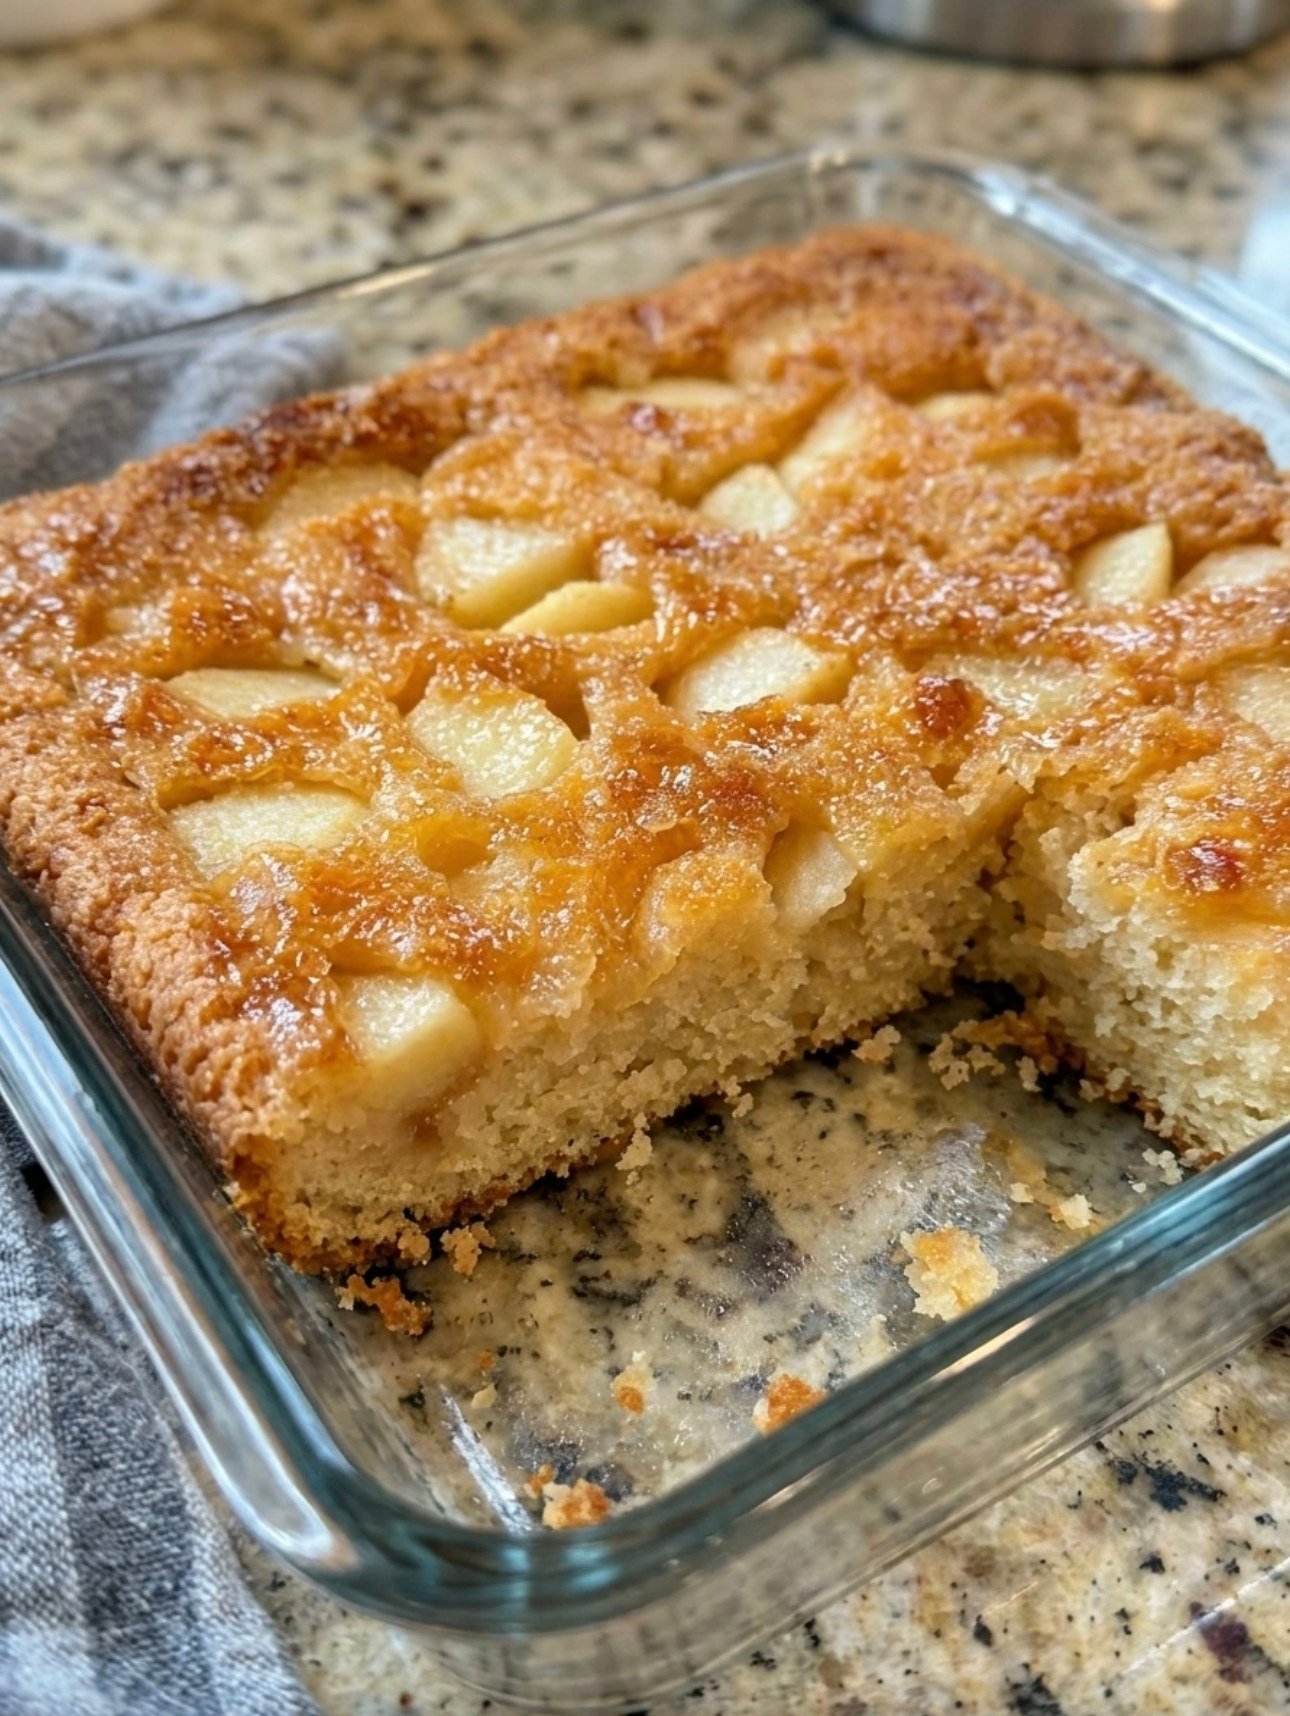
2-Ingredient Ice Cream Bread

2-Ingredient Ice Cream Bread

Yields: 1 Loaf | Prep time: 5 mins | Bake time: 40–45 mins

Ingredients

  • 2 cups (approx. 475ml) Full-fat vanilla ice cream (slightly softened)

  • 1 ½ cups (approx. 190g) Self-rising flour

  • Note: It is essential to use full-fat ice cream (not “light” or “low-fat”) because the fat content acts as the shortening for the bread.


Detailed Instructions

1. Prep the Oven and Pan

Preheat your oven to 350°F (175°C). Grease a standard loaf pan thoroughly with butter or non-stick spray, or line it with parchment paper for easy removal.

2. Soften the Ice Cream

Allow your ice cream to sit at room temperature for about 10–15 minutes until it is soft and easily scoopable, but not completely melted into a liquid.

3. Mix the Batter

In a large mixing bowl, combine the softened ice cream and the self-rising flour. Stir gently with a spatula just until the flour is incorporated. Do not overmix, as this will result in a tough, dense bread rather than a fluffy one.
4. Transfer and Smooth

Pour the batter into your prepared loaf pan. Use a spatula to smooth the top so it bakes evenly.

5. Bake to Perfection

Place the pan on the center rack and bake for 40–45 minutes. The bread is done when the top is golden brown and a toothpick inserted into the center comes out clean.

6. Cool and Serve

Let the bread cool in the pan for about 10 minutes before transferring it to a wire rack. This bread is best served warm with a little bit of butter or a drizzle of honey.


Why This Recipe Works

  • Self-rising flour already contains the baking powder and salt needed for the bread to rise.

  • Full-fat ice cream provides the liquid, sugar, and fat (cream), which are the core components of a traditional quick-bread batter.

Creative Variations

  • Chocolate Chip: Fold in 1/2 cup of chocolate chips before baking.

  • Berry Swirl: Use strawberry ice cream instead of vanilla for a fruity pink loaf.

  • Birthday Cake: Use “Funfetti” or cake-batter flavored ice cream and add extra sprinkles on top.

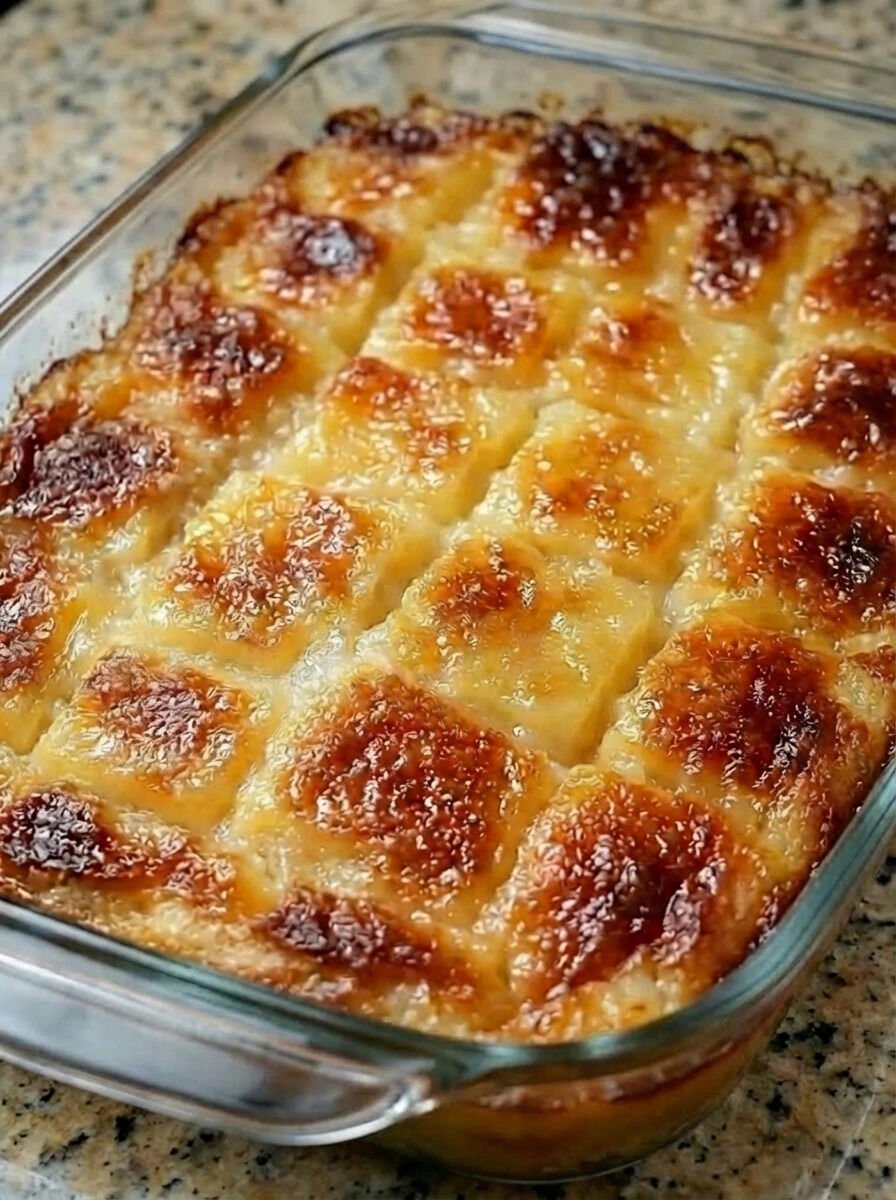
Soft Cheese-Stuffed Bread Boats with Herb Tomato Glaze

Soft Cheese-Stuffed Bread Boats with Herb Tomato Glaze

Yields: 10–12 Boats | Prep time: 20 mins (+1 hour rising) | Cook time: 20–25 mins

Ingredients

The Dough:

  • 200 ml Lukewarm milk

  • 200 ml Lukewarm water

  • 1 tbsp Sugar

  • 7 g (1 packet) Active dry yeast

  • 600-650 g All-purpose flour

  • 1 tsp Salt

  • 50 ml Vegetable oil

The Filling:

  • 300 g Feta cheese or soft white cheese, crumbled

  • 1 cup Shredded mozzarella

  • 1 Egg (optional, to bind)

  • Fresh parsley, chopped

The Herb Tomato Glaze:

  • 2 tbsp Tomato paste

  • 3 tbsp Olive oil

  • 1 tsp Dried oregano or Italian herbs

  • 1 clove Garlic, minced

  • Fresh parsley, finely chopped


Detailed Instructions

1. Prepare the Yeast Base

  • In a large mixing bowl, combine the 200 ml lukewarm milk, 200 ml lukewarm water, and 1 tbsp sugar.

  • Sprinkle 7 g of active dry yeast over the top and stir gently.

  • Let the mixture sit for about 5–10 minutes until it becomes foamy.

2. Mix and Knead the Dough

  • Add 50 ml vegetable oil and 1 tsp salt to the yeast mixture.

  • Gradually add 600-650 g of flour, mixing until a soft dough forms.

  • Knead the dough on a floured surface for 8–10 minutes until it is smooth and elastic.

3. First Rise

  • Place the dough in a lightly greased bowl and cover it with a warm, damp cloth.

  • Let it rise in a warm, draft-free spot for 1 hour or until it has doubled in size.

4. Shape the Boats

  • Punch the dough down to release air and divide it into 10–12 equal pieces.

  • Roll each piece into an oval shape.

  • Place a generous amount of the cheese filling (the crumbled feta, mozzarella, and parsley) in the center.

  • Fold the edges of the dough over the cheese and twist the ends to create a “boat” or twisted loaf shape.

5. Apply the Herb Tomato Glaze

  • Whisk together the 2 tbsp tomato paste, 3 tbsp olive oil, 1 tsp herbs, 1 clove minced garlic, and fresh parsley.
  • Use a pastry brush to coat the tops of the dough boats generously with this savory glaze.

6. Bake

  • Preheat your oven to 375°F (190°C).

  • Arrange the boats on a baking sheet lined with parchment paper.

  • Bake for 20–25 minutes until the bread is golden brown and the cheese is melted and bubbly.

7. Serve

  • Let the bread boats cool for a few minutes so the cheese sets slightly.

  • These are best served warm when the bread is at its softest.

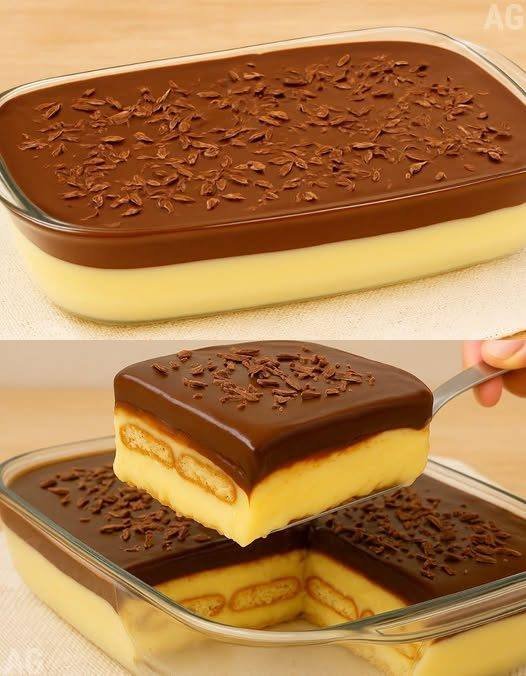
5-Minute Chocolate Wafer Layer Cake Yields: 6–8 Serving

5-Minute Chocolate Wafer Layer Cake

Yields: 6–8 Servings | Prep time: 5 mins | Cook time: 5 mins | Chill time: 1–2 hours

Ingredients

The Base:

  • 350 g Chocolate or vanilla wafers

The Chocolate Cream:

  • 500 ml (2 cups) Milk

  • 120 ml (1/2 cup) Whipping cream

  • 50 g (1/4 cup) Granulated sugar

  • 40 g (3 tbsp) Corn starch

  • 40 g (3 tbsp) Bitter cocoa powder

  • 1 tsp Vanilla extract (optional)


Detailed Instructions

1. Prepare the Cream Base

In a medium saucepan (off the heat), whisk together the sugar, corn starch, and bitter cocoa powder until no large lumps remain. Gradually pour in the milk and whipping cream, whisking constantly to create a smooth liquid.


2. Thicken the Custard

Place the saucepan over medium heat. Stir continuously with a whisk or spatula to prevent the bottom from scorching. Cook for about 3–5 minutes until the mixture thickens into a glossy, pudding-like consistency. Remove from heat immediately.

3. Layer the Wafers

Line a small rectangular baking dish or loaf pan with parchment paper or plastic wrap for easy removal. Spread a thin layer of the hot chocolate cream at the bottom. Arrange a single layer of wafers over the cream.

4. Build the Cake

Continue alternating layers: spread a generous layer of chocolate cream, followed by a layer of wafers. Repeat this process until you have used all the ingredients, finishing with a smooth layer of chocolate cream on top.

5. Chill and Set

Allow the cake to cool to room temperature, then place it in the refrigerator for at least 1–2 hours. This allows the wafers to slightly soften and the cream to set firmly, making it easy to slice.

6. Serve

Lift the cake out of the pan using the parchment paper edges. Dust the top with extra cocoa powder or chocolate shavings if desired. Slice into squares and enjoy!


Why This Recipe Works

The hot cream slightly softens the crisp wafers, turning them into a texture similar to delicate cake layers, while the corn starch ensures the chocolate filling is stable and rich.

Creamy Apple Coleslaw

Creamy Apple Coleslaw

Yields: 6–8 Servings | Prep time: 15 mins | Chill time: 30 mins

Ingredients

The Dressing:

  • 1/2 cup Mayonnaise

  • 1/2 cup Sour cream or Greek yogurt

  • 1 tablespoon Fresh lime juice

  • 1 teaspoon Vinegar (white or apple cider)

  • 1 teaspoon Granulated sugar

  • Salt and pepper to taste

The Slaw Base:

  • 1 pound Coleslaw mix (shredded cabbage and carrots)

  • 1 small bunch Scallions, chopped

  • 1 Granny Smith apple, chopped fine

  • 1 Red apple (such as Gala or Fuji), chopped fine


Detailed Instructions

1. Whisk the Creamy Dressing

In a large mixing bowl, combine the mayonnaise, sour cream (or Greek yogurt), lime juice, vinegar, and sugar. Whisk vigorously until the dressing is completely smooth and the sugar has dissolved. Season with a pinch of salt and pepper.

2. Prep the Apples

Core and finely chop both the Granny Smith and red apple. Keeping the skins on provides a beautiful pop of color to the salad.

Pro Tip: To prevent the apples from browning while you prep the rest of the ingredients, you can toss them directly into the prepared dressing as soon as they are chopped.

3. Combine the Ingredients

Add the 1-pound bag of coleslaw mix, the chopped scallions, and the chopped apples into the large bowl containing the dressing.

4. Toss and Coat

Using large spoons or salad tongs, toss everything together until every shred of cabbage and piece of apple is evenly coated in the creamy dressing. Taste and add more salt or pepper if needed.

5. Chill Before Serving

For the best flavor and texture, cover the bowl and refrigerate for at least 30 minutes before serving. This allows the cabbage to soften slightly and the flavors of the lime and apple to meld into the dressing.


Why This Recipe Works

The acidity from the lime juice and vinegar prevents the apples from oxidizing (turning brown) while balancing the richness of the mayonnaise and sour cream.

Lemon Yogurt Blueberry Loaf Cake

Lemon Yogurt Blueberry Loaf Cake

This loaf cake is soft, moist, and lightly flavored with lemon. Yogurt gives the cake a tender texture, while blueberries add gentle sweetness in every slice. It is suitable for breakfast, tea time, or dessert.


Yield

1 loaf (8–10 slices)

Time

  • Preparation: 15 minutes

  • Baking: 50–60 minutes

  • Cooling: 30 minutes


Ingredients

Dry Ingredients

  • 1 cup (120 g) all-purpose flour

  • ½ teaspoon baking powder

  • ½ teaspoon baking soda

  • ⅛ teaspoon salt


Wet Ingredients

  • 2 oz (57 g) unsalted butter, softened

  • ⅔ cup (134 g) granulated sugar

  • 1 large egg (room temperature)

  • ½ cup (118 ml) plain Greek yogurt

  • ½ teaspoon vanilla extract

  • Zest of 1 lemon (optional, for aroma and flavor)


Mix-ins

  • 1 cup blueberries (fresh or frozen)


Lemon Glaze (Optional)

  • ½ cup powdered sugar

  • 1 tablespoon fresh lemon juice


Instructions

1. Prepare the Oven and Pan

Preheat the oven to 350°F (175°C).
Grease a standard loaf pan with butter or line it with parchment paper, allowing extra paper to hang over the sides for easy lifting.


2. Combine Dry Ingredients

In a medium bowl, whisk together the flour, baking powder, baking soda, and salt.
Set aside.


3. Cream Butter and Sugar

In a large mixing bowl, beat the softened butter and sugar together until the mixture looks pale and fluffy.
This step helps create a soft, even crumb in the cake.


4. Add Egg and Flavoring

Add the egg and mix until fully blended.
Stir in the vanilla extract and lemon zest (if using).


5. Add Yogurt and Dry Ingredients

Add the dry ingredients to the batter in two parts, alternating with the yogurt.
Mix gently and stop as soon as everything is combined.
Avoid overmixing to keep the cake tender.


6. Fold in Blueberries

If using fresh blueberries, gently rinse and dry them first.
If using frozen blueberries, use them directly without thawing.

Lightly fold the blueberries into the batter using a spatula.

Helpful Tip: Toss the blueberries with 1 teaspoon of flour before adding them. This helps distribute them evenly throughout the loaf.


7. Bake

Pour the batter into the prepared loaf pan and smooth the surface.
Bake for 50–60 minutes, or until a toothpick inserted into the center comes out clean.

If the top browns too quickly, loosely cover it with foil during the last 10 minutes.


8. Cool the Cake

Allow the loaf to cool in the pan for 10 minutes.
Remove it carefully and place it on a wire rack to cool completely before glazing.


9. Prepare and Add the Glaze

In a small bowl, mix powdered sugar with lemon juice until smooth.
Drizzle the glaze over the cooled loaf and allow it to set for a few minutes.


Storage

  • Store at room temperature in a covered container for up to 2 days

  • Refrigerate for up to 5 days

  • Can be sliced and frozen for longer storage

Creamy No-Bake Dessert Roll

Creamy No-Bake Dessert Roll

This no-bake dessert is smooth, lightly sweet, and easy to prepare. It is chilled to set and sliced before serving.


Yield

6–8 servings

Time

  • Preparation: 5 minutes

  • Chilling: 2 hours or longer


Ingredients

  • 500 g mascarpone cheese or cream cheese, room temperature

  • 250 ml heavy whipping cream, chilled

  • 100 g powdered sugar (adjust to taste)

  • 1 teaspoon vanilla extract

  • Cocoa powder or cinnamon, for topping

Optional

  • Ladyfingers or crushed biscuits, for added texture


Instructions

1. Whip the Cream

Place the cold whipping cream in a chilled bowl.
Beat until thick and able to hold its shape.
Keep chilled while preparing the rest of the mixture.


2. Prepare the Cream Base

In a separate bowl, mix the mascarpone or cream cheese with powdered sugar and vanilla.
Stir until smooth and free of lumps.


3. Combine the Mixtures

Add the whipped cream to the cheese mixture in portions.
Fold gently with a spatula until fully combined and light in texture.


4. Shape the Roll

Lay a large sheet of plastic wrap on a flat surface.
Spread the cream mixture evenly into a rectangle.

If using biscuits, place them in a line along the center.

Using the plastic wrap for support, roll the mixture carefully into a log shape.
Twist the ends of the wrap to hold the shape securely.


5. Chill

Place the wrapped roll in the freezer for 1–2 hours or in the refrigerator for at least 4 hours until firm enough to slice.


6. Serve

Remove the wrap and place the roll on a serving plate.
Dust the top evenly with cocoa powder or cinnamon.
Slice with a sharp knife and serve chilled.


Storage

Store covered in the refrigerator for up to 2 days.

Flourless Chocolate Banana Oat Bread

Flourless Chocolate Banana Oat Bread

This loaf is soft, lightly chocolate-flavored, and naturally sweetened with ripe bananas. It is made without flour and works well as a simple baked snack or breakfast option.


Yield

1 loaf

Time

  • Preparation: 15 minutes

  • Baking: 35–40 minutes


Ingredients

  • 120 g (1½ cups) rolled oats

  • 250 ml (1 cup) hot milk (dairy or plant-based)

  • 2 medium ripe bananas

  • 2 large eggs

  • 3–4 tablespoons unsweetened cocoa powder

  • 1 teaspoon baking powder (optional)

  • Pinch of salt

Optional Topping

  • Chopped walnuts

  • Melted dark chocolate without added sugar


Instructions

1. Soak the Oats

Place the rolled oats in a large bowl.
Pour the hot milk over the oats, stir well, and let sit for 10 minutes.
This step softens the oats and helps create a smooth batter.


2. Prepare the Bananas

Peel the bananas and mash them in a separate bowl until smooth.
Fully ripe bananas work best for texture and natural sweetness.


3. Combine Wet Ingredients

Add the eggs to the mashed bananas and mix until evenly combined.
Pour this mixture into the bowl with the soaked oats and stir gently.


4. Add Dry Ingredients

Sift in the cocoa powder, baking powder (if using), and salt.
Fold everything together until the batter is evenly mixed and uniform in color.


5. Prepare the Pan

Preheat the oven to 350°F (180°C).
Line a loaf pan with parchment paper or lightly grease it.
Pour the batter into the pan and smooth the surface.


6. Bake

Place the pan in the center of the oven.
Bake for 35–40 minutes, or until a toothpick inserted into the center comes out clean.


7. Cool and Serve

Remove the loaf from the oven and allow it to cool in the pan for 10 minutes.
Lift out and cool completely before slicing.
If desired, drizzle with melted dark chocolate and sprinkle with walnuts.


Storage

Store in an airtight container in the refrigerator for up to 4 days.
Bring to room temperature before serving for best texture.

Savory Baked Potato & Egg Cups

Savory Baked Potato & Egg Cups

These baked potato and egg cups are lightly crisp on the outside and soft inside. They are suitable for breakfast, brunch, or a light meal.


Yield

12 cups

Time

  • Preparation: 15 minutes

  • Baking: 25–30 minutes


Ingredients

  • 4 large potatoes, peeled and grated

  • 3 large eggs

  • 1 cup shredded cheese (cheddar, mozzarella, or Swiss)

  • 2 green onions, finely chopped

  • ½ cup finely diced bell peppers or cooked ham (optional)

  • ½ teaspoon salt

  • ¼ teaspoon black pepper

  • ½ teaspoon garlic powder

  • ½ teaspoon paprika

  • Butter or oil, for greasing


Instructions

1. Prepare the Potatoes

Peel the potatoes and grate them using the large holes of a grater.
Place the grated potatoes into a clean kitchen towel or cheesecloth and squeeze firmly to remove as much liquid as possible. This step helps the cups bake evenly and hold their shape.


2. Mix the Ingredients

In a large bowl, lightly beat the eggs.
Add the grated potatoes, shredded cheese, green onions, and optional bell peppers or ham. Mix gently to combine.


3. Season the Mixture

Add salt, black pepper, garlic powder, and paprika.
Stir until the potatoes are evenly coated with the egg and seasoning.


4. Prepare the Muffin Tin

Preheat the oven to 400°F (200°C).
Grease a 12-cup muffin tin evenly with butter or oil.

Spoon the potato mixture into each cup. Press gently so the mixture is compact but not tightly packed.


5. Bake

Place the muffin tin on the center rack of the oven.
Bake for 25–30 minutes, until the edges are golden and the tops feel firm.


6. Rest and Serve

Remove the pan from the oven and let the cups rest for 5 minutes.
Run a knife around the edges and lift them out carefully.


Serving Ideas

Serve warm on their own or with plain yogurt or sour cream mixed with fresh herbs.

Fresh Vegetable Juice Blend

Fresh Vegetable Juice Blend

A refreshing vegetable juice made from simple, fresh ingredients. This drink is intended for general nourishment and hydration as part of a balanced diet.


Yield

Approximately 2 servings

Preparation Time

10 minutes


Ingredients

  • 5 medium carrots

  • 8 celery ribs

  • 1 medium cucumber

  • 1 beetroot

  • ¼ lemon (peeled)

  • 1-inch piece fresh ginger


Instructions

1. Wash and Prepare the Vegetables

Rinse the carrots, celery, and cucumber thoroughly under running water to remove dirt.

Scrub the beetroot well. You may leave the skin on if it is clean, or peel it for a milder taste.

Peel the ginger using the edge of a spoon.

Remove the outer yellow peel from the lemon and keep the inner white portion.


2. Cut for Juicing

Cut the carrots, celery, and cucumber into pieces that fit easily into your juicer.

Cut the beetroot into smaller chunks to help it process smoothly.


3. Juice the Ingredients

Turn on the juicer and feed the ingredients through gradually.

Alternate between firm vegetables (carrots, beetroot) and softer items (cucumber, lemon, ginger) to ensure smooth processing.


4. Mix and Serve

Stir the juice well to combine all flavors evenly.

Pour into glasses and serve immediately. Ice may be added if desired.


Storage

Fresh juice is best consumed right away. If needed, store in a sealed glass container in the refrigerator for up to 24 hours. Shake well before drinking.

Classic Homemade Fluffy Doughnuts

Classic Homemade Fluffy Doughnuts

Soft, light doughnuts with a tender interior and a lightly crisp exterior. These are made with simple pantry ingredients and are best enjoyed fresh.


Yield

12–15 doughnuts

Time

  • Preparation: 20 minutes

  • Rising: 1½ hours

  • Cooking: 15 minutes


Ingredients

Dough

  • 3 cups all-purpose flour

  • 1 cup whole milk, warm (not hot)

  • 7 g active dry yeast

  • 5 tablespoons granulated sugar

  • 2 tablespoons unsalted butter, softened

  • 1 large egg, room temperature

  • ½ teaspoon salt

Frying and Coating

  • Vegetable oil, for frying

  • Granulated sugar or powdered sugar, for coating


Instructions

1. Prepare the Yeast

Pour the warm milk into a small bowl. Add 1 tablespoon of the sugar and stir to dissolve. Sprinkle the yeast over the milk and stir gently. Let it rest for 5–10 minutes until the mixture looks foamy. This shows the yeast is ready.


2. Mix the Dough

In a large bowl, combine the flour, remaining sugar, and salt. Make a well in the center. Add the egg, softened butter, and the yeast mixture. Stir with a spoon until a soft, rough dough forms.


3. Knead the Dough

Transfer the dough to a lightly floured surface.

  • Knead by hand for 8–10 minutes until smooth and elastic

  • Or knead with a mixer and dough hook for about 5 minutes

The dough should feel soft and slightly tacky but not sticky.


4. First Rise

Place the dough in a lightly greased bowl. Cover and let it rest in a warm place for about 1 hour, or until doubled in size.


5. Shape the Doughnuts

Gently press the dough to release air. Roll it out to about ½-inch thickness on a floured surface.

Cut doughnut shapes using a cutter or a large glass with a smaller cutter for the center. Place each doughnut on a small piece of parchment paper. Cover and let rest for 30 minutes.


6. Fry the Doughnuts

Heat about 2 inches of oil in a heavy pot to 350°F (175°C).

Carefully lower the doughnuts into the oil. Remove the parchment paper once it releases.

Fry for 1–2 minutes per side until evenly golden.

Transfer to paper towels to drain excess oil.


7. Coat and Serve

While still warm, roll the doughnuts in granulated sugar or dust with powdered sugar.

Serve fresh.


Helpful Notes

  • Keep oil temperature steady for even cooking

  • Do not overcrowd the pot

  • Best enjoyed the same day

Fluffy Sparkling Water Pizza Buns

Fluffy Sparkling Water Pizza Buns

Yield: 12–15 buns
Preparation Time: 20 minutes + 1 hour rising
Cooking Time: 15–20 minutes


Ingredients

Dough

  • 750 g (5¾ cups) all-purpose flour, plus extra for dusting

  • 350 ml (1½ cups) sparkling water, room temperature

  • 50 g fresh yeast

  • 100 ml (7 tablespoons) butter, melted and slightly cooled

  • 3 large eggs

  • 1 teaspoon salt

Toppings (Optional)

  • Tomato sauce or marinara

  • Shredded mozzarella cheese

  • Dried oregano or Italian seasoning


Instructions

1. Prepare the Yeast

In a small bowl, crumble the fresh yeast into 100 ml of the sparkling water. Stir gently and leave for 5–10 minutes until dissolved and lightly foamy.

2. Mix Wet Ingredients

In a large bowl, whisk the eggs with the remaining sparkling water and melted butter. Add the yeast mixture and mix well.

3. Form the Dough

Gradually add the flour and salt to the wet mixture. Mix until a soft dough forms.

4. Knead

Knead the dough on a lightly floured surface for 8–10 minutes, or until smooth and elastic. The dough should be soft but not sticky.

5. First Rise

Place the dough in a lightly greased bowl. Cover with a clean cloth and let rise in a warm place for about 1 hour, or until doubled in size.

6. Shape the Buns

Gently press down the dough to release air.
Divide into equal portions and shape into balls.
Place on a baking tray lined with parchment paper.
Flatten each ball slightly to form a shallow center.

7. Add Toppings and Bake

Preheat the oven to 200°C (400°F).
Spread a small amount of tomato sauce on each bun.
Top with mozzarella and sprinkle with dried herbs.
Bake for 15–20 minutes, until golden and fully cooked.


Helpful Notes

  • Use room-temperature sparkling water for best dough texture.

  • Fresh yeast can be replaced with 18 g active dry yeast if needed.

  • Serve warm or allow to cool before storing.

Healing Stomach-Friendly Vegetable Soup

Healing Stomach-Friendly Vegetable Soup

 Description

This nourishing vegetable soup is light, soothing, and packed with fiber, vitamins, and minerals. It’s ideal for sensitive digestion, bloating, or when you want something warm and comforting day or night. The vegetables simmer gently to create a flavorful, naturally golden broth that feels like medicine for the stomach.

 Ingredients

For the Soup:

  • onion, chopped

  • 2 tbsp olive oil

  • leeks, chopped

  • 2 stalks celery, chopped

  • chili pepper, minced (optional)

  • 1 large carrot, sliced

  • 1 medium zucchini, chopped

  • 3–4 potatoes, peeled and diced

  • 1 handful fresh parsley, chopped

  • 1 tsp turmeric

  • ½ tsp black pepper

  • Salt to taste

  • 5–6 cups water or vegetable broth

 Instructions

  1. Heat olive oil in a large pot over medium heat.

  2. Add onion and sauté until soft and translucent.

  3. Stir in leeks, celery, and chili pepper; cook 3–4 minutes.

  4. Add carrots, zucchini, and potatoes. Mix well.

  5. Pour in water or broth and bring to a gentle boil.

  6. Add turmeric, salt, and black pepper.

  7. Reduce heat and simmer 25–30 minutes, until vegetables are tender.

  8. Stir in fresh parsley, adjust seasoning, and serve warm.

Notes & Tips

  • Chop vegetables evenly for uniform cooking

  • For extra digestion support, add ½ tsp grated ginger

  • Blend partially if you prefer a thicker texture

  • Skip chili if your stomach is very sensitive

  • Tastes even better the next day

 Servings

  • Makes 4–6 servings

Nutritional Info (per serving, approx.)

  • Calories: 120

  • Carbohydrates: 20 g

  • Fiber: 4 g

  • Fat: 4 g

  • Protein: 3 g

  • Sodium: Low (adjustable)

 Health Benefits

  • Supports digestion and gut health

  • Anti-inflammatory (turmeric + olive oil)

  • Hydrating and easy to digest

  • Helps with bloating and stomach discomfort

  • Naturally vegan, gluten-free, and low-fat

 Q & A

Q: Can I eat this soup every day?
A: Yes! It’s balanced, light, and safe for daily consumption.

Q: Is this good for gastritis or IBS?
A: Very good—just omit chili and keep seasoning mild.

Q: Can I store it?
A: Refrigerate for up to 4 days or freeze for 2 months.

Q: Can I add protein?
A: Yes—lentils, chickpeas, or shredded chicken work well.

Keto Egg Roll Wrap

Keto Egg Roll Wrap
❤️Ingredients

🍓 1 tablespoon sesame oil
12 ounces of ground pork
3 tablespoons fresh ginger grated
🍒3 teaspoon fresh garlic minced
1 ½ cup green cabbage, shredded
¼ cup carrot shredded
¼ cup gluten-free soy sauce
8 large eggs
½ teaspoon salt
1 teaspoon avocado oil
Instructions

Measure out and prepare all of the ingredients.
In a frying pan over medium heat, add the sesame oil along with the ground pork, grated ginger, and minced garlic.
Stir together and break up the meat until the pork starts to brown.
Add the shredded cabbage, shredded carrots, and gluten-free soy sauce. Stir together and let cook for 3-5 minutes.
In a large bowl, crack the eggs. Season with salt.
Whisk them together until they are combined well.
In a frying pan over medium heat, add the avocado oil. Pour the egg mixture in until it fills up the pan. Let this sit and cook for about 1-2 minutes.
Carefully flip over the egg wrap and let this side cook for 1-2 minutes. Move to a plate.
Spoon the pork and vegetable mixture onto the egg wrap.
Carefully roll the egg wrap like a burrito. Roll it over the pork, then tuck both of the sides in and continue to roll.
Serve and enjoy!

Oven-Baked Garlic Herb Chicken & Vegetables

Oven-Baked Garlic Herb Chicken & Vegetables

Prep time: 15 mins | Cook time: 30-35 mins | Serves: 4

Ingredients

The Base:

  • Chicken: 1.5 lbs (approx. 3 large) boneless, skinless chicken breasts.

  • Potatoes: 1 lb baby gold potatoes, quartered.

  • Green Beans: 1/2 lb fresh green beans, trimmed.

  • Garnish: Fresh parsley or chives, chopped.

The Garlic Herb Sauce:

  • 1/4 cup olive oil

  • 3 tbsp melted butter

  • 4 cloves garlic, minced

  • 1 tsp dried oregano

  • 1 tsp dried thyme

  • 1/2 tsp onion powder

  • 1/2 tsp smoked paprika (for that golden color)

  • Salt and black pepper to taste

  • Optional: Red pepper flakes (for the red bits seen in the photo)


Instructions

  1. Prep the Oven and Pan:

    Preheat your oven to 400°F (200°C). Lightly grease a large 9×13 inch glass baking dish or a rimmed sheet pan.

  2. Season the Vegetables:

    Place the quartered potatoes and trimmed green beans in the baking dish. Drizzle with half of the Garlic Herb Sauce. Toss well to ensure they are evenly coated, then push the vegetables to the sides to make room for the chicken in the center.

  3. Prepare the Chicken:

    Pat the chicken breasts dry with a paper towel. Place them in the center of the dish. Brush the remaining Garlic Herb Sauce generously over the chicken.

    Tip: For the look in the photo, you can pre-slice the chicken halfway through (hassleback style) or slice them fully after cooking. Slicing after cooking keeps them juicier!

  4. Bake:

    Place the dish in the oven. Roast for 25–30 minutes.

    • Check for doneness: The chicken is safe when it reaches an internal temperature of $165^\circ\text{F}$ ($74^\circ\text{C}$).

    • Check the potatoes: They should be fork-tender and slightly browned.

  5. Finish and Serve:

    Remove from the oven and let the chicken rest for 5 minutes (this keeps it moist). If you didn’t slice it before, slice it now. Garnish with fresh parsley and a squeeze of fresh lemon juice if desired.


Tips for Success

  • Even Cooking: If your potatoes are large, start them in the oven 10 minutes before adding the chicken and green beans so everything finishes at the same time.

  • Crispy Texture: If you prefer crispier potatoes, use a large metal sheet pan instead of a glass dish; metal conducts heat faster for better browning.

Soft Butter Cake

Soft Butter Cake

A classic butter cake with a tender crumb and rich flavor. This cake is soft, moist, and perfect for serving plain or with tea and coffee.


Ingredients

  • 1¾ cups (230 g) cake flour

  • ½ teaspoon baking powder

  • ¼ teaspoon salt

  • 1 cup (250 g) unsalted butter, softened

  • 1 cup (200 g) caster sugar

  • 4 large eggs, room temperature

  • 1 teaspoon vanilla extract

  • ¼ cup (59 ml) milk, room temperature


Instructions

1. Prepare the Pan
Preheat the oven to 170°C (340°F).
Grease a loaf pan and line it with parchment paper.

2. Mix Dry Ingredients
In a bowl, sift together the cake flour, baking powder, and salt. Set aside.

3. Cream Butter and Sugar
In a large bowl, beat the butter and sugar until pale, light, and fluffy. This takes about 3–4 minutes.

4. Add Eggs
Add the eggs one at a time, beating well after each addition. Scrape the bowl as needed.
Mix in the vanilla extract.

5. Add Dry Ingredients and Milk
Add the flour mixture in two additions, alternating with the milk.
Mix gently until just combined. Do not overmix.

6. Bake
Pour the batter into the prepared pan and smooth the top.
Bake for 45–55 minutes, or until a skewer inserted into the center comes out clean.

7. Cool
Let the cake cool in the pan for 10 minutes, then remove and cool completely on a wire rack.


Serving

Serve plain, dusted with powdered sugar, or with fruit and cream.

Aloe Vera and Cinnamon Wellness Drink

Aloe Vera and Cinnamon Wellness Drink

This is a simple natural wellness drink made with aloe vera and cinnamon to support overall body balance and daily nourishment. It is intended as a general health beverage, not a treatment or cure for any disease. Always consult a qualified healthcare professional before using herbal preparations.


Introduction

Aloe vera and cinnamon are commonly used in traditional wellness practices. They are valued for their antioxidant and soothing properties and are often included in routines that focus on general vitality, digestion, and daily well-being.


Ingredients

  • 1 large aloe vera leaf (clear gel only)

  • 1 cinnamon stick or 1 teaspoon ground cinnamon

  • 1 cup warm water

  • 1 tablespoon honey (optional)

  • 1 teaspoon lemon juice (optional)


Instructions

  1. Wash the aloe vera leaf thoroughly.

  2. Cut it open and scoop out the clear gel (about 2 tablespoons).

  3. In a small pot, simmer the cinnamon in water for 5–7 minutes.

  4. Allow the liquid to cool slightly, then remove the cinnamon.

  5. Add the aloe vera gel, honey, and lemon juice.

  6. Blend briefly until smooth.

  7. Consume in moderation as part of a balanced routine.


Tips

  • Use only the clear aloe gel and avoid the yellow sap.

  • Do not exceed recommended amounts of cinnamon.

  • Store leftovers in the refrigerator for up to 24 hours.

  • Pair with a balanced diet, hydration, and healthy lifestyle habits.

  • Consult a healthcare professional before adding new herbal drinks to your routine.

Lemon-Scented Yogurt Blueberry Loaf

Lemon-Scented Yogurt Blueberry Loaf

A moist, tangy cake perfect for tea time.


Ingredients

Dry Ingredients

  • 1 cup (120 g) all-purpose flour

  • ½ teaspoon baking powder

  • ½ teaspoon baking soda

  • ⅛ teaspoon salt

Wet Ingredients

  • 2 oz (57 g) unsalted butter, softened

  • ⅔ cup (134 g) granulated sugar

  • 1 large egg

  • ½ cup (118 ml) yogurt

  • ½ teaspoon vanilla extract

  • Optional: zest of 1 lemon

Fruit

  • 1 cup blueberries (fresh or frozen)


Instructions

Preparation:
Preheat the oven to 350°F (175°C). Grease an 8 × 4-inch loaf pan and line the bottom with parchment paper.

Mix Dry Ingredients:
In a bowl, whisk together the flour, baking powder, baking soda, and salt. Set aside. Lightly coat the blueberries with a small amount of this flour mixture to help prevent sinking.

Cream Butter and Sugar:
In a large bowl, beat the butter and sugar until light and fluffy. If using lemon zest, mix it in at this stage.

Add Egg and Yogurt:
Beat in the egg and vanilla until well combined. Stir in the yogurt until smooth.

Combine:
Gradually add the dry ingredients to the wet mixture, stirring gently just until combined. Avoid overmixing.

Fold in Berries:
Gently fold in most of the blueberries.

Bake:
Pour the batter into the prepared pan. Scatter the remaining blueberries over the top. Bake for 45–55 minutes, or until a toothpick inserted in the center comes out clean.

Cool:
Let cool in the pan for 10 minutes, then transfer to a wire rack to cool completely before slicing.


Optional Lemon Glaze

Mix ½ cup powdered sugar with 1 tablespoon lemon juice. Drizzle over the cooled loaf before serving.

Crispy Cocoa Peanut Clusters

Crispy Cocoa Peanut Clusters

No flour • No chocolate bars • No butter


Ingredients

  • 1 small egg

  • 100 g (½ cup) granulated sugar

  • 30 g (about 4 tablespoons) unsweetened cocoa powder

  • 150 g (about 1 cup) roasted peanuts (unsalted or lightly salted)

  • 40 g (about 1½ cups) crispy rice cereal

  • Optional: a pinch of salt


Instructions

Prep:
Preheat the oven to 300°F (150°C). Line a baking sheet with parchment paper or a silicone baking mat.

Whisk the Base:
In a mixing bowl, whisk the egg and sugar until pale and slightly frothy.

Add Cocoa:
Sift in the cocoa powder (and salt, if using). Whisk until smooth, dark, and glossy.

Fold in Crunch:
Add the roasted peanuts and crispy rice cereal. Gently fold until everything is evenly coated with the cocoa mixture.

Form the Clusters:
Spoon small mounds of the mixture onto the prepared baking sheet, keeping them compact so they hold together while baking.

Bake:
Bake for 15–18 minutes, until the coating sets and looks matte rather than shiny.

Cool Completely:
Allow the clusters to cool fully on the baking sheet. They will firm up and become crunchy as they cool.


Storage Tip

Store in an airtight container at room temperature. These clusters remain crunchy for up to one week.

Golden Cheesy Pizza Pull-Apart Ring

Golden Cheesy Pizza Pull-Apart Ring

This recipe uses a simple bubble-style method that makes it fun to pull apart and eat, perfect for sharing.


Ingredients

Dough:
1 can (16 oz) refrigerated biscuit dough or 1 lb fresh pizza dough

Cheese:
1½ cups shredded mozzarella cheese
½ cup shredded cheddar cheese

Toppings:
½ cup mini pepperoni slices or cooked Italian sausage crumbles


The Coating

  • 4 tablespoons melted unsalted butter

  • 1 teaspoon garlic powder

  • 1 tablespoon dried Italian seasoning (basil, oregano, parsley)

  • ¼ cup grated Parmesan cheese

Dip:
Marinara sauce, for serving


Instructions

Prep:
Preheat the oven to 375°F (190°C). Lightly grease a round baking dish or ring-shaped pan.

Cut the Dough:
Cut each biscuit into quarters. If using pizza dough, roll into small, bite-sized balls.

Butter Coating:
In a bowl, mix melted butter, garlic powder, and half of the Italian seasoning.

Assemble:
Toss the dough pieces in the butter mixture until coated. Arrange half of the dough in the prepared dish.

Layer:
Sprinkle half of the mozzarella, cheddar, and toppings over the dough. Add the remaining dough, followed by the rest of the cheese and toppings.

Finish:
Sprinkle Parmesan cheese and the remaining Italian seasoning on top.

Bake:
Bake for 20–25 minutes until golden brown and fully cooked.

Serve:
Let rest for 5 minutes before pulling apart. Serve warm with marinara sauce.


Tip for Best Shape

For a neat ring shape, crescent-style dough can be arranged in a circle, filled with cheese and toppings, then folded over toward the center before baking.

Refreshing Fruit and Milk Jelly Delight

Refreshing Fruit and Milk Jelly Delight

This Refreshing Fruit and Milk Jelly Delight is a beautiful, light, and luscious chilled dessert that layers vibrant fresh fruits with a delicate, creamy milk jelly. It’s a no-bake treat that’s perfect for summer gatherings, special occasions, or when you want to serve something elegant yet easy to prepare. Made with gelatin, milk, condensed milk, and a colorful medley of fruits like kiwi, banana, strawberries, and oranges, this dessert is both stunning to look at and refreshing to eat.

The final presentation is enhanced with a fruity glaze made from lemon juice, strawberry syrup, and fresh mint, giving the dish a glossy finish and an extra layer of flavor. Whether you’re entertaining guests or simply treating your family, this dessert is sure to impress with its delicate texture and sweet, fruity taste.


Preparation and Chilling Time

Prep Time: 25 minutes
Chilling Time: 3 hours
Total Time: 3 hours 25 minutes


Ingredients

For the Milk Jelly Base:

  • 60 g gelatin

  • 100 ml water (for blooming gelatin)

  • 400 ml milk

  • 200 ml sweetened condensed milk

  • 2 oranges (peeled and segmented)

  • 3 strawberries (sliced)

  • 2 kiwis (peeled and sliced)

  • 1 banana (sliced)

For the Glaze Topping:

  • 3 strawberries (blended or crushed)

  • Juice of ½ lemon

  • Water (to loosen the glaze)

  • Sugar (to taste)

  • Fresh mint leaves

  • Strawberry syrup (optional)


Step-by-Step Directions

  1. Bloom the Gelatin
    In a small bowl, mix the gelatin with cold water. Stir well and let it sit for 10–15 minutes until fully bloomed.

  2. Prepare the Milk Mixture
    In a saucepan, combine milk and condensed milk. Heat gently over medium heat, stirring constantly until warm but not boiling. Add the bloomed gelatin and stir until fully dissolved. Set aside to cool slightly.

  3. Prepare the Fruits
    Peel and segment the oranges, removing seeds and membranes. Slice the strawberries, kiwis, and banana into bite-sized pieces.

  4. Layer the Dessert
    In a mold or glass dish, layer the fruits evenly. Pour the slightly cooled milk gelatin mixture over the fruits, ensuring they are fully covered. Tap gently to release air bubbles.

  5. Chill the Jelly
    Refrigerate for at least 3 hours, or until fully set.

  6. Prepare the Glaze
    Blend or gently heat strawberries, lemon juice, water, sugar, and mint leaves until combined. Chill before use.

  7. Serve
    Unmold carefully onto a serving plate. Spoon the strawberry glaze over the top or serve on the side. Serve well chilled.

Grandma’s Crispy Parmesan Tornado Potatoes

Grandma’s Crispy Parmesan Tornado Potatoes

These potatoes are spiral-cut to hold onto as much Parmesan and panko as possible for maximum crunch.

Ingredients

  • 3 large yellow potatoes (Yukon Gold or Russet work best)

  • 60 g Panko breadcrumbs (for that signature crunch)

  • 50 g Grated Parmesan cheese

  • 1 tsp Salt

  • 1 tsp Garlic powder

  • 1 tsp Smoked paprika (for color and flavor)

  • 4 tbsp Butter, melted (or olive oil)

  • Wooden skewers

Instructions

  1. Prep the Potatoes: Wash the potatoes thoroughly. You can peel them if you prefer, but leaving the skin on adds extra nutrients and texture.

  2. The Spiral Cut:

    • Push a wooden skewer through the center of each potato lengthwise.

    • Take a sharp knife and cut at a slight angle until you hit the skewer.

    • Rotate the potato slowly, keeping the knife steady against the skewer to create one continuous spiral.

    • Gently pull the potato slices apart along the skewer to create gaps.

  3. Seasoning Mix: In a shallow dish, combine the Panko breadcrumbs, Parmesan cheese, salt, garlic powder, and paprika. Mix well.

  4. Coat the Potatoes: Brush each potato generously with the melted butter, making sure to get inside the spirals. Roll the buttered potatoes in the breadcrumb mixture, pressing lightly so the coating sticks to every surface.

  5. Baking:

    • Preheat your oven to 200°C (400°F).

    • Place the skewers over a baking dish so the potatoes are “hanging” (this allows air to circulate and makes them crispy all around), or lay them on a parchment-lined tray.

    • Bake for 35–45 minutes or until the potatoes are tender on the inside and deep golden brown on the outside.

Salty Garlic Roasted Chicken & Potatoes

It sounds like you have a wonderful, time-tested base for this meal! The combination of roasted garlic and maple syrup creates a fantastic sweet-and-savory glaze.

Based on your request for a “salty” version and your note to always provide the full recipe, I have adjusted the seasoning profile. I’ve increased the salt slightly and suggested using salted butter to lean into that savory-sweet contrast.


Salty Garlic Roasted Chicken & Potatoes

A savory-forward version of the classic maple-glazed roast.

  • Prep time: 15 minutes

  • Cook time: 60 minutes

  • Servings: 6

Ingredients

  • 1/4 cup salted butter (using salted butter enhances the “salty” profile)

  • 6 chicken leg quarters, split into drumsticks and thighs (12 pieces total)

  • 8 large Yukon Gold potatoes, cut into 1.5-inch chunks (increased for your preference)

  • 24 cloves garlic, unpeeled

  • 1 ½ teaspoons sea salt (plus more to taste for the finishing)

  • 1 teaspoon cracked black pepper

  • 1/4 cup maple syrup

Directions

  1. Preheat & Prep Pan: Preheat your oven to 400°F (200°C). Place the butter in a large roasting pan and put it in the oven for a few minutes until melted. Swirl the pan to ensure the bottom is fully coated.

  2. Season the Base: Place the chicken pieces, potato chunks, and unpeeled garlic cloves into the pan. Sprinkle generously with the sea salt and black pepper. Toss everything thoroughly in the melted butter until well-coated. Arrange the chicken skin-side up.

  3. First Roast: Bake for 40 minutes. During this time, baste the chicken and potatoes with the pan drippings at least three times to keep the meat moist and help the potatoes crisp.

  4. The Glaze: Remove the pan from the oven. Brush the maple syrup evenly over the chicken pieces. Use a spoon to drizzle the remaining salty pan drippings over the potatoes.

  5. Final Crisp: Return the pan to the oven and bake for another 20 minutes, or until the chicken reaches an internal temperature of 165°F (74°C) and the potatoes are golden-brown and tender.

  6. The “Secret” Finish: To serve, have your guests squeeze the softened garlic out of the skins and spread it directly onto the chicken. Pour the remaining salty juices from the pan over everything. Sprinkle with a final pinch of flaky salt if desired.


Tips for Success

  • Potato Sizing: To ensure the potatoes are soft on the inside and crispy on the outside, keep the chunks uniform in size.

  • The Garlic: Don’t skip the unpeeled garlic! The skin protects the garlic from burning, allowing it to “steam” into a spreadable paste inside the shell.

  • Extra Salt: If you really want that “salty” punch to hit first, use a coarse kosher salt or Maldon sea salt at the very end.

Goodbye Tartar: How to Remove It and Brighten Your Smile Naturally (Without Damaging Enamel

A clean, bright smile isn’t just about looks—it’s often a sign of good daily care. The problem is that tartar (hardened plaque) can build up quietly, making teeth look dull and sometimes contributing to bad breath, gum irritation, and cavities if it’s left alone. This guide explains why tartar forms, what actually works to remove it safely, and gentle ways to support a whiter-looking smile—without making risky claims or using harsh hacks. What Is Tartar (And Why Does It Form)? Dental plaque is a sticky film of bacteria that forms on teeth every day—especially after eating. If plaque isn’t removed well, it can harden into tartar (also called calculus). Once hardened, tartar clings strongly to teeth and often collects near the gumline. Common reasons tartar builds up Inconsistent brushing (less than twice a day) Skipping flossing, where plaque hides between teeth Frequent sugary or starchy snacks Smoking or chewing tobacco Low saliva flow (saliva helps rinse and balance acids) Staining drinks (coffee, tea, red wine) consumed often When tartar stays in place too long, it may lead to gum inflammation (gingivitis), stubborn bad breath, and sometimes more serious gum issues. How to Remove Tartar Safely and Effectively Here’s the honest truth: You can prevent plaque from hardening at home, but removing established tartar usually requires a professional cleaning. The safest approach is a mix of smart home care and dental visits. 1) Professional dental cleaning (the fastest, safest option) A dental cleaning (prophylaxis/scaling) is the most reliable way to remove tartar without harming enamel. Why it helps: tartar is fully removed, including hard-to-reach areas How often: many people benefit from every 6 months, or at least once a year (depending on your dentist’s advice) 2) Brush the right way (and don’t rush it) Brushing twice daily is good—but technique matters more than force. Use a soft-bristle brush Angle the brush gently toward the gumline Brush for 2 full minutes Replace your brush (or brush head) every 3 months Tip: An electric toothbrush can make technique easier for many people. 3) Floss or use interdental brushes daily Tartar loves the places a toothbrush misses. Flossing removes plaque before it hardens. Floss once a day, gently If floss is difficult, try interdental brushes or a water flosser 4) Alcohol-free antibacterial mouthwash (supportive, not magical) A gentle mouthwash can help lower bacterial load and support fresher breath—especially at night. Look for options with fluoride or essential oils Use as directed (overuse of strong antiseptics isn’t always ideal) Gentle “At-Home” Habits That Help Reduce Buildup These won’t “chip off tartar” safely (and you shouldn’t try), but they can help keep plaque under control and slow staining. Baking soda (occasional, gentle use) Baking soda can help neutralize acids and lightly polish surface stains. How to use (safe approach): Mix a small pinch with toothpaste (or water) Brush gently for 30 seconds Limit to once a week to avoid over-polishing Coconut oil pulling (optional support) Some people use oil pulling as a traditional routine for mouth freshness. How: Swish 1 tablespoon coconut oil for 10–15 minutes Spit into a trash bin (not the sink) Rinse and brush afterward Do this 2–3 times per week if it feels good for you. Citrus peels (be careful) Rubbing teeth with lemon/orange peel is popular online, but citrus is acidic and can irritate enamel if overdone. If you try it, keep it rare—and don’t scrub aggressively. Safer alternative: rinse with water after acidic foods/drinks. How to Make Teeth Look Whiter Naturally (The Smart Way) A naturally brighter smile usually comes from: keeping plaque down, reducing stains, and protecting enamel 1) Foods that help “clean” the surface as you chew These don’t bleach teeth, but they can reduce residue: Apples and celery (crisp texture) Raw carrots Strawberries (popular for surface stain support) 2) Limit enamel-staining habits (without giving up everything) Main stain contributors: coffee, tea, red wine, dark sauces (soy sauce, ketchup), sugary sodas, and energy drinks Simple trick: drink water afterward or rinse your mouth to reduce staining. 3) Home whitening “remedies”: what to use carefully Some trendy methods can be too harsh. Here’s a safer take: Baking soda + lemon: use very rarely. Lemon is acidic and may weaken enamel. Activated charcoal: can be abrasive; if you use it, keep it occasional and gentle. Strawberry + baking soda: popular, but still use sparingly. If you want noticeable whitening, dentist-supervised whitening is usually safer and more predictable than aggressive DIY mixes. Daily Routine for a Cleaner, Brighter Smile (Simple Plan) Brush 2x/day for 2 minutes Floss 1x/day Use a fluoride toothpaste Rinse with water after coffee/tea/dark foods Schedule cleanings regularly Avoid smoking (one of the biggest stain triggers) When to See a Dentist Soon: Get help sooner if you notice bleeding gums that don’t improve or persistent bad breath tooth sensitivity that worsens, visible tartar along the gumline, and pain when chewing These can be signs that more than “surface buildup” is going on—and early care makes everything easier. Final Thoughts: A White Smile Is Also a Healthy Smile Removing tartar and improving tooth brightness isn’t about chasing perfection—it’s about protecting gums, enamel, and comfort. With consistent daily habits, smart stain prevention, and professional cleanings when needed, you can keep your smile looking fresh for years.

Minute Healthy Shrimp & Vegetable Stir-Fry

Minute Healthy Shrimp & Vegetable Stir-Fry

Prep time: 10 mins | Cook time: 15 mins | Servings: 4

📜 Ingredients

The Protein & Veggies:

  • 1 lb large shrimp (peeled, deveined)

  • 1 tbsp olive oil or sesame oil (divided)

  • 1 head broccoli (cut into small florets, approx. 3 cups)

  • 2 medium carrots (peeled and thinly sliced diagonally)

  • 1 cup snap peas (trimmed)

  • 2 cloves garlic (minced)

  • 1 inch fresh ginger (grated)

The Savory Sauce:

  • 1/4 cup halal soy sauce or Tamari

  • 2 tbsp water or low-sodium chicken broth (halal)

  • 1 tbsp honey or maple syrup

  • 1 tsp cornstarch

Optional Garnish:

  • 1/2 tsp white sesame seeds

  • Red pepper flakes (for heat)


📝 Instructions

  1. Whisk the Sauce: In a small bowl, combine the halal soy sauce, water (or broth), honey, and cornstarch. Whisk until the cornstarch is fully dissolved and set aside.

  2. Sear the Shrimp: Heat 1/2 tablespoon of oil in a large skillet or wok over medium-high heat. Add the shrimp and cook for 1-2 minutes per side until pink and opaque. Remove the shrimp from the pan and set aside to avoid overcooking.

  3. Sauté Harder Veggies: Add the remaining 1/2 tablespoon of oil to the same skillet. Toss in the broccoli and carrots. Stir-fry for 3-4 minutes until they are vibrant but still have a “snap” (tender-crisp).

  4. Aromatics & Snap Peas: Add the snap peas, garlic, and ginger. Stir-fry for another 2-3 minutes. You’ll know it’s ready when the garlic is fragrant and the snap peas turn bright green.

  5. Thicken the Sauce: Give your sauce mixture one last whisk (cornstarch tends to settle) and pour it over the vegetables. Stir constantly for 1-2 minutes until the sauce bubbles and thickens into a glossy glaze.

  6. Combine: Return the shrimp to the skillet. Toss gently for 30 seconds to reheat the shrimp and coat everything evenly in the sauce.

  7. Serve: Plate immediately over jasmine rice, quinoa, or noodles. Top with sesame seeds.


💡 Quick Tips

  • The “Crunch” Factor: If you prefer your carrots very soft, add them 2 minutes before the broccoli.

  • Meal Prep: This recipe holds up well for 2 days in the fridge, making it a great healthy lunch option.