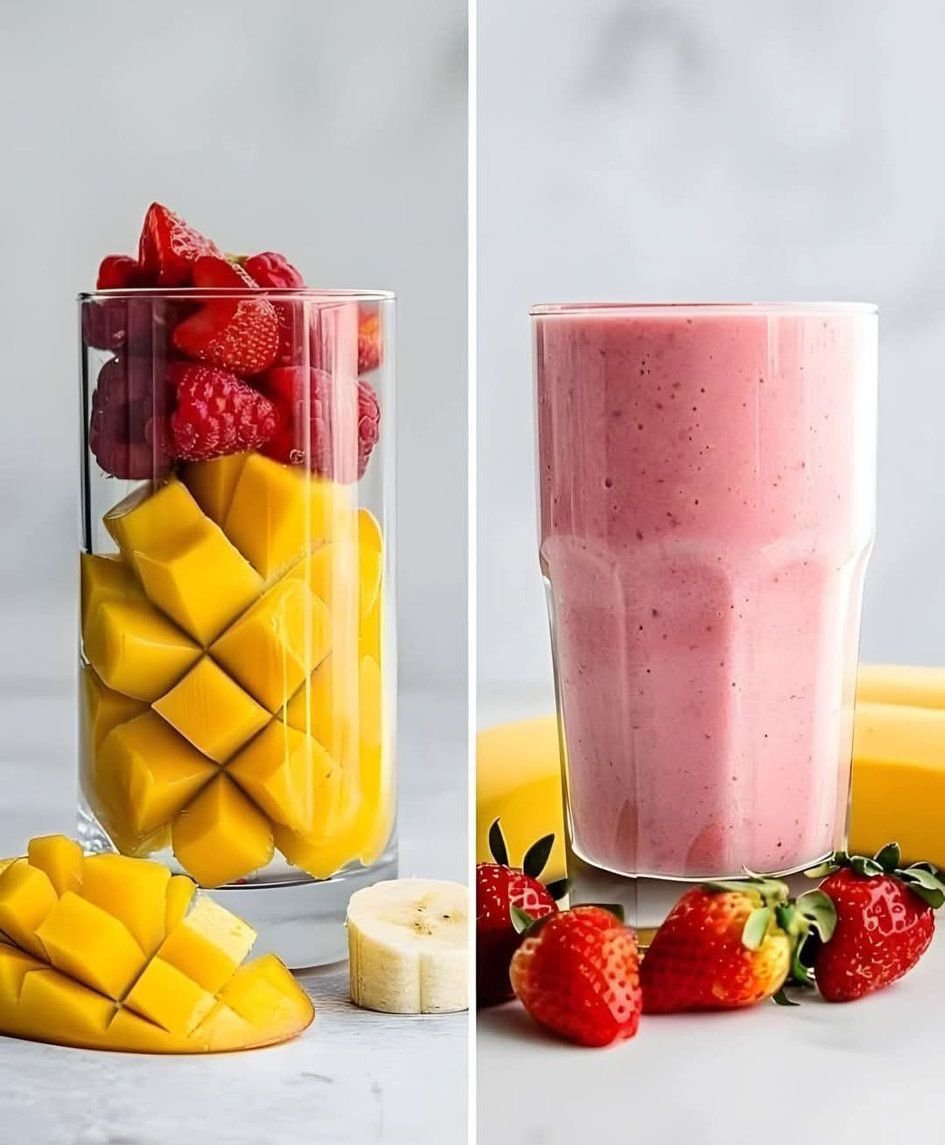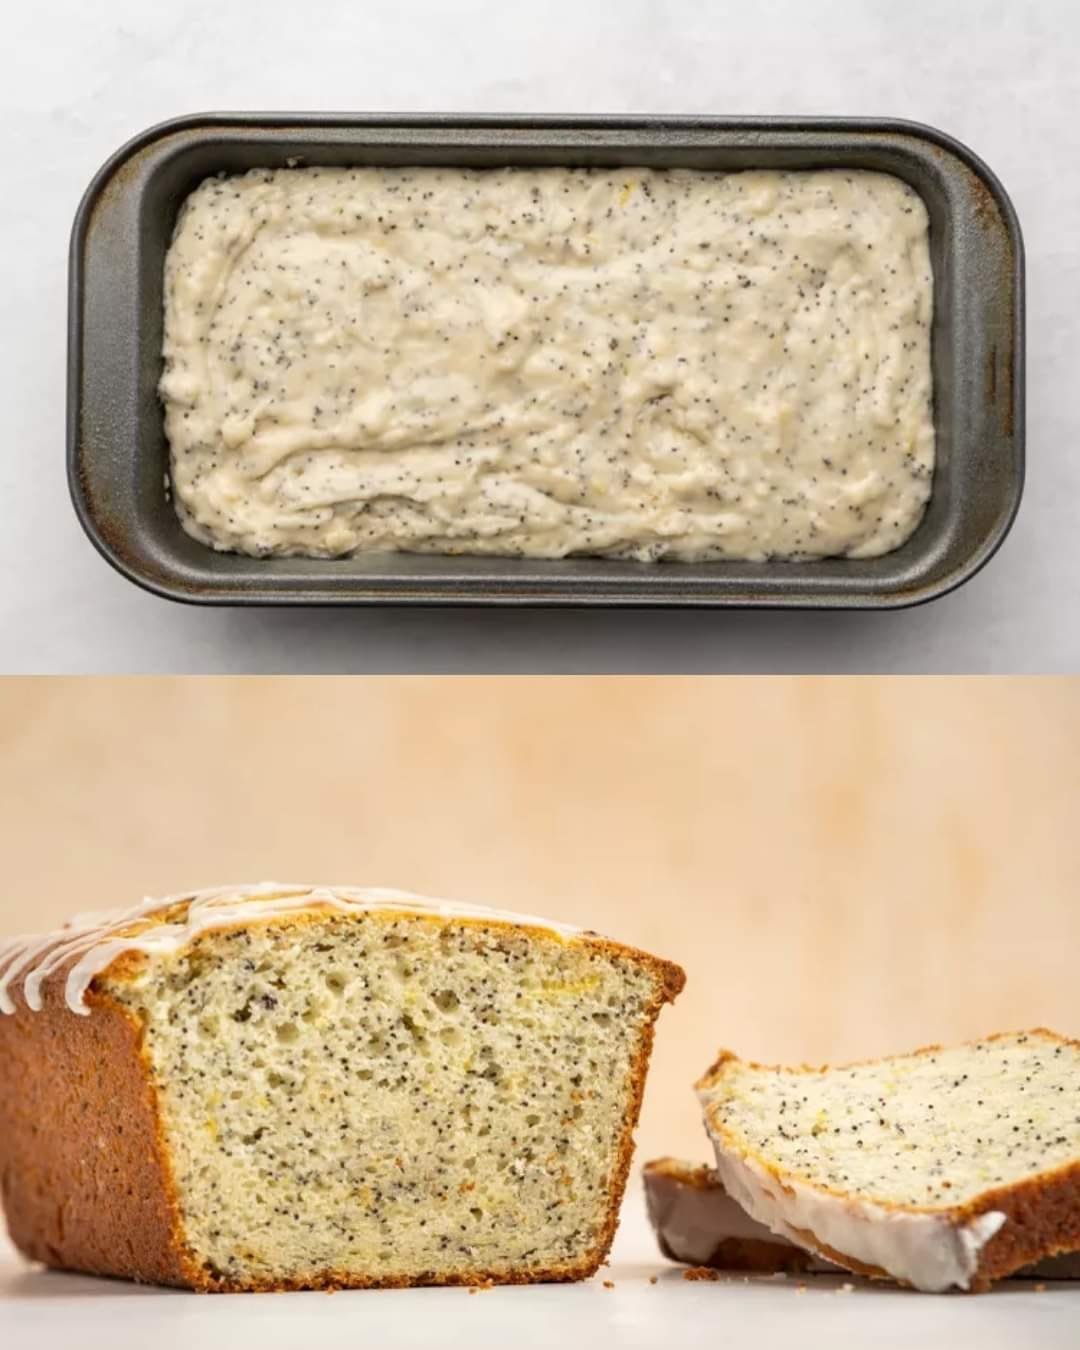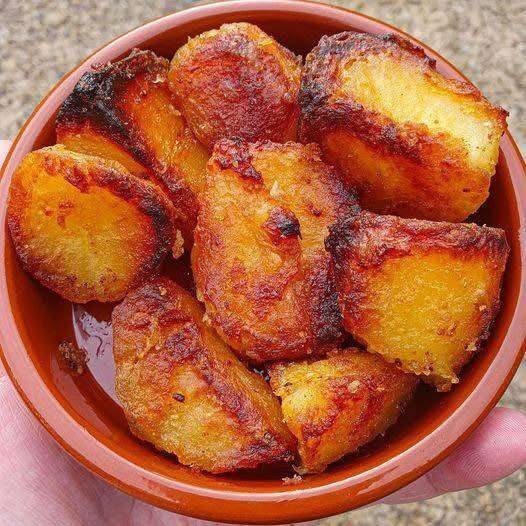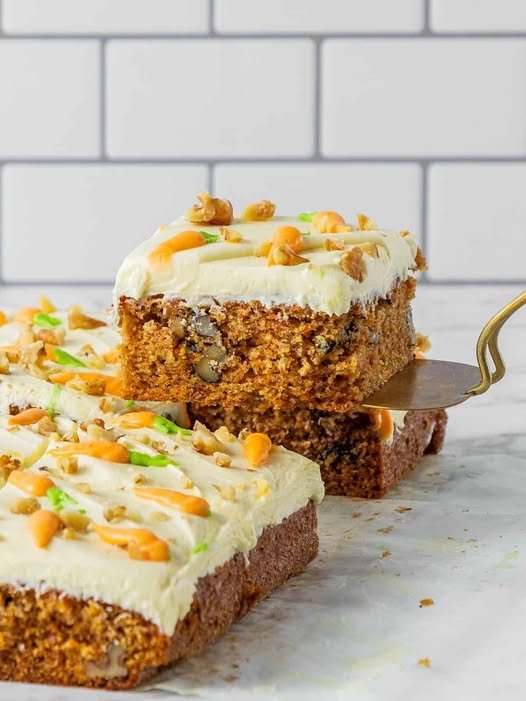
Creamy Green Strawberry Banana Oat Smoothie Recipe

Creamy Green Strawberry Banana Oat Smoothie Recipe

Creamy Green Strawberry Banana Oat Smoothie Recipe

This creamy green strawberry banana oat smoothie is a nourishing, refreshing, and naturally flavorful drink that brings together fresh fruits, leafy greens, and wholesome grains. It is perfect for breakfast, a midday refreshment, or a light evening option. The combination of strawberries, banana, spinach, and oats creates a smooth texture with a balanced taste that is lightly sweet, fresh, and comforting. This smoothie is easy to prepare, visually appealing, and suitable for everyday enjoyment.

Ingredients

  • 1 ripe banana, peeled and sliced

  • 1 cup fresh strawberries, washed and stems removed

  • 1 cup fresh spinach leaves

  • ¼ cup rolled oats

  • 1 cup milk of your choice (dairy or plant-based)

  • ½ cup chilled water or ice cubes (adjust as needed)

  • 1 teaspoon honey or natural sweetener (optional)

  • ½ teaspoon vanilla essence (optional)

Preparation Steps

Begin by preparing all your ingredients. Wash the strawberries and spinach thoroughly under clean running water. Slice the banana into small pieces to make blending easier. Measure the rolled oats and set them aside. If you prefer a smoother texture, you can soak the oats in water for 10 minutes before blending, though this step is optional.

Place the rolled oats into the blender first. Adding dry ingredients at the bottom helps them blend evenly. Next, add the spinach leaves, followed by the banana slices and strawberries. Pour in the milk of your choice, then add the chilled water or ice cubes. If you enjoy a slightly sweeter taste, add honey or a natural sweetener at this stage. For extra aroma, include vanilla essence.

Secure the blender lid tightly and blend on medium speed for about 30 seconds. Pause briefly, then blend again on high speed for another 30–45 seconds until the mixture becomes smooth and creamy. The color should be a vibrant green, and the texture should be thick yet pourable. If the smoothie feels too thick, add a small amount of water or milk and blend again until you reach your desired consistency.

Serving

Once blended, gently pour the smoothie into a clean glass. The smooth, glossy texture should flow easily, creating a rich and inviting appearance. You can garnish with a few oats or a sliced strawberry on the side if desired. Serve immediately for the freshest taste and best texture.

Taste and Texture

This smoothie has a naturally pleasant sweetness from the banana and strawberries, while the spinach adds freshness without overpowering the flavor. The oats provide a comforting, creamy body, making the smoothie satisfying and smooth. Each sip feels balanced and refreshing, with no single ingredient dominating the overall taste.

Helpful Tips

  • Use ripe bananas for better sweetness and creaminess.

  • Frozen strawberries can be used if fresh ones are not available; they also help keep the smoothie chilled.

  • Adjust the liquid amount depending on how thick or light you prefer your smoothie.

  • Blend thoroughly to ensure the oats are fully incorporated for a silky finish.

Storage Advice

This smoothie is best enjoyed fresh. However, if needed, it can be stored in a sealed container in the refrigerator for up to 12 hours. Shake well before drinking, as natural separation may occur.

Final Thoughts

This creamy green strawberry banana oat smoothie is a wonderful way to enjoy fresh ingredients in a simple and enjoyable form. It is easy to prepare, visually appealing, and versatile enough to suit different preferences. Whether you are starting your day or taking a refreshing break, this smoothie offers a delightful blend of flavor, texture, and freshness in every glass.

“Fluffy Egg Muffins — A Quick, Healthy, and Make-Ahead Breakfast Idea”

  • Servings: 6–8 muffins
  • Total Time: 20 minutes
  • Difficulty: Easy
  • Calories per Muffin: ~110 kcal
  • Macros (Per Muffin): 9g Protein / 2g Net Carbs / 7g Fat / 1g Fiber

Introduction

These Healthy Egg Muffins are a game-changer for busy mornings, meal prep, or on-the-go snacks. Packed with protein, vegetables, and a hint of cheese, they’re fluffy, flavorful, and customizable to your diet preferences.

Perfect for Keto, Slimming , Weight Watchers, High-Protein, and Mediterranean lifestyles, these muffins are low in carbs, high in nutrients, and entirely freezer-friendly — making your weekly meal planning effortless.

Whether you’re looking for a quick breakfast, a lunchbox addition, or a protein-packed snack, these muffins deliver flavor, convenience, and nutrition in every bite.


Look at the Recipe

  • Texture & Visual: Fluffy, golden on top, tender inside with colorful vegetable bits.
  • Flavor Highlight: Savory eggs enhanced with cheese, herbs, and fresh vegetables.
  • Diet Benefit: High in protein, low-carb, gluten-free, and easily adapted for Mediterranean diets.

Ingredients Needed

Base Ingredients

  • 6 large eggs
  • ½ cup Greek yogurt or cottage cheese (for added protein and fluffiness)
  • ¼ cup shredded cheese (cheddar, feta, or mozzarella)
  • ½ tsp salt
  • ¼ tsp black pepper

Vegetable Mix (Choose your favorites)

  • ½ cup diced bell peppers
  • ¼ cup chopped spinach or kale
  • 2 tbsp chopped onion
  • 2 tbsp cherry tomatoes, halved
  • 1–2 tbsp fresh herbs (parsley, chives, or basil)

Optional Add-Ins

  • ¼ cup cooked bacon or ham cubes (Keto/High-Protein)
  • 1 tsp paprika or chili flakes for spice
  • 1 tsp olive oil for greasing

How to Make Our Healthy Egg Muffins

  1. Preheat oven & prep pan:
    Preheat your oven to 375°F (190°C). Grease a 6–8 cup muffin tin with olive oil or line with silicone liners.
  2. Whisk eggs:
    In a large bowl, whisk eggs, Greek yogurt, salt, and pepper until smooth.
  3. Add vegetables & cheese:
    Fold in the diced bell peppers, spinach, onion, tomatoes, herbs, and shredded cheese. Add optional meat or spices if using.
  4. Fill muffin cups:
    Pour the mixture evenly into muffin cups, filling about ¾ full.
  5. Bake:
    Bake for 15–18 minutes, or until muffins are set and lightly golden on top.
  6. Cool & serve:
    Allow muffins to cool for 5 minutes before removing from tin. Serve warm or store for meal prep.

Storage & Serving Suggestions

  • Store: Refrigerate in an airtight container for up to 4 days.
  • Freeze: Freeze individually wrapped muffins for up to 2 months. Reheat in microwave or oven before eating.
  • Serving Ideas:
    • Pair with avocado slices or a side salad for a balanced breakfast.
    • Serve as a snack with hummus or tzatziki for Mediterranean flair.
    • Enjoy for a post-workout protein boost.

Tips & FAQs

1. Can I make this Slimming -friendly?
Yes! Use fat-free Greek yogurt or cottage cheese and omit cheese if desired. Each muffin is roughly 1–2 syns depending on ingredients.

2. How many Weight Watchers points per muffin?
Approximately 2–3 WW points per muffin when using low-fat cheese and yogurt.

3. Can I make these dairy-free?
Yes — replace Greek yogurt and cheese with coconut yogurt and dairy-free cheese.

4. How can I make it Keto-friendly?
Stick to full-fat cheese, Greek yogurt, and low-carb vegetables like spinach and peppers.

5. Can I add more vegetables or proteins?
Absolutely! Egg muffins are highly versatile — zucchini, mushrooms, or cooked chicken all work well.

Banana Pudding Parfaits (Healthy, Creamy & Guilt-Free)

Introduction

Indulgent yet guilt-free, these Banana Pudding Parfaits are the perfect healthy dessert or snack. Creamy layers of Greek yogurt, ripe bananas, and a touch of natural sweetness make every spoonful feel like a treat — without derailing your diet.

Ideal for Keto-adapted, Low Carb, Slimming, Weight Watchers, Mediterranean, and High-Protein lifestyles, these parfaits are naturally nourishing, easy to assemble, and satisfyingly creamy. They’re an effortless way to enjoy dessert while keeping your macros in check.

Perfect for quick meal prep or a wholesome snack, these parfaits deliver comfort, flavor, and nutrition all in one glass.

Look at the Recipe

  • Texture: Creamy yogurt layered with soft banana and crunchy optional toppings.
  • Flavor: Sweet banana, light vanilla, and a hint of cinnamon for extra warmth.
  • Diet Benefit: High-protein, low-sugar, and naturally nutrient-rich.

Ingredients Needed

Parfait Base

  • 2 cups Greek yogurt (full-fat or low-fat depending on diet)
  • 2 tsp vanilla extract
  • 2–3 tbsp honey or maple syrup (adjust to taste)

Fruit Layer

  • ripe bananas, sliced
  • ½ tsp ground cinnamon (optional)

Optional Crunch Topping

  • 2–3 tbsp granola (low-carb for Keto/Low-Carb versions)
  • 1 tbsp chopped nuts (almonds, walnuts, or pecans)

How to Make Our Banana Pudding Parfaits

  1. Mix yogurt: In a bowl, combine Greek yogurt, vanilla extract, and honey until smooth.
  2. Layer parfaits: In 4 serving glasses, start with a layer of yogurt, followed by banana slices. Repeat layers until glasses are full.
  3. Add crunch: Top with granola or chopped nuts if desired. Sprinkle cinnamon over the top for extra flavor.
  4. Serve: Enjoy immediately or refrigerate for 10–15 minutes for a slightly chilled parfait.

Storage & Serving Suggestions

  • Store: Keep in the fridge for up to 2 days. Best enjoyed fresh to maintain banana texture.
  • Make-Ahead: Assemble the yogurt base and banana slices separately; layer before serving.
  • Serve With: Add a drizzle of sugar-free chocolate or a few fresh berries for variation.

Meal Prep Tip

Prepare multiple parfaits in mason jars for an easy grab-and-go breakfast or snack throughout the week.

Macros & Plan Compatibility

Plan Notes
Keto & Low-Carb ~5–6g net carbs per serving using low-carb sweetener; avoid granola for strict Keto.
Slimming About 0–0.5 Syns per parfait using fresh banana and natural sweetener; mostly Free Food.
High-Protein ~8g protein per serving; increase Greek yogurt or add protein powder for more.
Weight Watchers ~2 SmartPoints per serving using minimal honey and optional toppings.
Mediterranean Nutrient-dense and heart-healthy; emphasizes fresh fruit, Greek yogurt, and nuts.

Tips & FAQs

Can I use a different yogurt?
Yes — plant-based Greek-style yogurt works for a dairy-free option.

How can I make it lower in sugar for Keto?
Use a low-carb sweetener like stevia or erythritol instead of honey or maple syrup.

Can I add protein powder?
Yes — mix in 1–2 scoops of protein powder into the yogurt for a high-protein version.

Can this be frozen?
Bananas may brown when frozen; best enjoyed fresh or refrigerated.

How do I make it more crunchy?
Add toasted nuts, low-carb granola, or cacao nibs just before serving.

Summary

These Banana Pudding Parfaits are creamy, healthy, and guilt-free! Made with Greek yogurt, ripe bananas, and optional granola, they’re perfect for Keto, High-Protein, Slimming, Weight Watchers, and Mediterranean meal plans. Quick, easy, and nutrient-rich!

Creamy Peanut Butter Banana Smoothie

Creamy Peanut Butter Banana Smoothie

Prep time: 5 minutes | Servings: 1

Ingredients

  • 1 large banana (frozen is best for that thick, creamy texture)

  • 1 cup milk of choice (dairy, almond, oat, or soy)

  • 2 tablespoons creamy peanut butter

  • 1/4 cup Greek yogurt (plain or vanilla for extra thickness and protein)

  • 1/2 teaspoon ground cinnamon (to match the dusting on top)

  • 1 teaspoon honey or maple syrup (optional, for extra sweetness)

  • A handful of ice (only if using a fresh banana instead of frozen)

Instructions

  1. Prep the Fruit: If you have time, peel and slice your banana and freeze it for at least 2 hours. If you’re in a hurry, a fresh banana works too!

  2. Combine: Add the milk, peanut butter, yogurt, banana, and cinnamon into a high-speed blender.

  3. Blend: Start on low speed and gradually increase to high. Blend for about 45–60 seconds until the mixture is completely smooth and no lumps remain.

  4. Check Consistency: If it’s too thick, add a splash more milk. If it’s too thin, add a couple more ice cubes or a piece of frozen fruit.

  5. Garnish: Pour into a tall glass. Drizzle a small amount of melted peanut butter on top, sprinkle with extra cinnamon, and finish with a fresh banana slice on the rim, just like in the photo.


Don’t Eat Sweet Potatoes Until You Know These 13 Important Facts!

weet potatoes are everywhere – in fitness meals, weight-loss plans, baby food, and even desserts. They’re praised as a “superfood,” but the truth is more complex.

Before you add another serving to your plate, there are 13 important facts about sweet potatoes you really should know.

Some may surprise you. A few might change how you eat them forever.

Let’s get into it.


1. Sweet Potatoes Are Not the Same as Yams (and That Matters)

Despite what grocery stores label, most “yams” sold in supermarkets are actually sweet potatoes.
True yams are starchier, drier, and much less sweet. Sweet potatoes are softer, sweeter, and higher in beta-carotene.

Why this matters: their blood sugar impact, digestion, and cooking behavior are very different. If you’re managing blood sugar, confusing the two can lead to bad choices.


2. They Can Spike Blood Sugar More Than You Think

Sweet potatoes are often recommended for diabetics, but preparation method changes everything.

  • Boiled: lower glycemic impact

  • Baked or roasted: much higher glycemic index

  • Mashed: spikes fastest

If you’re insulin resistant or prediabetic, eating large baked sweet potatoes regularly can quietly push blood sugar higher than expected.


3. They Are Loaded with Vitamin A – Sometimes Too Much

Sweet potatoes are one of the richest sources of beta-carotene (vitamin A precursor) in nature. That’s great… in moderation.

Too much vitamin A over time may cause:

  • Headaches

  • Dry skin

  • Nausea

  • Liver stress (in extreme cases)

If you already take multivitamins or eat lots of carrots, pumpkin, and spinach, it’s easy to overdo it.


4. Not Always “Weight-Loss Friendly”

Sweet potatoes are often marketed as a diet food, but one medium sweet potato can contain 100–120 calories and 20–25g of carbs.

That’s not bad — but if you’re:

  • on keto

  • low-carb

  • insulin-sensitive

  • trying to lose stubborn belly fat

…they may slow progress if eaten daily.

They are clean carbs, not free carbs.


5. They Can Cause Bloating and Gas

Many people experience:

  • bloating

  • stomach pressure

  • gas

  • mild cramps

after eating sweet potatoes.

Why?
They contain raffinose and resistant starch, which ferment in the gut. If your digestion is sensitive, you’ll feel it.

Pro tip: boiling them and eating smaller portions reduces this effect.


6. The Skin Is Nutrient-Rich – But Also Risky

Sweet potato skins contain fiber and antioxidants, but they also trap:

  • pesticides

  • dirt

  • bacteria

If not thoroughly washed or organic, eating the skin may do more harm than good.

If you buy non-organic, peeling is often the safer option.


7. They May Interfere with Thyroid Function (in Large Amounts)

Sweet potatoes contain goitrogens – compounds that can interfere with iodine absorption.

For most people, this is irrelevant.
But if you have hypothyroidism or iodine deficiency, eating very large amounts regularly could worsen symptoms.

Cooking reduces goitrogen levels, but they’re not eliminated entirely.


8. They Can Trigger Migraines in Some People

Sweet potatoes are naturally high in tyramine, a compound known to trigger migraines in sensitive individuals.

If you notice headaches after eating:

  • sweet potatoes

  • aged foods

  • bananas

  • avocados

…this could be the connection.


9. Not Ideal for Kidney Stone Formers

Sweet potatoes are high in oxalates, which contribute to kidney stone formation in susceptible people.

If you’ve had calcium oxalate stones before, it’s wise to:

  • limit portions

  • avoid daily consumption

  • drink plenty of water when eating them


10. They Are Extremely High in Potassium

Potassium is essential for:

  • heart rhythm

  • muscle function

  • blood pressure control

But too much potassium can be dangerous for people with:

  • kidney disease

  • adrenal issues

  • certain heart conditions

One large sweet potato can contain over 700 mg of potassium. That adds up fast.


11. Sweet Potatoes Change Nutritionally When Stored

As sweet potatoes sit in storage, their starch converts to sugar.
That means:

  • older sweet potatoes = sweeter taste

  • higher sugar content

  • stronger blood sugar response

So that “extra sweet” potato might not be the healthiest choice.


12. Purple and White Varieties Are Not the Same

Most people only eat orange sweet potatoes, but there are:

  • Purple sweet potatoes – higher in anthocyanins (anti-inflammatory, antioxidant)

  • White sweet potatoes – lower sugar, milder impact on blood glucose

If blood sugar or inflammation is a concern, white or purple varieties are often better options.


13. They Are Healthy – But Not a “Daily Food” for Everyone

This is the biggest truth most people miss.

Sweet potatoes are:

  • nutritious

  • natural

  • full of vitamins and fiber

But they are not ideal as a daily staple for every body type.

Depending on your:

  • metabolism

  • hormones

  • digestion

  • activity level

  • health conditions

…they may be perfect, or they may quietly cause weight gain, bloating, fatigue, or blood sugar swings.


The Bottom Line

Sweet potatoes are not bad.
They are not magic.
And they are definitely not one-size-fits-all.

Banana Avocado Almond Milk Smoothie

This smoothie looks incredibly creamy and nutritious. Based on the ingredients shown in the image, here is a simple recipe to recreate this Banana Avocado Almond Milk Smoothie at home.

Ingredients

  • 1 Frozen Banana: Sliced (using a frozen banana makes the texture like soft-serve ice cream).

  • ½ Ripe Avocado: Pitted and peeled.

  • 1 ½ cups Almond Milk: Unsweetened or vanilla flavored.

  • 1 tbsp Honey: Or maple syrup for a vegan option.

  • Optional: A small handful of whole almonds (to blend in for extra protein) or a dash of cinnamon.


Instructions

  1. Prep the Fruit: If you haven’t already, slice the banana and scoop the avocado out of its skin.

  2. Combine: Add the almond milk to your blender first (liquid first helps the blades spin more easily). Add the banana slices, avocado, honey, and any extra almonds.

  3. Blend: Start on a low speed and gradually increase to high. Blend for about 45–60 seconds until the mixture is completely smooth and pale green.

  4. Adjust Consistency: * If it’s too thick, add a splash more almond milk.

    • If you want it colder/thicker, add 2–3 ice cubes and pulse.

  5. Serve: Pour into a tall glass and enjoy immediately while fresh.


Why this works

This combination is a “powerhouse” drink. The avocado provides healthy monounsaturated fats that keep you full, the banana offers natural sweetness and potassium, and almond milk keeps the recipe light and dairy-free.

This soup recipe is a real treasure, because it causes a drop in blood sugar almost immediately. This soup

This soup recipe is a real treasure, because it causes a drop in blood sugar almost immediately.

The levels of sugar in the blood drop precipitously. The creation of this soup recipe is an honest act of global contribution.
Is a healthy and enjoyable way to control your blood sugar levels something you’re after? We will end your search right here! In addition to its delicious taste, this easy vegetable soup dish may have many positive effects on your health. How about we get into the specifics of this gastronomic miracle?
1. An initial proclamation
Picture this: it’s cold outside, and someone brings you a steaming bowl of vegetable soup to warm you up and calm your nerves at the same time. It seems to be a world where everyone is completely happy and fulfilled. But hold for a second, more details are coming! As an added bonus, this soup helps keep blood sugar levels stable while also satisfying your taste senses.
2. The Secret Ingredients in the Recipe
This extraordinary soup’s mystery will soon be solved. What you’ll need is: 

Two potatoes, one carrot, and a pair of onions.
Two vegetables: one pepper and one cabbage
Two stalks of celery and one onion.
Sulfuric acid
Herbal plants that have several uses, such in cooking, medicine, or fragrance. Mint Basil Parsley
3. Instructions in Sequence
The next step is to start cooking:
Get the Base Ready: In a saucepan with two liters of water, add the shredded carrots and potatoes. It has to be cooked over medium heat until it boils.
Peel and boil the potatoes until they are very soft. Chopped celery, onion, cabbage, salt, and basil should be added next.
As a finishing touch, the taste is elevated to perfection by adding the chopped red pepper and parsley. With the lid on, cook at a low boil for another five minutes.
I have it here! Guests are now welcome to help themselves to your vegetarian soup.
4. The Perfect Match for Each Other
Garnishing it with a substantial quantity of hard, shredded cheese elevates the taste of this already delicious soup. I promise you it will take the taste to a whole new level.
Benefits of vegetable soup abound.
Vegetable soup is delicious, and it also has several health advantages, such as:
The low glycemic index and high fiber content of this soup make it a good choice for managing blood sugar levels and preventing diabetes-related surges.
An improved immune system and overall health are benefits of the food’s rich nutritious content, which includes vitamins, minerals, and antioxidants.
Eating a bowl of vegetable soup before each meal may help you feel full on less, which might be helpful if you’re trying to lose weight.
The high water content of this soup makes it a great choice for hydrating and satisfying your hunger.
Do you think this soup may help with sudden drops in blood sugar?
I think so! This soup is great for avoiding dangerously low blood sugar levels and keeping them steady since it contains complex carbs, fiber, and minerals.
Second Question: How critical is it to adhere rigidly to the components that have been listed?
Your suggestions are free to be used. Even though the components offered create a wonderful flavor harmony, you can always modify the recipe to fit your tastes and the ingredients you have on hand.
If you want the best results from this soup, how often should you eat it?
The addition of this soup to your weekly meal plan, consumed twice or thrice, may lead to obvious improvements. Always pay attention to how you feel and adjust your movements as needed.
Is it possible to freeze this soup for later use?
I think so! This soup is perfect for those times when you need to whip up a quick supper since it freezes well. Before heating or thawing, store the item in airtight containers.
Is there anything you can suggest that would make the soup taste better?
Making a flavor profile that is uniquely tailored to your preferences is achievable via the process of experimenting with a wide variety of herbs and spices. For an extra flavor boost, add a revitalizing squeeze of lemon juice just before serving to the soup.
In a nutshell, this vegetable soup dish is tasty and may be very beneficial to your health since it is rich in important elements. This soup is perfect for those times when you need a hearty meal but are also watching your blood sugar levels. That being the case, why wait? Indulge in the mouth-watering flavor of this delectable treat by whipping

🌽 Sweet Corn Ice Cream Recipe

🌽 Sweet Corn Ice Cream Recipe

Ingredients

  • Corn: 2 cups fresh corn kernels (about 3 ears) or frozen corn (thawed).

  • Dairy: 2 cups heavy cream and 1 cup whole milk.

  • Sweetener: 3/4 cup granulated sugar.

  • Richness: 5 large egg yolks.

  • Flavor: 1 tsp vanilla extract and a pinch of salt.


Instructions

  1. Infuse the Milk: In a saucepan over medium heat, combine the corn kernels, milk, and 1 cup of the heavy cream. Bring to a gentle simmer (do not boil), then remove from heat. Cover and let it steep for 20–30 minutes to extract the corn flavor.

  2. Blend and Strain: Pour the corn and milk mixture into a blender and blend until very smooth. Pour the mixture through a fine-mesh sieve into a clean bowl, pressing hard on the solids to get all the liquid out. Discard the leftover corn pulp.

  3. Make the Custard: Whisk the egg yolks and sugar in a separate bowl until pale. Slowly whisk a small amount of the warm corn milk into the eggs to “temper” them, then pour the egg mixture back into the saucepan with the rest of the corn milk.

  4. Thicken: Cook over low heat, stirring constantly, until the mixture thickens enough to coat the back of a spoon. Do not let it boil, or the eggs will scramble.

  5. Chill: Remove from heat and stir in the remaining 1 cup of heavy cream, vanilla, and salt. Cover with plastic wrap (touching the surface) and refrigerate until completely cold (at least 4 hours or overnight).

  6. Churn: Pour the cold mixture into your ice cream maker and churn according to the manufacturer’s instructions.


Helpful Tips for Success

  • For the “Chunky” Look (Bottom Image): If you prefer the textured look in the second photo, set aside 1/2 cup of whole corn kernels. Sauté them in a little butter and sugar until caramelized, let them cool, and fold them into the ice cream during the last 2 minutes of churning.

  • Enhancing the Color: To get that vibrant yellow seen in the photos, you can add a tiny drop of yellow food coloring or a pinch of turmeric (it won’t affect the flavor in small amounts).

  • No Ice Cream Maker? You can pour the mixture into a shallow container and freeze, stirring vigorously every 30 minutes for 3 hours to break up ice crystals.

Cucumber, lemon, and cinnamon water: the natural remedy your body will thank you for

Discover the powerful benefits of this natural drink that helps cleanse your body, burn fat, and revitalize your daily energy.
It’s perfect for accompanying a healthy routine and promotes internal cleansing in just 10 days. Amazing

Why drink cucumber, lemon, and cinnamon water?

This natural drink has gained popularity for its ability to act as a natural detox. Its ingredients are known for their antioxidant, digestive, and anti-inflammatory properties, making it an excellent ally for improving your overall health and well-being.

 Main ingredients:

    • Cucumber: Rich in water, vitamins, and minerals. It helps eliminate toxins and deeply hydrate the body.
  • Lemon: A powerful source of vitamin C, antioxidants, and alkalizing compounds. It stimulates metabolism and strengthens the immune system.
  • Cinnamon stick: Improves digestion, regulates blood sugar levels, and provides a delicious natural aroma.
  • Mint or parsley leaves (optional): They help refresh the drink, improve digestion, and combat abdominal bloating.

 Proven benefits of cucumber water with lemon and cinnamon

1.  Detoxifies the body naturally

Thanks to the cucumber and lemon, this drink helps eliminate accumulated toxins, facilitating liver and kidney function.

2.  Promotes weight loss

Drinking two glasses of this mixture daily can speed up metabolism and reduce fluid retention, contributing to gradual weight loss.

3.  Improves digestion and prevents bloating

Cinnamon and mint relieve gas and improve digestion, while lemon stimulates bile production, facilitating the breakdown of fats.

4.  Deeply hydrates and provides energy

Unlike other caffeinated or sugary drinks, this water is hydrating and revitalizing without negative side effects.

5.  Strengthens the immune system

The vitamin C in lemon, along with the antioxidants in cucumber and the antibacterial properties of cinnamon, strengthen your defenses

🥖 Very Simple & Delicious Homemade Bread

🥖 Very Simple & Delicious Homemade Bread

Soft • Cheesy • Healthy • Anyone Can Make It

This homemade bread is fluffy on the inside, golden on the outside, and lightly cheesy. Perfect for breakfast, sandwiches, or enjoying with soup. No special skills required!


🧾 Ingredients

  • ½ cup warm water (not hot)

  • ½ cup warm milk

  • 1 teaspoon dry yeast

  • 1 tablespoon sugar

  • ½ teaspoon salt

  • 1 tablespoon oil

  • 3 cups all-purpose flour

  • 100 g mozzarella cheese (grated)

  • Black sesame or sesame seeds (optional, for topping)


🥣 Instructions

  1. Activate the yeast
    In a large bowl, mix warm water, warm milk, sugar, and dry yeast.
    Stir gently and let it rest for 5–10 minutes until foamy.

  2. Add wet ingredients
    Add salt and oil to the yeast mixture. Mix well.

  3. Form the dough
    Gradually add flour, mixing with a spoon or your hands.
    Knead for 8–10 minutes until the dough is soft and smooth.

  4. First rise
    Cover the bowl and let the dough rest in a warm place for 1 hour, or until doubled in size.

  5. Shape the bread
    Punch down the dough and divide it into portions.
    Shape into oval or flat bread shapes and place on a baking tray lined with parchment paper.

  6. Add cheese & topping
    Sprinkle mozzarella cheese on top and gently press it in.
    Add sesame or black seeds if desired.

  7. Second rest
    Cover lightly and let rest for 15–20 minutes.

  8. Bake
    Bake in a preheated oven at 180°C (350°F) for 18–22 minutes, until golden brown.

  9. Finish
    Optional: Brush with a little butter for extra softness.


🍽 Serving Ideas

  • Serve warm with butter or honey

  • Perfect with soups 🍲

  • Use for sandwiches or wraps

  • Great for kids’ lunch boxes

🍓 Creamy Strawberry Mint Smoothie

Ingredients

  • Strawberries: 2 cups fresh or frozen (frozen makes it thicker).

  • Milk Base: 1 cup of your preferred milk (dairy, almond, or oat milk all work well).

  • Yogurt: 1/2 cup Greek yogurt or vanilla yogurt for extra creaminess.

  • Sweetener: 1–2 tablespoons of honey or maple syrup (optional, depending on the sweetness of the berries).

  • Freshness: 2–3 fresh mint leaves (plus more for garnish).

  • Ice: A handful of ice cubes (only if using fresh berries).


Instructions

  1. Prepare the Berries: Wash the strawberries and remove the green leafy tops (hulls). If they are very large, cut them in half.

  2. Combine Ingredients: Place the strawberries, milk, yogurt, sweetener, and mint leaves into a blender.

  3. Blend: Start on a low speed and gradually increase to high. Blend for about 45–60 seconds until the mixture is completely smooth and pale pink.

  4. Check Consistency: If you prefer a thinner smoothie, add a splash more milk. If you want it thicker, add a few more frozen strawberries or ice cubes and blend again.

  5. Serve: Pour the smoothie into tall glasses like the ones in the photo.

  6. Garnish: Top each glass with a fresh mint leaf and a slice of strawberry to match the presentation in your image.


Quick Tips for the Best Result

  • For a “Frosty” Texture: Use frozen strawberries instead of fresh ones. This creates a thick, milkshake-like consistency without watering it down with ice.

  • Boost the Nutrition: You can add a tablespoon of chia seeds or flax seeds before blending; they won’t change the flavor much but will add healthy fiber.

Creamy Cucumber Salad Recipe

Creamy Cucumber Salad Recipe

  • Prep time: 15 minutes

  • Chilling time: 30 minutes (optional, for best flavor)

  • Servings: 4


Ingredients

The Base:

  • 2 large English cucumbers: Sliced into thin rounds (English cucumbers have thinner skin and fewer seeds).

  • 1/2 small red onion: Thinly sliced into half-moons.

The Dressing:

  • 1/2 cup sour cream (or Greek yogurt for a lighter version).

  • 2 tablespoons mayonnaise.

  • 1 tablespoon white vinegar or apple cider vinegar.

  • 1 tablespoon fresh dill (chopped) or parsley (as seen in the image).

  • 1 teaspoon sugar (to balance the acidity).

  • 1/2 teaspoon garlic powder.

  • Salt and black pepper to taste.

Garnish:

  • A pinch of paprika (for color).

  • Extra fresh herbs.


Instructions

  1. Prepare the Cucumbers: If you prefer a less watery salad, place the sliced cucumbers in a colander, sprinkle with a little salt, and let them sit for 10 minutes. Pat them dry with a paper towel before mixing.

  2. Whisk the Dressing: In a large mixing bowl, combine the sour cream, mayonnaise, vinegar, sugar, garlic powder, and herbs. Whisk until the dressing is smooth and creamy.

  3. Combine: Add the sliced cucumbers and red onions to the bowl. Toss gently until every slice is thoroughly coated in the dressing.

  4. Season: Taste and add salt, black pepper, and a dash of paprika.

  5. Chill: For the best results, cover the bowl and refrigerate for at least 30 minutes. This allows the flavors to meld and the cucumbers to become slightly marinated.

  6. Serve: Give it a final toss before serving. Top with fresh parsley or dill for a vibrant look.


Pro Tips for Success

  • Vinegar Swap: If you want a brighter citrus note, swap the vinegar for fresh lemon juice.

  • Texture: Keep the cucumber skins on for extra color and nutrients, or peel them in “stripes” for a decorative look.

  • Storage: This salad is best eaten the day it is made, as cucumbers release water over time, which can thin the dressing.

German Potato Pancakes

There are so many potato pancake recipes out there, and they are all claiming to be the original German Potato Pancakes. These are really fun to make and eat. They are crispy, slightly crunchy, and overly tasty. These cakes are truly loved worldwide. Of course, each locale has their own recipe. For instance, Swedish pancakes are also quite popular and eerily similar to the German potato pancakes.

Ingredients

  • 2 ½ pounds Russet potatoes, or any starchy potato, peeled and grated very finely
  • 1 yellow onion, grated very fine
  • 2 large eggs
  • 1 tsp salt
  • ¼ cup all-purpose flour
  • Oil for frying

How To Make German Potato Pancakes

FIRST STEP:

After grating the potatoes, using a towel, thoroughly wring out all the liquid from the potatoes

Place the drained potatoes into a large bowl with the grated onion, salt, eggs, and flour.

Mix it thoroughly with your hands; you want it to be somewhat tacky. Add a little more flour if it is too sticky

SECOND STEP:

Heat 3 tbsp oil in a skillet

Place ⅓ to ½ a cup of mixture into the hot skillet

THIRD STEP:

Fry for three to five minutes on each side, until they are golden.

Briefly drain on paper towels

FOURTH STEP:

Serve immediately, while hot, with applesauce and a sprinkle of powdered sugar, sour cream, or even yogurt.

These could also be served with meat and a gravy, using these as a side dish.

Enjoy!

Depression-Era Jewish Health Salad

Depression-Era Jewish Health Salad

A crisp, tangy vinegar-based slaw that only gets better the longer it sits in the fridge.

Ingredients

The Vegetables

  • 1 head Green cabbage (approx. 2 lbs), shredded

  • 3 Carrots, thinly sliced

  • 4 Cucumbers (2 for the original count + 2 to substitute for the peppers), sliced

  • 1 large Red onion, thinly sliced

  • 1 bunch Radishes, thinly sliced

  • 1/2 bunch Celery, sliced

The Dressing

  • 1 cup Vegetable oil

  • 1/2 cup Warm water

  • 1 1/2 cups White vinegar

  • 10–12 tbsp Granulated sugar (adjust to your preference for sweetness)

  • 1 tbsp Salt

  • 1 tbsp Garlic powder


Instructions

1. Prep the Vegetables

Shred the cabbage and thinly slice the carrots, cucumbers, red onion, radishes, and celery. Place all of the vegetables into a very large mixing bowl. Toss them together so the colors are evenly distributed.

2. Prepare the Brine

In a separate medium bowl, combine the warm watersugarsalt, and garlic powder. Stir continuously until the sugar and salt are completely dissolved. This ensures you don’t get a “gritty” dressing.

3. Complete the Dressing

Whisk the white vinegar and vegetable oil into the water mixture until well combined.

4. Marinate

Pour the dressing over the vegetables and toss thoroughly to ensure every piece is coated.

5. Jar and Chill

Pack the salad tightly into clean glass jars. Divide any remaining dressing from the bottom of the bowl and pour it evenly over the top of the vegetables in the jars.

6. Serve

While you can eat it immediately, this salad is best after chilling in the refrigerator for at least 4 to 6 hours. It stays fresh and crunchy in the fridge for up to two weeks.

Hamburger Potato Casserole

Hamburger Potato Casserole

If you’re craving classic comfort food, this Hamburger Potato Casserole delivers rich flavors and creamy, cheesy layers that everyone will love. With tender Yukon gold potatoes, savory ground beef, and a luscious cheese and mushroom sauce, this dish is perfect for family dinners or weeknight indulgence. Provided by Tinsuf, this recipe is simple, hearty, and guaranteed to impress.

 Groceries


  • Author: tinsuf
  • Cuisine: American
  • Category: Main Course, Casserole
  • Keywords: hamburger casserole, potato casserole, ground beef casserole, cheesy casserole
  • Prep Time: 20 minutes
  • Cook Time: 1 hour 30 minutes
  • Total Time: 2 hours 5 minutes (including resting)
  • Yield: 5 servings
  • Calories: 533 kcal

Ingredients

  • 2.5 pounds Yukon gold potatoes (about 8–9 medium), thinly sliced
  • 2 pounds lean ground beef
  • 1 cup sweet yellow onion, finely diced
  • 1 tablespoon garlic, minced
  • 10.5 oz cream of mushroom soup
  • 1 cup half-and-half
  • 1 tablespoon onion powder
  • 1 ½ teaspoons kosher salt
  • 1 teaspoon freshly cracked black pepper
  • 3 cups Colby Jack cheese, shredded and divided


Instructions

  1. Prep the potatoes: Thinly slice potatoes about ⅛-inch thick. Place in water to prevent browning while preparing other ingredients.
  2. Preheat oven: Set oven to 350°F (177°C). Lightly grease a 9×13-inch baking dish.
  3. Cook the meat: In a large saucepan or Dutch oven, brown ground beef with diced onions and garlic over medium-high heat. Stir frequently and crumble meat. Drain excess fat.
  4. Prepare the sauce: In a bowl, combine cream of mushroom soup, half and half, onion powder, salt, and pepper. Stir until smooth.
  5. Layer the casserole: Drain potato slices. Place 1/3 of the potatoes in the bottom of the baking dish, top with 1/3 of the meat mixture, ¾ cup of cheese, and 1/3 of the sauce.
  6. Add remaining layers: Repeat layers with another 1/3 of potatoes, meat, cheese, and sauce. Finish with the final layer of potatoes and meat, pour the remaining sauce, and top with 1½ cups of cheese.
  7. Bake: Cover tightly with foil and bake for 1 hour and 10 minutes. Remove foil and bake for an additional 20 minutes until cheese is melted and bubbling.
  8. Rest: Let the casserole rest for 15 minutes before serving.


Troubleshooting & Consistency Tips

Potato slices should be evenly thin to cook uniformly. Keep an eye toward the end of baking, as ovens vary. You can peel potatoes if preferred, but leaving skins on adds extra texture and nutrients. Assemble in advance and refrigerate if needed.


Storage & Make-Ahead

Store leftovers in an airtight container in the refrigerator for up to 3–4 days. Reheat in the oven at 350°F until warmed through for the best texture. This casserole can also be prepared a day ahead and baked just before serving.

Why This Recipe Works

This Hamburger Potato Casserole balances tender potatoes, savory ground beef, and creamy cheesy sauce perfectly. Layering ensures every bite has potatoes, meat, and cheese. Baking covered first keeps moisture in, while uncovering at the end browns the cheese beautifully.


Expert Tips

  • Use Yukon Gold potatoes for a creamy, buttery texture.
  • Shred cheese freshly for better melting.
  • Drain the meat well to prevent a watery casserole.
  • Cover tightly with foil to ensure even cooking and prevent the top from burning.
  • Optional: Add a layer of sautéed mushrooms for extra flavor.


This hearty Hamburger Potato Casserole recipe is brought to you by tinsuf. Enjoy this comforting, cheesy dish and explore more of our professional, easy-to-follow recipes for family-friendly dinners.

🥤 Banana & Apple Silk Smoothie

🥤 Banana & Apple Silk Smoothie

Prep time: 5 minutes | Servings: 1 large glass

Ingredients

Category Ingredient Quantity
Fruit Ripe Banana (frozen is best for thickness) 1 large
Fruit Red Apple (peeled and chopped) ½ large
Base Greek Yogurt or Skyr (Plain or Vanilla) ½ cup
Liquid Milk of choice (Oat, Almond, or Dairy) ½ to ¾ cup
Sweetener Honey or Maple Syrup (Optional) 1 tsp
Spice Ground Cinnamon A tiny pinch
Garnish Extra Banana 3-4 thin slices

Instructions

  1. Prepare the Fruit: * Peel and slice the banana. (Pro tip: use a frozen banana to get that thick, soft-serve consistency seen in the image).

    • Peel the apple and remove the core. Chopping it into small chunks helps it blend smoothly without leaving grainy bits of skin.

  2. Layer the Blender: * Add the liquid first, followed by the yogurt, then the fruit. This helps the blender blades catch the liquid and prevents “air pockets.”

  3. Blend: * Start on a low speed and gradually increase to high. Blend for about 45–60 seconds until perfectly silky.

    • If it’s too thick: Add a splash more milk.

    • If it’s too thin: Add a few ice cubes or more frozen banana.

  4. The “Visual” Touch: * To get the look in the photo, slice 3-4 very thin rounds of banana.

    • Press a few against the inside glass wall before pouring (the suction will hold them there).

    • Pour the smoothie in carefully, then float the remaining slices on top.


Quick Tips for the Best Result

  • The Apple: Since apples are fibrous, using a high-powered blender is key. If you don’t have one, you can use unsweetened applesauce (about 1/3 cup) instead of a fresh apple for an even smoother texture.

  • The Color: To keep the smoothie that bright, creamy beige color, add a tiny squeeze of lemon juice. This prevents the apple and banana from oxidizing (turning brown) if you don’t drink it immediately.

Evidence-Based Morning Wellness Drink, Start your day energized with a science-backed, nutrient-packed wellness beverage.

What This Drink Actually Supports

This simple morning drink may help with:

• Hydration
• Digestion
• Morning energy
• Gentle inflammation support
• Electrolyte balance
• Improved alertness

It does not cure depression, insomnia, or major medical conditions — but it’s a great healthy ritual that genuinely supports wellness.


Morning Lemon-Ginger Hydration Tonic

Meta Info

Servings: 1
Total Time: 3 minutes
Difficulty: Very Easy
Calories: ~8
Carbs: ~2–3g
SW (syns): 0
WW Points: 0


Ingredients Needed

  • 1 cup warm water
  • 1 tbsp fresh lemon juice (or apple cider vinegar if preferred)
  • ½ tsp grated fresh ginger OR 1–2 ginger slices
  • Optional:
    • A pinch of sea salt (for electrolytes)
    • ¼ tsp honey or sweetener (honey = ½ syn / 1 WW point; sugar-free sweetener = 0)

How to Make It

  1. Warm the water. Keep it comfortably warm — not boiling.
  2. Add lemon or ACV. Stir in 1 tablespoon.
  3. Add ginger. Grate or slice fresh ginger and add it to the cup.
  4. Enhance if needed. Add sea salt for electrolytes or a touch of sweetener.
  5. Stir & sip slowly. Drink first thing in the morning on an empty stomach or before breakfast.

Why This Recipe Works (Evidence-Based Benefits)

Lemon or ACV

  • Supports digestion
  • Helps hydration
  • Provides small amounts of antioxidants

Ginger

  • Shown in studies to reduce mild nausea
  • Contains anti-inflammatory compounds

Warm Water

  • Helps morning hydration
  • May improve natural digestion and circulation

Sea Salt (optional)

  • Helps replenish electrolytes
  • Useful for low-carb/keto followers

Safe & Realistic Expectations

This drink can:
• Support hydration
• Provide a refreshing start to your day
• Support digestion
• Offer gentle anti-inflammatory benefits
• Help morning energy

This drink cannot:
• Cure depression, rheumatism, nerve pain, cartilage damage, or hemorrhoids
• Replace medication
• Treat severe chronic conditions


Storage & Serving Suggestions

  • Best enjoyed fresh
  • If prepping ahead, store lemon/ginger mixture in the fridge for 24 hours
  • Serve warm or room temperature

FAQs

Can I drink this every morning?
Yes — it’s safe for most people and good for daily hydration.

Can keto or low-carb followers take this?
Yes — it’s extremely low in carbs, and with ACV + salt it fits keto perfectly.

Is it safe for SW and WW?
Yes — 0 syns and 0 WW points unless you add honey.

Can I use bottled lemon juice?
Fresh is best, but bottled works if it contains no added sugar.

Grilled Chicken & Broccoli Bowls with Creamy Garlic Sauce

Grilled Chicken & Broccoli Bowls with Creamy Garlic Sauce

Prep time: 15 mins | Cook time: 15 mins | Servings: 2

Ingredients

For the Chicken & Broccoli:

  • 2 boneless, skinless chicken breasts

  • 2 cups (200g) broccoli florets

  • 2 tbsp olive oil

  • Salt & black pepper to taste

  • 1/4 tsp paprika (for the chicken seasoning)

  • Cooked rice or quinoa (for serving)

For the Creamy Garlic Sauce:

  • 1/2 cup (120ml) Greek yogurt

  • 2 garlic cloves, minced

  • 1 tbsp lemon juice

  • 1 tbsp chopped fresh parsley

  • Pinch of salt


Instructions

1. Prepare the Chicken

Pat the chicken breasts dry with paper towels. Season both sides generously with saltblack pepper, and 1/4 tsp paprika. Drizzle with 1 tbsp olive oil to coat.

2. Grill the Chicken

Heat a grill pan or large skillet over medium-high heat. Once hot, add the chicken. Grill for about 6–7 minutes per side, or until the internal temperature reaches 165°F (74°C) and you have a nice golden-brown char. Remove from the pan and let it rest for 5 minutes before slicing.

3. Sauté or Steam the Broccoli

While the chicken is cooking, toss the broccoli florets with the remaining 1 tbsp olive oil, salt, and pepper. You can sauté them in the same pan as the chicken for extra flavor, or steam them for 4–5 minutes until tender-crisp and bright green.

4. Mix the Creamy Garlic Sauce

In a small bowl, whisk together the Greek yogurtminced garliclemon juice, and chopped fresh parsley. If the sauce is too thick, you can add a teaspoon of water or olive oil to reach your desired drizzling consistency.

5. Assemble the Bowls

Divide your cooked rice or quinoa between two bowls. Top with the sliced grilled chicken and the broccoli florets.

6. Garnish and Serve

Generously drizzle the creamy garlic sauce over the chicken and broccoli. Garnish with a bit more fresh parsley if desired.

Triple Berry Refresh Smoothie

Triple Berry Refresh Smoothie

Ingredients

To get that perfect thick consistency and bright purple hue, you will need:

  • Frozen Mixed Berries: 2 cups (a blend of blueberries, raspberries, and strawberries). Using frozen berries ensures a cold, frosty texture without watering it down with ice.

  • Greek Yogurt: 1/2 cup (plain or vanilla) for creaminess and protein.

  • Milk of Choice: 1 to 1 ½ cups (almond, oat, or dairy milk all work well).

  • Liquid Sweetener: 1–2 tablespoons of honey or maple syrup (optional, depending on the sweetness of your fruit).

  • Garnish: Fresh mint leaves, extra berries, and a few slices of strawberry.


Instructions

  1. Layer the Ingredients: Add the milk to your blender first. Following with the yogurt and then the frozen berries helps the blades spin more freely.

  2. Blend: Start on a low speed and gradually increase to high. Blend for about 45–60 seconds until the mixture is completely smooth and no large berry skins remain.

  3. Adjust Consistency: * If it is too thick, add a splash more milk.

    • If it is too thin, add a few more frozen berries or a handful of ice and blend again.

  4. Taste Test: Sip a small amount to see if it needs more sweetener.

  5. Serve: Pour into tall glasses. Top with a sprig of fresh mint, a raspberry, a few blueberries, and a slice of strawberry to match the beautiful presentation in your photo.


Tips for Success

  • The “Vibrant” Secret: If you want an even deeper purple color, add a teaspoon of acai powder or a few extra blackberries.

  • Nutritional Boost: Feel free to toss in a tablespoon of chia seeds or flax seeds before blending; they won’t change the flavor but add great healthy fats.

Homemade Mounjaro-Style Refreshing Drink with Pink Salt

Homemade Mounjaro-Style Refreshing Drink with Pink Salt

This homemade Mounjaro-style drink is a simple, refreshing beverage made with everyday kitchen ingredients. It combines water, fresh lemon juice, apple cider vinegar, pink salt, and ground ginger to create a lightly tangy, gently spiced drink that many people enjoy as part of their daily hydration routine. The flavor is clean, balanced, and easy to adjust according to personal taste. This recipe focuses on preparation, flavor balance, and serving ideas, making it suitable for everyday use at home.

Ingredients

To prepare one large serving, you will need the following:

  • 24 ounces (3 cups) of clean, room-temperature or chilled water

  • 2 tablespoons freshly squeezed lemon juice

  • 1 tablespoon apple cider vinegar

  • ¼ teaspoon pink salt

  • ¼ teaspoon ground ginger

Optional additions (for flavor variation only):

  • A few ice cubes

  • A small amount of honey or maple syrup (optional, for mild sweetness)

  • Fresh ginger slices for garnish

  • A lemon slice for presentation

Equipment Needed

  • Measuring spoons

  • Measuring cup

  • A large glass, mason jar, or pitcher

  • Spoon or small whisk for mixing

Step-by-Step Preparation

  1. Prepare the water
    Start by pouring 24 ounces of water into a large glass or mason jar. Room-temperature water allows the ingredients to dissolve easily, but chilled water can be used if you prefer a cooler drink.

  2. Add the lemon juice
    Measure 2 tablespoons of freshly squeezed lemon juice and add it to the water. Fresh lemon juice gives a brighter and cleaner taste compared to bottled juice. Stir gently to combine.

  3. Mix in the apple cider vinegar
    Add 1 tablespoon of apple cider vinegar to the mixture. Stir again so it blends evenly with the lemon water. The vinegar adds a subtle tang that balances the citrus flavor.

  4. Incorporate the pink salt
    Sprinkle in ¼ teaspoon of pink salt. Stir well until the salt dissolves completely. This step is important to ensure an even taste throughout the drink.

  5. Add the ground ginger
    Add ¼ teaspoon of ground ginger. Stir thoroughly so the ginger disperses evenly and does not settle at the bottom. If needed, whisk gently for a smoother texture.

  6. Taste and adjust
    Take a small sip and adjust the flavor if desired. You may add a little more water to soften the taste or a touch of honey if you prefer a hint of sweetness.

  7. Serve
    Add ice cubes if you like your drink chilled. Garnish with a lemon slice or fresh ginger for an attractive finish. Serve immediately for the best flavor.

Flavor Notes and Texture

This drink has a light citrus aroma from the lemon, a gentle tang from the apple cider vinegar, and a mild warmth from the ginger. The pink salt adds balance without overpowering the other ingredients. When mixed well, the drink is smooth, refreshing, and easy to sip.

Storage Tips

  • This drink is best enjoyed fresh.

  • If needed, it can be stored in a sealed container in the refrigerator for up to 24 hours.

  • Stir or shake well before serving, as natural ingredients may settle over time.

Serving Suggestions

  • Enjoy it in the morning as a refreshing start to the day.

  • Serve it chilled on warm days for a cooling beverage.

  • Pair it with light meals or enjoy it on its own as a flavorful water alternative.

Customization Ideas

  • Use sparkling water for a fizzy version.

  • Add a few mint leaves for a refreshing twist.

  • Replace ground ginger with freshly grated ginger for a stronger flavor.

This homemade Mounjaro-style drink is simple to prepare, easy to customize, and made entirely from common kitchen ingredients. It focuses on taste, freshness, and hydration, making it a pleasant addition to your daily beverage options.

Healthy Zucchini and Oatmeal Pizza Crust

Healthy Zucchini and Oatmeal Pizza Crust

If you’re looking for a nutritious and delicious alternative to traditional pizza crust, this zucchini and oatmeal pizza crust is a perfect choice! Packed with fiber, vitamins, and protein, it’s a great gluten-free and wholesome base for your favorite toppings. Whether you’re aiming for a low-carb meal or just adding more veggies to your diet, this crust is light, crispy, and satisfying.

Prep Time: 10 minutes

Draining Zucchini: 5 minutes (important for crispiness!)

Baking Time: 15-20 minutes for the crust, plus 10 minutes after adding toppings

Total Time: ~30-35 minutes

Ingredients:

1 medium zucchini, grated

1 cup rolled oats (blended into oat flour)

1 egg (or flax egg for vegan)

1/4 cup shredded mozzarella or nutritional yeast (optional)

1/2 tsp salt

1/2 tsp garlic powder

1/2 tsp Italian seasoning

1/4 tsp black pepper

Instructions:

Preheat oven to 400°F (200°C) and line a baking sheet with parchment paper.

Grate the zucchini, place it in a clean kitchen towel, and squeeze out excess moisture.

Make oat flour by blending rolled oats into a fine powder.

In a bowl, mix zucchini, oat flour, egg, cheese (if using), and seasonings until combined.

Form the crust: Spread the mixture onto the parchment paper, shaping it into a thin, even circle.

Bake for 15-20 minutes or until the crust is firm and slightly golden.

Add toppings of choice (e.g., tomato sauce, veggies, cheese) and bake for another 10 minutes.

Tips:

For a crispier crust, flip it after the first bake and cook for 5 more minutes.

Let it cool slightly before slicing to keep its structure.

Nutritional Facts (Per Serving, Approx. 1 of 4 Slices):

Calories: ~120

Protein: ~5g

Carbs: ~15g

Fiber: ~3g

Fat: ~4g

Golden Crispy Chicken Tenders

Golden Crispy Chicken Tenders

Ingredients

  • Chicken: 1 lb (500g) chicken breast or tenders, sliced into strips.

  • The Binder: 3 egg yolks (as shown in your image).

  • The Seasoning: 1 tsp salt, ½ tsp black pepper, 1 tsp garlic powder, and 1 tsp paprika.

  • The Coating: 1 cup all-purpose flour or breadcrumbs (Panko works best for extra crunch).

  • Oil: Neutral oil for frying (vegetable, canola, or sunflower oil).


Instructions

  1. Marinate the Chicken: In a large bowl, combine your chicken strips with the 3 egg yolks and the seasonings (salt, pepper, garlic powder, and paprika). Mix well until every piece of chicken is evenly coated. Let it sit for 10–15 minutes to allow the flavors to soak in.

  2. Bread the Pieces: Place your flour or breadcrumbs in a shallow dish. Take one piece of chicken at a time from the egg mixture and press it firmly into the coating. Make sure it is fully covered on all sides.

  3. Heat the Oil: Fill a heavy-bottomed pan with about 1 inch of oil. Heat it over medium-high heat. You can test if it’s ready by dropping a small breadcrumb in—if it sizzles immediately, it’s ready.

  4. Fry until Golden: Carefully place the chicken strips in the hot oil. Do not overcrowd the pan; fry in batches if necessary. Fry for about 3–4 minutes per side until they are deep golden brown and the internal temperature reaches 165°F (74°C).

  5. Drain and Serve: Remove the tenders and place them on a wire rack or a plate lined with paper towels to drain any excess oil.


Quick Tips for Success

  • Double Crunch: For an even thicker crust, dip the chicken back into the egg and then into the breading a second time before frying.

  • Air Fryer Version: If you prefer not to deep fry, spray the breaded tenders with a little oil and air fry at 400°F (200°C) for 10–12 minutes, turning halfway through.

Mixed Berry Banana Super Smoothie

Mixed Berry Banana Super Smoothie – Full Recipe

Ingredients

From the image, the smoothie appears to include:

  • ½ cup banana slices

  • ½ cup blueberries

  • ½ cup strawberries

  • ¼ avocado

  • 1–2 tbsp oats or ground flax/chia mix (seen at the bottom as a grainy layer)

  • 1 tbsp powdered sugar or protein powder (optional white powder visible)

  • 1 cup milk (dairy or plant-based)

  • 4–6 ice cubes (optional, for a thicker texture)

  • Honey or dates (optional) for extra sweetness

✨ Instructions

  1. Prep Your Ingredients:
    Slice the banana and wash the berries. Scoop out the avocado. Measure your oats, flax, or chia.

  2. Layering (Optional, as shown in the image):

    • Start with the oats/flax mix.

    • Add banana slices.

    • Add blueberries.

    • Add strawberries.

    • Place avocado chunks and powdered sugar/protein powder on top.
      This layering is mostly aesthetic for storage but blends the same.

  3. Blend:
    Pour everything into a blender. Add the milk and ice.
    Blend for 30–40 seconds until velvety smooth.

  4. Serve:
    Pour into a tall cup and enjoy immediately for the freshest taste.


❓ Q&A Section

Q1: What does this smoothie taste like?

It has a naturally sweet and creamy flavor. The bananas and strawberries add sweetness, blueberries give a mild tang, and avocado adds a buttery richness without overpowering the fruitiness.

Q2: Can I replace the milk?

Yes! Almond milk, oat milk, coconut milk, or even yogurt works well. For a thicker smoothie, use ½ cup milk + ½ cup yogurt.

Q3: Is the avocado necessary?

Not required, but highly recommended. It adds creaminess, healthy fats, and keeps the smoothie filling for longer.

Q4: Can I add protein?

Absolutely. Add 1 scoop of vanilla or unflavored protein powder. It blends perfectly with these fruits.

Q5: How can I make it colder and thicker?

Use frozen bananas or frozen berries, or add extra ice cubes. You can also add a spoon of Greek yogurt.

Q6: Is this smoothie good for breakfast?

Yes! It’s rich in fiber, antioxidants, potassium, and healthy fats. It provides long-lasting energy and supports digestion.

Zero-Carb Pizza, All the pizza flavor you crave—without a single gram of carbs.

Detail Value
Servings 4 slices
Total Time 40 Minutes (15 min Prep / 25 min Cook)
Difficulty Medium
Net Carbs per Serving 0g Net Carbs
Macros (per serving) Est. 35g Protein / 0g Carbs / 25g Fat

Intro Paragraph

Do you miss pizza, but follow a strict zero-carb diet or a Carnivore eating plan? Giving up bread and crusts might feel like giving up on a classic comfort food forever. We know that feeling of intense craving when your friends order a pie! Fortunately, we have the perfect zero-carb solution that delivers all the savory satisfaction you need while keeping your carb count exactly at zero.

This recipe, affectionately known as a “Meatza,” uses a perfectly seasoned, protein-packed ground meat crust instead of flour-based dough. It’s not just a substitution—it’s an incredibly delicious, high-protein meal that’s naturally gluten-free and completely free of vegetable oils and sugars. It’s the ultimate Keto-friendly recipe for when the craving hits hard.

Get ready to revolutionize your meal plan. This zero-carb pizza is easy, filling, and the absolute best way to enjoy a pizza night while staying 100% committed to your low-carb lifestyle.

Look at the Recipe

  • Sensory Appeal: A robust, savory crust that holds up perfectly, topped with a thick layer of melted, bubbling mozzarella and salty, smoky pepperoni.
  • Flavor Highlight: The rich, umami flavor of the beef crust provides a satisfying foundation, enhanced by the fatty, savory punch of the zero-carb toppings.
  • Key Keto Benefit: It contains 0g net carbs and is extremely high in bioavailable protein and healthy fats, making it a perfect fat-loss meal that keeps you satiated for hours.

Ingredients Needed

For the Zero-Carb Crust

  • 1.5 lbs Lean Ground Beef (85/15 is ideal for flavor, but 93/7 also works)
  • 1 Large Egg
  • 1 tsp Salt
  • ½ tsp Black Pepper
  • ½ tsp Garlic Powder (Optional: Omit for strictest Carnivore)

For the Zero-Carb Toppings

  • ½ cup Low-Sugar/Zero-Carb Pizza Sauce (Read labels for 0g sugar/carb, or use a thin layer of cream cheese for Carnivore)
  • 1 cup Shredded Full-Fat Mozzarella Cheese (Whole Milk preferred)
  • 10-12 slices Uncured Turkey Pepperoni or Standard Pepperoni (Check for no added sugar/dextrose)
  • 1 tbsp Dried Oregano (Optional: Omit for strictest Carnivore)

How to Make Our Zero-Carb Pizza

  1. Prep the Crust: Preheat your oven to 400°F (200°C). Line a baking sheet with parchment paper. In a large bowl, combine the ground beef, egg, salt, pepper, and garlic powder (if using). Mix thoroughly using your hands until just combined—do not overmix.
  2. Shape the Dough: Press the meat mixture evenly onto the prepared baking sheet into a 10×12-inch rectangular crust shape, about $\frac{1}{2}$ inch thick. Create a slight lip around the edge to form a crust barrier.
  3. Pre-Bake: Bake the crust for 15 minutes. This allows the crust to set and the fat to render.
  4. Drain the Fat: Carefully remove the baking sheet from the oven. Gently blot or carefully pour off any excess rendered fat from the baking sheet.
  5. Load the Toppings: Spread a thin layer of your zero-carb sauce or cream cheese over the pre-baked crust. Top evenly with the shredded mozzarella, followed by the pepperoni slices and oregano (if using).
  6. Final Bake: Return the pizza to the oven and bake for another 8-10 minutes, or until the cheese is completely melted and bubbly, and the pepperoni edges are crispy.
  7. Rest and Slice: Let the pizza rest for 5 minutes before slicing into 4 generous squares.

Storage & Serving Suggestions

This “meatza” holds up surprisingly well and is fantastic for meal prep.

  • Storing: Allow any leftovers to cool completely. Store slices in an airtight container in the refrigerator for up to 3 days.
  • Reheating: Reheat slices in an air fryer or a toaster oven at 350°F (175°C) for 5-7 minutes. This is crucial for crisping up the meat crust again. Microwaving may result in a rubbery texture.
  • Freezing: You can freeze individual cooked slices wrapped tightly in foil for up to 1 month. Thaw overnight in the refrigerator before reheating as instructed above.
  • Serving Pairings: Since the pizza is already a complete meal (protein and fat), serve it alongside a simple zero-carb beverage like sparkling water or a cup of rich, fatty bone broth for maximum nourishment.

Tips & FAQs

Q: Is ground beef the only meat I can use for the crust?

A: You can swap the ground beef for ground pork or a mixture of ground beef and pork. Some people also enjoy a crust made from ground chicken, but it tends to be drier. Using a fattier cut (85/15 or 80/20) will always yield a juicier, more flavorful zero-carb crust.

Q: How can I make this truly Carnivore-friendly?

A: To make this pizza fit the strict Carnivore dietomit the garlic powder, oregano, and all vegetables from the toppings (including any tomato or onion in the sauce). Use only the meat crust, cheese, and pepperoni. You can use a thin layer of softened cream cheese or ricotta as a “sauce” base if desired.

Q: What other zero-carb toppings are available?

A: Focus on quality protein and fat: bacon crumbles, thinly sliced ham, cooked sausage, or extra mozzarella. Always check the ingredients list on packaged meats to ensure no hidden sugars (dextrose) or nitrates are present.

Q: How do I prevent my meat crust from shrinking?

A: Pressing the meat firmly and ensuring you create a small edge/lip helps maintain its shape. The most important step is the pre-bake, which sets the proteins before you add the heavy toppings.

Chicken with Creamy Mustard:

Ingredients

  • 4 chicken breasts
  • 2 tablespoons olive oil
  • Salt, to taste
  • Black pepper, to taste
  • 1/2 cup heavy cream
  • 1/4 cup Dijon mustard
  • 1/4 cup chicken broth
  • 1 tablespoon fresh parsley, chopped (for garnish)

Instructions

  1. Season chicken breasts with salt and black pepper on both sides.
  2. In a large skillet, heat the olive oil over medium-high heat.
  3. Add the chicken breasts to the skillet and cook for 5-7 minutes on each side, or until they are golden brown and cooked through. Remove from the skillet and set aside.
  4. In the same skillet, reduce the heat to medium. Add the chicken broth, scraping any browned bits from the bottom of the pan.
  5. Stir in the Dijon mustard and heavy cream, mixing well until combined.
  6. Allow the sauce to simmer for 2-3 minutes, thickening slightly.
  7. Place the cooked chicken breasts back in the skillet, coating them in the sauce. Heat through for about 2 minutes.
  8. Transfer the chicken to a serving plate and drizzle the sauce on top. Sprinkle chopped parsley for a fresh garnish.