Mexican Street Corn White Chicken Chili

🌽 Mexican Street Corn White Chicken Chili

📝 Description

This creamy and flavorful Mexican Street Corn White Chicken Chili combines the zesty flavors of Mexican elote (street corn) with hearty, protein-rich white chicken chili. It’s a comforting one-pot meal loaded with tender chicken, roasted corn, white beans, green chiles, and spices—finished with lime juice, cilantro, and a touch of cotija cheese for an authentic street corn twist.

Perfect for cozy nights, game days, or when you’re craving a Mexican-inspired comfort dish!

🍲 Ingredients

Servings: 6–8
Prep Time: 15 minutes
Cook Time: 30–40 minutes
Total Time: 45–55 minutes

Main Ingredients

  • 2 tablespoons olive oil or butter

  • 1 medium onion, diced

  • 3 cloves garlic, minced

  • 1 ½ pounds boneless, skinless chicken breasts (or thighs), cubed

  • 4 cups chicken broth (low-sodium)

  • 2 cans (15 oz each) white beans, drained and rinsed (Great Northern or cannellini)

  • 2 cups corn kernels (fresh, frozen, or fire-roasted canned)

  • 1 can (4 oz) diced green chiles

  • 1 teaspoon cumin

  • 1 teaspoon chili powder

  • ½ teaspoon smoked paprika

  • Salt and pepper to taste

Creamy Base

  • ½ cup sour cream or plain Greek yogurt

  • 4 oz cream cheese, softened

  • ½ cup heavy cream (or milk for lighter version)

Street Corn Toppings

  • ½ cup cotija cheese (or feta cheese)

  • ¼ cup chopped fresh cilantro

  • 1 tablespoon lime juice + lime wedges for serving

  • Optional: Tajín or chili-lime seasoning for garnish

👩‍🍳 Instructions

  1. Sauté aromatics:
    Heat olive oil in a large pot over medium heat. Add onions and cook for 3–4 minutes until translucent. Add garlic and cook another 30 seconds until fragrant.

  2. Cook the chicken:
    Add cubed chicken, season with salt, pepper, cumin, and chili powder. Cook until chicken is lightly browned (not fully cooked through).

  3. Add the base ingredients:
    Pour in chicken broth, white beans, corn, and green chiles. Bring to a boil, then reduce heat and simmer for 20–25 minutes, until chicken is tender.

  4. Make it creamy:
    Stir in cream cheese until melted and smooth. Add sour cream and heavy cream; stir until fully combined.

  5. Adjust seasoning:
    Taste and add more salt, pepper, or spices as needed.

  6. Serve and garnish:
    Ladle into bowls and top with cotija cheese, cilantro, a squeeze of lime, and a sprinkle of Tajín for that street corn flavor!

🍴 Serving Suggestions

  • Serve with tortilla chipscornbread, or warm flour tortillas.

  • Garnish with avocado slices or pickled jalapeños for extra kick.

  • Pairs well with a fresh side salad or Mexican rice.

🧠 Chef’s Notes & Tips

  • Shortcut: Use rotisserie chicken to cut prep time in half.

  • Fire-roasted flavor: Use roasted corn and charred jalapeños for smokier depth.

  • Thickener tip: Mash ½ cup of beans before adding to naturally thicken the chili.

  • Dairy-free option: Substitute coconut milk for cream and dairy-free yogurt for sour cream.

  • Make ahead: The chili tastes even better the next day—perfect for meal prep.

⚖️ Nutrition (Per Serving)

(Approximate, based on 6 servings)

Nutrient Amount
Calories 420 kcal
Protein 32 g
Carbohydrates 25 g
Fat 20 g
Fiber 6 g
Sodium 650 mg
Sugar 5 g

💪 Health Benefits

  1. High in Protein: Supports muscle growth and repair.

  2. Fiber-Rich: White beans and corn aid in digestion and satiety.

  3. Good Fats: Olive oil and dairy provide healthy fats for sustained energy.

  4. Rich in Vitamins: Corn and cilantro offer Vitamin C and antioxidants.

  5. Gut-Friendly: The use of yogurt or sour cream adds probiotics.

❓ Frequently Asked Questions

Q1: Can I make this in a slow cooker?
👉 Yes! Add all ingredients except the dairy to your slow cooker. Cook on LOW for 6–7 hours or HIGH for 3–4 hours. Stir in cream cheese and sour cream before serving.

Q2: Can I freeze leftovers?
👉 Absolutely. Cool completely, store in airtight containers, and freeze up to 3 months. Reheat gently to preserve texture.

Q3: Can I make it vegetarian?
👉 Yes—skip the chicken, use vegetable broth, and add extra beans or roasted cauliflower for heartiness.

Q4: How do I make it spicier?
👉 Add diced jalapeños, chipotle peppers in adobo, or a pinch of cayenne pepper.

Q5: What’s the best cheese alternative if I can’t find cotija?
👉 Feta or grated Parmesan work great as substitutes.

Thanksgiving Stuffing Balls

Thanksgiving Stuffing Balls

Ingredients

  • 3 cups dried bread cubes or stuffing mix
  • ½ cup melted unsalted butter
  • ½ cup finely chopped onion
  • ½ cup finely chopped celery
  • 2 cloves garlic minced
  • ¾ cup chicken or vegetable broth
  • 2 large eggs
  • 1 teaspoon poultry seasoning
  • ½ teaspoon dried sage
  • ½ teaspoon salt
  • ¼ teaspoon black pepper
  • 2 tablespoons fresh parsley chopped
  • Optional: ¼ cup dried cranberries or finely diced apple

Instructions

  • Preheat your oven to 375°F (190°C) and line a baking sheet with parchment paper.
  • In a skillet over medium heat, melt the butter. Add onion, celery, and garlic. Sauté for about 4–5 minutes, until soft and fragrant.
  • Place the bread cubes in a large bowl. Pour the sautéed vegetables and melted butter over the bread.
  • Add the poultry seasoning, sage, salt, pepper, parsley, and any optional add-ins you like.
  • In a separate bowl, whisk together the broth and eggs. Pour this mixture over the bread and gently stir until evenly moistened.
  • Using your hands or a scoop, form the mixture into golf-ball-size balls and arrange them on the prepared baking sheet.
  • Bake for 22–25 minutes, until the outsides are golden and slightly crisp while the centers stay soft.
  • Serve warm as a festive Thanksgiving side dish or party appetizer.

Sweet Alabama Pecanbread

Sweet Alabama Pecanbread

Ingredients

  • 2 cups granulated sugar
  • 1 cup vegetable oil
  • 3 large eggs
  • 2 cups all-purpose flour
  • 1 teaspoon vanilla extract
  • 1 teaspoon salt
  • 1 teaspoon baking soda
  •  cups chopped pecans

Instructions

  • Preheat oven to 350°F (175°C). Lightly grease a 9×13-inch baking dish or line with parchment paper.
  • In a large bowl, whisk together the sugar and oil until smooth.
  • Add eggs one at a time, mixing well after each addition.
  • Stir in the vanilla extract.
  • In a separate bowl, combine flour, salt, and baking soda.
  • Gradually fold the dry ingredients into the wet mixture until just combined.
  • Gently fold in the chopped pecans.
  • Pour batter evenly into the prepared baking dish.
  • Bake for 30–35 minutes, or until a toothpick inserted in the center comes out clean.
  • Allow to cool before slicing and serving.

Strengthen Your Heart with This Keto Avocado Bread

Strengthen Your Heart with This Keto Avocado Bread

Soft on the inside, lightly crisp on the outside, this keto avocado bread is rich in heart-healthy fats, low in carbs, and naturally gluten-free. It’s an ideal breakfast or light meal that keeps you full, energized, and satisfied without spiking blood sugar.


Description

This keto avocado bread is a savory flatbread-style recipe, not a traditional loaf. Avocado provides healthy monounsaturated fats that support heart health, while almond and coconut flour keep it low-carb and grain-free. It’s quick to make and pairs beautifully with eggs, salmon, or fresh veggies.


Ingredients

  • 1 large ripe avocado

  • 2 large eggs

  • 1 cup almond flour

  • 2 tbsp coconut flour

  • ½ tsp baking powder

  • ¼ tsp salt

  • ½ tsp garlic powder (optional)

  • 1 tbsp olive oil or avocado oil

  • Optional: fresh herbs (parsley, basil, chives)


Instructions

  1. Mash the Avocado
    Mash avocado in a bowl until smooth.

  2. Add Wet Ingredients
    Mix in eggs and oil until well combined.

  3. Combine Dry Ingredients
    Stir in almond flour, coconut flour, baking powder, salt, and seasonings.

  4. Cook the Bread
    Heat a non-stick skillet over medium-low heat.
    Spoon batter into small, thin rounds.
    Cook 2–3 minutes per side until golden.

  5. Serve
    Enjoy warm or let cool slightly for firmer texture.


Tips for Best Results

  • Use a very ripe avocado for smooth texture

  • Keep heat medium-low to avoid burning

  • Make thinner rounds for a crispier finish

  • Add shredded cheese for extra flavor

  • Can also be baked at 180°C / 350°F for 12–15 minutes


Servings

  • Makes: 6 small flatbreads

  • Serves: 2–3


Nutritional Information (Approx. per flatbread)

  • Calories: 160

  • Fat: 13 g

  • Protein: 6 g

  • Net Carbs: 2 g

  • Fiber: 4 g

  • Sugar: <1 g

(May vary depending on ingredients used)


Health Benefits

  • ❤️ Supports heart health with healthy fats

  • 🥑 Rich in potassium and fiber

  • ✔ Keto & low-carb friendly

  • ✔ Gluten-free & grain-free

  • ✔ Helps maintain steady energy and fullness


Q & A

Q: Is this bread suitable for strict keto?
A: Yes, it’s low in net carbs and keto-friendly.

Q: Can I make it dairy-free?
A: It’s naturally dairy-free as written.

Q: Can I store it?
A: Refrigerate up to 3 days or freeze up to 1 month.

Q: Best toppings?
A: Eggs, smoked salmon, cream cheese, tomatoes, or avocado slices.

Q: Can I turn this into a sandwich bread?
A: Yes—make larger rounds and cook a bit longer.

Creamy Mango Banana Smoothie

Creamy Mango Banana Smoothie

Prep time: 5 minutes | Servings: 1


Ingredients

  • 1 cup Frozen Mango Cubes: Using frozen mango is key to getting that thick, whipped texture shown in the image.

  • 1 Frozen Banana: Sliced before freezing for easier blending.

  • 1/2 cup Greek Yogurt: This provides the creamy white layer and adds protein.

  • 1/4 to 1/2 cup Milk of choice: (Dairy, almond, or oat milk all work well). Start with less to keep it thick.

  • Optional: A squeeze of honey or a splash of vanilla extract for extra sweetness.


Instructions

  1. Prep the Fruit: If your fruit isn’t already frozen, peel and slice the banana and cube the mango, then freeze for at least 4 hours.

  2. Layer the Blender: Add the liquid (milk) first, followed by the yogurt, then the frozen mango and banana. Adding liquid first helps the blades move more easily.

  3. Blend: Start on a low speed and gradually increase to high. If you have a tamper for your blender, use it to push the frozen fruit down.

    • Tip: If it’s too thick to move, add milk one tablespoon at a time until it blends smoothly.

  4. Assemble (Optional): To match the photo, you can place a few fresh banana slices and mango chunks against the inside of your glass before pouring the smoothie in.

  5. Serve: Pour the mixture into a glass. It should be thick enough to hold a “swirl” on top!


Pro-Tips for Success

  • For a “Smoothie Bowl” Texture: Use only a splash of milk. The less liquid you use, the more it will resemble the thick, whipped consistency in the picture.

  • Naturally Sweet: Make sure your bananas are spotty and ripe before you freeze them; this ensures the smoothie is sweet without needing added sugar.

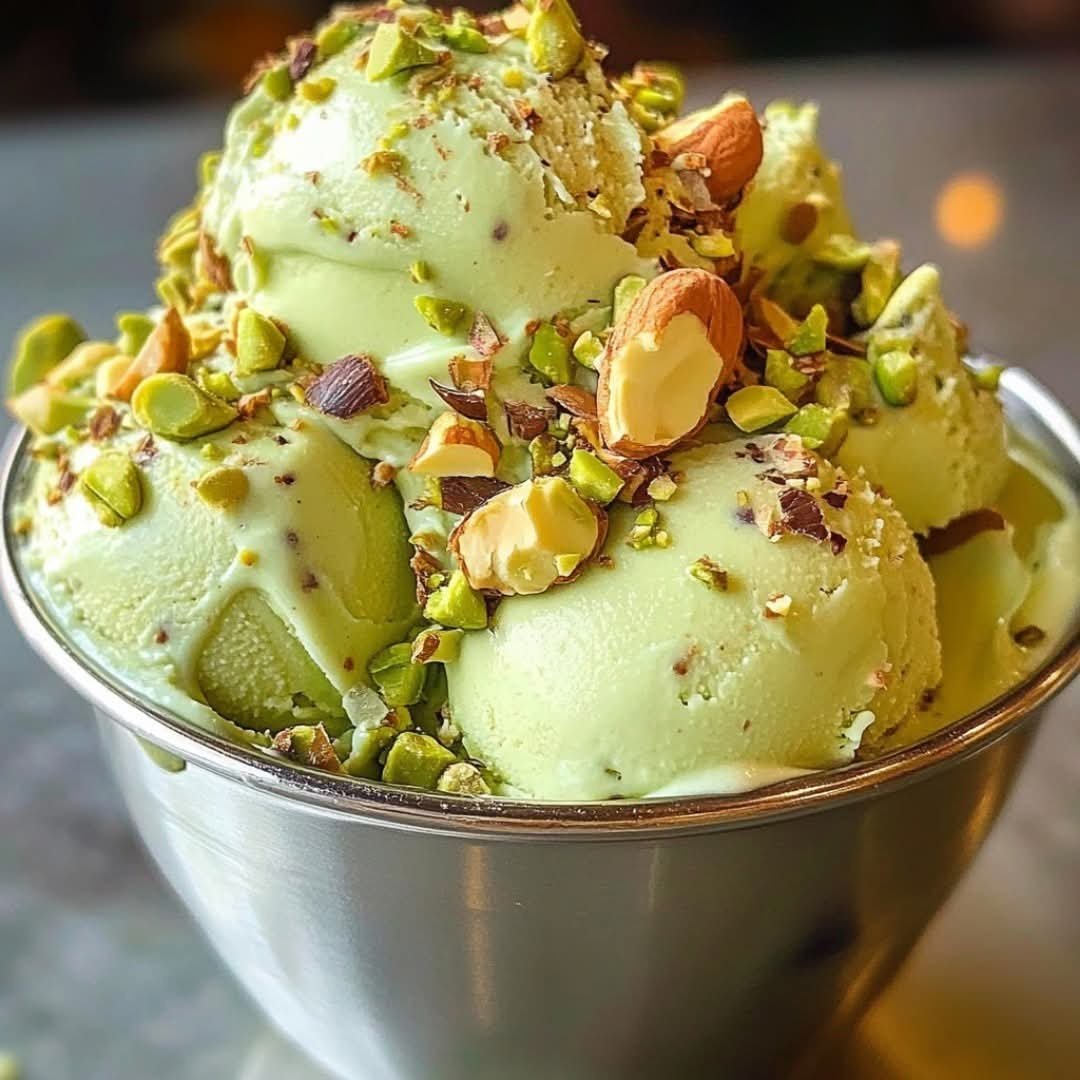
Creamy Vanilla Almond Ice Cream

Creamy Vanilla Almond Ice Cream

Ingredients

  • 2 cups Heavy cream

  • 1 cup Whole milk

  • 3/4 cup Granulated sugar

  • 1/8 tsp Salt

  • 5 Large egg yolks

  • 1 1/2 tsp Pure vanilla extract

  • 1/2 tsp Almond extract (optional, for extra almond flavor)

  • 3/4 cup Sliced almonds, toasted and roughly chopped


Instructions

1. Toast the Almonds

Place the sliced almonds in a dry skillet over medium heat. Stir frequently for 3–5 minutes until they are golden brown and fragrant. Remove from heat immediately and let them cool.

2. Warm the Dairy

In a medium saucepan, combine the heavy cream, milk, sugar, and salt. Heat over medium heat, stirring occasionally, until the sugar dissolves and the mixture is hot but not boiling (look for small bubbles around the edges).

3. Temper the Eggs

In a separate bowl, whisk the egg yolks. Slowly pour about half a cup of the hot cream mixture into the yolks, whisking constantly. This prevents the eggs from scrambling. Pour the egg mixture back into the saucepan with the rest of the cream.

4. Thicken the Custard

Cook over low-medium heat, stirring constantly with a wooden spoon or spatula. Continue until the mixture thickens enough to coat the back of the spoon (it should reach about 80°C or 175°F).

5. Chill

Strain the mixture through a fine-mesh sieve into a clean bowl. Stir in the vanilla and almond extracts. Cover the surface directly with plastic wrap (to prevent a skin from forming) and refrigerate for at least 4 hours (overnight is best).

6. Churn

Pour the chilled custard into your ice cream maker and churn according to the manufacturer’s directions. In the last 2 minutes of churning, add the toasted almonds so they are evenly distributed.

7. Freeze

Transfer the ice cream to a chilled container (like the one in your photo). Freeze for at least 4 hours to reach a “scoopable” firmness.


Quick Tips for Success

  • Don’t Rush the Chill: Starting with a very cold base ensures the smallest ice crystals, making the ice cream smoother.

  • The Crunch Factor: If you want the almonds to stay extra crunchy, you can toss them in a tiny bit of melted butter and salt before toasting.

Banana Cocoa Oatmeal Cake (No Sugar Crash!)

🍫🍌 Banana Cocoa Oatmeal Cake (No Sugar Crash!)

“I love chocolate, but I hate the sugar crash.”
So I solved that problem with this Banana Cocoa Oatmeal Cake 😁😍
It’s gluten-freerefined-sugar-free, naturally sweetened, and deeply fudgy. You get rich chocolate flavor without the spike — the smartest way to enjoy chocolate any time of day.

🌿 Description

This Banana Cocoa Oatmeal Cake is moist, dense, and chocolatey with a brownie-like texture. Sweetened naturally with ripe bananas and a touch of honey or maple syrup, it delivers steady energy instead of a crash. Perfect for breakfast, snack time, or guilt-free dessert.

📝 Ingredients

Cake Batter

  • 2 ripe bananas, mashed
  • 2 cups gluten-free rolled oats (or oat flour)
  • ¼ cup unsweetened cocoa powder
  • 2 eggs
  • ¼ cup honey or pure maple syrup
  • ¼ cup coconut oil or olive oil, melted
  • 1 tsp baking powder
  • 1 tsp vanilla extract
  • ½ tsp cinnamon (optional)
  • Pinch of salt

Topping (Optional but Recommended)

  • ¼ cup chopped walnuts or hazelnuts
  • 1–2 tbsp dark chocolate chips (optional, 70%+)

👩‍🍳 Instructions

  1. Preheat oven to 350°F (175°C). Line a loaf pan or small baking dish with parchment paper.
  2. Blend oats into flour if using whole oats.
  3. In a bowl, mash bananas until smooth.
  4. Add eggs, honey/maple syrup, oil, and vanilla. Mix well.
  5. Stir in oat flour, cocoa powder, baking powder, salt, and cinnamon.
  6. Pour batter into prepared pan and smooth the top.
  7. Sprinkle chopped nuts (and chocolate chips if using) on top.
  8. Bake for 30–35 minutes, until set and a toothpick comes out mostly clean.
  9. Cool completely before slicing for best texture.

⭐ Notes

  • The cake firms up as it cools — don’t overbake.
  • Naturally sweet: very ripe bananas are key.
  • Texture is dense and fudgy, not fluffy.

💡 Tips for Best Results

  • Use spotty bananas for maximum sweetness.
  • For extra protein, add 1–2 tbsp nut butter to the batter.
  • Want it extra fudgy? Reduce bake time by 2–3 minutes.
  • Store in the fridge for up to 5 days — flavor improves overnight.

🍽 Servings

Serves: 8 slices
Serving Size: 1 slice

🧮 Nutritional Information (Approx. per slice)

  • Calories: ~180 kcal
  • Protein: ~6 g
  • Carbohydrates: ~24 g
  • Fiber: ~4 g
  • Fat: ~8 g
  • Sugar: ~8 g (naturally occurring)

(Values may vary depending on ingredients used)

🌟 Health Benefits

  • No refined sugar: Prevents energy crashes
  • Gluten-free: Gentle on digestion
  • High fiber: From oats and bananas
  • Sustained energy: Slow-digesting carbs + healthy fats
  • Antioxidants: Cocoa supports heart and brain health

❓ Q & A

Q: Can I make this vegan?
A: Yes! Replace eggs with 2 flax eggs (2 tbsp ground flax + 5 tbsp water).

Q: Is this good for breakfast?
A: Absolutely — it’s filling, balanced, and won’t spike blood sugar.

Q: Can I freeze it?
A: Yes! Slice and freeze up to 2 months.

Q: Can I make it nut-free?
A: Simply skip the nut topping.

Slow Cooker Irish Potatoes (Short & Simple) ✨🥔

🧾 Ingredients

  • 3 lb Yukon Gold potatoes, peeled & chunked 🥔

  • 1 onion, sliced 🧅

  • 3 garlic cloves, minced 🧄

  • ½ cup butter 🧈

  • 1 cup vegetable or chicken broth 🍲

  • 1 tsp salt 🧂

  • ½ tsp black pepper

  • ½ tsp dried thyme (optional 🌿)

  • ½ cup warm milk or half-and-half 🥛

  • ¼ cup sour cream (optional 🤍)

  • Fresh parsley, chopped 🌿

  • Green onions for topping 🌱

👩‍🍳 Quick Directions

1️⃣ Add onion and garlic to slow cooker. Top with potatoes and butter.
2️⃣ Season with salt, pepper, and thyme. Pour in broth.
3️⃣ Cook on LOW for 5–6 hrs or HIGH for 3–4 hrs until very tender.
4️⃣ Add milk and sour cream. Mash gently until creamy. 🥔✨
5️⃣ Stir in parsley, adjust seasoning, and top with green onions.

Sugar-Free Chia Seed Breakfast Pudding

Slim Waist Morning Bowl

This Sugar-Free Chia Seed Breakfast Pudding is a simple, nourishing way to start your day without added sugars. Creamy, lightly sweet, and packed with fiber, protein, and healthy fats, it keeps you full for hours while supporting digestion and steady energy. Chia seeds absorb liquid overnight, creating a pudding-like texture that feels indulgent but is incredibly healthy. This recipe is perfect for weight management, gut health, and busy mornings since it can be prepared ahead of time.

Ingredients (Serves 1–2)

  • 3 tablespoons chia seeds
  • 1 cup unsweetened almond milk (or coconut milk, oat milk, or dairy milk)
  • ½ teaspoon vanilla extract
  • ½ teaspoon cinnamon
  • ¼ teaspoon ground ginger (optional)
  • 1–2 tablespoons mashed ripe banana or sugar-free sweetener to taste (optional)
  • Pinch of sea salt

Optional Toppings

  • Fresh berries (strawberries, blueberries, or raspberries)
  • Sliced almonds or walnuts
  • Unsweetened coconut flakes
  • Chia seeds or flaxseeds
  • Plain Greek yogurt (for extra protein)

Instructions

  1. Mix the Base
    In a medium bowl or jar, add chia seeds, almond milk, vanilla extract, cinnamon, ginger (if using), sea salt, and mashed banana or sugar-free sweetener. Stir well for 1–2 minutes to evenly distribute the chia seeds and prevent clumping.
  2. Rest and Stir Again
    Let the mixture sit at room temperature for 5 minutes, then stir again. This second stir is important—it helps the chia seeds absorb the liquid evenly and creates a smooth, creamy texture.
  3. Chill Overnight
    Cover the bowl or jar and refrigerate for at least 4 hours, preferably overnight. During this time, the chia seeds will swell and thicken the mixture into a pudding-like consistency.
  4. Check Consistency
    In the morning, give the pudding a good stir. If it feels too thick, add a splash of almond milk and mix until creamy. If it’s too thin, add 1 teaspoon of chia seeds and let it sit for 10 more minutes.
  5. Add Toppings and Serve
    Spoon the pudding into a bowl or enjoy it straight from the jar. Top with fresh berries, nuts, coconut flakes, or yogurt for added texture and nutrition.
See also  Lemon Cream Puff Pastry Tarts

Why This Bowl Supports a Slim Waist

  • Chia seeds are rich in soluble fiber, which promotes fullness and supports digestion.
  • No added sugar helps prevent blood sugar spikes and cravings.
  • Healthy fats and plant protein provide long-lasting energy.
  • Cinnamon and ginger may help support metabolism and reduce inflammation.

Make-Ahead & Storage Tips

  • Store chia pudding in an airtight container in the refrigerator for up to 4 days.
  • Prepare multiple jars at once for an easy grab-and-go breakfast.

This Slim Waist Morning Bowl is creamy, satisfying, and naturally nourishing—proof that healthy breakfasts can be simple, delicious, and sugar-free. 🌱✨

Protein Blueberry Breakfast Jar

Protein Blueberry Breakfast Jar (47g Protein)

Description

A creamy, crunchy, high-protein yogurt jar layered with blueberry compote, protein-packed Greek yogurt, and granola. Quick, refreshing, and perfect for grab-and-go mornings.

Ingredients (1 Jar)

Blueberry Layer

  • ½ cup blueberries

  • 1–2 tbsp water

  • ½–1 tsp lemon juice (optional)

  • Sweetener (optional)

Protein Yogurt

  • 1 cup (225g) Greek yogurt

  • 1 scoop vanilla protein powder

  • Splash of milk/water if needed

Crunch

  • ¼–⅓ cup high-protein granola

Topping

  • Extra blueberries

Instructions

1. Make Blueberry Compote
Heat blueberries + water in a pan until berries burst and become a sauce. Add lemon juice if you like. Cool.

2. Make Protein Yogurt
Mix Greek yogurt with protein powder until smooth (add 1–2 tbsp liquid if thick).

3. Build the Jar
Layer in a jar:

  1. Granola

  2. Half the protein yogurt

  3. Some compote

  4. Remaining yogurt

  5. Top with compote + fresh blueberries

Close the jar or enjoy immediately.

Nutrition (Approx.)

  • Protein: ~47g

  • Calories: 420–520

  • Carbs: 45–60g

  • Fat: 6–12g

Benefits

  • High-protein, long-lasting energy

  • Antioxidant-rich blueberries

  • Probiotic yogurt for healthy digestion

  • Quick 10-minute breakfast

  • Perfect for meal prep

Q&A

Q: Can this be prepped ahead?
Yes—keeps 2–3 days. For crunch, store granola separately.

Q: Can I use frozen blueberries?
Absolutely—they make even better compote.

Q: Can it be made dairy-free?
Yes—use coconut yogurt + plant protein powder (protein will vary).

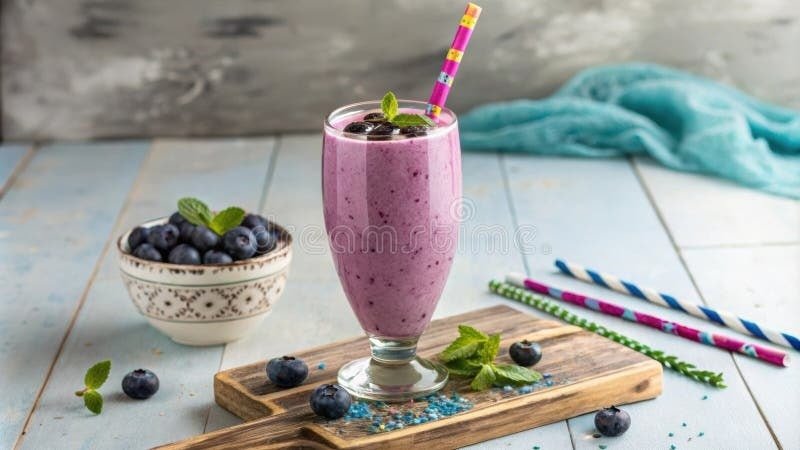
Triple Berry Cream Smoothie

Triple Berry Cream Smoothie

Ingredients

  • 1 cup frozen mixed berries (blueberries, raspberries, and strawberries)

  • 1 ripe banana (fresh or frozen for extra thickness)

  • 1 cup milk of your choice (dairy, almond, or oat milk work great)

  • 1/2 cup Greek yogurt (plain or vanilla)

  • 1 tbsp honey or maple syrup (optional, for added sweetness)

  • A splash of vanilla extract


Instructions

  1. Prep the Fruit: If you are using fresh berries instead of frozen, add 1/2 cup of ice to the blender to ensure you get that thick, chilled consistency seen in the photo.

  2. Combine: Add the milk and yogurt to the blender first. Adding liquids first helps the blades spin more freely and prevents sticking.

  3. Add Solids: Add the mixed berries, banana, and your sweetener of choice.

  4. Blend: Start the blender on a low setting and gradually increase to high. Blend for 45–60 seconds until completely smooth and the berry skins are finely incorporated.

  5. Serve: Pour into a tall glass. If you want to match the image perfectly, garnish with a few fresh berries on the side!


Tips for the Perfect Texture

  • For a Thicker Smoothie: Use a frozen banana. It acts like “healthy ice cream” and creates a much creamier texture than ice cubes.

  • For Extra Nutrition: Feel free to toss in a small handful of spinach (it won’t change the flavor much) or a tablespoon of chia seeds.

  • Adjusting Consistency: If it’s too thick, add a splash more milk. If it’s too thin, add more frozen fruit or a few ice cubes.

🥤 Creamy Peanut Butter Banana Smoothie

🥤 Creamy Peanut Butter Banana Smoothie

Ingredients

  • Bananas: 1 large banana (frozen is best for that thick, creamy texture).

  • Peanut Butter: 2 tablespoons of creamy peanut butter.

  • Milk Base: 1 cup of your choice (Almond, Oat, or Dairy milk work perfectly).

  • Greek Yogurt: 1/4 cup (optional, for extra thickness and protein).

  • Sweetener: 1/2 teaspoon of honey or maple syrup (optional, as the banana is usually sweet enough).

  • Toppings: * A few thin slices of fresh banana.

    • A light dusting of ground cinnamon.

Instructions

  1. Prep the Banana: For the best “milkshake” consistency, peel a ripe banana, break it into chunks, and freeze it for at least 2 hours before blending. If you’re in a hurry, use a fresh banana and add 1/2 cup of ice.

  2. Combine: Place the frozen banana chunks, peanut butter, milk, and yogurt into a high-speed blender.

  3. Blend: Start on a low speed and gradually increase to high. Blend for 45–60 seconds until the mixture is completely smooth and no lumps remain.

  4. Adjust Consistency: * Too thick? Add a splash more milk.

    • Too thin? Add more frozen banana or a few ice cubes.

  5. Assemble: Pour into a chilled glass.

  6. Garnish: Carefully place two thin banana slices on the surface and sprinkle with a pinch of cinnamon, just like in the photo.


Pro Tips for the Perfect Smoothie

  • The “Spotty” Rule: Use bananas with brown spots. They have a higher sugar content and a much stronger banana flavor than green or solid yellow ones.

  • Nut Butter Variations: If you have an allergy, almond butter or sunflower seed butter are excellent swaps that maintain the creamy texture.

  • Added Nutrition: You can blend in a handful of baby spinach (it will change the color to green, but you won’t taste it!) or a tablespoon of chia seeds for extra fiber.

Crisp Cucumber and Beetroot Salad

Crisp Cucumber and Beetroot Salad

A refreshing, mineral-rich salad that supports hydration, digestion, circulation, and overall skin and hair health when eaten regularly as part of a balanced diet.

Description

This salad combines cool, hydrating cucumbers with earthy, antioxidant-rich beetroots, finished with fresh herbs and a light dressing. It’s crunchy, vibrant, and naturally detox-friendly—perfect for daily meals, hot weather, or as a light side dish.

Many people report improved skin glow, hair texture, and energy levels after consistent intake due to better hydration, improved blood flow, and micronutrient support—not because it’s magic, but because it nourishes the body well.


Ingredients (Serves 2–3)

  • 2 medium cucumbers, thinly sliced

  • 2 medium beetroots, cooked or roasted, thinly sliced

  • 1–2 tbsp fresh basil or mint (or dill), chopped

  • 1 tbsp extra-virgin olive oil

  • 1–2 tsp lemon juice or apple cider vinegar

  • Salt, to taste

  • Freshly cracked black pepper, to taste

  • Optional:

    • ½ tsp dried oregano or thyme

    • 1 tsp sesame seeds or pumpkin seeds

    • Crumbled feta or goat cheese (optional, non-vegan)

 Instructions

  1. Prepare vegetables

    • Cook or roast beetroots until tender, cool, peel, and slice.

    • Slice cucumbers evenly (mandoline works well).

  2. Assemble

    • Arrange cucumber and beetroot slices in a bowl or platter.

  3. Dress

    • Drizzle olive oil and lemon juice evenly.

    • Sprinkle salt, pepper, and herbs.

  4. Finish & rest

    • Toss gently or leave layered.

    • Rest 5–10 minutes before serving for best flavor.

Tips & Notes

  • For extra crunch: Add thinly sliced red onion or radish

  • For digestion: Add a pinch of cumin powder

  • For skin focus: Add a few drops of cold-pressed flaxseed oil

  • Meal prep: Keeps well refrigerated for up to 24 hours

  • Color tip: Wear gloves when handling beetroot

 Serving Suggestions

  • As a daily lunch side

  • With grilled fish, tofu, or lentils

  • Inside wraps or grain bowls

  • As a light dinner with yogurt or hummus

 Nutritional Information (Approx. per serving)

  • Calories: ~110 kcal

  • Carbohydrates: 12 g

  • Fiber: 3–4 g

  • Protein: 2 g

  • Fat: 6 g

  • Vitamin C: 20% DV

  • Folate: 25% DV

  • Potassium: 15% DV

  • Antioxidants: High (betalains from beetroot)

 Health Benefits (Evidence-Based)

Skin

  • Improved hydration (cucumber)

  • Antioxidant protection (beetroot betalains)

  • Supports collagen health via vitamin C

Hair

  • Better blood circulation to scalp (nitrates in beetroot)

  • Minerals like iron and folate support hair growth cycles

Body

  • Aids digestion and gut health

  • Supports liver detox pathways

  • Helps regulate blood pressure

  • Naturally anti-inflammatory

Important: Results vary. This salad supports health but does not replace medical treatment.

Q & A

Q: Can I eat this daily?
Yes, for most people it’s safe and beneficial when part of a balanced diet.

Q: Raw or cooked beetroot?
Both are good. Cooked is easier to digest; raw retains more vitamin C.

Q: Is it good for weight loss?
Yes—low calorie, high fiber, very filling.

Q: Can diabetics eat this?
Yes, in moderation. Beetroot has natural sugars but a low glycemic load when paired with fiber and fat.

Q: Why do people say their skin and hair feel “reborn”?
Better hydration, improved circulation, antioxidants, and micronutrients often lead to visible improvements over 3–4 weeks.

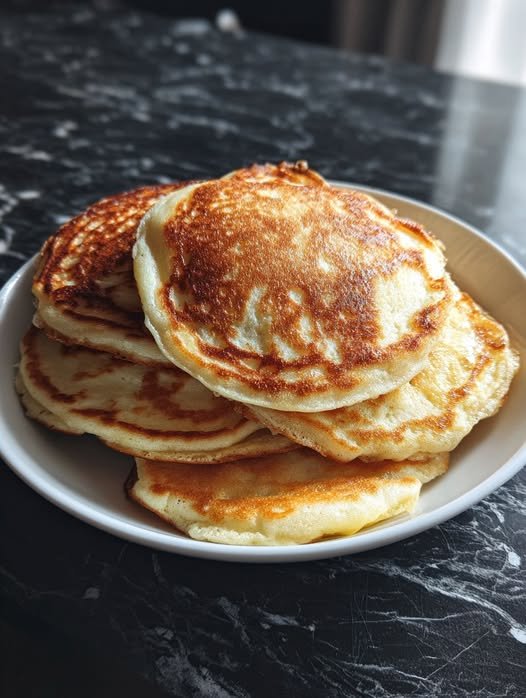
Best Fluffy Pancakes

Best Fluffy Pancakes

Soft, thick, and bakery-style fluffy pancakes that stay tender inside with lightly golden edges—perfect for breakfast or brunch.


🧾 Ingredients

Dry Ingredients

  • 1 ½ cups all-purpose flour

  • 2 ½ teaspoons baking powder

  • ½ teaspoon salt

  • 1 tablespoon sugar (optional, for light sweetness)

Wet Ingredients

  • 1 ¼ cups milk (room temperature)

  • 1 large egg (room temperature)

  • 3 tablespoons melted butter or oil

  • 1 teaspoon vanilla extract (optional)


👩‍🍳 Instructions

  1. Mix dry ingredients
    In a large bowl, whisk together flour, baking powder, salt, and sugar.

  2. Mix wet ingredients
    In another bowl, whisk milk, egg, melted butter, and vanilla.

  3. Combine gently
    Pour wet ingredients into dry. Stir gently until just combined.
    👉 Lumps are okay—do not overmix.

  4. Rest the batter
    Let the batter rest for 5–10 minutes. This helps activate the baking powder for extra fluffiness.

  5. Cook pancakes
    Heat a non-stick pan or griddle over medium heat. Lightly grease.
    Pour about ¼ cup batter per pancake.

  6. Flip
    Cook until bubbles form on the surface (about 2–3 minutes), flip, and cook another 1–2 minutes until golden.

  7. Serve warm
    Enjoy with butter, syrup, fruit, or honey.


🍽 Servings

  • Makes: 8–10 pancakes

  • Serves: 3–4 people


💡 Tips for Extra Fluffy Pancakes

  • ✔ Use fresh baking powder (key for lift)

  • ✔ Let batter rest before cooking

  • ✔ Cook on medium heat, not high

  • ✔ Flip only once

  • ✔ Do not press pancakes while cooking


🧠 Description Notes

  • These pancakes are light yet filling

  • Soft interior with a mild buttery flavor

  • Works well for add-ins like blueberries or chocolate chips


🥗 Nutritional Information (Per Pancake – Approx.)

  • Calories: ~150 kcal

  • Carbohydrates: 20 g

  • Protein: 4 g

  • Fat: 6 g

  • Sugar: 3 g

  • Sodium: 200 mg

(Values vary depending on toppings and substitutions)


🌟 Benefits

  • ✔ Quick and easy homemade breakfast

  • ✔ No special equipment needed

  • ✔ Customizable (sweet or savory)

  • ✔ Kid-friendly and freezer-friendly

  • ✔ Budget-friendly ingredients


❓ Recipe Q & A

Q: Why are my pancakes flat?
A: Overmixing the batter or expired baking powder.

Q: Can I make them without eggs?
A: Yes! Replace 1 egg with ¼ cup yogurt or applesauce.

Q: Can I use whole wheat flour?
A: Yes, but replace only half for best fluffiness.

Q: Can I store leftovers?
A: Yes. Refrigerate up to 3 days or freeze up to 2 months.

Q: Can I make the batter ahead?
A: Best cooked fresh, but batter can rest up to 30 minutes.

Fresh Strawberry Swirl Ice Cream

Fresh Strawberry Swirl Ice Cream

1. The Strawberry Swirl

  • 2 cups fresh strawberries (hulled and sliced)

  • 1/4 cup granulated sugar

  • 1 tsp lemon juice

2. The Ice Cream Base

  • 2 cups heavy whipping cream (cold)

  • 1 can (14 oz) sweetened condensed milk

  • 1 tsp pure vanilla extract

  • A pinch of salt


Instructions

Step 1: Make the Strawberry Reduction

  1. Place strawberries, sugar, and lemon juice in a small saucepan over medium heat.

  2. Cook for about 10–12 minutes, mashing the berries with a fork as they soften, until the mixture thickens into a jam-like consistency.

  3. Crucial: Let this cool completely in the fridge before using. If it’s warm, it will melt your ice cream.

Step 2: Whip the Base

  1. In a large chilled bowl, whip the heavy cream until stiff peaks form (be careful not to over-whip into butter).

  2. In a separate bowl, whisk together the sweetened condensed milk, vanilla, and salt.

  3. Gently fold the whipped cream into the condensed milk mixture using a spatula. Do this slowly so you don’t lose the airiness.

Step 3: Create the Swirl

  1. Pour half of the cream mixture into a loaf pan or freezer-safe container.

  2. Drip spoonfuls of the cooled strawberry sauce over the top.

  3. Add the remaining cream mixture, then more strawberry sauce.

  4. Use a butter knife or skewer to gently swirl the strawberry sauce through the cream. Don’t over-mix, or it will just turn pink instead of having distinct swirls!

Step 4: Freeze

  1. Cover tightly with plastic wrap or a lid.

  2. Freeze for at least 6–8 hours (overnight is best) until firm.


Pro Tips for Success

  • Cold Tools: Put your mixing bowl and whisk in the freezer for 15 minutes before whipping the cream to get better volume.

  • Smooth Sauce: If you don’t like berry chunks, run the strawberry sauce through a blender and a fine-mesh strainer before cooling it.

  • Soft Serve: If the ice cream is too hard straight from the freezer, let it sit on the counter for 5 minutes before scooping.

Mango & Lime Smoothie

Mango & Lime Smoothie
This smoothie is a refreshing smoothie with a tropical citrus twist that is guaranteed to wake you up or keep you going on the days that seem to last forever. 🥭

Ingredients
1 Cup Coconut Milk
1 Frozen Banana
1 Cup Frozen Mango
½ Cup Kale
½ Cup Spinach
2 Tbsp Flax seeds
⅛ Cup Lime juice
1 Tspn Coconut Flakes (To Top)

Instructions:
Add all of the ingredients but only one tablespoon of flax seeds to a blender and mix at a high speed until you reach your desired consistency.
Pour into a glass and top with the rest of the flax seeds and coconut flakes for a crunchy and delicious top.
Enjoy!

“Bake These Cinnamon Sugar Donut Muffins for the Ultimate Comfort Treat”

  • Servings: 12 muffins
  • Total Time: 25 minutes
  • Difficulty: Easy
  • Calories per Muffin: ~120 kcal
  • Macros (Per Muffin): 7g Protein / 4g Net Carbs / 8g Fat / 2g Fiber

Introduction

Craving a warm, cozy treat without blowing your healthy goals? These Cinnamon Sugar Donut Muffins taste just like a classic bakery donut — soft, tender, and coated in that irresistible cinnamon “sugar” blend — but with a clean, macro-friendly twist.

Made with almond flour, Greek yogurt, and a touch of vanilla, these muffins bring comfort to your morning coffee, post-workout snack, or sweet afternoon pick-me-up. Whether you’re following KetoSlimming Weight Watchers, or a Mediterranean-inspired, high-protein lifestyle, these fit perfectly into your plan.

They deliver all the joy of a donut — minus the guilt, sugar crash, and carb overload.


Look at the Recipe

  • Texture & Visual: Fluffy, golden, cake-like muffins with a melt-in-your-mouth coating.
  • Flavor Highlight: Warm cinnamon spice and sweet vanilla comfort.
  • Diet Benefit: Naturally gluten-free, low in carbs, high in protein, and made with wholesome fats.

Ingredients Needed

For the Muffins

  • 2 cups almond flour
  • 2 tbsp coconut flour
  • 1 ½ tsp baking powder
  • ½ tsp baking soda
  • ½ tsp salt
  • 2 large eggs
  • ⅓ cup Greek yogurt (or sour cream)
  • ¼ cup unsweetened almond milk
  • ¼ cup granulated erythritol (or sugar substitute of choice)
  • 1 tsp vanilla extract
  • 1 tbsp melted butter or olive oil (Mediterranean version)

For the Cinnamon “Sugar” Coating

  • 2 tbsp melted butter (or olive oil for Mediterranean twist)
  • ¼ cup erythritol (or stevia blend)
  • 1 ½ tsp ground cinnamon

How to Make Our Cinnamon Sugar Donut Muffins

  1. Preheat oven to 350°F (175°C). Line a 12-cup muffin tin with paper liners or grease lightly.
  2. Mix dry ingredients: In a large bowl, whisk together almond flour, coconut flour, baking powder, baking soda, salt, and sweetener.
  3. Add wet ingredients: Stir in eggs, Greek yogurt, almond milk, vanilla, and melted butter. Mix until smooth and thick.
  4. Fill muffin cups: Divide batter evenly among muffin cups, filling each about ¾ full.
  5. Bake: Bake for 15–18 minutes, or until a toothpick inserted comes out clean and tops are golden.
  6. Cool slightly: Let muffins rest for 5 minutes before removing.
  7. Coat: Brush each muffin with melted butter and roll in the cinnamon “sugar” mixture.

Storage & Serving Suggestions

  • Store: Keep in an airtight container at room temperature for 2 days or refrigerate up to 5 days.
  • Freeze: Freeze muffins (uncoated) for up to 1 month. Reheat and coat fresh for the best texture.
  • Serve With:
    • A hot cup of coffee or matcha for a cozy breakfast.
    • Fresh fruit or Greek yogurt for a balanced snack.
    • Drizzle with almond butter for extra protein and richness.

Tips & FAQs

1. Can I make this Slimming -friendly?
Yes! Use fat-free Greek yogurt and light butter spray. Each muffin is roughly 1–2 syns, depending on your ingredients.

2. How many Weight Watchers points are these?
Around 2–3 WW points per muffin, using fat-free yogurt and zero-calorie sweetener.

3. Can I make them dairy-free?
Absolutely — replace Greek yogurt with coconut yogurt and butter with olive oil or coconut oil.

4. Can I use oat flour or whole-wheat flour instead?
Yes, for Mediterranean-style — though it increases carbs slightly, it adds fiber and a nutty flavor.

5. How do I make them extra fluffy?
Don’t overmix! A quick fold of wet into dry ingredients gives the best light texture.

Spinach & Green Onion Crustless Quiche

Spinach & Green Onion Crustless Quiche

Prep time: 15 mins | Bake time: 35–45 mins | Serves: 6

Ingredients

  • Eggs: 6 large eggs

  • Dairy: 1 cup heavy cream or whole milk

  • Cheese: 1.5 cups shredded cheese (Swiss, Gruyère, or Sharp Cheddar work best)

  • Vegetables: * 2 cups fresh baby spinach (roughly chopped)

    • 1/2 cup sliced green onions (scallions)

  • Protein: 1/2 cup diced ham or cooked bacon (optional, as seen in the photo)

  • Seasoning: 1/2 tsp salt, 1/4 tsp black pepper, and a pinch of nutmeg

  • Thickener (Optional): 2 tbsp all-purpose flour (helps the structure)


Instructions

  1. Prepare the Oven and Dish: Preheat your oven to 375°F (190°C). Grease a 9-inch pie dish or tart pan (similar to the white scalloped one in your photo) with butter or non-stick spray.

  2. Layer the Fillings: Spread the chopped spinach, diced ham, and green onions evenly across the bottom of the dish. Sprinkle the shredded cheese over the top of the vegetables.

  3. Mix the Custard: In a medium bowl, whisk together the eggs, cream (or milk), salt, pepper, and nutmeg until smooth. If using flour, whisk it in now, ensuring there are no lumps.

  4. Assemble: Slowly pour the egg mixture over the fillings in the dish. Use a fork to gently poke the ingredients so the liquid settles into all the gaps.

  5. Bake: Place the dish in the center of the oven and bake for 35 to 45 minutes. The quiche is done when the edges are golden brown and the center is set (it shouldn’t jiggle when you gently shake the pan).

  6. Cool and Serve: Let it sit for at least 10 minutes before slicing. This allows the custard to firm up so you get clean slices.


Tips for Success

  • Squeeze the Spinach: If using frozen spinach instead of fresh, make sure to squeeze out every drop of water, otherwise the quiche will be soggy.

  • Add Spice: If you like a bit of heat, add a pinch of red pepper flakes or a dash of hot sauce to the egg mixture.

Tomato Basil Garlic Bread

Tomato Basil Garlic Bread

Ingredients

  • Bread: 1 large baguette or Italian loaf

  • Tomatoes: 3 ripe tomatoes, finely diced

  • Garlic: 4 cloves, minced

  • Fresh Basil: 1/4 cup leaves, chopped

  • Cheese: 1/4 cup grated Parmesan (optional) or sliced fresh Mozzarella

  • Oil: 1/4 cup olive oil

  • Vinegar: 1 tablespoon balsamic vinegar

  • Seasoning: Salt and freshly cracked black pepper to taste


Instructions

1. Prepare the Topping

  • In a medium bowl, combine the diced tomatoes, minced garlic, chopped basil, olive oil, and balsamic vinegar.

  • Season with salt and pepper. Let this mixture sit for at least 15 minutes at room temperature; this allows the tomatoes to release their juices and the garlic flavor to mellow.

2. Prepare the Bread

  • Preheat your oven to 400°F (200°C).

  • Slice the baguette or Italian loaf in half lengthwise, or cut it into thick individual slices.

  • Place the bread on a baking sheet. For extra flavor, you can lightly brush the cut side of the bread with a little extra olive oil or butter.

3. Assemble

  • Using a slotted spoon (to avoid too much liquid soaking the bread), distribute the tomato mixture evenly over the bread.

  • Top with the grated Parmesan or slices of Mozzarella cheese.

4. Bake and Broil

  • Bake for 8 to 10 minutes, or until the bread is toasted and the cheese is melted.

  • For a golden, bubbly finish (as seen in the image), turn the oven to Broil for the last 1–2 minutes. Watch closely to prevent burning!

5. Garnish and Serve

  • Remove from the oven and top with an additional sprinkle of fresh basil if desired. Serve warm while the bread is at its crunchiest.


Chef’s Tips

  • Avoid Soggy Bread: If your tomatoes are very juicy, seed them before dicing. This keeps the topping flavorful without making the bread soft.

  • The Bread Choice: A sturdier Italian loaf or sourdough works better than a soft sandwich loaf because it holds up under the weight of the tomatoes.

  • Rub with Garlic: For an even deeper garlic flavor, rub a raw, halved garlic clove directly onto the toasted bread before adding the tomato topping.

Tropical Tiger Nut Smoothie

Tropical Tiger Nut Smoothie

A creamy fruit and nut–based blended drink

This smoothie combines soaked tiger nuts with tropical fruits and warming ginger to create a naturally sweet, creamy drink. It can be enjoyed as a refreshing beverage or a light snack.


Ingredients

(Makes 2 servings)

  • Tiger nuts — 1 cup, soaked for 4–6 hours or overnight

  • Dates — 4–5, pitted

  • Fresh coconut pieces — ½ cup

  • Pineapple chunks — 1 cup

  • Fresh ginger — 1 small piece (about 1 inch), peeled

  • African cherry (Agbalumo) — 1 fruit, flesh only

  • Cold water — 1 cup (adjust for desired thickness)

  • Ice cubes — optional


Step-by-Step Instructions

1. Prepare the Tiger Nuts

  • Rinse the tiger nuts thoroughly.

  • Soak them in clean water for at least 4–6 hours or overnight.

  • Drain and rinse again before blending.
    Soaking softens the nuts and helps achieve a smoother texture.


2. Prepare the Fruits

  • Pit the dates.

  • Cut the pineapple into chunks if not already prepared.

  • Remove the flesh from the African cherry, discarding the seed.

  • Peel and slice the ginger.


3. Blend

  • Add the soaked tiger nuts to a high-speed blender.

  • Add dates, coconut pieces, pineapple chunks, ginger, and African cherry flesh.

  • Pour in the cold water.

  • Blend until smooth and creamy, stopping to scrape down the sides if needed.


4. Adjust Texture

  • If the smoothie is too thick, add a little more water.

  • If you prefer it colder, add a few ice cubes and blend again.


5. Serve

  • Pour into glasses and serve immediately.

  • Best enjoyed fresh.


Helpful Tips

  • Use a high-speed blender for the smoothest result

  • Strain the smoothie if you prefer a thinner, juice-like consistency

  • Adjust the number of dates based on your sweetness preference


Variations

  • Replace water with coconut water for a lighter texture

  • Add a pinch of cinnamon or nutmeg for extra aroma

  • Substitute mango for pineapple if desired


Storage

  • Best consumed immediately

  • If needed, refrigerate for up to 24 hours in a sealed container and shake well before drinking

Creamy House Dressing

Creamy House Dressing

A smooth, balanced dressing for salads and light meals

This creamy house dressing has a smooth texture and a well-balanced flavor. It works well on fresh salads, pasta salads, or as a light coating for cooked meats or vegetables.


Ingredients

  • Extra-virgin olive oil — ¾ cup

  • White wine vinegar or fresh lemon juice — ¼ cup

  • Mayonnaise or plain Greek yogurt — 2 tablespoons

  • Dijon mustard — 1 tablespoon

  • Honey or agave syrup — 2 teaspoons

  • Garlic — 1 small clove, finely grated or mashed

  • Dried Italian herbs — 1 teaspoon
    (such as oregano, basil, and thyme)

  • Salt — to taste

  • Black pepper — to taste

  • Finely grated Parmesan cheese — 2 tablespoons (optional)


Step-by-Step Instructions

1. Mix the Flavor Base

  • In a medium bowl or glass jar, add:

    • Garlic

    • Dijon mustard

    • Honey

    • Dried herbs

    • Salt and black pepper

  • Whisk until the mixture is smooth and evenly combined.


2. Add the Creamy Element

  • Add the mayonnaise (or yogurt) and the vinegar or lemon juice.

  • Whisk until the mixture is completely smooth with no visible lumps.


3. Blend in the Oil

Choose one method:

Whisking Method

  • While whisking continuously, slowly pour in the olive oil in a thin stream.

  • Continue whisking until the dressing thickens and looks smooth.

Jar Method

  • Add the olive oil to the jar.

  • Seal tightly and shake well for about 60 seconds, until fully blended.


4. Adjust the Flavor

  • Taste the dressing.

  • If it tastes too sharp, add a small amount of honey.

  • If it feels too thick, stir in 1–2 teaspoons of water or vinegar.

  • Stir in Parmesan cheese, if using.


5. Serve and Store

  • Use immediately over salads or cooked vegetables.

  • Store leftovers in an airtight container in the refrigerator for up to 7 days.

  • Shake or whisk before each use.


Helpful Tips

  • Letting the garlic sit briefly in the vinegar before mixing can soften its flavor

  • Greek yogurt creates a lighter dressing, while mayonnaise adds richness

  • The dressing should lightly coat a spoon without being overly thick


Variations

  • Add a teaspoon of lemon zest for brightness

  • Use apple cider vinegar for a slightly different flavor

  • Add a small amount of milk or water for a pourable consistency

Easy One-Bowl Chocolate Cake

Easy One-Bowl Chocolate Cake

A soft, moist chocolate cake made with yogurt

This one-bowl chocolate cake is simple to prepare and uses everyday ingredients. Yogurt helps create a tender texture, while a small amount of coffee powder (optional) deepens the chocolate flavor without tasting like coffee.


Ingredients

  • All-purpose flour — 1 cup (120 g)

  • Baking powder — 2 teaspoons

  • Unsweetened cocoa powder — ¾ cup

  • Coffee powder — 1 teaspoon (optional)

  • Granulated sugar — 1 cup

  • Plain yogurt (or Greek yogurt) — 1 cup

  • Vegetable oil — ½ cup

  • Vanilla extract — 1 teaspoon

  • Eggs — 3 large, at room temperature


Step-by-Step Instructions

1. Prepare the Pan and Oven

  • Preheat the oven to 175°C (350°F).

  • Grease a 9-inch round cake pan or a standard loaf pan.

  • Line the base with parchment paper for easy removal.


2. Mix the Wet Ingredients

  • In a large mixing bowl, add:

    • Eggs

    • Sugar

    • Yogurt

    • Vegetable oil

    • Vanilla extract

  • Whisk until the mixture is smooth and well combined.


3. Add the Dry Ingredients

  • Place a sieve over the bowl.

  • Sift in:

    • Flour

    • Cocoa powder

    • Baking powder

    • Coffee powder (if using)

Sifting helps remove cocoa lumps and creates a smoother batter.


4. Combine Gently

  • Fold or whisk gently until no dry flour remains.

  • Stop mixing as soon as the batter is smooth.

    • Overmixing can make the cake dense.


5. Bake

  • Pour the batter into the prepared pan.

  • Smooth the top evenly.

  • Bake:

    • 30–35 minutes for a round pan

    • 40–45 minutes for a loaf pan

Doneness Test:
Insert a toothpick into the center. It should come out clean or with a few moist crumbs.


6. Cool

  • Let the cake rest in the pan for 10 minutes.

  • Run a knife around the edges.

  • Turn out onto a wire rack and allow to cool completely before slicing or frosting.


Helpful Tips

  • Room-temperature eggs blend more easily into the batter

  • Coffee powder is optional and does not create a coffee flavor

  • For a lighter finish, dust with powdered sugar

  • For a richer dessert, serve with chocolate sauce or fresh fruit


Storage

  • Store at room temperature for 2 days in an airtight container

  • Refrigerate for up to 5 days

  • Can be frozen (wrapped well) for up to 1 month

Quick Coconut Loaf Cake

Quick Coconut Loaf Cake

A soft, buttery loaf with a rich coconut flavor

This coconut loaf cake comes together quickly using simple pantry ingredients. It has a tender, slightly dense crumb and a gentle coconut aroma, making it a lovely choice for tea time, breakfast, or a light dessert.


Ingredients

Cake Batter

  • Granulated sugar — 175 g (¾ cup + 2 tablespoons)

  • Unsalted butter — 110 g (½ cup), softened to room temperature

  • Vegetable oil — 30 ml (2 tablespoons)

  • Eggs — 2 large, room temperature

  • All-purpose flour — 190 g (1½ cups)

  • Baking powder — 1 teaspoon

  • Desiccated coconut — ½ cup

  • Milk or coconut milk — 60 ml (¼ cup)

  • Vanilla extract — 1 teaspoon


For the Pan

  • Butter or oil for greasing

  • Extra desiccated coconut for coating the pan


Step-by-Step Instructions

1. Prepare the Oven and Pan

  • Preheat the oven to 175°C (350°F).

  • Grease a standard loaf pan with butter or oil.

  • Sprinkle desiccated coconut evenly over the greased pan, tilting and tapping to coat the bottom and sides.

    • This adds texture and a lightly toasted coconut layer on the outside of the cake.


2. Cream the Butter and Sugar

  • In a large mixing bowl, add the softened butter and sugar.

  • Beat together for 2–3 minutes until the mixture looks pale and creamy.

  • Add the vegetable oil and vanilla extract.

  • Mix until fully combined.


3. Add the Eggs

  • Add the eggs one at a time, mixing well after each addition.

  • The batter should look smooth and well blended.


4. Combine Dry Ingredients

  • In a separate bowl, whisk together:

    • Flour

    • Baking powder


5. Make the Batter

  • Add half of the dry ingredients to the butter mixture and mix gently.

  • Pour in the milk or coconut milk and mix until incorporated.

  • Add the remaining dry ingredients and the ½ cup desiccated coconut.

  • Fold gently with a spatula until just combined.

    • Avoid overmixing to keep the loaf soft.


6. Bake

  • Pour the batter into the prepared loaf pan.

  • Smooth the top evenly.

  • Bake for 40–45 minutes, or until a toothpick inserted in the center comes out clean.


7. Cool

  • Remove the cake from the oven.

  • Let it cool in the pan for 10 minutes.

  • Transfer to a wire rack to cool completely before slicing.


Optional Finishing Touch

  • While the cake is still warm, lightly brush the top with a small amount of milk or coconut milk for added softness and shine.


Helpful Tips

  • Room-temperature ingredients help create a smooth batter

  • Coconut milk gives a deeper coconut flavor, while regular milk keeps it lighter

  • If the top browns too quickly, loosely cover with foil during the last 10 minutes


Storage

  • Store at room temperature for 2–3 days in an airtight container

  • Refrigerate for up to 5 days

  • Can be frozen (wrapped well) for up to 1 month

Homemade Garlic Buns

Homemade Garlic Buns

Soft, fluffy buns brushed with aromatic garlic butter

These homemade garlic buns are tender on the inside with a lightly golden top and a rich garlic aroma. They are perfect as a side for soups, pasta, or enjoyed on their own while warm.


Ingredients

Dough

  • All-purpose flour — 400 g (about 3¼ cups)

  • Sugar — 50 g (¼ cup)

  • Salt — 1 teaspoon

  • Instant dry yeast — 7 g (1 packet)

  • Lukewarm milk — 250 ml (1 cup)

  • Egg — 1 large, room temperature

  • Butter — 55 g (¼ cup), softened

  • Minced garlic — 1 tablespoon


Garlic Butter Topping

  • Minced garlic — 1 tablespoon

  • Dried parsley — 2 teaspoons

  • Salted butter — 55 g (¼ cup), melted


Step-by-Step Method

1. Prepare the Dough

  • In a large bowl, combine the flour, sugar, salt, and instant yeast.

  • Add the lukewarm milk and egg.

  • Mix until a rough dough forms.


2. Knead the Dough

  • Knead using a stand mixer or by hand for 5 minutes, until smooth.

  • Cover the dough with a clean towel and let it rest for 20 minutes.


3. Add Butter and Garlic

  • Add the softened butter and minced garlic to the dough.

  • Continue kneading for 5–7 minutes until the dough becomes elastic and slightly glossy.


4. First Rise

  • Lightly grease a bowl with oil.

  • Place the dough inside, cover, and let rise in a warm place for 1 hour, or until doubled in size.


5. Shape the Buns

  • Gently press the dough to release excess air.

  • Shape into a square and divide into 25 equal pieces.

  • Roll each piece into a smooth ball.

  • Cover and let rest for 15 minutes.


6. Second Rise

  • Lightly flatten each dough ball and tuck the edges underneath to create a smooth top.

  • Place in a greased baking pan.

  • Cover and let rise again for 30 minutes, until puffy.


7. Prepare Garlic Butter

  • In a small bowl, combine:

    • Melted butter

    • Minced garlic

    • Dried parsley

  • Mix well.


8. Bake

  • Preheat the oven to 180°C (350°F).

  • Brush the tops of the buns generously with garlic butter.

  • Bake for 15–17 minutes, until lightly golden.


9. Finish and Serve

  • Remove from the oven.

  • While still warm, brush with more garlic butter for extra flavor.

  • Serve warm.


Serving Suggestions

  • Pair with soups or pasta dishes

  • Serve as a dinner roll or party bread

  • Enjoy plain or with cheese spread


Storage Tips

  • Store at room temperature for 1 day

  • Refrigerate for up to 3 days

  • Reheat gently before serving

Ginger Water

Ginger Water

A warm, refreshing drink made with fresh ginger and lemon

Ginger water is a simple homemade beverage prepared by gently simmering fresh ginger in water. It has a naturally warming flavor and is often enjoyed as part of a balanced daily routine for hydration and digestive comfort.


Ingredients

  • Fresh ginger root — 1 large piece (about 2 inches)

  • Water — 1 liter (4 cups)

  • Fresh lemon juice — from 1 lemon (optional, for flavor)

  • Honey — 1 teaspoon (optional, for mild sweetness)


Step-by-Step Preparation

Step 1: Prepare the Ginger

  • Wash the ginger thoroughly.

  • Peel the skin using a spoon or vegetable peeler.

  • Slice the ginger thinly.
    Thin slices help release flavor more evenly into the water.


Step 2: Heat the Water

  • Add the sliced ginger and water to a saucepan.

  • Place over medium heat.

  • Bring to a gentle boil.


Step 3: Simmer

  • Reduce heat to low.

  • Simmer for 10–15 minutes, depending on how strong you prefer the flavor.

    • Shorter time = milder taste

    • Longer time = stronger, spicier taste


Step 4: Cool and Strain

  • Remove the pot from heat.

  • Allow the liquid to cool slightly.

  • Strain into a glass jar or bottle to remove ginger pieces.


Step 5: Add Optional Flavorings

  • Stir in fresh lemon juice if desired.

  • Add honey for light sweetness, or leave it out for an unsweetened version.

  • Mix well.


How to Enjoy Ginger Water

  • Drink warm, room temperature, or chilled

  • Enjoy:

    • In the morning as a warm beverage

    • Between meals for hydration

    • In the evening as a caffeine-free drink


Gentle Benefits (No Medical Claims)

Ginger water may:

  • Provide a warming, soothing drink

  • Support general digestive comfort

  • Help reduce the feeling of fullness after meals

  • Encourage regular hydration

  • Offer natural flavor without artificial additives

(This drink supports overall wellness as part of a healthy lifestyle but is not a treatment or cure.)


Helpful Tips

  • Fresh ginger provides the best flavor

  • For storage, keep refrigerated and use within 24–48 hours

  • You can reheat gently without boiling again

  • Adjust ginger quantity to suit your taste


Variations

  • Add a cinnamon stick while simmering

  • Add mint leaves after straining

  • Replace lemon with orange slices

  • Serve over ice in warm weather