10-Minute Prep Creamy Berry Pastry

10-Minute Prep Creamy Berry Pastry

Flaky, Elegant, and Effortless

Ingredients

  • 1 sheet Puff Pastry: Thawed (usually takes about 20 minutes on the counter).

  • 4 oz Cream Cheese: Softened to room temperature.

  • 2 tbsp Greek Yogurt: For added creaminess and a protein boost.

  • 2 tbsp Honey or Maple Syrup: (Or a sugar-free sweetener of your choice).

  • 1/2 cup Fresh Berries: Raspberries, blueberries, or sliced strawberries.

  • 1 Egg: Beaten, for the egg wash.

  • 1/2 tsp Vanilla Extract: For a touch of warmth.

Instructions

  1. Heat it Up: Preheat your oven to 400°F (200°C) and line a baking sheet with parchment paper.

  2. The 2-Minute Filling: In a small bowl, whisk together the softened cream cheese, Greek yogurt, sweetener, and vanilla until smooth and creamy.

  3. Prepare the Pastry: Lay the puff pastry sheet onto the baking sheet. Use a knife to lightly score a 1-inch border all the way around (don’t cut through). Use a fork to poke several holes in the center area to keep it from rising too much.

  4. Assemble: Spread the cream cheese mixture inside the border you created. Top with your fresh berries, pressing them slightly into the cream.

  5. The Golden Edge: Brush the 1-inch border with the beaten egg wash. This ensures that beautiful, bakery-style golden crunch.

  6. Bake: Slide it into the oven for 15–20 minutes until the edges are high and golden brown.

  7. Serve: Let it sit for 5 minutes. This is great served warm, but it holds up beautifully if you’re taking it to a dinner party later.


Why this works for your lifestyle:

  • Speed: The 10-minute prep means you can whip this up even on a weeknight without stress.

  • Balance: Using a mix of cream cheese and Greek yogurt keeps the filling light and satisfying.

  • Real Food: By using fresh fruit and natural sweeteners, you are avoiding the processed additives found in store-bought desserts.

Creamy Apple Custard Bake

3-Ingredient Base: Creamy Apple Custard Bake

Light, Airy, and Naturally Sweet

Ingredients

  • 3 Medium Sweet Apples: (Gala or Honeycrisp work best) peeled, cored, and thinly sliced.

  • 3 Large Eggs: At room temperature.

  • 1 Glass (approx. 200ml) Milk: You can use dairy, almond, or oat milk.

  • Optional for extra flavor: 1 tsp Vanilla extract or a pinch of cinnamon.

  • Optional for texture: 1/2 cup flour (if you want it more like a cake) or leave it out for a pure custard texture.

Instructions

  1. Prep the Oven: Preheat your oven to 350°F (175°C). Grease a small baking dish or a 7-inch round pan with a little butter or coconut oil.

  2. Prepare the Apples: Arrange your thinly sliced apples in the bottom of the prepared baking dish. You can layer them in a spiral for a beautiful look.

  3. Create the Custard: In a blender or a medium bowl, whisk together the 3 eggs and the glass of milk (plus vanilla if using) until the mixture is frothy and pale.

  4. The Pour: Slowly pour the egg and milk mixture over the apples. Ensure the liquid settles between the slices so every piece of apple is “cradled” by the custard.

  5. Bake: Place in the oven and bake for 30–35 minutes. You are looking for the custard to be set (it shouldn’t jiggle too much in the middle) and the edges to be a light golden brown.

  6. Cool and Set: Let it cool for at least 15 minutes. As it cools, the custard firms up, creating that creamy, melt-in-your-mouth experience.

  7. Serving: This is delicious warm, but it’s even better cold from the fridge the next morning!


Why this works for your progress:

  • Hydration & Volume: The high water content in the apples and milk makes this a high-volume snack that feels very filling for relatively few calories.

  • Protein Boost: With 3 eggs, you’re getting a good dose of protein to help keep your energy stable.

  • Clean Eating: By avoiding processed flours and sugars, you’re sticking to the habits that helped you lose those 15 kg!

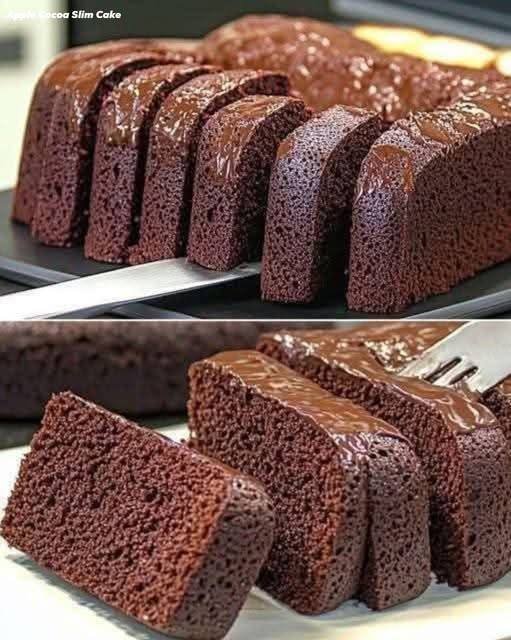
Apple & Chocolate “Magic” Cake

2-Ingredient Base: Apple & Chocolate “Magic” Cake

Sugar-Free, Flourless, and Dairy-Free

Ingredients

  • 4 Medium Sweet Apples: (Like Gala, Fuji, or Honeycrisp) peeled, cored, and sliced.

  • 4 Large Eggs: At room temperature.

  • 5 tbsp Unsweetened Cocoa Powder: Sifted to ensure a smooth batter.

  • 1 tsp Baking Powder: To give the cake its lift.

  • Olive Oil: Just a small amount for greasing the baking mold.

Step-by-Step Instructions

  1. Steam the Apples: Place your sliced apples in a steamer or a microwave-safe bowl with a splash of water. Cook until they are very soft and fork-tender (about 8–10 minutes). Drain any excess liquid.

  2. Puree: Place the softened apples into a blender or food processor. Blend until you have a completely smooth apple puree. Let it cool slightly so it doesn’t cook the eggs instantly.

  3. Combine: Add the 4 eggs, cocoa powder, and baking powder directly into the blender with the apple puree.

  4. Final Blend: Blend on medium speed until the mixture is uniform, dark, and glossy.

  5. Prepare the Mold: Lightly grease a 6 or 7-inch baking tin or silicone mold with a little olive oil.

  6. Bake: Pour the batter into the mold.

    • Oven Method: Bake at 350°F (175°C) for 35–40 minutes.

    • Air Fryer Method: Bake at 320°F (160°C) for 25–30 minutes.

  7. The Test: Insert a toothpick into the center. If it comes out clean, the cake is ready.

  8. The Setting Phase: This is the most important part! Let the cake cool completely in the mold, then refrigerate for at least 2 hours (or overnight). This allows the natural fibers to set into a fudgy, truffle-like consistency.


Why this supports your weight loss:

  • High Fiber: The apples provide bulk and fiber, which helps you feel full without the heavy calories of flour.

  • Natural Sweetness: By using sweet apple varieties, you eliminate the need for any added sugars or artificial sweeteners.

  • Metabolic Boost: Pure cocoa is rich in antioxidants and can help satisfy chocolate cravings without the insulin spike.

Crispy Greek Chicken Tenders

Recipe: Crispy Greek Chicken Tenders

These tenders are marinated in a tangy yogurt base which acts as a tenderizer, ensuring the meat never gets dry, even in a high-heat air fryer or oven.

  • Prep time: 15 minutes (plus 30 mins marinating)

  • Cook time: 12–15 minutes

  • Servings: 4

Ingredients

Category Item Amount
The Chicken Chicken Tenders (or breast sliced into strips) 1.5 lbs
The Marinade Plain Greek Yogurt 1/2 cup
Lemon Juice & Zest 1 lemon
Garlic (minced) 3 cloves
Dried Oregano 1 tsp
The Coating Panko Breadcrumbs 1 cup
Grated Parmesan Cheese 1/4 cup
Smoked Paprika 1/2 tsp
Salt & Black Pepper To taste
Olive Oil Spray For coating

Instructions

  1. Marinate: In a large bowl, whisk together the yogurt, lemon juice, zest, garlic, and oregano. Add the chicken tenders, tossing to coat thoroughly. Let them sit for at least 30 minutes (or up to 4 hours in the fridge).

  2. Prep the Coating: In a shallow dish, combine the panko, parmesan, paprika, salt, and pepper.

  3. Bread the Chicken: One by one, remove a tender from the yogurt (let excess drip off) and press it firmly into the panko mixture. Ensure all sides are well-covered.

  4. Cook (Air Fryer): Preheat to 400°F. Arrange tenders in a single layer. Spray generously with olive oil. Cook for 5–6 minutes per side until golden and the internal temp reaches 165°F.

  5. Cook (Oven): Bake at 425°F on a wire rack set over a baking sheet for 15–18 minutes, flipping halfway through.

Notes & Tips

  • The Yogurt Secret: The lactic acid in Greek yogurt breaks down protein fibers more gently than vinegar-based marinades, resulting in a superior texture.

  • Extra Crunch: For a deeper golden color, “toast” your panko in a dry pan for 2 minutes before breading the chicken.

  • The Dip: Serve these with a side of Tzatziki (cucumber yogurt dip) or a squeeze of fresh lemon to brighten the flavors.

Nutritional Info (Per Serving)

  • Calories: 310 kcal

  • Protein: 38g

  • Total Fat: 9g

  • Carbohydrates: 18g

  • Sodium: 420mg

The Benefit

This recipe is a high-protein, lower-fat alternative to traditional deep-fried tenders. By using Greek yogurt instead of eggs for the binder, you add a boost of probiotics and calcium while keeping the calorie count lean.

Q&A

Q: Can I make these gluten-free?

A: Absolutely. Just swap the panko for gluten-free breadcrumbs or crushed pork rinds for a keto-friendly version.

Q: Why isn’t my breading staying crispy?

A: This usually happens if the chicken is overcrowded in the pan (which creates steam) or if you didn’t use enough oil spray. Give them space to breathe!

Q: Can I freeze these?

A: Yes! Bread them, freeze them raw on a tray, then transfer to a bag. Cook from frozen, adding about 5 minutes to the total cook time.

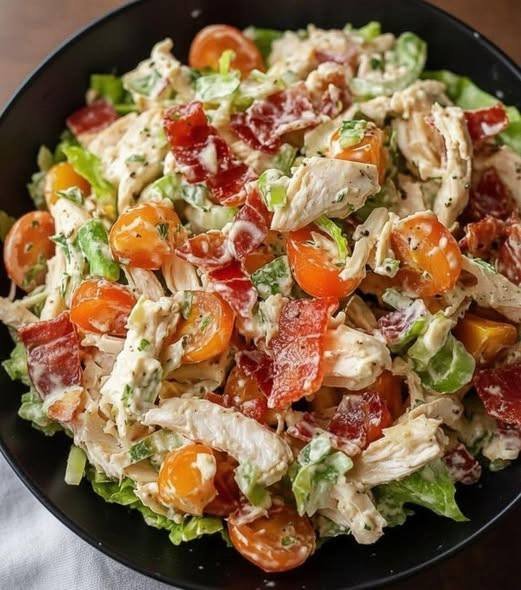
Chicken Bacon Ranch Salad

Chicken Bacon Ranch Salad
High Protein | Low Carb | Diabetic-Friendly | Gluten-Free
Ingredients:
2 cups cooked, shredded chicken breast
4 slices cooked bacon, chopped
1 cup cherry tomatoes, halved
1/2 cup chopped celery or green bell pepper
1/4 cup chopped green onions
1/4 cup ranch dressing (sugar-free for diabetic-friendly)
1–2 cups shredded romaine or mixed greens
Salt & pepper to taste
Instructions:
Prep ingredients: Cook and shred chicken; cook and chop bacon.
Mix: In a large bowl, combine chicken, bacon, tomatoes, celery/pepper, and green onions.
Dress: Add ranch dressing, season with salt & pepper, and toss well.
Serve: Spoon over a bed of greens and enjoy immediately or chill before serving.

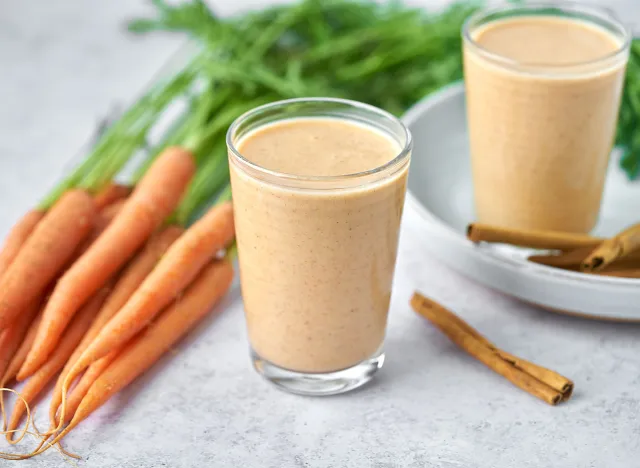
🥕 Creamy Carrot Cake Smoothie

🥕 Creamy Carrot Cake Smoothie

Prep time: 5 minutes | Servings: 1-2

Ingredients

  • 1 cup Carrots, finely grated (about 2 medium carrots)

  • 1 Frozen banana (for creaminess and sweetness)

  • 1/2 cup Greek yogurt or coconut yogurt

  • 1 cup Milk of choice (oat, almond, or dairy)

  • 1 tbsp Almond butter or cashew butter

  • 1 tsp Vanilla extract

  • 1/2 tsp Ground cinnamon

  • 1/4 tsp Ground ginger

  • A pinch of Nutmeg

  • Optional: 1-2 Medjool dates or 1 tsp maple syrup for extra sweetness


Instructions

  1. Prep the Carrots: If you have a high-powered blender, you can just chop the carrots into small chunks. If your blender is standard, grating them first ensures a perfectly smooth texture.

  2. Combine: Place the carrots, frozen banana, yogurt, milk, nut butter, and spices into the blender.

  3. Blend: Start on a low speed and gradually increase to high. Blend for about 45–60 seconds until the mixture is completely smooth and no carrot bits remain.

  4. Adjust: If the smoothie is too thick, add a splash more milk. If you want it colder, add a handful of ice and blend again.

  5. Serve: Pour into glasses and garnish with a sprinkle of cinnamon or a cinnamon stick, as shown in your photo.


Pro-Tips for the Best Texture

  • Steam the Carrots: If you want an even smoother, sweeter taste, lightly steam the carrots and let them cool before blending.

  • Boost the Protein: Add a scoop of vanilla protein powder for a more filling post-workout meal.

  • Add “Cake” Texture: Toss in a tablespoon of rolled oats or chopped walnuts for that authentic carrot cake feel.

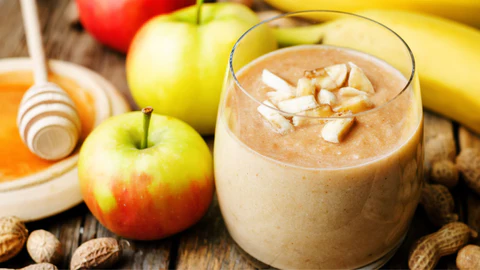
Apple & Peanut Butter Power Smoothie

Apple & Peanut Butter Power Smoothie

This smoothie is creamy, naturally sweet, and packed with protein and fiber.

Ingredients

  • 1 medium apple: Cored and sliced (keep the skin on for extra fiber!).

  • 1 frozen banana: Provides that thick, creamy texture seen in the glass.

  • 1 tablespoon peanut butter: Smooth or crunchy works great.

  • 1 cup milk of choice: Dairy, almond, or oat milk all fit perfectly.

  • 1 teaspoon honey: To match the honey wand in your photo.

  • A pinch of cinnamon: Optional, but brings out the apple flavor.

  • Ice: A small handful if your fruit isn’t frozen.


Instructions

  1. Prep the Fruit: Wash the apple thoroughly. Remove the core and chop it into small chunks. Peel your banana (if using a fresh one).

  2. Combine: Add the apple, banana, milk, peanut butter, and honey into a high-speed blender.

  3. Blend: Start on a low setting and gradually increase to high. Blend for about 45–60 seconds until completely smooth.

  4. Check Consistency: If it’s too thick, add a splash more milk. If you want it frostier, add a few ice cubes and blend again.

  5. Garnish: Pour into a glass. To match your image, top with a few small pieces of chopped banana and a tiny drizzle of honey or peanut butter.


Quick Tips for the Best Result

  • The Apple: Use a sweeter variety like Gala or Fuji to complement the peanut butter.

  • Texture: If you don’t have a high-powered blender, grate the apple first to ensure there are no chunky bits of skin left behind.

  • Peanut Allergy? You can easily swap the peanut butter for almond butter or sunflower seed butter.

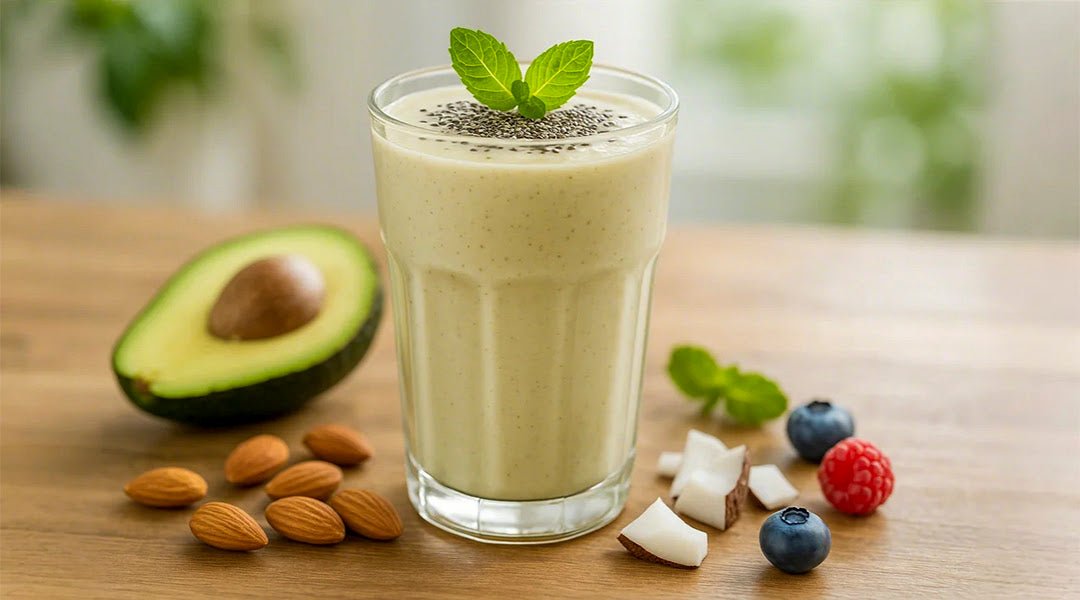
🥤 Creamy Avocado & Coconut Power Smoothie

🥤 Creamy Avocado & Coconut Power Smoothie

Ingredients

  • Base: 1/2 ripe avocado (pitted and peeled)

  • Liquid: 1 cup unsweetened coconut milk (or almond milk)

  • Protein/Texture: 1/4 cup Greek yogurt or coconut yogurt

  • Crunch & Fiber: 1 tablespoon chia seeds (for the top and the blend)

  • Nuts: A small handful of raw almonds (about 5-7)

  • Sweetener (Optional): 1 tablespoon honey, maple syrup, or 1 pitted date

  • Garnish: Fresh mint leaves, blueberries, and a few raspberry accents


Instructions

  1. Prep the Avocado: Ensure your avocado is ripe (it should give slightly when pressed). Scoop out the flesh of one half.

  2. Blend: Place the avocado, almonds, yogurt, and your choice of milk into a high-speed blender.

  3. Sweeten & Cool: Add your preferred sweetener and a handful of ice cubes if you prefer a frostier texture.

  4. Process: Blend on high until the mixture is completely smooth and creamy.

  5. Assemble: Pour into a tall glass.

  6. Top it Off: Sprinkle the chia seeds in a circle on top, place a fresh mint sprig in the center, and scatter the berries and coconut chunks around the base for that aesthetic look.


Why these ingredients work:

  • Avocado: Provides a silky texture and heart-healthy monounsaturated fats.

  • Chia Seeds: Adds a boost of Omega-3 fatty acids.

  • Almonds: Provides a bit of protein and vitamin E.

Pro Tip: If you want an even creamier “milkshake” consistency, freeze your avocado slices before blending!

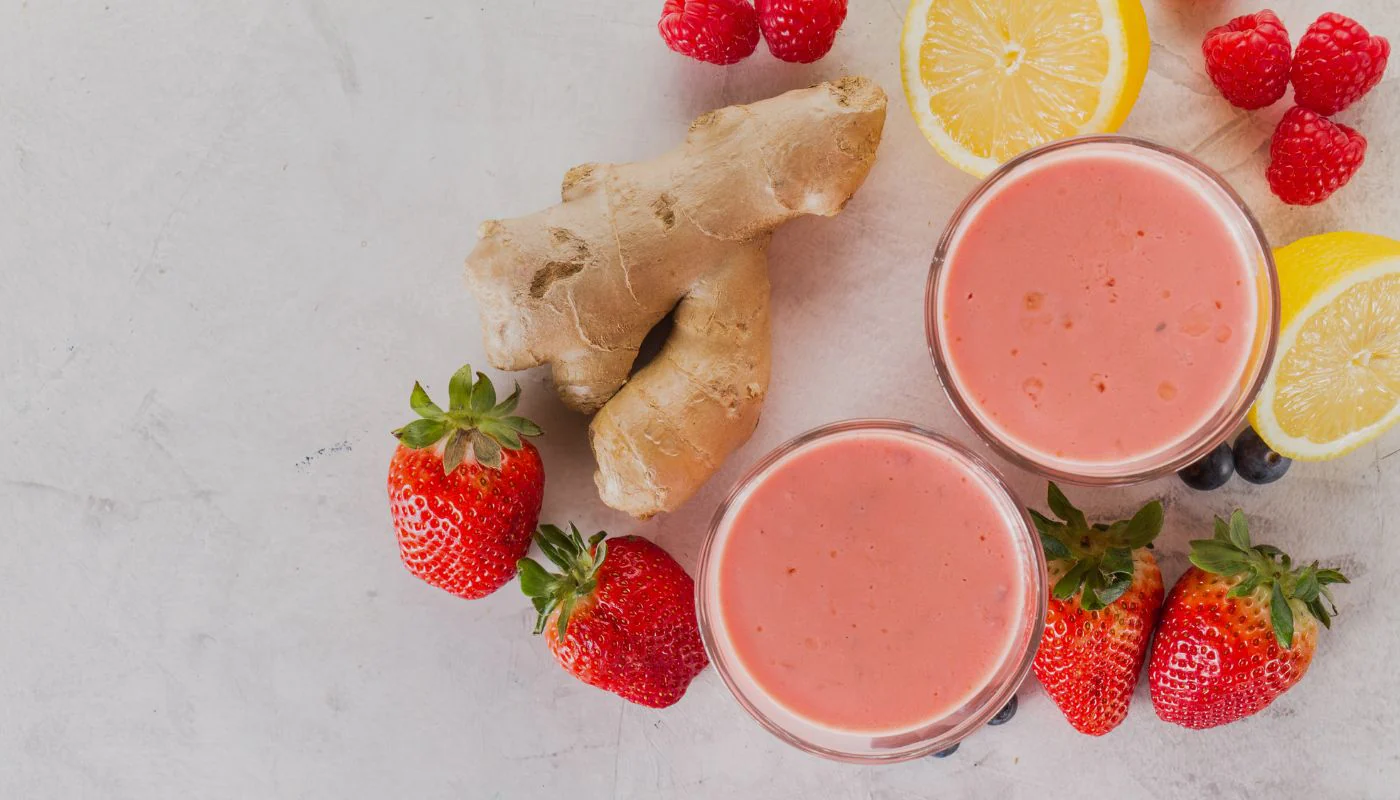
Zesty Berry-Ginger Glow Smoothie

Zesty Berry-Ginger Glow Smoothie

Servings: 2 | Prep time: 5 minutes

Ingredients

  • Berries: 1 cup fresh or frozen strawberries and ½ cup raspberries.

  • Ginger: A 1-inch knob of fresh ginger, peeled and roughly chopped (adjust based on how much “kick” you like!).

  • Citrus: Juice of ½ a large lemon.

  • Liquid Base: 1 cup of coconut water, almond milk, or plain water.

  • Optional Sweetener: 1 teaspoon of honey or maple syrup if the berries are tart.

  • Creaminess (Optional): ¼ cup Greek yogurt or half a frozen banana.


Instructions

  1. Prep the Ginger: Peel the ginger skin using the edge of a spoon. Grate it or chop it finely to ensure no large woody chunks remain in your smoothie.

  2. Load the Blender: Add the liquid base first (this helps the blades move), followed by the ginger, lemon juice, and finally the berries.

  3. Blend: Start on a low speed and gradually increase to high. Blend for about 45–60 seconds until perfectly smooth.

  4. Taste Test: Sip a small amount. If it’s too “spicy” from the ginger, add a bit more fruit or sweetener. If it’s too thick, add a splash more liquid.

  5. Serve: Pour into glasses and garnish with a lemon slice or a fresh raspberry on top, just like in your photo!


Why this combination works

Ingredient Benefit
Ginger Adds a warming, spicy note and is great for digestion.
Berries Packed with antioxidants and provides that beautiful pink hue.
Lemon Cuts through the sweetness and adds a bright, refreshing finish.

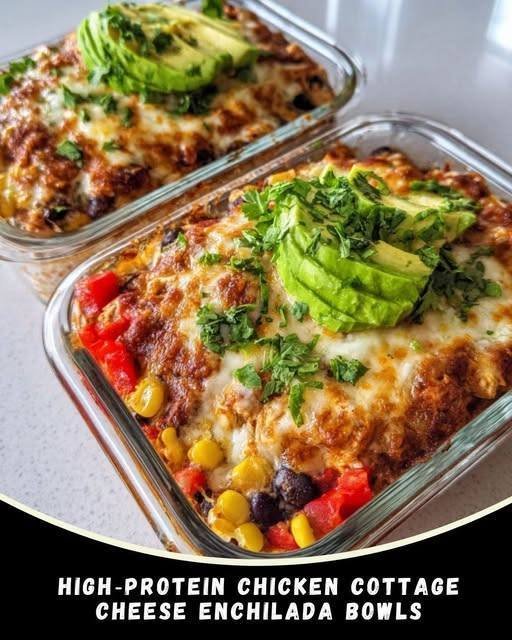
High Protein Chicken Cottage Cheese Enchilada Bowls

High Protein Chicken Cottage Cheese Enchilada Bowls
Creamy, cheesy, and ready fast – two bowls, big protein.
Ingredients
• 1 cup low fat cottage cheese, blended with 4 Tbsp enchilada sauce
• 4 oz cooked shredded chicken
• 1 Tbsp taco seasoning
• 1 cup diced red bell pepper – ¼ cup corn – ¼ cup black beans
• 1 oz shredded Mexican blend or cheddar
• Toppings: cilantro, ½ avocado, 2 Tbsp Greek yogurt/sour cream
How to Make it
Mix blended cottage cheese sauce with chicken and seasoning; fold in veggies and beans.
Divide into 2 bowls, top with cheese; microwave 1–2 min or bake 375°F 10–12 min until bubbly.
Finish with toppings and serve hot .
Per serving (serves 2, Approx.)
~430 kcal – ~45 g protein – ~22 g carbs – ~17 g fat.
Tip
Skip corn/beans and add extra peppers or zucchini for a lower carb bowl .

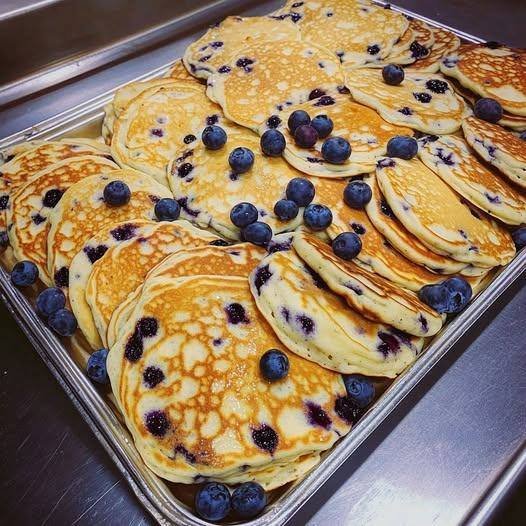
Easy 1-Point Blueberry Lemon Pancakes

Easy 1-Point Blueberry Lemon Pancakes

Servings: 6 pancakes
WW Points: 1 per pancake

Ingredients

  • 1 cup all-purpose flour
  • 1 tbsp sugar substitute (stevia, erythritol, etc.)
  • 1 tsp baking powder
  • 1/2 tsp baking soda
  • Pinch of salt
  • 1 cup unsweetened almond milk
  • 1 large egg
  • 1 tbsp lemon zest
  • 1 tbsp lemon juice
  • 1/2 cup blueberries (fresh or frozen)
  • Cooking spray or small amount of butter

Instructions

  • Mix dry ingredients:
    In a large bowl, whisk together flour, sugar substitute, baking powder, baking soda, and salt.
  • Mix wet ingredients:
    In another bowl, beat the egg with almond milk, lemon zest, and lemon juice.
  • Combine:
    Pour wet ingredients into dry and stir gently until just combined. A few lumps are fine.
  • Fold in blueberries:
    Gently stir in the blueberries.
  • Cook pancakes:
  • Heat a non-stick skillet over medium heat.
  • Lightly coat with cooking spray or butter.
  • Pour 1/4 cup batter per pancake.
  • Cook until bubbles appear on the surface, flip, and cook another 1–2 minutes until golden.
  • Serve:
    Enjoy warm with sugar-free syrup, fresh berries, or a little Greek yogurt.

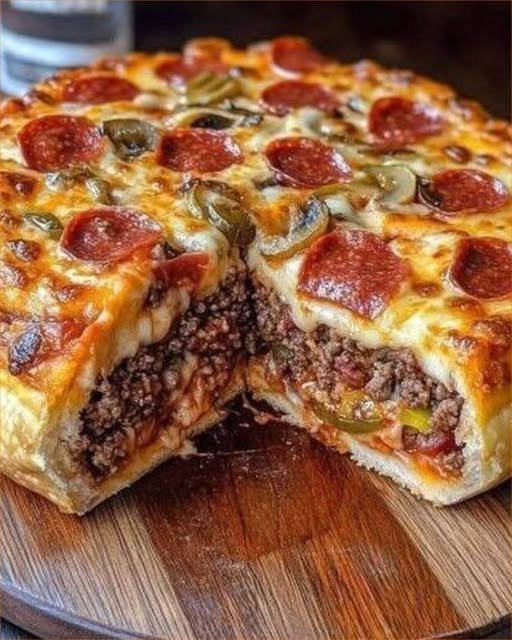
Deep-Dish Pizza

Deep-Dish Pizza


Ingredients

For the Dough
  • 2.25 cups all-purpose flour
  • 0.25 cups cornmeal
  • 1 tsp salt
  • 1 tsp sugar
  • 1 packet active dry yeast (about 2¼ tsp)
  • 0.75 cups warm water (110°F/43°C)
  • 0.25 cups unsalted butter, melted
  • 1 tbsp olive oil for mixing
For the Sauce
  • 1 can crushed tomatoes (28 oz/794 g)
  • 1 can tomato paste (6 oz/170 g)
  • 1 tbsp olive oil for sautéing
  • 1 medium onion, finely chopped
  • 2 cloves garlic, minced
  • 1 tsp dried oregano
  • 1 tsp dried basil
  • 0.5 tsp red pepper flakes (optional)
  • 1 tsp sugar
  • Salt and pepper to taste
For the Topping
  • 1 lb Italian sausage browned
  • 1 bell pepper , diced (optional)
  • 1 small onion , diced (optional)
  • 0.5 lb mozzarella cheese, shredded
  • 0.5 lb provolone cheese, shredded
  • 0.25 cups Parmesan cheese, grated
  • Olive oil for greasing the pan

Method

Prepare the Dough
  1. In a small bowl, mix the sugar and yeast into the warm water. Let it sit for 5–10 minutes until it becomes foamy.
  2. In a large bowl, combine the flour, cornmeal, and salt. Create a well in the center and pour in the yeast mixture, melted butter, and olive oil.
  3. Stir until a dough forms and then knead on a floured surface for 5–7 minutes until it’s smooth and elastic.
  4. Transfer the dough to a greased bowl, cover, and let it rise for 1–1½ hours, or until it doubles in size.
Make the Sauce
  1. Heat olive oil in a saucepan over medium heat. Add the chopped onion and cook for 4–5 minutes until soft.
  2. Stir in the minced garlic and cook for another 1–2 minutes.
  3. Add the crushed tomatoes, tomato paste, oregano, basil, red pepper flakes (if using), and sugar.
  4. Season with salt and pepper, then simmer for 20–25 minutes, stirring occasionally until the sauce thickens.
Prepare the Filling
  1. In a skillet, brown the Italian sausage, breaking it apart as it cooks. Drain the excess grease.
  2. If you’re using bell pepper and onion, sauté them in the same skillet until they are tender, then set aside.
Assemble the Pizza
  1. Preheat your oven to 425°F (220°C). Grease a 9- or 10-inch deep-dish pizza pan with olive oil.
  2. Punch down the dough and roll it into a 12-inch circle. Press the dough into the pan, making sure to create a thick crust along the edges.
  3. Layer half of the mozzarella cheese first, then add provolone and Parmesan.
  4. Follow with the sausage and any sautéed vegetables, and finally spread the tomato sauce over everything.
Bake
  1. Bake your pizza for 30–40 minutes, until the crust is golden and the cheese is melted and bubbly.
  2. If the crust turns brown too quickly, loosely cover the edges with foil.
Cool and Serve
  1. Allow the pizza to cool for 5–10 minutes before slicing.
  2. Serve it warm and enjoy every delicious bite!

Notes

Feel free to mix and match cheeses and get creative with toppings. You can prepare the dough a day in advance and store it in the fridge. Leftovers can be frozen for up to three months.

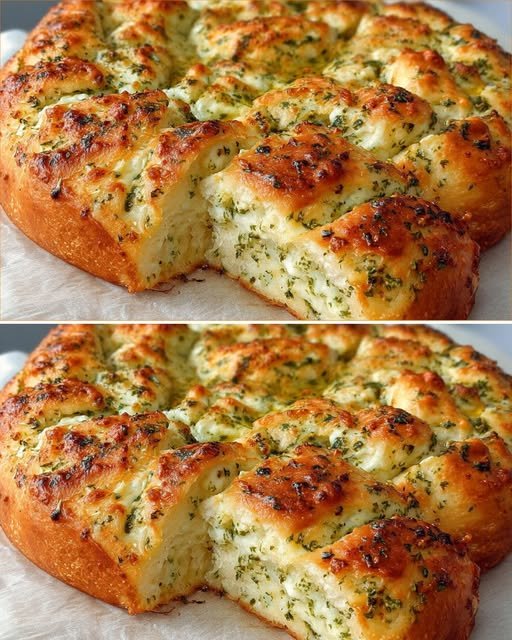
Garlic Butter Mozzarella Pull-Apart Bread

Garlic Butter Mozzarella Pull-Apart Bread


Ingredients

Dough Ingredients
  • 100 ml warm milk (about 1/3 cup)
  • 100 ml warm water (about 1/3 cup)
  • 1 tsp dry yeast
  • 1 tsp sugar
  • 2 tbsp sunflower oil
  • 350 g flour (about 2 3/4 cups)
  • 1 tsp salt
  • 1 tsp butter
Garlic Butter Topping
  • 50 g butter (about 1/4 cup)
  • 2 tbsp fresh parsley finely chopped
  • 2 cloves garlic minced
  • 1/2 tsp salt (for garlic butter)
  • Mozzarella cheese shredded

Method

Preparation
  1. In a bowl, mix warm milk, warm water, yeast, and sugar. Let it stand for 5 minutes until foamy.
  2. Add sunflower oil, flour, salt, and 1 tsp of butter. Knead until you have a soft, smooth dough.
  3. Cover the dough and let it rise in a warm place for 45 minutes, or until it doubles in size.
  4. Gently deflate the dough and shape it into a flat round on a lined baking tray. Let it rise again for 15 minutes.
  5. In the meantime, melt 50 g of butter. Mix it with parsley, minced garlic, and 1/2 tsp salt.
  6. Press deep indentations into the dough surface using your fingers.
  7. Spoon the garlic butter mixture into the holes and sprinkle generously with mozzarella cheese.
Baking
  1. Bake in a preheated oven at 180°C (about 350°F) for 20 minutes, or until golden brown and cooked through.
  2. Remove from the oven and serve warm.

Notes

Store leftovers in an airtight container for up to 2 days at room temperature. Reheat in the oven for a few minutes for the best texture. For a crustier outside, bake the bread a few minutes longer, keeping an eye on it to avoid burning. Consider adding grated Parmesan cheese or a sprinkle of red pepper flakes for an extra kick. You can also mix in other shredded cheeses like cheddar or gouda. If you don’t have parsley, try using fresh basil or oregano.

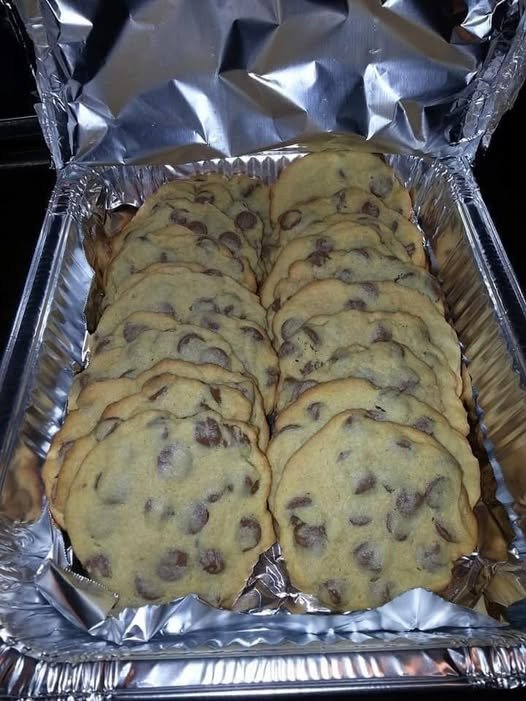
Best Chocolate Chip Cookies Ever

Alright 😋🍪 here’s a full, bakery-style detailed recipe for The Best Chocolate Chip Cookies Ever — soft centers, crispy edges, rich buttery flavor, and loads of melty chocolate chips.


🍪 Best Chocolate Chip Cookies Ever

Golden on the outside, soft and gooey inside — these cookies are thick, chewy, and packed with chocolate in every bite. Perfect for tea time, gifting, or serious cookie cravings!


⏱️ Time & Servings

  • Prep Time: 15 minutes
  • Chill Time: 30 minutes (recommended)
  • Bake Time: 10–12 minutes
  • Total Time: ~1 hour
  • Makes: 18–22 cookies

📝 Ingredients

  • 2¼ cups all-purpose flour
  • 1 tsp baking soda
  • ½ tsp salt
  • ¾ cup unsalted butter (softened)
  • ¾ cup brown sugar
  • ½ cup granulated sugar
  • 2 large eggs
  • 2 tsp vanilla extract
  • 2 cups chocolate chips or chunks
  • Optional: ½ cup chopped walnuts or pecans

👩‍🍳 Instructions

🥣 Step 1: Mix Dry Ingredients

In a bowl whisk together:

  • Flour
  • Baking soda
  • Salt
    Set aside.

🧈 Step 2: Cream Butter & Sugar

In a large bowl:

  • Beat butter, brown sugar, and white sugar
  • Mix until light and fluffy (about 2–3 minutes)

🥚 Step 3: Add Eggs & Vanilla

  • Add eggs one at a time
  • Mix well after each
  • Stir in vanilla extract

🔄 Step 4: Combine Dry & Wet

  • Gradually add dry ingredients
  • Mix until just combined
    ⚠️ Don’t overmix — keeps cookies soft.

🍫 Step 5: Add Chocolate Chips

  • Fold in chocolate chips and nuts (if using)

❄️ Step 6: Chill Dough (Important)

  • Cover dough
  • Refrigerate 30 minutes
    👉 Helps cookies stay thick and chewy.

🔥 Step 7: Bake

  • Preheat oven to 180°C (350°F)
  • Line baking tray with parchment paper
  • Scoop dough balls (2 tbsp each)
  • Leave space between cookies

Bake 10–12 minutes until:

  • Edges golden
  • Centers slightly soft

⏳ Step 8: Cool

  • Let cookies cool on tray for 5 minutes
  • Transfer to cooling rack

They firm up while cooling but stay soft inside 😍


🍽️ Serving Ideas

  • Serve warm with milk 🥛
  • Add vanilla ice cream for cookie dessert 🍨
  • Dip half cookies in melted chocolate

💡 Pro Tips

✔ Brown sugar = chewy texture
✔ Chill dough for thick cookies
✔ Slightly underbake for soft centers
✔ Use chocolate chunks for bakery-style look


🔄 Variations

  • 🍫 Double chocolate (add cocoa powder)
  • 🧂 Sea salt sprinkle on top
  • 🥜 Peanut butter chocolate chip
  • 🧁 Stuffed with Nutella or caramel

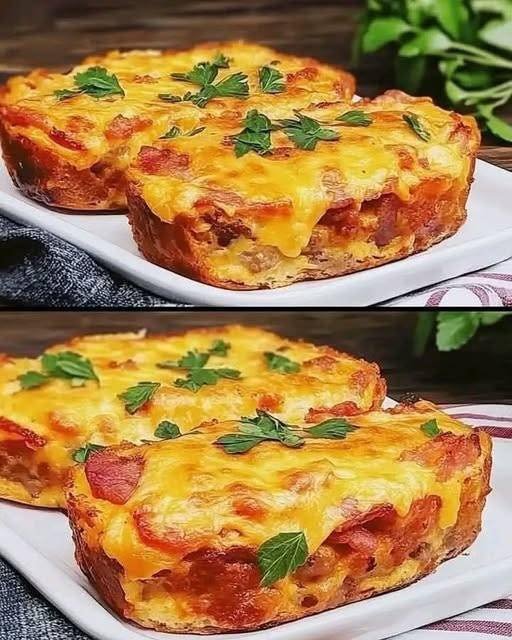
Cheesy Bacon Egg Toast Cups

Cheesy Bacon Egg Toast Cups

A quick baked breakfast made with bread, eggs, cheese, and bacon.

⏱ Prep Time: 5 minutes

🔥 Bake Time: 12–15 minutes

🍽 Serves: 6


📝 Ingredients

  • 6 slices sandwich bread

  • 6 slices cheese (cheddar, mozzarella, or your choice)

  • 6 slices cooked bacon (chopped)

  • 4 large eggs

  • Salt, to taste

  • Black pepper, to taste

  • 1 tbsp fresh parsley, chopped

  • 1 tbsp green onion, chopped

  • Butter or oil (for greasing pan)


👩‍🍳 Instructions

  1. Preheat oven to 180°C (350°F). Grease a muffin tin.

  2. Flatten each slice of bread with a rolling pin.

  3. Press each slice of bread into the muffin tin to form a cup.

  4. Place one slice of cheese inside each bread cup.

  5. Sprinkle chopped bacon evenly into each cup.

  6. In a bowl, beat the eggs with:

    • salt

    • black pepper

    • parsley

    • green onion

  7. Pour the egg mixture evenly into each bread cup.

  8. Bake for 12–15 minutes, or until:

    • eggs are set

    • cheese is melted

    • edges are golden

  9. Let cool for 2–3 minutes, then remove gently.


🌟 Optional Add-Ins

  • Bell peppers

  • Mushrooms

  • Spinach

  • Tomatoes

  • Chili flakes


🧊 Storage

  • Refrigerate up to 3 days

  • Reheat in oven or air fryer for best texture

Homemade Crepes Recipe

Homemade Crepes Recipe

In the battle between crepes and pancakes, I’ll side with crepes any day. Why? Because they’re endlessly versatile (serve them up with sweet or savory fillings) and their thin and delicate texture means I can enjoy a lot more of them before feeling overly stuffed. I mean sure, a big stack of fluffy pancakes always has its place, but crepes for me are just tops. Especially when they’re as easy as this recipe for homemade crepes.Recipe book

WHAT’S THE DIFFERENCE BETWEEN CREPES AND PANCAKES?

Crepes, like pancakes, are made with a simple batter comprised of flour, eggs, milk, and butter. The main difference between crepes and pancakes is the ratio of ingredients in the batter which creates different textures once cooked. Crepes are very thin and flexible, making them perfect for filling, folding, and rolling. Their delicate flavor also pairs well with both sweet and savory ingredients. American pancakes, on the other hand, are thick, fluffy, far more cake-like, and are almost always served with sweet toppings.Dessert cookbook

FILLING IDEAS FOR CREPES

The best part about crepes is filling them with all sorts of fun ingredients! Scavenge your fridge and pantry for anything you might need to use up, and come up with your own fun flavor combinations, or try one of these filling ideas for crepes:


Yogurt and jam

Ham and cheese

Lemon curd and whipped cream

Nutella and berries

Spinach and goat cheese or Swiss cheese

Peanut butter and chocolate chips.

HOW TO SERVE CREPES

Once you’ve chosen some fun fillings for your crepes, you can either fold or roll those fillings up in the crepe. To fold the crepes, cover half of the crepe with your toppings, fold the crepe in half to close, and then fold in half once more so it’s in a quarter-round. To roll the crepes, place your toppings down the center, or slightly to one side, then fold one side over the toppings, then continue to roll to the other side.

HOW TO STORE LEFTOVER CREPES

…If there are any leftovers! Leftover crepes are stored well in the fridge for quick use later in the week, and you can even freeze crepes for longer storage. Keep refrigerated crepes in a gallon-sized zip-top bag or other air-tight food storage container for 4-5 days. To freeze, make sure to place a piece of parchment between each crepe so they don’t stick together once frozen. Thaw frozen crepes in the refrigerator overnight, or at room temperature for 30-60 minutes, then microwave briefly until warmed through.

Easy Homemade Crepes Recipe

This easy crepes recipe yields thin, delicate, and delicious crepes that are ready to be filled with any sweet or savory filling you desire!Recipe book


Prep Time: 10mins


Cook Time: 15mins


Rest time: 30mins


Total Time: 55mins


INGREDIENTS:

1 cup all-purpose flour

1/2 tsp salt

2 large eggs, room temperature

1 cup milk, warmed

3 Tbsp melted butter

1/4 cup water

2 Tbsp cooking oil, for the skillet

INSTRUCTIONS:

Add the flour, salt, eggs, milk, melted butter, and water together in a large bowl until it forms a smooth and slightly thick batter.

Let the batter rest at room temperature for 30 minutes, or cover and refrigerate up to two days.

When ready to make your crepes, heat a 10-inch skillet over medium heat. Once hot, brush with about ½ tsp oil.

Pour about ⅓ cup of the batter into the skillet and begin to tilt the skillet in a circular motion to allow the batter to evenly cover the surface of the skillet.

Allow the batter to cook until mostly set, then flip and cook until golden brown on the second side.

The total cook time for each side will vary depending on your skillet and stove top. You may need to adjust the heat up or down as you go.

Repeat with the rest of the batter, adding more oil between crepes as needed.

As you cook the crepes, stack them on a clean plate and cover with a towel to keep warm.

Once all of the crepes are cooked, fill, fold, or roll the crepes then serve.

NOTES:

*Using room temperature or slightly warmed milk and eggs helps the melted butter incorporate more evenly into the batter rather than having it solidify as soon as it comes into contact with cold milk and eggs.Dessert cookbook


**To make sweet crepes, add 1 Tbsp sugar and ½ tsp vanilla to your batter.


NUTRITIONAL INFO:

Serving: 1crepe | Calories: 216kcal | Carbohydrates: 18g | Protein: 6g | Fat: 13g | Sodium: 279mg | Fiber: 1g

Crispy Stuffing Balls with Gravy

Crispy Stuffing Balls with Gravy

These crispy stuffing balls are a comforting, crowd-pleasing dish that’s perfect for holidays, family dinners, or even as a hearty appetizer. They have everything you love about traditional stuffing — buttery bread, savory herbs, and tender vegetables — but baked into golden, bite-sized balls with irresistibly crisp edges. Served warm with rich homemade gravy, they’re easy to make ahead and always disappear fast from the table.


Ingredients

For the Stuffing Balls

8 cups dried bread cubes or herb-seasoned stuffing mix

½ cup butter

1 medium onion, finely diced

3–4 celery stalks, diced

2 cloves garlic, minced

2 large eggs, beaten

1½–2 cups chicken broth (as needed)

1 tablespoon fresh parsley (or 1 teaspoon dried)

1 teaspoon poultry seasoning

½ teaspoon salt

½ teaspoon black pepper


For the Gravy

3 tablespoons butter

3 tablespoons flour

2 cups chicken or turkey broth

Salt and pepper to taste


Instructions

Start by preheating your oven to 375°F (190°C) and lining a baking sheet with parchment paper or lightly greasing it.


In a large skillet over medium heat, melt the butter. Add the diced onion, celery, and garlic. Sauté for about 7–10 minutes until softened and fragrant. Remove from heat and allow the mixture to cool slightly.


Place the bread cubes in a large mixing bowl. Add the cooked vegetables, parsley, poultry seasoning, salt, and pepper. Stir everything together until evenly combined. Add the beaten eggs, then slowly pour in the chicken broth while mixing. Use just enough broth to moisten the mixture so it holds together without becoming soggy.

Scoop portions of the mixture and shape them into golf-ball-sized rounds. Arrange them evenly on the prepared baking sheet.


Bake for 25–30 minutes, or until the balls are golden brown and lightly crisp on the outside while remaining tender inside.


Meanwhile, prepare the gravy. Melt butter in a saucepan over medium heat. Whisk in the flour and cook for 1–2 minutes to form a smooth roux. Gradually add the broth, whisking continuously until thick and smooth. Season with salt and pepper.


Serve the stuffing balls warm with gravy spooned generously over the top. Optional add-ins like sausage, shredded turkey, cranberries, or fresh herbs can add extra flavor and texture.

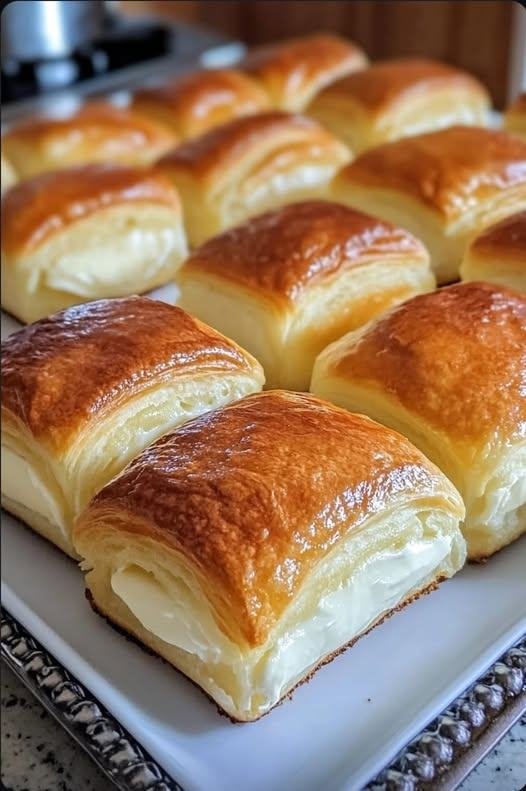
Simple Creamy Morning Pastry Squares

Simple Creamy Morning Pastry Squares

Flaky, Smooth, and Quick to Prepare

Ingredients

  • 1 package Puff Pastry Sheets: Thawed according to package directions.

  • 8 oz Cream Cheese: Softened to room temperature for a smooth, lump-free filling.

  • 1/4 cup Granulated Sugar: (Or your preferred sugar-free powdered sweetener).

  • 1 tsp Vanilla Extract: To give the filling a warm, dessert-like flavor.

  • 1 Large Egg: Beaten (to be used as an egg wash for that golden shine).

  • Optional: A dusting of powdered sugar or a drizzle of honey for serving.

Instructions

  1. Preparation: Preheat your oven to 400°F (200°C). Line a large baking sheet with parchment paper.

  2. The Creamy Filling: In a medium bowl, whisk together the softened cream cheese, sugar (or sweetener), and vanilla extract until the mixture is light and completely smooth.

  3. Shape the Pastry: Lay your puff pastry sheet on a flat surface. Cut the sheet into even squares (about 3×3 inches).

  4. Assemble: Place a generous tablespoon of the cream cheese mixture into the center of half of the squares.

  5. The Lid: Place a second pastry square on top of each filled one. Use a fork to crimp and seal the four edges tightly so the filling stays inside while baking.

  6. The Golden Finish: Lightly brush the tops of the squares with the beaten egg wash. Using a sharp knife, poke a tiny “X” or a small slit in the center of the top square to allow steam to escape.

  7. Bake: Place on the baking sheet and bake for 15–18 minutes. You are looking for a deep golden-brown color and a significant “puff” in the pastry.

  8. Serve: Allow them to cool for at least 5 minutes before serving to let the creamy center set slightly.


Why this works for your morning:

  • Efficiency: Using pre-made puff pastry gives you that “melt-in-your-mouth” texture without the hours of labor usually required for laminated dough.

  • Satiety: The protein and fats from the cream cheese help keep you full, mirroring the success you’ve had with your cheesecake fluff and keto mousse.

  • Family Friendly: It’s a crowd-pleaser that looks much more difficult to make than it actually is.

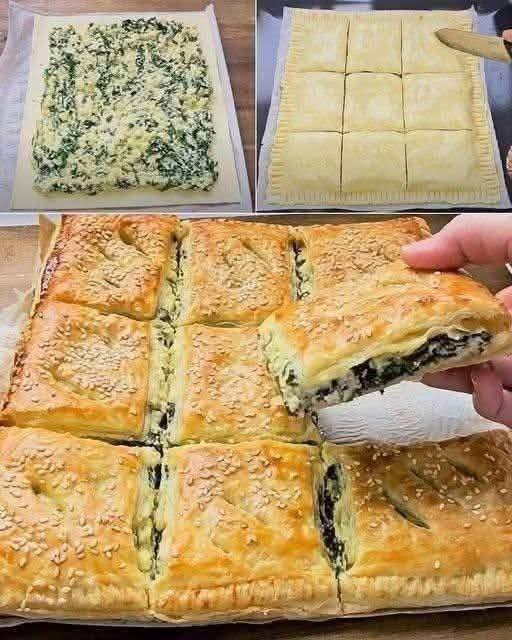
Spinach and Cheese Puff Pastry Squares

Spinach and Cheese Puff Pastry Squares

Flaky, Savory, and Potluck-Perfect

Ingredients

  • 2 sheets Puff Pastry: Thawed according to package instructions.

  • 1 ½ cups Spinach: Chopped and cooked. Crucial Step: Squeeze out every drop of excess water to prevent a soggy crust.

  • 1 cup Ricotta Cheese: For a creamy, mild flavor (or substitute Feta for a saltier, tangy kick).

  • 1/2 cup Shredded Mozzarella or Parmesan: To help bind the filling and add a golden crust.

  • 1 Large Egg: Beaten (to be used for the filling and as an egg wash).

  • 1 clove Garlic: Minced.

  • Salt & Pepper: To taste.

  • Optional: A pinch of nutmeg (pairs beautifully with spinach and ricotta).

Instructions

  1. Prep the Oven: Preheat your oven to 400°F (200°C). Line a large baking sheet with parchment paper.

  2. Make the Filling: In a medium bowl, combine the squeezed-dry spinach, ricotta (or feta), half of the beaten egg, minced garlic, mozzarella/parmesan, salt, and pepper. Mix until well combined.

  3. Prepare the Pastry: Lay one sheet of puff pastry onto your baking sheet.

  4. Assemble: Spread the spinach and cheese mixture evenly over the pastry sheet, leaving a 1-inch border around the edges.

  5. The “Lid”: Place the second sheet of puff pastry on top. Use a fork to crimp the edges together tightly, sealing the filling inside.

  6. The Egg Wash: Brush the remaining half of the beaten egg over the top of the pastry. This is what gives it that professional, deep golden shine.

  7. Score and Vent: Use a sharp knife to lightly score the top into squares (don’t cut all the way through) and poke a few small holes to let steam escape.

  8. Bake: Bake for 20–25 minutes until the pastry is puffed up and a beautiful golden brown.

  9. Serve: Let it rest for 5 minutes, then cut along your score lines into squares.


Why this is a “Potluck Winner”:

  • Handheld Ease: No forks or plates are strictly necessary, making it perfect for mingling.

  • Vegetable-Forward: It’s a great way to sneak a significant amount of greens into a savory snack.

  • The “Crunch” Factor: The contrast between the flaky outer shell and the creamy center is what makes people keep asking for it!

5-Minute “Melt-in-Your-Mouth” Cupcake

5-Minute “Melt-in-Your-Mouth” Cupcake

Quick, Simple, and Perfectly Portioned

Ingredients

  • 4 tbsp All-Purpose Flour: (Or almond flour for a lower-carb version).

  • 2 tbsp Sugar-Free Sweetener: (Like Monk Fruit or Erythritol).

  • 1 tbsp Unsweetened Cocoa Powder: For a chocolate version (or omit for vanilla).

  • 1/4 tsp Baking Powder: For that essential lift.

  • 3 tbsp Milk: (Dairy or almond milk both work great).

  • 1 tbsp Melted Butter or Coconut Oil: Adds the “melt-in-your-mouth” richness.

  • 1/4 tsp Vanilla Extract: To enhance the sweetness.

Instructions

  1. Mix Dry Ingredients: In a standard microwave-safe mug, whisk together the flour, sweetener, cocoa powder, and baking powder using a small fork. Ensure there are no lumps.

  2. Add Wet Ingredients: Pour in the milk, melted butter (or oil), and vanilla extract.

  3. Stir until Smooth: Mix everything together until the batter is smooth and glossy. Be sure to scrape the bottom of the mug to incorporate all the flour.

  4. Microwave: Place the mug in the center of the microwave. Cook on high for 90 seconds to 2 minutes.

    • Note: Every microwave is different. Start with 90 seconds; if the top still looks “wet,” add 15-second increments until it is firm.

  5. Rest and Enjoy: Let the cupcake sit for 2 minutes before eating. This is the “magic” step where the steam finishes cooking the center and the texture becomes soft and fluffy.


Why this works for your “No-Sweet” streak:

  • Portion Control: Since it only makes one, you don’t have to worry about a whole tray of leftovers calling your name.

  • Customizable: You can drop a few of your fresh raspberries (from your cheesecake fluff) into the center before microwaving for a fruity surprise.

  • Speed: It satisfies the “need something now” feeling in under 5 minutes, preventing you from reaching for processed snacks.

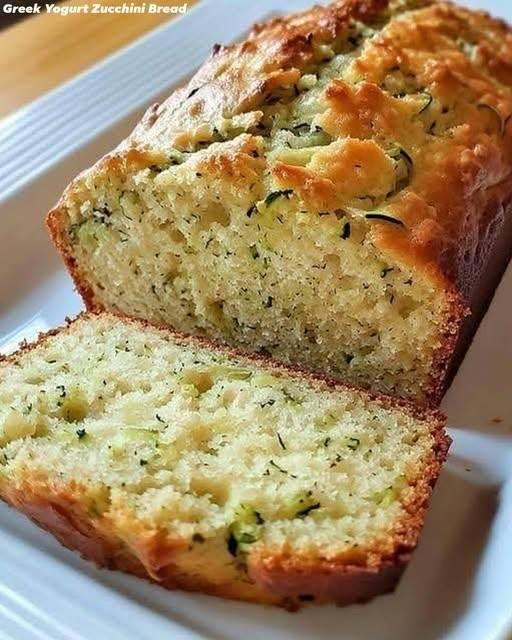
Moist Greek Yogurt Zucchini Bread

Moist Greek Yogurt Zucchini Bread

Wholesome, High-Protein, and Naturally Sweetened

Ingredients

  • 1 1/2 cups Grated Zucchini: Approximately 2 medium zucchinis. (Pro-tip: Squeeze out the excess moisture with a paper towel after grating for the best texture).

  • 2 Large Eggs: Room temperature.

  • 1/2 cup Plain Greek Yogurt: Provides moisture and a protein boost.

  • 1/3 cup Honey or Maple Syrup: A natural way to add sweetness.

  • 1/4 cup Melted Coconut Oil: Or vegetable oil if preferred.

  • 1 tsp Vanilla Extract: For a warm, baked aroma.

  • 1 1/2 cups Whole Wheat Flour: Or all-purpose flour for a lighter crumb.

  • 1 tsp Baking Powder & 1/2 tsp Baking Soda: For the perfect rise.

  • Spices: 1/2 tsp Ground Cinnamon and 1/4 tsp Ground Nutmeg.

  • 1/4 tsp Salt: To balance the flavors.

  • Optional: 1/2 cup chopped walnuts or sugar-free chocolate chips for added texture.

Instructions

  1. Preparation: Preheat your oven to 350°F (175°C). Grease a 9×5-inch loaf pan or line it with parchment paper for easy removal.

  2. Mix the Wet Ingredients: In a large bowl, whisk together the eggs, Greek yogurt, honey (or syrup), oil, and vanilla extract until smooth.

  3. Incorporate Zucchini: Stir the grated (and squeezed) zucchini into the wet mixture until evenly distributed.

  4. Combine Dry Ingredients: In a separate medium bowl, whisk together the flour, baking powder, baking soda, cinnamon, nutmeg, and salt.

  5. The Gentle Mix: Gradually add the dry ingredients into the wet ingredients. Fold them in gently with a spatula just until combined—do not overmix, as this can make the bread tough. Fold in your walnuts or chocolate chips now if using.

  6. Bake: Pour the batter into the prepared loaf pan. Bake for 45–55 minutes.

  7. The Toothpick Test: Insert a toothpick into the center; if it comes out clean or with just a few moist crumbs, it’s done.

  8. Cooling: Let the bread cool in the pan for 10 minutes, then transfer to a wire rack to cool completely before slicing.


Why this fits your lifestyle:

  • Moisture without Heavy Fats: The Greek yogurt replaces a large portion of the oil/butter usually found in quick breads, making it lighter but still incredibly soft.

  • Fiber-Rich: Using whole wheat flour and zucchini adds fiber, which helps maintain steady energy levels and keeps you full.

  • No Refined Sugars: By using honey or maple syrup, you’re avoiding the “crash” associated with processed white sugar.

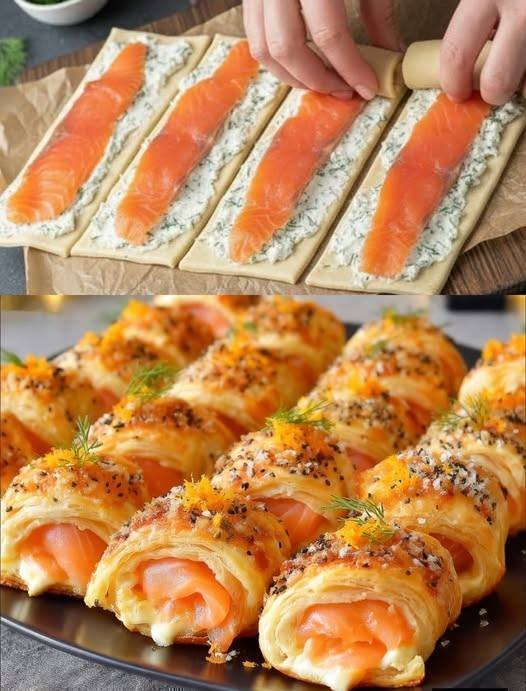
Elegant Salmon & Cream Cheese Puff Pastry Rolls

Elegant Salmon & Cream Cheese Puff Pastry Rolls

Crispy, Savory, and Refreshing

Ingredients

  • 1 package Puff Pastry Sheets: Thawed according to package instructions.

  • 200g Smoked Salmon: Sliced into thin, even strips.

  • 4 oz Cream Cheese: Softened at room temperature for easy spreading.

  • 2 tbsp Fresh Dill: Chopped finely (or 1 tsp dried dill).

  • Optional: 1 egg (beaten for an egg wash) and a squeeze of fresh lemon juice.

Instructions

  1. Prepare Your Workspace: Preheat your oven to 400°F (200°C). Line a large baking sheet with parchment paper to prevent sticking.

  2. Season the Base: In a small bowl, mix the softened cream cheese with the chopped dill. If you like a bit of brightness, add a small squeeze of lemon juice here.

  3. Roll and Spread: On a lightly floured surface, gently roll out the puff pastry sheet. Spread the cream cheese and dill mixture evenly over the entire surface, leaving a small half-inch border at the edges.

  4. Layer the Salmon: Place the smoked salmon strips evenly across the cream cheese layer.

  5. The Roll-Up: Starting from one long side, roll the pastry tightly into a log shape. Use a sharp knife to slice the log into rounds about 1 inch thick.

  6. The Final Touch: Place the rolls on the prepared baking sheet. For a professional golden shine, lightly brush the tops of the pastry with the beaten egg wash.

  7. Bake: Place in the oven for 15–18 minutes, or until the pastry has puffed up significantly and turned a beautiful golden brown.

  8. Serve: Let them rest for 5 minutes before serving. These are excellent warm or at room temperature.


Why this works for your goals:

  • Nutrient Dense: The smoked salmon provides essential fatty acids that support your energy levels during your “no-sweet” journey.

  • Satiety: The combination of protein and healthy fats helps you stay full longer, supporting the progress you’ve seen with your 15 kg loss.

20-Minute Sugar-Free Cloud Bread

20-Minute Sugar-Free Cloud Bread

Diabetic-Friendly, Gluten-Free, and Low-Calorie

Ingredients

  • 3 Large Eggs: Separated (whites in one bowl, yolks in another).

  • 3 tbsp Cream Cheese: Softened (you can use the same brand from your Cloud Cake).

  • 1/4 tsp Cream of Tartar: This is the secret to making it fluffy and stable.

  • 1/2 tsp Garlic Powder: For a savory bread flavor (optional).

  • 1/4 tsp Salt: To enhance the flavor.

  • 1 tbsp Powdered Monk Fruit: Only if you want a slightly sweeter “dessert bread” style.

  • 1/2 tsp Dried Oregano or Rosemary: For an herbal finish.

Instructions

  1. Preheat and Prep: Preheat your oven to 300°F (150°C). Line a baking sheet with parchment paper.

  2. Mix the Yolks: In a medium bowl, whisk the egg yolks with the softened cream cheese and salt until the mixture is completely smooth with no lumps.

  3. Whip the Whites: In a separate clean, dry bowl, add the egg whites and the cream of tartar. Using a hand mixer, beat on high speed until “stiff peaks” form (the whites should stay put even if you tilt the bowl).

  4. The Gentle Fold: Very slowly, fold the egg yolk mixture into the egg whites using a spatula. Do this gently so you don’t deflate the air bubbles you just created.

  5. Shape: Scoop the mixture onto the baking sheet into 6–8 rounds (about 1 inch thick). Sprinkle the top with your dried herbs or garlic powder.

  6. Bake: Bake for 15–20 minutes. The tops should be golden brown.

  7. Cool: Let them cool on the pan for at least 5 minutes. They will settle into a bread-like consistency as they cool.


Why this fits your routine:

  • No Calories/Low Carb: By removing the flour and sugar, you are avoiding the “spikes” that can interrupt your progress.

  • Speed: Because there is no yeast, you don’t have to wait hours for the dough to rise.

  • Versatility: You can use two pieces to make a sandwich or eat one plain as a light dessert.

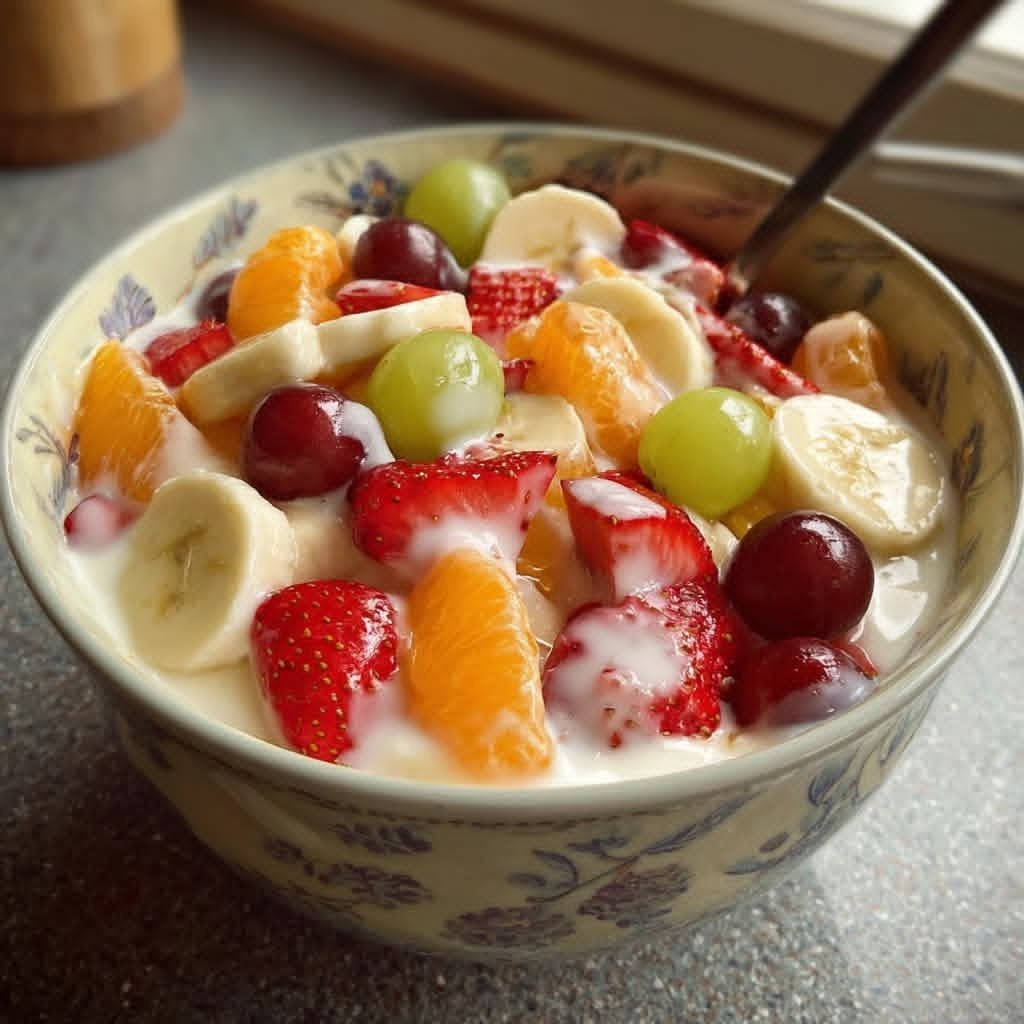
Creamy Mixed Fruit Breakfast Bowl 🍓🍌🍊🍇

Creamy Mixed Fruit Breakfast Bowl 🍓🍌🍊🍇

Ingredients 🛒

1 cup milk or drinkable yogurt 🥛

½ banana, sliced 🍌

3–4 strawberries, chopped 🍓

1 mandarin orange, peeled 🍊

Handful of grapes 🍇

Optional: spoon of oats or cereal 🌾

Optional: honey drizzle 🍯

Instructions 👩‍🍳

Pour milk into a bowl 🥣

Add banana and strawberries 🍌🍓

Add orange segments and grapes 🍊🍇

Sprinkle oats if using 🌾

Drizzle honey for sweetness 🍯

Stir lightly and enjoy fresh 😋✨

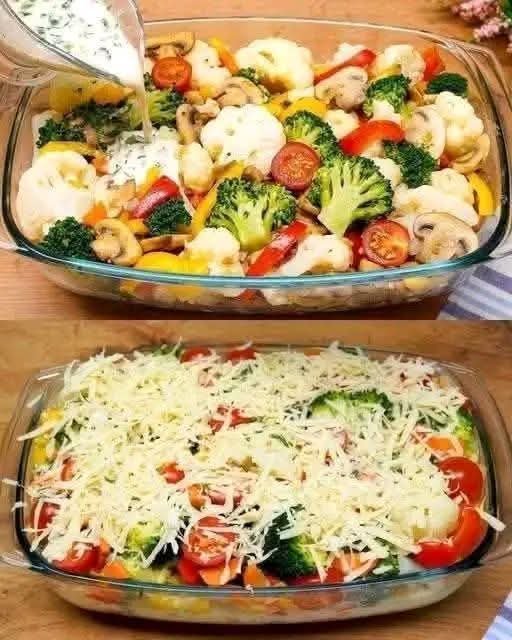
Cheesy Roasted Vegetable Bake

🥗 Recipe: Cheesy Roasted Vegetable Bake

Prep time: 15 minutes


Cook time: 35–40 minutes


Servings: 6


Dietary: Vegetarian, Gluten-Free (ensure spices are certified)


Ingredients

The Veggie Base:


Potatoes: 2 medium (cubed small)


Zucchini: 2 medium (sliced into half-moons)


Red Bell Pepper: 1 large (chopped)


Broccoli: 1 head (cut into small florets)


Red Onion: 1 large (wedged)


Cherry Tomatoes: 1 cup (whole)


The Seasoning:


Olive Oil: 3 tbsp


Garlic: 3 cloves, minced


Dried Oregano & Thyme: 1 tsp each


Smoked Paprika: ½ tsp


Salt & Black Pepper: To taste


The Topping:


Mozzarella Cheese: 1 ½ cups, shredded


Parmesan Cheese: ¼ cup, grated


Fresh Parsley: For garnish


Instructions

Prep the Oven: Preheat your oven to 200°C (400°F). Grease a large baking dish or rimmed sheet pan.


Toss the Veggies: In a large bowl, combine all the chopped vegetables. Drizzle with olive oil and add the garlic, oregano, thyme, paprika, salt, and pepper. Toss until every piece is well-coated.


Initial Roast: Spread the vegetables in a single layer on the tray. Roast for 25–30 minutes, tossing halfway through, until the potatoes are fork-tender and the edges are slightly charred.


Add the Cheese: Remove from the oven. Sprinkle the mozzarella and parmesan evenly over the top.


The Melt: Return to the oven for another 8–10 minutes, or until the cheese is golden and bubbly.


Serve: Let it rest for 5 minutes (this prevents the juices from being too runny), garnish with fresh parsley, and dig in!


💡 Tips & Notes

Size Matters: Cut harder vegetables (potatoes, carrots) into smaller pieces and softer vegetables (zucchini, peppers) into larger chunks so they finish cooking at the same time.


Don’t Overcrowd: Use two pans if necessary. If the veggies are piled on top of each other, they will steam instead of roast, and you’ll lose that delicious caramelization.


The “Crunch” Factor: For a crispy topping, mix ¼ cup of Panko breadcrumbs with the cheese before sprinkling.


📊 Nutritional Info (Per Serving)

Values are estimates based on standard ingredient sizes.


Nutrient Amount

Calories 245 kcal

Protein 11g

Total Fat 14g

Carbohydrates 21g

Fiber 4g

Net Carbs 17g

✨ Health Benefits

Phytochemical Punch: The variety of colors (purple onion, red pepper, green broccoli) ensures a broad spectrum of antioxidants that fight inflammation.


High Fiber: Excellent for gut health and keeping you full longer.


Bone Health: A solid dose of calcium from the cheese and Vitamin K from the broccoli.


❓ Common Q&A

Q: Can I use frozen vegetables?A: You can, but they tend to release more water. Thaw and pat them dry thoroughly first. Increase the heat by 10°C to help evaporate excess moisture.


Q: How do I store leftovers?A: Keep them in an airtight container in the fridge for up to 3 days. Reheat in the oven or air fryer to maintain the texture; the microwave makes the veggies a bit soft.


Q: What protein goes well with this?A: This is great alongside grilled chicken, pan-seared salmon, or even a simple fried egg on top for breakfast.