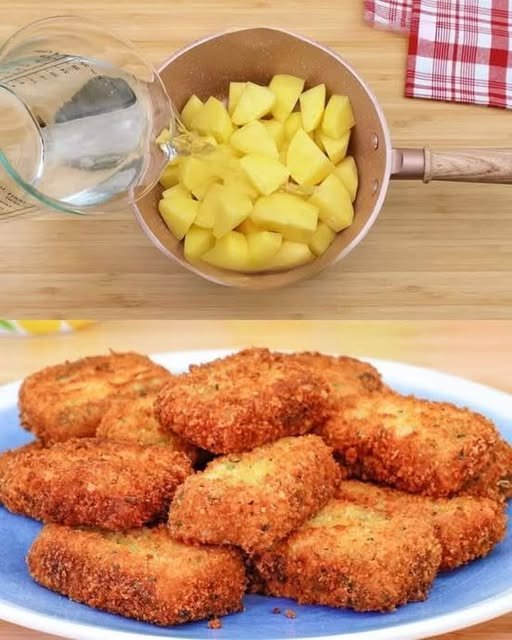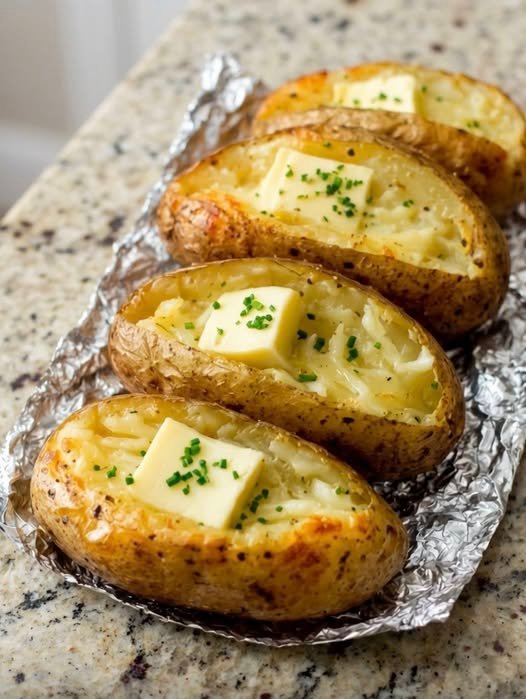
Crispy Potato & Egg Nest Muffins

🥔🍳 Crispy Potato & Egg Nest Muffins

Yields: 12 muffins
Prep Time: 15 minutes
Bake Time: 25–30 minutes

These Crispy Potato & Egg Nest Muffins are a comforting and satisfying dish made with simple ingredients. Grated potatoes form a crisp outer layer, while the inside stays soft and flavorful. They are perfect for breakfast, brunch, or light meals and are easy to prepare ahead of time.


📋 Ingredients

  • 3 large potatoes, peeled and grated

  • 4–5 large eggs, well beaten

  • 1 cup shredded cheese (cheddar or mozzarella works well)

  • 12 cherry tomatoes (one per muffin)

  • 2 green onions, finely chopped

  • Salt, to taste

  • Black pepper, to taste

  • A small pinch of garlic powder or paprika (optional)

  • Vegetable oil or butter, for greasing the muffin tin


👩‍🍳 Step-by-Step Instructions

Step 1: Prepare the Potatoes

  1. Preheat your oven to 400°F (200°C).

  2. Place the grated potatoes into a bowl of cold water.

  3. Rinse well to remove excess starch.

  4. Drain and squeeze the potatoes firmly using a clean kitchen towel until they are as dry as possible.
    Dry potatoes help create a crisp texture during baking.


Step 2: Make the Potato Nests

  1. Transfer the dried potatoes to a mixing bowl.

  2. Add salt, black pepper, and half of the shredded cheese.

  3. Mix gently until evenly combined.

  4. Grease a 12-cup muffin tin thoroughly.

  5. Divide the potato mixture evenly among the cups.

  6. Press the mixture firmly into the bottom and up the sides of each cup to form a nest shape.


Step 3: Prepare the Egg Mixture

  1. In a separate bowl or jug, whisk the eggs until smooth.

  2. Add chopped green onions and any remaining seasoning.

  3. Stir gently to combine.


Step 4: Assemble and Bake

  1. Carefully pour the egg mixture into the center of each potato nest.

  2. Place one cherry tomato in the center of each muffin.

  3. Sprinkle the remaining shredded cheese evenly on top.

  4. Bake for 25–30 minutes, or until:

    • The potato edges are golden and crisp

    • The egg filling is fully set


Step 5: Cool and Serve

  1. Remove the muffin tin from the oven.

  2. Allow the muffins to rest for 5 minutes.

  3. Use a small knife to gently loosen the edges.

  4. Lift the muffins out carefully.

Serve warm for the best texture and flavor.


🌟 Why You’ll Love This Recipe

  • Crispy Outside, Soft Inside: The potato base becomes golden and crunchy while the egg stays tender.

  • Easy to Customize: Add extra vegetables like spinach, bell peppers, or mushrooms for variety.

  • Great for Planning Ahead: These muffins can be prepared in advance and reheated while keeping their texture.

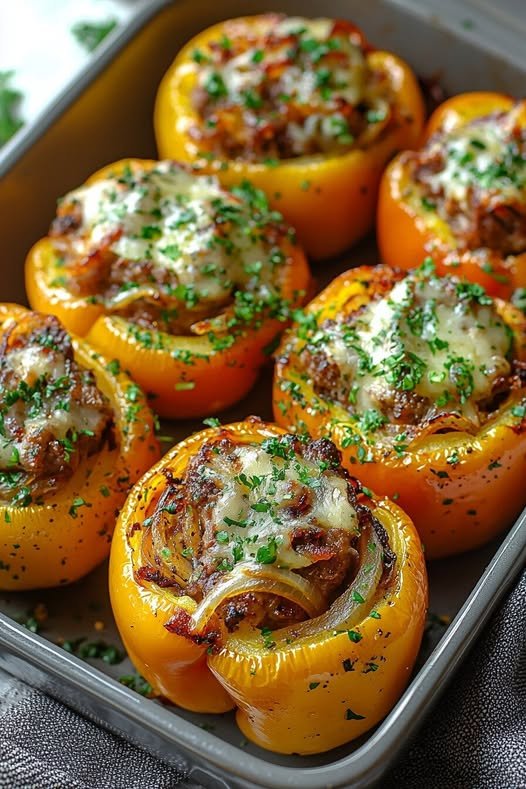
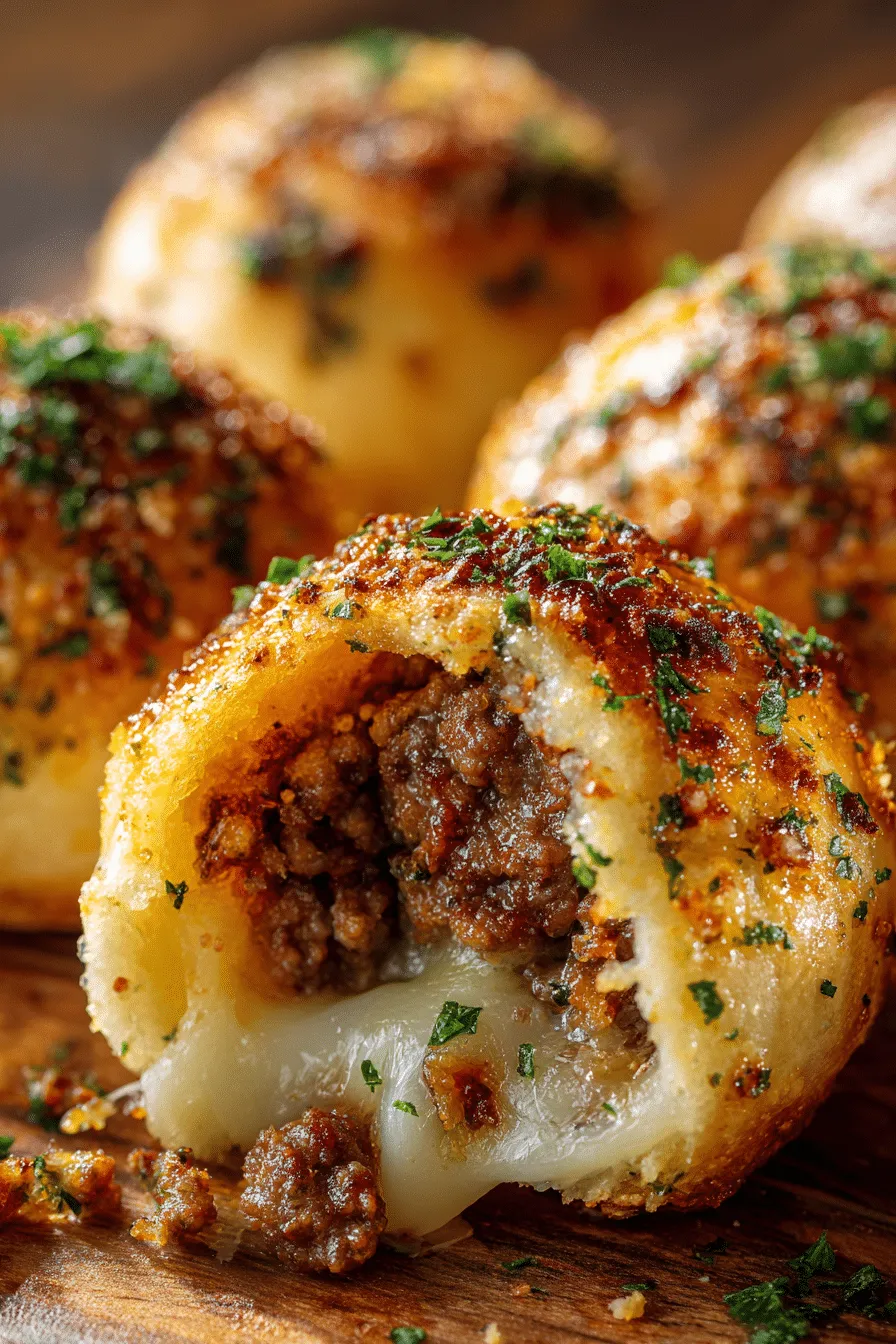
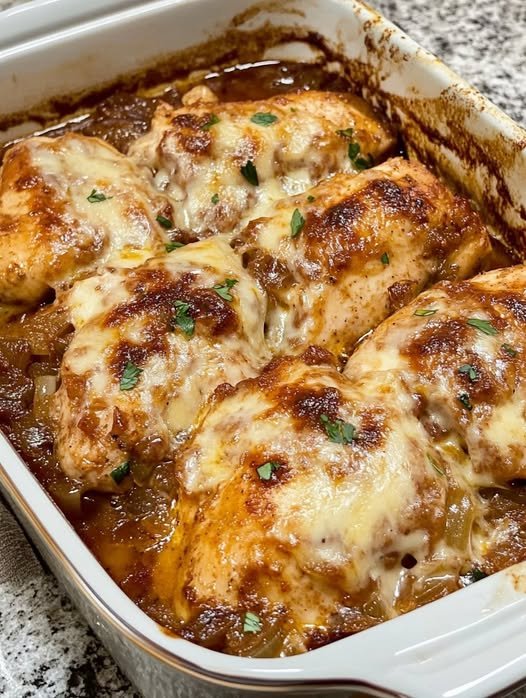
Cheesy Baked Meat & Potato “Pillows”

Cheesy Baked Meat & Potato “Pillows”

Yields: 6–8 individual portions | Prep time: 20 mins | Bake time: 40 mins

Ingredients

The Meat Base:

  • 2.2 lb (1 kg) Ground beef (lean is best to avoid excess grease)

  • 2 oz (60 g) Breadcrumbs

  • 1 Large egg

  • 1 Carrot, finely grated

  • 1 Green onion, chopped

  • 1 Red onion, finely diced

  • 1 Garlic clove, minced

  • 2 tbsp Fresh dill, chopped

  • Seasoning: Salt, ground black pepper, and dried garlic (to taste)

The Topping & Layers:

  • 3.5 oz (100 g) Sour cream

  • 2.8 oz (80 g) Mayonnaise

  • 10.6 oz (300 g) Mushrooms, finely sliced or chopped

  • 2 Tomatoes, thinly sliced

  • 7 oz (200 g) Mozzarella cheese, shredded

  • Garnish: Paprika and fresh parsley


Step-by-Step Instructions

1. Prepare the Meat Mixture

Preheat your oven to 375°F (190°C). In a large mixing bowl, combine the ground beef, breadcrumbs, egg, grated carrot, onions, garlic, and dill. Season generously with salt, pepper, and dried garlic. Mix by hand until well combined but do not overwork the meat (this keeps them tender).

2. Shape the Portions

Instead of a flat layer, shape the meat into large, thick patties (about 1.5 inches thick) and place them on a greased baking sheet or in a large baking dish with space between them. Use your thumb to make a slight indentation in the center of each patty—this creates a “well” for the toppings.

3. Layer the Flavor

  • Cream Base: Mix the sour cream and mayonnaise in a small bowl. Spread a dollop onto each meat patty.

  • Vegetables: Press a few mushroom slices and a slice of tomato into the cream on top of each patty.

  • The Cheese: Pile a generous mound of mozzarella over the top of each portion.

  • Final Touch: Spread a tiny bit more of the cream mixture over the cheese (this helps it brown without burning) and sprinkle with paprika.

4. The Bake

Cover the tray loosely with foil (try not to let it touch the cheese). Bake for 30 minutes. Remove the foil and bake for another 10–15 minutes until the cheese is bubbly and has those characteristic golden-brown spots seen in your photo.

5. Rest and Serve

Let the dish rest for 5–10 minutes before serving. This allows the juices to redistribute so the meat stays moist. Garnish with fresh parsley.


Chef’s Pro-Tips

  • Moisture Control: If your mushrooms are very fresh/watery, sauté them for 3 minutes in a pan before putting them on the meat to prevent the “pillows” from sitting in too much liquid.

  • The “Picky Eater” Hack: If someone dislikes mushrooms, swap them for a thin layer of pre-boiled potato slices or even a spoonful of caramelized onions.

Air Fryer Poached Eggs: A Game-Changer in the Kitchen

This air fryer method is a fantastic shortcut! Traditional poaching can be so finicky with the “whirlpool” method, so using the air fryer to steam them in ramekins is a clever way to get that silky texture without the stress.

Following your preference, here is the full recipe formatted for easy reference.


Air Fryer Poached Eggs

These “poached” eggs are technically steamed in the air fryer, resulting in a tender white and a perfectly runny yolk. It is a hands-off, mess-free alternative to the stovetop.

  • Prep time: 2 minutes

  • Cook time: 5–7 minutes

  • Total time: Under 10 minutes

Equipment

  • Air Fryer

  • Heat-proof ramekins or small ceramic bowls

Ingredients

  • Eggs: Large, fresh eggs (as many as your basket can fit)

  • Water: 3 tbsp hot water per ramekin

  • Oil Spray: Optional (non-stick spray or olive oil)

  • Seasoning: Salt and black pepper to taste

Instructions

  1. Preheat: Set your air fryer to 340°F (170°C) and let it preheat for about 3 minutes.

  2. Prep Ramekins: Lightly spray the inside of each ramekin with oil to prevent sticking. Add 3 tablespoons of hot water into each ramekin.

  3. Add Eggs: Carefully crack one egg into each ramekin, being careful not to break the yolk.

  4. Air Fry: Place the ramekins into the air fryer basket. Cook at 340°F (170°C) according to your preferred doneness:

    • 5 Minutes: Very runny yolk and soft whites.

    • 6 Minutes: Classic poached (jammy yolk, set whites).

    • 7 Minutes: Firm yolk and fully set whites.

  5. Serve: Using oven mitts, carefully remove the hot ramekins. Use a slotted spoon to lift the egg out of the water. Drain on a paper towel for a second if desired, then serve immediately

Crispy Golden Fried Shrimp

Crispy Golden Fried Shrimp

  • Prep time: 20 minutes

  • Cook time: 10 minutes

  • Serves: 3–4 people

Ingredients

The Shrimp & Marinade

  • 1 lb Large shrimp (peeled and deveined, tails on or off per preference)

  • 1 cup Buttermilk

  • 1 tsp Hot sauce (optional, for a tiny kick)

  • 1/2 tsp Garlic powder

The Breading (The “Secret” for Crunch)

  • 1 ½ cups All-purpose flour

  • ½ cup Cornstarch (this makes it extra crispy)

  • 1 tsp Baking powder

  • 1 tbsp Cajun or Old Bay seasoning

  • 1 tsp Salt

  • ½ tsp Black pepper

  • ½ tsp Dried parsley (for those green flecks seen in the photo)

For Frying

  • Neutral oil (Vegetable, Canola, or Peanut oil)

  • Lemon wedges and fresh parsley for garnish


Instructions

  1. Marinate: In a bowl, whisk together the buttermilk, hot sauce, and garlic powder. Add the shrimp and toss to coat. Let them sit for at least 15 minutes (this helps the breading stick).

  2. Prepare the Dredge: In a separate shallow dish or a large Ziploc bag, whisk together the flour, cornstarch, baking powder, Cajun seasoning, salt, pepper, and dried parsley.

  3. Heat the Oil: Fill a heavy-bottomed pot or deep skillet with about 2 inches of oil. Heat to 350°F (175°C).

    Tip: If you don’t have a thermometer, dip the end of a wooden spoon in; if it bubbles steadily, it’s ready.

  4. Bread the Shrimp: Remove a few shrimp from the buttermilk, letting the excess drip off. Toss them in the flour mixture, pressing firmly so the coating sticks to every nook and cranny. Shake off the heavy excess.

  5. Fry in Batches: Carefully drop the shrimp into the hot oil. Do not overcrowd the pan. Fry for 2–3 minutes until they are a deep golden brown and curled into a “C” shape.

  6. Drain: Remove with a slotted spoon and place on a wire rack (preferable for air circulation) or paper towels to drain.

  7. Serve: Dust with a little extra fresh parsley and serve immediately with lemon wedges and your favorite dipping sauce.

Crispy Baked Cabbage Steaks

Crispy Baked Cabbage Steaks are thick slices of fresh cabbage brushed with olive oil, seasoned simply, and oven-roasted until the edges are golden and caramelized while the centers stay tender. This easy, budget-friendly dish works beautifully as a healthy side, a vegetarian main, or a base for flavorful toppings.


⏱️ Prep & Cook Time

  • Prep Time: 10 minutes

  • Cook Time: 30–35 minutes

  • Total Time: 40–45 minutes


🍽️ Servings

Serves: 4 people
(1 cabbage yields 4 thick steaks)


🧾 Ingredients

  • 1 large green cabbage

  • 3–4 tablespoons olive oil

  • ½ teaspoon salt (or to taste)

  • ½ teaspoon black pepper

  • ½ teaspoon garlic powder (optional)

  • ½ teaspoon smoked paprika (optional)

  • Optional toppings:

    • Parmesan cheese

    • Lemon zest or juice

    • Red pepper flakes

    • Fresh herbs (parsley, thyme)


👩‍🍳 Instructions

  1. Preheat Oven
    Preheat oven to 425°F (220°C). Line a baking sheet with foil or parchment paper.

  2. Slice the Cabbage
    Remove loose outer leaves. Slice cabbage into ¾–1 inch thick steaks, keeping the core intact to hold them together.

  3. Season
    Arrange cabbage steaks on the baking sheet. Brush both sides generously with olive oil. Sprinkle with salt, pepper, and optional seasonings.

  4. Bake
    Roast for 30–35 minutes, flipping once halfway through, until edges are browned and crispy.

  5. Finish & Serve
    Add optional toppings and serve hot.


⭐ Recipe Notes

  • Thicker slices stay intact and develop better texture.

  • Don’t overcrowd the pan—space helps crisping.

  • Olive oil is key for caramelization.


🔥 Pro Tips for Extra Crispiness

  • Use high heat (425°F+)

  • Flip gently using a wide spatula

  • Add a final 2–3 minutes under the broiler

  • Sprinkle cheese during the last 5 minutes


🧮 Nutritional Information (Per Serving – Approximate)

  • Calories: 120

  • Carbohydrates: 10g

  • Protein: 2g

  • Fat: 9g

  • Fiber: 4g

  • Sodium: 230mg


💚 Health Benefits

  • Rich in fiber for digestion

  • High in vitamin C & K

  • Low-calorie and heart-healthy

  • Contains antioxidants that support immunity

  • Naturally gluten-free & vegan


❓ Q & A

Q: Can I use red cabbage?
Yes! Red cabbage works well but may need 5 extra minutes to soften.

Q: Can I make this in an air fryer?
Yes. Cook at 375°F for 12–15 minutes, flipping halfway.

Q: How do I store leftovers?
Store in an airtight container for up to 3 days in the fridge.

Q: Can I add protein?
Absolutely—top with chickpeas, tofu, or a fried egg.

Q: Why isn’t my cabbage crispy?
Likely overcrowding, low heat, or not enough oil.

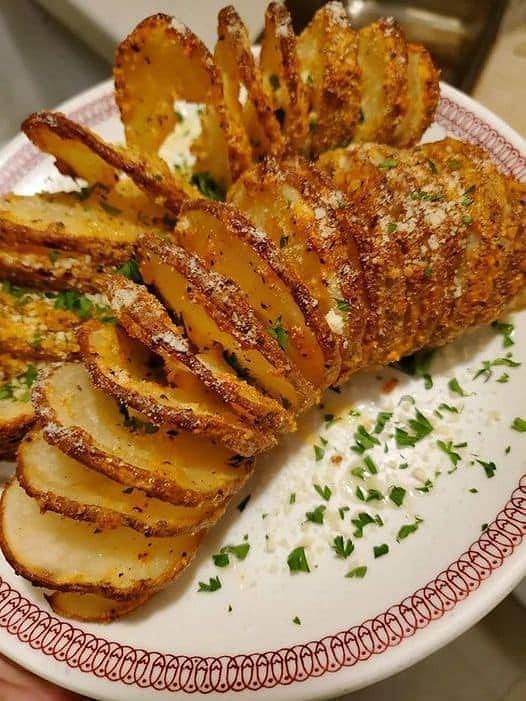
Crispy Garlic & Bacon Hasselback Potatoes

Crispy Garlic & Bacon Hasselback Potatoes

Ingredients

  • Potatoes: 8 medium-sized (Yukon Gold or Russets work best)

  • Bacon: 230 g (thinly sliced)

  • Butter: 40 g (melted)

  • Garlic: 3 cloves (minced)

  • Seasonings: Paprika, salt, and black pepper (to taste)

  • Optional: Fresh parsley or chives for garnish


Instructions

  1. Prepare the Potatoes:

    • Wash and scrub the potatoes thoroughly.

    • To slice them without cutting all the way through, place a potato between two wooden spoons or chopsticks. Slice the potato into thin layers (about 3–5 mm apart); the spoons will act as a guard to keep the base intact.

  2. Stuff with Bacon:

    • Cut the bacon strips into small squares or rectangles that fit the width of your potato slices.

    • Carefully tuck a piece of bacon into every second or third slit of the potato.

  3. Prepare the Garlic Butter:

    • In a small bowl, combine the 40 g of melted butter, minced garlic, paprika, salt, and black pepper.

    • Mix well to ensure the spices are evenly distributed.

  4. Brush and Bake:

    • Place the potatoes in a baking dish.

    • Using a pastry brush (as seen in your photo), generously coat the top of each potato with the garlic butter mixture, making sure some drips into the slits.

    • Bake in a preheated oven at 200°C (400°F) for 45–60 minutes. The exact time depends on the size of your potatoes; they are done when the edges are crispy and the center is soft when pierced with a fork.

  5. Finish:

    • For extra crispiness, you can brush them with the juices from the bottom of the pan halfway through cooking.

    • Garnish with fresh herbs before serving.

German Potato Pancakes

There are so many potato pancake recipes out there, and they are all claiming to be the original German Potato Pancakes. These are really fun to make and eat. They are crispy, slightly crunchy, and overly tasty. These cakes are truly loved worldwide. Of course, each locale has their own recipe. For instance, Swedish pancakes are also quite popular and eerily similar to the German potato pancakes.

Ingredients

  • 2 ½ pounds Russet potatoes, or any starchy potato, peeled and grated very finely
  • 1 yellow onion, grated very fine
  • 2 large eggs
  • 1 tsp salt
  • ¼ cup all-purpose flour
  • Oil for frying

How To Make German Potato Pancakes

FIRST STEP:

After grating the potatoes, using a towel, thoroughly wring out all the liquid from the potatoes

Place the drained potatoes into a large bowl with the grated onion, salt, eggs, and flour.

Mix it thoroughly with your hands; you want it to be somewhat tacky. Add a little more flour if it is too sticky

SECOND STEP:

Heat 3 tbsp oil in a skillet

Place ⅓ to ½ a cup of mixture into the hot skillet

THIRD STEP:

Fry for three to five minutes on each side, until they are golden.

Briefly drain on paper towels

FOURTH STEP:

Serve immediately, while hot, with applesauce and a sprinkle of powdered sugar, sour cream, or even yogurt.

These could also be served with meat and a gravy, using these as a side dish.

Enjoy!

Cheesy Air Fryer Hasselback Potatoes

Cheesy Air Fryer Hasselback Potatoes

Prep time: 10 mins | Cook time: 45 mins | Servings: 2

Ingredients

  • 2 russet potatoes

  • 4 tbsp butter, melted

  • 1 tbsp garlic paste or minced garlic

  • 3 to 5 slices Colby Jack cheese (cut into fourths)

  • Kosher salt and black pepper to taste

  • Optional toppings: Sour cream and fresh chives


Instructions

  1. Prep the Potatoes: * Cut a thin slice from the bottom of each potato to create a flat, stable base.

    • Place the potato between two chopsticks. Use a sharp knife to cut 1/4-inch slices across the potato; the chopsticks will stop your knife from cutting all the way through.

  2. The “Lift” Trick: * Place the small slices you cut from the bottom into the air fryer basket.

    • Set the large sliced potatoes on top of these bottom slices. This helps the Hasselback layers fan open during cooking.

  3. Seasoning: * Mix the melted butter, garlic, salt, and pepper.

    • Gently fan out the potato slices and brush the garlic butter over the top, making sure it gets between the layers.

    • Sprinkle with a little extra salt and pepper.

  4. First Stage Air Fry: * Set your air fryer to 370°F and cook for 20 minutes.

  5. Second Stage Air Fry: * Brush any remaining garlic butter over the potatoes.

    • Cook for an additional 20 to 25 minutes at 370°F until the edges are crispy and golden.

  6. Add the Cheese: * Slide the small cheese pieces into the gaps between the potato slices (either every gap or every other gap depending on your preference).

    • Cook for 1 to 2 more minutes until the cheese is bubbling and melted.

  7. Serve: * Top with a dollop of sour cream and a sprinkle of fresh chives.


Pro Tips for the Best Hasselbacks

  • Butter is Key: Don’t be shy with the garlic butter; it’s what creates the “salty” and “cheesy” experience mentioned in your notes.

  • Potato Size: Try to choose russet potatoes of a similar size so they cook evenly at the same time.

🧀 Savory Herb & Garlic Pull-Apart Bread

🧀 Savory Herb & Garlic Pull-Apart Bread

Soft • Aromatic • Golden • Perfect for Sharing

This Savory Herb & Garlic Bread is fluffy on the inside with a lightly crisp, golden top. Fresh garlic and herbs infuse every bite, while olive oil keeps the crumb tender and flavorful. Designed as a pull-apart loaf, it’s ideal for serving warm at the table.


Why This Recipe Works

  • Proper yeast activation ensures a light, airy texture

  • Olive oil adds softness and rich flavor

  • Fresh garlic and herbs create deep aroma

  • Two rises give excellent structure and fluffiness

  • Pull-apart shaping makes it easy to serve


Ingredients

For the Dough

  • 3 cups all-purpose flour, plus extra for dusting

  • 1 teaspoon salt

  • 2 teaspoons sugar

  • 2¼ teaspoons instant dry yeast (1 standard packet)

  • 1 cup warm water (about 105–110°F / 40–43°C)

  • 3 tablespoons olive oil

Flavor Add-Ins

  • 3 cloves garlic, finely minced

  • 1½ tablespoons fresh rosemary, finely chopped
    (or 1 teaspoon dried rosemary)

For the Top (Optional but Recommended)

  • 1–2 tablespoons olive oil or melted butter

  • Optional: pinch of salt or grated cheese


Step-by-Step Instructions

1. Activate the Yeast

  • In a small bowl, combine:

    • Warm water

    • Sugar

    • Yeast

  • Stir gently and let sit for 5–10 minutes

  • The mixture should become slightly foamy

Tip: If it doesn’t foam, the yeast may be inactive—start again for best results.


2. Mix the Dough

  • In a large bowl, whisk together:

    • Flour

    • Salt

    • Minced garlic

    • Chopped rosemary

  • Make a well in the center

  • Pour in:

    • Yeast mixture

    • Olive oil

  • Mix with a spoon or your hands until a shaggy dough forms


3. Knead the Dough

  • Transfer dough to a lightly floured surface

  • Knead for 5–8 minutes until:

    • Smooth

    • Elastic

    • Slightly tacky but not sticky

Adjustment Tip:
If the dough sticks, add flour 1 tablespoon at a time.


4. First Rise

  • Lightly oil a clean bowl

  • Place dough inside and turn once to coat

  • Cover with a damp cloth or plastic wrap

  • Let rise in a warm place for about 1 hour, or until doubled in size


5. Shape the Pull-Apart Pieces

  • Gently punch down the dough to release air

  • Divide into 8–10 equal portions

  • Roll each portion into a smooth ball

  • Arrange balls snugly in a greased loaf pan


6. Second Rise

  • Cover the pan loosely

  • Let rise again for 30 minutes

This step ensures a light, fluffy final texture.


7. Bake

  • Preheat oven to 375°F (190°C)

  • Brush the top with olive oil or melted butter

  • Bake for 25–30 minutes, until:

    • Top is golden brown

    • Bread sounds hollow when tapped


8. Cool and Serve

  • Let bread cool in the pan for 10 minutes

  • Remove gently and serve warm

  • Pull apart and enjoy the soft, herbed layers


Texture & Flavor Notes

  • Interior: soft, fluffy, and aromatic

  • Exterior: lightly crisp and golden

  • Flavor: savory garlic with fresh herb warmth


Storage Tips

  • Room temperature: Wrap and store up to 2 days

  • Refrigerator: Up to 4 days (reheat before serving)

  • Freezer: Freeze baked bread up to 2 months


Optional Variations

  • Add grated cheese between dough balls

  • Mix in parsley or thyme

  • Sprinkle sesame or herb seasoning on top

  • Brush with garlic-infused butter after baking

Creamy Broccoli Cauliflower Salad

Creamy Broccoli Cauliflower Salad

Crunchy • Creamy • Savory-Sweet • Perfect for Gatherings

This classic Creamy Broccoli Cauliflower Salad is a well-loved favorite for potlucks, picnics, and family meals. Crisp fresh vegetables are paired with smoky, crunchy bacon, sharp cheese, and a tangy-sweet dressing that coats every bite beautifully. It improves with time, making it ideal for preparing ahead.


Why This Recipe Works

  • Raw broccoli and cauliflower stay crisp and refreshing

  • Creamy dressing balances tang and sweetness

  • Bacon adds depth and crunch

  • Chilling time allows flavors to blend perfectly

  • Easy to customize for different diets


Ingredients

The Salad Base

  • 3 cups fresh broccoli florets, chopped into bite-sized pieces

  • 3 cups fresh cauliflower florets, chopped small

  • 6 slices bacon, cooked until crisp and crumbled

  • ¾ cup sharp cheddar cheese, freshly grated

  • ⅓ cup red onion, finely diced

  • ½ cup roasted sunflower seeds
    (or chopped almonds for a nutty variation)

  • Optional: ½ cup dried cranberries or raisins for gentle sweetness


The Creamy Dressing

  • ¾ cup mayonnaise, good quality

  • ¼ cup sour cream or plain Greek yogurt

  • 2 tablespoons apple cider vinegar

  • 2 tablespoons granulated sugar
    (or honey or maple syrup)

  • ½ teaspoon salt

  • ¼ teaspoon black pepper


Step-by-Step Instructions

1. Prepare the Vegetables

  • Wash broccoli and cauliflower thoroughly

  • Pat completely dry using a clean kitchen towel

Important Tip: Dry vegetables allow the dressing to cling properly instead of sliding off.

  • Chop into small, evenly sized pieces for the best texture and flavor in every bite


2. Cook the Bacon

  • Cook bacon in a skillet or oven until deeply crisp

  • Transfer to paper towels to cool

  • Crumble into small pieces

Make-Ahead Tip: Store bacon separately and add just before serving to keep it crunchy.


3. Make the Dressing

  • In a medium bowl, whisk together:

    • Mayonnaise

    • Sour cream (or yogurt)

    • Apple cider vinegar

    • Sugar

    • Salt

    • Black pepper

  • Whisk until smooth and creamy

  • Taste and adjust:

    • Add more vinegar for tang

    • Add a touch more sweetener if desired


4. Assemble the Salad

  • In a large mixing bowl, combine:

    • Broccoli

    • Cauliflower

    • Red onion

    • Cheddar cheese

    • Sunflower seeds

  • Pour dressing over the salad

  • Fold gently until all vegetables are evenly coated


5. Chill for Best Flavor

  • Cover and refrigerate for at least 30 minutes

  • For best results, chill 3–4 hours to allow flavors to blend

  • Stir in the crumbled bacon just before serving
    (or sprinkle on top for presentation)


Texture & Flavor Notes

  • Crisp vegetables with creamy coating

  • Savory, slightly sweet, and tangy balance

  • Bacon adds crunch and smoky depth


Customization & Variations

Lighter Version

  • Replace half the mayonnaise with Greek yogurt

  • Use honey or reduce sweetener

Low-Carb Version

  • Omit sugar and dried fruit

  • Add extra bacon or chopped hard-boiled eggs

Plant-Based Version

  • Use dairy-free mayonnaise

  • Replace bacon with toasted seeds or smoked seasoning


Storage & Make-Ahead Tips

  • Make Ahead:

    • Chop vegetables and prepare dressing up to 24 hours in advance

    • Store separately and combine 1–2 hours before serving

  • Leftovers:

    • Store in an airtight container in the refrigerator

    • Keeps well for up to 3 days

    • Stir before serving as some moisture may release

  • Freezing:

    • Not recommended due to texture changes

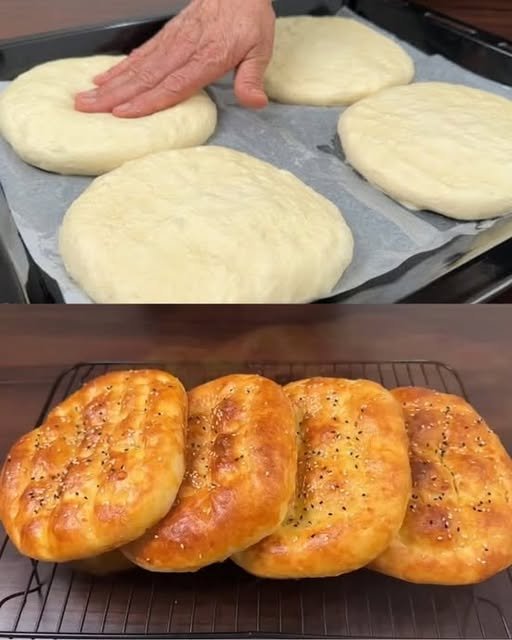
Soft Oven-Baked Tray Bread (Bakery-Style)

Soft Oven-Baked Tray Bread (Bakery-Style)

Yield: 2 large flatbreads
Prep Time: 25 minutes
Resting Time: 1½–2 hours
Bake Time: 18–22 minutes
Difficulty: Easy–Intermediate


🧾 INGREDIENTS

For the Dough

  • All-purpose flour – 4½ cups (560 g)

  • Warm milk – 1 cup (240 ml)

  • Warm water – ½ cup (120 ml)

  • Instant yeast – 2¼ teaspoons (1 sachet)

  • Sugar – 2 tablespoons

  • Salt – 1½ teaspoons

  • Oil or melted butter – 4 tablespoons

  • Yogurt – 3 tablespoons (for softness)


For Topping

  • Egg yolk – 1

  • Milk – 2 tablespoons

  • Sesame seeds – 1½ tablespoons

  • Nigella seeds (kalonji) – 1 tablespoon


For Tray

  • Semolina or cornmeal – 2 tablespoons (prevents sticking)


👩‍🍳 STEP-BY-STEP METHOD


🔹 Step 1: Activate the Yeast

  1. In a bowl, mix warm milk + warm water + sugar

  2. Sprinkle yeast on top

  3. Let rest 8–10 minutes until foamy

✔️ If it bubbles, yeast is active


🔹 Step 2: Make the Dough

  1. In a large bowl add:

    • Flour

    • Salt

  2. Pour in:

    • Yeast mixture

    • Oil

    • Yogurt

  3. Mix with a spoon, then knead by hand 10–12 minutes

➡️ Dough should be soft, slightly sticky, elastic

(Add 1–2 tbsp flour only if needed.)


🔹 Step 3: First Rise

  1. Lightly oil the bowl

  2. Place dough inside and cover

  3. Let rise in warm place 1–1½ hours

✔️ Dough should double in size


🔹 Step 4: Shape the Bread

  1. Punch down dough gently

  2. Divide into 2 equal portions

  3. Shape each into an oval or round loaf

  4. Place on baking tray dusted with semolina


🔹 Step 5: Second Rest

Cover loosely and let rest 20–25 minutes

This step gives extra fluffiness


🔹 Step 6: Topping & Design

  1. Mix egg yolk and milk.

  2. Brush generously over dough

  3. Sprinkle sesame and nigella seeds

  4. Press shallow finger lines or crisscross pattern on top

(This is traditional and helps even baking.)


🔹 Step 7: Bake

  • Preheat oven to 200°C (390°F)

  • Bake 18–22 minutes

  • Bread should be:

    • Deep golden

    • Soft when pressed

    • Lightly crisp on top


🔹 Step 8: Finish

  • Brush lightly with butter (optional)

  • Cover with cloth for 5 minutes to soften crust


🫓 FINAL RESULT

  • Golden bakery-style bread

  • Soft, airy crumb

  • Slight crunch from seeds

  • Perfect for dipping, wraps, or sandwiches


💡 PRO TIPS

✔ Yogurt makes it extra soft
✔ Semolina prevents soggy bottoms
✔ Do not overbake
✔ Can be frozen after cooling


🍽 SERVING IDEAS

  • With butter & honey

  • With curry or daal

  • As sandwich bread

  • With tea or soup

Soft Cheese-Stuffed Bread Boats with Herb Tomato Glaze

Soft Cheese-Stuffed Bread Boats with Herb Tomato Glaze

Yields: 10–12 Boats | Prep time: 20 mins (+1 hour rising) | Cook time: 20–25 mins

Ingredients

The Dough:

  • 200 ml Lukewarm milk

  • 200 ml Lukewarm water

  • 1 tbsp Sugar

  • 7 g (1 packet) Active dry yeast

  • 600-650 g All-purpose flour

  • 1 tsp Salt

  • 50 ml Vegetable oil

The Filling:

  • 300 g Feta cheese or soft white cheese, crumbled

  • 1 cup Shredded mozzarella

  • 1 Egg (optional, to bind)

  • Fresh parsley, chopped

The Herb Tomato Glaze:

  • 2 tbsp Tomato paste

  • 3 tbsp Olive oil

  • 1 tsp Dried oregano or Italian herbs

  • 1 clove Garlic, minced

  • Fresh parsley, finely chopped


Detailed Instructions

1. Prepare the Yeast Base

  • In a large mixing bowl, combine the 200 ml lukewarm milk, 200 ml lukewarm water, and 1 tbsp sugar.

  • Sprinkle 7 g of active dry yeast over the top and stir gently.

  • Let the mixture sit for about 5–10 minutes until it becomes foamy.

2. Mix and Knead the Dough

  • Add 50 ml vegetable oil and 1 tsp salt to the yeast mixture.

  • Gradually add 600-650 g of flour, mixing until a soft dough forms.

  • Knead the dough on a floured surface for 8–10 minutes until it is smooth and elastic.

3. First Rise

  • Place the dough in a lightly greased bowl and cover it with a warm, damp cloth.

  • Let it rise in a warm, draft-free spot for 1 hour or until it has doubled in size.

4. Shape the Boats

  • Punch the dough down to release air and divide it into 10–12 equal pieces.

  • Roll each piece into an oval shape.

  • Place a generous amount of the cheese filling (the crumbled feta, mozzarella, and parsley) in the center.

  • Fold the edges of the dough over the cheese and twist the ends to create a “boat” or twisted loaf shape.

5. Apply the Herb Tomato Glaze

  • Whisk together the 2 tbsp tomato paste, 3 tbsp olive oil, 1 tsp herbs, 1 clove minced garlic, and fresh parsley.

  • Use a pastry brush to coat the tops of the dough boats generously with this savory glaze.

6. Bake

  • Preheat your oven to 375°F (190°C).

  • Arrange the boats on a baking sheet lined with parchment paper.

  • Bake for 20–25 minutes until the bread is golden brown and the cheese is melted and bubbly.

7. Serve

  • Let the bread boats cool for a few minutes so the cheese sets slightly.

  • These are best served warm when the bread is at its softest.

Classic American Potato Salad

Classic American Potato Salad

A traditional potato salad with a creamy dressing, tender potatoes, and simple seasonings. This dish is suitable for picnics, gatherings, or everyday meals.


Yield

6–8 servings

Time

  • Preparation: 20 minutes

  • Cooking: 15 minutes


Ingredients

Salad Base

  • 6 medium potatoes, peeled and cut into 1-inch cubes

  • 4 hard-boiled eggs, peeled and chopped

  • ½ cup chopped celery

  • ½ cup chopped onion

Dressing

  • 1 cup mayonnaise

  • 2 tablespoons mustard

  • 1 tablespoon vinegar or pickle liquid

  • ½ teaspoon celery seed

  • ½ teaspoon salt (adjust to taste)

  • ¼ teaspoon black pepper

Optional Topping

  • Paprika

  • Chopped chives or green onions

  • Cooked bacon pieces


Instructions

1. Cook the Potatoes

Place the potato cubes in a large pot and cover with cold water.
Bring to a boil, then reduce to a gentle simmer.
Cook for 10–15 minutes until the potatoes are tender when pierced with a fork but still hold their shape.


2. Drain and Cool

Drain the potatoes and rinse briefly with cool water to stop further cooking.
Allow them to cool for about 15–20 minutes before mixing.


3. Prepare the Dressing

In a bowl, combine the mayonnaise, mustard, vinegar, celery seed, salt, and black pepper.
Mix until smooth.


4. Assemble the Salad

Place the cooled potatoes, eggs, celery, and onion into a large bowl.
Add the dressing and gently fold until everything is evenly coated.
Mix carefully to avoid breaking the potatoes.


5. Chill and Serve

Cover the bowl and refrigerate for at least 2 hours before serving.
This allows the flavors to blend and the salad to chill properly.


Optional Adjustments

  • Add chopped pickles for extra texture

  • Replace a portion of the mayonnaise with yogurt or sour cream for a lighter texture


Storage

Store covered in the refrigerator and use within 2 days.

Creamy No-Bake Dessert Roll

Creamy No-Bake Dessert Roll

This no-bake dessert is smooth, lightly sweet, and easy to prepare. It is chilled to set and sliced before serving.


Yield

6–8 servings

Time

  • Preparation: 5 minutes

  • Chilling: 2 hours or longer


Ingredients

  • 500 g mascarpone cheese or cream cheese, room temperature

  • 250 ml heavy whipping cream, chilled

  • 100 g powdered sugar (adjust to taste)

  • 1 teaspoon vanilla extract

  • Cocoa powder or cinnamon, for topping

Optional

  • Ladyfingers or crushed biscuits, for added texture


Instructions

1. Whip the Cream

Place the cold whipping cream in a chilled bowl.
Beat until thick and able to hold its shape.
Keep chilled while preparing the rest of the mixture.


2. Prepare the Cream Base

In a separate bowl, mix the mascarpone or cream cheese with powdered sugar and vanilla.
Stir until smooth and free of lumps.


3. Combine the Mixtures

Add the whipped cream to the cheese mixture in portions.
Fold gently with a spatula until fully combined and light in texture.


4. Shape the Roll

Lay a large sheet of plastic wrap on a flat surface.
Spread the cream mixture evenly into a rectangle.

If using biscuits, place them in a line along the center.

Using the plastic wrap for support, roll the mixture carefully into a log shape.
Twist the ends of the wrap to hold the shape securely.


5. Chill

Place the wrapped roll in the freezer for 1–2 hours or in the refrigerator for at least 4 hours until firm enough to slice.


6. Serve

Remove the wrap and place the roll on a serving plate.
Dust the top evenly with cocoa powder or cinnamon.
Slice with a sharp knife and serve chilled.


Storage

Store covered in the refrigerator for up to 2 days.

Savory Baked Potato & Egg Cups

Savory Baked Potato & Egg Cups

These baked potato and egg cups are lightly crisp on the outside and soft inside. They are suitable for breakfast, brunch, or a light meal.


Yield

12 cups

Time

  • Preparation: 15 minutes

  • Baking: 25–30 minutes


Ingredients

  • 4 large potatoes, peeled and grated

  • 3 large eggs

  • 1 cup shredded cheese (cheddar, mozzarella, or Swiss)

  • 2 green onions, finely chopped

  • ½ cup finely diced bell peppers or cooked ham (optional)

  • ½ teaspoon salt

  • ¼ teaspoon black pepper

  • ½ teaspoon garlic powder

  • ½ teaspoon paprika

  • Butter or oil, for greasing


Instructions

1. Prepare the Potatoes

Peel the potatoes and grate them using the large holes of a grater.
Place the grated potatoes into a clean kitchen towel or cheesecloth and squeeze firmly to remove as much liquid as possible. This step helps the cups bake evenly and hold their shape.


2. Mix the Ingredients

In a large bowl, lightly beat the eggs.
Add the grated potatoes, shredded cheese, green onions, and optional bell peppers or ham. Mix gently to combine.


3. Season the Mixture

Add salt, black pepper, garlic powder, and paprika.
Stir until the potatoes are evenly coated with the egg and seasoning.


4. Prepare the Muffin Tin

Preheat the oven to 400°F (200°C).
Grease a 12-cup muffin tin evenly with butter or oil.

Spoon the potato mixture into each cup. Press gently so the mixture is compact but not tightly packed.


5. Bake

Place the muffin tin on the center rack of the oven.
Bake for 25–30 minutes, until the edges are golden and the tops feel firm.


6. Rest and Serve

Remove the pan from the oven and let the cups rest for 5 minutes.
Run a knife around the edges and lift them out carefully.


Serving Ideas

Serve warm on their own or with plain yogurt or sour cream mixed with fresh herbs.

Classic Homemade Fluffy Doughnuts

Classic Homemade Fluffy Doughnuts

Soft, light doughnuts with a tender interior and a lightly crisp exterior. These are made with simple pantry ingredients and are best enjoyed fresh.


Yield

12–15 doughnuts

Time

  • Preparation: 20 minutes

  • Rising: 1½ hours

  • Cooking: 15 minutes


Ingredients

Dough

  • 3 cups all-purpose flour

  • 1 cup whole milk, warm (not hot)

  • 7 g active dry yeast

  • 5 tablespoons granulated sugar

  • 2 tablespoons unsalted butter, softened

  • 1 large egg, room temperature

  • ½ teaspoon salt

Frying and Coating

  • Vegetable oil, for frying

  • Granulated sugar or powdered sugar, for coating


Instructions

1. Prepare the Yeast

Pour the warm milk into a small bowl. Add 1 tablespoon of the sugar and stir to dissolve. Sprinkle the yeast over the milk and stir gently. Let it rest for 5–10 minutes until the mixture looks foamy. This shows the yeast is ready.


2. Mix the Dough

In a large bowl, combine the flour, remaining sugar, and salt. Make a well in the center. Add the egg, softened butter, and the yeast mixture. Stir with a spoon until a soft, rough dough forms.


3. Knead the Dough

Transfer the dough to a lightly floured surface.

  • Knead by hand for 8–10 minutes until smooth and elastic

  • Or knead with a mixer and dough hook for about 5 minutes

The dough should feel soft and slightly tacky but not sticky.


4. First Rise

Place the dough in a lightly greased bowl. Cover and let it rest in a warm place for about 1 hour, or until doubled in size.


5. Shape the Doughnuts

Gently press the dough to release air. Roll it out to about ½-inch thickness on a floured surface.

Cut doughnut shapes using a cutter or a large glass with a smaller cutter for the center. Place each doughnut on a small piece of parchment paper. Cover and let rest for 30 minutes.


6. Fry the Doughnuts

Heat about 2 inches of oil in a heavy pot to 350°F (175°C).

Carefully lower the doughnuts into the oil. Remove the parchment paper once it releases.

Fry for 1–2 minutes per side until evenly golden.

Transfer to paper towels to drain excess oil.


7. Coat and Serve

While still warm, roll the doughnuts in granulated sugar or dust with powdered sugar.

Serve fresh.


Helpful Notes

  • Keep oil temperature steady for even cooking

  • Do not overcrowd the pot

  • Best enjoyed the same day

Fluffy Sparkling Water Pizza Buns

Fluffy Sparkling Water Pizza Buns

Yield: 12–15 buns
Preparation Time: 20 minutes + 1 hour rising
Cooking Time: 15–20 minutes


Ingredients

Dough

  • 750 g (5¾ cups) all-purpose flour, plus extra for dusting

  • 350 ml (1½ cups) sparkling water, room temperature

  • 50 g fresh yeast

  • 100 ml (7 tablespoons) butter, melted and slightly cooled

  • 3 large eggs

  • 1 teaspoon salt

Toppings (Optional)

  • Tomato sauce or marinara

  • Shredded mozzarella cheese

  • Dried oregano or Italian seasoning


Instructions

1. Prepare the Yeast

In a small bowl, crumble the fresh yeast into 100 ml of the sparkling water. Stir gently and leave for 5–10 minutes until dissolved and lightly foamy.

2. Mix Wet Ingredients

In a large bowl, whisk the eggs with the remaining sparkling water and melted butter. Add the yeast mixture and mix well.

3. Form the Dough

Gradually add the flour and salt to the wet mixture. Mix until a soft dough forms.

4. Knead

Knead the dough on a lightly floured surface for 8–10 minutes, or until smooth and elastic. The dough should be soft but not sticky.

5. First Rise

Place the dough in a lightly greased bowl. Cover with a clean cloth and let rise in a warm place for about 1 hour, or until doubled in size.

6. Shape the Buns

Gently press down the dough to release air.
Divide into equal portions and shape into balls.
Place on a baking tray lined with parchment paper.
Flatten each ball slightly to form a shallow center.

7. Add Toppings and Bake

Preheat the oven to 200°C (400°F).
Spread a small amount of tomato sauce on each bun.
Top with mozzarella and sprinkle with dried herbs.
Bake for 15–20 minutes, until golden and fully cooked.


Helpful Notes

  • Use room-temperature sparkling water for best dough texture.

  • Fresh yeast can be replaced with 18 g active dry yeast if needed.

  • Serve warm or allow to cool before storing.

Oven-Baked Garlic Herb Chicken & Vegetables

Oven-Baked Garlic Herb Chicken & Vegetables

Prep time: 15 mins | Cook time: 30-35 mins | Serves: 4

Ingredients

The Base:

  • Chicken: 1.5 lbs (approx. 3 large) boneless, skinless chicken breasts.

  • Potatoes: 1 lb baby gold potatoes, quartered.

  • Green Beans: 1/2 lb fresh green beans, trimmed.

  • Garnish: Fresh parsley or chives, chopped.

The Garlic Herb Sauce:

  • 1/4 cup olive oil

  • 3 tbsp melted butter

  • 4 cloves garlic, minced

  • 1 tsp dried oregano

  • 1 tsp dried thyme

  • 1/2 tsp onion powder

  • 1/2 tsp smoked paprika (for that golden color)

  • Salt and black pepper to taste

  • Optional: Red pepper flakes (for the red bits seen in the photo)


Instructions

  1. Prep the Oven and Pan:

    Preheat your oven to 400°F (200°C). Lightly grease a large 9×13 inch glass baking dish or a rimmed sheet pan.

  2. Season the Vegetables:

    Place the quartered potatoes and trimmed green beans in the baking dish. Drizzle with half of the Garlic Herb Sauce. Toss well to ensure they are evenly coated, then push the vegetables to the sides to make room for the chicken in the center.

  3. Prepare the Chicken:

    Pat the chicken breasts dry with a paper towel. Place them in the center of the dish. Brush the remaining Garlic Herb Sauce generously over the chicken.

    Tip: For the look in the photo, you can pre-slice the chicken halfway through (hassleback style) or slice them fully after cooking. Slicing after cooking keeps them juicier!

  4. Bake:

    Place the dish in the oven. Roast for 25–30 minutes.

    • Check for doneness: The chicken is safe when it reaches an internal temperature of $165^\circ\text{F}$ ($74^\circ\text{C}$).

    • Check the potatoes: They should be fork-tender and slightly browned.

  5. Finish and Serve:

    Remove from the oven and let the chicken rest for 5 minutes (this keeps it moist). If you didn’t slice it before, slice it now. Garnish with fresh parsley and a squeeze of fresh lemon juice if desired.


Tips for Success

  • Even Cooking: If your potatoes are large, start them in the oven 10 minutes before adding the chicken and green beans so everything finishes at the same time.

  • Crispy Texture: If you prefer crispier potatoes, use a large metal sheet pan instead of a glass dish; metal conducts heat faster for better browning.

Crispy Cocoa Peanut Clusters

Crispy Cocoa Peanut Clusters

No flour • No chocolate bars • No butter


Ingredients

  • 1 small egg

  • 100 g (½ cup) granulated sugar

  • 30 g (about 4 tablespoons) unsweetened cocoa powder

  • 150 g (about 1 cup) roasted peanuts (unsalted or lightly salted)

  • 40 g (about 1½ cups) crispy rice cereal

  • Optional: a pinch of salt


Instructions

Prep:
Preheat the oven to 300°F (150°C). Line a baking sheet with parchment paper or a silicone baking mat.

Whisk the Base:
In a mixing bowl, whisk the egg and sugar until pale and slightly frothy.

Add Cocoa:
Sift in the cocoa powder (and salt, if using). Whisk until smooth, dark, and glossy.

Fold in Crunch:
Add the roasted peanuts and crispy rice cereal. Gently fold until everything is evenly coated with the cocoa mixture.

Form the Clusters:
Spoon small mounds of the mixture onto the prepared baking sheet, keeping them compact so they hold together while baking.

Bake:
Bake for 15–18 minutes, until the coating sets and looks matte rather than shiny.

Cool Completely:
Allow the clusters to cool fully on the baking sheet. They will firm up and become crunchy as they cool.


Storage Tip

Store in an airtight container at room temperature. These clusters remain crunchy for up to one week.

Golden Cheesy Pizza Pull-Apart Ring

Golden Cheesy Pizza Pull-Apart Ring

This recipe uses a simple bubble-style method that makes it fun to pull apart and eat, perfect for sharing.


Ingredients

Dough:
1 can (16 oz) refrigerated biscuit dough or 1 lb fresh pizza dough

Cheese:
1½ cups shredded mozzarella cheese
½ cup shredded cheddar cheese

Toppings:
½ cup mini pepperoni slices or cooked Italian sausage crumbles


The Coating

  • 4 tablespoons melted unsalted butter

  • 1 teaspoon garlic powder

  • 1 tablespoon dried Italian seasoning (basil, oregano, parsley)

  • ¼ cup grated Parmesan cheese

Dip:
Marinara sauce, for serving


Instructions

Prep:
Preheat the oven to 375°F (190°C). Lightly grease a round baking dish or ring-shaped pan.

Cut the Dough:
Cut each biscuit into quarters. If using pizza dough, roll into small, bite-sized balls.

Butter Coating:
In a bowl, mix melted butter, garlic powder, and half of the Italian seasoning.

Assemble:
Toss the dough pieces in the butter mixture until coated. Arrange half of the dough in the prepared dish.

Layer:
Sprinkle half of the mozzarella, cheddar, and toppings over the dough. Add the remaining dough, followed by the rest of the cheese and toppings.

Finish:
Sprinkle Parmesan cheese and the remaining Italian seasoning on top.

Bake:
Bake for 20–25 minutes until golden brown and fully cooked.

Serve:
Let rest for 5 minutes before pulling apart. Serve warm with marinara sauce.


Tip for Best Shape

For a neat ring shape, crescent-style dough can be arranged in a circle, filled with cheese and toppings, then folded over toward the center before baking.

Salty Garlic Roasted Chicken & Potatoes

It sounds like you have a wonderful, time-tested base for this meal! The combination of roasted garlic and maple syrup creates a fantastic sweet-and-savory glaze.

Based on your request for a “salty” version and your note to always provide the full recipe, I have adjusted the seasoning profile. I’ve increased the salt slightly and suggested using salted butter to lean into that savory-sweet contrast.


Salty Garlic Roasted Chicken & Potatoes

A savory-forward version of the classic maple-glazed roast.

  • Prep time: 15 minutes

  • Cook time: 60 minutes

  • Servings: 6

Ingredients

  • 1/4 cup salted butter (using salted butter enhances the “salty” profile)

  • 6 chicken leg quarters, split into drumsticks and thighs (12 pieces total)

  • 8 large Yukon Gold potatoes, cut into 1.5-inch chunks (increased for your preference)

  • 24 cloves garlic, unpeeled

  • 1 ½ teaspoons sea salt (plus more to taste for the finishing)

  • 1 teaspoon cracked black pepper

  • 1/4 cup maple syrup

Directions

  1. Preheat & Prep Pan: Preheat your oven to 400°F (200°C). Place the butter in a large roasting pan and put it in the oven for a few minutes until melted. Swirl the pan to ensure the bottom is fully coated.

  2. Season the Base: Place the chicken pieces, potato chunks, and unpeeled garlic cloves into the pan. Sprinkle generously with the sea salt and black pepper. Toss everything thoroughly in the melted butter until well-coated. Arrange the chicken skin-side up.

  3. First Roast: Bake for 40 minutes. During this time, baste the chicken and potatoes with the pan drippings at least three times to keep the meat moist and help the potatoes crisp.

  4. The Glaze: Remove the pan from the oven. Brush the maple syrup evenly over the chicken pieces. Use a spoon to drizzle the remaining salty pan drippings over the potatoes.

  5. Final Crisp: Return the pan to the oven and bake for another 20 minutes, or until the chicken reaches an internal temperature of 165°F (74°C) and the potatoes are golden-brown and tender.

  6. The “Secret” Finish: To serve, have your guests squeeze the softened garlic out of the skins and spread it directly onto the chicken. Pour the remaining salty juices from the pan over everything. Sprinkle with a final pinch of flaky salt if desired.


Tips for Success

  • Potato Sizing: To ensure the potatoes are soft on the inside and crispy on the outside, keep the chunks uniform in size.

  • The Garlic: Don’t skip the unpeeled garlic! The skin protects the garlic from burning, allowing it to “steam” into a spreadable paste inside the shell.

  • Extra Salt: If you really want that “salty” punch to hit first, use a coarse kosher salt or Maldon sea salt at the very end.

French Onion Roasted Potatoes

Golden, crispy potatoes tossed with French onion soup mix and garlic, then topped with melty cheese — the ultimate side dish for any meal.

Prep Time: 10 minutes
Cook Time: 30–35 minutes
Total Time: ~45 minutes
Servings: 6

Ingredients

Potatoes:

  • 2 lbs baby potatoes or Yukon gold potatoes, halved or quartered

  • 2 tbsp olive oil

Seasonings:

  • 1 packet (1 oz) French onion soup mix

  • ½ tsp garlic powder

  • Salt & pepper – to taste

Toppings:

  • 1 cup shredded mozzarella or Swiss cheese

  • 2 tbsp fresh parsley, chopped (for garnish)

Other:

  • Nonstick cooking spray

Instructions

  1. Preheat the oven: Set to 425°F (220°C). Spray a large baking sheet or 9×13-inch baking dish with nonstick cooking spray.

  2. Prep the potatoes: Wash and scrub thoroughly. Leave skins on for texture and nutrition. Halve baby potatoes (or quarter larger ones) into 1–2-inch pieces for even cooking.

  3. Season: In a large bowl, toss potatoes with olive oil. Sprinkle with French onion soup mix, garlic powder, salt, and pepper. Toss until evenly coated.

  4. Roast: Arrange potatoes in a single layer on the prepared sheet, cut-side down. Roast for 25–30 minutes until golden and tender.

  5. Add cheese: Remove from oven, sprinkle evenly with cheese, and return to the oven for 5–7 minutes until melted and lightly golden.

  6. Finish & serve: Garnish with fresh parsley and serve hot.

Quick Notes & Pro Tips

  • Don’t overcrowd the pan: Spread potatoes out to ensure crisp, caramelized edges. Use two pans if needed.

  • Extra crispiness: Pat potatoes completely dry after washing, or soak in cold water for 30 minutes to remove excess starch (dry well before roasting).

  • Cheese swap: Try Gruyère for a nutty twist or sharp cheddar for a tangy bite.

Why You’ll Love It

These potatoes are creamy on the inside, crispy on the outside, and packed with French onion flavor. With melted cheese on top, they’re irresistible — and they pair well with almost anything!

Variations & Serving Suggestions

  • Make it loaded: Add crumbled bacon, sour cream, and green onions for a “loaded baked potato” feel.

  • Turn it into a full meal: Mix in cooked sausage or chicken before topping with cheese.

  • Pair with: Steak, roasted chicken, or grilled veggies for a complete dinner.

Storage & Make-Ahead

  • Refrigerate: Store in an airtight container for up to 3 days.

  • Reheat: Bake at 375°F for 10–15 minutes or air fry at 400°F for 5 minutes to re-crisp.

  • Make-ahead: Chop and season potatoes a day ahead; roast and top with cheese just before serving.

FAQs

Q: Can I use frozen potatoes?
A: Yes, but thaw and pat them dry before seasoning for best results.

Q: Can I skip the cheese?
A: Absolutely — they’re flavorful enough to enjoy without it.

Q: Can I use sweet potatoes instead?
A: Yes, but adjust baking time slightly since sweet potatoes cook faster.

Personal Note

This dish is my go-to when I want a side that’s simple yet a little extra special. It’s perfect for weeknight dinners or holiday tables — and the cheesy topping always wins over picky eaters.

Air fryer Chicken Tenders

Our most recent fav family-friendly and simple dinner idea is Air fryer Chicken Tenders .A buttermilk marinade imparts flavor and moisture to the chicken in this recipe, and an air-fried panko and parmesan cheese breading is blasted to golden and crispy perfection.Cut the chicken breasts into strips that are approximately one inch thick if you … Read more