Using butternut squash instead of sweet potato keeps the carbohydrate count lower while maintaining that beautiful caramelized orange color, making it an excellent fit for a low-carb or Mediterranean framework.
Prep time: 10 minutes | Cook time: 30 minutes | Servings: 4-6
Ingredients
For the Roast:
-
1 large butternut squash (or 3 medium sweet potatoes), peeled, deseeded, and cut into 1.5-inch cubes
-
3 tbsp extra-virgin olive oil
-
1 tsp coarse sea salt
-
½ tsp freshly cracked black pepper
-
1 tsp dried oregano or Italian seasoning
For the Toppings:
-
8 oz (about 2 balls) fresh Burrata cheese (can substitute with dollops of whipped whole-milk ricotta)
-
½ cup raw walnuts, roughly chopped
-
⅓ cup dried cranberries (look for unsweetened or apple-juice sweetened to keep sugars low)
-
Fresh sprigs of rosemary and thyme
-
Optional garnish: A finishing drizzle of extra-virgin olive oil and a pinch of red pepper flakes for warmth.
Instructions
-
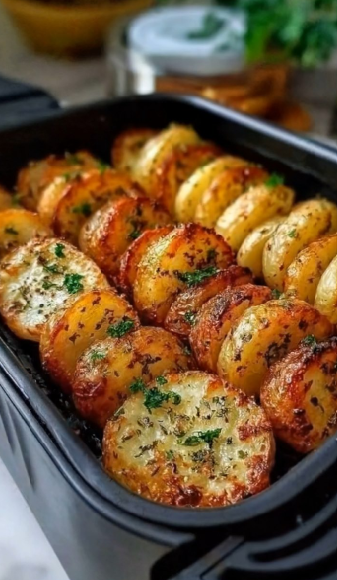
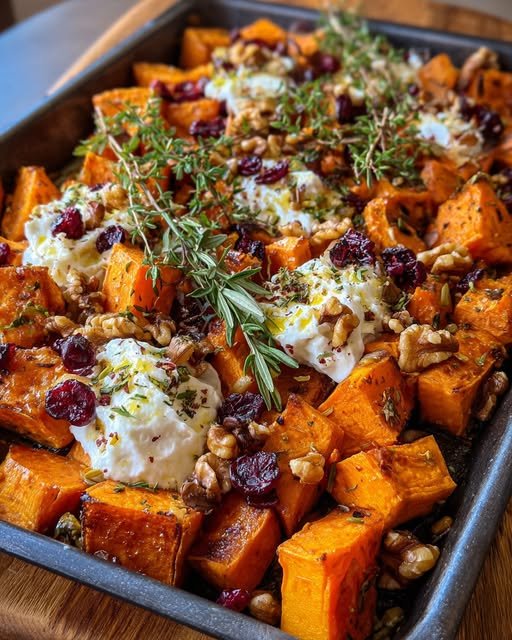
Prepare the Oven and Pan: Preheat your oven to 200°C (400°F). Line a large, rimmed baking sheet with parchment paper for easy cleanup, or roast directly on a dark metal pan (as seen in the photo) for a deeper sear and better caramelization on the edges.
-
Season and Roast: Place the cubed squash onto the baking sheet. Drizzle with the extra-virgin olive oil and sprinkle evenly with sea salt, black pepper, and dried oregano. Toss well until every cube is fully coated. Spread them out into a single, even layer so they roast rather than steam.
-
Bake: Roast in the preheated oven for 25–30 minutes, tossing halfway through, until the squash is fork-tender and the edges have developed a deep, golden-brown caramelization.
-
Toast the Walnuts: While the squash is roasting, place the chopped walnuts in a dry skillet over medium heat. Toast for 3–5 minutes, stirring frequently, until fragrant. Remove from heat immediately so they don’t burn.
-
Assemble the Dish: Remove the roasted squash from the oven. While the vegetables are still warm, gently tear the balls of Burrata into large pieces and nestle them evenly across the pan among the hot squash. The residual heat will soften the cheese beautifully.
-
Garnish and Serve: Scatter the toasted walnuts and dried cranberries over the top. Artfully arrange fresh sprigs of thyme and rosemary across the dish. Finish with a light drizzle of high-quality extra-virgin olive oil and a pinch of red pepper flakes directly over the burrata. Serve immediately straight from the pan!