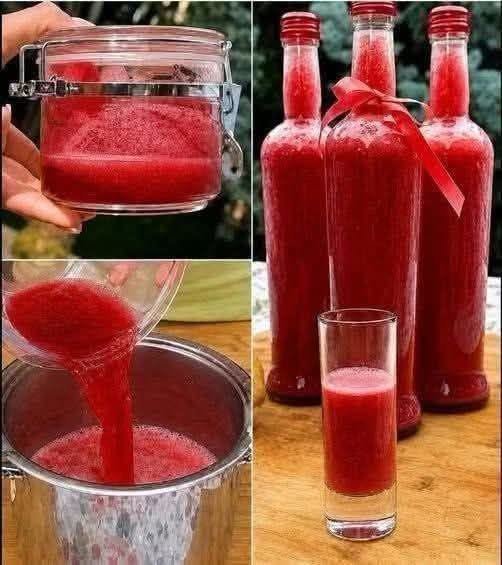
Jamaica (Hibiscus), Laurel & Cinnamon Tea

His aromatic herbal tea combines Jamaica (hibiscus flowers)laurel (bay leaves), and cinnamon sticks to create a refreshing, flavorful beverage enjoyed in many cultures. It has a tart, slightly sweet taste from the hibiscus, balanced by the warm spice of cinnamon and the earthy notes of bay leaves.

Flora & Fauna

While hibiscus tea may support healthy blood pressure and contains antioxidants, it is not a cure for kidney disease, high cholesterol, obesity, or other medical conditions. Think of this drink as a healthy addition to a balanced lifestyle rather than a miracle remedy.

Ingredients

  • 4 cups water
  • ¼ cup dried hibiscus flowers (flor de Jamaica)
  • 2 bay leaves (laurel)
  • 1 cinnamon stick
  • 1–2 teaspoons honey or preferred sweetener (optional)
  • Lemon slices for serving (optional)

Instructions

Step 1: Boil

  1. Add water to a medium saucepan.
  2. Bring to a boil.

Step 2: Steep

    1. Add hibiscus flowers, bay leaves, and cinnamon sticks.
    2. Reduce heat and simmer for 10 minutes.
Herbs & Spices

Step 3: Rest

  1. Remove from heat.
  2. Cover and let steep for an additional 10 minutes.

Step 4: Strain

  1. Strain the tea into a pitcher or teapot.
  2. Sweeten if desired.

Step 5: Serve

  • Enjoy warm or chilled over ice.
  • Garnish with lemon slices if desired.

Prep & Cook Time

Discover more
teas
Alcoholic Beverages
Sugar

Task Time
Prep Time 5 minutes
Cook Time 10 minutes
Steep Time 10 minutes
Total Time 25 minutes

Servings

4 servings

Beverages

Nutritional Information (Approximate Per Serving)

Nutrient Amount
Calories 5
Carbohydrates 1g
Protein 0g
Fat 0g
Fiber 0g
Sodium 0mg

Discover more
sugary
Drink
Food & Drink

Nutrition will vary if sweeteners are added.

Flora & Fauna

Recipe Notes

  • Use food-grade dried hibiscus flowers for the best flavor.
  • The longer the tea steeps, the stronger and tarter it becomes.
  • Serve chilled during warm weather for a refreshing drink.
  • Store refrigerated for up to 3 days.

Tips

✅ Add orange slices for a citrus twist.
✅ Sweeten lightly to preserve the natural tart flavor.
✅ Use a cinnamon stick instead of ground cinnamon for a clearer tea.
✅ Make a double batch and refrigerate for iced tea throughout the week.

Potential Benefits

Hibiscus (Jamaica)

    • Rich in antioxidants
    • May help support healthy blood pressure in some people
    • Naturally caffeine-free
Tea

Cinnamon

  • Adds flavor without sugar
  • Contains antioxidant compounds

Bay Leaves

  • Contribute aroma and flavor
  • Contain plant compounds studied for potential health effects

Important Note

Discover more
Alternative & Natural Medicine
sugar
Desserts

No scientific evidence shows that this tea:

  • Cleanses the kidneys
  • “Melts” body fat
  • Removes excess body fat rapidly
  • Cures high cholesterol
  • Replaces medical treatment

Healthy eating, exercise, and medical care remain the proven approaches for managing these conditions.

Beverages

Frequently Asked Questions

Q: Can I drink this every day?

Yes, most healthy adults can enjoy it regularly in moderation.

Q: Does hibiscus tea lower blood pressure?

Some studies suggest hibiscus may help support healthy blood pressure levels, but it should not replace prescribed medications.

Discover more
cheesy
Fruits & Vegetables
cookies

Q: Can this tea help with weight loss?

It may be a low-calorie alternative to sugary drinks, but it does not directly burn fat.

Q: Is it caffeine-free?

Yes, all three ingredients are naturally caffeine-free.

Food

Q: Can I drink it cold?

Absolutely. It’s delicious served over ice.

Q: Who should be cautious?

People taking blood pressure medications, pregnant individuals, or anyone with a medical condition should consult a healthcare professional before regularly consuming large amounts of herbal teas.

Orange Creamsicle Salad

Orange Creamsicle Salad 🍊

Ingredients

  • 1 box (3 oz) orange gelatin
  • 1 cup boiling water
  • 1 cup cold water
  • 1 box (3.4 oz) instant vanilla pudding mix
  • 1 container (8 oz) whipped topping, thawed
  • 1 can (15 oz) mandarin oranges, drained
  • 1 cup mini marshmallows

Instructions

1. Prepare the Gelatin
➡️ In a large bowl, dissolve the orange gelatin in boiling water.

➡️ Stir until completely dissolved.

➡️ Add the cold water and mix well.

2. Add the Pudding
➡️ Sprinkle the dry vanilla pudding mix into the gelatin mixture.

➡️ Whisk until smooth and slightly thickened.

3. Chill
➡️ Refrigerate for 15–20 minutes until slightly set but not firm.

4. Fold in the Remaining Ingredients
➡️ Gently fold in:

  • Whipped topping
  • Mandarin oranges
  • Mini marshmallows

➡️ Mix until evenly combined.

5. Chill Again
➡️ Cover and refrigerate for at least 2 hours.

➡️ The salad should be light, fluffy, and creamy.

6. Serve
➡️ Spoon into dessert bowls and serve chilled.


Q&A

Can I use fresh oranges?
➡️ Yes, peeled and segmented fresh oranges work well.

Can I make it ahead of time?
➡️ Yes, it can be made up to 24 hours in advance.

How long does it last?
➡️ Store covered in the refrigerator for up to 3 days.

Nutritional Benefits

✓ Contains vitamin C from oranges
✓ Light and refreshing dessert
✓ Easy no-bake recipe
✓ Perfect for potlucks, holidays, and family gatherings

Creamy Spinach & Shrimp Stuffed Salmon

Creamy Spinach & Shrimp Stuffed Salmon 🐟🦐

Ingredients

For the Salmon

  • 2 large salmon fillets (about 6 oz each)
  • 1 tbsp olive oil
  • ½ tsp salt
  • ½ tsp black pepper
  • ½ tsp smoked paprika
  • ½ tsp garlic powder

For the Filling

  • 1 cup spinach, chopped
  • ½ cup cooked shrimp, chopped
  • 4 oz cream cheese, softened
  • ¼ cup Parmesan cheese, grated
  • 2 cloves garlic, minced

Instructions

1. Prepare the Salmon
➡️ Preheat oven to 400°F (200°C).

➡️ Cut a pocket into the side of each salmon fillet.

➡️ Rub with olive oil and season with salt, pepper, paprika, and garlic powder.

2. Make the Filling
➡️ In a bowl, combine:

  • Spinach
  • Chopped shrimp
  • Cream cheese
  • Parmesan cheese
  • Minced garlic

➡️ Mix until creamy and well combined.

3. Stuff the Salmon
➡️ Fill each salmon pocket with the spinach and shrimp mixture.

➡️ Press gently to keep the filling inside.

4. Bake
➡️ Place salmon in a lightly greased baking dish.

➡️ Bake for 15–18 minutes or until the salmon flakes easily with a fork.

5. Serve
➡️ Let rest for 2 minutes.

➡️ Spoon any melted filling over the salmon before serving.


Q&A

Can I use frozen shrimp?
➡️ Yes, thaw and pat dry before using.

Can I make this ahead of time?
➡️ Yes, stuff the salmon and refrigerate for up to 12 hours before baking.

What sides go well with it?
➡️ Roasted vegetables, rice, or a fresh salad.

Nutritional Benefits

✓ High in protein 🐟
✓ Rich in omega-3 fatty acids
✓ Good source of calcium from Parmesan
✓ Packed with vitamins from spinach

Chocolate Pecan Toffee

Ingredients

  • 1 cup butter
  • 1 cup brown sugar
  • 1½ cups milk chocolate chips
  • 1 cup pecans, chopped
  • ½ tsp vanilla extract
  • Pinch of salt

Instructions

1. Prepare the Pan
➡️ Line an 8-inch square pan or tray with parchment paper.

2. Make the Toffee
➡️ In a saucepan, melt the butter over medium heat.

➡️ Add brown sugar and salt.

➡️ Stir continuously for 5–7 minutes until the mixture thickens and turns golden.

➡️ Remove from heat and stir in vanilla.

3. Pour and Set
➡️ Pour the hot toffee mixture into the prepared pan.

➡️ Spread evenly with a spatula.

4. Add Chocolate
➡️ Sprinkle the chocolate chips over the hot toffee.

➡️ Let sit for 2 minutes until melted.

➡️ Spread the chocolate into an even layer.

5. Add Pecans
➡️ Sprinkle the chopped pecans evenly over the chocolate.

➡️ Gently press them into the chocolate layer.

6. Chill
➡️ Refrigerate for 1–2 hours until firm.

7. Serve
➡️ Break into pieces or cut into squares.

➡️ Store in an airtight container.


Q&A

Can I use dark chocolate?
➡️ Yes, dark chocolate works wonderfully.

Can I use walnuts instead of pecans?
➡️ Absolutely! Walnuts or almonds are great substitutes.

How long does it keep?
➡️ Store in an airtight container for up to 2 weeks.

Nutritional Benefits

✓ Contains healthy fats from pecans
✓ Rich, crunchy texture
✓ Perfect homemade holiday treat
✓ Great for gifting and dessert trays

Chocolate Soft Serve Ice Cream

Ingredients

  • 2 cups heavy whipping cream
  • 1 can (14 oz / 400 g) sweetened condensed milk
  • ¼ cup cocoa powder
  • 1 tsp vanilla extract

Instructions

1. Prepare the Chocolate Base
➡️ In a large bowl, whisk together:

  • Sweetened condensed milk
  • Cocoa powder
  • Vanilla extract

➡️ Mix until smooth and lump-free.

2. Whip the Cream
➡️ In a separate bowl, beat the heavy cream until stiff peaks form.

➡️ Do not overbeat.

3. Combine
➡️ Gently fold the whipped cream into the chocolate mixture.

➡️ Mix until fully combined and fluffy.

4. Freeze
➡️ Transfer the mixture to a freezer-safe container.

➡️ Cover and freeze for 5–6 hours or overnight.

5. Serve
➡️ Let sit at room temperature for 5 minutes before scooping.

➡️ Serve in cups or cones.


Q&A

Can I use dark cocoa powder?
➡️ Yes, it will give a richer chocolate flavor.

Can I add chocolate chips?
➡️ Absolutely! Fold them in before freezing.

How long does it last?
➡️ Store in the freezer for up to 2 weeks.

Nutritional Benefits

✓ Provides calcium from dairy
✓ Rich chocolate flavor
✓ Easy no-churn recipe
✓ Perfect frozen dessert for chocolate lovers

Homemade Pickled Beets

Homemade Pickled Beets 🍠

Ingredients

  • 6 medium beets
  • 1 cup white vinegar
  • 1 cup water
  • ½ cup sugar
  • 1 tsp salt

Instructions

1. Cook the Beets
➡️ Wash the beets thoroughly.

➡️ Place them in a large pot and cover with water.

➡️ Bring to a boil and cook for 35–45 minutes, or until fork-tender.

2. Cool and Peel
➡️ Drain the beets and allow them to cool.

➡️ Peel off the skins and slice into rounds.

3. Make the Pickling Brine
➡️ In a saucepan, combine:

  • White vinegar
  • Water
  • Sugar
  • Salt

➡️ Bring to a gentle boil, stirring until the sugar dissolves.

4. Combine
➡️ Place the sliced beets in a large jar or bowl.

➡️ Pour the hot brine over the beets until completely covered.

5. Chill
➡️ Let cool to room temperature.

➡️ Cover and refrigerate for at least 24 hours before serving.

6. Serve
➡️ Serve chilled as a side dish, salad topping, or snack.


Q&A

Can I reduce the sugar?
➡️ Yes, adjust the sugar to your taste.

How long do pickled beets last?
➡️ Store in the refrigerator for up to 2 weeks.

Can I add spices?
➡️ Yes, cloves, cinnamon sticks, or peppercorns add extra flavor.

Nutritional Benefits

✓ Rich in fiber
✓ Good source of folate and potassium
✓ Contains natural antioxidants
✓ Low in fat and naturally gluten-free

Soft Cheese Flatbreads

Soft Cheese Flatbreads 🫓🧀

Ingredients

  • 3 cups all-purpose flour
  • 1 cup warm milk
  • 1 tsp sugar
  • 1 tsp salt
  • 2 tsp instant yeast
  • 2 tbsp vegetable oil

For the Filling

  • 1½ cups mozzarella cheese, shredded
  • ½ cup cream cheese

For Brushing

  • 2 tbsp melted butter

Instructions

1. Prepare the Dough
➡️ In a large bowl, combine warm milk, sugar, and yeast.

➡️ Let sit for 5 minutes until foamy.

➡️ Add flour, salt, and oil.

➡️ Mix until a soft dough forms.

➡️ Knead for 8–10 minutes until smooth.

2. Let the Dough Rise
➡️ Place the dough in a lightly oiled bowl.

➡️ Cover and let rise for 1 hour or until doubled in size.

3. Prepare the Filling
➡️ Mix the mozzarella and cream cheese in a bowl.

➡️ Set aside.

4. Shape the Flatbreads
➡️ Divide the dough into 6 equal portions.

➡️ Roll each portion into a circle.

➡️ Place some cheese filling in the center.

➡️ Seal the edges and gently flatten into a round disc.

5. Cook
➡️ Heat a non-stick skillet over medium heat.

➡️ Cook each flatbread for 3–4 minutes per side until golden brown with toasted spots.

➡️ Press lightly while cooking for even browning.

6. Finish
➡️ Brush the hot flatbreads with melted butter.

➡️ Stack and keep covered to stay soft.

Garlic Herb Pull-Apart Bread

Ingredients

For the Dough

  • 3 cups all-purpose flour
  • 1 cup warm milk
  • 2¼ tsp instant yeast
  • 1 tbsp sugar
  • 1 tsp salt
  • 2 tbsp melted butter

For the Garlic Herb Topping

  • 3 tbsp melted butter
  • 3 cloves garlic, minced
  • 2 tbsp fresh dill or parsley, chopped

👩‍🍳 Instructions

🥣 Step 1: Make the Dough

➡️ In a large bowl, combine warm milk, yeast, and sugar.

➡️ Let sit for 5 minutes until foamy.

➡️ Add flour, salt, and melted butter.

➡️ Mix until a soft dough forms.

✋ Step 2: Knead

➡️ Knead the dough for 8–10 minutes until smooth and elastic.

➡️ Place in a lightly greased bowl.

➡️ Cover and let rise for 1 hour or until doubled in size.

⚪ Step 3: Shape the Rolls

➡️ Punch down the dough.

➡️ Divide into 7–8 equal pieces.

➡️ Roll each piece into a smooth ball.

➡️ Arrange the balls in a round baking pan as shown in the picture.

⏳ Step 4: Second Rise

➡️ Cover and let rise again for 30 minutes.

➡️ The dough balls should expand and touch each other.

🔥 Step 5: Bake

➡️ Preheat oven to 375°F (190°C).

➡️ Bake for 25–30 minutes until golden brown on top.

🧄 Step 6: Make Garlic Butter

➡️ Mix together:

  • Melted butter
  • Minced garlic
  • Chopped dill or parsley

🌿 Step 7: Finish

➡️ Brush the hot bread generously with the garlic herb butter.

➡️ Let it soak into the bread for a few minutes.

✨ Step 8: Serve

➡️ Serve warm and pull apart the soft rolls by hand.

Slow Cooker Fried Potatoes and Onions

Ingredients

  • 6 medium potatoes, sliced
  • 2 large onions, sliced
  • 3 tbsp butter, melted
  • 1 tbsp olive oil
  • 1 tsp garlic powder
  • Salt and black pepper, to taste

👩‍🍳 Instructions

🥔 Step 1: Prepare the Vegetables

➡️ Wash and peel the potatoes if desired.

➡️ Slice the potatoes into thin rounds.

➡️ Slice the onions into thin strips.

🥣 Step 2: Season

➡️ In a large bowl, combine:

  • Potatoes
  • Onions
  • Melted butter
  • Olive oil
  • Garlic powder
  • Salt
  • Black pepper

➡️ Toss well until everything is evenly coated.

🥘 Step 3: Fill the Slow Cooker

➡️ Lightly grease the slow cooker.

➡️ Add the potato and onion mixture.

➡️ Spread into an even layer.

⏳ Step 4: Cook

➡️ Cover and cook on:

  • HIGH: 3–4 hours, or
  • LOW: 6–7 hours

➡️ Stir once or twice during cooking if possible.

🔥 Step 5: Crisp the Top (Optional)

➡️ For extra browning, transfer the cooked potatoes to a baking sheet.

➡️ Broil for 3–5 minutes until golden and crispy.

✨ Step 6: Serve

➡️ Serve hot as a side dish with chicken, steak, or eggs.

➡️ Garnish with fresh parsley if desired.


❓ Q&A

Q: Can I add cheese?
➡️ Yes, sprinkle shredded cheddar or Parmesan during the last 15 minutes of cooking.

Q: Can I leave the skins on?
➡️ Absolutely! The skins add texture and nutrients.

Q: How do I store leftovers?
➡️ Refrigerate in an airtight container for up to 4 days.

🌿 Nutritional Benefits

✅ Good source of fiber
✅ Naturally vegetarian
✅ Budget-friendly comfort food
✅ Perfect side dish for family meals 🥔🧅✨

Healthy Sugar-Free Carrot, Apple and Oat Cake

Ingredients

  • 2 medium carrots, grated
  • 1 large apple, grated
  • 1½ cups rolled oats
  • 2 eggs
  • 1 tsp cinnamon
  • 1 tsp baking powder

👩‍🍳 Instructions

🥕 Step 1: Prepare the Ingredients

➡️ Preheat oven to 350°F (175°C).

➡️ Grate the carrots and apple.

➡️ If the apple releases too much juice, gently squeeze out a little excess liquid.

🥣 Step 2: Make the Batter

➡️ In a large bowl, combine:

  • Grated carrots
  • Grated apple
  • Rolled oats
  • Eggs
  • Cinnamon
  • Baking powder

➡️ Mix until everything is evenly combined.

⏳ Step 3: Rest the Mixture

➡️ Let the mixture sit for 5 minutes so the oats absorb some moisture.

🍰 Step 4: Bake

➡️ Transfer the batter to a lightly greased loaf pan or small baking dish.

➡️ Spread evenly with a spoon.

➡️ Bake for 30–35 minutes or until golden and firm in the center.

❄️ Step 5: Cool

➡️ Remove from the oven.

➡️ Let cool in the pan for 10 minutes before slicing.

✨ Step 6: Serve

➡️ Slice and enjoy warm or chilled.

➡️ Perfect for breakfast, snacks, or a healthy dessert.


❓ Q&A

Q: Is this cake naturally sweet?
➡️ Yes, the apple and carrot provide natural sweetness without added sugar.

Q: Can I make it gluten-free?
➡️ Yes, use certified gluten-free oats.

Q: How should I store it?
➡️ Keep in an airtight container in the refrigerator for up to 4 days.

🌿 Nutritional Benefits

✅ No added sugar
✅ High in fiber from oats, apples, and carrots
✅ Naturally sweet and satisfying
✅ Great for a healthy breakfast or snack 🥕🍎🌾✨

Lemon Cream Dessert Cups 🍋

Ingredients

  • 1 cup lemon curd
  • 1 cup heavy whipping cream
  • 8 oz (225 g) cream cheese, softened
  • ¼ cup powdered sugar
  • 1 cup crushed vanilla cookies or graham crackers

👩‍🍳 Instructions

🥣 Step 1: Prepare the Base

➡️ Divide the crushed cookies among 4 dessert glasses.

➡️ Press lightly to form the bottom layer.

🧀 Step 2: Make the Cream Layer

➡️ In a bowl, beat the cream cheese and powdered sugar until smooth.

➡️ In a separate bowl, whip the heavy cream until soft peaks form.

➡️ Fold the whipped cream into the cream cheese mixture until creamy and fluffy.

🍋 Step 3: Layer the Dessert

➡️ Spoon a layer of the cream mixture over the cookie base.

➡️ Add a layer of lemon curd.

➡️ Repeat the layers until the glasses are filled.

❄️ Step 4: Chill

➡️ Refrigerate for at least 2 hours to allow the layers to set.

✨ Step 5: Serve

➡️ Serve chilled.

➡️ Top with an extra spoonful of lemon curd if desired.


❓ Q&A

Q: Can I make this dessert ahead of time?
➡️ Yes, it can be prepared up to 24 hours in advance.

Q: Can I use store-bought lemon curd?
➡️ Absolutely, store-bought lemon curd works perfectly.

Q: How long will it keep?
➡️ Store covered in the refrigerator for up to 3 days.

🌿 Nutritional Benefits

✅ Good source of calcium
✅ Refreshing citrus flavor
✅ No baking required
✅ Perfect make-ahead dessert 🍋🍨✨

Hearty Beef and Rice Casserole with Cheese

Ingredients

  • 1 lb (450 g) ground beef
  • 1 cup uncooked rice
  • 2 cups beef broth
  • 1 can (14 oz) diced tomatoes
  • 2 cups shredded cheddar cheese
  • 1 small onion, diced
  • Salt and black pepper, to taste

👩‍🍳 Instructions

🥩 Step 1: Cook the Beef

➡️ Preheat oven to 375°F (190°C).

➡️ In a large skillet, cook the ground beef over medium heat until browned.

➡️ Add the diced onion and cook for 3–4 minutes until softened.

➡️ Drain any excess grease.

🥣 Step 2: Combine Ingredients

➡️ Stir in:

  • Uncooked rice
  • Beef broth
  • Diced tomatoes
  • Salt
  • Black pepper

➡️ Mix everything well.

🥘 Step 3: Assemble the Casserole

➡️ Transfer the mixture to a greased baking dish.

➡️ Spread it evenly.

➡️ Cover tightly with foil.

🔥 Step 4: Bake

➡️ Bake for 40–45 minutes until the rice is tender and the liquid is absorbed.

🧀 Step 5: Add the Cheese

➡️ Remove the foil.

➡️ Sprinkle the shredded cheddar cheese evenly over the top.

➡️ Return to the oven for 10 minutes, or until the cheese is melted and bubbly.

✨ Step 6: Serve

➡️ Let the casserole rest for 5 minutes.

➡️ Scoop onto plates and serve warm.

Loaded Sweet Potato with Spinach, Mushrooms & Avocado

Loaded Sweet Potato with Spinach, Mushrooms & Avocado

Ingredients 🛒

  • 3 large sweet potatoes
  • 2 cups spinach
  • 1 cup mushrooms, sliced
  • 1 avocado, diced
  • ½ cup feta cheese, crumbled
  • 1 tbsp olive oil
  • Salt and black pepper to taste

Detailed Steps 👩‍🍳

1️⃣ Bake the Sweet Potatoes

➡️ Preheat the oven to 400°F (200°C).
➡️ Wash and dry the sweet potatoes.
➡️ Place them on a baking tray.
➡️ Bake for 45–50 minutes until fork-tender.
➡️ Let them cool for a few minutes.

2️⃣ Cook the Mushrooms

➡️ Heat olive oil in a skillet over medium heat.
➡️ Add the sliced mushrooms.
➡️ Cook for 5–6 minutes, stirring occasionally.
➡️ Continue until golden brown and lightly caramelized.

3️⃣ Add the Spinach

➡️ Add spinach to the skillet.
➡️ Stir for 2–3 minutes until wilted.
➡️ Season with salt and black pepper.
➡️ Cook until excess moisture evaporates.

4️⃣ Prepare the Sweet Potatoes

➡️ Slice each sweet potato lengthwise.
➡️ Gently fluff the inside with a fork.
➡️ This creates a soft base for the toppings.

5️⃣ Add the Filling

➡️ Spoon the spinach and mushroom mixture into each potato.
➡️ Sprinkle feta cheese over the top.
➡️ Add diced avocado evenly.

6️⃣ Final Touch

➡️ Return to the oven for 5 minutes if you prefer warm feta.
➡️ Remove and rest for 2 minutes before serving.

7️⃣ Serve

➡️ Serve warm as a healthy lunch or light dinner.
➡️ Enjoy immediately for the best flavor and texture.


Nutrition Benefits 💪

✅ Rich in fiber for healthy digestion.
✅ Avocado provides heart-healthy fats.
✅ Spinach is packed with vitamins A, C, and K.
✅ Sweet potatoes are an excellent source of vitamin A.
✅ Feta cheese adds protein and flavor.
✅ A balanced meal with vegetables, healthy fats, and protein.

Approximate Protein Content

Per Serving: 10–14g protein
Whole Recipe: 30–40g protein


Quick Q&A ❓

Can I make it ahead of time?
➡️ Yes, prepare the filling in advance and assemble before serving.

Can I use kale instead of spinach?
➡️ Yes, kale is a great substitute.

Can I add more protein?
➡️ Yes, add grilled chicken, shrimp, or chickpeas.

Creamy Baked Broccoli with Tomatoes and Kale

Ingredients

  • 3 cups broccoli florets
  • 1 cup cherry tomatoes, halved
  • 2 cups kale, chopped
  • 1 cup heavy cream
  • 1 cup shredded mozzarella cheese
  • 2 cloves garlic, minced
  • Salt and black pepper, to taste

👩‍🍳 Instructions

🥦 Step 1: Prepare the Vegetables

➡️ Preheat your oven to 375°F (190°C).

➡️ Wash the broccoli, tomatoes, and kale thoroughly.

➡️ Cut the broccoli into bite-sized florets and chop the kale.

🧄 Step 2: Make the Creamy Mixture

➡️ In a large bowl, combine:

  • Heavy cream
  • Minced garlic
  • Salt
  • Black pepper

➡️ Stir until well mixed.

🥣 Step 3: Assemble

➡️ Add the broccoli, tomatoes, and kale to a baking dish.

➡️ Pour the cream mixture evenly over the vegetables.

➡️ Toss gently to coat everything.

🧀 Step 4: Add Cheese

➡️ Sprinkle the shredded mozzarella evenly over the top.

➡️ Make sure the vegetables are mostly covered for a creamy, cheesy finish.

🔥 Step 5: Bake

➡️ Place the dish in the oven.

➡️ Bake for 25–30 minutes until the vegetables are tender and the cheese is golden and bubbly.

✨ Step 6: Serve

➡️ Let the casserole rest for 5 minutes.

➡️ Serve warm as a side dish or light vegetarian meal.


❓ Q&A

Q: Can I use spinach instead of kale?
➡️ Yes, spinach works perfectly and cooks even faster.

Q: Can I make it ahead of time?
➡️ Yes, assemble the dish and refrigerate. Bake when ready to serve.

Q: How do I store leftovers?
➡️ Store in an airtight container in the refrigerator for up to 3 days.

🌿 Nutritional Benefits

✅ Rich in fiber and antioxidants
✅ Good source of vitamins A, C, and K
✅ Contains calcium and protein from cheese
✅ Comforting, creamy, and packed with vegetables 🥦🍅💚

Fluffy Homemade Pancakes

Ingredients

  • 2 cups all-purpose flour
  • 2 tbsp sugar
  • 1 tbsp baking powder
  • ½ tsp salt
  • 1½ cups milk
  • 2 large eggs
  • 3 tbsp melted butter
  • 1 tsp vanilla extract

👩‍🍳 Instructions

🥣 Step 1: Mix Dry Ingredients

➡️ In a large bowl, combine:

  • Flour
  • Sugar
  • Baking powder
  • Salt

Mix well.

🥛 Step 2: Mix Wet Ingredients

➡️ In another bowl, whisk together:

  • Milk
  • Eggs
  • Melted butter
  • Vanilla extract

Whisk until smooth.

🔄 Step 3: Make the Batter

➡️ Pour the wet mixture into the dry ingredients.

➡️ Stir gently until just combined.

⚠️ Do not overmix. A few lumps are fine and help keep the pancakes fluffy.

⏳ Step 4: Rest the Batter

➡️ Let the batter rest for 5–10 minutes.

This helps create extra fluffy pancakes.

🍳 Step 5: Cook the Pancakes

➡️ Heat a lightly buttered skillet or griddle over medium heat.

➡️ Pour about ¼ cup batter for each pancake.

➡️ Cook for 2–3 minutes until bubbles form on top.

➡️ Flip and cook another 1–2 minutes until golden brown.

🥞 Step 6: Serve

➡️ Stack the pancakes on a plate.

➡️ Serve warm with:

  • Maple syrup
  • Honey
  • Butter
  • Fresh berries

❓Q&A

Q: Why are my pancakes not fluffy?
➡️ Overmixing the batter can make pancakes dense. Mix gently.

Q: Can I make the batter ahead of time?
➡️ Yes, refrigerate for up to 24 hours and stir gently before using.

Q: Can I freeze pancakes?
➡️ Yes, cool completely and freeze for up to 2 months.

Enjoy your soft, thick, fluffy homemade pancakes!

Cream Cheese Pecan Crescent Bites

Ingredients

  • 1 can crescent roll dough
  • 8 oz Philadelphia cream cheese, cut into cubes
  • 1 cup pecans, chopped
  • ½ cup brown sugar
  • ½ cup butter, melted

Instructions

➡️ Preheat oven to 350°F (175°C).

➡️ Lightly grease an 8×8-inch baking dish or foil pan.

➡️ Unroll the crescent dough and cut into 12 equal squares.

➡️ Place a cube of cream cheese in the center of each square.

➡️ Fold the dough around the cream cheese and pinch the edges closed.

➡️ Arrange the stuffed dough pieces in the baking dish.

➡️ Mix the melted butter and brown sugar until combined.

➡️ Pour the mixture evenly over the dough bites.

➡️ Sprinkle the chopped pecans over the top.

➡️ Bake for 25–30 minutes, or until golden brown and bubbly.

➡️ Let cool for 5 minutes before serving.

➡️ Spoon the buttery pecan sauce from the pan over the bites for extra flavor.

Q&A

Q: Can I use walnuts instead of pecans?
A: Yes, walnuts are a great substitute.

Q: Can these be made ahead?
A: Yes, assemble them the night before and bake when ready.

Q: How should I store leftovers?
A: Keep refrigerated in an airtight container for up to 3 days and reheat before serving. 😋🧀🥜🍯

Turmeric Ginger Honey Wellness Paste

Ingredients

  • 1/2 cup fresh turmeric, peeled and chopped
  • 1/2 cup fresh ginger, peeled and chopped
  • 1 tsp ground cinnamon
  • Juice of 1 lemon
  • 1/2 cup raw honey

Instructions

➡️ Wash, peel, and roughly chop the turmeric and ginger.

➡️ Add the turmeric, ginger, cinnamon, and lemon juice to a blender or food processor.

➡️ Blend until finely minced and well combined.

➡️ Add the raw honey and blend again until a thick paste forms.

➡️ Transfer the mixture to a clean glass jar.

➡️ Seal the jar and store it in the refrigerator.

➡️ Take 1 teaspoon daily or stir into warm water or tea.

Q&A

Q: How long does it last?
A: Up to 2 weeks in the refrigerator.

Q: Can I use powdered turmeric instead of fresh?
A: Yes, but fresh turmeric provides a stronger flavor and texture.

Q: Can I add it to tea?
A: Absolutely! Stir 1 teaspoon into warm tea or water.

Note

This is a traditional wellness mixture. While ingredients like ginger, turmeric, lemon, and honey are commonly used in home remedies, they are not proven cures for diseases. If you have a medical condition or take medications, consult a healthcare professional before using it regularly. 🍯🫚🍋✨

Chocolate Peanut Butter Balls

Ingredients

  • 1 cup creamy peanut butter
  • 1 cup powdered sugar
  • 2 cups milk chocolate chips, melted

Instructions

➡️ In a bowl, mix the peanut butter and powdered sugar until a thick dough forms.

➡️ Roll the mixture into small bite-sized balls and place them on a tray.

➡️ Freeze for 20–30 minutes until firm.

➡️ Melt the chocolate chips until smooth.

➡️ Dip each peanut butter ball into the melted chocolate, coating completely.

➡️ Place them on parchment paper and let the chocolate set.

➡️ Refrigerate for 15–20 minutes before serving.

➡️ Store in an airtight container in the refrigerator.

Q&A

Q: Can I use crunchy peanut butter?
A: Yes, it adds a nice crunch.

Q: How long do they last?
A: Up to 1 week in the refrigerator.

Q: Can I freeze them?
A: Yes, they freeze well for up to 2 months. 🍫🥜😋

Creamy Chicken Pasta Soup

Creamy Chicken Pasta Soup

Ingredients

  • 2 cups cooked chicken, shredded
  • 2 cups pasta (small tubes or macaroni)
  • 2 carrots, sliced
  • 1 cup peas
  • 1 onion, diced
  • 4 cups chicken broth
  • 1 cup heavy cream
  • 1 tbsp butter
  • Salt and black pepper, to taste

Instructions

🧈 Step 1: Cook the Vegetables

  • Melt butter in a large pot.
  • Add onion and carrots.
  • Cook for 4–5 minutes until softened.

🍲 Step 2: Add Broth

  • Pour in the chicken broth.
  • Bring to a gentle boil.

🍝 Step 3: Cook the Pasta

  • Add the pasta.
  • Cook according to package directions until tender.

🍗 Step 4: Add Chicken

  • Stir in the shredded chicken.
  • Simmer for 5 minutes.

🥛 Step 5: Make It Creamy

  • Add the heavy cream and peas.
  • Stir well and cook for 3–4 more minutes.

🧂 Step 6: Season

  • Add salt and black pepper to taste.
  • Stir and remove from heat.

🍽️ Step 7: Serve

  • Ladle into bowls and serve hot.

Q & A

Q: Can I use rotisserie chicken?
A: Yes, rotisserie chicken works perfectly and saves time.

Q: Can I freeze this soup?
A: Yes, but the pasta may soften slightly after reheating.

Q: How can I make it thicker?
A: Simmer a few extra minutes or add a little more cream.

Cheesy Salami & Mozzarella Toast Bake

Ingredients

  • 8 slices thick sandwich bread
  • 8 slices cheddar or processed cheese
  • 150g salami or pepperoni, diced
  • 1½ cups mozzarella cheese, shredded
  • 2 tbsp parsley, chopped
  • 4 tbsp butter (divided)
  • 2 tbsp all-purpose flour
  • 1½ cups milk
  • Salt and black pepper, to taste

Instructions

🧈 Step 1: Make the Cream Sauce

  • Melt 2 tbsp butter in a saucepan over medium heat.
  • Add flour and stir for 1 minute.
  • Slowly whisk in the milk until smooth.
  • Cook until the sauce thickens.
  • Season with salt and black pepper.

🍞 Step 2: Prepare the Bread

  • Butter one side of each bread slice.
  • Lightly toast in a pan until golden.

🥪 Step 3: Assemble the Sandwiches

  • Place 1 slice of cheese on 4 bread slices.
  • Add diced salami or pepperoni.
  • Top with another slice of cheese.
  • Cover with the remaining bread slices.

🧀 Step 4: Add the Toppings

  • Spread cream sauce over each sandwich.
  • Sprinkle extra salami and parsley on top.
  • Cover generously with shredded mozzarella.

🔥 Step 5: Bake

  • Place sandwiches on a baking tray.
  • Bake at 200°C (400°F) for 10–15 minutes until the cheese is melted and golden.

🍽️ Step 6: Serve

  • Let cool for 2 minutes.
  • Serve hot and enjoy!

Q & A

Q: Can I use turkey or chicken slices instead of salami?
A: Yes, any cooked deli meat works well.

Q: How do I make it extra crispy?
A: Broil for 1–2 minutes at the end of baking.

Magic Custard Cake

  • Prep time: 10 minutes

  • Bake time: 50–60 minutes

  • Servings: 8–10 slices

Ingredients

  • 4 large eggs (at room temperature, separated)

  • 1 tablespoon water

  • ¾ cup (150g) granulated sugar

  • ½ cup (115g) unsalted butter, melted and cooled slightly

  • ½ cup (70g) all-purpose flour (sifted)

  • 2 cups (500ml) milk, lukewarm

  • 1 teaspoon pure vanilla extract

  • A pinch of salt

Step-by-Step Instructions

1. Prep the Oven and Pan

  • Preheat your oven to 160°C (325°F).

  • Grease an 8×8 inch (20×20 cm) baking dish or a similar round glass casserole dish with a little butter. You can also line the bottom with parchment paper for easier lifting later.

2. Whip the Egg Whites

  • In a clean, dry bowl, add the 4 egg whites and a pinch of salt.

  • Whisk using a hand mixer until stiff peaks form. Set this bowl aside.

3. Mix the Liquid Batter

  • In a separate large bowl, beat the 4 egg yolks and the granulated sugar together until the mixture becomes pale yellow and slightly fluffy.

  • Add the melted butter, vanilla extract, and 1 tablespoon of water. Beat for another minute until fully incorporated.

  • Add the sifted flour and mix gently just until combined.

  • Slowly pour in the lukewarm milk while mixing on low speed. Note: The batter will look very watery and thin at this point—this is exactly how it should look!

4. Fold in the Whites

  • Gently fold the whipped egg whites into the liquid batter in three separate batches using a spatula.

  • Do not overmix. You want to leave small, fluffy clumps of egg whites floating on top. This floating layer is what creates the cake-like top crust during baking.

5. Bake to Perfection

  • Pour the batter into your prepared baking dish.

  • Bake for 50 to 60 minutes, or until the top is deeply golden brown and the center has a slight, gelatinous jiggle when moved (it shouldn’t be sloshy).

  • Let the cake cool completely at room temperature, then place it in the refrigerator for at least 2 to 3 hours to fully set before slicing.

Pro-Tips for Content Success

  • The Perfect Slice: To get those flawless, sharp, clean edges shown in the photo, use a sharp knife dipped in hot water and wiped dry between every single cut.

  • Serving Suggestion: It tastes incredible chilled, served exactly as it is, or with a very light dusting of powdered sugar on top.

Cheesy Spinach Puff Pastry Squares

Ingredients

  • 2 sheets puff pastry, thawed
  • 2 cups spinach, chopped
  • 1 cup mozzarella cheese, shredded
  • ½ cup feta cheese, crumbled
  • 1 egg
  • 1 tbsp sesame seeds
  • Salt and black pepper, to taste

Instructions

🥬 Step 1:

Preheat your oven to 200°C (400°F). Line a baking tray with parchment paper.

🧀 Step 2:

In a bowl, combine the chopped spinach, mozzarella cheese, feta cheese, salt, and black pepper.

🥚 Step 3:

Crack the egg into a small bowl and beat it lightly. Add half of the beaten egg to the spinach mixture and stir well.

📄 Step 4:

Place one puff pastry sheet on the prepared baking tray.

🥄 Step 5:

Spread the spinach and cheese mixture evenly over the pastry, leaving a small border around the edges.

📄 Step 6:

Place the second puff pastry sheet on top. Press the edges together with a fork to seal.

🔪 Step 7:

Cut the pastry into 9 equal squares before baking. This makes it easier to separate later.

🥚 Step 8:

Brush the top with the remaining beaten egg for a golden finish.

🌾 Step 9:

Sprinkle sesame seeds evenly over the top.

🔥 Step 10:

Bake for 25–30 minutes or until the pastry is puffed and golden brown.

⏲️ Step 11:

Let it cool for 5–10 minutes before cutting fully through the marked squares.

🍽️ Step 12:

Serve warm and enjoy the crispy, cheesy layers.

Q & A

Q: Can I use frozen spinach?
A: Yes. Thaw it completely and squeeze out excess water before using.

Q: What cheese works best?
A: Mozzarella and feta give a creamy, flavorful filling, but cheddar also works well.

Q: Can I make it ahead of time?
A: Yes. Assemble it ahead, refrigerate, and bake when ready to serve. 🥬🧀🥐

Pickled Jalapeños

Pickled Jalapeños

Ingredients

  • 10–12 fresh jalapeños, sliced
  • 1 cup white vinegar
  • 1 cup water
  • 2 cloves garlic, minced
  • 1 tsp salt
  • 1 tsp sugar (optional)

Instructions

🌶️ Step 1:

Wash the jalapeños thoroughly and slice them into thin rounds. Wear gloves if you have sensitive skin.

🔪 Step 2:

Peel and finely mince the garlic cloves.

🥣 Step 3:

In a saucepan, combine the vinegar, water, salt, sugar, and minced garlic.

🔥 Step 4:

Bring the mixture to a gentle boil, stirring until the salt dissolves completely.

🌶️ Step 5:

Add the sliced jalapeños to the hot brine and simmer for 2–3 minutes. Do not overcook them.

🫙 Step 6:

Transfer the jalapeños into a clean glass jar.

🥄 Step 7:

Carefully pour the hot brine over the jalapeños, making sure they are fully covered.

❄️ Step 8:

Allow the jar to cool to room temperature before sealing with a lid.

🕒 Step 9:

Refrigerate for at least 24 hours before serving for the best flavor.

🍽️ Step 10:

Enjoy on tacos, burgers, sandwiches, nachos, salads, or as a spicy snack.

Q & A

Q: How long do pickled jalapeños last?
A: They can last up to 1 month in the refrigerator when stored in a sealed jar.

Q: Can I make them less spicy?
A: Yes, remove some or all of the seeds before pickling.

Q: Can I add extra flavors?
A: Yes, try adding black peppercorns, oregano, or a bay leaf to the brine for extra flavor.

Blueberry Spinach Power Smoothie

Blueberry Spinach Power Smoothie

Prep time: 5 minutes | Servings: 1


Ingredients

  • Base: 1 cup unsweetened almond milk (or your preferred dairy-free alternative).

  • Fruit: 1 cup frozen blueberries (frozen berries give a thicker, colder texture).

  • Greens: 1 large handful of fresh baby spinach.

  • Protein & Creaminess: ½ cup Greek yogurt or a scoop of plant-based protein powder.

  • Healthy Fats: 1 tablespoon flax seeds or chia seeds.

  • Crunch: 1 tablespoon sliced almonds.

  • Optional Sweetener: 1 teaspoon honey or a pitted Medjool date if you prefer extra sweetness.

Instructions

  1. Layer the Blender: Always start with your liquid base (almond milk) to help the blades move freely. Add the spinach next, followed by the yogurt and seeds. Finally, add the frozen blueberries on top.

  2. Blend: Pulse a few times to break down the frozen fruit, then blend on high for about 45–60 seconds. You want to ensure the spinach is completely pulverized into a smooth, purple hue.

  3. Adjust Consistency: If the smoothie is too thick, splash in a little more milk. If it’s too thin, add a few ice cubes and blend again.

  4. Garnish & Serve: Pour the mixture into a tall glass. Top with a few fresh blueberries, a sprinkle of flax seeds, and the sliced almonds for a satisfying crunch.

Why It Works

The vitamin C in the blueberries helps your body better absorb the iron found in the spinach. Additionally, the fiber from the seeds and protein from the yogurt keep you feeling full and energized throughout the morning. Enjoy immediately!

Creamy Ranch Chicken Crack Dip

Ingredients

  • 2 cups cooked chicken, shredded
  • 8 oz cream cheese, softened
  • 1 cup sour cream
  • 1 cup shredded cheddar cheese
  • ¼ cup diced red bell pepper
  • 2 tbsp chopped green onions
  • 1 tbsp ranch seasoning
  • ½ tsp black pepper

👩‍🍳 Step-by-Step Instructions

1️⃣ Prepare the Chicken

  • Cook and shred the chicken into small pieces.
  • Let it cool slightly before mixing.

2️⃣ Make the Creamy Base

  • In a large bowl, combine softened cream cheese and sour cream.
  • Mix until smooth and creamy.

3️⃣ Add the Flavor

  • Stir in ranch seasoning and black pepper.
  • Mix well so the seasoning is evenly distributed.

4️⃣ Add the Mix-Ins

  • Fold in shredded chicken.
  • Add cheddar cheese, diced red bell pepper, and green onions.
  • Stir until everything is coated in the creamy mixture.

5️⃣ Chill

  • Cover and refrigerate for at least 1 hour.
  • Chilling helps the flavors blend together.

6️⃣ Serve

  • Transfer to a serving dish.
  • Serve with crackers, chips, toasted bread, or fresh vegetables.

🌟 Why You’ll Love It

  • Rich and creamy
  • Packed with flavor
  • Easy to prepare
  • Great for parties and gatherings
  • Perfect make-ahead appetizer

❓Q&A

Q: Can I use rotisserie chicken?
✅ Yes! Rotisserie chicken works perfectly and saves time.

Q: How long does it last in the fridge?
✅ Up to 3 days in an airtight container.

Q: Can I make it spicy?
✅ Yes! Add diced jalapeños or a pinch of cayenne pepper.

⏱️ Prep Time: 15 minutes
❄️ Chill Time: 1 hour
🍽️ Servings: 8–10

🥨 Serving Ideas

  • Crackers
  • Tortilla chips
  • Pretzels
  • Celery sticks
  • Cucumber slices

Creamy, cheesy, and loaded with flavor—this dip disappears fast at any gathering! 🧀✨🥣