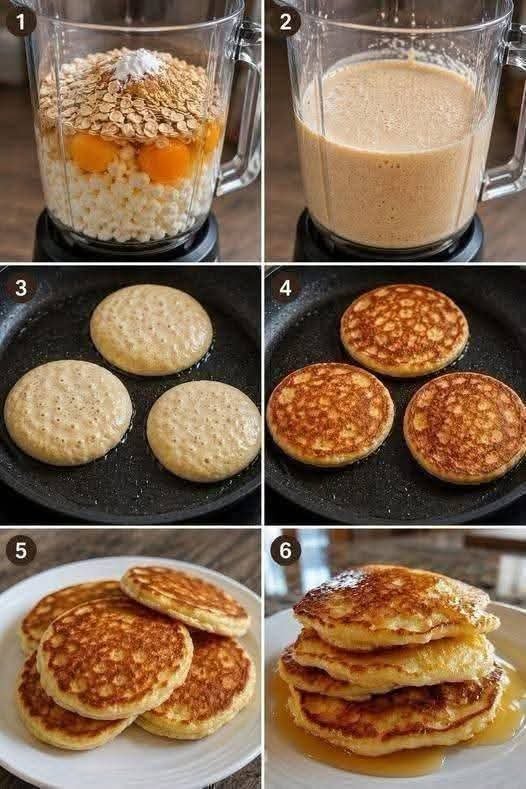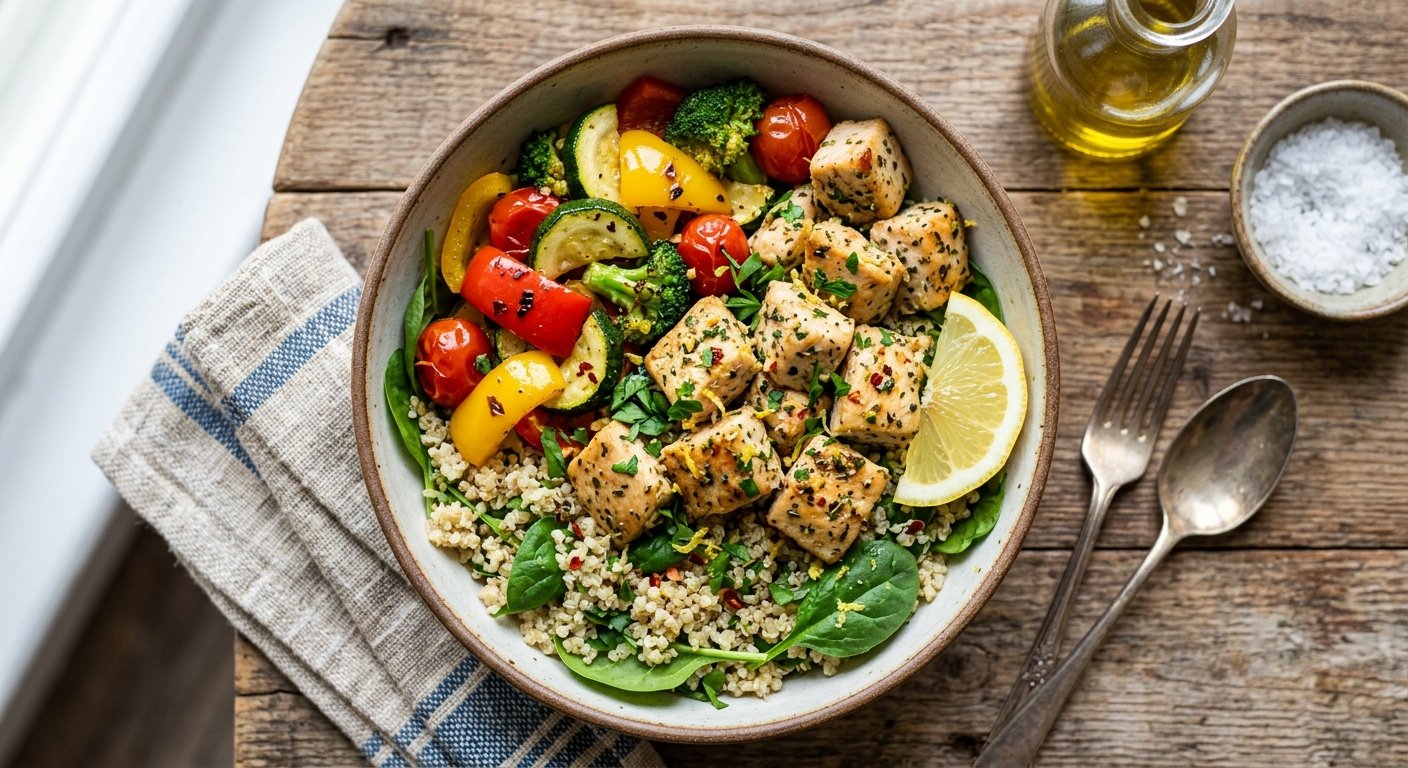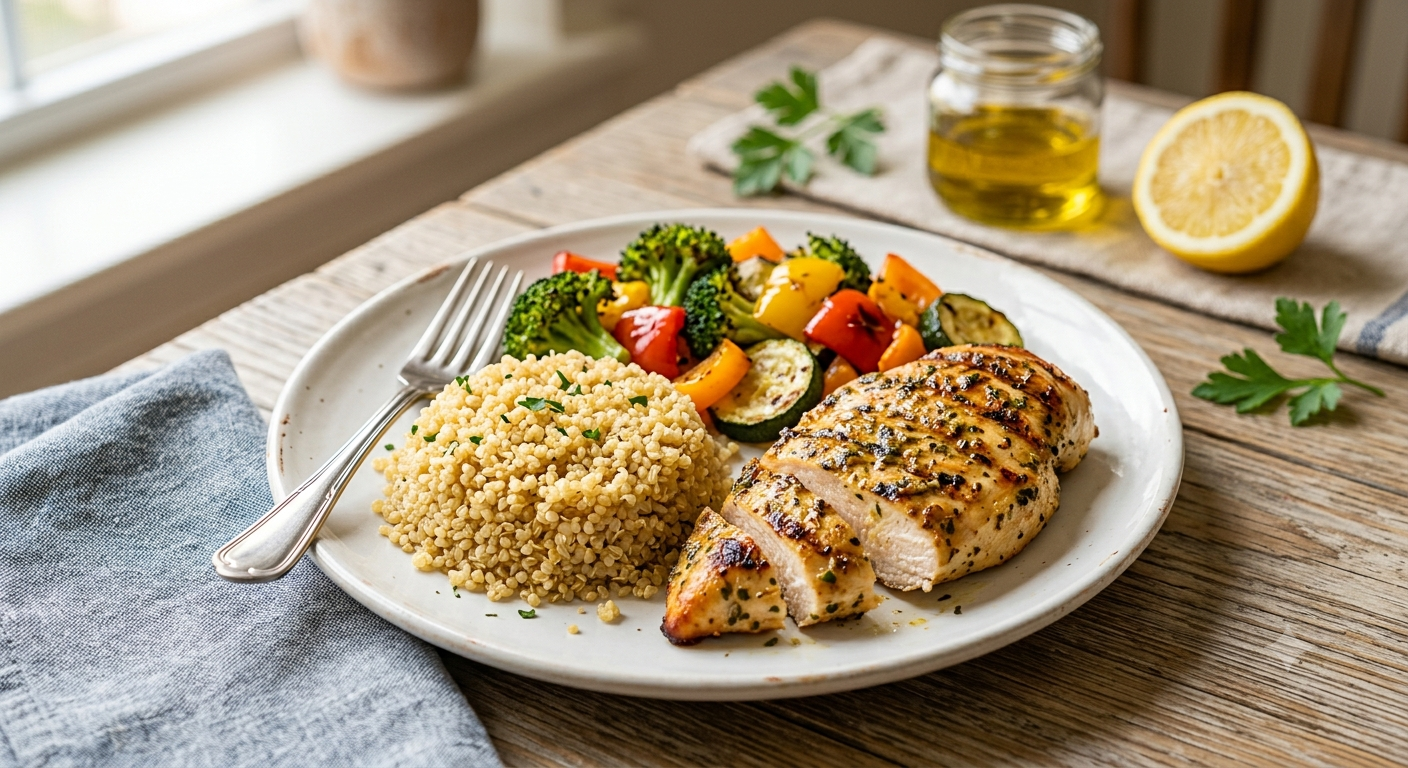
Creamy Garlic Grilled Chicken & Broccoli Bowl

🥗 Creamy Garlic Grilled Chicken & Broccoli Bowl

Servings: 2 | Prep time: 10 mins | Cook time: 15 mins

🛒 Ingredients

The Base:

  • 2 Chicken breasts (sliced into thin strips)

  • 2 cups Broccoli florets (fresh or frozen) 🥦

  • 1 cup Cooked rice (white, brown, or cauliflower rice)

  • 1 tbsp Olive oil

  • Seasoning: ½ tsp garlic powder, ½ tsp paprika, salt, and black pepper.

The Creamy Sauce:

  • ¼ cup Plain Greek yogurt

  • 1 tbsp Dijon mustard

  • 1 tsp Fresh lemon juice 🍋

  • 1 clove Garlic (minced finely)

  • 1–2 tsp Water (for consistency)


👩‍🍳 Step-by-Step Instructions

  1. Season the Chicken ➡️ In a bowl, toss chicken strips with olive oil, garlic powder, paprika, salt, and pepper until fully coated.

  2. Grill to Perfection ➡️ Heat a grill pan or skillet over medium-high heat. Cook chicken for 4 minutes undisturbed to get those golden char marks, then flip and cook for another 4–5 minutes. 🍗

  3. Steam the Broccoli ➡️ Steam florets for 4–5 minutes until vibrant green and fork-tender. 🥦

  4. Whisk the Sauce ➡️ Combine yogurt, mustard, lemon juice, and minced garlic. Add water a teaspoon at a time until it reaches a smooth “drizzling” texture.

  5. Assemble the Bowl ➡️ Scoop rice into two bowls, add the broccoli to the sides, and place the grilled chicken in the center. 🥣

  6. The Final Touch ➡️ Drizzle that creamy garlic sauce over the top. Garnish with fresh parsley or red pepper flakes for a little kick! 🔥


❓ Common Questions & Answers

Q: Can I use different vegetables? A: Absolutely! ➡️ Asparagus, green beans, or sliced bell peppers work beautifully if you want to switch things up.

Q: How do I store leftovers? A: Store the chicken, rice, and broccoli in an airtight container for up to 3 days. ➡️ Pro-Tip: Keep the sauce in a separate small jar and add it after reheating to keep it creamy!

Q: Is there a substitute for Greek yogurt? A: You can use sour cream or a dairy-free plain yogurt alternative for a similar tangy profile. 🥣

Q: What if I don’t have a grill pan? A: No worries! ➡️ A regular non-stick skillet works perfectly; you’ll still get a delicious sear.


✨ Success Tips

  • Don’t Overcrowd: Give the chicken space in the pan so it sears rather than steams. 💨

  • Bright Broccoli: Rinse steamed broccoli under cold water briefly to stop the cooking and keep it bright green. 🥦

  • Flavor Boost: Grate some lemon zest into the sauce for an extra punch of freshness! 🍋

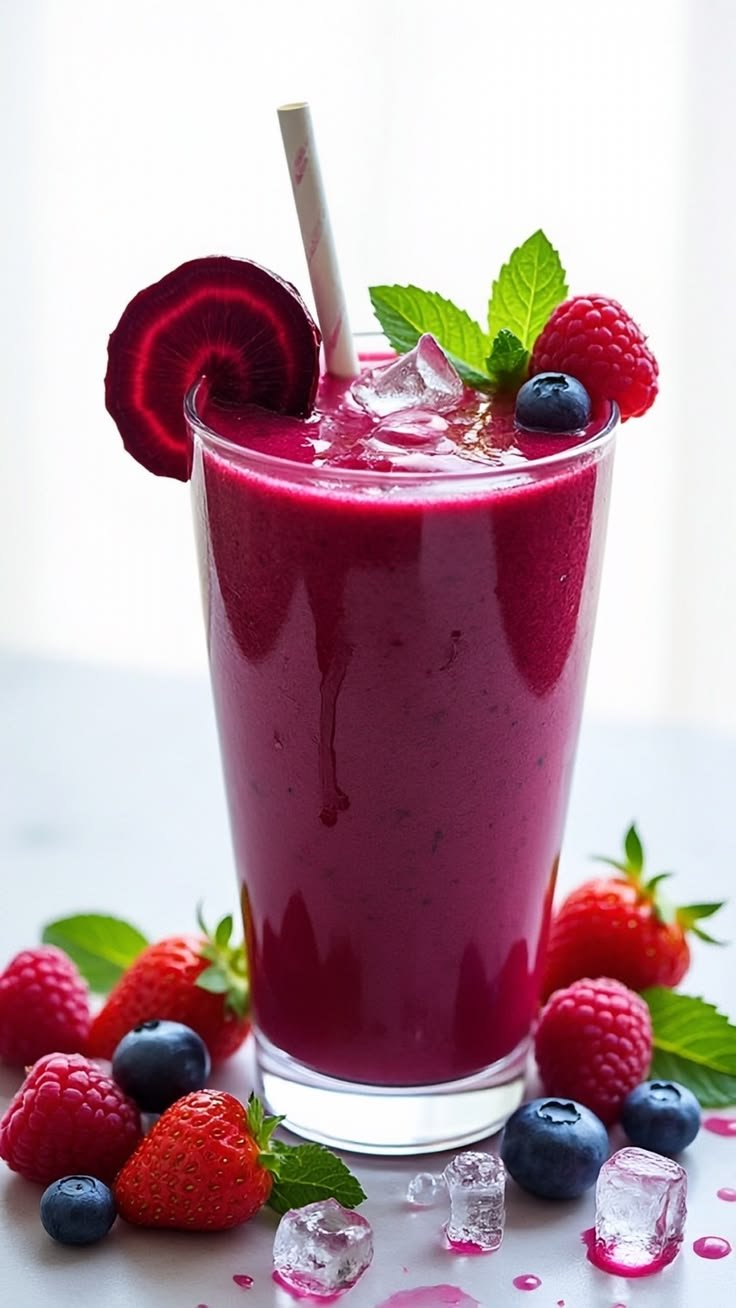
Berry Circulation Smoothie

Berry Circulation Smoothie

🛒 Ingredients

  • 1 cup Blueberries (fresh or frozen)

  • 1 Medium beetroot (peeled and chopped)

  • 1 Ripe banana

  • 1 cup Water or coconut water 🥥

  • 1 tbsp Honey (or maple syrup)

  • 1 tsp Chia seeds

  • Handful Ice cubes 🧊


👩‍🍳 Step-by-Step Recipe

  1. Prep the Produce ➡️ Wash the blueberries and beetroot thoroughly under cold water.

  2. Chop for Success ➡️ Peel the beetroot and dice it into small, uniform cubes. ⚠️ Tip: Small pieces ensure a perfectly smooth texture without “crunchy” surprises!

  3. Load the Blender ➡️ Place the blueberries, beetroot, banana, honey, chia seeds, and ice into your blender canister.

  4. Add Liquid ➡️ Pour in your water or coconut water. 💧

  5. The Big Blend ➡️ Start on a low speed and transition to high. Blend for 1–2 minutes until the color is a deep, vibrant magenta and the texture is silky.

  6. Consistency Check ➡️ If the smoothie is too thick to sip, add an extra splash of liquid and pulse for 10 seconds.

  7. Serve & Sip ➡️ Pour into a chilled glass. 🥂 Serve immediately to enjoy the peak flavor and texture!


❓ Q&A: Tips & Substitutions

Q: Can I make it without banana? A: Yes! ➡️ If you want to skip the banana, try adding 1/2 cup of Greek yogurt or 1/4 of an avocado to maintain that signature creamy texture. 🥑

Q: Can I store it for later? A: It’s best enjoyed fresh, but you can keep it in an airtight jar in the fridge for up to 24 hours. ➡️ Give it a quick shake before drinking as the chia seeds may thicken the mixture over time.

Q: What does beetroot do in the smoothie? A: Beetroot provides that incredible “vibe” and earthy depth. ➡️ It is often used in “circulation” smoothies because it contains natural nitrates that support blood flow!

Q: My blender is struggling with the raw beet. What should I do? A: You can lightly steam the beetroot chunks first and let them cool, or use a splash more liquid to help the blades catch the ingredients. 🌪️

Classic Homemade Tiramisu Recipe

☕ Classic Homemade Tiramisu Recipe

🛒 Ingredients

  • 500g Mascarpone cheese (cold)

  • 4 Large egg yolks (room temperature)

  • 100g Granulated sugar

  • 300ml Heavy whipping cream (cold)

  • 1 pack Savoiardi (Ladyfingers)

  • 300ml Strong espresso or coffee (cooled)

  • 2 tbsp Unsweetened cocoa powder (for dusting)

  • Optional: 1 tsp Vanilla extract or a splash of coffee liqueur


👩‍🍳 Instructions

  1. Prep the Coffee Base ➡️ Brew your espresso or strong coffee and let it cool completely in a shallow bowl.

  2. Cream the Yolks ➡️ In a large bowl, whisk the egg yolks and sugar together until the mixture is pale, thick, and doubled in volume.

  3. Incorporate Mascarpone ➡️ Add the mascarpone cheese to the yolk mixture. Fold it in gently or whisk on low speed until smooth. Don’t overmix, or it might become grainy!

  4. Whip the Cream ➡️ In a separate bowl, whip the heavy cream (and vanilla, if using) until stiff peaks form.

  5. The Final Fold ➡️ Gently fold the whipped cream into the mascarpone mixture. This keeps the cream light and airy. ☁️

  6. The Dip ➡️ Quickly dip each ladyfinger into the cooled coffee. ⚠️ Pro Tip: Only dip for 1–2 seconds per side. If they soak too long, they will turn into mush!

  7. Layering Part 1 ➡️ Arrange a layer of dipped ladyfingers in the bottom of a rectangular dish. Spread half of the mascarpone cream over the top.

  8. Layering Part 2 ➡️ Repeat with another layer of dipped ladyfingers, followed by the remaining cream. Smooth out the top with a spatula. 🍰

  9. The Chill ➡️ Cover and refrigerate for at least 6 hours (overnight is even better) to let the flavors meld and the structure set.

  10. The Finish ➡️ Just before serving, dust a generous layer of cocoa powder over the top. 🍫


❓ Q&A: Troubleshooting & Tips

Q: Why is my Tiramisu runny? A: This usually happens if the ladyfingers were soaked too long or if the cream wasn’t whipped to stiff peaks. Make sure your mascarpone and cream are cold when you start! ❄️

Q: Can I make this without eggs? A: Yes! You can skip the yolks and sugar mixture. Just whip the mascarpone with a bit of powdered sugar and fold it into the whipped cream. It will be slightly less “custard-like” but still delicious.

Q: How long does it stay fresh? A: It’s best eaten within 2 to 3 days. Keep it tightly covered in the fridge so it doesn’t absorb other food scents. 👃

Q: Can I freeze Tiramisu? A: You can! Freeze it without the cocoa powder dusting. Thaw it in the fridge overnight before serving and dust with cocoa right at the end. 🧊


Enjoy your dessert! It’s definitely worth the wait. 🥂✨

Soft Homemade Seed Bread Rolls

Soft Homemade Seed Bread Rolls 🍞✨

Ingredients

  • 4 cups all-purpose flour
  • 2¼ teaspoons active dry yeast
  • 1 cup warm milk
  • ¼ cup warm water
  • 2 tablespoons sugar
  • 1 teaspoon salt
  • ¼ cup melted butter or oil
  • 1 egg
  • 2 tablespoons poppy seeds or chia seeds

Egg Wash

  • 1 egg yolk
  • 1 tablespoon milk

Instructions

  1. In a bowl, mix warm milk, warm water, sugar, and yeast. Let sit for 5–10 minutes until foamy.
  2. Add egg, melted butter, and salt. Mix well.
  3. Gradually add flour and knead until soft and smooth, about 8–10 minutes.
  4. Mix in the seeds.
  5. Place dough in a greased bowl, cover, and let rise for 1 hour or until doubled in size.
  6. Divide dough into equal balls and place on a baking tray.
  7. Cover and let rise again for 30 minutes.
  8. Brush with egg wash.
  9. Bake at 375°F (190°C) for 18–22 minutes until golden brown.
  10. Cool slightly and serve warm with butter or jam.

Tips

  • Add sesame seeds for extra flavor.
  • These rolls stay soft for up to 3 days in an airtight container.
  • Perfect for sandwiches or breakfast buns.

Zucchini Pancakes with Cheese Recipe

Ingredients

  • 2 medium zucchini

  • 3 eggs

  • 1 cup shredded mozzarella cheese

  • 1/2 cup grated cheddar cheese

  • 1 cup all-purpose flour

  • 2 tablespoons chopped fresh parsley or green onions

  • 1/2 teaspoon garlic powder

  • 1/2 teaspoon black pepper

  • 1/2 teaspoon salt

  • 2 tablespoons olive oil or butter for cooking

Instructions

  1. Wash the zucchini well and grate them using a box grater. Place the grated zucchini in a clean towel and gently squeeze out extra moisture. This helps the pancakes become golden and slightly crisp.

  2. Add the zucchini to a large mixing bowl. Crack in the eggs and stir well until combined.

  3. Add mozzarella cheese, cheddar cheese, parsley, garlic powder, salt, and black pepper. Mix everything together.

  4. Slowly add the flour and stir until a thick batter forms. If the mixture feels too wet, add 1–2 extra tablespoons of flour.

  5. Heat a non-stick pan over medium heat and add a little olive oil or butter.

  6. Scoop about 1/4 cup of batter into the pan and flatten gently with the back of a spoon to form round pancakes.

  7. Cook for 3–4 minutes on each side until golden brown and the cheese melts beautifully inside.

  8. Transfer the pancakes to a plate and continue cooking the remaining batter.

Serving Ideas

Serve warm with:

  • Sour cream

  • Garlic yogurt dip

  • Fresh salad

  • Tomato sauce

These zucchini pancakes are soft inside, cheesy, flavorful, and perfect for breakfast, lunch, or a light dinner.

Blueberry Puff Pastry Recipe 🫐✨

Blueberry Puff Pastry Recipe 🫐✨

These golden blueberry puff pastries are flaky, buttery, and filled with juicy blueberries. They are perfect for breakfast, dessert, or a sweet afternoon snack.

Ingredients

  • 1 sheet puff pastry, thawed

  • 1 cup fresh blueberries

  • 2 tablespoons sugar

  • 1 tablespoon cornstarch

  • 1 teaspoon lemon juice

  • 1 teaspoon vanilla extract

  • 1 egg

  • 1 tablespoon milk

  • Powdered sugar for topping (optional)

Instructions

  1. Preheat your oven to 400°F (200°C). Line a baking tray with parchment paper.

  2. In a small bowl, combine the blueberries, sugar, cornstarch, lemon juice, and vanilla extract. Mix gently until the berries are coated.

  3. Lightly flour your surface and unfold the puff pastry sheet. Cut it into 4 equal squares.

  4. Spoon the blueberry filling into the center of each pastry square, leaving space around the edges.

  5. Fold the corners slightly toward the center, leaving the middle open so the blueberries can be seen.

  6. In another small bowl, whisk together the egg and milk to make an egg wash. Brush it over the pastry edges for a shiny golden finish.

  7. Bake for 18–22 minutes or until the pastries are puffed and beautifully golden brown.

  8. Remove from the oven and allow them to cool for a few minutes.

  9. Sprinkle with powdered sugar if desired and serve warm.

Tips

  • Fresh blueberries work best, but frozen blueberries can also be used.

  • Add a little cream cheese beneath the berries for extra richness.

  • Serve with tea or coffee for a cozy treat.

Enjoy these delicious homemade blueberry puff pastries with family and friends!

Mini Deep Dish Pizza Cups 🍕🧀

Mini Deep Dish Pizza Cups 🍕🧀

Ingredients

For the Crust

  • 1 can refrigerated biscuit dough or pizza dough
  • 1 tablespoon olive oil

Pizza Filling

  • 1 cup pizza sauce
  • 2 cups shredded mozzarella cheese
  • ½ cup cooked ground beef or sausage
  • 12 pepperoni slices
  • ¼ cup sliced black olives
  • ¼ cup diced green bell pepper
  • ¼ cup diced yellow bell pepper
  • 1 teaspoon Italian seasoning

Instructions

  1. Preheat oven to 375°F (190°C).
  2. Grease 4–6 foil cups or a muffin tin with olive oil.
  3. Flatten dough pieces and press them into the cups to form mini crusts.
  4. Add 1–2 tablespoons pizza sauce into each cup.
  5. Sprinkle mozzarella cheese over the sauce.
  6. Top with cooked beef or sausage, pepperoni, olives, and peppers.
  7. Add a little more cheese and sprinkle Italian seasoning on top.
  8. Bake for 15–18 minutes or until crust is golden and cheese is bubbly.
  9. Let cool for 5 minutes before serving.

Tips

  • Add mushrooms, onions, or jalapeños for extra flavor.
  • Use turkey pepperoni for a lighter version.
  • Serve with garlic sauce or ranch dip.

Frozen Yogurt Blueberry Bites

Frozen Yogurt Blueberry Bites 🫐❄️

Ingredients

  • 2 cups fresh blueberries
  • 1 cup vanilla Greek yogurt
  • 1 cup white chocolate chips
  • 1 teaspoon coconut oil

Instructions

  1. Wash and dry the blueberries completely.
  2. In a bowl, mix blueberries with Greek yogurt until evenly coated.
  3. Place small clusters on a parchment-lined tray.
  4. Freeze for 1–2 hours until firm.
  5. Melt white chocolate chips with coconut oil until smooth.
  6. Dip each frozen blueberry cluster into melted chocolate.
  7. Place back on the tray and freeze again for 20–30 minutes.
  8. Serve frozen and enjoy!

Tips

  • Store in a freezer-safe bag for up to 2 weeks.
  • Add crushed nuts or coconut flakes for extra crunch.
  • Use dark chocolate for a healthier twist.

Savory Cottage Cheese Breakfast Muffins

Savory Cottage Cheese Breakfast Muffins

Ingredients

  • 1 cup Cottage cheese (full fat or low fat)

  • 4 Large eggs

  • 1 ½ cups Chopped broccoli florets (finely diced)

  • 1 cup Shredded cheddar cheese

  • ½ cup All-purpose flour (or almond flour for a gluten-free option)

  • 1 tsp Baking powder

  • ¼ cup Sliced green onions or fresh chives

  • ½ tsp Garlic powder

  • ¼ tsp Salt

  • ¼ tsp Black pepper


Instructions

  1. Prep: Preheat your oven to 375°F (190°C). Grease a standard 12-cup muffin tin thoroughly with non-stick spray or use silicone liners to prevent sticking.

  2. Mix Wet Ingredients: In a large mixing bowl, whisk the eggs together. Stir in the cottage cheese until well combined.

  3. Combine Dry Ingredients: In a separate small bowl, whisk together the flour, baking powder, garlic powder, salt, and pepper.

  4. Fold it Together: Add the dry ingredients to the egg mixture and stir until just combined. Fold in the finely chopped broccoli, shredded cheddar cheese, and green onions.

  5. Fill the Tin: Divide the batter evenly among the 12 muffin cups.

  6. Bake: Bake for 20–25 minutes, or until the tops are golden brown and a toothpick inserted into the center comes out clean.

  7. Cool: Let the muffins cool in the tin for at least 5–10 minutes before removing. This helps them set and prevents them from falling apart.

Layered Potato Flatbread with Cheese and Herbs

Layered Potato Flatbread with Cheese and Herbs

Ingredients

  • 1 cup mashed potatoes (pre-cooked or leftover)

  • 1 ½ cups all-purpose flour (plus extra for dusting)

  • ½ cup shredded cheese (Mozzarella or Cheddar work best)

  • 2 tablespoons fresh herbs, finely chopped (parsley, chives, or cilantro)

  • ¼ cup warm water (adjust as needed for dough consistency)

  • 1 tablespoon olive oil or melted butter

  • ½ teaspoon salt

  • ½ teaspoon garlic powder (optional)

  • Butter or oil for pan-frying


Instructions

  1. Prepare the Dough: In a large bowl, combine the mashed potatoes, flour, salt, and garlic powder. Mix until the texture becomes crumbly.

  2. Knead: Gradually add the warm water and olive oil. Knead the mixture for about 2–3 minutes until a smooth, soft dough forms.

  3. Incorporate Fillings: Flatten the dough slightly and sprinkle the shredded cheese and chopped herbs over the surface. Fold the dough over itself and knead gently just until the cheese and herbs are evenly distributed.

  4. Divide and Roll: Divide the dough into 4 equal portions. On a lightly floured surface, roll each portion into a thin circle or square, approximately ⅛-inch thick.

  5. Create Layers: lightly brush the top of the rolled dough with oil, fold it into thirds (like a letter), and then roll it out thin again.

  6. Cook: Heat a non-stick skillet over medium heat and lightly grease with butter or oil.

  7. Sear: Place a flatbread in the skillet and cook for 2 minutes on each side, or until golden brown spots appear and the cheese inside is melted.

  8. Serve: Stack the hot flatbreads on a plate and serve immediately while the edges are crisp and the center is tender.

Boat Dip (Rotel Ranch Dip)

Boat Dip (Rotel Ranch Dip)

Boat Dip, also known as Rotel Ranch Dip, is a creamy, cheesy, flavor-packed appetizer that comes together in minutes with no cooking required. Made with Rotel tomatoes, ranch seasoning, sour cream, and cheese, this irresistible dip is perfect for parties, barbecues, game days, lake trips, and casual gatherings. Its smooth texture and zesty flavor pair perfectly with tortilla chips, crackers, or fresh vegetables. The nickname “Boat Dip” comes from how portable and easy it is to serve anywhere — especially outdoors.

Ingredients

  • 1 can (10 oz) Rotel diced tomatoes with green chilies, drained
  • 1 packet ranch seasoning mix
  • 1 cup sour cream
  • 8 oz cream cheese, softened
  • 1½ cups shredded cheddar cheese
  • 1/2 cup mayonnaise
  • 2 green onions, sliced
  • 1 tablespoon chopped fresh cilantro or parsley (optional)
  • Juice of 1/2 lime (optional for extra freshness)

Instructions

  1. In a large mixing bowl, combine softened cream cheese, sour cream, mayonnaise, and ranch seasoning mix. Stir until smooth and creamy.
  2. Fold in drained Rotel tomatoes, shredded cheddar cheese, green onions, and cilantro if using.
  3. Add lime juice for a brighter flavor if desired.
  4. Cover and refrigerate for at least 30 minutes to allow the flavors to blend.
  5. Serve chilled with tortilla chips, crackers, pretzels, or fresh vegetables.

Recipe Notes

  • Draining the Rotel well prevents the dip from becoming watery.
  • Softened cream cheese mixes more smoothly and creates a creamy texture.
  • Use spicy Rotel for extra heat.

Helpful Tips

  • Prepare the dip several hours ahead for even better flavor.
  • Add cooked crumbled bacon for a smoky twist.
  • Stir in diced jalapeños if you like extra spice.
  • Keep chilled during parties for the best texture and freshness.

Servings

Serves 8–10 people as an appetizer.

Nutritional Information (Per Serving Approx.)

  • Calories: 220
  • Protein: 5g
  • Carbohydrates: 4g
  • Fat: 20g
  • Fiber: 1g
  • Calcium: 10% DV

Health Benefits

While this dip is an indulgent appetizer, it does provide calcium and protein from the dairy ingredients. Rotel tomatoes contribute vitamin C and antioxidants like lycopene. For a lighter version, use Greek yogurt instead of sour cream or reduced-fat cream cheese and cheddar.

Q&A

Can I make Boat Dip ahead of time?

Yes. It actually tastes better after chilling for a few hours because the flavors blend together.

How long does it last in the refrigerator?

Store in an airtight container for up to 3–4 days.

Can I make it spicy?

Absolutely. Use hot Rotel, add jalapeños, or mix in hot sauce.

What can I serve with this dip?

Tortilla chips, crackers, pretzels, celery sticks, cucumber slices, or bell pepper strips all work well.

Can I make it lighter?

Yes. Substitute Greek yogurt for sour cream and use reduced-fat cheese and cream cheese.

Cinnamon Apple Cottage Cheese Bake

Cinnamon Apple Cottage Cheese Bake

Ingredients

  • 1 cup Low-fat or full-fat cottage cheese

  • 1 large Egg

  • 1 medium Apple (Honeycrisp or Granny Smith work best), peeled and diced

  • 1 tsp Ground cinnamon (plus extra for dusting)

  • 1 tbsp Maple syrup or honey (optional, for sweetness)

  • 1/2 tsp Vanilla extract

  • A pinch of Salt


Instructions

  1. Prep the Oven: Preheat your oven to 350°F (175°C). Lightly grease a small oven-safe ramekin or baking dish

  2. Combine the Base: In a small mixing bowl, whisk together the cottage cheese, egg, vanilla extract, and sweetener (if using) until well combined.

  3. Season the Apples: In a separate bowl, toss the diced apples with the 1 teaspoon of cinnamon until they are evenly coated.

  4. Assemble: Fold about half of the cinnamon apples into the cottage cheese mixture. Pour the mixture into your prepared baking dish.

  5. Top It Off: Arrange the remaining diced apples on top of the mixture the apples should sit prominently on the surface. Finish with an extra dusting of cinnamon.

  6. Bake: Place in the oven and bake for 25–30 minutes, or until the center is set and the edges are slightly golden.

  7. Serve: Let it cool for a few minutes before eating. The texture will firm up slightly as it cools.

High Protein Banana Pudding,

High Protein Banana Pudding


Ingredients

  • 1 cup Non-fat Greek yogurt (plain or vanilla)

  • 1 scoop Vanilla protein powder (whey or casein works best for thickness)

  • 1/2 package (approx. 14g) Sugar-free instant banana or vanilla pudding mix

  • 1/4 cup Unsweetened almond milk (add more for a thinner consistency)

  • 1 small Banana, sliced

  • 8-10 Low-fat vanilla wafers

  • Optional: Fat-free whipped topping for garnish


Instructions

  1. Mix the Base: In a medium bowl, whisk together the Greek yogurt, protein powder, and sugar-free pudding mix until smooth.

  2. Adjust Consistency: Slowly stir in the almond milk. Continue stirring until the mixture reaches a thick, pudding-like consistency. Let it sit for 2-3 minutes to allow the pudding mix to set.

  3. Layer the Pudding: In a glass or jar  create layers starting with a few vanilla wafers at the bottom, followed by a layer of sliced bananas, and then a generous spoonful of the protein pudding.

  4. Repeat: Continue layering until the container is full or ingredients are used up.

  5. Chill: For the best texture, refrigerate for at least 30 minutes. This allows the wafers to soften slightly into the pudding.

  6. Garnish: Top with a dollop of whipped topping, an extra banana slice, and one whole wafer before serving.

Chicken and Corn Soup

creamy Chicken and Corn Soup


Ingredients

The Base

  • 6 cups Chicken broth (low sodium preferred)

  • 1 can (15 oz) Cream-style corn

  • 1 cup Whole kernel corn (canned, frozen, or fresh)

  • 2 cups Cooked chicken breast, shredded

  • 1 tsp Fresh ginger, minced

  • 1 tbsp Soy sauce

  • 1 tsp Sesame oil

The Thickener & Finish

  • 2 tbsp Cornstarch mixed with 3 tbsp water (slurry)

  • 2 large Eggs, lightly beaten

  • Salt and white pepper to taste

Garnish

  • 2-3 Scallions (green onions), thinly sliced


Instructions

  1. Simmer the Base: In a large pot, combine the chicken broth, cream-style corn, whole kernel corn, minced ginger, and soy sauce. Bring the mixture to a gentle boil over medium-high heat.

  2. Add Chicken: Stir in the shredded chicken and let it simmer for about 5 minutes to allow the flavors to meld together.

  3. Thicken the Soup: Give your cornstarch slurry a quick stir and slowly pour it into the boiling soup while stirring constantly. Continue to cook for 1-2 minutes until the soup has thickened slightly.

  4. The Egg Ribbon: Turn the heat down to low. While stirring the soup in a slow, circular motion, gently drizzle in the beaten eggs. This creates those beautiful, wispy “ribbons” seen in the video.

  5. Final Seasoning: Stir in the sesame oil and season with salt and white pepper to your liking.

  6. Serve: Ladle the soup into bowls and top generously with the sliced scallions for that fresh, vibrant crunch.

Sweet & Spicy Pickle Slaw

🥗 Sweet & Spicy Pickle Slaw

🛒 Ingredients

The Slaw Base:

  • 4 cups Shredded cabbage (green or a mix of red and green) 🥬

  • 1 cup Carrots (shredded) 🥕

  • 1 cup Dill pickles (chopped or sliced into rounds) 🥒

  • ½ Red onion (thinly sliced) 🧅

  • ¼ cup Fresh dill (chopped) 🌿

The Creamy Dressing:

  • ½ cup Greek yogurt or light mayonnaise 🥣

  • 2 tbsp Pickle juice (right from the jar!) 🍶

  • 1 tbsp Honey or maple syrup 🍯

  • 1 tsp Sriracha or your favorite hot sauce 🌶️

  • ½ tsp Garlic powder

  • Salt and black pepper to taste


👩‍🍳 Step-by-Step Instructions

  1. Prep the Veggies ➡️ If you aren’t using a pre-shredded mix, thinly slice your cabbage and carrots. Place them in a large mixing bowl. 🔪🥬

  2. Add the Pickles ➡️ Chop your dill pickles into bite-sized pieces. If you like a more rustic look, use the round slices as shown in the jar! 🥒

  3. Whisk the Dressing ➡️ In a separate small bowl, combine the yogurt (or mayo), pickle juice, sweetener, sriracha, and spices. Whisk until smooth and creamy. 🥣➡️🌶️

  4. Toss and Coat ➡️ Pour the dressing over the cabbage mixture. Use large spoons to toss everything together until every shred is perfectly coated. 🥗✨

  5. The Chill Factor ➡️ Transfer the slaw to a glass jar or airtight container. Refrigerate for at least 30 minutes before serving. This allows the flavors to meld and the cabbage to soften just slightly. ❄️🕒

  6. Final Garnish ➡️ Before serving, top with a fresh sprig of dill and an extra drizzle of hot sauce for that beautiful “spicy” look! 🌿🔥


❓ Common Questions & Answers

Q: Can I make this dairy-free?A: Definitely! ➡️ Just use a vegan mayonnaise or a plant-based unsweetened yogurt for the base of the dressing. 🥣🌱

Q: How long will this stay crunchy?A: This slaw is best eaten within 24–48 hours. ➡️ The longer it sits, the more moisture the cabbage releases, so it will become softer over time. 🥗💨

Q: What does this pair well with?A: It is the perfect topping for burgers, grilled sandwiches, or served alongside roasted chicken. 🍔🍗

Q: Can I use sweet pickles instead of dill?A: You can, but it will change the flavor significantly! ➡️ If you use sweet pickles, you might want to reduce the honey in the dressing so it doesn’t become overly sweet. 🍯🥒

Enjoy this refreshing and zesty twist on a classic! 🥒🌶️🥗✨

2-Ingredient Pineapple Soft Serve

🍦 2-Ingredient Pineapple Soft Serve (Creamy & Refreshing) 🍍✨

A quick, healthy frozen treat that tastes like tropical ice cream — made in just minutes with no ice cream machine needed! 🌴💛


🛒 Ingredients

  • 2 cups frozen pineapple chunks 🧊🍍
  • ½ cup unsweetened coconut milk 🥥

👉 Optional:

  • 1 tsp honey or maple syrup 🍯 (if extra sweetness is needed)
  • Tiny pinch of salt (enhances sweetness)

👩‍🍳 Step-by-Step Instructions

1️⃣ Freeze the Pineapple 🍍

If using fresh pineapple:
Cut into small chunks and freeze for at least 4–6 hours until solid.
(Pre-frozen store-bought pineapple works perfectly too!)


2️⃣ Add to Blender 🌪️

Place frozen pineapple and coconut milk into a high-speed blender or food processor.


3️⃣ Blend Slowly First 🥄

Start blending on low speed.
Stop occasionally to scrape down the sides so everything mixes evenly.


4️⃣ Make It Creamy ✨

Keep blending until the mixture becomes:

  • Smooth
  • Thick
  • Soft-serve texture 🍦

👉 If it’s too thick, add coconut milk 1 tablespoon at a time.


5️⃣ Adjust Taste 🍯

Taste and adjust:

  • Add a little honey if needed
  • Add a pinch of salt to enhance flavor

6️⃣ Serve Immediately 🍦✨

Scoop into bowls or glasses.
For a beautiful swirl look, pipe it using a star nozzle piping bag 🌀


❓ Q & A

Q: Can I use another milk instead of coconut milk?

➡️ Yes! Almond or oat milk works, but coconut milk gives the creamiest texture.

Q: Why is my soft serve not blending?

➡️ Let the pineapple sit for 3–5 minutes or add a splash more liquid.

Q: Can I store it?

➡️ It’s best fresh, but you can freeze it and re-blend before serving.


🌟 Pro Tip

Add a tiny pinch of salt or a splash of lime juice 🍋 — it makes the pineapple taste even more vibrant and tropical!


Enjoy your refreshing homemade pineapple soft serve! 🍍🍦💛

Roasted Butternut Squash & Cranberry Medley

Roasted Butternut Squash & Cranberry Medley

🛒 Ingredients

The Roast:

  • 1 large Butternut squash (peeled and cubed into 1-inch pieces) ➡️ Look for a matte skin for the best ripeness!

  • 1 ½ cups Fresh or frozen cranberries 🍒

  • 2 tbsp Olive oil 🫒

  • 1 tbsp Maple syrup or honey 🍯

  • 1 tsp Dried thyme or rosemary (plus a fresh sprig for garnish) 🌿

  • Salt and black pepper to taste

The Toppings:

  • ½ cup Feta cheese (crumbled) 🧀

  • ½ cup Walnuts or pecans (toasted) 🥜

  • 2 tbsp Fresh parsley (chopped) 🌿


👩‍🍳 Step-by-Step Instructions

  1. Heat it Up ➡️ Preheat your oven to 400°F (200°C). Line a large rimmed baking sheet with parchment paper. 🌡️

  2. Toss and Season ➡️ In a large bowl, combine the butternut squash cubes, olive oil, maple syrup, dried herbs, salt, and pepper. Toss until every piece is glistening. 🥣✨

  3. The First Roast ➡️ Spread the squash in a single layer on the baking sheet. Roast for 20 minutes. 🎃🔥

  4. Add the Berries ➡️ Remove the tray and scatter the cranberries among the squash. Toss gently. Roast for another 10–15 minutes until the squash is tender and the cranberries have softened or burst. 🍒➡️⏲️

  5. Toast the Nuts ➡️ While the squash finishes, lightly toast your walnuts in a dry pan over medium heat for 3–5 minutes until fragrant. 🥜🍳

  6. Assemble ➡️ Transfer the warm squash and cranberries to a serving platter. Sprinkle generously with crumbled feta, toasted walnuts, and fresh parsley. 🧀✨

  7. Final Touch ➡️ Place a fresh rosemary sprig in the center for that beautiful professional look! 🌿📸


❓ Common Questions & Answers

Q: Can I use Sweet Potato instead of Butternut Squash? A: Absolutely! ➡️ Sweet potatoes or even Kabocha squash work perfectly with these exact same flavors.

Q: My cranberries are very tart—how can I balance that? A: You can toss the cranberries in a teaspoon of sugar or extra maple syrup before adding them to the tray. ➡️ This creates a lovely sweet-tart glaze! 🍯🍒

Q: Can I make this dish ahead of time? A: You can roast the squash and berries ahead of time. ➡️ However, wait to add the feta and walnuts until just before serving to keep the cheese fresh and the nuts crunchy. 🧀🥜

Q: Is this dish served hot or cold? A: It is delicious both ways! ➡️ It’s traditionally served warm as a side dish, but it also makes a fantastic cold salad the next day when tossed with some arugula or spinach. 🥗

Enjoy this vibrant and flavorful autumn-inspired dish! 🎃🍂✨

Zucchini Ricotta Roll-Ups

Zucchini Ricotta Roll-Ups

🛒 Ingredients

The Zucchini:

  • 3-4 large Zucchinis (sliced into thin, wide ribbons) ➡️ A mandoline works best for this!

  • 1 tbsp Olive oil 🫒

  • A pinch of salt and black pepper

The Savory Filling:

  • 1 ½ cups Ricotta cheese 🧀

  • ½ cup Parmesan cheese (grated)

  • 1 large Egg (lightly beaten)

  • 1 cup Fresh spinach (finely chopped) 🌿

  • 1 tsp Garlic powder or 2 cloves fresh garlic (minced) 🧄

  • 1 tbsp Fresh basil (chopped)

  • 1 cup Mozzarella cheese (shredded, divided) 🧀

The Base & Topping:

  • 2 cups Marinara sauce 🍅

  • Fresh basil leaves for garnish 🌿


👩‍🍳 Step-by-Step Instructions

  1. Prep the Zucchini ➡️ Slice your zucchinis into thin ribbons. Lay them on paper towels and sprinkle lightly with salt. Let them sit for 10 minutes, then pat dry to remove excess moisture. 🥒💨

  2. Soften the Ribbons ➡️ To make them easy to roll, lightly grill the ribbons for 1–2 minutes per side or roast them in the oven at 400°F (200°C) for 5 minutes until pliable.

  3. Mix the Filling ➡️ In a medium bowl, combine the ricotta, Parmesan, half of the mozzarella, egg, spinach, garlic, and herbs. Stir until well combined. 🥣🌿

  4. Sauce the Pan ➡️ Spread about 1 ½ cups of the marinara sauce on the bottom of a 9×13 inch baking dish. 🥘🍅

  5. Roll it Up ➡️ Lay a zucchini ribbon flat. Spread about 1 tablespoon of the cheese mixture along the ribbon, then roll it up tightly. 🥒➡️🌀

  6. Arrange and Bake ➡️ Place the rolls seam-side down in the baking dish. Top with the remaining marinara sauce and the rest of the mozzarella cheese. 🧀

  7. Cook to Perfection ➡️ Bake at 375°F (190°C) for 20–25 minutes until the cheese is bubbly and golden brown. 🌡️🔥

  8. Serve ➡️ Let it rest for 5 minutes, then garnish with fresh basil before serving. 🌿✨


❓ Common Questions & Answers

Q: Can I make this without egg? A: Yes! ➡️ The egg helps bind the cheese, but you can omit it. The filling will just be a bit softer and creamier.

Q: How do I stop it from being watery? A: The secret is the “salt and pat” method in Step 1. ➡️ Zucchini holds a lot of water, so removing it early keeps your sauce thick and rich! 🍅

Q: Can I add meat to this? A: Absolutely. ➡️ You can mix some cooked ground turkey or Italian sausage into the marinara sauce for extra heartiness. 🍖

Q: Is this good for freezing? A: It is best eaten fresh. ➡️ Zucchini can change texture when frozen and thawed, but you can certainly keep leftovers in the fridge for up to 3 days! ❄️

Enjoy this beautiful and flavorful meal! 🥒🇮🇹✨

Healthy Apple Cottage Cheese Biscuits

Healthy Apple Cottage Cheese Biscuits

Ingredients

  • 2 cups All-purpose flour (or white whole wheat flour)

  • 1 tablespoon Baking powder

  • ½ teaspoon Salt

  • ½ teaspoon Ground cinnamon

  • 1 cup Low-fat cottage cheese (small curd)

  • ¼ cup Unsweetened applesauce or melted coconut oil

  • 2 tablespoons Maple syrup or honey

  • 1 medium Apple, peeled and finely diced (Honeycrisp or Fuji work well)

  • 1 teaspoon Vanilla extract

  • 2-3 tablespoons Milk (as needed for dough consistency)


Instructions

  1. Preheat and Prep: Preheat your oven to 400°F (200°C). Line a large baking sheet with parchment paper or a silicone baking mat.

  2. Mix Dry Ingredients: In a large mixing bowl, whisk together the flour, baking powder, salt, and cinnamon until well combined.

  3. Blend Wet Ingredients: In a separate bowl (or food processor for a smoother texture), mix the cottage cheese, applesauce, maple syrup, and vanilla extract.

  4. Combine: Pour the wet mixture into the dry ingredients. Use a spatula to fold the mixture together until a shaggy dough begins to form. Fold in the finely diced apples.

  5. Adjust Consistency: If the dough is too dry, add milk one tablespoon at a time until the dough holds together but is not overly sticky.

  6. Shape the Biscuits: Turn the dough out onto a lightly floured surface. Gently pat it down to about 1-inch thickness. Use a biscuit cutter or the rim of a glass to cut out circles.

  7. Bake: Place the biscuits on the prepared baking sheet, ensuring they are spaced about an inch apart. Bake for 15–18 minutes,

  8. Cool: Let the biscuits rest on the pan for 5 minutes before transferring them to a wire rack. Serve warm.

Healthy Creamy Avocado Ice Cream

Healthy Creamy Avocado Ice Cream 🥑🍦✨

Cool, silky, and naturally creamy — this avocado ice cream is a refreshing dessert packed with healthy fats and tropical flavor! 🌿💚

🛒 Ingredients

The Creamy Base 🥑🥥

  • 2 ripe avocados
  • 1 can (13.5 oz) full-fat coconut milk, chilled overnight
  • ½ cup honey or maple syrup
  • 1 tbsp lime juice
  • 1 tsp vanilla extract

Toppings 🌿

  • 2 tbsp chopped pistachios
  • Honey for drizzling
  • Fresh mint leaves

👩‍🍳 Step-by-Step Instructions

1️⃣ Prepare the Coconut Cream 🥥

Open the chilled coconut milk can carefully.
Scoop out only the thick cream from the top and place it into a blender. Save the liquid for smoothies or drinks.

2️⃣ Add the Main Ingredients 🥑

Add:

  • Avocado flesh
  • Coconut cream
  • Honey or maple syrup
  • Lime juice
  • Vanilla extract

3️⃣ Blend Until Creamy 🌪️

Blend everything on high speed until the mixture becomes completely smooth and fluffy.
The texture should look rich and silky with no avocado chunks remaining.

4️⃣ Churn or Freeze 🍦

If using an ice cream maker:
➡️ Churn for about 15–20 minutes until thick and creamy.

For the no-churn method:
➡️ Pour the mixture into a shallow container and freeze for at least 4 hours.

5️⃣ Keep It Smooth ❄️

During the first 2 hours of freezing, stir the mixture every 45 minutes.
This helps create a softer and creamier texture.

6️⃣ Soften Before Serving 🥄

Let the ice cream sit at room temperature for 5–10 minutes before scooping for the best texture.

7️⃣ Garnish & Enjoy 🌿✨

Top with chopped pistachios, honey drizzle, and fresh mint leaves before serving.


❓Q & A

Q: Does avocado make the ice cream taste savory?

➡️ No! The avocado mainly adds creaminess while the vanilla, honey, and lime create a sweet tropical flavor.

Q: Can I make this dairy-free?

➡️ Yes! This recipe is naturally dairy-free because it uses coconut milk instead of cream.

Q: How do I keep the green color bright?

➡️ Lime juice helps prevent browning and keeps the ice cream vibrant green.

Q: How long can I store it?

➡️ Keep it in the freezer for up to 1 week. Let it soften slightly before scooping.

Enjoy your creamy homemade avocado ice cream! 🥑🍦💚

Creamy Broccoli and Mushroom Casserole

Creamy Broccoli and Mushroom Casserole

Ingredients

  • 1 lb fresh broccoli florets

  • 8 oz sliced mushrooms (button or cremini)

  • 4 large eggs

  • 1 cup heavy cream or half-and-half

  • 1/2 cup grated Parmesan or Gruyère cheese

  • 2 tablespoons butter

  • 1 small onion, finely diced

  • 2 cloves garlic, minced

  • 1 teaspoon dried thyme or oregano

  • Salt and black pepper to taste

  • Fresh parsley, chopped (for garnish)


Instructions

  1. Prep the Vegetables: Preheat your oven to 375°F (190°C). Lightly grease a medium-sized baking dish.

  2. Sauté: In a large skillet over medium heat, melt the butter. Add the diced onions and cook until softened. Stir in the sliced mushrooms and cook until they release their moisture and turn golden brown. Add the garlic and dried herbs, cooking for another minute until fragrant.

  3. Steam Broccoli: Lightly steam the broccoli florets for 3-4 minutes until bright green but still firm. Drain well.

  4. Mix the Custard: In a mixing bowl, whisk together the eggs, cream, half of the cheese, salt, and pepper.

  5. Assemble: Arrange the steamed broccoli and the sautéed mushroom mixture evenly in the prepared baking dish.

  6. Pour and Top: Pour the egg and cream mixture over the vegetables. Sprinkle the remaining cheese over the top.

  7. Bake: Place in the oven and bake for 25-30 minutes, or until the center is set and the top is lightly golden,

  8. Serve: Let the casserole rest for 5 minutes before serving. Garnish with fresh parsley.

Grilled Salmon Avocado Toast

Grilled Salmon Avocado Toast

Ingredients

  • Salmon: 1 fresh salmon fillet

  • Bread: 1 thick slice of multigrain or oat-topped bread

  • Avocado: 1/2 ripe avocado

  • Cheese: Crumbled goat cheese or feta

  • Greens: A handful of fresh arugula

  • Garnish: Fresh chives (chopped), black sesame seeds, and a lemon wedge

  • Seasoning: Salt, black pepper, and olive oil


Instructions

  1. Prepare the Salmon: Brush the salmon fillet with olive oil and season with salt and pepper.

  2. Grill: Place the salmon on a hot grill or pan. Cook until the exterior is slightly charred and the fish flakes easily with a fork, then break into large pieces.

  3. Toast the Bread: Grill or toast the bread slice until golden brown and crisp around the edges.

  4. Mash the Avocado: In a small bowl, lightly mash the avocado with a pinch of salt and a squeeze of lemon.

  5. Assemble: Spread a thick layer of mashed avocado onto the toast.

  6. Layer: Add a layer of fresh arugula over the avocado, followed by the crumbled cheese.

  7. Top: Place the grilled salmon pieces generously on top of the greens and cheese.

  8. Finish: Sprinkle with chopped chives and black sesame seeds.

  9. Serve: Provide a lemon wedge on the side for a final squeeze of citrus.

Red Velvet Coconut Strawberry Cake

🍰 Red Velvet Coconut Strawberry Cake

🛒 Ingredients

For the Cake:

  • 1 box Red Velvet cake mix (plus ingredients listed on the box: usually eggs, oil, and water) ➡️ Or your favorite homemade recipe!

  • 1 tsp Vanilla extract

For the Filling:

  • 1 cup Strawberry jam or preserves 🍓

  • 2 tbsp Water

For the Topping:

  • 1 ½ cups Heavy whipping cream (cold)

  • ¼ cup Powdered sugar

  • 1 tsp Coconut extract

  • ½ cup Shredded sweetened coconut 🥥

  • Fresh strawberries for garnish


👩‍🍳 Step-by-Step Instructions

  1. Bake the Base ➡️ Preheat your oven according to the cake mix instructions. Grease a 9×13 inch baking pan. Mix your red velvet batter, add the vanilla extract, and bake until a toothpick comes out clean.

  2. The “Poke” Stage ➡️ While the cake is still slightly warm, use the handle of a wooden spoon or a large fork to poke holes all over the top of the cake, spaced about an inch apart.

  3. Prepare the Filling ➡️ In a small bowl, microwave the strawberry jam and water for 20–30 seconds until fluid. Stir until smooth. 🥣

  4. Fill the Cake ➡️ Pour the warm strawberry mixture over the cake, ensuring it drips down into the holes. Let the cake cool completely. ❄️

  5. Make the Whipped Cream ➡️ In a large bowl, beat the heavy cream, powdered sugar, and coconut extract until stiff peaks form.

  6. Assemble ➡️ Spread the whipped cream evenly over the cooled cake. Sprinkle the shredded coconut generously over the top. 🥥✨

  7. Final Flourish ➡️ Slice fresh strawberries and place them on each square before serving. Refrigerate for at least 1 hour for the best texture! 🍓🍰


❓ Common Questions & Answers

Q: Can I use cream cheese frosting instead of whipped cream? A: Absolutely! ➡️ Cream cheese frosting is a classic pairing for red velvet. Just fold in a little coconut milk or extract to keep that tropical flavor profile.

Q: How do I store leftovers? A: Because of the fresh fruit and whipped cream, this cake should be kept in the refrigerator in an airtight container for up to 3 days. 🧊

Q: My cake is too soggy—what happened? A: This usually happens if the cake hasn’t cooled enough before adding the topping, or if too much liquid was added to the jam. ➡️ Make sure the cake is room temperature before frosting!

Q: Can I make this ahead of time? A: Yes! ➡️ You can bake and “poke” the cake a day in advance. Add the whipped cream and fresh strawberries right before you plan to serve it to keep them looking fresh.

Enjoy your baking! 🍓🥥✨

Lasagna-Style Grilled Cheese Sandwich.

Lasagna-Style Grilled Cheese Sandwich.

Ingredients

  • Bread: 2 thick slices of sourdough or Italian bread.

  • Cheese: 2 slices of mozzarella and 1 tablespoon of ricotta cheese.

  • Meat Sauce: 3 tablespoons of thick bolognese or marinara sauce mixed with cooked ground beef or sausage.

  • Butter: 1 tablespoon, softened.

  • Seasoning: A pinch of dried oregano and garlic powder.

  • Garnish: Fresh basil leaves.


Instructions

  1. Prepare the Bread: Spread butter on one side of each slice of bread. Sprinkle the buttered side lightly with garlic powder.

  2. Layer the Filling: Place one slice of bread, butter-side down, in a cold skillet. Add one slice of mozzarella, the meat sauce, the ricotta cheese, and the second slice of mozzarella.

  3. Assemble: Place the second slice of bread on top, butter-side up.

  4. Toast: Turn the heat to medium-low. Cook for 3 to 4 minutes per side until the bread is golden brown and the cheese is fully melted.

  5. Serve: Remove from the heat, let it sit for one minute, and slice diagonally.

Garlic Butter Naan Recipe

Garlic Butter Naan Recipe

Ingredients

For the Dough:

  • 2 cups All-purpose flour

  • 1 teaspoon Instant yeast

  • 1 teaspoon Sugar

  • 1/2 teaspoon Salt

  • 1/4 cup Plain Greek yogurt (room temperature)

  • 2 tablespoons Olive oil

  • 1/2 cup Warm water (not boiling)

For the Garlic Butter Topping:

  • 3 tablespoons Salted butter, melted

  • 2 cloves Garlic, finely minced

  • 1 tablespoon Fresh parsley or cilantro, finely chopped


Instructions

  1. Prepare the Yeast: In a small bowl, combine the warm water, sugar, and instant yeast. Let it sit for about 5–10 minutes until it becomes frothy.

  2. Mix the Dough: In a large mixing bowl, whisk together the flour and salt. Create a well in the center and add the yeast mixture, yogurt, and olive oil.

  3. Knead: Stir until a dough forms. Turn the dough onto a lightly floured surface and knead for 3–5 minutes until smooth and slightly elastic.

  4. First Rise: Place the dough in a lightly greased bowl, cover with a damp cloth, and let it rise in a warm spot for about 1 hour, or until it has doubled in size.

  5. Divide and Shape: Punch the dough down and divide it into 6 to 8 equal-sized balls. Use a rolling pin to flatten each ball into an oval or circle about 1/4 inch thick.

  6. Cook the Naan: Heat a cast-iron skillet or non-stick pan over medium-high heat. Place one piece of dough into the dry pan. Cook for 1–2 minutes until bubbles form on the surface and the bottom is charred. Flip and cook for another 1–2 minutes.

  7. Prepare Garlic Butter: While the naan is cooking, whisk together the melted butter, minced garlic, and chopped herbs.

  8. Finish: Immediately brush the hot naan with the garlic butter mixture. Serve warm.