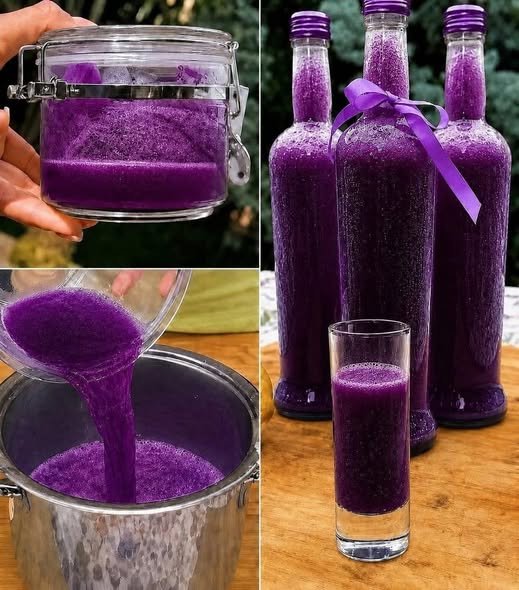
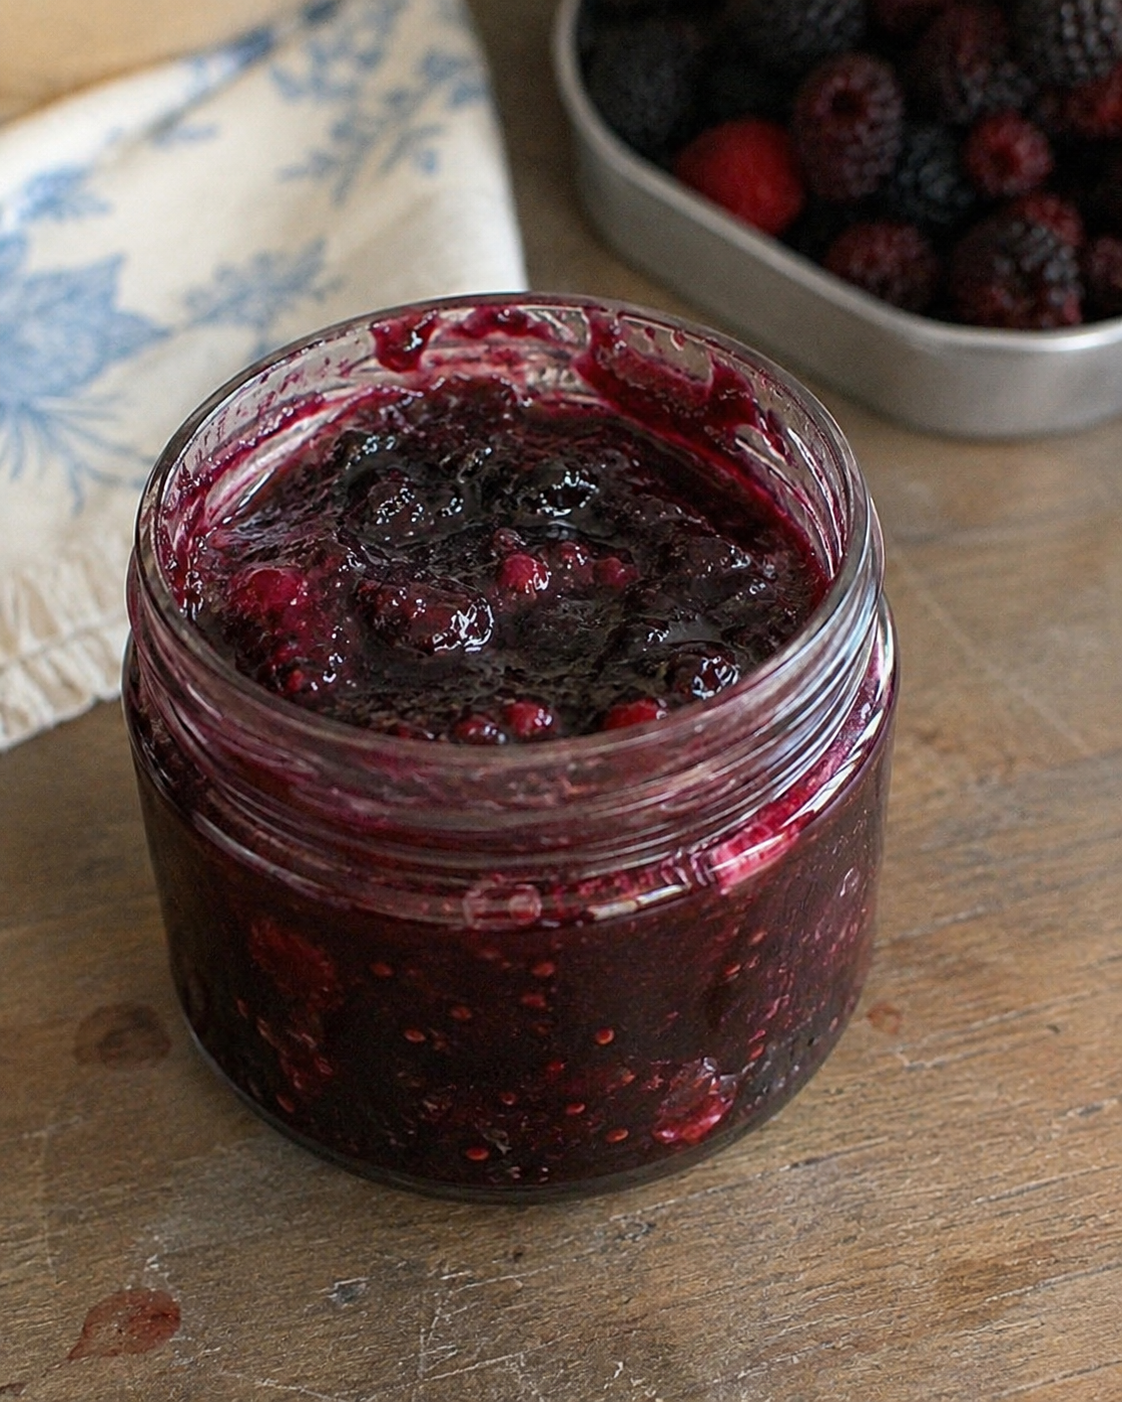
This mixed berry coconut ice cream is a simple, creamy frozen dessert made with just a few ingredients. Blended frozen berries create a naturally vibrant colour and fruity flavour, while coconut milk adds richness without the need for dairy. It’s easy to prepare, requires no flour, and can be enjoyed as a refreshing treat any time of year.
Note: The image claims “zero carbs” and suggests you can eat unlimited amounts. That’s not accurate. Berries, honey, and coconut milk all contain carbohydrates and calories. While this recipe can fit into many healthy eating plans, portion size still matters.
Servings
Makes 4 servings
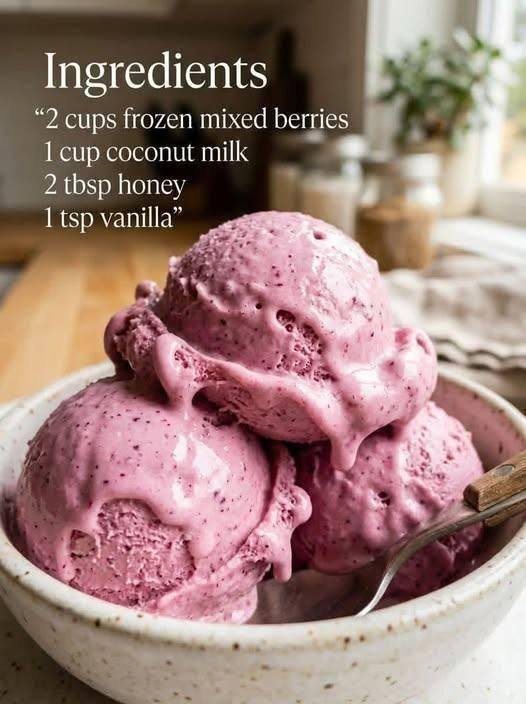
Ingredients
- 2 cups frozen mixed berries
- 1 cup full-fat coconut milk
- 2 tablespoons honey
- 1 teaspoon vanilla extract
Optional Add-Ins
- 1 tablespoon lemon juice
- Fresh berries for garnish
- Unsweetened shredded coconut
Instructions
- Add the frozen mixed berries to a high-speed blender or food processor.
- Pour in the coconut milk, honey, and vanilla extract.
- Blend until smooth and creamy, stopping to scrape down the sides as needed.
- For a soft-serve consistency, serve immediately.
- For scoopable ice cream, transfer the mixture to a freezer-safe container.
- Freeze for 2–3 hours until firm.
- Let it sit at room temperature for 5–10 minutes before scooping.
- Garnish with fresh berries or coconut if desired.
Description
This naturally sweet frozen dessert combines the bright flavour of mixed berries with the creamy richness of coconut milk. The result is a smooth, refreshing treat that’s simple to make and packed with fruity goodness. Whether served as a quick soft-serve or frozen into traditional scoops, it’s a delicious alternative to many store-bought ice creams.
Recipe Notes
- Full-fat coconut milk produces the creamiest texture.
- Frozen berries eliminate the need for ice cubes.
- Adjust honey according to the sweetness of your berries.
- A splash of lemon juice enhances the berry flavour.
Tips for Success
- Use very cold ingredients for the best texture.
- Blend in short pulses to avoid overheating the mixture.
- Freeze in a shallow container for faster chilling.
- Cover the surface with parchment paper to reduce ice crystals.
- If frozen solid, allow the ice cream to soften before serving.
Nutritional Information
Approximate per serving
- Calories: 150
- Protein: 1 g
- Carbohydrates: 18 g
- Fiber: 3 g
- Sugars: 13 g
- Fat: 9 g
- Saturated Fat: 7 g
- Sodium: 10 mg
Health Benefits
- Berries are rich in antioxidants that help protect cells from oxidative stress.
- Coconut milk provides healthy fats that contribute to satiety.
- Berries contain fibre that supports digestive health.
- This recipe contains fewer ingredients than many commercial ice creams.
- Naturally gluten-free and dairy-free.
Frequently Asked Questions
Q: Is this recipe really zero carbs?
A: No. Berries, honey, and coconut milk all contain carbohydrates. This recipe is lower in processed ingredients but not carb-free.
Q: Can I make it without honey?
A: Yes. You can omit the honey or use a sugar-free sweetener if preferred.
Q: Can I use fresh berries?
A: Yes, but you’ll need to freeze them first or add ice for a frozen texture.
Q: How long does it keep?
A: Store in an airtight container in the freezer for up to 2 weeks.
Q: Can I use only one type of berry?
A: Absolutely. Strawberries, blueberries, raspberries, or blackberries all work well.
Q: Is this recipe vegan?
A: To make it vegan, replace honey with maple syrup or another plant-based sweetener.
Variations
- Strawberry Coconut Ice Cream: Use only frozen strawberries.
- Blueberry Vanilla Ice Cream: Add extra vanilla for a richer flavour.
- Berry Lemon Ice Cream: Mix in 1 tablespoon lemon zest.
- Chocolate Berry Ice Cream: Add 1 tablespoon unsweetened cocoa powder.
This mixed berry coconut ice cream is a quick, wholesome dessert that delivers creamy texture and bright berry flavour with minimal effort. Perfect for warm days, healthy snacking, or satisfying a sweet craving without relying on heavily processed ingredients.