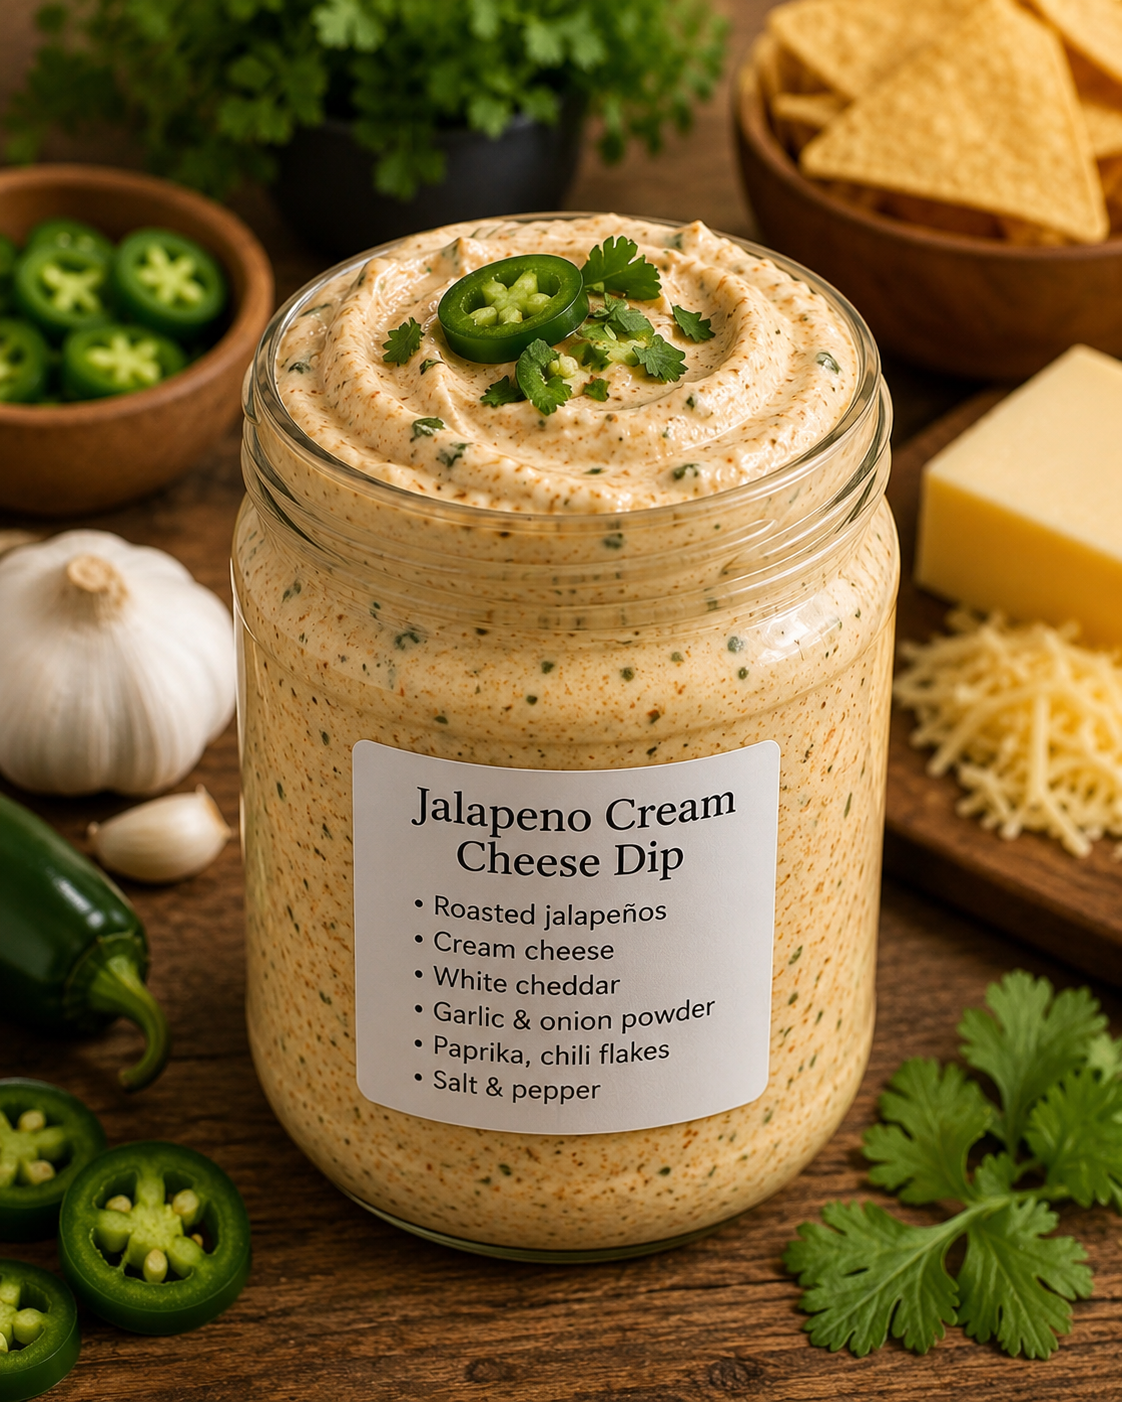
Duchess Potatoes Recipe

Duchess Potatoes Recipe

Ingredients

  • Potatoes: 2 lbs (approx. 1 kg) Yukon Gold or Russet, peeled and cubed.

  • Butter: 4 tbsp unsalted, softened.

  • Egg Yolks: 3 large (these provide the rich color and structure).

  • Heavy Cream: 3 tbsp (optional, for extra silkiness).

  • Seasoning: 1 tsp salt, ½ tsp black pepper, and a pinch of nutmeg.

  • Garnish: Fresh thyme or parsley (as seen in your photo).


Instructions

  1. Boil & Dry: Place potatoes in a pot of salted cold water. Bring to a boil and simmer for 15–20 minutes until tender. Drain well. Pro tip: Return the potatoes to the hot pot for 1 minute to steam off excess moisture—this ensures they hold their shape.

  2. Mash: Use a potato ricer or food mill for a perfectly smooth consistency. Avoid a blender, as it makes them gummy.

  3. Incorporate: Stir in the butter until melted. Once the potatoes have cooled slightly, whisk in the egg yolks, cream, and seasonings. The mixture should be firm but pipeable.

  4. Pipe: Transfer the mixture to a piping bag fitted with a large star tip. Pipe 2-inch mounds onto a parchment-lined baking sheet in a swirling motion to create those beautiful ridges.

  5. Bake: Preheat your oven to 400°F (200°C). Lightly brush the tops with a little extra melted butter if desired. Bake for 15–20 minutes until the edges are golden brown and crispy.

  6. Serve: Top with fresh herbs immediately and serve hot.

Note: If you don’t have a piping bag, you can scoop mounds with a spoon and use a fork to create ridges on the surface; these ridges are essential for catching the heat and turning golden.

Easy Mango Milk Tea

🛒 Ingredients

  • 1 large ripe mango (fresh is best for that vibrant color)

  • 1 cup milk of choice (whole milk, oat, or coconut milk all work great)

  • 1 black tea bag or 1 tsp loose leaf tea (Earl Grey or Ceylon pairs well)

  • 1–2 tbsp sweetener (honey, agave, or simple syrup)

  • Ice cubes

  • Optional: 1/4 cup tapioca pearls (boba)


👩‍🍳 Instructions

1. Prepare the Tea Base

Brew the tea in 1/2 cup of hot water for about 3–5 minutes. You want a strong concentrate. Remove the tea bag and stir in your sweetener while it’s still warm. Let it cool completely in the fridge.

2. Make the Mango Puree

Peel and dice the mango. Set aside a few small cubes for a garnish. Blend the rest of the mango until it is completely smooth. If your mango isn’t very sweet, you can add a tiny drizzle of honey to the blender.

3. Create the “Swirl” Effect

Take a tall glass and spoon about 3–4 tablespoons of the mango puree into the bottom. Use the back of your spoon to “paint” some of the puree up the inner sides of the glass—this creates the beautiful marbled look seen in your photo.

4. Assemble

Fill the glass with ice cubes. Slowly pour in your cold milk, followed by the chilled tea concentrate.

5. Final Touch

Top with the remaining mango cubes and serve with a wide straw. Stir gently before sipping to mix those delicious layers!


Pro Tip: For an extra creamy texture, use a splash of sweetened condensed milk or heavy cream on top!

“Baked Cottage Cheese Eggs: High-Protein Breakfast Perfection”

Servings 4 servings (2 egg cups each)
Total Time 25 minutes
Difficulty Easy
Calories per Serving Approx. 150 Calories
Macros P: 18g / C: 5g / F: 7g / Fiber: 0g

💖 Why This ZeroPoint Breakfast Is Your WW Secret Weapon

Breakfast is the most crucial meal for successful weight loss meals, and starting your day with pure protein is the best strategy for staying satisfied and on track. Most of us reach for scrambled eggs, but these Baked Cottage Cheese Egg Cups offer something even better: massive protein content and incredible satiety for minimal (or ZeroPoint) contribution!

This recipe transforms simple ingredients—eggs and cottage cheese—into a fluffy, savory, muffin-tin masterpiece. The cottage cheese melts and stabilizes the eggs, creating a custard-like texture that is miles better than a plain baked egg. It’s an easy meal prep idea you can make ahead, grab, and go. This is a quick, wholesome, macro-friendly breakfast designed to fuel your busy day while keeping your SmartPoints (or PersonalPoints) budget safely in check.


✨ Look at the Recipe (WW Focus)

  • Sensory Appeal: A light, airy, and fluffy texture with a rich, savory, slightly tangy flavor, thanks to the baked cottage cheese.
  • Flavor Highlight: Savory herbs (chives, parsley) and a touch of black pepper elevate the simple egg and cheese base into a genuinely satisfying dish.
  • Key WW Benefit: Utilizes two ZeroPoint foods (eggs and nonfat cottage cheese) as the base, making it extremely high in protein for maximum fullness and adherence to the Weight Watchers plan.

🛒 Ingredients Needed

For the Baked Egg Cups

  • 1 cup nonfat cottage cheese (ZeroPoint on many plans)
  • 8 large eggs (ZeroPoint on many plans)
  • 2 Tbsp finely chopped fresh chives
  • 1 Tbble chopped fresh parsley
  • $1/4$ tsp garlic powder
  • Salt and freshly ground black pepper to taste
  • Optional: Nonstick cooking spray or silicone liners for the muffin tin

Optional ZeroPoint Add-ins (Add $1/4$ cup total)

  • Diced bell peppers
  • Chopped spinach (squeeze out excess water)
  • Diced mushrooms

🔪 How to Make Our SmartPoints Egg Cups

  1. Prep the Batter: Preheat your oven to 375°F (190°C). Lightly spray a standard 12-cup muffin tin with nonstick spray, or line with silicone baking cups.
  2. Blend the Cottage Cheese: In a medium bowl, use an immersion blender, stand blender, or food processor to blend the nonfat cottage cheese until it is completely smooth and creamy. This prevents a chunky texture in the final product.
  3. Mix the Batter: Pour the blended cottage cheese into a large bowl. Whisk the 8 eggs lightly and add them to the cheese. Add the chives, parsley, garlic powder, salt, and pepper. Gently stir until just combined. You now have a macro-friendly meal batter!
  4. Fold in Fillings: If using optional ZeroPoint vegetables (like spinach or peppers), gently fold them into the mixture. Be careful not to over-mix.
  5. Bake: Pour the mixture evenly into the 8 or 10 prepared muffin cups (filling them about $3/4$ full).
  6. Cook: Bake for 18 to 22 minutes, or until the egg cups are set in the center and lightly golden around the edges. This is an excellent clean eating breakfast.
  7. Cool & Serve: Let the cups cool in the tin for 5 minutes before carefully removing them. They may deflate slightly upon cooling.

🧊 Storage & Serving Suggestions

  • Storing: Once completely cooled, the egg cups can be stored in an airtight container in the refrigerator for up to 4 days. This is the perfect easy meal prep idea.
  • Reheating: Reheat in the microwave for 30–60 seconds, or in a toaster oven for a few minutes until warm.
  • Freezing: Do not freeze. The cottage cheese can become rubbery and separate upon thawing.
  • Serving Pairings (WW-Approved): Serve with a side of fresh fruit (like berries or melon—ZeroPoint) and a slice of whole-wheat toast (points calculated separately) for a complete and filling weight loss meal.

❓ Tips & FAQs

Q: What is the best way to keep these ZeroPoint/low-point?

A: Always use nonfat cottage cheese and whole eggs. Avoid adding cheese (like cheddar or mozzarella), meat, or heavy cream to the recipe, as these will significantly increase the SmartPoints.

Q: How can I spice this recipe up?

A: Add a dash of hot sauce (ZeroPoint) before serving, or fold in a pinch of chili powder or smoked paprika before baking. You can also mix in some finely diced jalapeño for a healthy twist.

Q: My cottage cheese mixture looks chunky before baking. What did I do wrong?

A: If you skip the blending step, the large curds of cottage cheese will remain chunky. The secret to the super-fluffy texture is blending the cottage cheese until it is liquid smooth before mixing in the eggs.

Q: Are these suitable for meal prep for a whole week?

A: Yes! Making a batch of 8 to 12 of these makes for a simple, macro-friendly breakfast every morning. Store them in the fridge and reheat as needed.

Blueberry Lemon Cream Cheese Loaf

Blueberry Lemon Cream Cheese Loaf


Ingredients

For the Loaf:

  • 1 ½ cups Almond flour

  • ½ cup Coconut flour

  • ½ cup Granulated monk fruit or erythritol sweetener

  • 2 teaspoons Baking powder

  • ½ teaspoon Salt

  • 3 large Eggs, room temperature

  • ½ cup Sour cream or plain Greek yogurt

  • ¼ cup Melted butter (unsalted)

  • 1 tablespoon Lemon zest (freshly grated)

  • 2 tablespoons Fresh lemon juice

  • 1 teaspoon Vanilla extract

  • 1 cup Fresh blueberries (tossed in 1 teaspoon of coconut flour to prevent sinking)

For the Cream Cheese Swirl:

  • 4 ounces Cream cheese, softened

  • 1 large Egg yolk

  • 2 tablespoons Granulated sweetener

  • ½ teaspoon Vanilla extract


Instructions

1. Preparation Preheat your oven to 350°F. Grease a standard loaf pan and line it with parchment paper, leaving an overhang on the sides for easy removal.

2. Mix the Dry Ingredients In a large mixing bowl, whisk together the almond flour, coconut flour, sweetener, baking powder, and salt until no lumps remain.

3. Combine the Wet Ingredients In a separate bowl, beat the 3 eggs. Stir in the sour cream (or yogurt), melted butter, lemon zest, lemon juice, and vanilla extract until smooth.

4. Merge and Fold Add the wet ingredients to the dry ingredients and stir until just combined. Gently fold in the blueberries using a spatula, being careful not to burst them.

5. Make the Cream Cheese Filling In a small bowl, use a hand mixer to blend the softened cream cheese, egg yolk, sweetener, and vanilla until creamy and smooth.

6. Assemble the Loaf Pour about two-thirds of the lemon blueberry batter into the prepared loaf pan. Drop dollops of the cream cheese mixture over the batter. Top with the remaining batter. Use a butter knife or skewer to gently swirl the cream cheese layer through the batter—don’t over-mix, or the swirl will disappear.

7. Bake Place the pan in the center of the oven and bake for 50 to 60 minutes. The loaf is done when a toothpick inserted into the center comes out clean or with just a few moist crumbs.

Note: If the top is browning too quickly, loosely cover the pan with aluminum foil after the 40-minute mark.

8. Cool and Serve Allow the loaf to cool in the pan for at least 20 minutes before lifting it out using the parchment paper. Let it cool completely on a wire rack before slicing to ensure the cream cheese center is set.


Serving Suggestion

For a “Wildcard” variation, you can replace the blueberries with raspberries or add a handful of toasted slivered almonds to the top before baking for an extra crunch.

Roasted Beet, Avocado & Mandarin Salad 🍊🥑

Roasted Beet, Avocado & Mandarin Salad 🍊🥑

  • Prep time: 15 minutes ⏱️

  • Cook time: 45 minutes (for roasting beets) ⏲️

  • Servings: 2–4 👥

  • Difficulty: Easy ✨


Ingredients List 🛒

  • Fresh Beets: 3–4 medium — Scrubbed and trimmed. 🍎

  • Avocado: 1 large — Ripe but firm, sliced into wedges. 🥑

  • Mandarin Oranges: 2–3 — Peeled and segmented. 🍊

  • Fresh Cilantro or Parsley: 1/4 cup — Finely chopped. 🌿

  • Olive Oil: 2 tablespoons — Extra virgin for the dressing. 🫒

  • Lemon or Lime Juice: 1 tablespoon — Freshly squeezed. 🍋‍🟩

  • Honey or Agave: 1 teaspoon — To balance the citrus. 🍯

  • Salt & Black Pepper: To taste. 🧂

  • Red Pepper Flakes: A tiny pinch — For a subtle hint of heat. 🌶️


Step-by-Step Instructions 👩‍🍳

  1. Roast the Beets ⏲️

    • Preheat your oven to 400°F (200°C). ➡️ Wrap each beet individually in foil and place them on a baking sheet. ➡️ Roast for 45–60 minutes until a knife slides easily into the center. ➡️ Let them cool, then peel off the skins (they should slip right off!) and cut into wedges or half-moons.

  2. Prepare the Fruit and Veg 🔪

    • Avocado: Slice the avocado in half, remove the pit, and cut into elegant wedges. ➡️ Squeeze a little lemon juice over them immediately to prevent browning.

    • Mandarins: Carefully peel the mandarins and remove as much of the white pith as possible. ➡️ Keep the segments whole.

  3. Whisk the Vinaigrette 🥣

    • In a small jar or bowl, combine the olive oil, lemon juice, honey, salt, black pepper, and a pinch of red pepper flakes. ➡️ Shake or whisk until the dressing is emulsified.

  4. Assemble with Care 🪜

    • Place the roasted beet wedges in a large bowl first. ➡️ Add the avocado wedges and mandarin segments. ➡️ Be gentle so the beets don’t “stain” the avocado too much before serving.

  5. Drizzle and Garnish

    • Pour the vinaigrette over the salad. ➡️ Toss very lightly with your hands or large spoons. ➡️ Scatter the freshly chopped cilantro or parsley over the top.

  6. Final Presentation 🍽️

    • Transfer to a clean white plate or serving bowl to make the vibrant colors pop. ➡️ Serve immediately while the beets are at room temperature or slightly chilled.


Q/A Section

Q: Can I use canned or pre-cooked beets to save time? A: ➡️ Absolutely! If you’re in a hurry, vacuum-packed steamed beets found in the produce section work beautifully. Just slice them up and you’re ready to go.

Q: What is the best way to peel mandarins cleanly? A: ➡️ For the best look, try to remove the “strings” (pith) carefully. If you want a gourmet touch, you can “supreme” the citrus by cutting the segments out of the membranes with a sharp knife.

Q: How do I stop the beets from turning everything red? A: ➡️ The trick is to toss the beets in a little oil first to “seal” them, and then add the avocado and mandarins at the very last second right before serving.

Q: Can I add some crunch to this? A: ➡️ Yes! This salad tastes amazing with a sprinkle of toasted walnuts, pumpkin seeds (pepitas), or even some crumbled feta cheese if you like. 🥜🧀


Pro-Tips 💡

  • Glove Up: ➡️ When peeling and slicing roasted beets, wearing kitchen gloves will keep your hands from turning bright pink! 🧤

  • Ripeness Check: ➡️ For the avocado, look for one that gives slightly to gentle pressure. If it’s too soft, it will turn into a mash when you toss the salad.

  • Citrus Variety: ➡️ If mandarins aren’t in season, blood oranges or cara cara oranges provide a stunning color contrast. 🍊🍎

Peanut Butter Cup Dessert Lasagna 🍰


Peanut Butter Cup Dessert Lasagna 🍰

  • Prep time: 30 minutes ⏱️

  • Chilling time: 4 hours (minimum) ❄️

  • Servings: 12–15 👥

  • Difficulty: Easy (No-Bake!) ✨


Ingredients List 🛒

  • Chocolate Sandwich Cookies: 1 package (approx. 36 cookies) — For the crunchy base. 🍪

  • Melted Butter: 6 tablespoons — To bind the crust. 🧈

  • Cream Cheese: 8 oz package — Softened to room temperature. 🧀

  • Peanut Butter: 1 cup — Creamy works best for a smooth texture. 🥜

  • Powdered Sugar: 1 cup — To sweeten the peanut butter layer. 🍬

  • Milk: 2 tablespoons — To thin the peanut butter mixture slightly. 🥛

  • Whipped Topping: 1 container (12 oz) — Thawed (divided into two parts). ☁️

  • Instant Chocolate Pudding: 2 boxes (3.9 oz each). 🍫

  • Cold Milk: 3 cups — For the chocolate pudding layer. 🥛

  • Mini Peanut Butter Cups: 1.5 cups — Chopped or halved for the topping. 🍬

  • Chocolate Syrup: For drizzling. 🍯


Step-by-Step Instructions 👩‍🍳

  1. The Cookie Base 🍪

    • Crush the chocolate sandwich cookies into fine crumbs using a food processor or a rolling pin in a zip-top bag. ➡️ Mix the crumbs with melted butter until they look like wet sand. ➡️ Press the mixture firmly into the bottom of a 9×13 inch glass baking dish. ➡️ Place in the freezer for 10 minutes to set.

  2. The Creamy Peanut Butter Layer 🥜

    • In a large bowl, beat the softened cream cheese, peanut butter, powdered sugar, and 2 tablespoons of milk until completely smooth. ➡️ Gently fold in half of the whipped topping (about 1.5 cups). ➡️ Spread this mixture evenly over the chilled cookie crust.

  3. The Rich Chocolate Layer 🍫

    • In a separate bowl, whisk together both boxes of instant chocolate pudding and the 3 cups of cold milk for about 2 minutes until it starts to thicken. ➡️ Spread the pudding carefully over the peanut butter layer. ➡️ Let it sit for 5 minutes to firm up completely.

  4. The Fluffy Topping ☁️

    • Spread the remaining whipped topping over the chocolate pudding layer, smoothing it out to the edges of the dish.

  5. The Garnish 🍬

    • Sprinkle the chopped mini peanut butter cups generously over the top. ➡️ Drizzle with chocolate syrup in a zigzag pattern for that professional look.

  6. The Chill Phase ❄️

    • Cover the dish and refrigerate for at least 4 hours, or ideally overnight. ➡️ This is crucial so the layers can set and be sliced cleanly.


Q/A Section

Q: Can I use homemade whipped cream instead of store-bought whipped topping? A: ➡️ Yes! Use about 3-4 cups of heavy cream whipped with a little sugar until stiff peaks form. Note that the dessert may be slightly softer than the original version.

Q: Can I make this a lower-carb version? A: ➡️ You can swap the cookies for a nut-based crust, use sugar-free pudding mixes, and use a sugar-free whipped topping and sweetener. It still tastes delicious!

Q: What is the best way to slice this cleanly? A: ➡️ Use a sharp knife and wipe it clean with a damp paper towel between every single cut. This keeps the layers looking distinct and beautiful.

Q: How long will it stay fresh? A: ➡️ You can keep this in the refrigerator for up to 3–4 days. Keep it covered so it doesn’t absorb other fridge scents.


Pro-Tips 💡

  • Room Temperature Cheese: ➡️ Make sure your cream cheese is truly soft before mixing, or you will end up with small lumps in your peanut butter layer.

  • Cold Milk for Pudding: ➡️ Always use very cold milk for instant pudding to ensure it sets quickly and firmly.

  • Freeze for Quick Slicing: ➡️ If you are in a rush, pop the dessert in the freezer for 30 minutes before serving to get those perfect, clean squares.

Korean-Style Carrot Salad (Morkovcha)

Korean-Style Carrot Salad (Morkovcha)

This dish is a savory, tangy, and slightly spicy staple of Koryo-saram cuisine. It is naturally gluten-free and packed with nutrients.

  • Prep time: 20 minutes

  • Chilling time: 2–12 hours (essential for flavor)

  • Servings: 4–6

  • Calories: ~115 kcal per serving


Ingredients

Ingredient Amount Notes
Carrots 1 lb (500g) Firm, large carrots work best
Sugar 1 tbsp Balances the acidity
Salt 1 tsp For sweating the carrots
Vinegar (9%) 2 tbsp White distilled or Apple Cider
Vegetable Oil 1/4 cup Neutral oil (Sunflower or Grapeseed)
Garlic 3–4 cloves Minced or pressed
Coriander 1 tsp Ground (the “secret” ingredient)
Red Chili Flakes 1/2 to 1 tsp Adjust to your heat preference
Black Pepper 1/2 tsp Freshly ground
Onion 1/2 medium Used to flavor the oil (optional)

Detailed Instructions

  1. The Shred:

    Peel the carrots. To achieve the traditional texture, use a julienne peeler or a specific Korean carrot grater to create long, thin, spaghetti-like strands. Avoid a standard box grater, as it can make the carrots too soft.

  2. The Sweat:

    Place the shredded carrots in a large glass or stainless steel bowl. Sprinkle with the salt and sugar. Using your hands, massage the carrots for 1–2 minutes until they soften slightly and begin to release moisture. Let them sit for 10 minutes. If you prefer a very crunchy salad, drain any excess liquid that has pooled at the bottom.

  3. The Seasoning:

    Clear a small space in the center of the carrots. Place the minced garlic, ground coriander, black pepper, and red chili flakes in a concentrated pile. Do not stir them in yet.

  4. The Sizzle:

    In a small skillet or saucepan, heat the vegetable oil over medium-high heat until it is shimmering and just about to smoke.

    • Optional Pro-Tip: Sauté the chopped onion in the oil until golden brown, then remove and discard the onion pieces. This infuses the oil with a deeper savory aroma.

  5. The Bloom:

    Carefully pour the hot oil directly onto the pile of spices and garlic. You should hear a loud sizzle. This “blooms” the spices, intensifying their flavor and mellowing the sharp bite of the raw garlic.

  6. The Marinate:

    Pour the vinegar over the mixture. Use tongs (or wear gloves) to toss everything thoroughly until the carrots are evenly coated in the spiced oil and vinegar.

  7. The Wait:

    Transfer the salad to airtight jars or cover the bowl tightly. Refrigerate for at least 2 hours. For the best results, let it marinate overnight to allow the carrots to fully absorb the flavors.


Tips for Success

  • Oil Temperature: The oil must be hot enough to sizzle the spices but not so hot that it burns the garlic. If it doesn’t sizzle when it hits the coriander, the flavor won’t be as deep.

  • Customizing Heat: If you prefer a milder version, replace the red chili flakes with sweet paprika. This maintains the beautiful orange color without the spice.

  • Storage: This salad is a “Meal Prep King”—it stays fresh, crunchy, and delicious in the refrigerator for 5 to 7 days.


Nutritional Benefits

  • Vitamin A: One serving provides roughly 300% of your daily value, which is excellent for eye health.

  • Bioavailability: Carrots contain Beta-carotene, which is fat-soluble. The vegetable oil in this recipe significantly increases your body’s ability to absorb these nutrients.

  • Gut Health: The combination of vinegar and raw garlic can act as a mild digestive aid.

Low-Point Creamy Crab Salad

Low-Point Creamy Crab Salad

Ingredients

  • 1 cup imitation crab meat, chopped into bite-sized pieces

  • 1/2 cup plain non-fat Greek yogurt

  • 1 tbsp light mayonnaise

  • 1/4 cup celery, finely chopped for crunch

  • 2 tbsp green onions, chopped

  • 1 tbsp fresh parsley, finely chopped

  • 1 tsp lemon juice, fresh

  • Salt and black pepper, to taste


Step-by-Step Instructions

  1. Prepare the Base: Begin by chopping the imitation crab meat into small, uniform pieces. If you prefer a more “shredded” texture, you can pull the crab apart with two forks.

  2. Prep the Vegetables: Finely chop your celery, green onions, and parsley. Keeping the celery pieces small ensures you get a bit of crunch in every single bite without it being overwhelming.

  3. Whisk the Creamy Dressing: In a medium mixing bowl, combine the non-fat Greek yogurt, light mayonnaise, and lemon juice. Whisk until the mixture is completely smooth. This blend provides the tanginess of a traditional deli salad with much less fat.

  4. Fold Everything Together: Add the prepared crab meat, celery, green onions, and parsley into the bowl with the dressing. Use a spatula to gently toss everything until the crab and vegetables are thoroughly and evenly coated.

  5. Season to Taste: Add a pinch of salt and black pepper. Give it one final stir and taste to see if it needs an extra squeeze of lemon for brightness.

  6. Chill for Flavor: For the best results, cover the bowl and refrigerate for 20 to 30 minutes. This allows the flavors of the onion and parsley to really infuse into the creamy base.

  7. Serve: This salad is delicious served in large lettuce cups, on top of cucumber slices, or alongside your favorite flourless flatbread.

Rotisserie Chicken Mushroom Soup

Rotisserie Chicken Mushroom Soup

Rotisserie Chicken Mushroom Soup
Hearty and comforting soup made with tender chicken, earthy mushrooms, and a rich, savory broth!

Indulge in a rich and satisfying soup that’s perfect for chilly evenings, special occasions, or everyday meals. This Rotisserie Chicken Mushroom Soup is a masterful blend of tender chicken, earthy mushrooms, and aromatic vegetables, all simmered in a flavorful broth that’s sure to become a family favorite.

Ingredients:

  1. 1 rotisserie chicken, shredded
  2. 8 oz mushrooms, sliced
  3.  1 onion, chopped
  4.  3 cloves of garlic, minced
  5.  6 cups of chicken broth
  6.  1 cup of heavy cream
  7.  2 tablespoons of olive oil
  8.  2 tablespoons of all-purpose flour
  9.  Salt and pepper to taste
  10.  Fresh parsley for garnish

Instructions:
1. In a large pot, heat olive oil over medium heat.
2. Add chopped onions and sliced mushrooms, sauté until they are tender.
3. Stir in minced garlic and flour, cook for a minute to get rid of the raw flour taste.
4. Gradually pour in the chicken broth while stirring to avoid lumps.
5. Bring the mixture to a simmer.
6. Add the shredded rotisserie chicken to the pot.
7. Pour in the heavy cream and let the soup simmer for about 10-15 minutes.
8. Season the soup with salt and pepper according to your taste.
9. Serve hot, garnished with fresh parsley.

Enjoy your Rotisserie Chicken Mushroom Soup!

Cookie Dough Ice Cream

Si. Given your interest in recipes that perform well on social media and options that fit into a healthy lifestyle, I’ve included a Classic Homemade version and a High-Protein “Wellness” version.


1. Classic No-Churn Cookie Dough Ice Cream

This is the “crowd-pleaser” version—super creamy, rich, and perfect for sharing on your Facebook page.

Ingredients

  • The Base:

    • 2 cups heavy whipping cream (cold)

    • 1 can (14 oz) sweetened condensed milk

    • 1 tsp vanilla extract

    • A pinch of sea salt

  • The Mix-ins:

    • 1 cup “Edible” Cookie Dough bits (store-bought or homemade using heat-treated flour)

    • ½ cup semi-sweet chocolate chunks or chips

Instructions

  1. Prep the Base: In a large chilled bowl, whip the heavy cream until stiff peaks form.

  2. Fold: In a separate bowl, mix the condensed milk, vanilla, and salt. Gently fold this into the whipped cream using a spatula so you don’t lose the air.

  3. The Good Stuff: Gently fold in the cookie dough bits and chocolate chunks.

  4. Freeze: Transfer to a loaf pan or airtight container. Freeze for at least 6 hours (or overnight) until firm.


2. Low-Point / High-Protein “Cottage Cheese” Ice Cream

This version is viral for a reason—it’s much lower in points/calories but surprisingly creamy, fitting right in with your WW-friendly preferences.

Ingredients

  • 2 cups low-fat cottage cheese (the “secret” for creaminess and protein)

  • 2-3 tbsp maple syrup or honey (or a sugar-free sub like Monkfruit)

  • 1 tsp vanilla extract

  • The Mix-ins: 2 tbsp mini dark chocolate chips and 2 broken-up low-carb protein cookies (or “PB2” dough crumbles).

Instructions

  1. Blend: Place the cottage cheese, sweetener, and vanilla in a blender. Process until it is completely smooth—no lumps allowed!

  2. Combine: Stir in the chocolate chips and cookie crumbles by hand.

  3. Set: Pour into a container. To keep it from getting too icy, stir it every 30 minutes for the first 2 hours, or just freeze for 3-4 hours total.

  4. Serve: Let it sit on the counter for 5 minutes before scooping to get that perfect “ice cream” texture.

Chicken Alfredo Cabbage Bake

Chicken Alfredo Cabbage Bake

Ingredients

For the Chicken:

  • 2 large chicken breasts, cooked and shredded
  • 1 tbsp olive oil
  • 2 cloves garlic, minced
  • 1/2 tsp salt
  • 1/4 tsp black pepper

For the Cabbage Base:

  • 4 cups cabbage, chopped
  • 1 tbsp olive oil
  • 1/2 tsp salt
  • 1/4 tsp black pepper

For the Alfredo Sauce:

  • 1 cup heavy cream
  • 1/2 cup grated Parmesan cheese
  • 1/2 tsp garlic powder
  • 1/4 tsp black pepper

For the Topping:

  • 1/2 cup shredded mozzarella cheese
  • 2 tbsp grated Parmesan cheese
  • Fresh parsley, chopped

Directions

Prepare the Cabbage:

Preheat oven to 375°F (190°C)

Heat olive oil in a skillet over medium heat

Add chopped cabbage, salt, and black pepper

Cook for 5–7 minutes until slightly softened

Prepare the Chicken:

In the same skillet, add olive oil and garlic

Sauté for 1 minute

Add shredded chicken, salt, and black pepper and mix well

Prepare the Alfredo Sauce:

In a saucepan, heat heavy cream over medium heat

Stir in Parmesan cheese, garlic powder, and black pepper

Simmer until slightly thickened

Assemble the Bake:

In a baking dish, layer cooked cabbage

Add chicken on top

Pour Alfredo sauce evenly over everything

Top with mozzarella and extra Parmesan cheese

Bake:

Bake for 20–25 minutes until bubbly and golden

Serve:

Garnish with fresh parsley

Serve hot

Nutritional Info (per serving, serves 3–4)

Calories: 420 kcal

Protein: 35 g

Fat: 28 g

Carbohydrates: 10 g

Fiber: 3 g

Sugar: 4 g

Greek Chicken Souvlaki Bowls with Tzatziki

Greek Chicken Souvlaki Bowls with Tzatziki

Ingredients

For the Chicken Souvlaki

  • 2 large chicken breasts, cut into bite-sized cubes
  • 3 tablespoons olive oil
  • 2 tablespoons lemon juice
  • 3 cloves garlic, minced
  • 1 teaspoon dried oregano
  • 1 teaspoon paprika
  • ½ teaspoon ground cumin
  • Salt and black pepper to taste
  • Wooden skewers (soaked in water)

For the Tzatziki Sauce

  • 1 cup Greek yogurt
  • ½ cucumber, grated and squeezed dry
  • 2 cloves garlic, minced
  • 1 tablespoon olive oil
  • 1 tablespoon lemon juice
  • 1 tablespoon fresh dill, chopped
  • Salt to taste

For the Bowls

  • 2 cups cooked rice or quinoa
  • 1 cup cherry tomatoes, halved
  • 1 cucumber, sliced
  • ½ red onion, thinly sliced
  • ½ cup kalamata olives
  • ½ cup crumbled feta cheese

Fresh parsley for garnish

Directions

In a bowl, mix olive oil, lemon juice, garlic, oregano, paprika, cumin, salt, and pepper. Add chicken cubes and toss to coat. Marinate for at least 30 minutes (or up to 2 hours).

Thread the marinated chicken onto skewers.

Heat a grill pan or outdoor grill over medium-high heat. Cook the skewers for 10–12 minutes, turning occasionally, until chicken is cooked through and slightly charred.

In a separate bowl, combine Greek yogurt, grated cucumber, garlic, olive oil, lemon juice, dill, and salt. Mix well and chill until ready to serve.

Assemble the bowls: add a base of rice or quinoa, then top with grilled chicken, tomatoes, cucumber, red onion, olives, and feta cheese.

Drizzle generously with tzatziki sauce and garnish with fresh parsley. Serve warm.

Nutritional Information (per serving)

Calories: 520 kcal

Protein: 38g

Carbohydrates: 42g

Fat: 22g

Fiber: 4g

Sugar: 5g

Savory Golden Rounds

Savory Golden Rounds

Prep time: 10 mins | Bake time: 15–20 mins | Yields: 6–8 rounds

Ingredients

  • 3 large Eggs (separated into whites and yolks)

  • 3 tbsp Cream cheese (softened to room temperature)

  • 1/4 tsp Cream of tartar (this provides the essential lift and structure)

  • 1/2 tsp Garlic powder

  • A pinch of sea salt

  • Optional: 1 tbsp melted butter and a sprinkle of fresh parsley for a bakery-style finish.


Step-by-Step Instructions

  1. Preparation: Preheat your oven to 300°F (150°C). Line a large baking sheet with parchment paper. This step is vital because the batter is delicate and requires a non-stick surface to rise and release perfectly.

  2. Mix the Savory Base: In a medium bowl, whisk together the egg yolks, softened cream cheese, garlic powder, and salt. Continue whisking until the mixture is silky smooth with no visible lumps of cheese.

  3. Whip the Whites: In a separate, scrupulously clean glass or metal bowl, combine the egg whites and the cream of tartar. Using a hand mixer on high speed, whip the whites until stiff peaks form. They are ready when the foam stands straight up and doesn’t move when you tilt the bowl.

  4. The Gentle Fold: Carefully fold the egg yolk mixture into the whipped whites using a spatula. Use a slow “under-and-over” motion. Do not stir or whisk, as the goal is to keep the air bubbles intact so the rounds stay fluffy.

  5. Form the Rounds: Spoon the mixture onto your prepared baking sheet to form 6 to 8 even circles. You can use the back of the spoon to gently shape them into rounds.

  6. Bake to Perfection: Bake for 15–20 minutes. They are done when they have reached a beautiful golden-brown color and feel firm but springy to the touch.

  7. The Final Touch: While still warm, you can lightly brush the tops with melted butter and a sprinkle of fresh parsley. Allow them to cool for about 5 minutes to let the texture set before serving.


Why You’ll Love This Recipe:

  • Soft & Fluffy: The texture is uniquely light, making it a wonderful base for any meal.

  • Simple Ingredients: Using mainly eggs and cream cheese makes this a satisfying, protein-focused snack.

  • Endless Options: These make excellent “buns” for sandwiches or can be served alongside a bowl of soup.

Green Apple & Ginger Wellness Juice

Green Apple & Ginger Wellness Juice

A bright, zesty beverage rich in fiber, flavonoids, and Vitamin C.

  • Prep time: 10 minutes

  • Yields: 1 glass

Ingredients

  • 1 large organic Green Apple (provides fiber and flavonoids)

  • 1 inch fresh Ginger root (natural anti-inflammatory properties)

  • 1/2 fresh Lemon (high in Vitamin C)

  • 1/2 cup filtered water (optional, for thinning the consistency)


Detailed Directions

  1. Clean the Produce: Thoroughly wash the apple, ginger, and lemon under cold running water. Since you are juicing the skins, organic produce is recommended to minimize exposure to surface residues.

  2. Prepare the Ingredients: * If using a blender, core the apple and peel the ginger root.

    • If using a high-powered juicer, you can often leave the core and skin intact.

  3. Juicing Method: * Process the apple and ginger through your juicer first.

    • Finish by squeezing the fresh lemon juice into the glass to preserve the delicate enzymes and flavor.

  4. Blender Method: * Place the apple pieces, ginger, and lemon juice into the blender with 1/2 cup of water.

    • Blend on high until completely smooth.

    • For a traditional “juice” consistency, pour the mixture through a fine-mesh sieve or a nut milk bag to remove the pulp.

  5. Serve: Drink the juice immediately to ensure you get the most benefit from the fresh ingredients. It is often enjoyed first thing in the morning on an empty stomach for a refreshing start to the day.


Recipe Tips & Safety

  • Protect Your Teeth: Because lemon juice and apple cider vinegar (if added) are acidic, it is best to drink this through a straw or rinse your mouth with plain water afterward to protect your tooth enamel.

  • Listen to Your Body: If you have a sensitive stomach, start with a smaller piece of ginger, as its natural heat can be quite strong.

  • Medical Disclaimer: This drink should be viewed as a healthy addition to your lifestyle and not a substitute for professional medical care, especially for conditions like diabetes or gastritis mentioned in viral posts.

Savory Zucchini & Oat Rolls

Savory Zucchini & Oat Rolls

These zucchini rolls are a fantastic way to enjoy a wholesome, satisfying meal that feels indulgent without the heavy crust. They are packed with flavor, easy to shape, and develop a beautiful golden exterior that makes them a family favorite for any time of day.

Ingredients

  • 1 medium zucchini, grated

  • 3–4 tbsp oatmeal (finely ground works best)

  • 100g (1 cup) grated cheese (mozzarella or cheddar)

  • 2 eggs

  • Chopped chives, to taste

  • Salt and pepper, to taste


Step-by-Step Instructions

  1. Prepare the Zucchini: Place the grated zucchini in a bowl and sprinkle with a little salt. Let it sit for about 5–10 minutes to draw out the moisture. This is a vital step to ensure your rolls aren’t soggy.

  2. Squeeze Dry: Using a clean kitchen towel or your hands, squeeze the zucchini as hard as you can to remove all the excess water. Place the dry zucchini shreds into a fresh mixing bowl.

  3. Mix the Batter: To the zucchini, add the 2 eggs3–4 tbsp oatmeal100g grated cheese, and chopped chives. Season with pepper and a small pinch of salt (remember the zucchini was already salted).

  4. Let it Rest: Allow the mixture to sit for about 5 minutes. This gives the oats time to absorb the moisture from the eggs, which helps bind the rolls together.

  5. Shape: Take a small handful of the mixture and roll it between your palms to form a log or sausage shape.

  6. Cook: * In a Pan: Heat a lightly oiled non-stick skillet over medium heat. Fry the rolls for 3–4 minutes per side until they are golden brown and crispy all the way around.

    • In the Oven: Arrange on a lined baking tray and bake at 200°C for 15–20 minutes, turning halfway through.

  7. Serve: Enjoy them warm! They are delicious on their own or served with a side of Greek yogurt for dipping.


Quick Tip

If the mixture feels a bit too wet to shape, add one extra tablespoon of oatmeal to help firm it up.

Creamy 3-Ingredient Whipped Delight

Creamy 3-Ingredient Whipped Delight

This incredibly smooth and airy dessert is the perfect solution for a quick sweet fix. It requires no baking and no gelatin, relying on the natural thickness of the ingredients to create a melt-in-your-mouth texture that feels like a gourmet mousse.

Ingredients

  • 2 cups heavy whipping cream (chilled)

  • 1 cup condensed milk (or a sugar-free condensed milk alternative)

  • 1 tsp vanilla extract

  • Optional: Ground cinnamon or cocoa powder for dusting the top


Step-by-Step Instructions

  1. Chill Your Tools: For the best results, place your mixing bowl and whisk attachment in the freezer for about 10 minutes before starting. This helps the cream whip faster and creates a more stable texture.

  2. Whip the Cream: Pour the 2 cups of heavy whipping cream into the chilled bowl. Using an electric mixer, beat the cream on medium-high speed until stiff peaks form. Be careful not to over-beat, or it will turn into butter.

  3. Combine: Gently pour the 1 cup of condensed milk and 1 tsp vanilla extract into the whipped cream.

  4. Fold Gently: Using a spatula, fold the ingredients together very gently. Use a circular motion, lifting from the bottom to the top, to keep as much air in the mixture as possible. This ensures the dessert stays light and creamy.

  5. Set: Transfer the mixture into a glass serving dish or individual ramekins. Smooth the top with the back of a spoon or a spatula.

  6. Chill: Place the dish in the refrigerator for at least 2 hours (or the freezer for 30 minutes) to let it set and become firm.

  7. Serve: Just before serving, lightly dust the top with ground cinnamon or cocoa powder to add a beautiful finish and a hint of extra flavor.


Serving Suggestion

This dessert is wonderful on its own, but it also tastes amazing when served with fresh sliced strawberries or a handful of crushed nuts for a bit of crunch.

Ginger–Lemon Wellness Drink

Ginger–Lemon Wellness Drink

Ingredients

  • 1 medium fresh ginger root
  • 1 lemon
  • 3–4 cups water
  • 1–2 teaspoons honey (optional)
  • Ice cubes (optional)

Step-by-Step Method

  1. Wash the ginger
    Rinse the ginger root well with water to remove any dirt.
  2. Peel and slice
    Peel the ginger and cut it into thin slices or small pieces.
  3. Boil the water
    Pour 3–4 cups of water into a pot and bring it to a gentle boil.
  4. Add the ginger
    Put the sliced ginger into the boiling water.
  5. Simmer
    Lower the heat and let it simmer for about 10–15 minutes so the ginger flavor mixes with the water.
  6. Strain the drink
    Turn off the heat and strain the liquid into a jug or cups to remove the ginger pieces.
  7. Add lemon juice
    Squeeze the juice of one fresh lemon into the warm drink.
  8. Sweeten if desired
    Add honey and stir well (this step is optional).
  9. Serve
    • Drink it warm, or
    • Let it cool and add ice cubes for a refreshing version.

Suggested Use

Many people like to drink one cup in the morning or after meals for digestion and general comfort.

✅ Note: This is a simple home drink that may support hydration and digestion, but it is not a medical treatment. If someone has health concerns, it is always best to consult a healthcare professional.

Zesty Lemon Butter Fish Fillet

Zesty Lemon Butter Fish Fillet

A quick, flavorful meal that brings together bright citrus and savory garlic butter. Perfect for a busy weeknight!


Ingredients

For the Fish:

  • 4 white fish fillets (cod, tilapia, or haddock)

  • 1 teaspoon Paprika

  • 1 teaspoon Garlic powder

  • 1 teaspoon Onion powder

  • 2 tablespoons Olive oil

  • Salt and pepper, to taste

For the Lemon Butter Sauce:

  • 3 tablespoons Unsalted butter

  • 2 cloves Garlic, minced

  • 1 tablespoon Fresh lemon juice

  • 1 teaspoon Lemon zest

  • Fresh parsley, chopped (for garnish)


Instructions

1. Season the Fillets

  • Pat the fish fillets completely dry with paper towels.

  • In a small bowl, mix the paprikagarlic powderonion powdersalt, and pepper.

  • Sprinkle the seasoning evenly over both sides of each fillet.

2. Sear the Fish

  • Heat the olive oil in a large skillet over medium-high heat.

  • Once the pan is hot, add the fillets. Cook for 3–4 minutes on the first side until a golden-brown crust forms.

  • Carefully flip the fillets and cook for another 2–3 minutes until the fish is opaque and flakes easily with a fork. Remove the fish from the pan and set aside on a plate.

3. Make the Sauce

  • In the same skillet, reduce the heat to medium and add the butter.

  • Once melted, add the minced garlic and cook for about 1 minute until fragrant (be careful not to burn it).

  • Stir in the lemon juice and lemon zest. Whisk for 30 seconds to combine.

4. Finish and Serve

  • Spoon the lemon butter sauce generously over the cooked fillets.

  • Garnish with fresh parsley and extra lemon slices if desired.


A Note on the Wellness Tonic

The first image you shared mentions a tonic for “bone pain, nerve pain, and anxiety.” While ingredients like ginger and turmeric (which we’ve looked at before!) are great for general wellness and inflammation, it’s important to remember that a drink can’t “cure” conditions like depression or chronic rheumatism on its own. It’s always a good idea to keep using these as a supplement to the advice your doctor gives you!

🥪 Creamy Chicken Salad Sandwich

🥪 Creamy Chicken Salad Sandwich (Full Recipe)

🧾 Ingredients

For the Chicken Salad:

  • 2 cups cooked chicken (shredded or diced)
  • ½ cup mayonnaise (adjust to taste)
  • 1 tbsp Dijon mustard (optional but recommended)
  • 1 tbsp lemon juice (fresh)
  • 2 tbsp celery (finely chopped)
  • 2 tbsp green onions (chopped)
  • 1 tbsp parsley (optional)
  • Salt (to taste)
  • Black pepper (to taste)

Optional Add-ins (for extra flavor):

  • 1 tbsp sweet pickle relish or chopped pickles
  • 1 tbsp chopped walnuts or almonds
  • A pinch of garlic powder
  • A dash of paprika

🍞 For the Sandwich:

  • Fresh bread rolls / baguette (like in image)
  • Lettuce leaves (optional)
  • Tomato slices (optional)

👩‍🍳 Instructions

1. Prepare the Chicken

  • Use boiled, roasted, or leftover chicken
  • Shred it using forks or chop into small pieces

2. Make the Creamy Mixture

In a bowl:

  • Add mayonnaise, mustard, and lemon juice
  • Mix until smooth and creamy

3. Combine Everything

  • Add chicken, celery, green onions, and parsley
  • Mix well until everything is coated
  • Season with salt and pepper

👉 Taste and adjust (more mayo = creamier, more lemon = tangier)


4. Chill (Important!)

  • Cover and refrigerate for 20–30 minutes
  • This helps flavors blend perfectly

5. Assemble the Sandwich

  • Slice your bread open
  • Fill generously with chicken salad
  • Add lettuce or tomato if you like

6. Serve

  • Serve with chips, fries, or a pickle (just like in your image!)
  • Best enjoyed fresh and slightly chilled 😍

🔥 Pro Tips (Secret Level)

  • Use rotisserie chicken for best flavor
  • Add a little honey for a sweet twist
  • Toast the bread lightly for extra crunch
  • For healthier version: use Greek yogurt instead of mayo

Twisted Stuffed Puff Pastry Bread

Twisted Stuffed Puff Pastry Bread
Ingredients:
1 sheet puff pastry (or pizza dough, thawed if frozen)
100 g mozzarella cheese (grated or sliced)
80 g cheddar cheese (grated)
100 g cooked chicken, ham, or pepperoni (sliced/shredded)
1 small tomato (finely chopped)
½ small onion (finely chopped)
½ green bell pepper or capsicum (finely chopped)
1 tbsp fresh parsley or coriander (chopped)
Salt & black pepper (to taste)
1 tsp oregano or Italian seasoning
1 egg (beaten, for egg wash)
1 tbsp sesame seeds or coarse salt (optional, for topping)
Instructions:
Prepare the Filling
In a bowl, mix together chopped tomato, onion, capsicum, cooked chicken/ham/pepperoni, parsley, salt, pepper, and oregano.
Add mozzarella and cheddar cheese. Mix well.
Prepare the Dough
Roll out the puff pastry/pizza dough into a rectangle.
Cut into strips about 2–3 inches wide.
Stuff and Twist
Place some filling lengthwise on each strip.
Fold gently and twist each strip to lock in the filling (as shown in the top image).
Place on a baking tray lined with parchment paper.
Egg Wash & Topping
Brush the top with beaten egg for a shiny golden crust.
Sprinkle sesame seeds or a pinch of coarse salt on top.
Bake
Preheat oven to 190°C (375°F).
Bake for 20–25 minutes or until golden brown and crispy.
Serve
Let cool slightly, garnish with parsley, and serve warm with ketchup, garlic dip, or chili sauce..

Creamy Pomegranate Power Smoothie

Creamy Pomegranate Power Smoothie

This recipe yields approximately two servings and takes less than five minutes to whip up.

Ingredients

  • 1 ½ cups Pomegranate juice (chilled)

  • 1 cup Frozen mixed berries (strawberries or raspberries work best for the color)

  • 1 cup Greek yogurt (plain or vanilla)

  • 1 Ripe banana (frozen slices provide a creamier texture)

  • 1 tbsp Honey or maple syrup (optional, depending on fruit sweetness)

  • For Garnish: Fresh pomegranate arils (seeds) and mint leaves


Instructions

  1. Prep the Base: Pour the pomegranate juice into your blender first. Adding liquid first helps the blades move freely and prevents the frozen fruit from getting stuck at the bottom.

  2. Combine: Add the frozen berries, banana slices, and Greek yogurt. The yogurt adds a boost of protein and creates that silky, milkshake-like consistency seen in the photo.

  3. Blend: Pulse a few times to break up the frozen chunks, then blend on high for 45–60 seconds until completely smooth. If the mixture is too thick, add a splash more juice; if it’s too thin, add a few more frozen berries.

  4. Taste Test: Give it a quick sip. If the pomegranate juice is quite tart, blend in your sweetener of choice.

  5. Serve: Pour into tall glasses. Top with a generous handful of fresh pomegranate arils and a sprig of mint for a pop of green. Serve with a colorful straw and enjoy immediately!


Pro Tip: For an extra nutritional kick, you can add a tablespoon of chia seeds or ground flaxseeds without altering the beautiful pink hue!

Greek Yogurt Blueberry & Oat Smoothie

 Greek Yogurt Blueberry & Oat Smoothie

Ingredients

  • Greek Yogurt: 1/2 cup plain non-fat or low-fat (for a protein boost).

  • Blueberries: 1 cup frozen (frozen berries give it a thick, chilled texture).

  • Rolled Oats: 1/4 cup (adds fiber and a nutty heartiness).

  • Milk of Choice: 1/2 cup to 1 cup (almond, oat, or dairy milk work perfectly).

  • Natural Sweetener: 1 teaspoon honey or maple syrup (optional).

  • Nut Butter: 1 tablespoon almond or peanut butter (for healthy fats).

  • Topping: A sprinkle of extra oats or hemp seeds.


Instructions

  1. Prep the Base: Add the rolled oats to your blender first and pulse them a few times. This breaks them down into a finer consistency so your smoothie remains silky smooth rather than chunky.

  2. Combine: Add the Greek yogurt, frozen blueberries, and your choice of milk. If you prefer a sweeter taste, drizzle in your honey or maple syrup now.

  3. Boost: Add the nut butter. This helps with satiety and gives the smoothie a rich, velvety mouthfeel.

  4. Blend: Start the blender on a low speed and gradually increase to high. Blend for about 45–60 seconds until the color is a vibrant, uniform purple.

  5. Adjust: If the mixture is too thick, splash in a little more milk. If you prefer it thicker, add a few ice cubes or more frozen fruit.

  6. Serve: Pour into a tall glass, top with a pinch of oats, and enjoy immediately!

Keto Green Smoothie

Keto Green Smoothie

Ingredients

To keep this strictly keto-friendly, we focus on nutrient density and healthy fats:

  • 1 cup Unsweetened Almond Milk (or coconut milk for extra richness)

  • ½ medium Ripe Avocado (provides that signature velvety texture)

  • 1 cup Fresh Baby Spinach (packed with iron and vitamins)

  • 1 scoop Vanilla Collagen Peptides or Whey Protein (ensure it is sugar-free)

  • 1 tbsp Chia Seeds or Hemp Hearts (for a fiber and Omega-3 boost)

  • 1-2 tsp Erythritol or Stevia (adjust to your preferred sweetness)

  • ½ cup Ice Cubes

  • Optional: A squeeze of fresh lime or a few mint leaves for brightness.


Instructions

  1. Layer the Liquid: Pour your almond milk into the blender first. This helps the blades move freely and prevents the dry ingredients from sticking to the bottom.

  2. Add the Solids: Add the spinach, avocado, protein powder, and sweetener.

  3. The Chill Factor: Drop in the ice cubes and seeds last.

  4. Blend: Start on a low speed and gradually increase to high. Blend for about 45–60 seconds until the mixture is completely smooth and vibrant green.

  5. Serve: Pour into a chilled glass. Garnish with a fresh strawberry (as seen in the photo) or a sprinkle of hemp hearts.


Quick Tip: If you prefer a “spoonable” smoothie bowl, reduce the almond milk by half! Enjoy your clean, keto-friendly energy boost.

Creamy Berry Whipped Delight

Creamy Berry Whipped Delight 🍓🍨

This light and airy dessert is a celebration of fresh berries. It has a soft, mousse-like texture that is incredibly refreshing. Whether served in a large family-style bowl or individual glasses, it is a beautiful treat for any occasion.


🛒 Ingredients

  • Fresh Strawberries: 2 cups (hulled and chopped) 🍓

  • Mixed Berries: 1 cup raspberries and blueberries (optional) 🫐

  • Heavy Whipping Cream: 2 cups (chilled) 🥛

  • Greek Yogurt: 1 cup (Vanilla or Plain) 🍦

  • Sweetener: 3–4 tbsp honey, maple syrup, or powdered sugar (adjust to taste) 🍯

  • Vanilla Extract: 1 tsp 🥥

  • Fresh Mint: For garnish 🌿


👩‍🍳 Instructions

  1. Prep the Berries ➡️ Wash all berries and pat them dry. Take 1 cup of the strawberries and mash them with a fork or pulse them in a blender to create a chunky puree. Slice the remaining berries for folding in. 🍓🥣

  2. Whip the Cream ➡️ In a large chilled bowl, pour in the heavy whipping cream and vanilla extract. Use an electric mixer to beat until stiff peaks form. ➡️🥛☁️

  3. Fold in the Base ➡️ In a separate bowl, whisk together the Greek yogurt and your choice of sweetener until smooth. Gently fold the yogurt mixture into the whipped cream using a spatula. 🥣⚖️

  4. Add the Fruit ➡️ Slowly fold in the strawberry puree and the sliced fresh berries. Be careful not to over-mix so the cream stays fluffy and you get beautiful pink swirls. 🍓🌀

  5. Chill ➡️ Transfer the mixture into serving glasses or a large glass bowl. Place in the refrigerator for at least 1 hour to set and allow the flavors to combine. ❄️⏳

  6. Garnish and Serve ➡️ Just before serving, top with extra fresh berries and a sprig of fresh mint. 🍨✨


❓ Q&A Section

Q: Can I make this a low-fat version? A: ➡️ You can use a light whipped topping instead of heavy cream and fat-free Greek yogurt. However, the texture will be slightly less stable and more airy than the original recipe. 🍦📉

Q: Why did my whipped cream turn runny? A: ➡️ This usually happens if the cream wasn’t cold enough or if it was over-mixed after the yogurt and berries were added. Always keep your cream in the fridge until the very second you use it! ❄️🥛

Q: Can I use frozen berries? A: ➡️ Yes, but make sure to thaw them completely and drain all excess liquid before mashing or folding them in. If they are too wet, they will thin out the cream. 🍓💧

Q: How long does this dessert stay fresh? A: ➡️ This is best enjoyed within 24 hours of making it. After that, the berries may release juices that can make the whipped cream soften. ⏳🛍️


💡 Tips for Success

  • Chilled Tools: For the fastest and fluffiest whipped cream, place your metal bowl and beaters in the freezer for 10 minutes before you start! 🧊⚒️

  • Texture: If you want an even thicker texture, you can fold in ½ cup of softened cream cheese to the yogurt mixture before combining with the whipped cream. 🧀✨

Savory Boiled Red Onion Broth

Savory Boiled Red Onion Broth 🧅✨

This simple, nutrient-dense broth is often enjoyed for its mild, earthy flavor and warm comfort. Using red onions provides a beautiful hue and a subtle sweetness that makes it a perfect light base or a soothing warm drink.


🛒 Ingredients

  • Red Onions: 2 large (peeled and sliced into thick rings) 🧅

  • Garlic: 3–4 cloves (smashed) 🧄

  • Water: 6 cups 💧

  • Fresh Herbs: A handful of fresh parsley or cilantro 🌿

  • Seasoning: A pinch of salt and black pepper to taste 🧂


👩‍🍳 Instructions

  1. Prep the Veggies ➡️ Peel the red onions and slice them into thick, even rings. Smash the garlic cloves to release their natural oils. 🧅🧄

  2. Combine ➡️ Place the onion rings and smashed garlic into a large pot. Pour in the 6 cups of water. 🥘

  3. Boil and Simmer ➡️ Bring the water to a boil over medium-high heat. Once boiling, reduce the heat to low and let it simmer gently for about 20 to 30 minutes. The water should take on a deep, beautiful purple or pink tint. 🌡️➡️🧪

  4. Add Herbs ➡️ During the last 5 minutes of simmering, add the fresh parsley or cilantro to infuse the broth with a bright, herbal note. 🌿

  5. Strain (Optional) ➡️ If you prefer a clear broth, strain the liquid through a fine-mesh sieve. If you enjoy the softened onions, you can leave them in the bowl! 🥄

  6. Season and Serve ➡️ Add a small pinch of salt and pepper. Ladle the warm broth into mugs or bowls and enjoy while hot. ☕✨


❓ Q&A Section

Q: Can I add other vegetables to this broth? A: ➡️ Absolutely! Adding a few slices of fresh ginger or a stalk of celery can add even more depth and a refreshing aromatic quality to the liquid. 🫚🌱

Q: Is it okay to eat the onions after boiling? A: ➡️ Yes! After simmering, the red onions become very soft and mild. They can be eaten as part of the broth or saved to add to a salad or omelet later. 🧅🍳

Q: How do I store leftovers? A: ➡️ Allow the broth to cool completely, then pour it into a glass jar or airtight container. It will stay fresh in the refrigerator for up to 4 days. ❄️🏺

Q: Why use red onions specifically? A: ➡️ Red onions contain specific antioxidants called anthocyanins (which give them their color). When boiled, these are released into the water, making it a very colorful and flavorful base. 🧪✨


💡 Tips for Success

  • Low and Slow: Don’t rush the simmer! A gentle heat ensures the onions release their sweetness without becoming bitter. 🕯️

  • Freshness Matters: Use firm, heavy onions for the best flavor profile in your broth. 🧅✅