Chicken and Biscuit Cobbler.

 Chicken and Biscuit Cobbler.

Ingredients

  • Base: 2 cups shredded cooked chicken, 1 bag frozen peas and carrots, 1 diced onion.

  • Sauce: 2 cups chicken broth, 1 can cream of chicken soup, 1 tsp dried thyme, salt, and pepper.

  • Topping: 1 can refrigerated flaky biscuits (or homemade dough) and 1 cup shredded cheddar cheese.


Instructions

  1. Prep the Filling: Preheat your oven to 400°F (200°C). In a large bowl, mix the chicken, frozen vegetables, onion, soup, broth, and seasonings. Pour the mixture into a greased 9×13 inch baking dish.

  2. Add the Biscuits: Arrange the biscuits on top of the chicken mixture. If you like extra flavor, brush the tops with melted butter and sprinkle with the shredded cheese.

  3. Bake: Place in the oven for 20–25 minutes. You’re looking for the sauce to be bubbly and the biscuits to be tall, fluffy, and a deep golden brown.

  4. Serve: Let it sit for 5 minutes before serving to allow the sauce to thicken slightly.

Tip: If the biscuits brown too quickly, tent the dish with foil for the last 10 minutes. Enjoy!

Bacon and Mushroom Crustless Quiche

Bacon and Mushroom Crustless Quiche

Ingredients

  • 8 large eggs

  • 1 cup heavy cream (or whole milk)

  • 6 slices thick-cut bacon, chopped

  • 8 oz cremini mushrooms, sliced

  • 1 ½ cups shredded sharp cheddar cheese

  • 2 cloves garlic, minced

  • ½ tsp dried thyme

  • Salt and black pepper to taste

  • Fresh parsley, chopped (for garnish)


Instructions

1. Prepare the Fillings

Preheat your oven to 375°F (190°C) and lightly grease a 9-inch glass pie dish or baking pan. In a large skillet over medium heat, fry the chopped bacon until it is crisp. Use a slotted spoon to remove the bacon and set it aside on a paper towel.

Leave about a tablespoon of bacon fat in the pan. Add the sliced mushrooms and sauté for about 5–7 minutes until they are golden brown and their moisture has evaporated. Stir in the minced garlic during the last minute of cooking.

2. Mix the Base

In a medium bowl, whisk the eggs, heavy cream, dried thyme, salt, and pepper until well combined and slightly frothy.

3. Assemble

Spread half of the shredded cheese across the bottom of your prepared baking dish. Top with the sautéed mushrooms and the crispy bacon bits. Pour the egg mixture over the top, ensuring it settles into all the gaps. Sprinkle the remaining cheese over the surface.

4. Bake to Perfection

Place the dish in the oven and bake for 30–35 minutes. The quiche is done when the edges are golden brown and the center is set but still has a very slight jiggle.

5. Serve

Let the dish rest for at least 10 minutes before slicing. This allows the custard to set firmly. Garnish with fresh parsley and serve alongside fresh tomatoes or a light green salad.


Tip: For an extra “gourmet” look, save a few mushroom slices and bacon pieces to press into the top of the egg mixture just before putting it in the oven!

Strawberry Nut-Butter Swirl

Strawberry Nut-Butter Swirl

Prep time: 5 minutes | Servings: 1

Ingredients

  • The Base: 1 ½ cups frozen strawberries (for that thick, creamy texture).

  • The Cream: ½ cup Greek yogurt or coconut cream.

  • The Liquid: ¾ cup unsweetened almond milk (or milk of choice).

  • The Sweetener: 1 pitted Medjool date or 1 tablespoon maple syrup.

  • The Nut Butter: 2 tablespoons creamy almond butter (or peanut butter).

  • Boosters: 1 scoop vanilla protein powder or 1 tablespoon chia seeds (optional).


Instructions

1. Prepare the Glass To get those beautiful swirls seen in the image, take a small spoon and smear about half of your almond butter along the inside walls of your glass. Focus on creating a thick band around the middle and a few streaks near the bottom.

2. Blend the Smoothie In a high-speed blender, combine the frozen strawberries, yogurt, almond milk, and your sweetener of choice. If you’re using protein powder or seeds, add them now. Blend on high until the mixture is completely smooth and thick.

Tip: If it’s too thick to move, add an extra splash of milk. If it’s too thin, add more frozen berries.

3. The Pour Slowly pour the pink strawberry mixture into your prepared glass. The thick smoothie will press the almond butter against the glass, creating that layered, marble effect.

4. The Finishing Touch Drizzle the remaining tablespoon of almond butter over the top of the smoothie. Use a toothpick or the tip of a knife to gently swirl it into the surface. Garnish with a fresh strawberry on the side of the plate for the full café experience.


Why it works

The vitamin C from the strawberries paired with the healthy fats in the almond butter makes this more than just a snack—it’s a sustained energy source. Enjoy your beautiful (and edible) masterpiece!

Creamy Mango-Kiwi Sunshine Smoothie

Creamy Mango-Kiwi Sunshine Smoothie.

Ingredients

  • Base: 1 cup frozen mango chunks (for that thick, chilled texture)

  • Liquid: 1 cup unsweetened almond milk or coconut water

  • Sweetener: 1–2 pitted Medjool dates (as seen in the side dish)

  • Fiber & Texture: ¼ cup rolled oats

  • Healthy Fats: ¼ cup raw walnuts (plus extra for topping)

  • Vitamin Boost: 1 ripe kiwi, peeled (plus extra slices for garnish)

  • Optional: A squeeze of lime juice for brightness


Instructions

  1. Prepare the Fruit: Peel your kiwi and remove the pits from the dates. If your dates are a bit firm, soak them in warm water for 5 minutes beforehand to ensure a smooth blend.

  2. Layer the Blender: Start by adding the liquid base to your blender. Following this with the oats and walnuts ensures they are fully pulverized for a silky consistency.

  3. Add the Tropical Mix: Add the frozen mango chunks and the peeled kiwi.

  4. Blend: Start on a low speed and gradually increase to high. Blend for about 45–60 seconds until the mixture is completely smooth and the oats have “disappeared” into the creaminess.

  5. Assemble: Pour the smoothie into a mason jar. Top with a generous handful of crushed walnuts for crunch and a slice of kiwi on the rim for that professional aesthetic.


Why This Works

This isn’t just a treat; it’s a balanced meal. The mango provides a rich, velvety base high in Vitamin C, while the oats and walnuts offer a slow-release energy source and healthy omega-3 fatty acids. Using dates instead of refined sugar keeps the sweetness natural and adds a hint of caramel-like flavor that pairs beautifully with the tartness of the kiwi.

Tip: For an even thicker “smoothie bowl” consistency, reduce the liquid to ¾ cup and use a tamper while blending!

Apple Pie Smoothie with Almond Butter Swirl

Apple Pie Smoothie with Almond Butter Swirl

Ingredients

  • Base: 1 large apple (Fuji or Honeycrisp work best), cored and chopped.

  • Creaminess: 1 frozen banana (for a thick, soft-serve texture).

  • Oats: 1/4 cup rolled oats (adds a “crust” flavor and keeps you full).

  • Liquid: 1 cup unsweetened almond milk (or milk of choice).

  • Protein/Fat: 1 tablespoon almond butter (plus extra for the jar swirl).

  • Spice: 1/2 teaspoon ground cinnamon and a pinch of ground nutmeg or star anise.

  • Sweetener (Optional): 1 teaspoon maple syrup or 1 pitted date.

  • Topping: A sprinkle of dry oats and a dash of cinnamon.


Instructions

  1. Prepare the Jar: To get that beautiful aesthetic from your photo, take a spoonful of creamy almond butter and use the back of a spoon to “paint” swirls on the inside of your glass or mason jar. Set it aside.

  2. Blend the Base: In a high-speed blender, combine the chopped apple, frozen banana, rolled oats, cinnamon, and nutmeg.

  3. Add Liquids: Pour in the almond milk and the tablespoon of almond butter. If you prefer a thinner consistency, add an extra splash of milk.

  4. Process: Blend on high until the oats are completely pulverized and the mixture is silky smooth.

  5. Assemble: Pour the smoothie carefully into your prepared jar. The almond butter on the sides will marble into the drink.

  6. Garnish: Top with a small handful of rolled oats and an extra pinch of cinnamon. Serve immediately with a straw or spoon.


Pro Tip

For an even colder, frostier texture, you can pre-slice your apples and freeze them for an hour before blending. If you want a boost of protein, a scoop of vanilla protein powder pairs perfectly with these flavors!

Sweet & Spicy Pickle Slaw

🥒 Sweet & Spicy Pickle Slaw

This refreshing slaw is perfect for topping sandwiches or serving at a barbecue.

🛒 Ingredients

  • 4 cups Shredded cabbage mix (green and red cabbage with carrots) 🥕

  • 1 cup Dill pickles, chopped or sliced into thin rounds 🥒

  • ¼ cup Red onion, thinly sliced 🧅

  • ½ cup Mayonnaise or Greek yogurt

  • 2 tablespoons Pickle juice (straight from the jar!)

  • 1 tablespoon Honey or maple syrup 🍯

  • 1–2 teaspoons Sriracha or hot sauce (adjust to your spice level) 🔥

  • ½ teaspoon Celery seeds and black pepper 🧂


👩‍🍳 Step-by-Step Instructions

  1. Prep the Base ➡️ In a large mixing bowl, toss together the shredded cabbage, carrots, red onion, and chopped pickles. 🥣

  2. Whisk the Dressing ➡️ In a separate small bowl, whisk together the mayonnaise, pickle juice, honey, Sriracha, celery seeds, and pepper until smooth and creamy. 🥄

  3. Combine ➡️ Pour the creamy dressing over the vegetable mixture. ➡️ Tip: Use a large spoon to fold everything together until every shred of cabbage is well-coated. 🥗

  4. The Spicy Finish ➡️ For that beautiful look in the photo, drizzle a little extra Sriracha over the top once it’s in the jar or bowl. 🔥🌀

  5. Chill for Flavor ➡️ Let the slaw sit in the refrigerator for at least 20–30 minutes. This softens the cabbage slightly and lets the spicy and sweet flavors meld together. 🧊


❓ Common Questions & Answers

Q: Can I make this ahead of time? A: Yes! You can prep the veggies and the dressing separately a day early. Mix them about an hour before serving to keep the maximum crunch. ⏱️

Q: Is there a way to make it less spicy? A: Simply reduce the amount of Sriracha or omit it entirely. You can replace it with a pinch of paprika for color without the heat. 🌶️➡️✨

Q: What does this pair well with? A: It is incredible on top of pulled chicken sandwiches, burgers, or served alongside grilled fish. 🍔🐟

Golden Crispy Cheesy Potato Cakes

🥔 Golden Crispy Cheesy Potato Cakes

This recipe makes about 8–10 cakes and is perfect as a side dish or a light snack.

🛒 Ingredients

  • 2 cups Cold mashed potatoes (plain or seasoned)

  • 1 cup Shredded cheddar or mozzarella cheese 🧀

  • 1 Large egg (lightly beaten) 🥚

  • ¼ cup All-purpose flour (plus extra for coating)

  • 2 tablespoons Fresh parsley or green onions, finely chopped 🌿

  • ½ teaspoon Garlic powder

  • Salt and Black pepper to taste 🧂

  • 2-3 tablespoons Olive oil or butter for pan-frying 🍳


👩‍🍳 Step-by-Step Instructions

  1. Mix the Base ➡️ In a large bowl, combine the cold mashed potatoes, shredded cheese, chopped parsley (or green onions), garlic powder, and the beaten egg. 🥣

  2. Bind it Together ➡️ Stir in the flour. The mixture should be firm enough to hold its shape. ➡️ Tip: If the mixture feels too sticky, add another tablespoon of flour. 🥄

  3. Shape the Cakes ➡️ Scoop about ¼ cup of the mixture and roll it into a ball. Flatten it gently with your palms to form a patty about ½ inch thick. ✋

  4. Light Coating ➡️ Lightly dredge each patty in a little bit of extra flour. This is the secret to getting that extra crispy crust! ✨

  5. Heat the Pan ➡️ Heat the oil or butter in a large non-stick skillet over medium heat. 🍳

  6. Fry until Golden ➡️ Place the cakes in the pan (don’t crowd them!). Fry for 3–4 minutes per side until they are deep golden brown and crispy. ➡️ 🔃

  7. Drain & Garnish ➡️ Remove the cakes and place them on a plate lined with a paper towel to remove excess oil. Sprinkle with a little extra fresh parsley. 🌿


❓ Common Questions & Answers

Q: Can I make these in the air fryer? A: Yes! Lightly spray the cakes with oil and air fry at 400°F (200°C) for about 10–12 minutes, flipping halfway through until crispy. 💨

Q: My potato cakes are falling apart in the pan. Why? A: This usually happens if the potatoes are too warm or the mixture is too wet. Make sure to use cold mashed potatoes and add enough flour to create a dough-like consistency. 💡

Q: Can I add other ingredients? A: Definitely! Finely diced cooked turkey or small pieces of steamed broccoli work great inside these cakes for extra flavor. 🥦

Q: What should I serve these with? A: They are delicious with a dollop of sour cream, Greek yogurt, or even a little bit of spicy ranch dip on the side! 🍯


✨ Pro Tip

If you have leftover mashed potatoes from dinner, store them in the fridge overnight. Cold potatoes contain more starch, which helps these cakes stay together perfectly without needing too much flour! 🥔🔥

Creamy Pistachio Protein Gelato

Ingredients

  • 2 cups unsweetened almond milk
  • 1 cup Greek yogurt or cottage cheese
  • ½ cup shelled pistachios
  • 1 scoop vanilla protein powder
  • 2–3 tablespoons honey or maple syrup
  • 1 teaspoon vanilla extract
  • ¼ teaspoon almond extract (optional but delicious)
  • 2 tablespoons chopped pistachios
  • 2 tablespoons raisins or dark chocolate chips
  • Pinch of salt

Instructions

  1. Blend the base
    Add almond milk, yogurt, pistachios, protein powder, sweetener, vanilla, almond extract, and salt to a blender. Blend until smooth and creamy.
  2. Add mix-ins
    Stir in chopped pistachios and raisins or chocolate chips.
  3. Freeze
    Pour mixture into a freezer-safe container. Freeze 3–4 hours, stirring every hour for a creamier texture.
  4. Serve
    Let sit at room temperature for 5–10 minutes before scooping.

Optional Boosts

  • Add spinach for natural green color
  • Use coconut milk for extra richness
  • Add cardamom for a Mediterranean twist

Protein Tip

For extra protein, use:

  • high-protein Greek yogurt
  • fairlife milk
  • collagen peptides or extra protein powder

Lemon Curd Chia Pudding

ingredients

Chia Pudding

  • 3 tablespoons chia seeds
  • 1 cup milk
    (almond, oat, coconut, or dairy)
  • 1–2 teaspoons maple syrup or honey
  • ½ teaspoon vanilla extract

Lemon Layer

  • ⅓ cup lemon curd
  • ¼ cup Greek yogurt or whipped coconut cream
  • 1 teaspoon lemon zest

Instructions

  1. Prepare chia pudding
    Mix chia seeds, milk, sweetener, and vanilla in a jar or bowl.
    Stir well, wait 10 minutes, then stir again to prevent clumps.
  2. Chill
    Refrigerate at least 4 hours or overnight until thickened.
  3. Make lemon cream
    Stir together lemon curd, yogurt, and lemon zest until smooth.
  4. Assemble
    Spoon chia pudding into serving glasses and top with the lemon mixture.
  5. Serve cold
    Garnish with extra zest, berries, or crushed graham crackers if desired.

Optional Add-Ins

  • blueberries or raspberries
  • crushed vanilla wafers
  • toasted coconut
  • white chocolate shavings

Quick Homemade Lemon Curd

If you want to make your own:

  • 2 egg yolks
  • ⅓ cup sugar
  • ¼ cup fresh lemon juice
  • 1 tablespoon lemon zest
  • 2 tablespoons butter

Cook gently over low heat until thickened, then chill.

Mediterranean Scallion Crackers

Ingredients

  • 1½ cups all-purpose flour
    (or whole wheat flour for extra fiber)
  • ½ teaspoon salt
  • ½ teaspoon baking powder
  • ½ teaspoon dried oregano
  • ½ teaspoon dried thyme
  • ½ teaspoon garlic powder
  • 2 tablespoons olive oil
  • ⅓–½ cup water
  • 3 scallions (green onions), finely chopped
  • Optional: sesame seeds or grated Parmesan for topping

Instructions

  1. Preheat oven to 375°F (190°C). Line a baking sheet with parchment paper.
  2. Mix dry ingredients
    In a bowl, combine flour, salt, baking powder, oregano, thyme, and garlic powder.
  3. Add scallions & oil
    Stir in chopped scallions and olive oil.
  4. Form dough
    Gradually add water until a soft dough forms. Knead lightly for 2–3 minutes.
  5. Roll thin
    Roll dough out very thin on a lightly floured surface.
  6. Cut crackers
    Use a knife or pizza cutter to cut into squares or rectangles. Prick each cracker with a fork.
  7. Bake
    Transfer to baking sheet and bake 12–18 minutes, until golden and crisp.
  8. Cool completely
    Crackers crisp up more as they cool.

Flavor Variations

  • Add crushed red pepper for heat
  • Sprinkle with za’atar before baking
  • Mix in chopped olives or feta crumbles

Serving Suggestions

Great with:

  • hummus
  • tzatziki
  • labneh
  • cheese boards
  • soups and salads

Cheesy Spinach Puff Pastry Bites

✨ Cheesy Spinach Puff Pastry Bites ✨

If you’re looking for a crowd-pleasing appetizer that looks fancy but is incredibly simple to make, these Cheesy Spinach Puff Pastry Bites are a perfect choice. They are crispy, creamy, and packed with flavor!


🛒 Ingredients

  • Puff Pastry: 1 pack (usually 2 sheets), thawed

  • Fresh Spinach: 2 cups, chopped

  • Cream Cheese: 4 oz (half a block), softened

  • Mozzarella Cheese: 1 cup, shredded

  • Garlic: 2 cloves, minced

  • Egg Wash: 1 egg beaten with 1 tbsp water

  • Topping: Everything bagel seasoning or sesame seeds


👩‍🍳 Step-by-Step Recipe

🥬 1. Prepare the Filling

  1. Heat a pan over medium heat.

  2. Add the chopped spinach and sauté for 2–3 minutes until wilted.

  3. Stir in the minced garlic and cook for another minute until fragrant.

  4. Remove from heat and transfer to a bowl. Mix in the softened cream cheese and mozzarella until the mixture is smooth and creamy.

📜 2. Prepare the Puff Pastry

  1. Lightly flour your work surface and roll out the puff pastry sheets.

  2. Cut the pastry into equal rectangles or squares (about 3×3 inches works well).

🧀 3. Fill the Pastry

  1. Spoon about 1 tablespoon of the spinach-cheese mixture onto the center of each pastry piece.

  2. Fold the pastry over the filling (into a triangle or rectangle) and press the edges with a fork to seal them tightly.

✨ 4. Add Topping

  1. Place the pastries on a baking tray lined with parchment paper.

  2. Brush the tops evenly with the egg wash to ensure a beautiful golden finish.

  3. Sprinkle with everything bagel seasoning or sesame seeds.

🔥 5. Bake

  1. Bake in a preheated oven at 400°F (200°C) for 18–22 minutes.

  2. Remove when they are puffed up and have turned a deep, golden brown.

🍽️ 6. Serve

  1. Allow them to cool for a few minutes so the cheese sets slightly.

  2. Serve warm! These pair beautifully with a side of garlic aioli or a tangy dill yogurt dip.


❓ Quick Tips & Q/A

  • Frozen Spinach: If using frozen, make sure to thaw it completely and squeeze out every bit of excess water to prevent the pastry from getting soggy.

  • Make-Ahead: You can assemble these a few hours in advance. Keep them covered in the fridge and simply brush with egg wash right before you pop them in the oven.

  • Cheese Variations: For a sharper bite, swap half the mozzarella for Feta or Parmesan. For extra creaminess, a dollop of Ricotta works wonders.

California Spaghetti Salad

A chilled pasta salad loaded with crisp vegetables, Italian dressing, and Parmesan — great for BBQs, meal prep, or hot weather dinners.

https://images.openai.com/static-rsc-4/RoyRp4ZVN45T9k8U_BU55J6-b3MAHbvFktCwdI6YFwlPmHe2NbYJcsb3y-vPAZHJJzsb_jZRMx_0Wh5yEnGtbJEZ9ZBYF-TMGsAKUdJV_fa15YYcjsdOPfkE10TFQhBZ_6YHtb1uNLlNoqn6lnjDhB5wTWeY4HADiwvUBkZIQtR67dQe3Uks7nxoVj4YbVEM?purpose=fullsize
https://images.openai.com/static-rsc-4/4DvnzjiNePwapmu3dcWsKk2arC2CVFv9eKYy1wobDVWGiSMfOJbzD32AOfIT4rVS1S0mBonIuYgaXD-QNsHOrBSe55nuDXQ0nwt4BOigyG3zJlp3_rkWoSUgXVgDmLf7VJbHYyGCKsP5KEnWH79imSxEbjkLiaW06dd1diQ6BKvwPRBGuV7-QIPh_dCPyfV2?purpose=fullsize
https://images.openai.com/static-rsc-4/mzb9DEY-pkK-luS9i23z3C7RmgiNsiaKxTQtG-oDF_j1KgjMd6gv1Lw_sGCVVbjyHOnCnhKkZtFpVz-OsLwOhMRCs70UWAYd6rJFAND52cYuqn6qfy2EUbG9NoR_kwJ8xOZqBS3InRgooFTeovdPALOJpwNc0VZSDWN8-twOOHENqIPshhmYV-1wne1YAFZ3?purpose=fullsize
https://images.openai.com/static-rsc-4/Fx3dqe8qpWwuKrQzg1C5EMlqRV3NC3LPUb6m6-sYRbALAxQYApnhf3eBMWTb4yRKDfh4RVn61M0WdX2omg-A7c9yn24rdkIW-VD_u2SuSiBOoeqi3O5odiNC0bNjq2_EWYkG7beE1TfpjH-Oy6L2mqeF6QzFRXlIlJlC43NLbvuDr2SnI5Bs4NHC0uGLWXae?purpose=fullsize
https://images.openai.com/static-rsc-4/5TUAsXw6iVd3whUIBCzpKsDUOPE299k4898YUtlI_HgsW-UYilZHhlf2ufaFJHZkaocasMTK6-If6ZTIzTRWgLQrMX1KL3hWEJ7B7oyqY50dgxgbuRnzw3YzeypRZp4-G58fmCpW3O4RbjGLUBDmTVrv5P3L0LYPp7od7YK8iF-j7e7farTXQiav9B3q4GL0?purpose=fullsize
https://images.openai.com/static-rsc-4/v2fT40b8V4fs8pUW90RbtN-M1eseHCAriNGKGm8HuB7Uro8m6lF0yfWHJvwb-1hZgxBwy71zXt6_gw6l8kjge_FiRp2qr2sV1iIB__TdDpVMjWz-2H3mzu83DXmYQr9ouwSLCE3mf8AHr_p2CiRaYZGqcgYtVZa8GR154-kE2bWm1zWhjFlM0drbLM-2DbfH?purpose=fullsize

Ingredients

Salad

  • 1 lb spaghetti
  • 1½ cups cherry tomatoes, halved
  • 1 cucumber, diced
  • 2 zucchini, diced
  • 1 green bell pepper, diced
  • 1 red bell pepper, diced
  • 1 red onion, finely chopped
  • 1 can sliced black olives, drained
  • 1 cup shredded Parmesan cheese

Dressing

  • 1 bottle Italian dressing (about 16 oz)
  • 1 tsp sesame seeds
  • 1 tsp paprika
  • ¼ tsp celery seed
  • ½ tsp garlic powder

Instructions

  1. Cook spaghetti until al dente. Rinse under cold water and drain well.
  2. In a large bowl, combine all chopped vegetables and olives.
  3. Whisk together the Italian dressing, sesame seeds, paprika, celery seed, and garlic powder.
  4. Toss spaghetti with vegetables and dressing until evenly coated.
  5. Stir in Parmesan cheese.
  6. Cover and chill for at least 2 hours before serving.

Tips

  • Tastes even better the next day.
  • Add grilled chicken, salami, or chickpeas for extra protein.
  • Use thin spaghetti if you prefer a lighter texture.
  • Fresh parsley or basil adds a nice finish.

Serving Ideas

Pairs well with:

  • grilled burgers
  • BBQ chicken
  • garlic bread
  • picnic sandwiches

No-Bake Chocolate Biscuit Cake

Ingredients

Biscuit Layer

  • 300 g tea biscuits or Marie biscuits
  • 120 g unsalted butter
  • 120 g sugar
  • 60 ml milk
  • 40 g cocoa powder
  • 150 g dark chocolate, melted
  • 1 tsp vanilla extract
  • Pinch of salt

Cream Layer (optional but matches photo)

  • 250 g cream cheese or mascarpone
  • 3 tbsp powdered sugar
  • 1 tsp vanilla

Chocolate Ganache Topping

  • 200 g dark chocolate
  • 120 ml heavy cream
  • 1 tbsp butter

Instructions

1. Prepare the Chocolate Mixture

  1. In a saucepan, melt:
    • butter
    • sugar
    • milk
    • cocoa powder
  2. Stir until smooth.
  3. Remove from heat.
  4. Add melted dark chocolate, vanilla, and salt.

2. Add the Biscuits

  1. Break biscuits into medium chunks.
  2. Fold them into the chocolate mixture until fully coated.

3. Make the Cream Layer

  1. Beat cream cheese (or mascarpone) with powdered sugar and vanilla until smooth.

4. Assemble

  1. Line a square pan (about 20×20 cm / 8×8 inch) with parchment paper.
  2. Press half the chocolate biscuit mixture into the pan.
  3. Spread the cream layer evenly.
  4. Add remaining biscuit mixture on top and press flat.

5. Make the Ganache

  1. Heat cream until hot (not boiling).
  2. Pour over chopped chocolate.
  3. Let sit 1 minute, then stir smooth.
  4. Add butter for extra shine.

Pour ganache over the cake and smooth the top.


6. Chill

  • Refrigerate for at least 4–6 hours
  • Overnight is best for clean slices

Serving Tips

  • Use a hot knife for perfect squares.
  • Store refrigerated up to 5 days.
  • Tastes even better the next day.

Optional Add-Ins

  • Chopped hazelnuts
  • Crushed Oreos
  • Espresso powder
  • Coconut flakes
  • Peanut butter swirl

If you want, I can also give:

  • an eggless version
  • a condensed milk version
  • a Nutella version
  • exact bakery-style measurements in cups and grams
  • a quick 10-minute version without cream cheese

Cheesy Spinach White Pizza

Cheesy Spinach White Pizza

This recipe features a protein-packed, low-carb-friendly “two-ingredient dough” crust, making it a great option for a lighter, points-friendly meal that still delivers on that classic, cheesy comfort.

Ingredients

For the Protein-Packed Crust:

  • 1 cup self-rising flour

  • 1 cup non-fat plain Greek yogurt (strained of excess liquid)

  • Note: If you don’t have self-rising flour, use 1 cup all-purpose flour + 1 ½ tsp baking powder + ½ tsp salt.

For the Toppings:

  • 2 cups fresh baby spinach

  • 1 clove garlic, minced

  • 1 tsp olive oil

  • 1 cup part-skim shredded mozzarella cheese

  • 2 tbsp grated Parmesan cheese

  • A pinch of red pepper flakes (optional)

  • Salt and black pepper to taste


Instructions

  1. Preheat the Oven: Preheat your oven to 425°F (220°C). Line a baking sheet or pizza stone with parchment paper.

  2. Prepare the Spinach: In a skillet over medium heat, add the olive oil and minced garlic. Sauté for about 30 seconds until fragrant. Add the fresh spinach and cook until just wilted (about 1-2 minutes). Remove from heat, let it cool slightly, and squeeze out as much excess moisture as possible so the pizza doesn’t get soggy.

  3. Make the Dough: In a mixing bowl, combine the self-rising flour and Greek yogurt. Stir until a crumbly dough forms.

  4. Knead and Shape: Transfer the dough to a lightly floured surface and knead for a few minutes until it becomes smooth and elastic. If it’s too sticky, sprinkle a little extra flour. Roll or press the dough out onto your prepared parchment paper into a roughly 10-12 inch circle.

  5. Assemble the Pizza: Lightly spray the rolled-out crust with cooking spray or brush with a tiny bit of olive oil. Spread the wilted garlic spinach evenly across the dough. Top evenly with the shredded mozzarella and Parmesan cheese.

  6. Bake: Bake for 12-15 minutes, or until the crust is golden brown and the cheese is melted and bubbly.

  7. Serve: Remove from the oven, let it cool for 2-3 minutes, sprinkle with red pepper flakes if desired, slice, and serve.

Cheesy Broccoli Egg Bites

Cheesy Broccoli Egg Bites 

Ingredients

  • 6 large eggs

  • 1/2 cup cottage cheese (for extra creaminess and protein)

  • 1 cup shredded sharp cheddar cheese

  • 1/2 cup finely chopped broccoli (steamed or blanched)

  • 1/4 cup grated Parmesan cheese

  • 1/4 tsp salt and 1/4 tsp black pepper

  • 1/8 tsp garlic powder

  • Fresh parsley (optional garnish)


Instructions

  1. Prep the Oven: Preheat your oven to 350°F (175°C). Generously grease a standard 12-cup muffin tin with non-stick spray or butter.

  2. Blend for Texture: In a blender, combine the eggs, cottage cheese, salt, pepper, and garlic powder. Blend on high for about 15–20 seconds until the mixture is completely smooth and frothy. This aeration is the secret to a “soufflé-like” texture.

  3. Mix in the Solids: In a medium bowl, stir together the shredded cheddar and finely chopped broccoli.

  4. Assemble: Divide the cheese and broccoli mixture evenly among the muffin cups. Pour the egg mixture over the top of each cup until they are about 3/4 full. Sprinkle the tops with Parmesan cheese.

  5. The Water Bath (Optional but Recommended): Place a baking dish filled with an inch of hot water on the bottom rack of the oven. This creates steam, which keeps the egg bites velvety and prevents them from drying out.

  6. Bake: Place the muffin tin on the middle rack. Bake for 20–25 minutes, or until the centers are set and the tops are slightly golden.

  7. Cool and Serve: Let them rest in the pan for 5 minutes before using a rubber spatula to gently pop them out. Garnish with fresh parsley if desired.


Storage Tip

These stay fresh in an airtight container in the fridge for up to 4 days. To reheat, simply microwave for 30 seconds for a quick, warm meal!

Creamy Garlic Chicken and Asparagus

Creamy Garlic Chicken and Asparagus

Ingredients

  • Chicken: 3 boneless, skinless chicken breasts.

  • Vegetables: 1 bunch of fresh asparagus (woody ends trimmed).

  • The Sauce: 1/2 cup heavy cream, 1/4 cup chicken broth, 3 cloves minced garlic, 1 tbsp Dijon mustard, and 1/2 tsp onion powder.

  • Seasoning: Salt, black pepper, red pepper flakes, and fresh parsley for garnish.

  • Fat: 2 tbsp olive oil or melted butter.


Instructions

  1. Prep and Sear: Preheat your oven to 200°C (400°F). Season the chicken breasts generously with salt and pepper. In a large oven-safe skillet or baking dish, lightly sear the chicken with olive oil over medium-high heat for about 3 minutes per side until golden brown. (The chicken won’t be fully cooked yet).

  2. Arrange: If you used a skillet, push the chicken to the center and tuck the asparagus spears around the sides. If using a baking dish, place the chicken in the middle and surround it with the asparagus.

  3. Whisk the Sauce: In a small bowl, whisk together the heavy cream, chicken broth, minced garlic, mustard, and onion powder.

  4. Combine: Pour the creamy mixture over the chicken and asparagus. Ensure the garlic is evenly distributed. Sprinkle a pinch of red pepper flakes over the top for a subtle kick.

  5. Bake: Place the dish in the oven and bake for 15–20 minutes. You’ll know it’s ready when the chicken reaches an internal temperature of 75°C (165°F) and the asparagus is tender-crisp.

  6. Garnish: Remove from the oven and let it rest for 5 minutes. Spoon some of the pan sauce back over the chicken and top with freshly chopped parsley.


Tips for Success

  • Even Cooking: If the chicken breasts are very thick, gently pound them to an even thickness before cooking so they finish at the same time as the asparagus.

Side Dish: This pairs beautifully with mashed potatoes, rice, or a crusty piece of bread to soak up that garlic cream sauce.

Tropical Berry Green Smoothie

Tropical Berry Green Smoothie 

Ingredients

The Base:

  • 1 cup fresh baby spinach or kale (tightly packed)

  • 1/2 green apple, cored and sliced

  • 1/2 golden kiwi, peeled

  • 1/2 cup coconut water or almond milk (for a creamy finish)

The Toppings (as pictured):

  • Fresh Berries: A handful of blueberries, raspberries, and blackberries

  • Garnish: 1 sprig of fresh mint


Instructions

  1. Prep the Greens: Start by adding your liquid base (coconut water or almond milk) into the blender. Adding liquid first helps the blades move more efficiently and prevents the greens from getting stuck at the bottom.

  2. Add the Fruit: Add the spinach, green apple, and kiwi. If you prefer a colder, thicker consistency, use a frozen banana or a few ice cubes.

  3. Blend: Pulse on low at first, then increase to high speed. Blend for about 45–60 seconds until the texture is completely smooth and vibrant green with no visible leafy bits.

  4. Assemble: Pour the mixture into a tall glass.

  5. Garnish: Carefully place your fresh blueberries, raspberries, and blackberries on the surface. They should sit right on top of the thick foam.

  6. The Finishing Touch: Tuck in a small sprig of mint for aroma and add a colorful straw.


Quick Tips

  • Natural Sweetness: If your apple is particularly tart, you can add a teaspoon of honey or a single pitted date.

  • Texture: If the smoothie is too thick, splash in a little more coconut water. If it’s too thin, add a tablespoon of chia seeds or Greek yogurt.

  • Boost It: For extra protein, a scoop of vanilla plant-based protein powder pairs beautifully with the kiwi and mint flavors.

Enjoy this refreshing, nutrient-dense treat! It’s the perfect way to fuel your morning or recharge after a workout.

Creamy Blueberry Banana Smoothie

Creamy Blueberry Banana Smoothie

Ingredients

  • 1 cup fresh or frozen blueberries (frozen will yield a thicker texture).

  • 1 large ripe banana (peel and slice; use frozen for extra creaminess).

  • 1/2 cup Greek yogurt or a plant-based alternative like coconut yogurt.

  • 1 cup milk of your choice (dairy, almond, or oat milk work beautifully).

  • 1 teaspoon honey or maple syrup (optional, depending on fruit ripeness).

  • 1/2 cup ice cubes (if using fresh fruit).

  • Garnish: Extra banana slices and a few whole blueberries.


Instructions

  1. Prepare the Fruit: If you are using fresh fruit, rinse the blueberries thoroughly and peel the banana. For a thicker, more “milkshake-like” consistency, use a banana that has been sliced and frozen ahead of time.

  2. Layer the Blender: To ensure a smooth blend without taxing your motor, add your liquids first. Pour the milk and yogurt into the blender base. Follow this with the blueberries, banana slices, and sweetener. Place the ice on top last.

  3. Blend: Secure the lid firmly. Start on a low speed to break up the larger pieces of fruit, then gradually increase to high. Blend for about 45–60 seconds until the color is a uniform, deep purple and the texture is velvety.

  4. Check Consistency: If the smoothie is too thick, add a splash more milk and pulse. If you prefer it thicker, add a few more ice cubes or frozen fruit pieces and blend again.

  5. Serve: Pour the smoothie into a chilled glass.

  6. Garnish: As seen in the image, take a fresh banana slice and cut a small notch into it to rest it on the rim of the glass. Drop a few whole blueberries on top for a professional finish.

Enjoy immediately while chilled!

Creamy Avocado & Pistachio Smoothie

Creamy Avocado & Pistachio Smoothie

Ingredients

  • 1 ripe avocado: Pitted and peeled (the source of that velvet texture).

  • 1 cup spinach: Fresh baby spinach for an extra boost of green.

  • 1 ½ cups milk of choice: Almond, oat, or dairy milk all work beautifully.

  • 1 frozen banana: Provides natural sweetness and a chilled, thick consistency.

  • 2 tbsp honey or maple syrup: Adjust based on your sweetness preference.

  • ¼ cup raw pistachios: Shelled (save a few for the garnish).

  • 1 tsp vanilla extract: For a fragrant, rounded flavor.

  • A squeeze of lime juice: To keep the color bright and add a subtle zing.

  • Fresh mint leaves: A small handful for the blend and one for the top.


Instructions

  1. Prep the Base: Place your liquid (milk) into the blender first. Adding liquids first helps the blades move freely and prevents the thicker ingredients from getting stuck at the bottom.

  2. Add the Greens: Add the spinach and the avocado flesh. By blending these with the liquid for a quick 10-second pulse, you ensure a perfectly smooth, “no-leaf” texture.

  3. Combine Remaining Ingredients: Add the frozen banana chunks, pistachios, honey, vanilla, lime juice, and most of the mint leaves.

  4. The Big Blend: Secure the lid and blend on high speed for 45–60 seconds. You are looking for a completely uniform, pale green color with no visible nut fragments.

  5. Adjust Consistency: If it feels too thick, splash in a little more milk. If you want it colder, add 3–4 ice cubes and pulse again.

  6. Garnish and Serve: Pour into a chilled glass. Top with finely crushed pistachios and a sprig of fresh mint as seen in the image.

Pro Tip

For an even creamier experience, use full-fat coconut milk. The healthy fats in the avocado and coconut combine to create a mousse-like texture that is incredibly satisfying!

Cranberry Pecan Chicken Salad with Poppy Seed Dressing 🥗🍗

Cranberry Pecan Chicken Salad with Poppy Seed Dressing 🥗🍗
Sweet, crunchy, meal-prep ready — 15 min

Serves 4 | Prep 15 min | No cooking

Salad
Cooked chicken: 3 cups / 450g, shredded or diced — rotisserie works
Celery: 2 stalks, diced
Dried cranberries: ½ cup
Pecans: ½ cup, toasted + chopped
Red onion: 2 tbsp, minced
Fresh parsley: 2 tbsp, chopped

Poppy Seed Dressing
Greek yogurt: ½ cup — or mayo for classic
Olive oil: 2 tbsp
Apple cider vinegar: 1½ tbsp
Honey: 1 tbsp
Poppy seeds: 1 tbsp
Dijon mustard: 1 tsp
Salt + pepper: ½ tsp each

Method
Dressing: Whisk all dressing ingredients until smooth.
Mix: Toss chicken + celery + cranberries + pecans + onion with dressing.
Chill: 20 min for flavors to marry. Garnish parsley.

How to serve:
Lettuce wraps, croissants, or over mixed greens.

High-Protein / Low-Carb Version — for your page:
Honey → sugar-free maple syrup
Serve in lettuce cups, not bread
Macros per serving: ∼310 cal, 32g protein, 6g net carbs, 17g fat

Key tip: Toast pecans 3 min in a dry pan — doubles the flavor.

Soft-Baked Protein Banana Cookies

Soft-Baked Protein Banana Cookies

Ingredients

  • 2 large overripe bananas, thoroughly mashed

  • 1 cup rolled oats (or substitute with almond flour for a strictly low-carb option)

  • 1/2 cup vanilla protein powder

  • 1/4 cup zero-calorie sweetener (like Monk fruit or Stevia blend)

  • 1 large egg

  • 1 tsp vanilla extract

  • 1 tsp ground cinnamon

  • 1/2 tsp baking powder

  • A pinch of salt

Instructions

  1. Prep the Equipment: Preheat your oven to 350°F (175°C) and line a baking sheet with parchment paper. (Tip: If you prefer using an air fryer, simply line your air fryer basket with a fitted piece of parchment paper instead).

  2. Mix the Wet Ingredients: In a large mixing bowl, mash the bananas until completely smooth. Whisk in the egg and vanilla extract until well combined.

  3. Incorporate the Dry: Fold in the rolled oats, protein powder, sweetener, cinnamon, baking powder, and salt. Stir until a thick, cohesive dough forms. Let the dough rest for about 5 minutes so the oats can absorb the moisture from the bananas.

  4. Scoop and Shape: Using a cookie scoop or a spoon, drop even mounds of dough onto your prepared baking sheet (or into the air fryer basket in small batches), spacing them about 2 inches apart. Gently flatten the tops slightly, as these soft-baked cookies won’t spread much while cooking.

  5. Bake:

    • Oven Method: Bake for 10-12 minutes, or until the edges are golden brown and the centers are set.

    • Air Fryer Method: Air fry at 320°F (160°C) for 7-9 minutes until golden and cooked through.

  6. Cool and Serve: Allow the cookies to cool on the baking sheet for a few minutes before transferring them to a wire rack to cool completely. Enjoy with a cup of tea or coffee!

blueberry streusel muffins

blueberry streusel muffins

These bakery-style blueberry streusel muffins are soft, fluffy, and packed with juicy blueberries under a buttery cinnamon crumb topping. They’re perfect for breakfast, brunch, lunchboxes, or an afternoon coffee treat. The streusel adds a sweet crunchy texture that contrasts beautifully with the moist muffin base.

Description

Blueberry streusel muffins combine tender vanilla muffin batter with fresh or frozen blueberries and a cinnamon-sugar crumb topping. The muffins rise high with golden tops and stay moist for days. The streusel melts slightly into the muffin while keeping a crisp texture on top.

They are easy enough for beginners yet taste like they came from a professional bakery.

Prep & Cook Time

  • Prep Time: 20 minutes
  • Cook Time: 22–25 minutes
  • Total Time: 45 minutes

Servings

  • Makes 12 muffins

Ingredients

For the Muffins

  • 2 cups all-purpose flour
  • 1 teaspoon baking powder
  • ½ teaspoon baking soda
  • ½ teaspoon salt
  • ½ cup unsalted butter, melted
  • ¾ cup granulated sugar
  • 2 large eggs
  • 1 cup buttermilk
  • 1½ teaspoons vanilla extract
  • 1½ cups fresh or frozen blueberries
  • 1 tablespoon flour (to coat blueberries)

For the Streusel Topping

  • ½ cup all-purpose flour
  • ⅓ cup brown sugar
  • ½ teaspoon cinnamon
  • 3 tablespoons cold unsalted butter, cubed

Instructions

Step 1: Prepare the Oven

  • Preheat oven to 375°F (190°C).
  • Line a 12-cup muffin tin with paper liners or grease lightly.

Step 2: Make the Streusel

In a small bowl:

  • Combine flour, brown sugar, and cinnamon.
  • Cut in cold butter using a fork or fingertips until crumbly.
  • Refrigerate while preparing batter.

Step 3: Mix Dry Ingredients

In a medium bowl whisk together:

  • Flour
  • Baking powder
  • Baking soda
  • Salt

Step 4: Mix Wet Ingredients

In a large bowl:

  • Whisk melted butter and sugar together.
  • Add eggs one at a time.
  • Stir in buttermilk and vanilla extract.

Step 5: Combine Batter

  • Gradually fold dry ingredients into wet ingredients.
  • Do not overmix.

Toss blueberries with 1 tablespoon flour, then gently fold into batter.

Step 6: Fill Muffin Cups

  • Divide batter evenly among muffin cups, filling about ¾ full.
  • Sprinkle streusel generously over each muffin.

Step 7: Bake

Bake for 22–25 minutes or until:

  • Tops are golden brown
  • Toothpick inserted comes out clean

Cool in pan for 5 minutes, then transfer to a wire rack.

Notes

  • Tossing blueberries in flour prevents them from sinking.
  • Frozen blueberries work well; do not thaw before using.
  • Buttermilk creates extra softness and moisture.
  • Overmixing batter can make muffins dense.

Tips for Best Results

  1. Use room-temperature eggs for smoother batter.
  2. Chill streusel before baking for crisp crumbs.
  3. Fill muffin cups evenly for consistent baking.
  4. Use fresh blueberries in peak season for strongest flavor.
  5. Sprinkle coarse sugar on top for bakery-style shine.
  6. Bake on the center rack for even heat distribution.

Storage Instructions

  • Room Temperature: Store in airtight container for 2 days.
  • Refrigerator: Up to 5 days.
  • Freezer: Freeze for up to 2 months.

Reheat in microwave for 15–20 seconds before serving.

Nutritional Information (Per Muffin Approx.)

Nutrient Amount
Calories 255
Carbohydrates 34g
Protein 4g
Fat 11g
Saturated Fat 6g
Fiber 1.5g
Sugar 18g
Sodium 190mg

Health Benefits

Blueberries

Blueberries are rich in antioxidants, vitamin C, and fiber. They may support brain health and help reduce inflammation.

Homemade Muffins

Homemade muffins contain fewer preservatives and can be customized with healthier ingredients.

Buttermilk

Buttermilk adds calcium and protein while keeping baked goods tender.

Variations

Lemon Blueberry Muffins

Add:

  • 1 tablespoon lemon zest
  • 1 tablespoon lemon juice

Mixed Berry Muffins

Replace blueberries with:

  • raspberries
  • blackberries
  • chopped strawberries

Healthier Version

Substitute:

  • Whole wheat flour for half the flour
  • Greek yogurt for part of the butter
  • Honey or coconut sugar for white sugar

Serving Suggestions

Serve warm with:

  • Coffee
  • Tea
  • Milk
  • Vanilla yogurt
  •  Butter or cream cheese

Great for:

  • Breakfast
  • Brunch tables
  • Picnics
  • School snacks

Frequently Asked Questions

Why did my muffins turn out dense?

Usually from overmixing the batter. Stir only until ingredients are combined.

Can I use frozen blueberries?

Yes. Add them frozen to prevent excess moisture and color bleeding.

How do I make muffins extra fluffy?

  • Use fresh baking powder
  • Avoid overmixing
  • Don’t overbake

Can I make these ahead of time?

Yes. Bake a day ahead and store in an airtight container.

Why is my streusel melting?

The butter may have been too warm. Chill the topping before baking.

Can I make mini muffins?

Yes. Bake mini muffins at 375°F for about 10–13 minutes.

Recipe Summary

These blueberry streusel muffins are soft, moist, buttery, and topped with irresistible cinnamon crumble. They are simple to make, freezer-friendly, and ideal for breakfast or dessert. The juicy blueberries and crunchy streusel create a delicious bakery-style treat everyone loves.

Brown Sugar Roasted Sweet Potatoes 

Brown Sugar Roasted Sweet Potatoes 🍠✨
Caramelized edges, soft center — 35 min
Serves 4 | Prep 10 min | Roast 25 min
Ingredients
Sweet potatoes: 2 large / 600g, peeled + cubed 1-inch
Butter: 3 tbsp, melted
Brown sugar: 2 tbsp, packed
Maple syrup: 1 tbsp
Cinnamon: 1 tsp
Salt: ½ tsp
Vanilla: ½ tsp — secret for flavor
Method
Toss: Coat sweet potato cubes with melted butter, brown sugar, maple, cinnamon, salt, vanilla.
Roast: Spread on parchment-lined sheet. 425°F / 220°C for 25–30 min. Stir once halfway.
Caramelize: Broil 2 min at end for crispy edges. Watch so it doesn’t burn.
Why this works:
High heat + sugar = glossy, candied edges. Vanilla makes it taste like dessert.
High-Protein / Lower-Carb Version — for your page:
Sweet potato → cubed butternut squash or carrots
Brown sugar + maple → 1 tbsp sugar-free maple syrup + 1 tsp brown sugar monk fruit
Add ¼ cup chopped pecans after roasting
Macros per serving: ∼95 cal, 1g protein, 7g net carbs, 6g fat
Key tip: Cut pieces same size so they cook evenly. Don’t skip the broil.

Classic Shepherd’s Pie

Classic Shepherd’s Pie

Ingredients

The Meat Filling:

  • 1 lb extra-lean ground lamb (or ground beef if you prefer a traditional Cottage Pie)

  • 1 medium yellow onion, finely diced

  • 2 large carrots, peeled and diced

  • 1 cup frozen peas

  • 2 cloves garlic, minced

  • 2 tbsp tomato paste

  • 1 cup beef broth

  • 1 tbsp Worcestershire sauce

  • 1 tsp fresh thyme (plus a sprig for garnish)

  • Salt and freshly ground black pepper to taste

  • 1 tsp olive oil

The Mashed Topping:

  • 1.5 lbs Yukon Gold or Russet potatoes, peeled and cubed (To make this a low-carb, WW-friendly dish, swap half or all of the potatoes for cauliflower florets!)

  • 1/4 cup skim milk or unsweetened almond milk

  • 2 tbsp light butter or plain Greek yogurt (for extra protein and creaminess)

  • 1/4 cup reduced-fat shredded cheddar cheese

  • Salt and pepper to taste

Instructions

  1. Boil the Mash: Place the cubed potatoes (and cauliflower, if using) in a large pot and cover with cold, salted water. Bring to a boil and cook until fork-tender, about 15 minutes. Drain completely.

  2. Whip the Topping: Mash the drained potatoes with the milk, butter or Greek yogurt, salt, and pepper until completely smooth and fluffy. Set aside.

  3. Brown the Meat: Heat the olive oil in a large, oven-safe skillet over medium-high heat. Add the ground meat and diced onions. Cook until the meat is fully browned and the onions are soft. Drain any excess fat from the pan.

  4. Build the Flavor: Stir in the garlic, carrots, and tomato paste. Cook for 2 minutes, stirring constantly so the tomato paste deepens in color.

  5. Simmer the Filling: Pour in the beef broth and Worcestershire sauce. Add the fresh thyme, salt, and pepper. Bring the mixture to a gentle simmer, reduce the heat, and let it thicken for about 10 minutes. Stir in the frozen peas during the last 2 minutes. (Tip: You can also prep this meat filling in a slow cooker on LOW for 4-5 hours to let the flavors marry before assembling).

  6. Assemble the Pie: If your skillet isn’t oven-safe, transfer the thickened meat filling into a 9×9 baking dish. Spoon the mashed topping over the meat and spread it evenly. Drag the tines of a fork across the mash to create textured ridges—these peaks will crisp up beautifully in the oven. Sprinkle the shredded cheese evenly over the top.

  7. Bake: Bake at 400°F (200°C) for 25-30 minutes, or until the edges are bubbling and the potato topping is a rich golden brown.

  8. Rest and Serve: Let the pie rest for 10-15 minutes before serving so the filling can set. Garnish with a fresh thyme sprig right in the center.

Zero-Piont Fatbomb Fluff ( WW- Friendly)

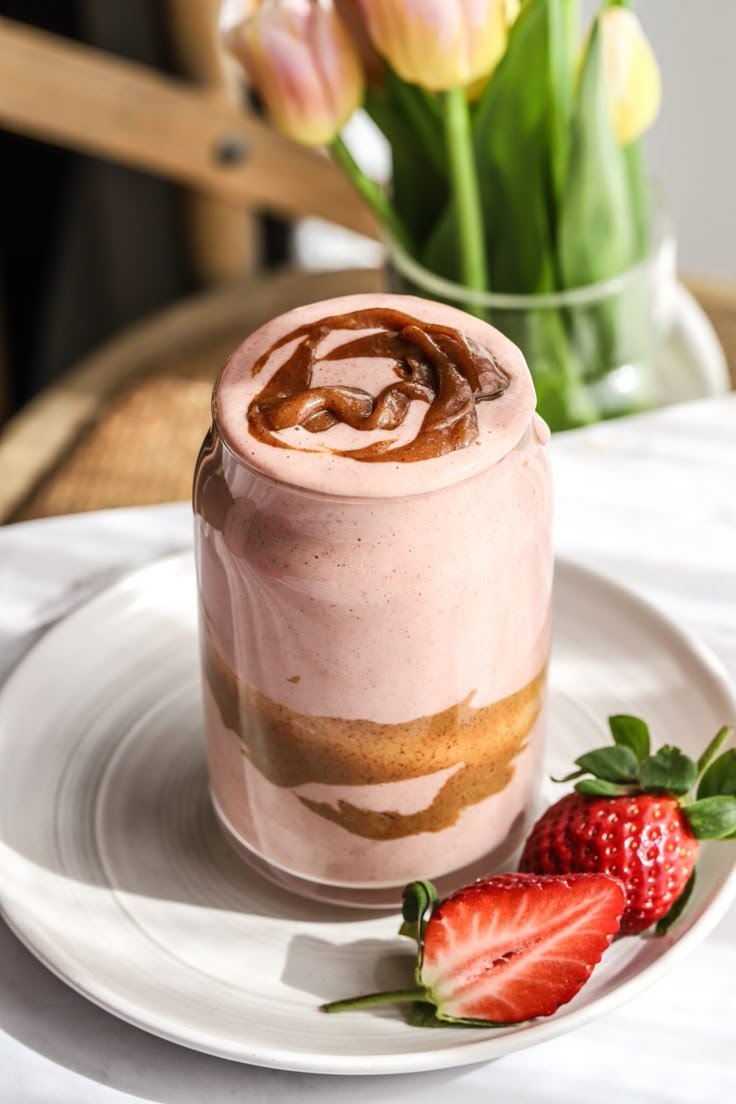
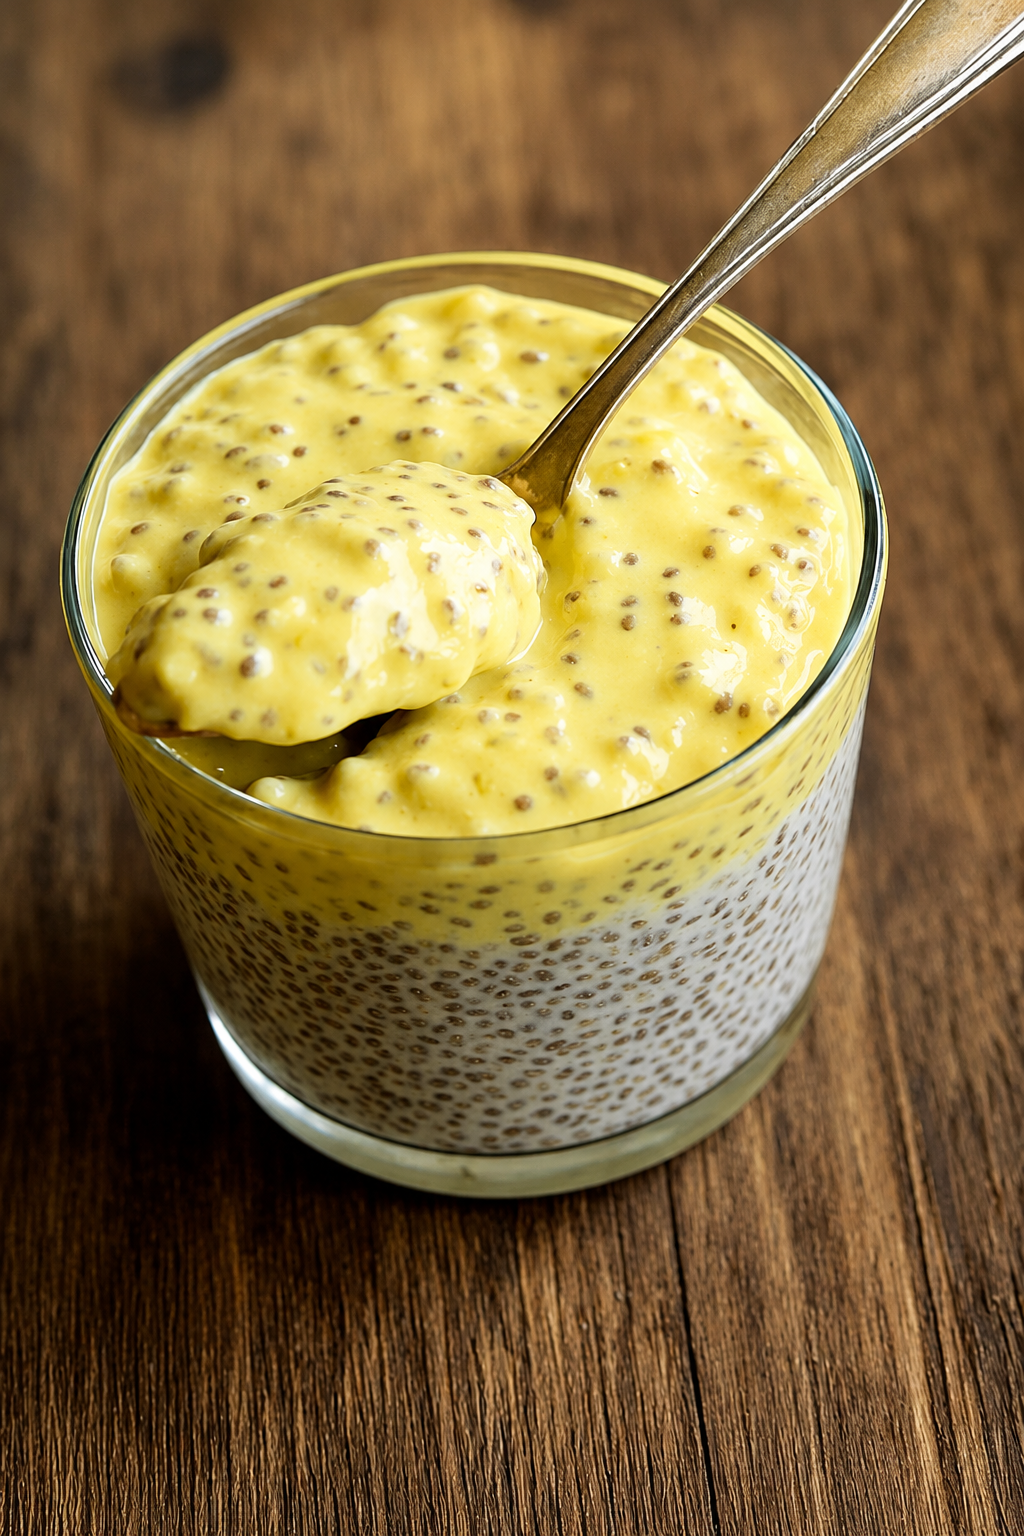
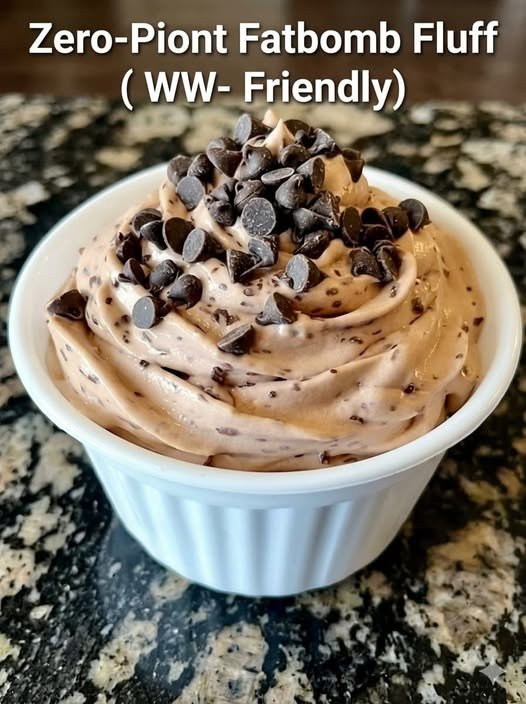
🍨 Zero-Point Fat Bomb Fluff (WW-Friendly, Light & Creamy)

This fluffy dessert is smooth, creamy, and perfectly sweet while staying light and protein-packed 💛
It tastes like a whipped mousse but comes together in just minutes with simple ingredients. Perfect for a quick snack, healthy dessert, or late-night sweet treat!

⏱️ Prep Time: 5–10 minutes
❄️ Chill Time: 10–20 minutes
🍽️ Servings: 1–2


🛒 Ingredients

  • 1 cup non-fat plain Greek yogurt 🥣
  • 1 packet sugar-free instant pudding mix or gelatin mix 🍮
  • 1–2 tbsp unsweetened almond milk or cold water 🥛
  • Zero-calorie sweetener (stevia or monk fruit), to taste 🍬
  • ½ tsp vanilla extract 🌼

✨ Optional Mix-Ins & Toppings

  • Sugar-free chocolate chips 🍫
  • Fat-free whipped topping ☁️
  • Chia seeds or flaxseeds 🌱
  • Fresh berries 🍓🫐

👩‍🍳 Step-by-Step Instructions

🥣 Step 1: Add the Yogurt

➡️ Place the Greek yogurt into a medium mixing bowl.

💡 Make sure the yogurt is thick and smooth. This creates the richest and fluffiest texture.


🍮 Step 2: Mix in the Pudding

➡️ Sprinkle the sugar-free pudding or gelatin mix over the yogurt.

➡️ Stir slowly at first so the powder blends evenly without clumps.

➡️ Continue mixing until fully combined and creamy.

✨ The mixture will immediately begin thickening.


🌼 Step 3: Add Flavor

➡️ Stir in the vanilla extract and your preferred sweetener.

➡️ Taste the mixture and adjust sweetness if needed.

💡 Different pudding flavors have different sweetness levels, so tasting helps create the perfect balance.


🥛 Step 4: Create the Fluffy Texture

➡️ Add almond milk or cold water slowly, about 1 tablespoon at a time.

➡️ Whisk vigorously or use a hand mixer for extra fluffiness.

➡️ Continue mixing until the dessert becomes airy, smooth, and mousse-like ☁️

✨ The fluff should hold soft peaks and feel light rather than dense.


🌱 Step 5: Add Optional Mix-Ins

➡️ Fold in chia seeds or flaxseeds if using.

➡️ Stir gently so the mixture stays fluffy.

💡 Chia seeds naturally thicken the dessert as it chills.


❄️ Step 6: Chill the Fluff

➡️ Place the bowl in the refrigerator for 10–20 minutes.

✨ Chilling improves the texture and allows the pudding mix to fully set.


🍓 Step 7: Decorate & Serve

➡️ Spoon into serving bowls or dessert cups.

➡️ Top with berries, whipped topping, or chocolate chips.

➡️ Serve cold and enjoy every creamy bite 😋


🌟 Helpful Tips

✅ Use thick Greek yogurt for the creamiest fluff
✅ Add liquid slowly to avoid a runny texture
✅ Beat well for extra airy consistency
✅ Chill before serving for best flavor
✅ Don’t overload toppings if tracking points
✅ A hand mixer creates ultra-whipped texture
✅ Pudding mix gives creaminess while gelatin makes it lighter


🍫 Delicious Variations

🍫 Chocolate Delight

Use sugar-free chocolate pudding mix and top with raspberries.

🍓 Berry Bliss

Fold mashed strawberries or raspberries directly into the fluff.

🍋 Cheesecake Style

Use cheesecake pudding mix with a squeeze of lemon juice.

☕ Mocha Fluff

Mix instant coffee with chocolate pudding for a coffee-dessert flavor.

🥥 Coconut Cream

Add coconut extract and a sprinkle of toasted coconut.

🎃 Pumpkin Spice

Mix in pumpkin puree with cinnamon and nutmeg.

🍦 Frozen Treat

Freeze for 1–2 hours for a soft ice-cream texture.


❓ Q & A

❓Can I make this ahead of time?

✅ Yes! Store it in the refrigerator for up to 2 days in an airtight container.

❓Why is my fluff too thin?

✅ Too much liquid can make it runny. Add liquid slowly and whisk thoroughly.

❓Can I freeze it?

✅ Yes! It turns into a creamy frozen dessert.

❓Can I use flavored yogurt?

✅ Yes, but it may increase sweetness and points.

❓How do I make it thicker?

✅ Use less liquid or add chia seeds for extra thickness.


🥗 Approximate Nutrition (Per Serving)

  • Calories: 80–120 🔥
  • Protein: 10–15g 💪
  • Carbohydrates: 5–10g 🍽️
  • Fat: 0–2g 🧈
  • Fiber: 1–3g 🌾
  • Sugar: 2–5g 🍬

✨ Values vary depending on toppings and ingredients used.


💛 Final Thoughts

Zero-Point Fat Bomb Fluff is creamy, refreshing, and incredibly satisfying while staying light and wellness-friendly 🌟
It’s fast to prepare, endlessly customizable, and perfect when you want something sweet without feeling heavy afterward.