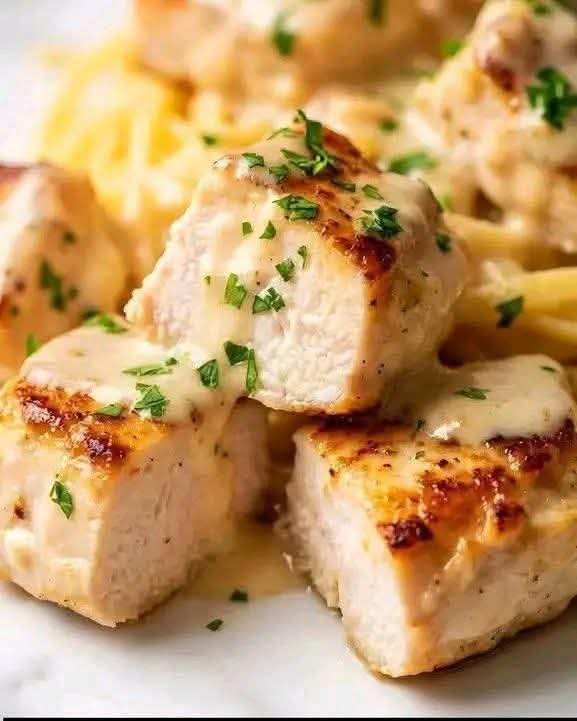
Lemon Garlic Butter Chicken & Creamy Pasta

🍽️ Recipe: Lemon Garlic Butter Chicken & Creamy Pasta

  • Prep time: 15 minutes

  • Cook time: 20 minutes

  • Servings: 4

  • Category: Main Course

Ingredients

The Chicken

  • 1.5 lbs Boneless skinless chicken breasts (thinly sliced or pounded flat)

  • 1/2 cup All-purpose flour (for dredging)

  • 1 tsp Paprika

  • Salt and black pepper to taste

  • 2 tbsp Olive oil

  • 2 tbsp Unsalted butter

The Pasta & Sauce

  • 10 oz Fettuccine or Linguine

  • 4 cloves Garlic, minced

  • 1 cup Heavy cream

  • 1/2 cup Chicken broth (low sodium)

  • 1 cup Freshly grated Parmesan cheese

  • Zest and juice of 1 large lemon

  • 1 tsp Red pepper flakes (optional, for heat)

  • Fresh parsley, chopped (for garnish)

Instructions

  1. Boil the Pasta: Bring a large pot of salted water to a boil. Cook pasta according to package directions until al denteReserve 1/2 cup of pasta water before draining.

  2. Dredge the Chicken: In a shallow bowl, mix flour, paprika, salt, and pepper. Coat the chicken pieces lightly, shaking off any excess.

  3. Sear the Chicken: In a large skillet over medium-high heat, add olive oil and 1 tbsp of butter. Sear chicken for 3–5 minutes per side until golden brown and cooked through. Remove chicken from the pan and set aside.

  4. Aromatic Base: In the same skillet, reduce heat to medium. Add the remaining 1 tbsp of butter and the minced garlic. Sauté for 1 minute until fragrant (don’t let it burn!).

  5. Build the Sauce: Pour in the chicken broth and lemon juice, scraping the bottom of the pan to release the brown bits (fond). Stir in the heavy cream and let it simmer for 2 minutes.

  6. Cheese & Emulsify: Whisk in the Parmesan cheese until melted and smooth. If the sauce is too thick, add a splash of the reserved pasta water.

  7. Combine: Toss the cooked pasta into the sauce. Add the lemon zest and red pepper flakes.

  8. Serve: Slice the chicken and place it atop the pasta. Garnish generously with fresh parsley and extra Parmesan.

💡 Pro Tips & Notes

  • The “Fond” is Gold: Those brown bits stuck to the pan after cooking the chicken are packed with flavor. The lemon juice and broth will deglaze the pan and incorporate that flavor into your sauce.

  • Fresh is Best: Use freshly grated Parmesan from a block. Pre-shredded cheese is often coated in potato starch, which can make your sauce grainy rather than silky.

  • Chicken Temp: To ensure the chicken stays juicy, aim for an internal temperature of 165°F (74°C).

🥗 Nutritional Info (Per Serving)

Estimate based on standard ingredients.

Nutrient Amount
Calories 680 kcal
Protein 42g
Total Fat 34g
Carbohydrates 52g
Fiber 2g
Sodium 720mg

✨ Benefits of This Meal

  • High Protein: Excellent for muscle repair and satiety.

  • Vitamin C: Fresh lemon juice provides a boost to the immune system.

  • Quick Cooking: By slicing the chicken thin (scaloppine style), you reduce cook time and ensure even browning.

❓ Common Q&A

Q: Can I use milk instead of heavy cream?

A: You can, but the sauce will be thinner. If using milk, I recommend whisking in 1 tsp of cornstarch to the cold milk before adding it to the pan to help it thicken.

Q: How do I store leftovers?

A: Store in an airtight container for up to 3 days. When reheating, add a splash of water or milk, as the pasta will absorb the sauce while sitting in the fridge.

Q: Can I add vegetables?

A: Absolutely! Asparagus, baby spinach, or sundried tomatoes pair beautifully with this flavor profile. Add spinach at the very end to wilt it, or sauté asparagus with the garlic.

Mediterranean Low-Carb Tortillas

Mediterranean Low-Carb Tortillas

Mediterranean Low-Carb Tortillas (Flexible, Strong & Grain-Free)

These Mediterranean-style low-carb tortillas are soft, bendable, and shockingly sturdy—without flour, starches, or sugar. Made with just eggs and cheese (plus one secret ingredient), they’re perfect for wraps, gyros, quesadillas, or breakfast roll-ups while staying low-carb and protein-rich.

Unlike eggy flatbreads that crack or tear, these tortillas cool into a flexible, almost wheat-like texture. The key is gentle heat, full blending, and allowing them to rest after cooking. Simple ingredients. Smart technique. Big payoff.

Ingredients (Makes 4 Tortillas)

  • 2 large eggs
  • ½ cup shredded mozzarella (low-moisture works best)
  • 1 tablespoon cream cheese (the secret to flexibility)

Optional (still carnivore, improves strength):

  • ½ tablespoon beef gelatin

Equipment

  • Blender or food processor
  • Non-stick skillet (8–10 inch)
  • Silicone spatula

Instructions

1️⃣ Blend Until Silky

Add eggs, shredded mozzarella, cream cheese, and gelatin (if using) to a blender or food processor.
Blend until completely smooth—no cheese bits, no streaks. This step is crucial for even cooking and flexibility.

2️⃣ Heat the Pan Gently

Place a non-stick skillet over medium-low heat.
Lightly grease with butter or beef tallow.
The pan should be warm, not hot—too much heat causes rubbery tortillas.

3️⃣ Cook Thin & Even

Pour ¼ of the batter into the center of the pan.
Immediately swirl to form a thin, even circle.

Cook for 60–90 seconds, until:

  • The edges lift easily
  • The surface looks set with no wet spots

4️⃣ Flip Carefully

Flip gently using a silicone spatula.
Cook the second side for 30–40 seconds, then remove to a plate or cooling rack.

👉 Do not overcook — they continue to firm up as they cool.

Cooling = Flexibility

Let tortillas cool for 2–3 minutes before using.
This resting phase is where the magic happens—they become bendable, strong, and tear-resistant.

Texture Troubleshooting

  • Too eggy? Use 1 whole egg + 1 egg white
  • Breaking? Add a little more cream cheese or gelatin
  • Rubbery? Heat was too high

Storage

  • Fridge: 3–4 days (store with parchment between)
  • Freezer: Up to 1 month

Simple, clean, and endlessly versatile—these tortillas prove low-carb doesn’t mean low-satisfaction. 💪🌯

GOLDEN-BROWN ROASTED CHICKEN BREASTS WITH MEDITERRANEAN STUFFING

🍗 GOLDEN-BROWN ROASTED CHICKEN BREASTS WITH MEDITERRANEAN STUFFING

🌿 Description

These Golden-Brown Roasted Chicken Breasts are tender, juicy, and generously stuffed with a bold Mediterranean filling of feta, sun-dried tomatoes, Kalamata olives, pine nuts, and fresh herbs. Roasted to perfection, this dish delivers restaurant-quality flavor while staying simple, wholesome, and naturally satisfying.

📝 INGREDIENTS

For The Chicken

  • 4 boneless, skinless chicken breasts
  • 2 tbsp olive oil
  • Salt and freshly ground black pepper, to taste
  • 1 tsp smoked paprika
  • 1 tsp garlic powder

For The Mediterranean Stuffing

  • ½ cup feta cheese, crumbled
  • ¼ cup sun-dried tomatoes, finely chopped
  • ¼ cup Kalamata olives, chopped
  • 2 tbsp pine nuts, toasted
  • 2 tbsp fresh parsley, chopped
  • 1 small garlic clove, minced

👩‍🍳 INSTRUCTIONS

  1. Preheat oven to 400°F (200°C). Lightly grease a baking dish.
  2. Prepare stuffing: In a bowl, mix feta, sun-dried tomatoes, olives, pine nuts, parsley, and minced garlic. Set aside.
  3. Prepare chicken: Using a sharp knife, carefully slice a pocket into the side of each chicken breast.
  4. Stuff chicken: Fill each pocket with the Mediterranean mixture, pressing gently to seal.
  5. Season: Brush chicken with olive oil, then season with salt, pepper, smoked paprika, and garlic powder.
  6. Roast: Place chicken in the baking dish and roast for 25–30 minutes, or until golden brown and internal temperature reaches 165°F (74°C).
  7. Rest & serve: Let rest for 5 minutes before serving.

⭐ NOTES

  • Secure stuffed chicken with toothpicks if needed.
  • Use oil-packed sun-dried tomatoes for extra moisture.
  • Internal temperature is key for juicy chicken.

💡 TIPS FOR BEST RESULTS

  • Pound chicken slightly for even thickness before stuffing.
  • Add lemon zest to the stuffing for extra brightness.
  • Broil for 2–3 minutes at the end for a crisp golden finish.
  • Serve with roasted vegetables, couscous, or a Greek salad.

🍽 SERVINGS

Serves: 4
Serving Size: 1 stuffed chicken breast

🧮 NUTRITIONAL INFORMATION (APPROX. PER SERVING)

  • Calories: ~360 kcal
  • Protein: ~38 g
  • Fat: ~22 g
  • Carbohydrates: ~4 g
  • Fiber: ~1 g
  • Calcium: ~15% DV

(Values may vary depending on brands used)

🌟 HEALTH BENEFITS

  • High-protein: Supports muscle strength and satiety
  • Mediterranean fats: Heart-healthy olive oil, olives, and pine nuts
  • Low-carb & gluten-free: Great for balanced eating
  • Calcium-rich: Thanks to feta cheese

❓ Q & A

Q: Can I make this ahead of time?
A: Yes! Stuff the chicken up to 24 hours ahead and refrigerate until ready to roast.

Q: Can I use chicken thighs instead?
A: Yes, boneless thighs work well but may need a slightly longer cook time.

Q: What can I substitute for feta?
A: Goat cheese or ricotta salata are great alternatives.

Q: Is this keto-friendly?
A: Yes, it’s naturally low-carb and keto-approved.

Mango Smoothie Bowl

The Golden Mango Smoothie Bowl


Ingredients

The Base:

  • 2 cups Frozen mango chunks (frozen is key for that thick, soft-serve texture)

  • 1 Frozen banana (adds natural sweetness and creaminess)

  • 1/2 cup Greek yogurt or coconut cream

  • 1/4 cup Unsweetened almond or coconut milk (add more only if needed)

  • 1 tsp Freshly squeezed lime juice (to brighten the flavor)

The Toppings (As seen in the image):

  • Fresh mango cubes

  • Chia seeds

  • Pumpkin seeds (pepitas)

  • Sliced almonds

  • Shredded coconut

  • Fresh mint leaves


Instructions

  1. Prep the Base: Place the frozen mango, frozen banana, yogurt, and lime juice into a high-speed blender.

  2. Blend: Start on a low speed, using a tamper to push the frozen fruit down toward the blades. Add the milk one tablespoon at a time only if the blender stalls. You want the consistency to be thick and scoopable, not liquid like a drink.

  3. The Swirl: Pour the mixture into a chilled bowl. Use the back of a spoon to create a circular “swirl” pattern on the surface.

  4. Style It: Arrange your toppings in neat, diagonal rows to mimic the photo:

    • Start with a line of shredded coconut.

    • Follow with a row of pumpkin seeds.

    • Place a bold center line of fresh mango cubes.

    • Add a row of sliced almonds and a dense line of chia seeds.

  5. Final Touch: Garnish with a sprig of fresh mint and serve immediately while cold.

Pro Tip: For an extra protein boost, blend in a scoop of vanilla protein powder or a tablespoon of hemp seeds!

No-Bake Greek Yogurt Jello Cheesecake

No-Bake Greek Yogurt Jello Cheesecake

Ingredients

  • Crust: 1 cup graham cracker crumbs mixed with 2 tbsp melted butter (optional).

  • Filling:

    • 2 cups Plain Greek Yogurt (Full-fat or 2% works best for creaminess).

    • 1 packet (0.3 oz) Sugar-Free Lemon or Vanilla Jello (or any flavor you prefer).

    • 1/2 cup boiling water.

    • 1 tsp vanilla extract.

    • Fresh raspberries or blueberries for topping.


Instructions

  1. Prepare the Base: If you want a crust, press the graham cracker mixture into the bottom of small glass jars or a 7-inch springform pan. Chill in the freezer for 10 minutes to set.

  2. Dissolve the Jello: In a small heat-proof bowl, stir the Jello powder into 1/2 cup of boiling water. Stir vigorously for about 2 minutes until the powder is completely dissolved and no granules remain. Let it cool slightly (about 3–5 minutes) so it doesn’t curdle the yogurt.

  3. Mix the Filling: In a large mixing bowl, whisk the Greek yogurt and vanilla extract until smooth. Slowly pour the liquid Jello into the yogurt, whisking constantly until the color is uniform and the texture is velvety.

  4. Set: Pour the mixture over your prepared crust or directly into serving ramekins.

  5. Chill: Refrigerate for at least 2 to 3 hours (or until firm).

  6. Serve: Top with fresh raspberries as shown in the photo.

Tip: For an extra fluffy “mousse” texture, fold in 1/2 cup of whipped topping before chilling!

Key Lime Smoothie

Key Lime Smoothie

Ingredients

  • 1 cup Frozen pineapple chunks (adds natural sweetness and thickness)

  • 1/2 cup Greek yogurt (plain or vanilla)

  • 1/4 cup Fresh key lime juice (about 5–6 key limes or 2 regular limes)

  • 1 tsp Lime zest

  • 1/2 cup Milk of choice (dairy, almond, or coconut milk)

  • 1 handful Fresh spinach (optional, for that vibrant green color)

  • 1 tbsp Honey or maple syrup (adjust to taste)

  • Optional Garnish: Whipped cream, graham cracker crumbs, and lime slices.


Instructions

  1. Prep the Limes: Zest one lime before juicing. If you can’t find key limes, regular Persian limes work perfectly fine—they are just slightly less aromatic.

  2. Combine: Add the frozen pineapple, Greek yogurt, lime juice, lime zest, and liquid sweetener into a high-speed blender.

  3. Add the Greens: Throw in a handful of spinach. This provides the bright green hue seen in the photo without changing the tropical flavor profile.

  4. Blend: Pour in your milk and blend on high until completely smooth. If the mixture is too thick, add an extra splash of milk. If you prefer it frostier, add a half-cup of ice.

  5. Serve: For the full experience, rim your glass with honey and dip it into crushed graham cracker crumbs. Pour the smoothie in and top with a dollop of whipped cream and a lime wheel.


Quick Tips

  • Protein Boost: Add a scoop of vanilla protein powder for a more filling meal.

  • Vegan Option: Use coconut yogurt and agave nectar for a completely plant-based treat that pairs beautifully with the lime.

Blueberry Cream Cheese Danish

Blueberry Cream Cheese Danishes


Ingredients

  • Pastry: 1 sheet frozen puff pastry (thawed).

  • Cream Cheese Filling: 4 oz softened cream cheese, 2 tbsp sugar, 1/2 tsp vanilla extract, and a squeeze of lemon juice.

  • Blueberry Topping: 1 cup fresh blueberries, 1 tbsp sugar, and 1/2 tsp cornstarch.

  • Finish: 1 egg (beaten for egg wash) and coarse sugar for sprinkling.


Instructions

  1. Prep the Oven: Preheat your oven to 400°F (200°C). Line a large baking sheet with parchment paper.

  2. Make the Fillings: In a small bowl, whisk the cream cheese, sugar, vanilla, and lemon juice until smooth. In a separate bowl, gently toss the blueberries with sugar and cornstarch until coated.

  3. Shape the Pastry: Unroll your puff pastry sheet on a lightly floured surface. Cut it into 4 equal squares.

  4. Assemble: Place a dollop of the cream cheese mixture (about 1.5 tablespoons) into the center of each square. Top the cheese with a generous spoonful of the blueberry mixture.

  5. The Fold: To achieve the look in your photo, pull two opposite corners of the pastry toward the center and overlap them slightly over the fruit, pressing down to secure.

  6. The Finish: Brush the exposed pastry dough with the beaten egg wash. This is the secret to that deep golden-brown shine. Sprinkle the edges with coarse sugar for extra crunch.

  7. Bake: Bake for 18–22 minutes, or until the pastry is puffed and golden.


Pro Tip: Let them cool for at least 10 minutes before serving. The fruit filling gets very hot and needs a moment to set so it doesn’t run when you take your first bite!

Cream Cheese Kolache Recipe

Cream Cheese Kolache Recipe

1. Ingredients for the Dough

  • All-purpose flour: 3 ½ cups

  • Sugar: ¼ cup

  • Instant Yeast: 2 ¼ tsp (1 packet)

  • Salt: 1 tsp

  • Warm Milk: 1 cup (about 110°F/45°C)

  • Melted Butter: ¼ cup (unsalted)

  • Egg: 1 large (room temperature)

2. Ingredients for the Filling

  • Cream Cheese: 8 oz (225g), softened at room temperature

  • Sugar: ¼ cup

  • Egg Yolk: 1

  • Vanilla Extract: ½ tsp

  • Lemon Juice: 1 tsp (adds a nice brightness to the cheese)


Instructions:

Step 1: Prepare the Dough

In a large mixing bowl, combine the warm milk, melted butter, sugar, and yeast. Gradually add the flour and salt. Knead the dough (by hand or with a mixer) for about 5–8 minutes until it is smooth and slightly tacky but not sticky. Place it in a greased bowl, cover, and let it rise in a warm spot for 1 to 1.5 hours until doubled in size.

Step 2: Make the Filling

While the dough is rising, beat the cream cheese, sugar, egg yolk, vanilla, and lemon juice together in a small bowl until completely smooth. Set aside.

Step 3: Shape and Second Rise

Punch the dough down and divide it into equal-sized balls (about the size of a golf ball). Place them on a baking sheet lined with parchment paper. Cover and let them rest for another 20–30 minutes.

Step 4: Create the “Well” and Fill

Use your thumb or the bottom of a small greased glass to press down firmly in the center of each dough ball to create a deep indentation. Spoon about 1 tablespoon of the cream cheese filling into each center.

Step 5: Bake

Preheat your oven to 180°C (350°F). Bake for 15–20 minutes, or until the edges are a light golden brown.


Blog & Video Tips

  • The “Glove” Aesthetic: Since you use black nitrile gloves in your videos, the contrast against the white flour and pale dough will look very sharp and professional on camera.

  • Top-Down Shot: Capture the moment you press the “well” into the dough—it’s very satisfying for viewers.

  • Final Touch: As seen in your photo, you can brush the edges with melted butter right after they come out of the oven and sprinkle a little powdered sugar or “streusel” (flour, butter, sugar mix) on top before baking for that authentic look.

SAVORY ZUCCHINI & OAT ROLLS

SAVORY ZUCCHINI & OAT ROLLS

These zucchini rolls are a fantastic way to enjoy a wholesome, satisfying meal that feels indulgent without the heavy crust. They are packed with flavor, easy to shape, and develop a beautiful golden exterior that makes them a family favorite for any time of day.

Ingredients

  • 1 medium zucchini, grated

  • 3–4 tbsp oatmeal (finely ground works best)

  • 100g (1 cup) grated cheese (mozzarella or cheddar)

  •  eggs

    • Chopped chives, to taste

    • Salt and pepper, to taste


    Step-By-Step Instructions

    1. Prepare the Zucchini: Place the grated zucchini in a bowl and sprinkle with a little salt. Let it sit for about 5–10 minutes to draw out the moisture. This is a vital step to ensure your rolls aren’t soggy.

    2. Squeeze Dry: Using a clean kitchen towel or your hands, squeeze the zucchini as hard as you can to remove all the excess water. Place the dry zucchini shreds into a fresh mixing bowl.

    3. Mix the Batter: To the zucchini, add the 2 eggs3–4 tbsp oatmeal100g grated cheese, and chopped chives. Season with pepper and a small pinch of salt (remember the zucchini was already salted).

    4. Let it Rest: Allow the mixture to sit for about 5 minutes. This gives the oats time to absorb the moisture from the eggs, which helps bind the rolls together.

    5. Shape: Take a small handful of the mixture and roll it between your palms to form a log or sausage shape.

    6. Cook: * In a Pan: Heat a lightly oiled non-stick skillet over medium heat. Fry the rolls for 3–4 minutes per side until they are golden brown and crispy all the way around.

      • In the Oven: Arrange on a lined baking tray and bake at 200°C for 15–20 minutes, turning halfway through.

    7. Serve: Enjoy them warm! They are delicious on their own or served with a side of Greek yogurt for dipping.


    Quick Tip

    If the mixture feels a bit too wet to shape, add one extra tablespoon of oatmeal to help firm it up.

Cherry Banana Almond Smoothie

Cherry Banana Almond Smoothie

Ingredients

To recreate the smoothie shown in the image, you will need:

  • 1 cup Fresh or Frozen Cherries: Pitted (frozen cherries give a thicker, frostier texture).

  • 1 Large Banana: Ripe and sliced (frozen slices make it extra creamy).

  • 2 tablespoons Whole Almonds: Or 1 tablespoon of smooth almond butter.

  • 1 cup Almond Milk: Unsweetened works best, but any milk of your choice is fine.

  • 1/2 cup Greek Yogurt: Optional, for added creaminess and protein.

  • A splash of Vanilla Extract: To enhance the sweetness of the fruit.

  • Ice Cubes: Only if using fresh fruit and you want a colder drink.


Instructions

  1. Prep the Fruit: If you are using fresh cherries, ensure they are thoroughly washed and the pits are removed. Peel and slice your banana.

  2. Layer the Blender: Start by pouring the almond milk into the blender first. Adding liquid at the bottom helps the blades move freely and prevents the fruit from getting stuck.

  3. Add Solids: Add the cherries, banana slices, and almonds. If you prefer a smoother texture without tiny nut fragments, use almond butter instead of whole almonds.

  4. Blend: Secure the lid and blend on high for 45–60 seconds. If the mixture is too thick, add an extra splash of almond milk. If it is too thin, add a few more frozen banana slices or ice.

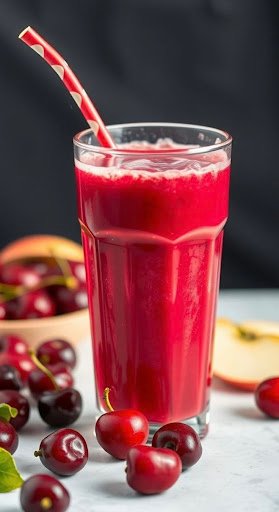
  5. Serve: Pour the vibrant pink smoothie into a tall glass.

Cheesy Baked Chicken Burrito

Cheesy Baked Chicken Burrito

Baked Cheesy Chicken Burrito

Prep time: 15 mins | Cook time: 20 mins | Yields: 4 large burritos

1. The Filling Ingredients

  • Chicken: 3 cups shredded rotisserie chicken (or poached chicken breast).

  • Rice: 1 cup cooked Mexican red rice or cilantro-lime rice.

  • Beans: 1 can (15 oz) black beans or pinto beans, drained and rinsed.

  • Cheese: 2 cups shredded Monterey Jack or a Mexican cheese blend.

  • Tortillas: 4 large “Burrito size” flour tortillas.

  • Salsa: ½ cup of your favorite red salsa (mild or medium).

2. The Creamy Cilantro Sauce

  • ½ cup sour cream or Greek yogurt.

  • ¼ cup mayonnaise.

  • 1 small bunch fresh cilantro (stems removed).

  • 1 clove garlic, minced.

  • Juice of 1 lime.

  • A pinch of salt and cracked black pepper.


Preparation Steps

Step 1: Make the Sauce

In a blender or food processor, combine the sour cream, mayo, cilantro, garlic, lime juice, salt, and pepper. Pulse until smooth and light green. Set aside.

Step 2: Mix the Filling

In a large bowl, toss the shredded chicken with the red salsa and a handful of the shredded cheese. This keeps the chicken moist while baking.

Step 3: Assemble

  1. Lay a tortilla flat.

  2. Add a layer of rice, then beans, then the chicken mixture.

  3. Add an extra sprinkle of cheese inside.

  4. Fold in the sides and roll tightly.

Step 4: Bake to Perfection

  1. Preheat your oven to 200°C (400°F).

  2. Place the burritos seam-side down in a lightly greased baking dish or on a parchment-lined tray.

  3. Top each burrito generously with the remaining shredded cheese.

  4. Bake for 10–12 minutes until the cheese is melted and slightly golden.

Step 5: The Finishing Touch

Remove from the oven. While still hot, drizzle the creamy cilantro sauce over the top (as seen in your photo). Garnish with fresh parsley or cilantro leaves.


Pro Tips for the Best Results

  • Warm the Tortillas: Zap your tortillas in the microwave for 15 seconds before rolling. This makes them stretchy so they don’t tear.

  • The “Golden” Look: If you want the cheese extra bubbly like the photo, pop the burritos under the broiler for the last 2 minutes of cooking.


Creamy Berry-Nut Butter Smoothie

Creamy Berry-Nut Butter Smoothie

Prep time: 5 minutes | Servings: 2


Ingredients

To achieve that smooth, velvety texture seen in the image, gather the following:

  • 1 ½ cups Unsweetened almond milk (or milk of choice)

  • 2 tablespoons Creamy almond or peanut butter

  • 1 cup Frozen mixed berries (strawberries and blueberries work best)

  • 1 large Ripe banana (frozen for extra thickness)

  • 1 scoop Protein powder (vanilla or chocolate)

  • 1 teaspoon Ground cinnamon

  • Garnish: Fresh strawberry slices, blueberries, and mint leaves


Instructions

  1. Layer the Liquid: Pour the milk into the blender first. Adding liquid at the bottom helps the blades move freely and prevents the thicker ingredients from getting stuck.

  2. Add the Base: Add the frozen banana, berries, and nut butter. The frozen fruit acts as the “ice,” providing a chilled, thick consistency without watering down the flavor.

  3. Boost the Flavor: Add the protein powder and cinnamon. If you prefer a sweeter taste, you can add a small drizzle of honey or a single pitted date.

  4. Blend: Start on a low speed to break up the frozen fruit, then gradually increase to high. Blend for 45–60 seconds until the mixture is completely uniform and silky.

  5. Serve: Pour into tall glasses. For that professional aesthetic, top with a fresh strawberry slice and a sprig of mint.


Pro Tip

If the smoothie is too thick, add an extra splash of milk. If you prefer it like a smoothie bowl, add a handful of ice cubes or decrease the milk by ¼ cup. Enjoy immediately while chilled!

Banana, Pineapple, and Mango

Banana, Pineapple, and Mango

Ingredients

  • 1 medium Banana: Best used when ripe (with a few brown spots) for maximum sweetness.

  • 1 cup Pineapple chunks: Fresh is great, but frozen will give you a thicker, frostier texture.

  • 1 cup Mango chunks: Use sweet varieties like Alphonso or Honey mangoes if available.

  • 1/2 cup Greek Yogurt: Plain or vanilla works perfectly to add creaminess and protein.

  • 1/2 cup Milk of choice: Dairy, almond, or coconut milk all work well.

  • Optional: A squeeze of lime juice for zing or a teaspoon of honey if you prefer it extra sweet.


Instructions

  1. Prep the Fruit: Peel the banana and break it into smaller chunks. Slice your mango and pineapple into cubes. If you want a thicker, “smoothie bowl” consistency, freeze your fruit pieces for at least two hours before blending.

  2. Layer the Blender: To ensure a smooth blend without taxing your motor, add your liquids first (milk and yogurt). Follow with the soft banana, then the denser pineapple and mango.

  3. Blend: Start on a low speed to break up the large chunks, then increase to high. Blend for about 45–60 seconds until the mixture is completely silky and no fruit fibers remain.

  4. Serve: Pour into a tall glass. For that “Recipe Journal” look from your photo, top with a dollop of whipped cream or extra yogurt and a few fresh mango cubes.

Pro Tip: If the smoothie is too thick, add an extra splash of milk. If it’s too thin, add a few ice cubes or more frozen fruit and pulse again!

Creamy Avocado, Banana, and Oat Smoothie

Creamy Avocado, Banana, and Oat Smoothie

Ingredients

  • 1/2 Ripe Avocado: Provides a silky texture and heart-healthy monounsaturated fats.

  • 1 Large Banana: Frozen slices work best for a thicker, chilled consistency.

  • 1/3 Cup Rolled Oats: Adds fiber and creates a more filling, meal-replacement quality.

  • 1 Cup Liquid Base: You can use almond milk, oat milk, or coconut water depending on your preference.

  • Optional Boosters: A teaspoon of honey or maple syrup for sweetness, or a scoop of your favorite vanilla protein powder.


Instructions

  1. Prep the Base: Place the rolled oats into the blender first and pulse them a few times until they reach a fine, flour-like consistency. This ensures your smoothie is smooth rather than gritty.

  2. Add the Fruit: Scoop out the flesh of the half avocado (be sure to remove the pit) and add it to the blender along with the banana slices.

  3. Combine and Blend: Pour in your liquid base. Start the blender on a low speed to incorporate the ingredients, then increase to high for about 45–60 seconds until the mixture is completely uniform and pale green.

  4. Adjust Consistency: If the smoothie is too thick, add a splash more milk. If you prefer it colder, toss in a handful of ice cubes and blend again.

  5. Serve: Pour into a tall glass and enjoy immediately while fresh!


Nutritional Benefit

This drink is a powerhouse of nutrients. The potassium from the banana supports muscle function, the fiber in the oats aids digestion, and the avocado helps your body absorb fat-soluble vitamins. It is a sustained energy booster that will keep you feeling satisfied for hours.

Tropical Sunrise Fruit Smoothie

Tropical Sunrise Fruit Smoothie

This blend combines creamy textures with a punch of antioxidants, perfect for a quick breakfast or a post-workout treat.


Ingredients

  • 1 cup Mango: Fresh or frozen chunks (for that bright orange base).

  • 1 medium Banana: Sliced (provides natural sweetness and creaminess).

  • ½ cup Raspberries: Fresh (adds a beautiful tart contrast).

  • 1 small Kiwi: Peeled and sliced (adds a hint of tropical zing).

  • 1 cup Liquid Base: Your choice of whole milk, almond milk, or coconut milk (as shown being poured).

  • Optional: A drizzle of honey or a scoop of Greek yogurt for extra protein.


Instructions

  1. Prep the Fruit: Start by peeling your banana and kiwi. Chop the mango into bite-sized cubes. If you prefer a thicker, “milkshake” consistency, use frozen mango chunks.

  2. Layer the Blender: Follow the “liquids first” rule to protect your blender blades. Pour your milk into the canister, then add the heavier fruits like mango and banana. Top it off with the delicate raspberries and kiwi slices.

  3. Blend: Secure the lid firmly. Start the blender on a low speed to break up the larger chunks, then gradually increase to high.

  4. Check Consistency: Blend for about 45–60 seconds until the mixture is silky smooth and the raspberry seeds are finely processed. If it’s too thick, add a splash more milk; if too thin, add a few ice cubes.

  5. Serve: Pour into a tall glass. Garnish with a few leftover raspberry pieces or a slice of kiwi on the rim for that professional kitchen look.

Enjoy your fresh, homemade energy boost!

Golden Buttermilk Cornbread Loaf

Golden Buttermilk Cornbread Loaf

🛒 Ingredients

  • 1 cup Yellow cornmeal (fine ground) 🌽

  • 1 cup All-purpose flour 🌾

  • 1/2 cup Granulated sugar (adjust to preference) 🍬

  • 1 tbsp Baking powder 🥄

  • 1/2 tsp Salt 🧂

  • 1 cup Buttermilk (at room temperature) 🥛

  • 2 large Eggs 🥚

  • 1/2 cup Unsalted butter (melted and slightly cooled) 🧈

  • 1 tbsp Honey (optional, for a golden crust) 🍯


📝 Step-by-Step Instructions

  1. Preheat & Prep ➡️ Preheat your oven to 375°F (190°C). Grease an 8×4 inch loaf pan thoroughly with butter or line it with parchment paper for easy removal. 🌡️

  2. Mix Dry Ingredients ➡️ In a large mixing bowl, whisk together the cornmeal, flour, sugar, baking powder, and salt until there are no clumps. 🥣

  3. Combine Wet Ingredients ➡️ In a separate medium bowl, whisk the eggs, buttermilk, and honey. Slowly pour in the melted butter while whisking to ensure everything is well combined. 🥛➡️🥚

  4. Create the Batter ➡️ Make a well in the center of the dry ingredients. Pour the wet mixture into the dry. Use a spatula to gently fold until just combined. Do not overmix, or the bread will be tough! 🥄✨

  5. Bake ➡️ Pour the batter into your prepared loaf pan and smooth the top. Bake for 30–35 minutes, or until a toothpick inserted into the center comes out clean and the top is a beautiful golden brown. ⏲️🔥

  6. Cool ➡️ Let the bread cool in the pan for about 10 minutes, then transfer to a wire rack to cool completely before slicing. This helps the crumb set so it doesn’t crumble! 💨🧱


❓ Common Questions (Q&A)

Q: Can I make this dairy-free? A: Yes! ➡️ Use a dairy-free milk (like soy or almond) mixed with 1 tsp of lemon juice to mimic buttermilk, and swap the butter for a neutral oil like avocado oil. 🥑🥛

Q: My bread is too dry. What can I do? A: This is usually from over-baking. ➡️ Next time, start checking for doneness 5 minutes early. You can also add 1/4 cup of sour cream or Greek yogurt to the batter for extra moisture! 🍦💧

Q: Why are there large holes in my bread? A: This is often caused by over-mixing the batter or having the oven temp too high. ➡️ Mix until the flour just disappears and ensure your oven is properly calibrated. 🌡️🚫

Q: How do I get that shiny top seen in the photo? A: ➡️ Brush the top of the warm loaf with a little melted butter and honey as soon as it comes out of the oven! 🍯🧈

Enjoy your fresh, golden slices! 😋🍞✨

Copycat Mexican Pizza

Copycat Mexican Pizza

Prep time: 10 mins | Cook time: 10 mins | Servings: 2 pizzas

Ingredients

  • The Base: 4 medium flour tortillas (or low-carb/Keto-friendly tortillas)

  • The Protein: 1/2 lb lean ground beef (seasoned with 1 tbsp taco seasoning)

  • The “Glue”: 1/2 cup refried beans (warmed for easy spreading)

  • The Toppings:

    • 1/2 cup mild red enchilada sauce

    • 1 cup shredded Mexican-style cheese (cheddar and Monterey Jack blend)

    • Fresh Finish: Diced tomatoes, diced red onion, and sliced jalapeños


Instructions

  1. Crisp the Shells: Lightly spray your tortillas with oil. In an air fryer, cook them at 400°F (200°C) for about 2–3 minutes per side until they are golden and rigid. (Alternatively, toast them in a dry skillet over medium heat).

  2. Prepare the Filling: Brown the ground beef in a skillet until fully cooked. Drain the excess fat and stir in the taco seasoning.

  3. The Assembly:

    • Place two crisp tortillas on a flat surface. Spread a thin layer of warm refried beans on each, then top with a generous layer of the seasoned ground beef.

    • Place a second crisp tortilla on top of the beef (like a sandwich).

    • Spread a layer of enchilada sauce over the top tortilla and sprinkle heavily with cheese.

  4. The Melt: Pop the assembled pizzas back into the air fryer at 375°F (190°C) for 2–3 minutes, or until the cheese is bubbly and slightly browned.

  5. Garnish and Serve: Top with the fresh diced onions, tomatoes, and jalapeños. Use a pizza cutter to slice into quarters.


Quick Tips for Content Creators

  • The “Cheese Pull” Shot: For that perfect cinematic look, ensure the cheese is piping hot when you lift the first slice.

  • Color Contrast: The purple of the red onion against the green jalapeños really makes the colors pop for photos or reels.

  • Alternative Base: If you want a lighter version, this works beautifully using thin corn tortillas for extra crunch without the extra weight.

Creamy Pan-Seared Salmon Fettuccine

Creamy Pan-Seared Salmon Fettuccine

Serves: 2-3 | Prep time: 5 mins | Cook time: 15 mins


Ingredients

The Salmon

  • 1 lb Salmon fillet, cut into thick bite-sized cubes

  • 1 tbsp Olive oil

  • Salt and black pepper to taste

  • 1/2 tsp Garlic powder

  • 1/2 tsp Paprika (for that golden color)

The Pasta & Sauce

  • 8 oz Fettuccine or Linguine

  • 2 tbsp Butter

  • 3 cloves Garlic, minced

  • 1 cup Heavy cream (or half-and-half for a lighter version)

  • 1/2 cup Grated Parmesan cheese

  • 1/2 tsp Red pepper flakes (optional, for a hint of heat)

  • Fresh parsley or chives, finely chopped for garnish


Instructions

  1. Boil the Pasta: Bring a large pot of salted water to a boil. Cook the fettuccine according to package directions until al dente. Reserve 1/2 cup of pasta water before draining.

  2. Sear the Salmon: While the pasta cooks, pat the salmon cubes dry and season with salt, pepper, garlic powder, and paprika. Heat olive oil in a large skillet over medium-high heat. Sear the salmon for about 2-3 minutes per side until golden brown and cooked through. Remove salmon from the pan and set aside.

  3. Build the Cream Sauce: In the same skillet, lower the heat to medium and melt the butter. Add the minced garlic and sauté for 1 minute until fragrant. Pour in the heavy cream and bring to a gentle simmer.

  4. Thicken: Stir in the Parmesan cheese and red pepper flakes. Whisk constantly until the cheese is melted and the sauce thickens slightly (about 2 minutes). If the sauce is too thick, splash in a little of that reserved pasta water.

  5. Assemble: Toss the cooked pasta into the sauce until every strand is coated.

  6. Garnish and Serve: Divide the pasta onto plates. Top generously with the seared salmon cubes. Drizzle any remaining sauce from the pan over the fish and garnish with fresh parsley and cracked black pepper.

No-Bake Chocolate Oat Bars

No-Bake Chocolate Oat Bars

🛒 Ingredients

  • 3 cups Rolled oats (Old-fashioned oats work best for texture) 🌾

  • 1 cup Creamy peanut butter (or almond butter) 🥜

  • 1/2 cup Honey or maple syrup 🍯

  • 1/4 cup Unsweetened cocoa powder 🍫

  • 1/2 cup Coconut oil (melted) 🥥

  • 1 tsp Vanilla extract 🍦

  • 1/4 tsp Salt 🧂


📝 Step-by-Step Instructions

  1. Prepare the Pan ➡️ Line an 8×8 inch square baking pan with parchment paper. Leave a little overhang on the sides so you can lift the bars out easily later. 📝

  2. Mix Wet Ingredients ➡️ In a large microwave-safe bowl (or a small saucepan over low heat), combine the peanut butter, honey, and coconut oil. Heat gently and stir until the mixture is completely smooth and liquid. 🔥

  3. Add Flavor ➡️ Whisk in the cocoa powder, vanilla extract, and salt until there are no cocoa clumps left. You should have a glossy chocolate sauce. 🍫✨

  4. Incorporate the Oats ➡️ Pour the rolled oats into the chocolate mixture. Use a sturdy spatula to fold them in until every single oat is thoroughly coated in chocolate. 🥣

  5. Press into Pan ➡️ Transfer the mixture into your prepared pan. Use the back of a spoon or a piece of parchment paper to press down firmly. The harder you press, the better the bars will hold together! 💪

  6. Chill ➡️ Place the pan in the refrigerator for at least 2 hours (or the freezer for 30 minutes) until they are completely firm to the touch. ❄️

  7. Slice and Serve ➡️ Lift the bars out using the parchment paper overhang. Use a sharp knife to cut them into even squares. 🔪📐


❓ Common Questions (Q&A)

Q: Can I make these nut-free? A: Absolutely! ➡️ Swap the peanut butter for sunflower seed butter or tahini. They will still be delicious and creamy. 🌻

Q: My bars are crumbling when I cut them. What happened? A: This usually happens if they weren’t pressed down hard enough in the pan or if they haven’t chilled long enough. ➡️ Try pressing them more firmly next time and ensure they stay cold until serving! 🧊

Q: How should I store these? A: Because they use coconut oil (which melts at room temperature), it is best to keep them in an airtight container in the fridge for up to 1 week or the freezer for up to 3 months. ❄️📦

Q: Can I add “mix-ins”? A: Yes! ➡️ Fold in some shredded coconut, chia seeds, or mini dark chocolate chips for extra texture and flavor. 🥥🍫

Enjoy your homemade treats! 😋✨

Carrot Ginger Detox Smoothie Recipe

🥕 The Ultimate Glow-Up Smoothie

This blend is packed with beta-carotene, antioxidants, and anti-inflammatory properties to support your digestion and brighten your skin.

Ingredients

  • Carrots: 2 large carrots (peeled and chopped) or 1 cup pure carrot juice.

  • Ginger: 1-inch knob of fresh ginger (peeled and sliced).

  • Fruit Base: 1 frozen banana or 1 cup frozen mango chunks for creaminess.

  • Liquid: 1 cup unsweetened coconut water or almond milk.

  • Citrus: 1 tablespoon fresh lemon or lime juice to brighten the flavors.

  • Optional Boost: A pinch of turmeric or a teaspoon of hemp seeds.

Instructions

  1. Prep the Carrots: If you have a high-speed blender, you can toss the raw chopped carrots straight in. If your blender is less powerful, steam the carrots for 5 minutes and let them cool first to ensure a silky texture.

  2. Layer the Blender: Add your liquid base first to help the blades move freely. Follow with the ginger, carrots, and frozen fruit.

  3. Blend: Start on a low speed and gradually increase to high. Blend for 60 seconds or until the mixture is completely smooth and vibrant orange.

  4. Adjust: If it’s too thick, add a splash more coconut water. If you prefer it sweeter, add a single pitted date.

  5. Serve: Pour into a tall glass. Garnish with a carrot slice or a sprig of mint, just like in the photo!


Pro Tip: Adding a tiny drop of healthy fat, like flax oil or a slice of avocado, helps your body better absorb the fat-soluble Vitamin A found in the carrots!

Enjoy your refreshing, nutrient-dense boost! Do you prefer your smoothies more on the fruity side or the spicy side?

Crispy Garlic Butter Gnocchi

Garlic Butter Roasted Potatoes

These aren’t just your average spuds; they are Garlic Butter Roasted Potatoes designed to be crispy on the outside while remaining buttery and fluffy on the inside. Infused with aromatic garlic and fresh herbs, they make the ultimate side dish for everything from roast chicken to a fancy steak dinner.

Description

These potatoes are par-boiled to ensure a soft interior, then tossed in a decadent mixture of melted butter, olive oil, and minced garlic before being roasted at a high temperature. This creates a deeply caramelized, golden-brown “shattering” crust that contrasts perfectly with the creamy center.

  • Prep time: 15 minutes

  • Cook time: 35-40 minutes

  • Servings: 6 people

Ingredients

  • Potatoes: 3 lbs (1.4 kg) Yukon Gold or Russet, peeled and cut into 1.5-inch chunks.

  • Butter: 4 tbsp unsalted butter, melted.

  • Oil: 2 tbsp Extra Virgin Olive Oil (helps prevent the butter from burning).

  • Garlic: 6 cloves, finely minced.

  • Herbs: 2 tbsp fresh parsley (chopped) and 1 tsp dried oregano or thyme.

  • Seasoning: Salt and freshly cracked black pepper to taste.

  • Optional: 1/4 cup grated Parmesan cheese for extra crunch.

Step-by-Step Instructions

  1. Par-boil: Place potato chunks in a large pot of salted water. Bring to a boil and cook for 8-10 minutes until the edges are just softening but they aren’t falling apart. Drain well.

  2. Rough ’em up: Return the drained potatoes to the pot and shake them vigorously with the lid on for 10 seconds. This creates a “starchy mash” on the surface that turns into a crisp crust when roasted.

  3. Season: In a small bowl, whisk the melted butter, olive oil, garlic, and dried herbs. Pour over the potatoes and toss until evenly coated.

  4. Roast: Spread the potatoes in a single layer on a large baking sheet (or the ceramic dish shown in the image). Bake at 400°F (200°C) for 30-35 minutes.

  5. Flip: Halfway through roasting, flip the potatoes to ensure even browning.

  6. Finish: Remove from the oven, garnish with fresh parsley and a sprinkle of salt.

Tips for Success

  • Dry them out: After draining the boiled potatoes, let them sit in the colander for 2 minutes. Steam is the enemy of crispiness!

  • Don’t crowd the pan: If potatoes are too close together, they will steam instead of roast. Use two pans if necessary.

  • High Heat: Don’t be afraid of the 400°F temperature; that’s where the magic (the Maillard reaction) happens.

Nutritional Info (Per Serving)

Nutrient Amount
Calories 240 kcal
Total Fat 10g
Carbohydrates 35g
Fiber 4g
Protein 4g

Benefits of this Dish

  • Energy Source: Potatoes are a great source of complex carbohydrates, providing sustained energy.

  • Vitamin C & Potassium: Often overlooked, potatoes contain more potassium than bananas, which is vital for heart health.

  • Immune Boost: The heavy use of fresh garlic provides Allicin, known for its antibacterial and immune-supporting properties.

Q&A

Q: Can I use red potatoes?

A: Yes! Red potatoes hold their shape well, though they won’t be quite as “fluffy” as Yukon Golds.

Q: Why do my potatoes stick to the pan?

A: You likely didn’t use enough fat, or you tried to flip them too early. Let them develop a crust first; they will naturally “release” from the pan when they are ready to be turned.

Q: Can I make these ahead of time?

A: You can par-boil them up to 24 hours in advance and keep them in the fridge. For the best texture, roast them immediately before serving.

Vanilla Caramel Banana Split Bowl

Vanilla Caramel Banana Split Bowl

Ingredients

  • 1 ripe banana, halved lengthwise

  • 2 generous scoops of premium vanilla bean ice cream

  • 2 tbsp high-quality salted caramel sauce (warmed)

  • 2 tbsp toasted walnuts or pecans, roughly chopped

  • A pinch of flaky sea salt (optional, for extra depth)

  • Optional: A dusting of cinnamon or a side of hot espresso


Instructions

  1. Prepare the Base: Start with a shallow, chilled bowl. Peel your banana and slice it down the middle. Place the two halves along the edges of the bowl, creating a “cradle” for your ice cream.

  2. The Main Event: Place two large, round scoops of vanilla ice cream directly in the center of the banana halves. For the best texture, let the ice cream sit at room temperature for two minutes before scooping.

  3. The Drizzle: Using a spoon, slowly drizzle the warm salted caramel over the ice cream peaks, allowing it to pool slightly on the banana and the bottom of the bowl. The contrast between the cold ice cream and warm sauce creates a delicious “fudge” texture where they meet.

  4. The Crunch: Generously sprinkle the toasted walnuts or pecans over the top. The earthiness of the nuts cuts through the sweetness of the caramel.

  5. The Finishing Touch: If you like a “salted” profile, add a tiny pinch of flaky sea salt over the top. Serve immediately with a silver spoon and, if you’re feeling fancy, a fresh cup of black coffee to balance the richness.


Blueberry Banana Smoothie Recipe

The Ultimate Blueberry Banana Smoothie

This recipe makes one large serving or two smaller snack portions. It’s naturally sweet, vibrant in color, and incredibly simple to whip up.

Ingredients

  • 1 cup Frozen blueberries (provides that deep purple hue and chilled texture)

  • 1 large Ripe banana (fresh for creaminess, or frozen for a milkshake-like consistency)

  • 1 cup Milk of your choice (dairy, almond, or oat milk all work beautifully)

  • 1/2 cup Greek yogurt (plain or vanilla for added protein and thickness)

  • 1 tsp Honey or maple syrup (optional, depending on your preferred sweetness)

  • A pinch of cinnamon (to enhance the fruit flavors)


Instructions

  1. Prep your fruit: If you aren’t using frozen fruit, add 1/2 cup of ice to ensure the smoothie is cold and thick. Peel the banana and break it into chunks to make it easier on your blender blades.

  2. Layer the ingredients: Always add your liquid (milk) first. This creates a “vortex” that pulls the solid ingredients down, preventing the blender from stalling. Follow with the yogurt, then the blueberries and banana chunks.

  3. Blend until smooth: Start your blender on a low speed to break up the large fruit pieces, then increase to high for 45–60 seconds. You want the blueberry skins to be fully pulverized for that signature speckled look seen in your photo.

  4. Adjust and Serve: Taste a small spoonful. If it’s too thick, add a splash more milk; if it’s too thin, add more frozen berries. Pour into a tall glass, grab a straw, and enjoy immediately!

Pro Tip: For an extra nutritional boost, toss in a tablespoon of chia seeds or ground flaxseeds before blending!

Choco Blueberry Ice Cream.

Choco Blueberry Ice Cream.

Ingredients

  • 2 cups Fresh blueberries (plus extra for garnish)

  • 2 cans (400ml each) Full-fat Santan (Coconut Milk), chilled overnight

  • 1/2 cup Honey (adjust to taste)

  • 1/2 cup Coklat Putih (White Chocolate), melted and cooled

  • 1/2 cup Dark Choco Chips

  • 1 tsp Vanilla extract


Instructions

  1. Prepare the Blueberry Base: In a small saucepan, simmer the blueberries with a tablespoon of honey over medium heat for 8–10 minutes. Use a fork to mash them into a thick compote. Let this cool completely; this step intensifies the purple hue and flavor.

  2. Whip the Santan: Open the chilled cans of coconut milk and scoop out only the thick, hardened cream from the top. Place it in a chilled bowl and whip using a hand mixer until it becomes light and airy. Fold in the remaining honey and vanilla extract.

  3. Combine & Swirl: Gently fold the cooled blueberry compote and the melted white chocolate into the whipped coconut cream. For a marbled look, don’t over-mix. Finally, stir in the dark choco chips to add a delightful crunch.

  4. The Freeze: Pour the mixture into a freezer-safe container. Smooth the top and sprinkle a few extra blueberries and choco chips. Cover tightly with plastic wrap (touching the surface to prevent ice crystals) and freeze for at least 6 hours.

  5. Serving: Let the ice cream sit at room temperature for 5 minutes before scooping. The result is a creamy, decadent treat that perfectly balances the tartness of berries with the sweetness of white chocolate. Enjoy!

Light-as-Air Savory Brunch Bake

The Recipe: Light-as-Air Savory Brunch Bake

This dish is the perfect solution for those who want a hearty breakfast without the “heavy” feeling that usually follows.

  • Prep time: 15 minutes

  • Cook time: 25 minutes

  • Servings: 4

  • Dietary: Gluten-Free, Low-Carb, High-Protein

Ingredients

  • 8 Large eggs (separated into whites and yolks)

  • 1 cup Low-fat cottage cheese (blended until smooth)

  • 1 cup Fresh baby spinach, finely chopped

  • 1/2 cup Lean turkey sausage crumbles or cooked bacon bits

  • 1/4 cup Parmesan cheese, finely grated

  • 1/4 tsp Cream of tartar (the secret to the “air”)

  • 1/2 tsp Garlic powder

  • Salt & Black pepper to taste

  • Optional: Fresh chives for garnish

Instructions

  1. Prep the Oven: Preheat your oven to 190°C (375°F). Grease an 8×8 inch glass baking dish or four individual ramekins with olive oil spray.

  2. The Base: In a medium bowl, whisk the 8 egg yolks with the blended cottage cheese, garlic powder, salt, pepper, and chopped spinach. Stir in your protein (turkey sausage or bacon).

  3. The “Air”: In a separate, clean metal or glass bowl, add the 8 egg whites and the cream of tartar. Using a hand mixer, beat on high until stiff peaks form (the whites should stand straight up when you lift the beaters).

  4. The Fold: Gently fold about 1/3 of the egg whites into the yolk mixture to lighten it up. Then, very carefully fold in the remaining whites. Do not overmix, or you will deflate the bubbles!

  5. Bake: Pour the mixture into the prepared dish. Sprinkle the Parmesan cheese over the top.

  6. Golden Finish: Bake for 22–25 minutes until the top is golden brown and the bake has risen significantly. Serve immediately, as it will settle slightly as it cools.

Description & Notes

This bake relies on mechanical leavening (air trapped in egg whites) rather than flour or baking powder. The cottage cheese melts into the structure, providing a creamy “custard” feel while amping up the protein count.

  • Note on Texture: It will be very puffy right out of the oven and will deflate about 10-20% after a few minutes—this is normal!

  • Note on Cottage Cheese: If you hate the “curds,” blending it is mandatory. It turns into a high-protein heavy cream substitute.

Pro Tips for Success

  • Cold Eggs vs. Room Temp: Separate your eggs while they are cold (the yolks are less likely to break), but let the whites sit for 10 minutes before beating to get maximum volume.

  • Zero Fat in the Whites: Ensure your whisk and bowl are bone-dry and grease-free. Even a tiny drop of yolk will prevent the whites from fluffing up.

  • The Squeeze: If using frozen spinach instead of fresh, squeeze every drop of water out first, or the bake will become soggy.

Nutritional Info (Per Serving)

Values are estimates based on standard ingredients.

Nutrient Amount
Calories 245 kcal
Protein 28g
Net Carbs 3g
Fat 14g
Fiber 1g

Benefits

  • Muscle Recovery: With 28g of protein per serving, it’s an ideal post-workout brunch.

  • Satiety: The combination of high protein and healthy fats keeps you full until dinner.

  • Blood Sugar Friendly: Since there are no grains or added sugars, you won’t experience the mid-morning insulin crash.

Q&A

Q: Can I make this ahead of time?

A: You can prep the yolk mixture the night before, but you must whip and fold the egg whites right before baking. If the batter sits, the air bubbles will pop and the dish will be flat and rubbery.

Q: Can I swap the cottage cheese?

A: Yes, Ricotta cheese works beautifully as a 1:1 swap, though it will slightly increase the fat content and decrease the protein.

Q: Is it freezer friendly?

A: Unfortunately, no. The delicate egg structure doesn’t survive the freezing and thawing process well—it tends to become “weepy.”