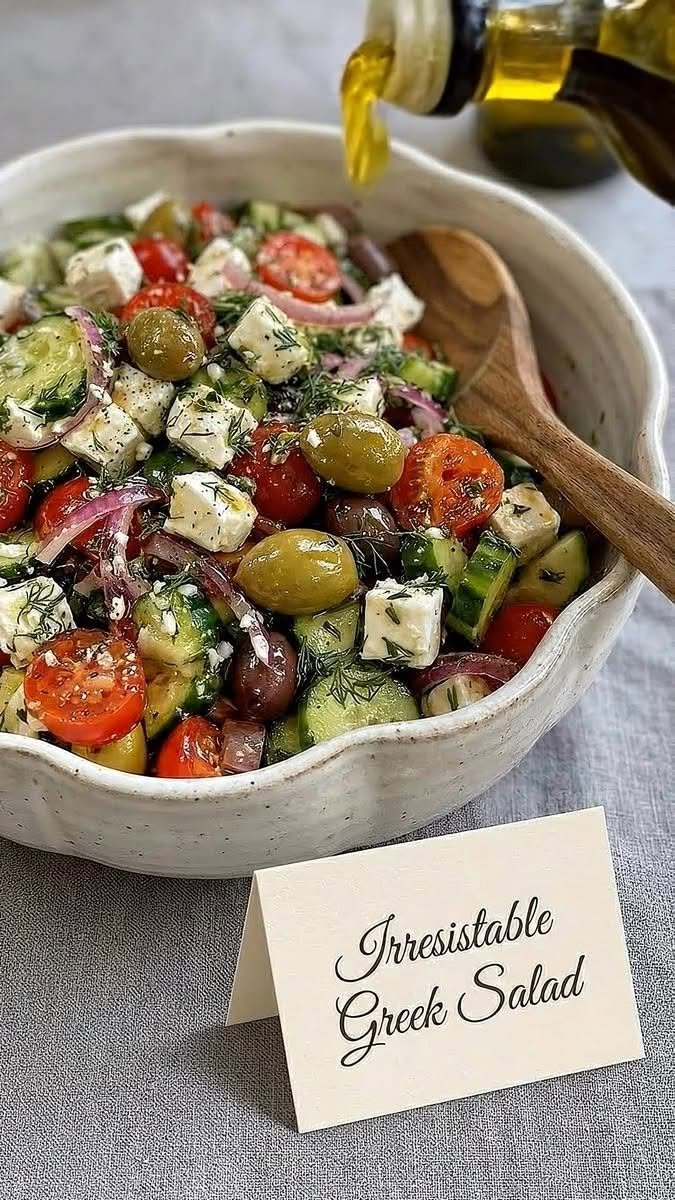
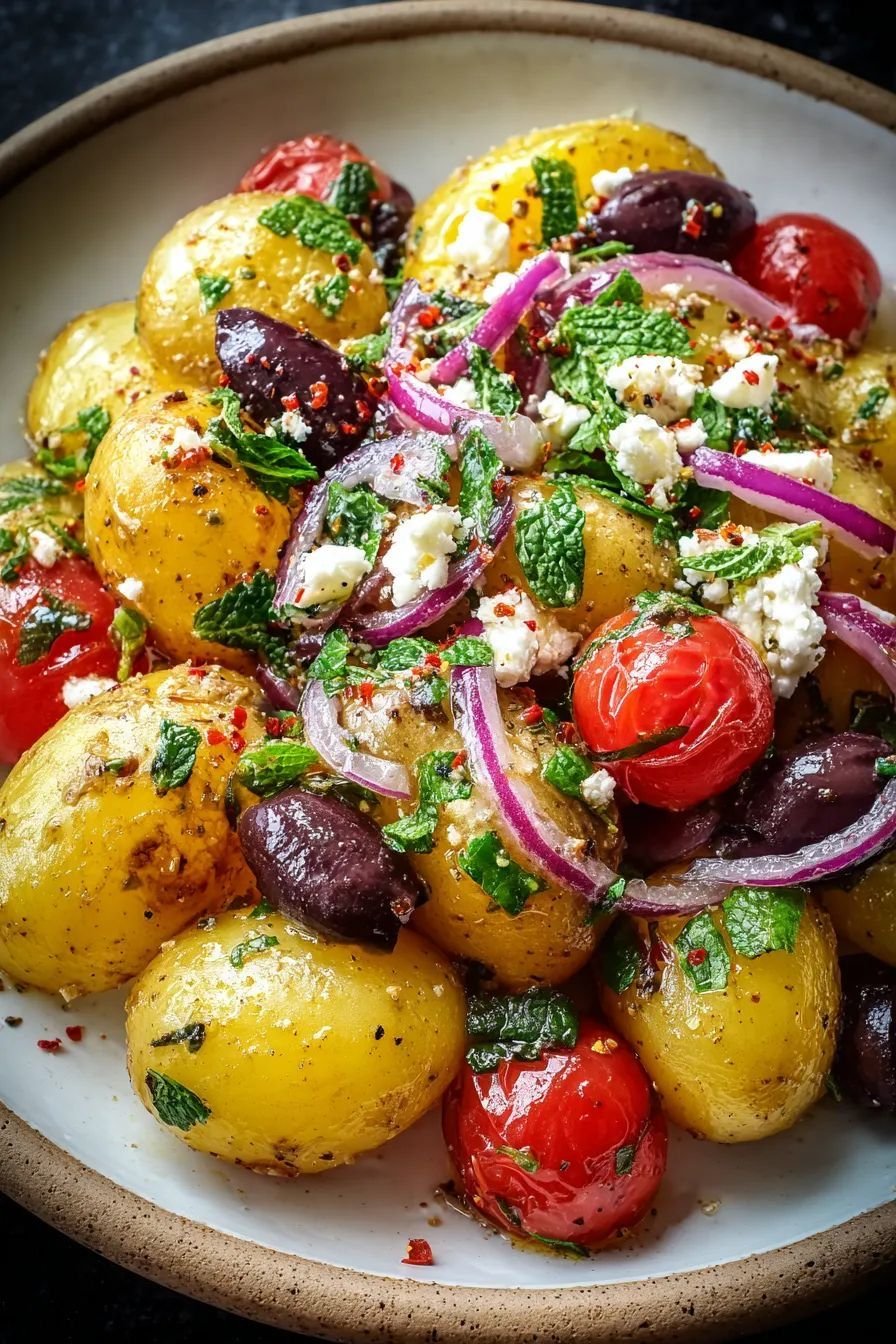
Fresh Mediterranean Cucumber & Tomato Salad
Ingredients
For the Salad:
English Cucumbers: 2 large (or 4 Persian cucumbers), diced into bite-sized chunks
Roma or Cherry Tomatoes: 4 medium Roma tomatoes (chopped) or 1 pint of cherry tomatoes (halved)
Red Onion: 1/2 small red onion, thinly sliced or diced
Fresh Mint: 1/4 cup, finely chopped (plus a sprig for garnish as seen in 1000306781.jpg)
Fresh Parsley: 1/4 cup, finely chopped (optional, but adds great depth)
For the Mediterranean Vinaigrette:
Olive Oil: 3 tablespoons extra-virgin olive oil
Lemon Juice: 2 tablespoons fresh lemon juice (or red wine vinegar)
Garlic: 1 clove, minced
Dried Oregano: 1/2 teaspoon
Salt & Black Pepper: To taste
Red Pepper Flakes: A pinch (optional, for a subtle kick like the flecks visible in the image)
Instructions
Prep the Vegetables: In a large mixing bowl, combine the diced cucumbers, chopped tomatoes, and sliced red onion.
Add Herbs: Toss in the finely chopped fresh mint and parsley.
Whisk the Dressing: In a small bowl, whisk together the extra-virgin olive oil, fresh lemon juice, minced garlic, dried oregano, salt, pepper, and red pepper flakes until well combined.
Dress and Toss: Pour the vinaigrette over the salad. Toss gently to ensure all the vegetables are beautifully coated and glistening, just like in 1000306781.jpg.
Chill and Serve: You can serve it immediately, but letting it sit in the fridge for about 15–20 minutes allows the flavors to meld together perfectly. Garnish with a fresh sprig of mint right before serving.
🍋 Creamy Limoncello Liqueur
Homemade Garlic Flatbread
Servings: 8 flatbreads
Prep Time: 20 minutes (plus 1 hour rising)
Cook Time: 15 minutes
Ingredients
For the Dough
3 cups (375 g) all-purpose flour
2¼ teaspoons (1 packet) active dry yeast
1 teaspoon sugar
1 teaspoon salt
1 cup (240 ml) warm water (105–110°F / 40–43°C)
2 tablespoons olive oil
Garlic Butter
¼ cup (60 g) unsalted butter, melted
3 cloves garlic, minced
1 tablespoon chopped fresh parsley
½ teaspoon garlic powder (optional)
Pinch of salt
Instructions
1. Make the Dough
In a small bowl, combine warm water, sugar, and yeast. Let stand for 5–10 minutes until foamy.
In a large bowl, mix the flour and salt.
Add the yeast mixture and olive oil.
Mix until a soft dough forms, then knead for 8–10 minutes until smooth and elastic.
Place the dough in a lightly oiled bowl, cover, and let rise for about 1 hour or until doubled in size.
2. Shape the Flatbreads
Punch down the dough and divide it into 8 equal pieces.
Roll each piece into a circle or oval about ¼ inch (6 mm) thick.
3. Cook
Skillet Method (Best)
Heat a cast-iron or nonstick skillet over medium-high heat.
Cook each flatbread for 2–3 minutes per side, until golden with bubbly, charred spots.
Repeat with the remaining dough.
4. Garlic Butter
Mix the melted butter, garlic, parsley, garlic powder (if using), and salt.
Brush generously over each warm flatbread.
Ingredients
Hibiscus Berry Base
2 cups brewed hibiscus tea, chilled
1 cup mixed berries (strawberries, blueberries, raspberries)
1 tablespoon lemon juice
1–2 tablespoons honey or maple syrup (optional)
½ teaspoon vanilla extract (optional)
½ cup cold water or coconut water
1 cup ice cubes
Protein Boost
1 scoop vanilla protein powder (whey or plant-based)
½ cup Greek yogurt (optional for a creamy version)
Garnish (Optional)
Fresh berries
Lemon slices
Mint leaves
Hibiscus petals (food-safe)
Instructions
Prepare Hibiscus Tea
Brew hibiscus tea and allow it to cool completely.
Chill in the refrigerator for a colder, more refreshing drink.
Blend Ingredients
Add chilled hibiscus tea, berries, lemon juice, sweetener, vanilla, water/coconut water, and ice to a blender.
Blend until smooth.
Add Protein
Add protein powder and Greek yogurt (if using).
Blend again briefly until fully combined.
Serve
Pour into glasses over extra ice.
Garnish with berries, lemon, or mint.
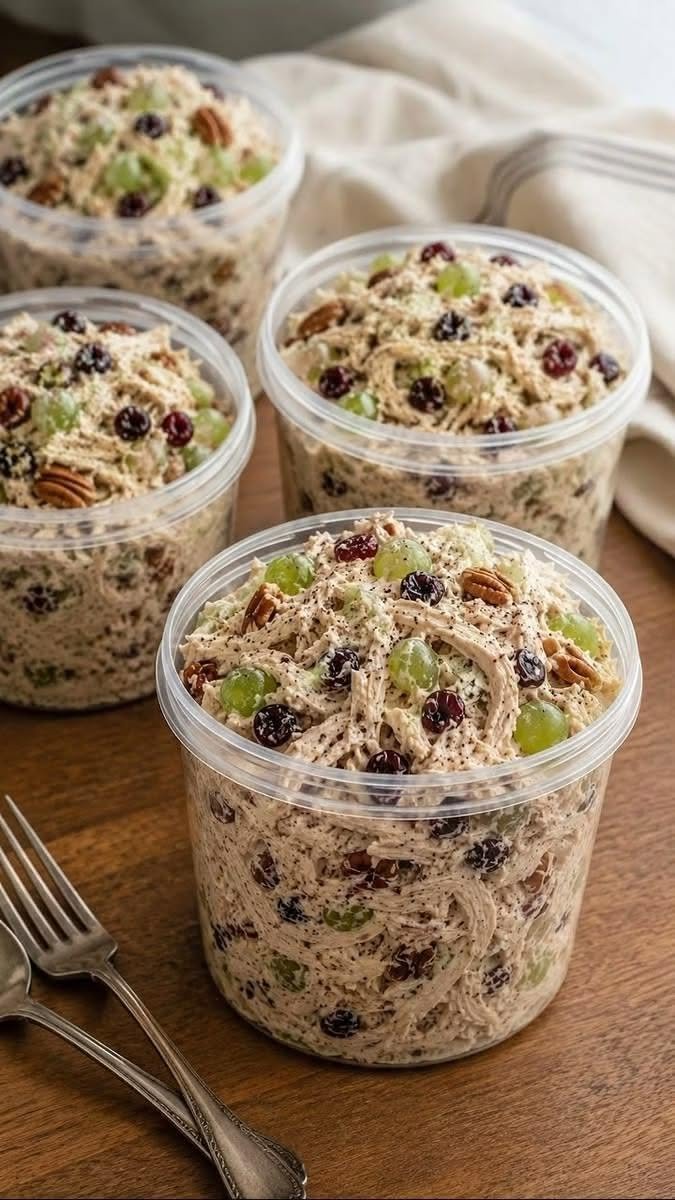
Creamy Chicken Salad
Creamy Chicken Salad is a fresh, protein-packed dish made with tender chicken, crisp vegetables, and a creamy dressing. Perfect for sandwiches, wraps, lettuce cups, or served on its own, it’s an easy meal for lunch, picnics, or meal prep.
Ingredients
- 2 cups cooked chicken, shredded or diced
- ½ cup mayonnaise
- ¼ cup plain Greek yogurt (or sour cream)
- 1 celery stalk, finely chopped
- 2 tbsp red onion, finely diced
- 1 tbsp lemon juice
- 1 tsp Dijon mustard
- Salt and black pepper, to taste
- 1 tbsp chopped fresh parsley (optional)
Instructions
- In a large bowl, combine mayonnaise, Greek yogurt, lemon juice, Dijon mustard, salt, and pepper.
- Add the cooked chicken, celery, red onion, and parsley.
- Stir until all ingredients are evenly coated.
- Cover and refrigerate for at least 30 minutes to enhance the flavor.
- Serve chilled in sandwiches, wraps, on crackers, or over fresh greens.
Notes
- Rotisserie chicken works well for convenience.
- Adjust the dressing quantity for a thicker or creamier texture.
Tips
- Add grapes, diced apples, or dried cranberries for a sweet twist.
- Mix in chopped pecans or almonds for extra crunch.
- Store in an airtight container in the refrigerator for up to 3 days.
Servings
4 servings
Nutritional Information (Per Serving)
- Calories: 290
- Protein: 24 g
- Carbohydrates: 4 g
- Fat: 20 g
- Saturated Fat: 4 g
- Fiber: 1 g
- Sodium: 380 mg
Benefits
- High in protein to support muscle health.
- Quick and easy for meal prep.
- Low in carbohydrates and satisfying.
- Versatile for sandwiches, salads, or wraps.
Q&A
Q: Can I make this ahead of time?
A: Yes, it tastes even better after chilling for a few hours.
Q: Can I use canned chicken?
A: Yes, drain it well before mixing with the dressing.
Q: How long does it last?
A: Store it in the refrigerator for up to 3 days in an airtight container.
Q: Can I make it healthier?
A: Replace some or all of the mayonnaise with plain Greek yogurt for a lighter, high-protein version.
Anti-Aging Clove and Oat Elixir
Description
This soothing, nutrient-dense beverage combines the antioxidant strength of whole cloves with the deeply hydrating, skin-supportive properties of oats. Designed to combat oxidative stress, it promotes a radiant complexion and supports overall cellular health from the inside out.
Recipe & Servings
-
Servings: 1 glass
-
Prep Time: 2 minutes | Cook Time: 10 minutes
Ingredients
-
2 tablespoons rolled oats
-
3 to 4 whole cloves
-
1.5 cups filtered water
-
1 teaspoon raw honey (optional, for taste)
Instructions
-
Combine: In a small saucepan, bring the water, rolled oats, and whole cloves to a gentle boil.
-
Simmer: Reduce the heat to low and let the mixture simmer for 8 to 10 minutes, allowing the nutrients to infuse thoroughly.
-
Strain: Pour the mixture through a fine-mesh strainer straight into your glass, separating the liquid elixir from the solids.
-
Serve: Stir in honey if desired, and enjoy while warm.
Notes & Tips
-
Texture Control: Keep the heat on a low simmer. Boiling too vigorously can cause the oats to release excess starches, making the liquid overly thick or gummy.
-
Zero Waste: Don’t throw away the strained oats! They can be mixed into your breakfast oatmeal or cooled down to use as a soothing, all-natural DIY face mask.
Benefits & Nutritional Info
-
Benefits: Cloves contain high levels of eugenol and polyphenols that neutralize free radicals responsible for premature aging. Oats supply skin-loving beta-glucans and amino acids that support gut health and skin hydration.
-
Nutritional Info (Per Serving): ~45 Calories | 8g Carbohydrates | 1g Protein | 0.5g Fat
Q&A
-
Q: Can I drink this every day?
-
A: Yes, this drink can be enjoyed daily. However, it is always a good idea to rotate your wellness routines and listen to your body to prevent any digestive sensitivity to the spices.
-
-
Q: When is the best time to consume it?
-
A: It is highly recommended to drink this elixir warm in the morning on an empty stomach to optimize nutrient absorption.
-
Blueberry Lemon Glazed Donut Holes
Ingredients
The Batter
2 Cups All-purpose flour
1/3 Cup Granulated sugar
1 Tbsp Baking powder
½ tsp Salt
¾ Cup Whole milk
1 Large egg
4 Tbsp Butter (melted)
1 tsp Vanilla extract
Zest of 1 lemon
1 Cup Fresh blueberries (Frozen works, but don’t thaw them or they’ll turn the batter purple!)
The Coating & Glaze
Sugar Coating: ½ cup granulated sugar (for tossing immediately after frying).
Lemon Glaze: 1 cup powdered sugar + 2 tbsp lemon juice + 1 tbsp melted butter.
Instructions
1. Prep the Oil
In a heavy-bottomed pot or Dutch oven, heat about 2 inches of neutral oil (vegetable or canola) to 350°F (175°C).
Tip: If you don’t have a thermometer, dip the handle of a wooden spoon in; if it bubbles steadily, you’re ready.
2. Mix the Batter
Dry: In a large bowl, whisk together flour, sugar, baking powder, lemon zest, and salt.
Wet: In a separate bowl, whisk the milk, egg, melted butter, and vanilla.
Combine: Fold the wet ingredients into the dry until just combined. Do not overmix, or they will be tough!
Fold: Gently fold in the blueberries.
3. Fry the Holes
Using a small cookie scoop or two spoons, carefully drop rounded tablespoons of batter into the hot oil. Do not overcrowd the pot.
Fry for about 2–3 minutes, turning them occasionally, until they are golden brown all over.
Remove with a slotted spoon and drain on a paper towel for just 30 seconds.
4. The Finish
Sugar Toss: While still hot, toss the donut holes in a bowl of granulated sugar.
Glaze: Whisk your glaze ingredients until smooth. Drizzle it generously over the stack of warm donuts just like in the photo
Pumpkin Pie Overnight Oats
This creamy, autumn-inspired breakfast tastes like dessert but fuels your morning with fiber and protein.
Ingredients
-
1 cup Rolled oats
-
1 cup Milk of choice (dairy or plant-based)
-
1/2 cup Pumpkin purée (unsweetened)
-
1 tbsp Chia seeds
-
1-2 tbsp Maple syrup or honey
-
1/2 tsp Vanilla extract
-
1 tsp Pumpkin pie spice (cinnamon, nutmeg, ginger, cloves)
-
Toppings: Greek yogurt, pecans, or star anise (for garnish).
Instructions
-
Combine: In a large jar or container, mix the oats, milk, pumpkin purée, chia seeds, sweetener, vanilla, and spices.
-
Stir: Mix thoroughly until no clumps of pumpkin remain.
-
Set: Cover tightly and refrigerate for at least 6 hours, or ideally overnight, to allow the oats and chia seeds to hydrate.
-
Serve: Give it a quick stir. If it’s too thick, add a splash of milk. Top with a dollop of yogurt and a dash of cinnamon. Enjoy cold!
Patty Melt Recipe
Patty Melt Recipe
Ingredients
1/2 lb ground beef (formed into 2 thin patties)
4 slices rye or sourdough bread
1 large onion, sliced
4 slices Swiss cheese
2 tbsp butter
Salt and pepper to taste
Instructions
Caramelize Onions: Melt 1 tablespoon of butter in a skillet over medium heat. Cook onions until soft and brown (about 15 minutes). Remove and set aside.
Cook Patties: Season beef with salt and pepper. Cook patties in the same skillet for 3 minutes per side until browned. Remove them.
Assemble: Butter one side of each bread slice. Place two slices, butter-side down, in the skillet. Top each with a cheese slice, a patty, onions, another cheese slice, and the remaining bread (butter-side up).
Grill: Toast until the bread is golden brown and the cheese melts perfectly, about 3 minutes per side.
Baked Cottage Cheese Eggs
Creamy, fluffy, and packed with protein, these Baked Cottage Cheese Eggs are the perfect healthy breakfast for busy mornings. Made with simple ingredients like eggs, cottage cheese, spinach, and cheese, this easy breakfast bake is satisfying, low carb, and meal-prep friendly.
Why You’ll Love This Recipe
- High in protein and low in carbs
- Easy to customize with your favorite veggies and cheeses
- Perfect for meal prep and busy mornings
- Ready in about 30 minutes
- Great for a healthy Mediterranean-inspired lifestyle
Ingredients
- 4 large eggs
- 1 cup cottage cheese
- ½ cup shredded cheddar or mozzarella cheese
- ½ teaspoon garlic powder
- ½ teaspoon onion powder
- Salt and black pepper, to taste
- ½ cup chopped spinach
- ¼ cup diced bell peppers
- Fresh parsley or chives, for garnish
Instructions
Step 1: Preheat the Oven
Preheat your oven to 375°F (190°C). Lightly grease a small baking dish or individual ramekins.
Step 2: Prepare the Egg Mixture
In a medium bowl, whisk the eggs until smooth and fluffy.
Step 3: Add the Ingredients
Stir in the cottage cheese, shredded cheese, garlic powder, onion powder, salt, and black pepper. Fold in the chopped spinach and diced bell peppers.
Step 4: Bake
Pour the mixture into the prepared baking dish. Bake for 25–30 minutes, or until the eggs are fully set and lightly golden on top.
Step 5: Serve
Remove from the oven and let cool for a few minutes. Garnish with fresh parsley or chives before serving.
Tips for the Best Baked Eggs
- Add cooked turkey bacon, chicken sausage, or smoked salmon for extra protein.
- Swap spinach and peppers with mushrooms, tomatoes, zucchini, or onions.
- Use feta cheese for a Mediterranean twist.
- Store leftovers in the refrigerator for up to 3 days.
Serving Suggestions
Serve these baked cottage cheese eggs with:
- Avocado slices
- Fresh fruit
- Whole grain toast
- A light Mediterranean salad
- Roasted vegetables
Frequently Asked Questions
Can I make this recipe ahead of time?
Yes! This recipe is perfect for meal prep. Store in an airtight container and reheat in the microwave or oven.
Can I freeze baked cottage cheese eggs?
Yes. Let them cool completely, then freeze individual portions for up to 2 months.
Is cottage cheese good in eggs?
Absolutely. Cottage cheese makes the eggs extra creamy, fluffy, and adds a boost of protein.
Nutrition Information (Approximate Per Serving)
- Calories: 220
- Protein: 20g
- Carbohydrates: 4g
- Fat: 14g
Healthy, simple, and delicious — these Baked Cottage Cheese Eggs are an easy breakfast recipe you’ll want to make again and again!
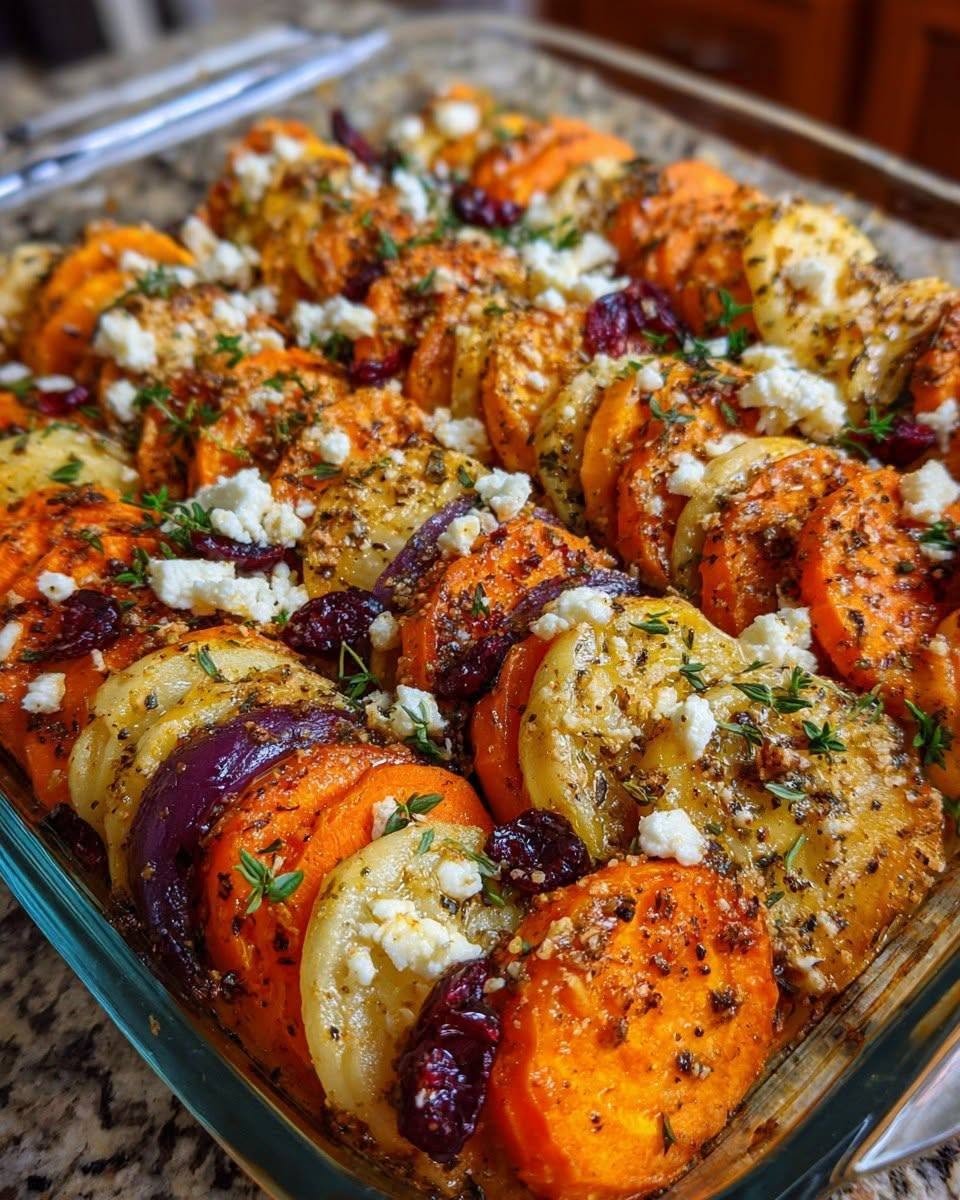
Roasted Carrot, Pumpkin & Sweet Potato Bake with Feta and Maple Cranberry Drizzle
🍠🥕✨ Roasted Carrot, Pumpkin & Sweet Potato Bake with Feta and Maple Cranberry Drizzle ✨🧀
A beautiful combination of sweet roasted vegetables, creamy feta, crunchy almonds, and a sweet-tart maple cranberry drizzle. Perfect as a holiday side dish or a hearty vegetarian meal! 😍
📝 Ingredients
🥕 For the Vegetables
- 3 large carrots, thickly sliced
- 3 cups pumpkin, cubed
- 2 medium sweet potatoes, cubed
- 2 tbsp olive oil
- 1 tsp dried thyme
- ½ tsp garlic powder
- 1 tsp paprika
- Salt & black pepper, to taste
🧀 For the Topping
- 200g (7 oz) feta cheese, block or crumbled
- ⅓ cup sliced almonds
- Fresh parsley, chopped (for garnish)
🍁 For the Maple Cranberry Drizzle
- ½ cup dried cranberries
- ¼ cup pure maple syrup
- 2 tbsp orange juice
- 1 tbsp water
- 1 tsp Dijon mustard (optional)
- Pinch of cinnamon
👩🍳 Instructions
1️⃣ Preheat the oven to 400°F (200°C). Line a large baking tray or casserole dish with parchment paper.
2️⃣ In a large bowl, combine carrots, pumpkin, and sweet potatoes. Drizzle with olive oil and season with thyme, garlic powder, paprika, salt, and pepper. Toss until evenly coated.
3️⃣ Spread the vegetables in a single layer on the baking tray. Roast for 25–30 minutes, stirring halfway through, until tender and lightly caramelized.
4️⃣ Remove from the oven and place the feta cheese in the center of the vegetables. Sprinkle sliced almonds around the tray.
5️⃣ Return to the oven and bake for another 10–12 minutes, until the feta is warm and slightly golden and the almonds are toasted.
6️⃣ Meanwhile, make the drizzle. In a small saucepan, combine cranberries, maple syrup, orange juice, water, Dijon mustard, and cinnamon. Simmer over low heat for 5–7 minutes until the cranberries soften and the mixture thickens slightly.
7️⃣ Remove the vegetables from the oven. Gently crumble the warm feta over the roasted vegetables.
8️⃣ Drizzle generously with the warm maple cranberry sauce and garnish with fresh parsley.
🍽️ Serving Suggestion
Serve warm as a festive side dish, or enjoy as a vegetarian main with a fresh green salad and crusty bread.
💡 Tip: For extra crunch, add chopped pecans or walnuts before serving!
Caprese Avocado Toast with Balsamic Glaze 🥑🍅🌿
Thick sourdough, smashed avocado, heirloom cherry tomatoes, fresh mozzarella, basil, and that glossy balsamic drizzle. Brunch cafe energy at home.
Serves 4 toasts | Prep 10 min | No cook
Ingredients
For the toast:
Sourdough bread: 4 thick slices, ¾-inch — or artisan country loaf
Olive oil: 1 tbsp — for toasting
Garlic: 1 clove, halved — to rub on hot toast
For the avocado mash:
Avocados: 2 large, ripe but firm
Lemon juice: 1 tbsp, fresh — stops browning + adds zing
Kosher salt: ½ tsp
Black pepper: ½ tsp, freshly cracked
Red pepper flakes: Pinch — optional for heat
For the caprese topping:
Cherry tomatoes: 1 cup, halved — mix red + yellow heirlooms like your photo
Fresh mozzarella: 4 oz, cut into ½-inch cubes — or ciliegine balls halved
Fresh basil: ¼ cup leaves, small ones left whole, large ones torn
Extra virgin olive oil: 1 tsp, for drizzling
Balsamic glaze: 2 tbsp — or make quick version below
Flaky sea salt: Pinch, for finishing
Lemon zest: ½ tsp — shown in your photo as yellow specks
Quick balsamic glaze — if you don’t have it:
Balsamic vinegar: ½ cup
Honey: 1 tbsp
Method
Toast the bread — 3 min
Brush sourdough with olive oil. Toast in skillet med-high or toaster until deep golden + crispy edges.
Immediately rub hot toast with cut garlic clove. Instant garlic bread base.
Make balsamic glaze — 5 min, if needed
Small pan: balsamic + honey. Simmer 5–7 min until thick enough to coat spoon and reduced by half. Cool. Gets thicker as it sits.
Shortcut: Store-bought glaze works.
Smash the avocado — 2 min
Bowl: avocado, lemon juice, salt, pepper, chili flakes. Mash with fork. Keep it chunky, not guacamole smooth. Taste: should be bright + salty.
Assemble — 3 min
Spread thick layer of avocado on each toast. Go edge to edge.
Top with halved tomatoes, mozzarella cubes. Alternate colors like your photo.
Tuck basil leaves between. Drizzle olive oil + balsamic glaze. Finish with flaky salt, black pepper, lemon zest.
Why this works:
Garlic-rubbed toast: Raw garlic infuses bread without overpowering
Lemon in avocado: Acid stops browning + cuts richness
Balsamic glaze vs vinegar: Glaze is thick + sweet. Regular vinegar makes toast soggy
Room temp tomatoes: Cold tomatoes = dull flavor. Leave on counter 20 min
Flaky salt at end: Crunch + pops of salt with creamy + acidic bites
Easy swaps:
Cheese: Feta for salty tang, or vegan mozz
Veggies: Add sliced peaches in summer, roasted red peppers, or cucumber
Gluten-free: GF sourdough or sweet potato toast slices
No glaze: Reduce balsamic or just use extra olive oil + squeeze of lemon
Protein boost: Sprinkle hemp seeds or 1 tbsp white beans mashed with avo
Macros per toast:
Calories: ∼340
Protein: 9g
Carbs: 28g
Fiber: 8g
Fat: 23g
Vegetarian. Add chicken = 38g protein.
Serve with:
Coffee, fresh fruit, or those Mediterranean Roasted Vegetables. This is brunch, lunch, or “I don’t want to cook” dinner.
Storage:
Avocado mash: Press plastic wrap directly on surface, fridge 1 day. Tops brown fast.
Assembled toast: Eat immediately. Toast goes soggy in 10 min.
Cheesy Taco Soup (Lightened-Up Version)
Ingredients
2 lbs 99% lean ground turkey (or extra lean ground beef)
½ cup green bell pepper, finely chopped
1 jalapeño, seeded and finely chopped
1 (10 oz) can diced tomatoes with green chilies, undrained
5 cups fat-free beef broth
1 (7 oz) can tomato paste
2 (4 oz) cans diced green chilies
1 packet taco seasoning (low-sodium preferred)
4 oz reduced-fat cream cheese, softened
¼ cup plain nonfat Greek yogurt (replaces heavy cream)
Instructions
Brown meat: In a large pot, cook turkey over medium heat until fully browned. Drain if needed.
Add vegetables & base: Stir in bell pepper, jalapeño, tomatoes, broth, tomato paste, green chilies, and taco seasoning.
Simmer: Cook uncovered on medium-low for 20 minutes until slightly thickened.
Make it creamy: Lower heat and stir in softened reduced-fat cream cheese until melted.
Finish: Stir in Greek yogurt just before serving for extra creaminess.
WW Points (Estimated – Current Plans)
Makes 8 servings (about 1½ cups each)
Using 99% lean turkey
Reduced-fat cream cheese
Nonfat Greek yogurt
~2–3 points per serving
(Points may vary slightly by brand and tracking method.)
Even Lower Point Option (1–2 Points)
Use fat-free cream cheese
Omit Greek yogurt
Add extra spices + splash of lime for flavor boost
Sugar-Free Chocolate Mousse Domes
A rich, elegant dessert that looks like it came straight from a pastry shop—but without added sugar. These glossy domes hide a light, airy chocolate mousse inside and are perfect for special occasions or anyone watching their sugar intake.
Description
Sugar-free chocolate mousse domes combine indulgence with mindful eating. They typically feature a silky mousse made with dark chocolate (or sugar-free chocolate), gently sweetened with alternatives like stevia, erythritol, or monk fruit. The mousse is molded into dome shapes and often finished with a shiny glaze or cocoa coating.
Ingredients (6 servings)
For the mousse:
- 200g sugar-free dark chocolate
- 1 cup heavy whipping cream (cold)
- 2 tbsp powdered erythritol (or preferred sweetener)
- 2 egg whites
- 1 tsp vanilla extract
- Pinch of salt
Optional base:
- Sugar-free biscuit crumbs or almond flour crust
Optional glaze:
- 100g sugar-free chocolate
- ½ cup cream
Instructions
Step 1: Melt chocolate
Gently melt the sugar-free chocolate using a double boiler or microwave in short bursts. Let it cool slightly.
Step 2: Whip cream
Whip the cold cream until soft peaks form. Set aside in the fridge.
Step 3: Prepare meringue
Beat egg whites with a pinch of salt until foamy, then gradually add sweetener and beat to stiff peaks.
Step 4: Combine
- Mix melted chocolate with vanilla
- Fold in whipped cream gently
- Then fold in meringue until smooth and airy
Step 5: Mold
Pour mousse into silicone dome molds. Smooth tops and freeze for at least 4–6 hours (or overnight).
Step 6: Glaze (optional)
Heat cream and pour over chopped chocolate. Stir until smooth. Cool slightly, then pour over frozen domes.
Step 7: Serve
Let domes sit at room temperature for 10–15 minutes before serving.
Servings
- Makes: 6 individual domes
- Serving size: 1 dome
Nutritional Information (per serving, approx.)
- Calories: 220
- Fat: 18g
- Protein: 4g
- Carbohydrates: 8g
- Net carbs: 4g
- Sugar: 1g or less
Tips for Success
- Use high-quality sugar-free chocolate for best flavor
- Don’t overmix—keep the mousse airy
- Silicone molds make unmolding much easier
- Freeze thoroughly before glazing to keep shape
- Add a surprise center (like sugar-free caramel or berries) for a gourmet touch
Notes
- You can replace egg whites with whipped aquafaba for an egg-free version
- Adjust sweetness gradually—some sugar substitutes are stronger than others
- For keto diets, ensure all ingredients are low-carb certified
Benefits
Low sugar / diabetic-friendly
Lower carb than traditional mousse desserts
Rich in antioxidants (from dark chocolate)
Satisfies chocolate cravings without sugar spikes
Q&A
Q: Can I make this dairy-free?
Yes—use coconut cream instead of heavy cream.
Q: What’s the best sugar substitute?
Erythritol or monk fruit blends work well without strong aftertaste.
Q: Can I skip freezing?
Freezing is needed for the dome shape. If skipped, serve as regular mousse.
Q: How long do they last?
Up to 3 days in the fridge or 2 weeks frozen.
Q: Can I use regular chocolate?
Yes, but it will no longer be sugar-free
Peanut Butter and Berry Date Smoothie.
Ingredients
-
Frozen Berries: 1 cup of mixed strawberries and raspberries
-
Dates: 2 soft, pitted dates (for natural sweetness)
-
Nut Butter: 2 tablespoons of creamy peanut butter (or almond butter)
-
Milk Base: 1 cup of your favorite milk (oat, almond, or dairy)
-
Protein Boost (Optional): ½ cup of plain Greek yogurt
Instructions
-
Prepare the Base: Place the frozen strawberries, raspberries, and pitted dates into a high-speed blender.
-
Add the Creaminess: Spoon in 1 tablespoon of the peanut butter and pour your chosen milk over the top.
-
Blend: Secure the lid and blend on high for about 60 seconds, or until the texture is completely smooth, thick, and creamy. If it is too thick, simply splash in a little more milk.
-
Drizzle and Serve: To recreate the beautiful presentation in gently drizzle the remaining tablespoon of peanut butter around the inner rim of a clean glass jar or bottle.
-
Enjoy: Carefully pour the pink smoothie into the glass, pop in a reusable straw, and enjoy immediately while perfectly chilled!
Easy Marinated Cheese Appetizer with Salami & Pickles
There are some recipes that instantly become a favorite after the very first bite, and this Easy Marinated Cheese Appetizer with Salami & Pickles is definitely one of them. I actually tried this recipe with my family last weekend when we were hosting a casual game night at home. I was looking for something simple that didn’t require hours in the kitchen, and a close friend recommended this appetizer. She promised it would disappear quickly from the table, and she was absolutely right.
The moment I placed the platter out, everyone gathered around it. Between the creamy cheese cubes, savory salami slices, tangy pickles, and flavorful marinade, there was something for everyone to love. Even the picky eaters in my family kept coming back for more. By the end of the evening, the serving tray was completely empty.
What I love most about this recipe is how effortless it is. Whether I’m feeling happy and celebrating with friends, stressed after a busy week, or simply enjoying a relaxing weekend at home, this appetizer always feels like a special treat. It’s one of those recipes that looks impressive but requires very little work.
Why You’ll Love This Recipe
Quick and easy to prepare
Perfect for parties, holidays, and family gatherings
Packed with bold flavors
Can be made ahead of time
Requires minimal cooking skills
Looks beautiful on any appetizer table
Ingredients
8 ounces cheddar cheese, cubed
8 ounces mozzarella cheese, cubed
6 ounces salami, sliced into bite-sized pieces
1 cup dill pickles, sliced
½ cup olive oil
2 tablespoons red wine vinegar
1 teaspoon Italian seasoning
½ teaspoon garlic powder
½ teaspoon onion powder
¼ teaspoon crushed red pepper flakes (optional)
1 tablespoon fresh parsley, chopped
Salt and black pepper, to taste
Instructions
Step 1: Prepare the Ingredients
Cut the cheddar and mozzarella into bite-sized cubes. Slice the salami into smaller pieces if needed, and drain and slice the pickles.
Step 2: Make the Marinade
In a small bowl, whisk together the olive oil, red wine vinegar, Italian seasoning, garlic powder, onion powder, crushed red pepper flakes, parsley, salt, and pepper until well combined.
Step 3: Combine Everything
Place the cheese cubes, salami, and pickles in a large mixing bowl. Pour the marinade over the top and gently toss until everything is evenly coated.
Step 4: Marinate
Cover the bowl and refrigerate for at least 2 hours. For the best flavor, let it marinate overnight.
Step 5: Serve
Transfer to a serving platter or bowl and serve chilled with crackers, toasted bread, or fresh vegetables.
Tips for the Best Marinated Cheese Appetizer
Allow enough marinating time so the flavors fully develop.
Use high-quality cheese for the best texture and taste.
Add olives or cherry tomatoes for extra variety.
Prepare it the night before a party to save time.
Serve with a variety of crackers and breadsticks.
Variations
Spicy Version
Add extra crushed red pepper flakes or diced jalapeños for a spicy kick.
Mediterranean Style
Include olives, feta cheese, and sun-dried tomatoes.
Herb Lovers Version
Add fresh basil, oregano, and thyme for even more flavor.
What to Serve With It
This appetizer pairs wonderfully with:
Assorted crackers
Toasted baguette slices
Fresh vegetable sticks
Fruit platters
Charcuterie boards
I recently served it alongside a simple fruit tray and some crackers during a family movie night. The combination was fantastic, and everyone kept asking for the recipe.
Storage Instructions
Store leftovers in an airtight container in the refrigerator for up to 4 days. The flavors often become even better after a day as the ingredients continue to marinate together.
Nutritional Information
Nutrient Amount Per Serving
Calories 280 kcal
Protein 14 g
Carbohydrates 3 g
Fat 23 g
Saturated Fat 8 g
Cholesterol 35 mg
Sodium 720 mg
Fiber 0.5 g
Sugar 1 g
Calcium 220 mg
Nutritional values are approximate and may vary depending on the specific ingredients used.
Frequently Asked Questions
Can I make this appetizer ahead of time?
Absolutely. In fact, it tastes even better when made a day in advance because the flavors have more time to blend together.
What type of cheese works best?
Cheddar and mozzarella are excellent choices, but you can also use Monterey Jack, Colby, or pepper jack cheese.
Can I use different pickles?
Yes. Dill pickles are traditional, but bread-and-butter pickles or spicy pickles can add a unique twist.
Is this recipe suitable for parties?
Definitely. It’s one of my favorite make-ahead party appetizers because it’s easy, affordable, and always gets compliments.
Final Thoughts
This Easy Marinated Cheese Appetizer with Salami & Pickles has become one of those reliable recipes I turn to again and again. It reminds me of relaxed weekends, family gatherings, and sharing good food with people I care about. The first time I made it, I wasn’t expecting much from such a simple combination of ingredients, but it completely won everyone over.
Watermelon Juice..
I made something cool for my family last weekend because it was so hot outside and the afternoon sun was shining through our kitchen windows. For weeks, my cousin had been telling me about her favourite homemade watermelon juice recipe. To be honest, I didn’t think something so basic could become so popular in our home. However, everyone fell in love with those cool pink cups of fresh watermelon juice as soon as I offered them.
For me, watermelon has a nostalgic quality. It brings back memories of our childhood summers spent giggling uncontrollably while sitting on the floor with enormous watermelon slices and trying not to spill juice all over ourselves. Even now, anytime I’m feeling anxious or emotionally spent,
Watermelon Juice (Anti-Inflammatory Summer Drink)
Description
Refreshing, naturally sweet, and deeply hydrating, watermelon juice is one of the best homemade summer wellness drinks. Packed with antioxidants like lycopene, vitamin C, and amino acids, this anti-inflammatory beverage may help support hydration, digestion, muscle recovery, and healthy skin.
This easy detox-style fruit juice is perfect for hot weather, post-workout recovery, weight management, and healthy living routines. It’s also caffeine-free, low in calories, and incredibly simple to prepare at home.
Ingredients
- 6 cups fresh watermelon cubes (seedless preferred)
- 1 tablespoon fresh lemon or lime juice
- 1–2 tablespoons honey or maple syrup (optional)
- 4–5 fresh mint leaves
- 1 small piece fresh ginger (optional for stronger anti-inflammatory benefits)
- Ice cubes as needed
Optional:
- Pinch of black salt
- Chia seeds for fiber
- Sparkling water for a fizzy version
Instructions
Step 1: Prepare the Watermelon
Cut the watermelon into cubes and remove seeds if necessary.
Step 2: Blend
Add watermelon cubes, lemon juice, mint leaves, and ginger into a blender.
Blend until smooth.
Step 3: Strain (Optional)
For smoother juice, strain through a fine mesh sieve or cheesecloth.
Step 4: Sweeten
Taste and add honey if needed.
Step 5: Chill & Serve
Pour into glasses over ice and serve immediately.
Health Benefits (High-Value Wellness Keywords)
Anti-Inflammatory Properties
Watermelon contains lycopene and vitamin C, which may help reduce inflammation and oxidative stress.
Hydration Support
With over 90% water content, watermelon juice is an excellent natural hydration drink.
Weight Loss Friendly
Low in calories and naturally sweet, it can replace sugary beverages in a healthy diet plan.
Skin & Beauty Benefits
Rich antioxidants may support glowing skin and collagen production.
Heart Health Support
Potassium and lycopene may help support cardiovascular wellness.
Serving Suggestions
Serve this juice:
- As a summer mocktail
- After workouts for hydration
- At brunch parties
- With grilled foods
- Alongside healthy breakfast bowls
Garnish ideas:
- Mint sprigs
- Lemon slices
- Watermelon wedges
- Chia seeds
Delicious Variations
1. Ginger Watermelon Detox Juice
Add extra ginger for a spicy wellness boost.
2. Watermelon Mint Cooler
Increase mint and add sparkling water.
3. Tropical Watermelon Smoothie
Blend with pineapple or coconut water.
4. Watermelon Cucumber Juice
Add cucumber for a spa-style detox drink.
5. Protein Recovery Drink
Mix with Greek yogurt or protein powder.
Nutrition Information (Approx. Per Serving)
| Nutrient | Amount |
|---|---|
| Calories | 70 |
| Carbohydrates | 17g |
| Sugar | 14g |
| Fiber | 1g |
| Vitamin C | 20% DV |
| Potassium | 250mg |
| Water Content | High |
Storage Tips
- Refrigerate for up to 2 days
- Store in airtight glass bottles
- Shake before serving
- Best enjoyed fresh
Related Questions People Ask
Is watermelon juice good for inflammation?
Yes, watermelon contains antioxidants like lycopene and vitamin C that may help reduce inflammation.
Can I drink watermelon juice daily?
Yes, in moderation as part of a balanced diet.
Does watermelon juice help with weight loss?
It can support weight management because it’s hydrating and low in calories.
Can I freeze watermelon juice?
Yes, freeze in ice cube trays or airtight containers.
What can I mix with watermelon juice?
Mint, lime, cucumber, ginger, pineapple, and sparkling water pair well.
Final Thoughts
Homemade Watermelon Juice is one of the easiest healthy drink recipes you can make. It’s refreshing, naturally hydrating, budget-friendly, and loaded with nutrients that support wellness and recovery.