Honey Ricotta Roasted Sweet Potatoes 🍠🍯

Honey Ricotta Roasted Sweet Potatoes 🍠

Ingredients

For the Sweet Potatoes

  • 2 large sweet potatoes
  • 1 tbsp olive oil
  • Salt, to taste
  • Black pepper, to taste

For the Toppings

  • 1 cup ricotta cheese
  • 2 tbsp honey
  • 2 tbsp chopped pecans, walnuts, or pistachios
  • 1 tbsp fresh parsley, finely chopped
  • 1 tsp fresh thyme leaves
  • ½ tsp red pepper flakes (optional)

Instructions

Step 1: Prepare the Sweet Potatoes

  1. Preheat your oven to 400°F (200°C).
  2. Wash and dry the sweet potatoes thoroughly.
  3. Slice them in half lengthwise.
  4. Brush the cut sides with olive oil.
  5. Season lightly with salt and black pepper.

Step 2: Roast

  1. Place the sweet potatoes cut-side down on a parchment-lined baking sheet.
  2. Roast for 35–45 minutes until soft and caramelized.
  3. Test with a fork; it should slide in easily.

Step 3: Prepare the Toppings

  1. Chop the nuts into small pieces.
  2. Finely chop the parsley.
  3. Remove thyme leaves from the stems.
  4. Warm the honey slightly for easy drizzling.

Step 4: Assemble

  1. Remove sweet potatoes from the oven.
  2. Turn them cut-side up.
  3. Lightly fluff the centers with a fork.
  4. Add generous spoonfuls of ricotta cheese on top of each half.

Step 5: Finish and Serve

  1. Sprinkle with chopped nuts.
  2. Add parsley and thyme.
  3. Sprinkle red pepper flakes if using.
  4. Drizzle warm honey over everything.
  5. Serve immediately while warm.

Q&A

Q: Can I use cottage cheese instead of ricotta?
A: Yes. Cottage cheese provides a similar creamy texture and extra protein.

Q: Can I prepare these ahead of time?
A: Yes. Roast the sweet potatoes in advance and add the toppings just before serving.

Q: What other toppings can I use?
A: Crumbled feta, goat cheese, dried cranberries, or pomegranate seeds are excellent additions.

Nutritional Benefits

  • Sweet Potatoes: Excellent source of fiber, vitamin A, and antioxidants.
  • Ricotta Cheese: Provides protein and calcium.
  • Nuts: Rich in healthy fats, vitamins, and minerals.
  • Honey: Adds natural sweetness and flavor.
  • Fresh Herbs: Add freshness and beneficial plant compounds.

Servings: 4

Approximate Nutrition Per Serving

  • Calories: 260
  • Protein: 8g
  • Carbohydrates: 28g
  • Fat: 13g
  • Fiber: 4g
  • Sugar: 10g

Serving Suggestions

  • Serve alongside grilled chicken, turkey, or salmon.
  • Pair with a fresh green salad for a light meal.
  • Add to a holiday dinner spread for an elegant side dish.

Papaya Seeds Remedy & Benefits

Papaya seeds are edible and contain fiber, healthy fats, and plant compounds. However, many social media posts exaggerate their effects. They are not a cure for liver disease, obesity, or any medical condition.

🥄 Simple Papaya Seed Remedy

Ingredients

  • 1 ripe papaya
  • ½ to 1 teaspoon fresh papaya seeds
  • 1 tablespoon honey (optional)
  • 1 glass water or smoothie

👩‍🍳 How to Use

  1. Scoop the seeds from a ripe papaya.
  2. Wash and dry them lightly.
  3. Chew ½ teaspoon of seeds or blend them into a smoothie.
  4. If the taste is too strong, mix with honey.
  5. Use occasionally as part of a balanced diet.

🌟 Possible Benefits

✅ Contains antioxidants
✅ Provides dietary fiber
✅ May support healthy digestion
✅ Adds nutrients and plant compounds to the diet
✅ Can be included in a healthy eating pattern

⚠️ Important Notes

  • Papaya seeds have a strong peppery taste.
  • Eating large amounts may cause stomach discomfort.
  • Pregnant women should avoid consuming large quantities.
  • There is no strong evidence that papaya seeds “melt fat,” “detox the liver,” or “clean the intestines.”

❓Q&A

Q: How many papaya seeds can I eat?
A: Start with ½ teaspoon and see how your body tolerates them.

Q: Can papaya seeds help with weight loss?
A: No food alone causes weight loss. Weight management depends on overall diet and activity.

Q: Can I eat them every day?
A: Small amounts are generally used by some people, but moderation is recommended.

🥭 Easy Papaya Seed Smoothie

  • 1 cup papaya chunks
  • ½ teaspoon papaya seeds
  • 1 cup water or milk
  • 1 teaspoon honey (optional)

Blend until smooth and serve chilled. ✨

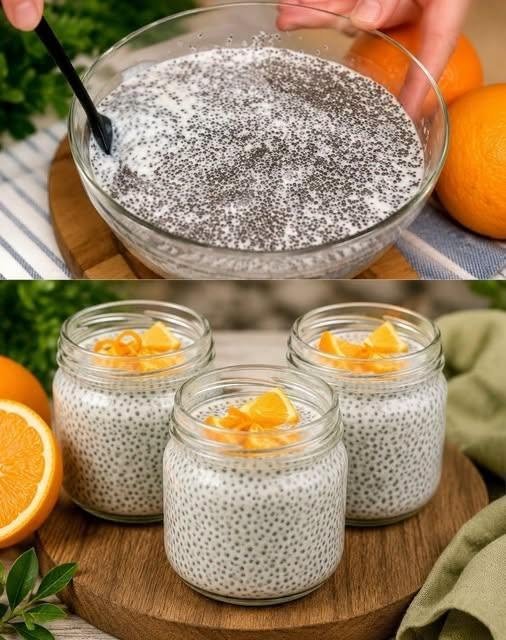
Creamy Vanilla Black Seed Dessert Cups

Ingredients

  • 4 cups whole milk
  • ½ cup sugar
  • 4 tbsp cornstarch
  • 2 tbsp custard powder (vanilla flavor)
  • 1 tsp vanilla extract
  • 2 tbsp black seeds (nigella seeds or black sesame seeds)
  • 2 tbsp butter

👩‍🍳 Instructions

1️⃣ In a saucepan, add milk, sugar, cornstarch, and custard powder. Whisk until completely smooth.

2️⃣ Place over medium heat and stir continuously to prevent lumps.

3️⃣ Once the mixture starts to thicken, add vanilla extract and butter. Continue stirring for 2–3 minutes.

4️⃣ Add the black seeds and mix well so they are evenly distributed throughout the custard.

5️⃣ Remove from heat and let cool for 5 minutes.

6️⃣ Pour the mixture into 4–6 small containers or dessert cups.

7️⃣ Cover and refrigerate for at least 3 hours, or until fully set and chilled.

8️⃣ Serve cold and enjoy the creamy texture.

💡 Tips

  • Use black sesame seeds for a milder flavor.
  • Add a little lemon zest for extra freshness.
  • Store in the refrigerator for up to 4 days.

Q&A

Can I make it without custard powder?
Yes, replace it with 1 extra tablespoon of cornstarch and a little more vanilla.

Can I use low-fat milk?
Yes, but the dessert will be slightly less creamy.

🍽️ Servings: 4–6

🥗 Nutrition (Approx. per serving)

  • Calories: 180
  • Carbohydrates: 24g
  • Protein: 5g
  • Fat: 7g

⚠️ The claim “zero carbs” is not accurate for desserts made with milk, sugar, or custard powder. This recipe contains carbohydrates.

Crustless Spinach and Ricotta Quiche

Crustless Spinach and Ricotta Quiche

Crustless spinach and ricotta quiche is a light, protein-rich dish that feels comforting without being heavy. It has a soft, custardy texture with creamy ricotta, tender spinach, and a gentle hint of nutmeg that brings everything together. Since there’s no crust, it’s quicker to prepare and naturally lower in carbs, making it a great option for breakfast, brunch, or even a simple dinner. It’s also highly versatile, so you can easily adapt it with whatever cheeses or vegetables you have on hand.

Prep Time: 15 minutes
Cook Time: 35–40 minutes
Total Time: 55–60 minutes
Servings: 6

Ingredients

Main Ingredients

10 oz frozen chopped spinach, thawed and completely squeezed dry or 2–3 cups fresh baby spinach, sautéed and wilted

1 cup ricotta cheese

3 to 6 large eggs, beaten

¼ to ½ cup milk or cream

Cheeses & Flavorings

¼ to ½ cup grated Parmesan cheese

½ to 1 cup shredded mozzarella, cheddar, or Swiss cheese (optional)

1 small onion, diced and sautéed

1 to 2 cloves garlic, minced

Seasonings

¼ teaspoon nutmeg

½ teaspoon garlic powder (optional)

½ teaspoon onion powder (optional)

Salt and black pepper to taste

Instructions

Preheat the oven to 180°C and lightly grease a baking dish or pie dish.

If using fresh spinach, sauté it in a pan until wilted, then let it cool and squeeze out any excess moisture. If using frozen spinach, ensure it is fully thawed and well-drained.

In a pan, lightly sauté onion until soft and translucent. Add garlic and cook briefly until fragrant. Set aside to cool.

In a large bowl, whisk together eggs, milk or cream, ricotta cheese, Parmesan, salt, pepper, and nutmeg until smooth and well combined.

Stir in the spinach, sautéed onion, and garlic. Mix gently until everything is evenly distributed.

If using extra shredded cheese, fold it into the mixture or sprinkle it on top before baking.

Pour the mixture into the prepared baking dish and spread evenly.

Bake for 35 to 40 minutes or until the quiche is set in the center and lightly golden on top. A knife inserted should come out mostly clean.

Let it cool for at least 10 minutes before slicing to help it set properly. Serve warm or at room temperature.

Tips

Make sure spinach is very dry to avoid a watery quiche

Use whole milk ricotta for a creamier, richer texture

Do not overbeat eggs to keep the texture soft and custardy

Let sautéed onions and garlic cool before mixing to avoid curdling eggs

Add nutmeg carefully as it enhances flavor without overpowering

Bake until just set to avoid dryness

Let the quiche rest before slicing for clean portions

Use a ceramic or glass dish for even baking

Add cheese on top for a golden, slightly crisp finish

Serve with a light salad for a balanced meal

Variations

Add mushrooms for an earthy flavor

Include sun-dried tomatoes for a tangy twist

Swap ricotta with cottage cheese for a lighter version

Use feta cheese for a saltier Mediterranean profile

Add cooked bacon or ham for a protein boost

Mix in zucchini or bell peppers for extra vegetables

Make it dairy-free with plant-based cheese and milk alternatives

Add fresh herbs like basil, parsley, or dill

Turn into mini muffin quiches for meal prep

Add chili flakes for a mild spicy kick

FAQs

Can I make this ahead of time
Yes, it stores well and can be reheated or served cold

Can I freeze crustless quiche
Yes, freeze after baking and reheat when needed

Why is my quiche watery
Spinach was likely not fully drained

Can I use fresh spinach instead of frozen
Yes, just cook and drain it well before using

What size baking dish should I use
An 8 to 9 inch dish works best

Can I add meat
Yes, cooked chicken, bacon, or sausage work well

How do I store leftovers
Keep refrigerated for up to 3 days

Can I make it low-fat
Yes, use low-fat ricotta and milk

Is it good for breakfast meal prep
Yes, it reheats very well and is filling

Can I serve it cold
Yes, it tastes great chilled or at room temperature

Nutrition

(Approx. per serving)

Calories: 180–240
Protein: 14–18g
Carbohydrates: 4–7g
Fat: 12–16g
Fiber: 1–2g

Conclusion

Crustless spinach and ricotta quiche is a simple, nourishing dish that delivers comfort and flavor in every bite. The creamy ricotta, tender spinach, and subtle seasoning create a soft, satisfying texture that works for any time of day. It’s easy to prepare, flexible with ingredients, and perfect for meal prep or serving guests. Once you make it, it quickly becomes a go-to recipe for a light yet satisfying homemade meal.

Tomato Onion Salad

Tomato Onion Salad
🍽️ Servings

4 servings

🥘 Ingredients
4 medium tomatoes, sliced
1 small red onion, thinly sliced
2 tbsp olive oil
1 tbsp lemon juice
2 tbsp fresh parsley, chopped
Salt and black pepper, to taste
👩‍🍳 Instructions
1️⃣ Prepare the Vegetables
Wash the tomatoes thoroughly.
Slice the tomatoes into medium-thick rounds or wedges.
Peel the red onion and slice it into thin rings.
Chop the fresh parsley.
2️⃣ Make the Dressing
In a small bowl, combine olive oil and lemon juice.
Add a pinch of salt and black pepper.
Whisk until well combined.
3️⃣ Assemble the Salad
Place the sliced tomatoes in a large bowl.
Add the red onion rings.
Sprinkle the chopped parsley over the top.
4️⃣ Dress the Salad
Pour the dressing evenly over the vegetables.
Gently toss everything together so the tomatoes stay intact.
5️⃣ Rest & Serve
Let the salad sit for 5–10 minutes to allow the flavors to blend.
Taste and adjust seasoning if needed.
Serve immediately.
💡 Tips
Use ripe tomatoes for the best flavor.
Chill the salad for 15 minutes before serving on hot days.
Add cucumber for extra crunch if desired.
Q&A

Q: Can I make this ahead of time?
A: Yes, but add the dressing just before serving for the freshest texture.

Q: What pairs well with this salad?
A: Grilled chicken, fish, steak, or crusty bread.

🥗 Nutrition (Per Serving)
Calories: 90
Carbohydrates: 7g
Protein: 1g
Fat: 7g
Fiber: 2g

Lemon, Ginger & Turmeric Drink

Lemon, Ginger & Turmeric Drink – My Favorite Homemade Wellness Drink

There are some recipes that become a part of your routine without you even realizing it, and this  Lemon, Ginger & Turmeric  Drink is definitely one of them. I first heard about this simple  drink from my aunt, who swears by natural ingredients for staying energized and feeling her best. At first, I wasn’t sure if I’d enjoy the combination of lemon, ginger, and turmeric, but after trying it, I completely understood why she loved it so much.

Flora& Fauna

Last weekend, I made a fresh batch for my family during a relaxed Sunday morning. The weather was pleasant, everyone was gathered around the breakfast table, and this warm golden drink turned out to be the highlight of the morning. Even my family members, who are usually skeptical about healthy drinks, enjoyed it and asked for a second cup.

I find myself making this drink whenever I need a little boost. Sometimes it’s during busy workweeks when I’m feeling stressed, and other times it’s simply part of my weekend self-care routine. There is something incredibly comforting about the warm aroma of ginger and the bright freshness of lemon. It’s simple, refreshing, and always leaves me feeling good.

Why You’ll Love This Drink

  • Made with simple, natural ingredients
  • Refreshing and comforting at the same time
  • Quick to prepare in under 10 minutes
  • Perfect for mornings or afternoons
  • Naturally flavorful without artificial ingredients
  • Easy to customize with honey or black pepper

Ingredients

  • 2 cups water
  • 1 tablespoon fresh ginger, grated
  • ½ teaspoon turmeric powder (or 1 teaspoon fresh turmeric, grated)
  • Juice of 1 fresh lemon
  • 1 teaspoon honey (optional)
  • A pinch of black pepper (optional)

Kitchen Tools Needed

  • Small saucepan
  • Fine strainer
  • Spoon
  • Mug or glass

How to Make Lemon, Ginger & Turmeric Drink

Step 1: Boil the Water

Pour the water into a saucepan and bring it to a gentle boil over medium heat.

Step 2: Add Ginger and Turmeric

Add the grated ginger and turmeric to the boiling water. Reduce the heat and let it simmer for about 5 minutes. This helps release all the wonderful flavors.

Alternative& Natural Medicine

Step 3: Strain the Mixture

Remove the saucepan from the heat and strain the liquid into a mug to remove the ginger pieces.

Step 4: Add Lemon Juice

Allow the drink to cool slightly before adding the fresh lemon juice. Adding lemon after cooking helps preserve its fresh flavor.

Step 5: Sweeten and Serve

If desired, stir in honey and a pinch of black pepper. Mix well and serve warm.

Tips for the Best Flavor

  • Use freshly grated ginger whenever possible for a stronger, fresher taste.
  • Fresh lemon juice provides the brightest flavor.
  • Add honey only after the drink has cooled slightly.
  • A small pinch of black pepper complements the turmeric beautifully.
  • For a chilled version, refrigerate and serve over ice.

Variations

Orange Twist

Replace half of the lemon juice with fresh orange juice for a sweeter citrus flavor.

LemonJuice

Mint Refresh

Add a few fresh mint leaves while steeping the drink.

Spiced Version

Include a small cinnamon stick during simmering for extra warmth and aroma.

Serving Suggestions

I love serving this drink first thing in the morning alongside fresh fruit or a light breakfast. It’s also wonderful during quiet afternoons when you need a moment to relax and recharge. Last weekend, I served it with homemade toast and fruit, and everyone loved how fresh and comforting it tasted.

Nutritional Information

The following values are approximate per serving (without honey):

Nutrient Amount
Calories 12 kcal
Carbohydrates 3 g
Protein 0.3 g
Fat 0.1 g
Fiber 0.5 g
Sugar 1 g
Sodium 3 mg
Vitamin C 20 mg
Potassium 55 mg

Frequently Asked Questions

Can I make this drink ahead of time?

Yes. You can prepare it in advance and store it in the refrigerator for up to 2 days.

Can I use fresh turmeric instead of powder?

Absolutely. Fresh turmeric gives an even more vibrant flavor and color.

Alternative& Natural Medicine

Can I drink it cold?

Yes. It tastes delicious both warm and chilled.

Is honey necessary?

Not at all. The  drink is naturally flavorful, but honey can add a touch of sweetness if preferred.

Final Thoughts

This  Lemon, Ginger & Turmeric  Drink has become one of my favorite homemade beverages because it’s simple, comforting, and incredibly easy to prepare. Every time I make it, it reminds me of that relaxing weekend morning with my family gathered around the table, enjoying something wholesome together. Whether I’m feeling energetic, stressed after a long day, or simply looking for a refreshing drink to enjoy, this recipe never disappoints.

4-Ingredient Oven-Baked Beef Steak and Onion Foil Bake

This Oven-Baked Beef Steak and Onion Foil Bake is a simple, hearty dinner made with just four basic ingredients. The steak cooks gently inside sealed foil packets, allowing the onions to become tender and sweet while keeping the meat juicy and flavorful. With minimal prep and almost no cleanup, this comforting meal is perfect for busy weeknights, family dinners, or meal prep. Serve it with mashed potatoes, rice, or your favorite vegetables for a complete meal.

Ingredients

For the Steak Packets

  • 1½–2 lbs (680–900g) beef steak (sirloin, round, or chuck), about 1-inch thick
  • 2 large onions, thinly sliced
  • 3 tbsp olive oil or melted butter
  • 1½ tsp salt
  • 1 tsp black pepper

Step-by-Step Instructions

Step 1: Preheat the Oven

  • Preheat your oven to 400°F (200°C).
  • Prepare 4 large sheets of heavy-duty aluminum foil.

Step 2: Season the Onions

  • Place the sliced onions in a bowl.
  • Drizzle with olive oil or melted butter.
  • Sprinkle with half of the salt and pepper.
  • Toss until evenly coated.

Step 3: Prepare the Steak

  • Cut the steak into 4 equal portions.
  • Pat dry with paper towels.
  • Season both sides with the remaining salt and pepper.

Step 4: Assemble the Packets

  • Lay the foil sheets flat on the counter.
  • Divide the seasoned onions evenly among the foil sheets.
  • Place each steak portion on top of the onions.
  • Spoon any remaining oil and seasonings over the steaks.

Step 5: Seal the Packets

  • Fold the foil tightly around the steak and onions.
  • Roll and crimp the edges to create sealed packets.
  • Ensure no steam can escape.

Step 6: Bake

  • Arrange the foil packets on a baking sheet.
  • Bake for 20–25 minutes for medium doneness.
  • Add 5–10 extra minutes if you prefer well-done steak or are using a tougher cut.

Step 7: Rest and Serve

  • Remove from the oven and let rest for 5 minutes.
  • Carefully open the packets (watch for hot steam).
  • Spoon the onions and flavorful juices over the steak.
  • Serve immediately.

Tips

  • Use butter instead of olive oil for a richer flavor.
  • Add thinly sliced potatoes underneath the onions for a complete meal.
  • For a slightly crispy finish, open the packets and broil for 2–3 minutes before serving.
  • Leftovers make excellent steak sandwiches or wraps.

Q&A

Q: Can I use a different cut of beef?
A: Yes, sirloin, chuck, round steak, or even ribeye work well.

Q: How do I store leftovers?
A: Refrigerate in an airtight container for up to 3 days.

Q: Can I make this ahead of time?
A: Yes. Assemble the foil packets and refrigerate them for up to 24 hours before baking.

Servings & Nutrition

Servings: 4

Approximate Nutrition Per Serving

  • Calories: 420
  • Protein: 38g
  • Carbohydrates: 7g
  • Fat: 27g
  • Fiber: 1g

Apple Cranberry Pecan Salad

Apple Cranberry Pecan Salad
Description
This Apple Cranberry Pecan Salad is a fresh, crunchy, and flavorful salad packed with crisp apples, sweet dried cranberries, crunchy pecans, and leafy greens. Tossed in a simple homemade dressing, it’s perfect as a light lunch, side dish, or holiday salad. The combination of sweet, tangy, and nutty flavors makes every bite delicious and satisfying.
Ingredients
For the Salad
6 cups chopped green leaf lettuce
2 medium red apples, diced
½ cup dried cranberries
¾ cup pecans, roughly chopped
¼ cup feta cheese, crumbled (optional)
For the Dressing
3 tbsp olive oil
1 tbsp apple cider vinegar
1 tbsp honey
½ tsp Dijon mustard
Salt and black pepper to taste
Instructions
Step 1: Prepare the Ingredients
Wash and dry the lettuce thoroughly.
Chop the lettuce into bite-sized pieces.
Dice the apples and leave the skin on for extra color and texture.
Roughly chop the pecans.
Step 2: Make the Dressing
In a small bowl, whisk together olive oil, apple cider vinegar, honey, Dijon mustard, salt, and pepper.
Mix until smooth and well combined.
Step 3: Assemble the Salad
Place the lettuce in a large salad bowl.
Add the diced apples, dried cranberries, pecans, and feta cheese.
Pour the dressing over the salad.
Step 4: Toss and Serve
Gently toss everything together until evenly coated.
Serve immediately for the freshest flavor and crunch.
Tips
Use Honeycrisp, Gala, or Fuji apples for the best sweetness.
Toast the pecans for 3–4 minutes to enhance their flavor.
Add grilled chicken for extra protein.
Toss the salad just before serving to keep it crisp.
Q&A
Can I make this salad ahead of time?
Yes. Keep the dressing separate and toss just before serving.
What can I use instead of pecans?
Walnuts, almonds, or sunflower seeds work well.
How long will leftovers last?
Store in an airtight container in the refrigerator for up to 1 day.
Servings & Nutrition
Servings: 4–6
Approximate Nutrition Per Serving
Calories: 250
Protein: 4g
Carbohydrates: 20g
Fat: 18g
Fiber: 4g
Sugar: 12g

Oatmeal Egg Pancakes 🥞

Oatmeal Egg Pancakes 🥞

Ingredients

  • 1 cup rolled oats (about 90g)
  • 2 eggs
  • 1 cup milk (240ml)
  • 1 tsp baking powder
  • 1 tbsp sugar or honey (optional)
  • 1 pinch salt
  • 1 tbsp vegetable oil or butter (for cooking)

Instructions

1️⃣ Prepare the Batter

  • Add the oats to a blender and blend into a fine flour.
  • Add the eggs, milk, baking powder, salt, and sugar (if using).
  • Blend until the mixture becomes smooth.
  • Let the batter rest for 5 minutes so the oats can absorb some liquid.

2️⃣ Cook the Pancakes

  • Heat a non-stick pan over medium-low heat.
  • Lightly grease with oil or butter.
  • Pour a small amount of batter into the pan and spread gently.
  • Cook for 2–3 minutes until bubbles appear on the surface.
  • Flip carefully and cook another 1–2 minutes until golden.

3️⃣ Serve

  • Stack the pancakes on a plate.
  • Serve warm with honey, maple syrup, fresh fruit, or yogurt.

Tips

✅ For sweeter pancakes, add 1 mashed banana to the batter.
✅ For extra protein, add 2 tablespoons Greek yogurt.
✅ Keep the heat medium-low to prevent burning.

Q & A

Q: Can I make these without a blender?
A: Yes, use oat flour instead of rolled oats.

Q: Can I store leftovers?
A: Yes, refrigerate for up to 3 days and reheat before serving.

Q: Can I freeze them?
A: Yes, freeze for up to 2 months in an airtight container.

Caption

🥞 Just oats, eggs, and milk! No flour, no fuss—these soft and fluffy pancakes are the perfect healthy breakfast. Save this recipe and try it tomorrow! 😍

Creamy Chicken Cranberry Grape Salad

Creamy Chicken Cranberry Grape Salad

🥘 Ingredients

  • 4 cups cooked chicken, shredded
  • 1 cup green grapes, halved
  • ½ cup dried cranberries
  • ½ cup pecans, chopped
  • 2 celery stalks, finely diced

For the Dressing

  • ¾ cup mayonnaise
  • ¼ cup Greek yogurt or sour cream
  • 1 tbsp lemon juice
  • ½ tsp garlic powder
  • ½ tsp onion powder
  • Salt and black pepper to taste

👩‍🍳 Instructions

1️⃣ Prepare the Chicken

  • Cook and cool the chicken.
  • Shred it into thin strands using two forks.

2️⃣ Mix the Dressing

  • In a large bowl, combine mayonnaise, Greek yogurt, lemon juice, garlic powder, onion powder, salt, and pepper.
  • Stir until smooth and creamy.

3️⃣ Add the Ingredients

  • Add shredded chicken to the bowl.
  • Mix in grapes, dried cranberries, pecans, and celery.

4️⃣ Combine

  • Toss everything gently until the chicken is evenly coated with the dressing.

5️⃣ Chill

  • Cover and refrigerate for at least 1 hour to allow the flavors to blend.

6️⃣ Serve

  • Serve cold in meal-prep containers, on croissants, in wraps, or over lettuce.

❓ Q & A

Q: Can I make this ahead of time?
✅ Yes! It stays fresh in the refrigerator for up to 4 days.

Q: Can I use rotisserie chicken?
✅ Absolutely. Rotisserie chicken works perfectly and saves time.

Q: Can I substitute the pecans?
✅ Yes, walnuts, almonds, or cashews are great alternatives.

🍽️ Servings: 6–8

🔥 Calories: Approximately 320–380 per serving.

The “Zero Cholesterol, Zero Inflammation” Drink: Can This Colorful Blend Support Your Wellness Naturally?

Why Is Everyone Talking About This “Zero Cholesterol” Drink?
Over the past few months, a vibrant homemade drink has gained significant attention online. Often referred to as the “Zero Cholesterol, Zero Inflammation” Drink, it is promoted as a simple blend of fruits, vegetables, and spices that may help support overall wellness.

Many social media posts describe it as a refreshing beverage that can promote circulation, provide antioxidants, and contribute to a healthier lifestyle.

But what can this drink realistically do?

The truth is that while its ingredients offer valuable nutrients, no single beverage can replace a balanced diet, healthy habits, or medical care when needed.

Let’s explore what makes this drink so popular and what benefits it may genuinely provide.

🥕🍅 What Is the “Zero Cholesterol” Drink?
This natural beverage typically combines:

1 ripe tomato
1 carrot
Juice of 1 orange
A small piece of fresh ginger
½ cup water
1 teaspoon honey (optional)
Because all ingredients come from plant sources, the drink naturally contains no dietary cholesterol, which is found only in animal-based foods.

This is why many people refer to it as a “zero cholesterol” beverage.

🌱 Why Has It Become So Popular?
Several factors explain its growing popularity:

✅ Made with simple ingredients

✅ Easy and affordable to prepare

✅ Rich in natural vitamins and antioxidants

✅ Fits well into wellness-focused lifestyles

✅ A refreshing alternative to sugary soft drinks

As more people seek nutritious beverage options, recipes like this continue to attract attention.

💪 Potential Benefits of This Nutrient-Rich Drink
🧠 1. Provides Antioxidants
Tomatoes, carrots, oranges, and ginger contain naturally occurring antioxidants that help protect cells from oxidative stress.

These compounds play an important role in maintaining overall health and supporting normal cellular function.

❤️ 2. Supports Heart-Friendly Habits
A diet rich in fruits and vegetables is commonly associated with cardiovascular wellness.

This drink provides vitamins, minerals, and plant compounds that can complement a heart-conscious lifestyle.

However, it should be viewed as one healthy choice among many rather than a standalone solution.

💧 3. May Support Digestive Comfort
Ginger has long been used in traditional wellness practices to support digestive comfort.

Combined with fiber-containing ingredients like tomato and carrot, this beverage may help promote a feeling of digestive ease when enjoyed as part of a balanced diet.

🛡️ 4. Contributes to Immune System Support
Oranges are a well-known source of vitamin C, an essential nutrient involved in normal immune function.

Regular intake of vitamin-rich foods can help support the body’s natural defenses.

⚡ 5. Offers Natural Energy
The natural carbohydrates found in fruits and vegetables provide a gentle source of energy.

Many people enjoy this drink in the morning as a refreshing addition to their daily routine.

💦 6. Supports Hydration
Hydration is one of the foundations of overall health.

Since this drink contains water-rich ingredients, it can contribute to daily fluid intake while also delivering beneficial nutrients.

Does It Actually Lower Cholesterol?
This is where realistic expectations are important.

✔ The ingredients contain nutrients that support a healthy diet.

✔ Some provide fiber and antioxidant compounds.

✔ Healthy eating patterns may contribute to maintaining normal cholesterol levels.

❌ However, this drink alone does not “remove” cholesterol from the body.

Experts generally agree that cholesterol management depends on multiple lifestyle factors, including:

Balanced nutrition
Regular physical activity
Weight management
Sleep quality
Medical guidance when necessary
No single beverage can replace these foundations.

What About the “Zero Inflammation” Claim? ⚠️
The phrase “zero inflammation” is more of a marketing expression than a scientific reality.

While ingredients such as ginger and tomatoes contain compounds that have been studied for their role in supporting the body’s normal inflammatory balance, no drink can completely eliminate inflammation.

A healthy lifestyle remains the most important factor in maintaining long-term wellness.

🥤 How to Make the Drink
Ingredients
1 ripe tomato
1 carrot
Juice from 1 orange
Small piece of fresh ginger
½ cup water
1 teaspoon honey (optional)
Instructions
Wash all ingredients thoroughly.
Peel and chop the carrot.
Squeeze the orange juice.
Add all ingredients to a blender.
Blend until smooth.
Serve immediately.
⏰ When Should You Drink It?
Many people prefer to enjoy it:

In the morning
Before breakfast
Three times per week
As part of a short wellness routine
Consistency matters more than excessive consumption.

🌟 What Results Might You Notice?
When included in a balanced lifestyle, some people report:

Better hydration
Improved dietary variety
Increased fruit and vegetable intake
More consistent energy levels
Greater overall wellness awareness
Results vary from person to person and depend heavily on broader lifestyle habits.

Why It Isn’t a Miracle Drink
Although nutritious, this beverage cannot replace:

❌ A balanced diet

❌ Regular exercise

❌ Medical treatment

❌ Professional healthcare advice

True wellness comes from consistent habits practiced over time.

🧠 Important Considerations
Even natural drinks should be enjoyed mindfully.

Keep in mind:

The drink contains naturally occurring sugars from fruits.
Excessive consumption may cause digestive discomfort in some individuals.
Honey may not be suitable for everyone.
Individuals with specific health conditions should seek personalized medical advice before making major dietary changes.
Moderation remains key.

🌿 Similar Wellness Drinks
If you enjoy this recipe, you might also explore:

Apple, carrot, and celery juice
Flaxseed-based beverages
Herbal infusions
Vegetable smoothie blends
Citrus and ginger drinks
Each offers unique nutrients and can contribute to a varied diet.

Tips to Maximize the Benefits
For the best results:

✔ Eat a variety of fruits and vegetables

✔ Stay physically active

✔ Drink enough water

✔ Limit heavily processed foods

✔ Maintain realistic expectations

✔ Focus on long-term habits rather than quick fixes

Final Thoughts
The so-called “Zero Cholesterol, Zero Inflammation” Drink is a colorful, nutrient-rich beverage that can be a refreshing addition to a healthy lifestyle.

Its ingredients provide vitamins, antioxidants, hydration, and plant-based nutrients that may support overall wellness. However, it is not a miracle cure and should not be viewed as a substitute for balanced nutrition, exercise, or professional healthcare.

When enjoyed as part of a sustainable wellness routine, this simple homemade drink can be one small step toward healthier everyday habits.

Zucchini Potato Savory Pancakes

Zucchini Potato Savory Pancakes

🥘 Ingredients

  • 1 medium zucchini, grated
  • 1 medium potato, grated
  • 2 eggs
  • 300 ml milk
  • 140 g all-purpose flour
  • 1 tsp baking powder
  • 2 tbsp chopped green onions
  • 2 tbsp chopped parsley
  • ½ tsp salt
  • ¼ tsp black pepper
  • 1 tbsp vegetable oil (for cooking)

👩‍🍳 Instructions

1️⃣ Prepare the Vegetables

  • Grate the zucchini and potato.
  • Squeeze out excess moisture using a clean kitchen towel.
  • Place them in a large mixing bowl.

2️⃣ Make the Batter

  • Crack the eggs into the bowl and whisk.
  • Pour in the milk and mix well.
  • Add flour and baking powder.
  • Stir until a smooth batter forms.

3️⃣ Add Flavor

  • Mix in green onions, parsley, salt, and black pepper.
  • Stir until everything is evenly combined.

4️⃣ Cook the Pancakes

  • Heat a lightly oiled non-stick skillet over medium heat.
  • Pour a thin layer of batter into the pan.
  • Cook for 2–3 minutes until the bottom is golden.
  • Flip carefully and cook for another 2 minutes.

5️⃣ Repeat

  • Continue until all batter is used.
  • Stack the pancakes on a plate and keep warm.

6️⃣ Serve

  • Serve warm with yogurt, sour cream, or your favorite dipping sauce.

❓ Q & A

Q: Can I make these gluten-free?
✅ Yes, use a gluten-free flour blend.

Q: Can I add cheese?
✅ Absolutely! Add ½ cup shredded mozzarella or cheddar for extra flavor.

Q: How do I store leftovers?
✅ Refrigerate for up to 3 days and reheat in a skillet.

🍽️ Servings: 8–10 pancakes
🔥 Calories: Approximately 120–150 per pancake.

Cheesy Garlic Toast Bake

Cheesy Garlic Toast Bake

🥘 Ingredients

  • 8 slices thick white bread
  • 2 eggs
  • ½ cup milk
  • 1 cup mozzarella cheese, shredded
  • ¼ cup cheddar cheese, shredded
  • 2 tbsp butter, melted
  • 2 garlic cloves, minced
  • 1 tbsp parsley, chopped
  • 1 small red chili, finely chopped (optional)
  • Salt and black pepper to taste

👩‍🍳 Instructions

1️⃣ Prepare the Egg Mixture

  • In a bowl, whisk together eggs, milk, salt, and black pepper.
  • Add minced garlic and mix well.

2️⃣ Soak the Bread

  • Dip each bread slice into the egg mixture for a few seconds.
  • Make sure both sides are lightly coated but not soggy.

3️⃣ Add the Cheese

  • Place half of the bread slices on a baking tray.
  • Sprinkle mozzarella and cheddar cheese generously over each slice.
  • Cover with the remaining bread slices to make sandwiches.

4️⃣ Top and Bake

  • Brush the tops with melted butter.
  • Sprinkle extra cheese, parsley, and chopped red chili on top.
  • Bake at 190°C (375°F) for 15–20 minutes, or until golden brown and bubbly.

5️⃣ Serve

  • Let cool for 2–3 minutes.
  • Slice and serve warm while the cheese is still melted.

❓ Q & A

Q: Can I use different cheese?
✅ Yes! Monterey Jack, Gouda, or Colby work great.

Q: Can I make it in an air fryer?
✅ Yes, cook at 180°C (350°F) for 8–10 minutes.

Q: How do I store leftovers?
✅ Refrigerate for up to 2 days and reheat in the oven or air fryer.

🍽️ Servings: 4
🔥 Calories: Approximately 320–380 per serving.

Mediterranean Beet & Chickpea Salad

Mediterranean Beet & Chickpea Salad

🥘 Ingredients

  • 2 medium cooked beets, sliced
  • 1 can (15 oz) chickpeas, drained and rinsed
  • 2 cups arugula (rocket)
  • ¼ red onion, thinly sliced
  • ¼ cup feta cheese, crumbled
  • 1 tbsp fresh parsley, chopped

🍋 Lemon Dressing

  • 2 tbsp olive oil
  • Juice of 1 lemon
  • 1 tsp lemon zest
  • ½ tsp paprika
  • Salt and black pepper to taste

👩‍🍳 Instructions

1️⃣ Prepare the Ingredients

  • Cook the beets until tender, then let them cool.
  • Peel and slice the beets into bite-sized rounds.
  • Drain and rinse the chickpeas thoroughly.

2️⃣ Make the Dressing

  • In a small bowl, whisk together olive oil, lemon juice, lemon zest, paprika, salt, and pepper.

3️⃣ Assemble the Salad

  • Add arugula to a large serving bowl.
  • Top with sliced beets, chickpeas, and red onion.

4️⃣ Add Flavor

  • Drizzle the lemon dressing over the salad.
  • Toss gently until everything is lightly coated.

5️⃣ Finish & Serve

  • Sprinkle feta cheese and fresh parsley on top.
  • Serve immediately with extra lemon wedges if desired.

❓ Q & A

Q: Can I make this salad ahead of time?
✅ Yes! Prepare everything up to a day ahead and add the dressing just before serving.

Q: Can I use canned beets?
✅ Absolutely. Just drain them well before using.

Q: What protein can I add?
✅ Grilled chicken, salmon, or quinoa are excellent additions.

🍽️ Servings: 4
🔥 Calories: Approximately 250–300 per serving.

Loaded Sweet Potato with Avocado & Feta

Loaded Sweet Potato with Avocado & Feta

🥘 Ingredients

  • 3 medium sweet potatoes
  • 1 large avocado, diced
  • ⅓ cup feta cheese, crumbled
  • 1 tbsp olive oil
  • Juice of ½ lime
  • 1 tbsp fresh parsley, chopped
  • ½ tsp chili flakes
  • Salt and black pepper to taste
  • Hot honey or honey (optional, for drizzling)

👩‍🍳 Instructions

1️⃣ Roast the Sweet Potatoes

  • Preheat oven to 200°C (400°F).
  • Wash and cut sweet potatoes in half lengthwise.
  • Brush with olive oil and season with salt and pepper.
  • Place cut-side down on a baking tray.
  • Roast for 35–40 minutes until soft and caramelized.

2️⃣ Prepare the Topping

  • Dice the avocado into small chunks.
  • Mix with lime juice and a pinch of salt to keep it fresh.

3️⃣ Assemble

  • Turn the roasted sweet potatoes cut-side up.
  • Gently fluff the inside with a fork.
  • Top each sweet potato with diced avocado.

4️⃣ Add Cheese & Seasoning

  • Sprinkle crumbled feta over the avocado.
  • Add chopped parsley and chili flakes.

5️⃣ Finish & Serve

  • Drizzle with hot honey or regular honey if desired.
  • Serve immediately while warm.

❓ Q & A

Q: Can I make this dairy-free?
✅ Yes, simply omit the feta or use a dairy-free cheese alternative.

Q: What protein can I add?
✅ Grilled chicken, chickpeas, or black beans work perfectly.

Q: Can I store leftovers?
✅ Store in the refrigerator for up to 2 days. Add avocado just before serving.

Servings: 3
Calories: Approximately 280–350 per serving 🍽️

Zucchini, Potato & Egg Bake

Zucchini, Potato & Egg Bake 🥒🥔🥚

Ingredients

  • 1 zucchini, grated
  • 1 potato, grated
  • 3 eggs
  • 300 ml milk
  • 140 g all-purpose flour
  • 1 tsp baking powder
  • 1 tsp salt (or to taste)
  • 2 spring onions, chopped
  • 2 tbsp fresh parsley, chopped
  • 2 tbsp vegetable oil (plus extra for greasing)

Instructions

  1. 🥒 Grate the zucchini and potato. Squeeze out any excess moisture using a clean kitchen towel.
  2. 🥚 In a large bowl, whisk together the eggs and milk until smooth.
  3. 🌾 Add the flour, baking powder, and salt. Mix until no lumps remain.
  4. 🥔 Stir in the grated zucchini, grated potato, spring onions, and parsley.
  5. 🫒 Add the vegetable oil and mix well to combine everything evenly.
  6. 🔥 Preheat your oven to 180°C (350°F).
  7. 🍽️ Lightly grease a baking dish and pour the batter into it, spreading it evenly.
  8. ⏲️ Bake for 35–40 minutes or until golden brown and a toothpick inserted in the center comes out clean.
  9. 🌿 Let it cool for 5 minutes before slicing.
  10. ❤️ Serve warm as a snack, breakfast, or light dinner.

Q & A

Q: Can I add cheese?
A: Yes! Add ½ cup shredded mozzarella or cheddar for extra flavor.

Q: How do I store leftovers?
A: Keep in an airtight container in the refrigerator for up to 3 days.

Q: Can I make it ahead?
A: Yes, bake it in advance and reheat slices in the oven or air fryer.

Caption:
🥒🥔 Turn 1 zucchini, 1 potato, and 3 eggs into the most delicious savory bake! Crispy on the outside, soft on the inside, and packed with flavor. 😍✨

Lemon Ginger Cinnamon Bedtime Drink

Lemon Ginger Cinnamon Bedtime Drink

Description
A warm, comforting bedtime drink made with fresh lemon, ginger, and cinnamon. This caffeine-free beverage is simple to prepare and can be a relaxing addition to your evening routine. Its soothing warmth and natural ingredients make it a popular choice for winding down before sleep while staying hydrated.

Prep Time: 5 minutes
Cook Time: 2 minutes
Total Time: 7 minutes
Servings: 1

Ingredients

  • 1 cup warm water
  • 1 tablespoon fresh lemon juice
  • ½ teaspoon freshly grated ginger (or ¼ teaspoon ground ginger)
  • ¼ teaspoon ground cinnamon
  • 1 teaspoon honey (optional)

Instructions

  1. Warm the water until comfortably hot, but do not boil.
  2. Pour the warm water into a mug.
  3. Add the fresh lemon juice.
  4. Stir in the grated ginger and ground cinnamon.
  5. Add honey if desired for extra sweetness.
  6. Mix well until everything is combined.
  7. Sip slowly 30–60 minutes before bedtime.

Tips & Notes

  • Fresh ginger provides a stronger flavor than ground ginger.
  • Adjust the cinnamon to your taste preference.
  • Honey is optional and will increase the calorie count slightly.
  • If lemon feels too acidic, reduce the amount or omit it.
  • Best enjoyed warm rather than hot.

Potential Benefits

  • Helps support hydration before bed.
  • Warm drinks can feel calming and comforting.
  • Ginger may help ease occasional digestive discomfort.
  • Cinnamon adds flavor without adding significant calories.
  • A soothing nighttime ritual may help promote relaxation.

Servings & Nutrition (Approximate, Without Honey)

  • Calories: 10
  • Carbohydrates: 2g
  • Protein: 0g
  • Fat: 0g
  • Fiber: 0.5g
  • Sugar: 1g

Q&A

Q: Can this drink remove belly fat overnight?
No. There is no scientific evidence that any drink can eliminate belly fat overnight.

Q: Can it help with weight loss?
It may fit into a calorie-conscious eating plan because it is low in calories, but weight loss depends on overall diet, physical activity, sleep, and lifestyle habits.

Q: Is it safe to drink every night?
Most healthy adults can enjoy it regularly. However, people with acid reflux, stomach ulcers, or sensitivity to acidic foods may need to reduce the lemon.

Q: What is the most effective way to reduce belly fat?
A combination of:

  • Consistent calorie control
  • Regular exercise
  • Adequate protein intake
  • Quality sleep
  • Stress management

Q: Can I drink it cold?
Yes, but it is generally enjoyed warm because the warmth can feel more soothing before bedtime.

Creamy Cheesy Corn Casserole

Creamy Cheesy Corn Casserole

Description
This Creamy Cheesy Corn Casserole is a rich, comforting side dish made with sweet corn, melted cheese, eggs, and a creamy base baked until golden brown. It has a soft, custard-like texture with a delicious cheesy crust on top. Perfect for family dinners, holiday gatherings, potlucks, or whenever you need an easy crowd-pleasing dish.

Ingredients

For the Casserole

  • 2 cups sweet corn kernels (fresh, frozen, or canned)
  • 1 cup shredded mozzarella cheese
  • ½ cup shredded cheddar cheese
  • 3 large eggs
  • 1 cup milk
  • ½ cup heavy cream
  • 3 tbsp butter, melted
  • 3 tbsp all-purpose flour
  • ½ tsp salt
  • ¼ tsp black pepper

For Topping

  • ¼ cup shredded cheddar cheese
  • 1 tbsp butter

Instructions

Step 1: Prepare the Oven

  • Preheat your oven to 350°F (175°C).
  • Lightly grease a baking dish or casserole dish with butter.

Step 2: Make the Batter

  • In a large mixing bowl, whisk together the eggs, milk, heavy cream, and melted butter.
  • Add flour, salt, and black pepper.
  • Whisk until smooth and lump-free.

Step 3: Add Corn and Cheese

  • Stir in the sweet corn kernels.
  • Add mozzarella cheese and cheddar cheese.
  • Mix well so everything is evenly combined.

Step 4: Fill the Baking Dish

  • Pour the mixture into the prepared baking dish.
  • Spread evenly with a spatula.

Step 5: Add Topping

  • Sprinkle the remaining cheddar cheese over the top.
  • Dot with small pieces of butter for extra browning.

Step 6: Bake

  • Bake for 35–40 minutes or until the center is set and the top is golden brown.
  • A knife inserted into the center should come out clean.

Step 7: Rest and Serve

  • Let the casserole rest for 5–10 minutes before serving.
  • Serve warm as a side dish or light meal.

Tips & Notes

  • For extra flavor, add chopped green onions or a pinch of garlic powder.
  • Pepper Jack cheese can be used for a spicy version.
  • Frozen corn should be thawed and drained before use.
  • Avoid overbaking to keep the casserole creamy.

Q&A

Can I make this ahead of time?
Yes. Assemble the casserole, cover, and refrigerate for up to 24 hours before baking.

Can I freeze it?
Yes. Cool completely, wrap tightly, and freeze for up to 2 months.

What can I serve with it?
It pairs well with roasted chicken, grilled steak, barbecue dishes, or holiday meals.

Servings & Nutrition

Servings: 6–8

Approximate Nutrition Per Serving

  • Calories: 280
  • Protein: 12g
  • Carbohydrates: 16g
  • Fat: 18g
  • Fiber: 2g
  • Sugar: 4g
  • Sodium: 290mg

This cheesy corn casserole is creamy, fluffy, and loaded with sweet corn flavor, making it one of the easiest and most satisfying comfort-food side dishes you can make. 🌽🧀✨

Creamy Baked Rice Pudding

Creamy Baked Rice Pudding 

Description

This Creamy Baked Rice Pudding is a rich, comforting dessert with a silky custard base and a beautifully caramelized golden top. Each spoonful is soft, creamy, and slightly sweet with a delicate texture that melts in your mouth. It’s a timeless classic—perfect served warm or chilled, making it ideal for cozy evenings or simple indulgence.

 Ingredients

  • 1/2 cup uncooked short-grain rice
  • 2 cups milk
  • 1/2 cup heavy cream
  • 1/3 cup sugar
  • 2 eggs
  • 1 tsp vanilla extract
  • 1/2 tsp cinnamon (optional)
  • Pinch of salt
  • 1 tbsp butter (for greasing)

 Instructions

1. Cook the Rice

In a saucepan, cook rice with 1 cup of milk over medium heat until soft and most liquid is absorbed (about 10–12 minutes).

2. Prepare Custard

In a bowl, whisk together eggs, sugar, remaining milk, cream, vanilla, cinnamon, and salt.

3. Combine

Add cooked rice to the custard mixture and stir well.

4. Bake

Pour mixture into a buttered baking dish or ramekins. Bake at 180°C (350°F) for 30–40 minutes until set and golden on top.

5. Cool & Serve

Let cool slightly. Serve warm or chilled.

 Notes

  • Short-grain rice gives the creamiest texture
  • The top caramelizes naturally during baking
  • Thickens more as it cools

 Tips

  • Sprinkle sugar on top before baking for extra caramel crust
  • Add raisins or nutmeg for extra flavor
  • Use coconut milk for a twist
  • Serve with fresh berries or honey

 Servings

  • Serves: 3–4 people
  • Prep Time: 10 minutes
  • Cook Time: 40 minutes

 Nutritional Information (per serving approx.)

  • Calories: 280 kcal
  • Carbohydrates: 38 g
  • Protein: 7 g
  • Fat: 10 g

 Health Benefits

  • Comfort Food: Satisfying and calming
  • Calcium-Rich: Supports bone health
  • Energy Boosting: Provides quick energy
  • Customizable: Can be made lighter or dairy-free

 Q&A

Q: Can I use leftover rice?
A: Yes, it works perfectly and saves time.

Q: Can I make it dairy-free?
A: Yes, use plant-based milk and cream.

Q: Why is my pudding too runny?
A: It needs more baking time or cooling time.

Q: Can I refrigerate it?
A: Yes, store up to 3 days in the fridge.

Q: Can I make it less sweet?
A: Reduce sugar to your preference.

Garlic Butter Cheesy Chicken

🧄 Garlic Butter Cheesy Chicken 

Serves 2 | 30 mins

You need:

  • 2 chicken breasts, boneless
  • 3 tbsp butter, melted
  • 3 garlic cloves, minced
  • 1 tsp Italian seasoning
  • Salt + pepper
  • 1/2 cup mozzarella, shredded
  • 2 tbsp parmesan, grated
  • Fresh parsley, chopped

Do this:

Prep: Preheat oven 200°C/400°F. Pat chicken dry, make 2-3 slits on top.

Season: Mix melted butter + garlic + Italian seasoning + salt/pepper. Pour over chicken.

Bake: 20 mins until chicken is cooked through.

Cheese it: Top with mozzarella + parmesan. Broil 2-3 mins till golden + bubbly.

Finish: Sprinkle parsley. Rest 3 mins then serve with the buttery sauce.


Tips:

Pound chicken to even thickness so it cooks evenly

No broiler? Bake 5 mins more with cheese on top

Goes great with rice, pasta, or just garlic bread

Cheesy Ravioli w/ Asparagus & Tomatoes

Cheesy Ravioli w/ Asparagus & Tomatoes

15 mins | 2 servings

You’ll need:

Cheese ravioli: 250g pack

Asparagus: 1 bunch, cut 2-inch pieces

Cherry tomatoes: 1 cup, halved

Garlic: 3 cloves, minced

Butter: 2 tbsp + olive oil 1 tbsp

Basil: handful, chopped

Parmesan: grated, for topping

Chili flakes, salt, pepper

Make it:

Boil ravioli in salted water till it floats + 1 min more. Save ½ cup pasta water. Drain.

Sear asparagus in butter + oil, 3-4 min till bright green. Add pinch salt. Remove.

Blister tomatoes in same pan 2-3 min till they burst. Add garlic 30 sec.

Toss ravioli + asparagus back in. Add splash pasta water, chili flakes, pepper. Coat everything in that buttery sauce.

Finish with basil + lots of parmesan.

Pro tip: Don’t overcook ravioli or they’ll tear. High heat on tomatoes = sweet + juicy.

Garlic Shrimp Spinach Pasta  

Garlic Shrimp Spinach Pasta  

Serves 2

You need:

Pasta: 180g spaghetti/linguine

Shrimp: 250g peeled, deveined

Spinach: 2 big handfuls fresh

Cherry tomatoes: 1 cup, halved

Garlic: 3 cloves, minced

Olive oil: 2 tbsp

Parmesan: 1/4 cup grated + extra for topping

Salt,

pepper,

chili flakes: to taste

Lemon: 1/2, juice only

Do this:

Boil pasta: Salted water, cook till al dente. Save 1/2 cup pasta water. Drain.

Sear shrimp: Hot pan + 1 tbsp oil. 2 min each side till pink. Salt + pepper. Take out.

Make base: Same pan, 1 tbsp oil. Garlic 30 sec, then tomatoes 3 min till soft. Add chili flakes.

Wilt spinach: Toss spinach in, 1 min till it wilts.

Toss it all: Pasta + shrimp + lemon juice + parmesan into the pan. Add pasta water little by little till saucy.

Finish: More pepper + parmesan on top.

Realistic Weight-Loss Drinks

Realistic Weight-Loss Drinks 🍋✨

When I want to feel lighter and get back on track, I keep things simple. These two drinks are part of my routine because they help me stay hydrated, support digestion, and reduce unnecessary snacking.

☀️ Morning Drink

  • 1 tbsp lemon juice
  • 1 tbsp honey
  • 1 cup warm water

🌙 Evening Drink

  • 1 tbsp apple cider vinegar
  • ½ tsp ginger powder
  • 1 cup warm water

💡 Important: These drinks are not “fat burners” or “detox miracles.” Weight loss comes from a calorie-controlled diet, regular movement, good sleep, and consistency. These drinks can simply be a helpful habit alongside a healthy lifestyle.

✨ I use them to:
✔ Stay hydrated
✔ Support digestion
✔ Help manage cravings
✔ Maintain healthy daily habits

Remember: Small habits repeated every day often work better than extreme diets.

Save this post for later and follow for more realistic health tips! 💛

Healthy Apple Oat Breakfast Cake

Healthy Apple Oat Breakfast Cake

Description

Healthy Apple Oat Breakfast Cake is a nourishing and delicious way to start your day. Made with wholesome oats, fresh apples, and naturally sweet ingredients, this breakfast cake is soft, moist, and packed with comforting flavors. Unlike traditional cakes that are loaded with refined sugar and flour, this recipe relies on the natural sweetness of apples and a touch of honey or maple syrup for flavor. It is rich in fiber, provides lasting energy, and can be prepared ahead of time for busy mornings. Enjoy a slice with your morning coffee, tea, or yogurt for a satisfying breakfast or healthy snack.

Prep Time: 15 minutes
Cook Time: 35 minutes
Total Time: 50 minutes

Ingredients

  • 2 cups rolled oats
  • 2 medium apples, peeled and diced
  • 2 large eggs
  • 1 cup milk of choice
  • ¼ cup honey or maple syrup
  • 1 teaspoon vanilla extract
  • 1 teaspoon baking powder
  • 1 teaspoon ground cinnamon
  • ¼ teaspoon nutmeg
  • ¼ teaspoon salt
  • ¼ cup chopped walnuts or pecans (optional)
  • 2 tablespoons raisins (optional)

Instructions

  1. Preheat your oven to 350°F (175°C). Grease or line an 8-inch square baking dish.
  2. In a large bowl, whisk together the eggs, milk, honey, and vanilla extract.
  3. Add the oats, baking powder, cinnamon, nutmeg, and salt. Stir until combined.
  4. Fold in the diced apples, nuts, and raisins if using.
  5. Let the mixture sit for 5 minutes so the oats can absorb some of the liquid.
  6. Pour the batter into the prepared baking dish and spread evenly.
  7. Bake for 35–40 minutes, or until the top is golden and the center is set.
  8. Allow the cake to cool for 10 minutes before slicing and serving.

Notes

  • Use sweet apples such as Fuji, Gala, or Honeycrisp for the best flavor.
  • For extra texture, sprinkle additional oats on top before baking.
  • The cake can be enjoyed warm, at room temperature, or chilled.

Tips for Success

  • Dice the apples into small, even pieces for uniform distribution.
  • Do not skip the resting time before baking; it helps soften the oats.
  • For a richer flavor, lightly toast the nuts before adding them.
  • Store leftovers in an airtight container to maintain freshness.

Servings

Serves: 8 slices

Nutritional Information (Per Serving)

Approximate values

  • Calories: 180
  • Carbohydrates: 29 g
  • Protein: 6 g
  • Fat: 5 g
  • Saturated Fat: 1 g
  • Fiber: 4 g
  • Sugar: 10 g
  • Sodium: 120 mg

Health Benefits

High in Fiber

Oats and apples provide dietary fiber that supports healthy digestion and helps keep you feeling full longer.

Sustained Energy

Complex carbohydrates from oats release energy gradually, making this an excellent breakfast option.

Rich in Antioxidants

Apples contain beneficial plant compounds that support overall health.

Heart-Friendly

Oats contain beta-glucan, a soluble fiber associated with supporting healthy cholesterol levels.

Frequently Asked Questions

Can I make this cake dairy-free?

Yes. Substitute the milk with almond, oat, soy, or another plant-based milk.

Can I prepare it ahead of time?

Absolutely. Bake it the night before and store it in the refrigerator for a quick breakfast.

Can I freeze this breakfast cake?

Yes. Slice and freeze individual portions for up to 3 months. Thaw overnight in the refrigerator or warm in the microwave.

What other fruits can I use?

Pears, berries, peaches, or chopped bananas work well as substitutes or additions.

How do I make it gluten-free?

Use certified gluten-free rolled oats and ensure all other ingredients are gluten-free.

Healthy Apple Oat Breakfast Cake is a wholesome, satisfying, and easy-to-make recipe that combines nutritious ingredients with naturally sweet flavors. It’s a perfect make-ahead breakfast that supports a balanced and energized start to the day.

CLASSIC STRAWBERRY CHIA SMOOTHIE

Prep time: 5 minutes | Servings: 2


Ingredients

Frozen Strawberries: 2 cups (using frozen makes it creamy without needing ice).


Banana: 1 ripe banana (adds natural sweetness and a smooth texture).

 Milk of Choice: 1 ½ cups (dairy, almond, oat, or coconut  milk all work great).


 Greek Yogurt: ½ cup (plain or vanilla for extra protein and thickness).


Chia Seeds: 2 tablespoons.


Honey or Maple Syrup: 1-2 teaspoons (optional, depending on how sweet your berries are).


Instructions

Combine: Place the frozen strawberries, banana, milk, yogurt, and sweetener (if using) into your blender.


Add the “Specs”: Add the chia seeds last so they don’t all get stuck to the bottom of the blender blades.


Blend: Start on a low speed and gradually increase to high. Blend for about 45–60 seconds until the mixture is completely smooth and the chia seeds are evenly distributed.


Adjust: If it’s too thick, add a splash more milk. If you prefer it thicker, add a few more frozen berries.


Serve: Pour into tall glasses and garnish with a fresh strawberry slice on the rim, just like in the picture!


Pro-Tips for the Best Texture

The “Soak” Method: If you have time, let the smoothie sit in the fridge for 5–10 minutes after blending. The chia seeds will expand slightly, creating a thicker, pudding-like consistency.


Layering: Always put your liquid in the blender first. This helps the blades move freely and prevents “air pockets” that stop the blending process.