Chocolate Lava Mug Cakes (Baked in Cups)

Chocolate Lava Mug Cakes (Baked in Cups)

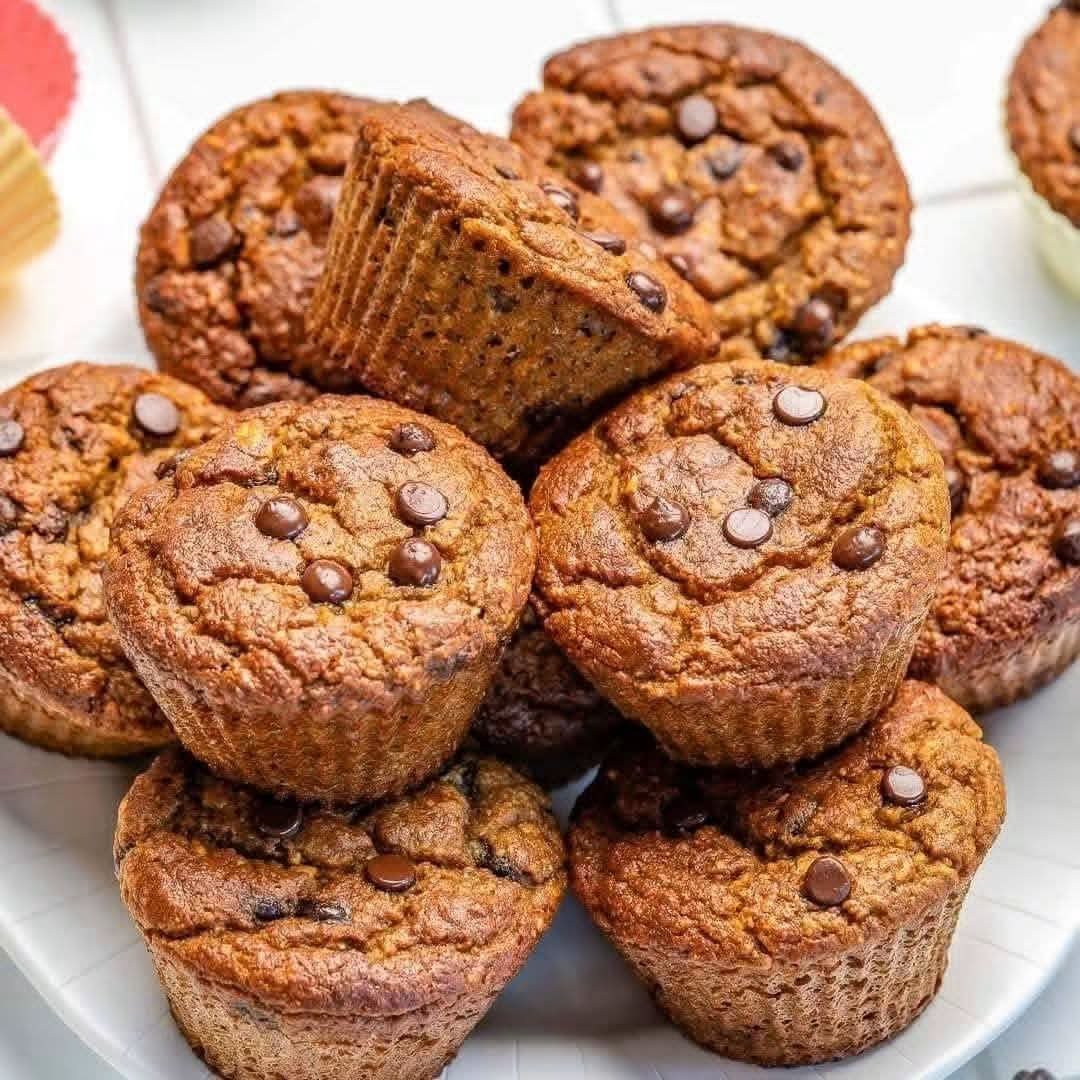
These individual chocolate lava mug cakes are rich, moist, and slightly gooey in the center. Baked directly in oven-safe cups, they’re perfect for portion control and make an elegant yet simple dessert.

Servings

6 small mug cakes

Ingredients

  • 1 cup all-purpose flour
  • ½ cup unsweetened cocoa powder
  • 1 tsp baking powder
  • ¼ tsp baking soda
  • ¼ tsp salt
  • ¾ cup granulated sugar
  • ½ cup milk (or plant-based alternative)
  • ½ cup vegetable oil or melted butter
  • 2 large eggs
  • 1 tsp vanilla extract
  • ½ cup chocolate chips or chunks
  • Optional: chocolate sauce for topping

Instructions

  1. Preheat Oven: Set your oven to 350°F (175°C). Lightly grease 6 oven-safe mugs or cups.
  2. Mix Dry Ingredients: In a bowl, whisk flour, cocoa powder, baking powder, baking soda, salt, and sugar.
  3. Combine Wet Ingredients: In another bowl, whisk milk, oil, eggs, and vanilla extract until smooth.
  4. Make Batter: Gradually combine wet and dry ingredients. Stir until just mixed—do not overmix.
  5. Add Chocolate: Fold in chocolate chips for a gooey center.
  6. Fill Cups: Divide batter evenly among mugs, filling about ¾ full.
  7. Bake: Place mugs on a baking tray and bake for 15–20 minutes. Centers should remain slightly soft.
  8. Finish: Remove from oven, cool slightly, and drizzle with chocolate sauce if desired. Serve warm.

Description

These mug cakes have a soft, sponge-like outer layer with a rich chocolate flavor, while the inside stays slightly molten thanks to the melted chocolate chips. Baking them in cups gives a rustic, cozy presentation—perfect for dinner parties or casual indulgence.

Tips for Best Results

  • Don’t overbake: Slightly underbaking ensures a gooey center.
  • Use good-quality cocoa powder: This significantly enhances flavor.
  • Room temperature ingredients: Helps create a smoother batter.
  • Check mugs: Ensure they are oven-safe to prevent cracking.
  • Customize: Add nuts, caramel bits, or a pinch of espresso powder for depth.

Notes

  • You can substitute whole wheat flour for a slightly denser texture.
  • Dairy-free options work well using almond or oat milk.
  • For extra molten centers, place a piece of chocolate in the middle before baking.

Nutritional Information (Approx. per serving)

  • Calories: 320
  • Carbohydrates: 38g
  • Protein: 5g
  • Fat: 17g
  • Saturated Fat: 5g
  • Sugar: 22g
  • Fiber: 3g

(Values may vary depending on ingredients used.)

Benefits

  • Portion control: Individual servings help manage intake.
  • Quick dessert: Simple ingredients and fast baking time.
  • Mood booster: Chocolate can help elevate mood and reduce stress.
  • Customizable: Easily adaptable to dietary needs or preferences.

Q&A

Q: Can I make these in a microwave instead of an oven?
A: Yes, microwave each mug for 60–90 seconds, but the texture will be slightly different—less fluffy and more dense.

Q: How do I store leftovers?
A: Cover and refrigerate for up to 2 days. Reheat briefly before serving.

Q: Can I make them ahead of time?
A: You can prepare the batter in advance and refrigerate it for up to 24 hours before baking.

Q: Why is my cake dry?
A: Likely overbaking. Reduce baking time slightly and check earlier.

Q: Can I reduce sugar?
A: Yes, reduce by ¼ cup, though it may slightly affect texture and sweetness.

Fluffy Blueberry Cottage Cheese Pancake Bites

Fluffy Blueberry Cottage Cheese Pancake Bites

These fluffy blueberry cottage cheese pancake bites are soft, golden, and bursting with juicy blueberries in every bite. They’re easy to make, packed with protein, and perfect for breakfast, snacks, or meal prep. Kids and adults both love these delicious mini pancake bites!

Ingredients

  • 1 cup cottage cheese
  • 1 cup all-purpose flour
  • 1 teaspoon baking powder
  • 2 eggs
  • ¼ cup milk
  • 2 tablespoons honey or maple syrup
  • 1 teaspoon vanilla extract
  • 1 cup fresh blueberries
  • 2 tablespoons melted butter
  • 1 pinch salt

Optional Toppings

  • Powdered sugar
  • Maple syrup
  • Fresh blueberries
  • Greek yogurt

Instructions

Step 1: Prepare the Oven

Preheat your oven to 375°F (190°C). Lightly grease a mini muffin tray with butter or cooking spray to prevent sticking.

Step 2: Mix the Wet Ingredients

In a large mixing bowl, combine the cottage cheese, eggs, milk, honey, vanilla extract, and melted butter. Stir until smooth and creamy. Small cottage cheese pieces are perfectly fine and help create a soft texture.

Step 3: Add the Dry Ingredients

Add the flour, baking powder, and salt into the bowl. Mix gently until just combined. Avoid overmixing because it can make the pancake bites dense instead of fluffy.

Step 4: Fold in the Blueberries

Carefully fold the fresh blueberries into the batter using a spoon or spatula. Mix gently to keep the berries whole and juicy.

Step 5: Fill the Muffin Tray

Spoon the batter evenly into the prepared mini muffin tray. Fill each cup about three-quarters full so the pancake bites have room to rise while baking.

Step 6: Bake

Place the tray in the oven and bake for 13–15 minutes, or until the tops are golden brown and slightly firm. Insert a toothpick into the center of one bite. If it comes out clean, they are ready.

Step 7: Cool and Serve

Remove the tray from the oven and let the pancake bites cool for a few minutes before removing them from the pan.

Serve warm with powdered sugar, maple syrup, Greek yogurt, or extra fresh blueberries on top.

Tips

  • Fresh blueberries work best, but frozen blueberries can also be used without thawing.
  • Store leftovers in an airtight container in the refrigerator for up to 4 days.
  • Freeze for up to 2 months and reheat in the microwave for a quick breakfast.
  • Add cinnamon, lemon zest, or chocolate chips for extra flavor variations.

These fluffy pancake bites are perfect for busy mornings, lunchboxes, brunch tables, or healthy snacks anytime during the day!

Pink Cadillac Pasta Salad

This creamy, colorful, and flavorful pasta salad is loaded with crunchy vegetables and coated in a rich tangy dressing. Perfect for BBQs, potlucks, picnics, or an easy side dish everyone will love!

🛒 Ingredients

  • 3 cups elbow macaroni
  • 1 cup mayonnaise
  • ½ cup sour cream
  • 1 tbsp apple cider vinegar
  • 1 tsp paprika
  • 1 tsp garlic powder
  • Salt & black pepper

Vegetables

  • 1 cup celery, diced
  • 1 red bell pepper, diced
  • ½ red onion, diced
  • 2 green onions, sliced

👩‍🍳 Instructions

1️⃣ Cook the Pasta

Boil macaroni according to package directions until tender.

Drain and rinse with cold water to cool completely.

2️⃣ Make the Dressing

In a large bowl, whisk together mayonnaise, sour cream, vinegar, paprika, garlic powder, salt, and black pepper until creamy.

3️⃣ Add Vegetables

Stir in celery, bell pepper, red onion, and green onions.

4️⃣ Combine Everything

Add cooled macaroni to the dressing mixture.

Toss until every piece is coated evenly.

5️⃣ Chill

Cover and refrigerate for at least 1 hour before serving for the best flavor.

6️⃣ Serve

Serve cold and garnish with extra green onions if desired.

💡 Tips

  • Chill overnight for even better flavor.
  • Add shredded cheddar or crispy bacon for extra richness.
  • Use rainbow pasta for a colorful twist.

❓Q/A

Q: Can I make this ahead of time?
Yes, it’s even better the next day.

Q: How long does it last in the fridge?
Up to 3–4 days in an airtight container.

Q: Can I use Greek yogurt instead of sour cream?
Absolutely, it works great.

Cheesy Savory Bread Loaf

This soft, fluffy, and cheesy homemade bread loaf is golden on the outside and perfectly moist inside. Loaded with melted cheese flavor, it’s perfect for breakfast, snacks, or served warm with soup and butter!

🛒 Ingredients

  • 2 cups all-purpose flour
  • 1 tbsp baking powder
  • ½ tsp salt
  • 2 eggs
  • 1 cup milk
  • ½ cup melted butter
  • 1½ cups shredded cheddar cheese
  • 1 tsp garlic powder
  • 1 tsp dried herbs (optional)

👩‍🍳 Instructions

1️⃣ Prepare the Pan

Preheat oven to 350°F (175°C).

Grease a loaf pan or line with parchment paper.

2️⃣ Mix Dry Ingredients

In a large bowl, whisk together flour, baking powder, salt, garlic powder, and herbs.

3️⃣ Add Wet Ingredients

In another bowl, whisk eggs, milk, and melted butter.

Pour into the dry ingredients and mix gently.

4️⃣ Add Cheese

Fold in most of the shredded cheese, saving a little for the top.

Do not overmix.

5️⃣ Bake

Pour batter into the loaf pan.

Sprinkle remaining cheese on top.

Bake for 40–45 minutes until golden brown and a toothpick comes out clean.

6️⃣ Cool & Serve

Let cool for 10 minutes before slicing.

Serve warm with butter or soup.

💡 Tips

  • Use sharp cheddar for stronger flavor.
  • Add jalapeños for a spicy twist.
  • Best served warm and fresh.

❓Q/A

Q: Can I use mozzarella cheese?
Yes, mozzarella works great for a softer cheesy texture.

Q: How do I store the bread?
Keep covered at room temperature for 2 days or refrigerate for 5 days.

Q: Can I freeze it?
Yes, wrap slices individually and freeze for up to 2 months.

Chocolate Bundt Cake with Chocolate Glaze

Chocolate Bundt Cake with Chocolate Glaze

This rich and moist chocolate bundt cake is soft, fluffy, and covered in a silky chocolate glaze that melts into every bite. Perfect for birthdays, holidays, or whenever you’re craving a decadent chocolate dessert!

🛒 Ingredients

Cake

  • 2 cups all-purpose flour
  • 1 cup cocoa powder
  • 1½ cups sugar
  • 2 tsp baking powder
  • 1 tsp baking soda
  • ½ tsp salt
  • 3 eggs
  • 1 cup milk
  • ½ cup melted butter
  • 1 tsp vanilla extract
  • 1 cup hot coffee or hot water

Chocolate Glaze

  • 1 cup chocolate chips
  • ½ cup heavy cream
  • 1 tbsp butter

👩‍🍳 Instructions

1️⃣ Prepare the Pan

Preheat oven to 350°F (175°C).

Grease a bundt pan very well to prevent sticking.

2️⃣ Mix Dry Ingredients

In a large bowl, whisk together flour, cocoa powder, sugar, baking powder, baking soda, and salt.

3️⃣ Add Wet Ingredients

Add eggs, milk, melted butter, and vanilla.

Mix until smooth.

Slowly pour in hot coffee or hot water and mix gently until the batter becomes glossy.

4️⃣ Bake

Pour batter into the prepared bundt pan.

Bake for 45–50 minutes or until a toothpick comes out clean.

Let cool in the pan for 15 minutes before removing.

5️⃣ Make the Chocolate Glaze

Heat heavy cream until warm.

Pour over chocolate chips and butter.

Stir until smooth and shiny.

6️⃣ Glaze & Serve

Pour glaze over the cooled bundt cake.

Allow the glaze to set slightly before slicing.

💡 Tips

  • Use coffee instead of water for deeper chocolate flavor.
  • Do not overbake to keep the cake moist.
  • Let the cake cool completely before glazing.

❓Q/A

Q: Can I use boxed cake mix?
Yes, but homemade gives richer flavor and texture.

Q: How do I store the cake?
Store covered at room temperature for 2 days or refrigerate for 5 days.

Q: Can I freeze it?
Yes, freeze without glaze for up to 2 months.

Cheesy Corn Casserole

Cheesy Corn Casserole

  • Prep time: 10 minutes

  • Bake time: 35–45 minutes

  • Servings: 6–8 sides

Ingredients

  • 2 cans (15 oz each) whole kernel corn, drained

  • 1 can (14.75 oz) cream-style corn (do not drain)

  • 1 cup sour cream

  • 1/2 cup (1 stick) unsalted butter, melted

  • 1 package (8.5 oz) corn muffin mix (like Jiffy)

  • 1 1/2 cups shredded Cheddar or Monterey Jack cheese, divided

  • A pinch of salt and black pepper to taste

Instructions

1. Prep the Oven and Pan

Preheat your oven to 350°F (175°C). Lightly grease a 9×13-inch baking dish (or an 11×7-inch dish for a thicker casserole) with a little butter or cooking spray.

2. Mix the Base

In a large mixing bowl, combine the drained whole corn, cream-style corn, sour cream, and melted butter. Stir until smooth and well combined.

3. Add the Dry Ingredients

Stir in the corn muffin mix, salt, and pepper until just combined. Fold in 1 cup of the shredded cheese (save the remaining 1/2 cup for later).

4. Bake

Pour the mixture into your prepared baking dish and smooth the top with a spatula. Bake uncovered for 30 to 35 minutes, or until the center is mostly set and the edges are lightly golden.

5. Add the Cheesy Topping

Carefully remove the dish from the oven. Sprinkle the remaining 1/2 cup of cheese evenly over the top. Put it back in the oven for another 5 to 10 minutes, until the cheese is completely melted and bubbly.

6. Cool and Serve

Let the casserole rest for about 5 to 10 minutes before serving. This helps it firm up slightly so it’s easier to scoop. Enjoy!

Healthy Carrot Cake Bars

Healthy Carrot Cake Bars

These soft and moist carrot cake bars are packed with wholesome ingredients, warm spices, and topped with creamy frosting and crunchy walnuts. Perfect for breakfast, snacks, or a healthy dessert!

🛒 Ingredients

Cake Bars

  • 2 cups grated carrots
  • 1 cup cottage cheese
  • 2 eggs
  • 1 tsp vanilla extract
  • 1 cup oat flour
  • 1 tsp baking powder
  • 1 tsp cinnamon
  • ¼ cup honey or maple syrup
  • ½ cup chopped walnuts

Frosting

  • 4 oz cream cheese
  • 2 tbsp Greek yogurt
  • 1 tbsp honey

Topping

  • Chopped walnuts

👩‍🍳 Instructions

1️⃣ Prepare the Pan

Preheat oven to 350°F (175°C).

Line a square baking pan with parchment paper.

2️⃣ Mix Wet Ingredients

In a large bowl, combine cottage cheese, eggs, vanilla, and honey.

Mix until smooth and creamy.

3️⃣ Add Dry Ingredients

Add grated carrots, oat flour, cinnamon, and baking powder.

Stir until fully combined.

Fold in chopped walnuts.

4️⃣ Bake

Pour the batter into the prepared pan and spread evenly.

Bake for 30–35 minutes until firm and lightly golden.

Let cool completely.

5️⃣ Make the Frosting

Mix cream cheese, Greek yogurt, and honey until smooth.

Spread over cooled bars.

6️⃣ Finish & Serve

Top with chopped walnuts.

Cut into squares and serve.

💡 Tips

  • Chill before slicing for cleaner bars.
  • Add raisins for extra sweetness.
  • Store in the fridge for up to 4 days.

❓Q/A

Q: Can I use almond flour instead of oat flour?
Yes, but the texture will be softer.

Q: Can I freeze these bars?
Yes, freeze unfrosted bars for up to 2 months.

Q: Are these high protein?
Yes! Cottage cheese and eggs add extra protein.

Cheesy Mushroom Toast Melts

These crispy cheesy mushroom toast melts are rich, creamy, and packed with savory flavor! Perfect for breakfast, lunch, snacks, or a quick comforting dinner.

🛒 Ingredients

  • 3 slices thick bread
  • 1 cup mushrooms, sliced
  • 1 tbsp butter
  • 1 garlic clove, minced
  • 1 cup mozzarella cheese
  • 2 tbsp cream or mayonnaise
  • Salt & black pepper
  • Fresh parsley

👩‍🍳 Instructions

1️⃣ Cook the Mushrooms

Heat butter in a pan over medium heat.

Add mushrooms and garlic. Cook for 5–6 minutes until soft and golden.

Season with salt and black pepper.

2️⃣ Prepare the Bread

Place bread slices on a baking tray.

Lightly toast for 2–3 minutes so they become slightly crispy.

3️⃣ Add the Topping

Mix cooked mushrooms with cream or mayonnaise.

Spread the mixture evenly over each bread slice.

Top generously with mozzarella cheese.

4️⃣ Bake

Bake at 375°F (190°C) for 8–10 minutes until the cheese melts and becomes bubbly golden.

5️⃣ Garnish & Serve

Sprinkle fresh parsley on top and serve hot.

💡 Tips

  • Use sourdough bread for the best texture.
  • Add caramelized onions for extra flavor.
  • Broil for 1 minute at the end for a golden cheesy top.

❓Q/A

Q: Can I use different cheese?
Yes, Swiss, provolone, or cheddar work great.

Q: Can I make this in an air fryer?
Yes, cook at 360°F for about 5 minutes.

Q: What mushrooms work best?
Button or cremini mushrooms are perfect.

Saucy Beef Strips & Crispy Fries Plate

Saucy Beef Strips & Crispy Fries Plate 😍🔥

The best comfort food for an easy family dinner!

📝 Ingredients :

500g beef strips or beef ribs pieces
2 tbsp olive oil
1 tsp paprika
1 tsp garlic powder
1 tsp black pepper
1 tsp salt
1 tbsp soy sauce
1 red bell pepper, diced
2 garlic cloves, minced
4 large potatoes, cut into fries
Vegetable oil for frying
2 cups shredded cabbage
1 carrot, shredded
1 lime, halved

🍽️ How to Make It :

1️⃣ Season the Beef

Toss beef with paprika, garlic powder, soy sauce, salt, and pepper for an easy dinner idea, best homemade beef recipe, and quick comfort meal flavor boost.

2️⃣ Cook the Beef

Sauté beef with garlic and red peppers until caramelized and glossy. This restaurant-style beef, high-protein dinner, and family favorite recipe creates amazing flavor.

3️⃣ Prepare the Fries

Fry potatoes until crispy and golden for a best crispy fries, quick weeknight side, and comfort food classic finish.

4️⃣ Make the Salad

Mix shredded cabbage and carrots for a fresh side that adds a healthy meal balance, easy homemade salad, and fresh crunchy bite.

5️⃣ Plate & Serve

Arrange fries, saucy beef, salad, and fresh lime on a plate for the best dinner plate, easy family meal, and crowd favorite recipe experience.

Prep Time: 15 minutes | Cook Time: 30 minutes | Total Time: 45 minutes | Serving: 4 persons

Calories: ~730 per serving | Protein: ~35g per serving

Creamy Lemon Icebox Pie

This creamy lemon pie is smooth, refreshing, and incredibly easy to make with a buttery graham cracker crust and rich lemon filling. Perfect for summer desserts, parties, or anytime you want a sweet citrus treat!

🛒 Ingredients

Crust

  • 2 cups graham cracker crumbs
  • ½ cup melted butter
  • 2 tbsp sugar

Filling

  • 1 can sweetened condensed milk
  • 1 package instant lemon pudding mix
  • 1½ cups cold milk
  • 1 tub whipped topping

👩‍🍳 Instructions

1️⃣ Prepare the Crust

Mix graham cracker crumbs, melted butter, and sugar in a bowl until combined.

Press firmly into a pie pan, covering the bottom and sides evenly.

Place in the fridge while preparing the filling.

2️⃣ Make the Lemon Filling

In a large bowl, whisk together cold milk and lemon pudding mix for 2 minutes until slightly thickened.

Add sweetened condensed milk and mix until creamy and smooth.

Fold in whipped topping gently until light and fluffy.

3️⃣ Fill the Pie

Pour the lemon mixture into the chilled crust and spread evenly.

Smooth the top with a spoon or spatula.

4️⃣ Chill

Refrigerate for at least 4 hours, or overnight for best results.

5️⃣ Serve

Slice and serve chilled. Garnish with lemon zest or whipped cream if desired.

💡 Tips

  • Chill overnight for cleaner slices.
  • Add fresh lemon juice for extra tangy flavor.
  • Keep refrigerated until ready to serve.

❓Q/A

Q: Can I freeze this pie?
Yes! Freeze for up to 1 month and thaw slightly before serving.

Q: Can I use homemade whipped cream?
Absolutely, homemade whipped cream works great.

Q: What crust works best?
Graham cracker crust gives the best classic flavor.

Apple, Walnut & Feta Salad

Apple, Walnut & Feta Salad

Ingredients

  • Greens: 5 cups fresh baby spinach or mixed salad greens

  • Fruit: 1 large red apple (such as Honeycrisp or Gala), cored and thinly sliced

  • Nuts: cup chopped walnuts (pecans also work great)

  • Cheese: cup crumbled feta cheese (or goat cheese)

  • Dried Fruit: cup dried cranberries

Simple Dressing:

  • 3 tablespoons olive oil

  • 1 tablespoon apple cider vinegar (or lemon juice)

  • 1 tablespoon honey or maple syrup

  • A pinch of salt and black pepper

Instructions

  1. Prepare the Base: Thoroughly wash and dry your greens. Place them into a large salad bowl as the base.

  2. Layer the Toppings: Arrange the thin apple slices evenly over the bed of greens. Scatter the chopped walnuts, crumbled feta cheese, and dried cranberries over the top.

  3. Whisk the Dressing: In a small small bowl or jar, combine the olive oil, apple cider vinegar, honey, salt, and black pepper. Whisk or shake vigorously until the mixture is smooth and fully blended.

  4. Toss and Serve: Drizzle the dressing over the salad just before serving. Toss gently to combine all the ingredients so the leaves are lightly coated. Serve immediately while the apples are fresh and crisp.

Tip: To keep the apple slices from turning brown if you are making this ahead of time, toss them in a splash of lemon juice right after slicing.

Cheesy Bacon Ranch Potato Bake

Ingredients

  • 5 cups mashed potatoes
  • 2 cups shredded cheddar cheese
  • 6 slices bacon, cooked and chopped
  • ½ cup sour cream
  • 1 packet ranch seasoning
  • 2 green onions, sliced
  • 1 egg
  • 1 tsp garlic powder
  • Salt & black pepper to taste

Instructions

1. Prepare the Mixture

  • Preheat oven to 375°F (190°C).
  • In a large bowl mix:
    • mashed potatoes
    • sour cream
    • ranch seasoning
    • egg
    • garlic powder
    • half of the cheese
    • half of the bacon
  • Stir until creamy and well combined.

2. Form the Potato Mounds

  • Scoop large spoonfuls of the potato mixture into a greased baking dish.
  • Leave slight space between each mound.

3. Add Toppings

  • Sprinkle remaining cheddar cheese over the top.
  • Add the rest of the bacon pieces.

4. Bake

  • Bake for 25–30 minutes until hot and golden brown on top.

5. Broil for Extra Crispiness

  • Broil for 2–3 minutes until bubbly and lightly crispy.

6. Serve

  • Garnish with green onions.
  • Serve warm with ranch or sour cream.

Tips

  • Use leftover mashed potatoes for best texture.
  • Add mozzarella for extra cheesy pull.
  • Perfect for family dinners or potlucks.

Old-Fashioned Chess Pie 🥧

Old-Fashioned Chess Pie 🥧

Ingredients

  • 1 unbaked pie crust
  • 1½ cups sugar
  • 4 large eggs
  • ½ cup melted butter
  • ¼ cup milk
  • 1 tbsp cornmeal
  • 1 tbsp flour
  • 1 tsp vanilla extract
  • 1 tbsp lemon juice

Instructions

1. Prepare the Oven

  • Preheat oven to 350°F (175°C).
  • Place pie crust into a pie dish and crimp the edges.

2. Make the Filling

  • In a large bowl, whisk together:
    • sugar
    • eggs
    • melted butter
    • milk
    • vanilla
    • lemon juice
  • Add cornmeal and flour.
  • Mix until smooth.

3. Fill the Pie

  • Pour the filling into the unbaked pie crust.

4. Bake

  • Bake for 45–50 minutes until the top is golden brown and the center is mostly set.

5. Cool & Serve

  • Let cool completely before slicing.
  • Serve plain or with whipped cream.

Tips

  • The pie will slightly jiggle in the center when done.
  • Refrigerate leftovers for a chilled cheesecake-like texture.
  • A pinch of nutmeg adds extra flavor.

4-Ingredient Bake Sale Cookies

4-Ingredient Bake Sale Cookies

Ingredients

  • 1 cup peanut butter
  • 1 cup sugar
  • 1 large egg
  • 1 tsp vanilla extract

Instructions

  1. Preheat oven to 350°F / 180°C.
  2. In a bowl, mix peanut butter, sugar, egg, and vanilla until a soft dough forms.
  3. Scoop small balls onto a lined baking tray.
  4. Press each cookie lightly with a fork to make a crisscross pattern.
  5. Bake for 10–12 minutes until edges look set.
  6. Let cool on the tray for 10 minutes before serving.

Lemon Garlic Butter Cod Bowls with Roasted Brussels Sprouts

Lemon Garlic Butter Cod Bowls with Roasted Brussels Sprouts

Bright, buttery, and packed with flavour, these Lemon Garlic Butter Cod Bowls with Roasted Brussels Sprouts are a simple yet elegant meal that feels restaurant-quality but is easy enough for any night of the week. Tender cod fillets are seasoned with lemon, garlic, and herbs, then paired with crispy roasted Brussels sprouts for a balanced bowl that’s both nourishing and satisfying. Every bite delivers freshness, richness, and a perfect mix of textures.

Full Recipe

Ingredients

For the Cod

  • 1 pound cod fillets, cut into 4 pieces
  • 2 tablespoons olive oil
  • 2 cloves garlic, minced
  • 1 tablespoon lemon juice
  • ½ teaspoon dried oregano
  • ¼ teaspoon salt
  • ¼ teaspoon black pepper
  • 1 tablespoon butter (for finishing)

For the Brussels Sprouts

  • 3 cups Brussels sprouts, halved
  • 2 tablespoons olive oil
  • ½ teaspoon salt
  • ½ teaspoon black pepper
  • ½ teaspoon garlic powder

For Serving

  • Cooked rice, quinoa, or cauliflower rice
  • Lemon wedges
  • Fresh parsley (optional)

Instructions

  1. Preheat oven to 400°F (200°C).
  2. Toss Brussels sprouts with olive oil, salt, pepper, and garlic powder. Spread on a baking sheet and roast for 20–25 minutes until crispy and golden.
  3. Pat cod dry and season with salt, pepper, and oregano.
  4. Heat olive oil in a skillet over medium heat. Add garlic and cook for 30 seconds until fragrant.
  5. Place cod fillets in the pan and cook for 3–4 minutes per side until flaky and cooked through (internal temp 145°F / 63°C).
  6. Add lemon juice and butter to the pan, spooning sauce over the cod as it melts.
  7. Assemble bowls with rice or quinoa, roasted Brussels sprouts, and cod.
  8. Drizzle extra pan sauce over the top and garnish with parsley and lemon wedges.

Description

This dish is a perfect combination of light, flaky cod and deeply roasted Brussels sprouts. The lemon garlic butter sauce adds richness without heaviness, while the roasted vegetables bring caramelised depth and crunch. It’s a wholesome bowl that feels comforting yet fresh, making it ideal for healthy dinners or meal prep.

Notes

  • Fresh cod works best, but frozen (thawed) fillets are also fine.
  • Don’t overcook cod—it should flake easily but stay moist.
  • Brussels sprouts should be well spaced on the pan for crisping.
  • You can swap cod for haddock, tilapia, or halibut.

Tips

  • Dry cod well before cooking for a better sear.
  • Add a pinch of chilli flakes for heat.
  • Use a cast-iron skillet for better browning.
  • Double the lemon butter sauce if you love extra flavour.

Servings

Serves: 4

Nutritional Information (Per Serving)

  • Calories: 360
  • Protein: 32g
  • Carbohydrates: 18g
  • Fat: 18g
  • Fiber: 5g
  • Sugar: 3g

Benefits of This Recipe

  • High in lean protein for muscle support and fullness
  • Rich in omega-3 fatty acids from cod
  • Brussels sprouts provide fiber and antioxidants
  • Balanced meal with healthy fats and vegetables
  • Great for low-carb or clean eating plans

Questions & Answers

Can I bake the cod instead of pan-searing it?

Yes! Bake at 400°F (200°C) for 10–12 minutes until flaky.

Can I make this recipe dairy-free?

Yes, simply replace butter with olive oil or plant-based butter.

What can I serve instead of Brussels sprouts?

Asparagus, broccoli, or green beans work well.

Can I meal prep this bowl?

Yes, store components separately and assemble before eating for the best texture.

How do I know cod is cooked?

It should flake easily with a fork and appear opaque throughout.

Spanakopita (Greek Spinach Pie)

Spanakopita is a traditional Greek savory pie made with crispy phyllo pastry and a rich spinach and feta filling. It can be served as an appetizer, snack, or light meal.

Ingredients

Filling

  • 2 tbsp olive oil
  • 1 onion, chopped
  • 3 garlic cloves, minced
  • 450g fresh spinach (or frozen spinach, squeezed dry)
  • 1½ cups feta cheese
  • 2 eggs
  • 2 tbsp fresh dill or parsley
  • Salt and black pepper

Crust

  • 12 sheets phyllo dough
  • ½ cup melted butter or olive oil

Instructions

Step 1: Prepare the Filling

Heat olive oil in a large pan over medium heat.

Cook onion for 3–4 minutes until soft.

Add garlic and cook for 1 minute.

Add spinach and cook until wilted.

Remove from heat and let cool slightly.

Mix in feta cheese, eggs, dill or parsley, salt, and black pepper.


Step 2: Layer the Phyllo

Preheat oven to 175°C / 350°F.

Lightly grease a baking dish.

Place one sheet of phyllo dough into the dish and brush with melted butter or olive oil.

Repeat with 6 sheets.

Spread spinach filling evenly over the layers.

Add the remaining phyllo sheets on top, brushing each layer with butter or oil.

Fold edges neatly into the pan.


Step 3: Bake

Score the top gently into squares.

Bake for 45–50 minutes until golden brown and crispy.

Let rest for 10 minutes before slicing and serving.


Tips

  • Keep phyllo dough covered with a damp towel while working.
  • Squeeze excess water from spinach to avoid soggy filling.
  • Let the filling cool slightly before assembling.

Q&A

Can I use frozen spinach?

Yes. Thaw it completely and squeeze out extra moisture before using.

Can I prepare it ahead of time?

Yes. Assemble the pie and refrigerate before baking.

How do I store leftovers?

Store in the refrigerator for up to 4 days and reheat in the oven or air fryer.


Nutritional Benefits

  • Spinach provides iron and vitamins
  • Feta cheese adds calcium and protein
  • Olive oil contains healthy Mediterranean fats

Air Fryer Poached Eggs

These Air Fryer Poached Eggs are soft, creamy, and incredibly easy to make! Perfect for breakfast toast, avocado toast, salads, or healthy meal prep. ✨

🛒 Ingredients

  • 2 eggs
  • 2 small ramekins or oven-safe bowls
  • 2 tbsp water (1 tbsp per ramekin)
  • Cooking spray or a little butter

👩‍🍳 Step-by-Step Instructions

🔥 Step 1: Preheat Air Fryer

➡️ Preheat your air fryer to 180°C / 350°F for 3 minutes.


🥣 Step 2: Prepare the Ramekins

➡️ Lightly grease the ramekins with cooking spray or butter.

➡️ Add 1 tablespoon water into each ramekin.

➡️ Crack one egg into each ramekin carefully.


🍳 Step 3: Air Fry the Eggs

➡️ Place ramekins into the air fryer basket.

➡️ Cook at 180°C / 350°F for:

  • 5–6 minutes for soft yolks 🥚
  • 7–8 minutes for firmer yolks

✨ Step 4: Serve

➡️ Carefully remove ramekins.

➡️ Use a spoon to lift eggs out gently.

➡️ Serve immediately on:

  • Toast 🍞
  • Avocado toast 🥑
  • Salads 🥗
  • Breakfast bowls 🍽️

💡 Tips

✨ Add a pinch of salt & pepper before cooking
✨ Sprinkle chili flakes for extra flavor 🌶️
✨ Use silicone cups for easy cleanup


❓Q&A

❓Can I make multiple eggs?

✅ Yes! Just use more ramekins if your air fryer basket has space.

❓Why add water?

✅ Water creates steam which helps gently poach the eggs.

❓Can I reheat them?

✅ They are best fresh, but can be reheated gently for 20–30 seconds.


🌿 Nutritional Benefits

🥚 High in protein
💪 Keeps you full longer
🧠 Rich in healthy fats and vitamins

Cheesy Herb Bread Loaf

This soft, cheesy herb bread is fluffy inside with a golden, crispy top loaded with melted cheese and herbs. Perfect for breakfast, snacks, or alongside soup and pasta! 🍞✨

Ingredients

  • 2 cups all-purpose flour
  • 1 tbsp sugar
  • 1 tsp salt
  • 2 tsp baking powder
  • 2 eggs
  • 1 cup milk
  • 1/4 cup melted butter
  • 1 cup shredded mozzarella or cheddar cheese
  • 1 tsp dried thyme or Italian herbs
  • 2 garlic cloves (minced)

Step-by-Step Instructions

Step 1: Prepare the Batter

➡️ Preheat oven to 180°C / 350°F.
➡️ Grease a loaf pan lightly with butter or oil.

➡️ In a large bowl, mix:

  • Flour
  • Sugar
  • Salt
  • Baking powder

🧄 Step 2: Mix Wet Ingredients.

➡️ In another bowl, whisk together:

  • Eggs
  • Milk
  • Melted butter
  • Minced garlic

➡️ Pour wet mixture into dry ingredients.

➡️ Stir gently until combined. Do not overmix.


🧀 Step 3: Add Cheese & Herbs

➡️ Fold in shredded cheese and herbs.

➡️ Pour batter into prepared loaf pan.

➡️ Sprinkle extra cheese and herbs on top for a beautiful crust ✨


🔥 Step 4: Bake

➡️ Bake for 35–40 minutes until:

  • The top becomes golden brown. 🌟
  • Toothpick comes out clean

➡️ Let cool for 10 minutes before slicing.


🍽️ Serving Ideas

✅ Serve warm with butter
✅ Pair with soup or pasta
✅ Toast leftovers for breakfast


💡 Tips

✨ Use mozzarella for a stretchy texture.
✨ Add chili flakes for a spicy version.
✨ Fresh herbs make it even more flavorful.


❓Q&A

❓Can I use self-rising flour?

✅ Yes! Skip the baking powder and salt.

❓How do I store it?

✅ Keep in an airtight container for 2–3 days.

❓Can I freeze this bread?

✅ Yes! Slice and freeze for up to 1 month.


🌿 Nutritional Benefits

🧀 Cheese provides protein and calcium.
🥚 Eggs add richness and protein.
🌿 Herbs add aroma and antioxidants.

Spicy Mediterranean Glazed Fish Platter

Spicy Mediterranean Glazed Fish Platter

This colorful Mediterranean fish platter is packed with bold flavors, fresh vegetables, creamy cheese, and a spicy garlic sauce 🌶️🐟✨
Perfect for lunch, dinner, or party platters!

🛒 Ingredients

For the Fish

  • 4 fish fillets (cod, tilapia, or white fish)
  • 2 tbsp olive oil
  • 2 garlic cloves (minced)
  • 1 tsp paprika
  • ½ tsp chili flakes
  • Salt & black pepper

For the Platter

  • Cherry tomatoes
  • Sliced cucumbers
  • Kalamata olives
  • Feta cheese
  • Pita bread
  • Fresh parsley or dill

Sauce

  • 2 tbsp olive oil
  • 1 tbsp lemon juice
  • 1 tsp chili flakes
  • 1 garlic clove

👩‍🍳 Instructions

🐟 Step 1: Season the Fish

  • Pat fish dry with paper towel.
  • Rub with olive oil, garlic, paprika, chili flakes, salt, and pepper.

🔥 Step 2: Cook the Fish

  • Heat a pan over medium heat.
  • Cook fish for 3–4 minutes per side until golden and flaky.
  • Brush with extra spicy sauce while cooking for glossy flavor 😍

🥗 Step 3: Prepare the Sides

  • Slice cucumbers and tomatoes.
  • Arrange olives, feta cheese, and pita bread on a large platter.

✨ Step 4: Make the Sauce

  • Mix olive oil, lemon juice, garlic, and chili flakes in a bowl.

🌿 Step 5: Assemble

  • Place cooked fish onto the platter.
  • Drizzle sauce over the fish.
  • Garnish with parsley or dill.

💡 Tips

  • Use fresh white fish for best flavor.
  • Add hummus or tzatziki on the side.
  • Warm pita bread before serving.

🌟 Nutritional Benefits

  • High in protein 💪
  • Rich in omega-3 nutrients 🐟
  • Fresh vegetables provide fiber and vitamins 🥒🍅

❓Q/A

❓Can I bake the fish instead?

✅ Yes! Bake at 200°C (400°F) for 12–15 minutes.

❓What fish works best?

✅ Cod, tilapia, halibut, or salmon all work great.

❓Can I make it less spicy?

✅ Absolutely! Reduce the chili flakes.

Creamy Pistachio Protein Gelato

Creamy Pistachio Protein Gelato

This creamy pistachio gelato is rich, nutty, high in protein, and incredibly refreshing 💚✨
Perfect for a healthy dessert without feeling heavy!

🛒 Ingredients

  • 2 cups Greek yogurt
  • 1 scoop vanilla protein powder
  • ½ cup pistachios (chopped)
  • 2 tbsp honey or maple syrup
  • ½ tsp vanilla extract
  • ¼ cup almond milk
  • Optional: chopped almonds for topping

👩‍🍳 Instructions

🥣 Step 1: Blend the Base

  • In a blender add:
    • Greek yogurt
    • Protein powder
    • Honey
    • Vanilla
    • Almond milk
  • Blend until smooth and creamy.

💚 Step 2: Add Pistachios

  • Stir in chopped pistachios gently.
  • Save a few for topping later.

❄️ Step 3: Freeze

  • Pour mixture into a freezer-safe container.
  • Freeze for 3–4 hours.
  • Stir once every hour for a smoother texture.

🍨 Step 4: Scoop & Serve

  • Let gelato sit for 5 minutes before scooping.
  • Top with extra pistachios and almonds 😍

💡 Tips

  • Use roasted pistachios for deeper flavor.
  • Add a few drops of pistachio extract for stronger taste.
  • Freeze overnight for firmer gelato texture.

🌟 Nutritional Benefits

  • High in protein 💪
  • Rich in healthy fats 🌰
  • Great energy-boosting dessert
  • Lower sugar than regular ice cream

❓Q/A

❓Can I make it dairy-free?

✅ Yes! Use dairy-free yogurt and plant protein powder.

❓How long does it last?

✅ Store in freezer for up to 1 week.

❓Can I use another nut?

✅ Yes! Almonds or cashews work well too.

Creamy Cucumber Tea Sandwiches Recipe

Creamy Cucumber Tea Sandwiches Recipe

Ingredients
  • 10 slices soft white bread
  • 1 large cucumber, thinly sliced
  • 1 can tuna or shredded cooked chicken
  • 4 tablespoons cream cheese or mayonnaise
  • 1 tablespoon fresh lemon juice
  • 1 tablespoon chopped fresh dill or parsley
  • Salt to taste
  • Black pepper to taste
  • Butter for spreading

Instructions

  1. Wash the cucumber and slice it into very thin rounds or strips. Pat dry with a paper towel so the sandwiches stay fresh and soft.
  2. In a bowl, mix the tuna or shredded chicken with cream cheese or mayonnaise. Add lemon juice, dill, salt, and black pepper. Stir until smooth and creamy.
  3. Lightly spread butter on one side of each bread slice. This helps keep the bread soft and delicious.
  4. Spread a generous layer of the creamy filling over 5 bread slices. Arrange cucumber slices evenly on top.
  5. Cover with the remaining bread slices and gently press down. Trim the crusts if you want a classic tea sandwich style.
  6. Cut each sandwich into halves or triangles and serve chilled or fresh.

Serving Ideas

  • Serve with lemon slices, fresh salad, or hot tea.
  • Perfect for lunch boxes, picnics, afternoon snacks, or family gatherings.

Preparation Time

  • Prep Time: 15 minutes
  • Servings: 5 sandwiches

Crispy Garlic Parmesan Potatoes

Crispy Garlic Parmesan Potatoes

These crispy sliced potatoes are golden on the outside, soft inside, and packed with buttery garlic flavor. Perfect for air fryer or oven snacks! 😍

🛒 Ingredients

  • 10–12 small potatoes
  • 3 tbsp butter (melted)
  • 3 garlic cloves (minced)
  • ½ tsp salt
  • ½ tsp black pepper
  • 1 tsp Italian seasoning
  • ¼ cup grated Parmesan cheese
  • Fresh parsley for garnish

👩‍🍳 Instructions

🥔 Step 1: Prepare the Potatoes

  • Wash the potatoes well.
  • Slice each potato halfway down into thin layers (don’t cut fully through).
  • This helps them become crispy and fan-like while cooking.

🧄 Step 2: Make Garlic Butter

  • In a bowl, mix:
    • Melted butter
    • Garlic
    • Salt
    • Black pepper
    • Italian seasoning

✨ Step 3: Coat the Potatoes

  • Brush the garlic butter mixture all over the potatoes.
  • Try to get some butter between the slices too for extra flavor.

🧀 Step 4: Add Parmesan

  • Sprinkle Parmesan cheese generously over the potatoes.

🔥 Step 5: Cook

Air Fryer:

  • Preheat to 180°C (350°F).
  • Cook for 18–22 minutes until crispy and golden.

Oven:

  • Bake at 200°C (400°F) for 30–35 minutes.

🌿 Step 6: Garnish & Serve

  • Sprinkle fresh parsley on top.
  • Serve hot with ketchup, garlic sauce, or sour cream. 😋

💡 Tips

  • Use baby potatoes for the best crispy texture.
  • Add chili flakes for a spicy version.
  • Don’t skip the Parmesan — it creates a crispy cheesy crust!

❓Q/A

❓Can I make these without Parmesan?

✅ Yes, but Parmesan adds extra crispiness and flavor.

❓How do I keep them crispy?

✅ Serve immediately after cooking while hot.

❓Can I store leftovers?

✅ Yes, refrigerate and reheat in the air fryer for 3–4 minutes.

Lemon & Ginger Wellness Tonic

Lemon & Ginger Wellness Tonic

A refreshing homemade wellness tonic packed with lemon, ginger, turmeric, and apple cider vinegar to help support digestion, hydration, and natural energy. Perfect as a morning wellness shot or soothing warm drink.

🛒 Ingredients

  • 2 large Lemons (washed well) 🍋
  • 3-inch piece Fresh ginger root (peeled & sliced) 🌿
  • 1 tsp Ground turmeric (or 1-inch fresh turmeric root) ✨
  • 1 tbsp Apple cider vinegar (with “the mother”)
  • 1 pinch Black pepper
  • 1 cup Filtered water 💧
  • Optional: 1 tsp Raw honey or natural sweetener 🍯

👩‍🍳 Step-by-Step Instructions

1️⃣ Prepare the Ingredients

Slice the lemons into thin rounds.
Peel and grate the ginger (and turmeric if using fresh) to release maximum flavor and nutrients.

2️⃣ Blend or Steep

🥤 Method A — Smoothie Style

Add lemons, ginger, turmeric, black pepper, and water to a blender. Blend until smooth.

☕ Method B — Infusion Style

Simmer ginger and turmeric in water for about 10 minutes.
Remove from heat, cool slightly, then stir in fresh lemon juice and apple cider vinegar.


3️⃣ Strain (Optional)

For a smoother tonic, strain the mixture through a fine-mesh strainer or cheesecloth into a clean jar or bottle. Press the solids well to extract all the liquid.


4️⃣ Store

Pour into a glass bottle or airtight jar and refrigerate.
Keeps fresh for about 5–7 days.


🥄 How to Use

  • Take 1–2 tablespoons daily as a wellness shot.
  • Or mix into warm (not boiling) water for a soothing tea.

💡 Pro Tip

Drinking this tonic first thing in the morning may help wake up your digestive system and keep you feeling refreshed and hydrated throughout the day.

Million Dollar Ritz Bites

Million Dollar Ritz Bites

Ingredients

  • 1 sleeve Ritz crackers (or any round buttery crackers)

  • 8 oz cream cheese, softened

  • ½ cup mayonnaise

  • 1 cup sharp cheddar cheese, shredded

  • 4 slices bacon, cooked crispy and crumbled

  • 3 green onions, finely chopped (plus extra for garnish)

  • ½ tsp garlic powder

  • ¼ tsp black pepper


Instructions

  1. Prep the Filling: In a medium mixing bowl, combine the softened cream cheese and mayonnaise until completely smooth and creamy.

  2. Mix it Up: Fold in the shredded cheddar cheese, crumbled bacon pieces, chopped green onions, garlic powder, and black pepper. Stir well until all the ingredients are evenly distributed.

  3. Assemble: Lay out half of your Ritz crackers on a clean surface or serving platter. Place a generous spoonful (about one tablespoon) of the creamy cheese mixture onto the center of each cracker.

  4. Top it Off: Gently press a second cracker on top of the filling to create a cute, bite-sized sandwich. Be careful not to press too hard so the cracker doesn’t break!

  5. Garnish and Serve: Top each sandwich with a small piece of green onion for a beautiful pop of color. Serve immediately while the crackers are perfectly crunchy, or cover and chill the filling in the fridge ahead of time!

Quick Tip: If you want a little kick, you can mix in a tablespoon of diced pimientos or a pinch of smoked paprika to the cream cheese mixture!

Classic Stuffed Cabbage Rolls

Tender cabbage leaves stuffed with juicy beef and rice, then simmered in a rich tomato sauce until perfectly cozy and delicious ❤️🍅

🛒 Ingredients

For the Cabbage Rolls

  • 1 large cabbage
  • 1 lb ground beef
  • 1 cup cooked rice
  • 1 small onion, finely chopped
  • 2 cloves garlic, minced
  • 1 egg
  • 1 tsp salt
  • ½ tsp black pepper

For the Sauce

  • 2 cups tomato sauce
  • 1 tbsp tomato paste
  • 1 tsp paprika
  • 1 tbsp olive oil
  • Salt & pepper to taste

👩‍🍳 Step-by-Step Instructions

🔥 Step 1: Prepare the Cabbage

➡️ Bring a large pot of water to a boil.
➡️ Carefully place the whole cabbage into the water for 5–7 minutes.
➡️ Remove softened leaves gently and let cool.

💡 Trim the thick stem part slightly so the leaves roll easily.


🥣 Step 2: Make the Filling

➡️ In a bowl, combine:

  • Ground beef
  • Cooked rice
  • Onion
  • Garlic
  • Egg
  • Salt
  • Black pepper

➡️ Mix until fully combined.


🌯 Step 3: Roll the Cabbage

➡️ Place a cabbage leaf flat on the counter.
➡️ Add 2–3 tablespoons of filling near the center.
➡️ Fold the sides inward and roll tightly like a burrito.

➡️ Repeat with remaining leaves and filling.


🍅 Step 4: Make the Sauce

➡️ In a bowl, mix together:

  • Tomato sauce
  • Tomato paste
  • Olive oil
  • Paprika
  • Salt & pepper

🍲 Step 5: Cook the Rolls

➡️ Spread a little sauce on the bottom of a baking dish or pot.
➡️ Arrange cabbage rolls seam-side down.
➡️ Pour remaining sauce over the top.

➡️ Cover and cook:

  • Oven: 350°F (175°C) for 1½ hours
    OR
  • Stovetop: Simmer on low for 60–75 minutes

😋 Step 6: Serve

➡️ Spoon extra sauce over the rolls.
➡️ Garnish with parsley and serve warm.

Perfect with mashed potatoes or crusty bread 🍞✨


💡 Tips

✅ Freeze the cabbage first for softer leaves.
✅ Add cheese inside for extra richness.
✅ Use pork + beef mix for more flavor.


❓Q/A

❓Can I make these ahead?

➡️ Yes! Assemble them a day before and refrigerate.

❓Can I freeze cabbage rolls?

➡️ Absolutely. Freeze cooked or uncooked for up to 2 months.

❓Can I use another meat?

➡️ Yes! Ground turkey or chicken works great too.