CHIA SEED PUDDING RECIPE

CHIA SEED PUDDING RECIPE

Description

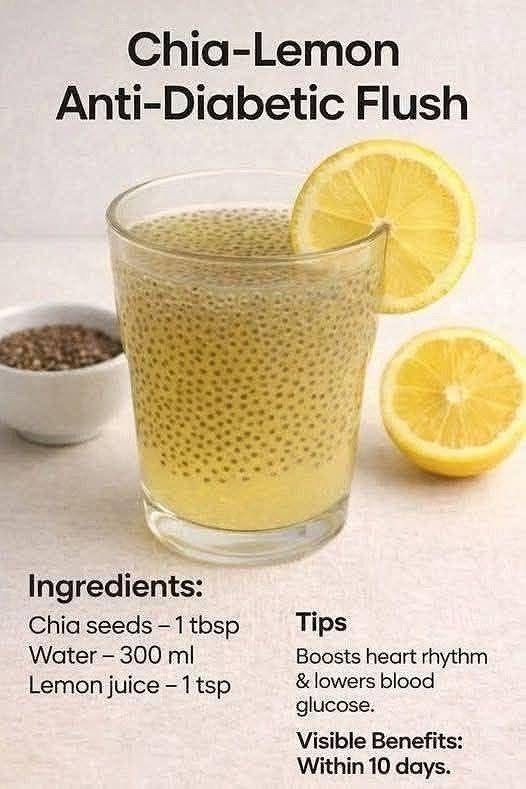
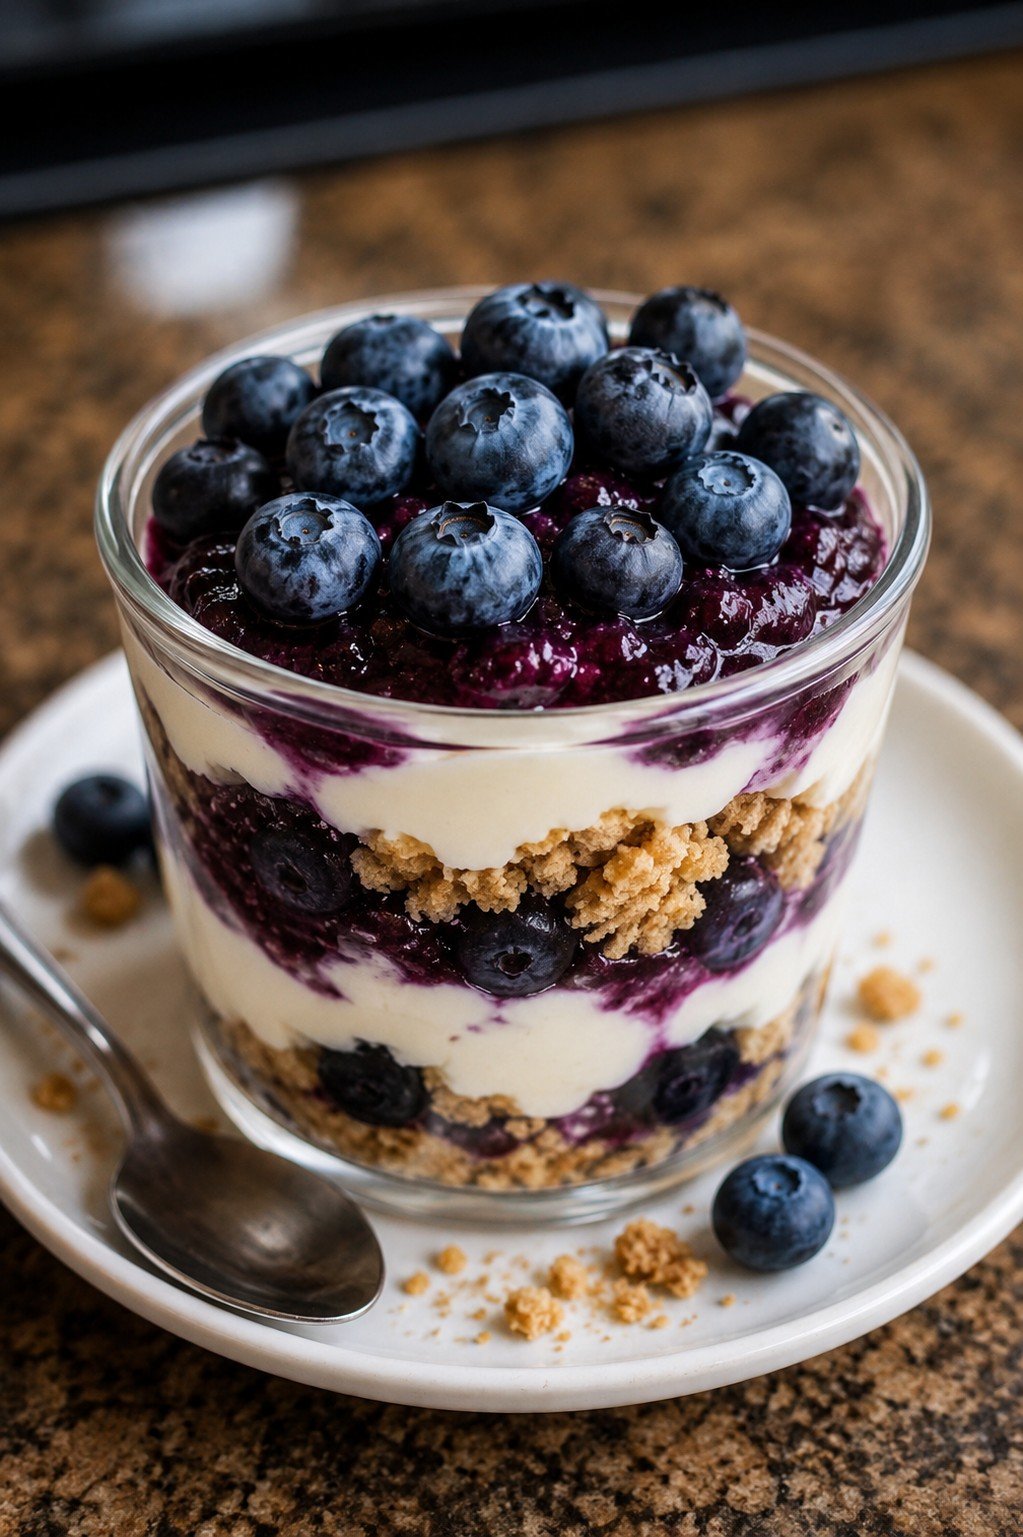
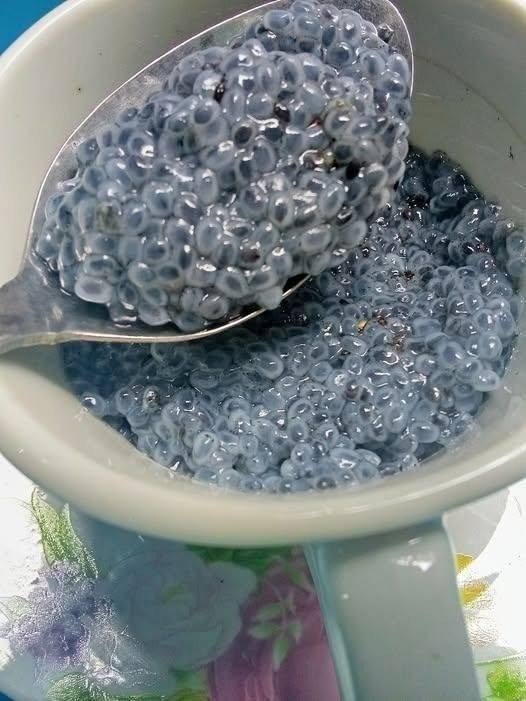
Chia seed pudding is a creamy, nutritious dish made by soaking chia seeds in liquid until they form a gel-like texture. It’s rich in fiber, omega-3 fatty acids, and protein, making it a popular breakfast, snack, or healthy dessert.

Ingredients (Basic Version)

  • 3 tbsp chia seeds

  • 1 cup milk (dairy or plant-based: almond, coconut, oat, soy, etc.)

  • 1–2 tsp sweetener (honey, maple syrup, stevia, or sugar — optional)

  • ½ tsp vanilla extract (optional)

Instructions

  1. Add chia seeds, milk, and sweetener to a jar or bowl.

  2. Stir very well to prevent clumping.

  3. Let sit for 5 minutes, stir again.

  4. Cover and refrigerate for 2 hours minimum (or overnight) until thick.

  5. Stir once more before eating.

  6. Add toppings of your choice (fruit, nuts, yogurt, spices).

 Optional Flavor Ideas


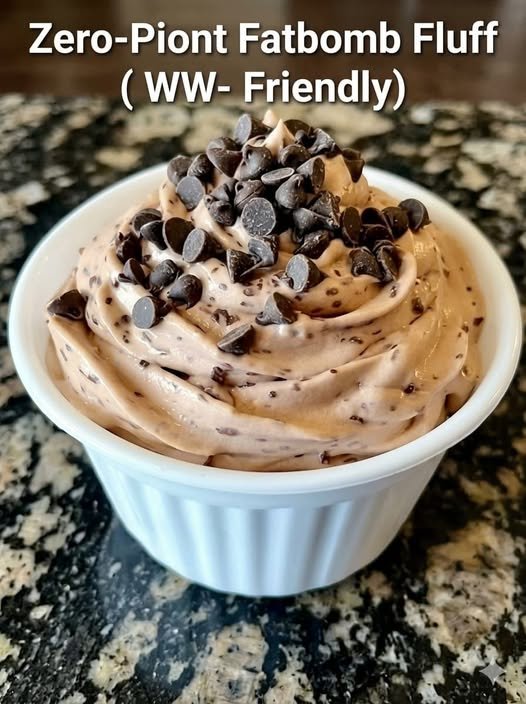
  • Chocolate: Add 1 tbsp cocoa powder

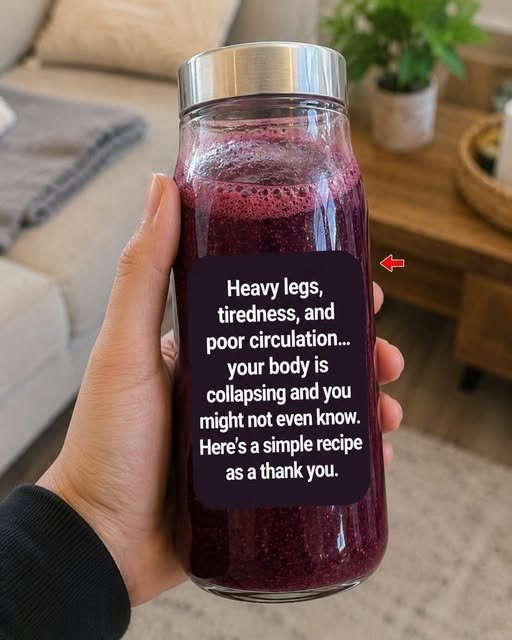
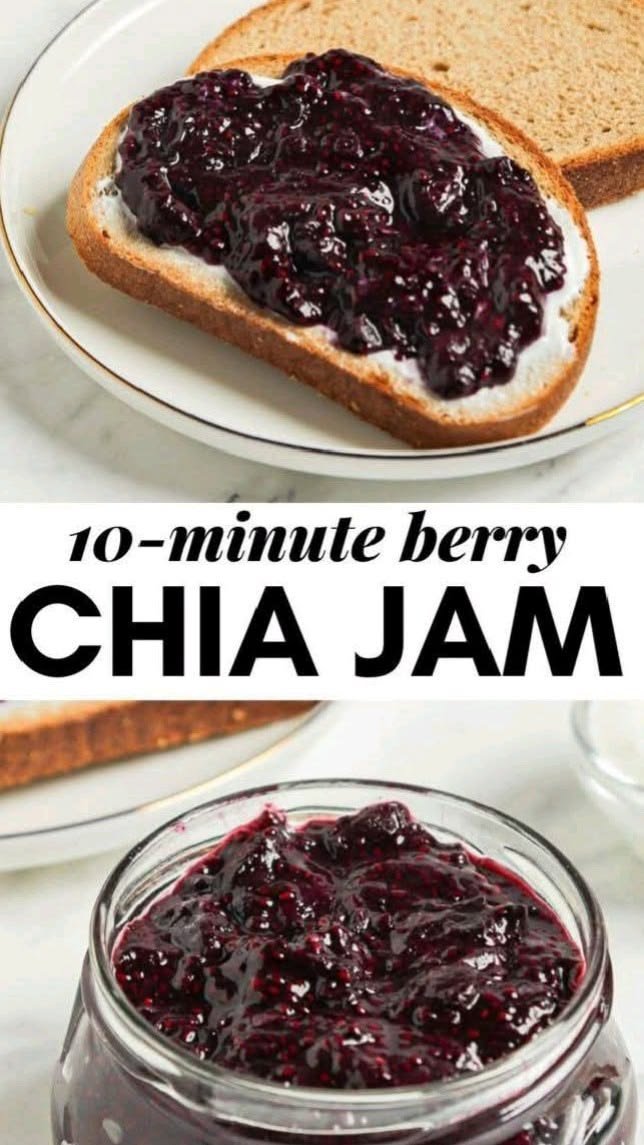
  • Berry: Add blended strawberries or blueberries

  • Tropical: Add mango or pineapple

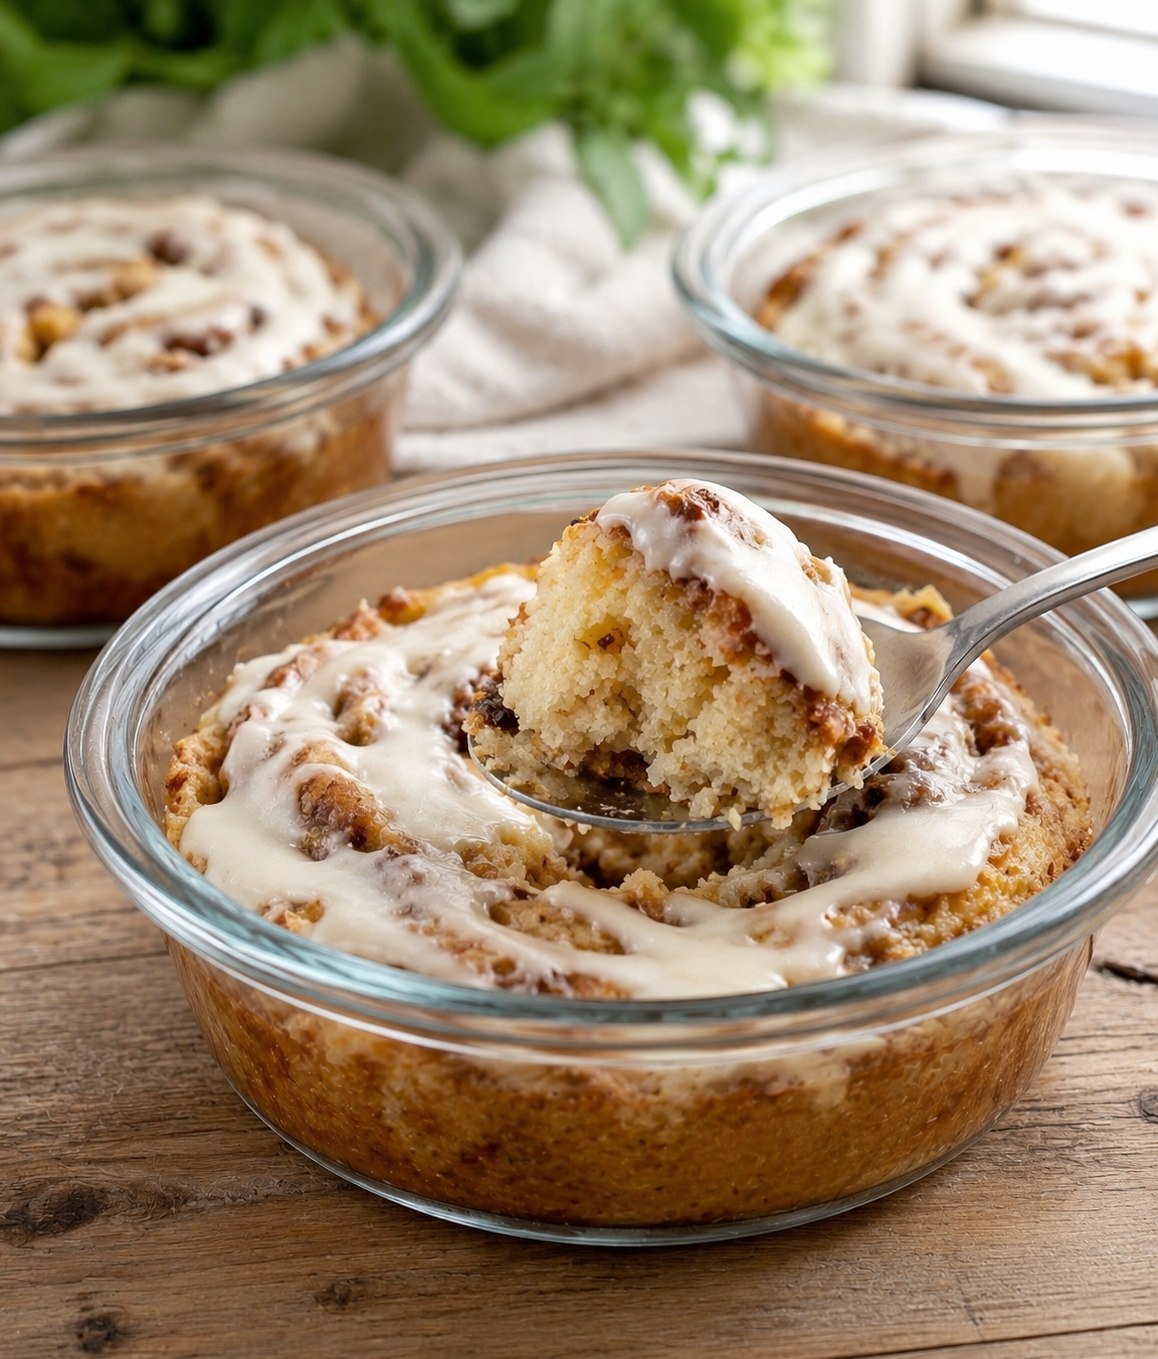
  • Cinnamon Spice: Add ½ tsp cinnamon

Notes

  • If too thick, add a splash of milk.

  • If too thin, add 1–2 teaspoons more chia seeds.

  • Best chilled overnight for maximum creaminess.

  • Use glass jars for perfect grab-and-go snacks.

Tips


  • Stir twice in the first 10 minutes to avoid clumping.

  • For a smoother pudding, blend the mixture before chilling.

  • Coconut milk creates the richest, creamiest texture.

  • Chia seeds absorb up to 10x their weight in liquid — a little goes a long way.

Servings

This recipe makes 1 large serving or 2 small servings.

Nutritional Information (per 1 serving, approximate)


Using almond milk, unsweetened:

  • Calories: ~180

  • Fiber: ~10–12 g

  • Protein: ~4–6 g

  • Carbohydrates: ~12–14 g

  • Fat: ~8–9 g

  • Omega-3 fatty acids: ~5 g

(Values vary depending on milk and sweetener.)

Health Benefits (Evidence-based)

Chia seeds are linked to several nutritional benefits:

✔ High in fiber

Supports digestion and helps keep you full longer.

✔ Contains omega-3s

Plant-based ALA omega-3 supports heart health.


✔ May help with blood sugar control

The fiber may slow glucose absorption.

✔ Helps with satiety

Expands in the stomach and may reduce appetite.

✔ Rich in minerals

Calcium, magnesium, and phosphorus.

Note:
They do not directly “clean arteries” or cure medical conditions. They can support heart and metabolic health when consumed as part of an overall healthy diet.


Q & A

Q: Is one spoonful a day enough?

A tablespoon offers nutrients, but for pudding you typically need 2–3 tbsp. For daily health, 1–2 tbsp is common.

Q: Can I eat this every day?

Yes — chia seeds are generally safe daily in moderate amounts (1–2 tablespoons).

Q: Can chia seeds lower cholesterol?


They may help improve lipid profiles due to fiber and omega-3s, but effects vary per person.

Q: Can this help with weight loss?

Chia pudding can help you feel full longer, which may support weight management.

Q: Can diabetics eat chia pudding?

Yes, especially unsweetened versions — the fiber helps stabilize blood sugar.
(Always follow medical guidance.

Chia–Lemon Drink (Chia Lemon Water)

A refreshing, hydrating drink made with chia seeds, fresh lemon juice, and water. This simple wellness beverage is popular for hydration, digestion support, and a light energy boost. The chia seeds absorb water and form a gel-like texture, while lemon adds brightness and vitamin C.

Description

Chia–Lemon Drink is a cooling drink often enjoyed in the morning or during warm weather. The soaked chia seeds create a satisfying texture and help keep you fuller for longer. It’s naturally vegan, gluten-free, and easy to customize with honey, mint, cucumber, or fruit slices.

Ingredients (1 Serving)

  • 1 tablespoon chia seeds
  • 1 cup cold water
  • 1–2 tablespoons fresh lemon juice
  • 1–2 teaspoons honey or maple syrup (optional)
  • Ice cubes (optional)
  • Lemon slices or mint leaves for garnish

Instructions

  1. Add chia seeds to the water and stir well.
  2. Let the mixture sit for 10–15 minutes until the seeds swell and develop a gel-like coating.
  3. Stir again to prevent clumping.
  4. Add fresh lemon juice and sweetener if using.
  5. Pour into a serving glass with ice.
  6. Garnish with lemon slices or mint leaves and serve chilled.

Recipe Notes

  • Stir the chia seeds twice during soaking to avoid clumps.
  • Fresh lemon juice gives the best flavor.
  • Adjust sweetness based on your preference.
  • For a thinner drink, add more water.

Helpful Tips

  • Refrigerate for 30 minutes for extra refreshment.
  • Add cucumber slices for a spa-style detox drink.
  • Blend lightly if you prefer a smoother texture.
  • Use warm water initially if chia seeds are not expanding properly.

Servings

  • Makes: 1 serving
  • Can easily be doubled or tripled for a larger batch.

Nutritional Information (Approx. Per Serving)

Nutrient Amount
Calories 70–90
Protein 2–3 g
Fiber 5–6 g
Fat 3–4 g
Carbohydrates 7–9 g
Vitamin C 15–20% DV
Omega-3 Fatty Acids Good source

Health Benefits

1. Hydration Support

Lemon water combined with water-absorbing chia seeds may help maintain hydration.

2. Rich in Fiber

Chia seeds contain soluble fiber that can support digestion and fullness.

3. Source of Omega-3s

Chia seeds naturally provide plant-based omega-3 fatty acids.

4. May Support Weight Management

The fiber and gel texture may help reduce hunger between meals.

5. Vitamin C Boost

Lemon juice adds vitamin C and a fresh citrus flavor.

Frequently Asked Questions (Q&A)

Q1: Can I drink chia lemon water daily?

Yes, many people enjoy it daily in moderate amounts. Start with small quantities if you are new to chia seeds.

Q2: How long should chia seeds soak?

Usually 10–15 minutes is enough, though longer soaking creates a thicker texture.

Q3: Can I make it ahead of time?

Yes. Store it in the refrigerator for up to 24 hours and stir before drinking.

Q4: Is it good for weight loss?

It may help with fullness due to fiber, but it works best as part of a balanced diet and active lifestyle.

Q5: Can I use bottled lemon juice?

Fresh lemon juice is preferred for better flavor and freshness, but bottled juice can work in a pinch.

Q6: Can kids drink it?

Yes, in moderate amounts and with properly soaked chia seeds.

Q7: What can I add for extra flavor?

Mint, cucumber, orange slices, berries, or ginger are popular additions.

Chocolate Soft Serve Ice Cream

Ingredients

  • 2 cups heavy whipping cream
  • 1 can (14 oz / 400 g) sweetened condensed milk
  • ¼ cup cocoa powder
  • 1 tsp vanilla extract

Instructions

1. Prepare the Chocolate Base
➡️ In a large bowl, whisk together:

  • Sweetened condensed milk
  • Cocoa powder
  • Vanilla extract

➡️ Mix until smooth and lump-free.

2. Whip the Cream
➡️ In a separate bowl, beat the heavy cream until stiff peaks form.

➡️ Do not overbeat.

3. Combine
➡️ Gently fold the whipped cream into the chocolate mixture.

➡️ Mix until fully combined and fluffy.

4. Freeze
➡️ Transfer the mixture to a freezer-safe container.

➡️ Cover and freeze for 5–6 hours or overnight.

5. Serve
➡️ Let sit at room temperature for 5 minutes before scooping.

➡️ Serve in cups or cones.


Q&A

Can I use dark cocoa powder?
➡️ Yes, it will give a richer chocolate flavor.

Can I add chocolate chips?
➡️ Absolutely! Fold them in before freezing.

How long does it last?
➡️ Store in the freezer for up to 2 weeks.

Nutritional Benefits

✓ Provides calcium from dairy
✓ Rich chocolate flavor
✓ Easy no-churn recipe
✓ Perfect frozen dessert for chocolate lovers

Vitality Beet Juice

Vitality Beet Juice


A simple, concentrated way to enjoy the benefits of beets.

Juice
  • Ingredients:

    • 1 medium beet, peeled and diced

    • 1 glass of water

    • ½ lemon, juiced (optional, for vitamin C and flavor)

  • Instructions:

    1. Place the diced beets and water into a high-speed blender.

    2. Blend until completely smooth.

    3. If you prefer a thinner consistency, strain the mixture through a fine-mesh sieve or nut  milk bag.

      Milk
    4. Stir in the lemon  juice and serve chilled.


2. Energizing Circulation Smoothie

A more filling option that combines fiber with the nitric oxide boost of beets.

  • Ingredients:

    • 1 small beet, peeled and diced

    • 1 crisp apple (like Granny Smith or Gala), cored

    • 1 small knob of fresh ginger (about 1/2 inch), peeled

    • 1 glass of water (or coconut water for extra electrolytes)

  • Instructions:

    1. Add the beet, apple, and ginger to the blender.

    2. Pour in the water.

    3. Blend on high until the ginger and beet are fully pulverized.

    4. Drink immediately, preferably in the morning, to jumpstart your energy.


Quick Tips for Heavy Legs


Discover more
Bread
Food
Dairy & Eggs


In addition to these recipes, the text suggests these lifestyle habits for better circulation:

  • Movement: Walk at least 30 minutes daily.

  • Elevation: Raise your legs above heart level when resting.

  • Hydration: Drink plenty of water and reduce salt intake to minimize fluid retention.

Note: While beets are a wonderful superfood, symptoms like “collapsing circulation” or chronic heavy/tingling legs should always be evaluated by a medical professional to rule out serious conditions.

0-Point Oatmeal Banana Muffins

0-Point Oatmeal Banana Muffins

These soft and hearty oatmeal muffins are naturally sweetened with banana and made with wholesome ingredients. Perfect for breakfast, meal prep, or a healthy snack!

⏱️ Prep Time

10 minutes

⏱️ Bake Time

18–22 minutes

🍽️ Yield

12 muffins


🛒 Ingredients

  • 2 cups rolled oats
  • 2 ripe bananas, mashed 🍌
  • 2 large eggs 🥚
  • 1 cup unsweetened applesauce 🍎
  • 1 tsp vanilla extract
  • 1 tsp baking powder
  • ½ tsp baking soda
  • 1 tsp ground cinnamon
  • Pinch of salt

Optional Add-Ins

  • ¼ cup raisins
  • 1 tbsp chia seeds
  • ½ tsp nutmeg
  • Sugar-free chocolate chips

👩‍🍳 Instructions

1. Preheat Oven

Preheat your oven to 350°F (175°C). Line a 12-cup muffin tin with paper liners or lightly spray with nonstick cooking spray.

2. Blend the Oats

Place the rolled oats in a blender or food processor and pulse until they resemble a coarse flour.

3. Mix the Batter

In a large bowl, combine the oat flour, baking powder, baking soda, cinnamon, and salt.

In another bowl, whisk together the mashed bananas, eggs, applesauce, and vanilla extract.

Pour the wet ingredients into the dry ingredients and stir until just combined.

4. Fill the Muffin Tin

Divide the batter evenly among the muffin cups, filling each about ¾ full.

5. Bake

Bake for 18–22 minutes, or until a toothpick inserted into the center comes out clean.

6. Cool

Allow the muffins to cool in the pan for 5 minutes, then transfer to a wire rack to cool completely.


🌿 Nutritional Benefits

  • 🍌 Bananas provide natural sweetness and potassium.
  • 🌾 Oats are rich in fiber and help keep you full longer.
  • 🍎 Applesauce adds moisture without extra fat.
  • 🥚 Eggs contribute protein and structure.

💡 Tips

  • Store in an airtight container for up to 4 days.
  • Freeze for up to 3 months.
  • Warm in the microwave for 15–20 seconds before serving.
  • Add a sprinkle of cinnamon on top before baking for extra flavor.

❓ Frequently Asked Questions

Q: Can I make these gluten-free?
A: Yes! Use certified gluten-free oats.

Q: Can I use quick oats?
A: Yes, though the texture may be slightly softer.

Q: Can I add protein powder?
A: Absolutely. Add ¼ cup protein powder and a splash of milk if the batter becomes too thick.

High-Protein Cinnamon Roll Pancake Bowl

High-Protein Cinnamon Roll Pancake Bowl

Ingredients 🛒

  • 1 ripe banana
  • 2 eggs
  • ½ cup vanilla protein powder
  • 1 tsp cinnamon
  • 2 tbsp Greek yogurt
  • 1 tbsp cream cheese, softened
  • 1 tsp honey or maple syrup

Detailed Steps 👩‍🍳

1️⃣ Make the Batter

  • Place the banana in a mixing bowl.
  • Mash it completely with a fork until smooth.
  • Add the eggs, protein powder, and cinnamon.
  • Mix until a thick, smooth batter forms.

2️⃣ Cook the Pancake Bowl

  • Lightly grease an oven-safe bowl or small baking dish.
  • Pour the batter into the bowl.
  • Bake at 350°F (175°C) for 20–25 minutes.
  • The center should be set and the top lightly golden.

3️⃣ Prepare the Cinnamon Swirl

  • In a small bowl, mix a pinch of cinnamon with a teaspoon of honey.
  • Once the pancake bowl is baked, drizzle the mixture over the top.

4️⃣ Make the Icing

  • Combine Greek yogurt, cream cheese, and a little honey.
  • Stir until smooth and creamy.
  • The texture should resemble classic cinnamon roll icing.

5️⃣ Add the Topping

  • Spread or drizzle the icing over the warm pancake bowl.
  • Let it melt slightly into the surface.

6️⃣ Serve

  • Enjoy warm with a spoon.
  • Perfect for breakfast, meal prep, or a high-protein dessert.

Nutrition Benefits 💪

High in Protein

  • Protein powder, eggs, and Greek yogurt provide plenty of protein to help keep you full.
  • Great for muscle recovery and sustained energy.

Gluten-Free

  • Naturally gluten-free when using a certified gluten-free protein powder.

Better Than a Traditional Cinnamon Roll

  • Delivers the flavor of a cinnamon roll with significantly more protein and less sugar.

Approximate Protein Content

  • Per Bowl: 30–40g protein

Quick Q/A ❓

Can I make it ahead of time?
➡️ Yes, store in the refrigerator for up to 3 days.

Can I use flavored protein powder?
➡️ Yes, vanilla protein powder works best.

Can I microwave it instead?
➡️ Yes, microwave for 2–3 minutes, checking until the center is set.

No-Bake Chocolate Cream Dessert

Ingredients

Cream Layer

  • 2 cups heavy cream
  • 1 can (14 oz) sweetened condensed milk
  • 8 oz cream cheese, softened
  • 1 tsp vanilla extract

Chocolate Layer

  • 1½ cups semi-sweet chocolate chips
  • ¾ cup heavy cream

Instructions

Step 1

  • In a large bowl, beat the cream cheese until smooth.
  • Add sweetened condensed milk and vanilla.
  • Mix until creamy.

Step 2

  • In another bowl, whip the heavy cream until soft peaks form.

Step 3

  • Gently fold the whipped cream into the cream cheese mixture.

Step 4

  • Spread the mixture evenly into a glass serving dish.
  • Refrigerate for 30 minutes.

Step 5

  • Heat ¾ cup heavy cream until hot but not boiling.
  • Pour over the chocolate chips.
  • Let sit for 2 minutes, then stir until smooth.

Step 6

  • Pour the chocolate mixture over the chilled cream layer.
  • Spread evenly.

Step 7

  • Refrigerate for at least 4 hours or until fully set.

Step 8

  • Slice into squares and serve chilled.

Q & A

Q: Can I make it ahead of time?
A: Yes, it can be prepared a day in advance.

Q: How long does it last?
A: Store covered in the refrigerator for up to 4 days.

Q: Can I add a cookie crust?
A: Yes, a crushed biscuit or graham cracker crust works perfectly.

Creamy Cheeseburger Soup

Creamy Cheeseburger Soup

Ingredients

  • 1 lb ground beef
  • 4 tbsp butter, divided
  • 1 cup onion, diced
  • 1 cup carrots, shredded
  • 1 cup celery, diced
  • 3 cups potatoes, peeled and diced
  • 3 cups chicken broth
  • ¼ cup all-purpose flour
  • 2 cups whole milk
  • 2 cups cheddar cheese, shredded
  • ½ tsp garlic powder
  • 1 tsp salt
  • ½ tsp black pepper
  • ¼ cup sour cream

Instructions

Step 1

  • Cook the ground beef in a large pot until fully cooked.
  • Remove excess liquid if needed and set aside.

Step 2

  • Melt 2 tablespoons butter in the same pot.
  • Add onion, carrots, and celery.
  • Cook for 5 minutes until softened.

Step 3

  • Add potatoes and chicken broth.
  • Bring to a gentle boil.
  • Reduce heat and simmer for 12–15 minutes until potatoes are tender.

Step 4

  • In a separate saucepan, melt the remaining butter.
  • Whisk in flour and cook for 1 minute.
  • Slowly add milk while whisking until smooth.

Step 5

  • Pour the milk mixture into the soup pot.
  • Add cooked beef, garlic powder, salt, and pepper.
  • Stir well.

Step 6

  • Lower the heat.
  • Gradually add shredded cheese and stir until melted.

Step 7

  • Remove from heat.
  • Stir in sour cream.

Step 8

  • Serve warm with extra cheese, green onions, or croutons if desired.

Q & A

Q: Can I make this soup ahead of time?
A: Yes, it can be stored in the refrigerator for up to 4 days.

Q: Can I use ground turkey instead of beef?
A: Yes, ground turkey works well as an alternative.

Q: How can I make the soup thicker?
A: Mash some of the cooked potatoes before serving.

Easy & Healthy Blueberry Lemon Pancakes

Easy & Healthy Blueberry Lemon Pancakes

These blueberry lemon pancakes are light, fluffy, and bursting with fresh flavor. Sweet blueberries and bright lemon zest make every bite taste fresh and sunny, while simple wholesome ingredients keep them healthier than traditional pancakes.

They’re perfect for a weekend breakfast, brunch, or even meal prep for the week.

Prep Time & Servings

Prep Time: 10 minutes

Cook Time: 10 minutes

Total Time: 20 minutes

Servings: 4 (about 8 pancakes)

Ingredients

1 cup whole wheat flour or oat flour

1 teaspoon baking powder

1 tablespoon honey or maple syrup

1 large egg

¾ cup milk of choice

1 teaspoon vanilla extract

Zest of 1 lemon

1 cup fresh or frozen blueberries

Optional Toppings

Greek yogurt

Fresh blueberries

Lemon zest

Maple syrup

Chopped almonds

Chia seeds

Instructions

1. Make the Batter

In a large bowl, whisk together:

flour

baking powder

In a separate bowl, whisk:

egg

milk

honey

vanilla

lemon zest

Pour the wet ingredients into the dry ingredients and stir until just combined.

Gently fold in the blueberries.

2. Cook the Pancakes

Heat a non-stick skillet or griddle over medium heat.

Lightly grease if needed.

Pour about ¼ cup of batter for each pancake.

Cook for 2–3 minutes until bubbles form on the surface.

Flip and cook for another 1–2 minutes until golden.

3. Serve

Stack the pancakes and top with:

extra blueberries

Greek yogurt

a drizzle of maple syrup

extra lemon zest

Helpful Tips

Don’t overmix the batter or the pancakes may become dense.

If using frozen blueberries, add them straight from the freezer.

Let the batter rest for 5 minutes for fluffier pancakes.

Add chia seeds for extra fiber and nutrition.

Nutritional Information

Calories: 240

Protein: 9g

Carbohydrates: 36g

Fiber: 5g

Fat: 7g

Sugar: 9g

Sodium: 180mg

Easy 10 min berries and chia seed jam

Easy 10-Minute Berry Chia Seed Jam

This homemade berry chia jam is fresh, fruity, and incredibly easy to make. It has all the flavor of classic jam but without tons of sugar or complicated canning. The chia seeds naturally thicken the berries into a soft spreadable jam in just minutes.

Perfect for toast, yogurt bowls, oatmeal, pancakes, or healthy desserts.

Prep Time & Servings

Prep Time: 5 minutes

Cook Time: 5 minutes

Total Time: 10 minutes

Servings: About 1 jar

Ingredients

2 cups mixed berries (fresh or frozen)

2 tablespoons chia seeds

1–2 tablespoons honey or maple syrup

1 tablespoon lemon juice

1 teaspoon vanilla extract (optional)

Instructions

1. Cook the Berries

Add the berries to a small saucepan over medium heat.

Cook for about 5 minutes, stirring occasionally, until the berries soften and release their juices.

Use a spoon or fork to mash them slightly.

2. Add the Chia Seeds

Stir in:

chia seeds

honey or maple syrup

lemon juice

vanilla if using

Mix well.

3. Let It Thicken

Remove from heat and let the jam sit for about 5–10 minutes.

The chia seeds will absorb the liquid and naturally thicken the jam.

4. Serve or Store

Serve warm or chilled.

Store in a sealed jar in the refrigerator for up to 1 week.

Helpful Tips

Frozen berries work just as well as fresh

Add more sweetener if your berries are tart

The jam thickens more as it cools

Blend it if you want a smoother texture

Ways to Use It

This jam tastes amazing on:

toast

oatmeal

yogurt bowls

pancakes

waffles

chia pudding

ice cream

Nutritional Information

Calories: 45

Protein: 1g

Carbohydrates: 8g

Fiber: 3g

Fat: 1g

Sugar: 5g

Sodium: 2mg

Air Fryer Grilled Cheese Sandwiches

Air Fryer Grilled Cheese Sandwiches

🛒 Ingredients

  • 8 slices bread 🍞
  • 4 slices cheddar or mozzarella cheese 🧀
  • 2 tbsp butter

👩‍🍳 Step-by-Step Recipe

🧈 Step 1: Butter the Bread

➡️ Spread butter on one side of each bread slice.
➡️ This helps make the sandwiches crispy and golden ✨


🧀 Step 2: Add Cheese

➡️ Place cheese slices between two pieces of bread.
➡️ Keep buttered sides facing outward.


🔥 Step 3: Prepare Air Fryer

➡️ Line air fryer basket with parchment paper.
➡️ Place sandwiches in a single layer.


🍞 Step 4: Air Fry

➡️ Cook at 370°F (188°C) for 4–5 minutes.
➡️ Flip sandwiches carefully.
➡️ Cook another 3–4 minutes until golden brown and melty 🤤


🌟 Serving Tips

✅ Serve hot with tomato soup 🍅
✅ Add ham or cooked chicken for extra flavor
✅ Use thick bread for extra crunch


❓Q/A

❓Can I use different cheese?

✅ Yes! Cheddar, mozzarella, provolone, or Swiss work great.

❓Why use parchment paper?

✅ It helps prevent cheese from sticking and makes cleanup easier.

Easy & Healthy 5-Ingredient Ice Cream

Easy & Healthy 5-Ingredient Ice Cream

This Easy & Healthy 5-Ingredient Ice Cream is creamy, naturally sweet, refreshing, and incredibly simple to make. Made with frozen fruit, yogurt, and natural ingredients, it tastes like soft-serve ice cream without heavy cream or refined sugar.

Prep Time & Servings

Prep Time: 10 minutes

Freeze Time: Optional 1 hour

Total Time: 10–70 minutes

Servings: 4

Ingredients

2 frozen bananas

1 cup frozen berries

½ cup Greek yogurt

1 tablespoon honey or maple syrup

1 teaspoon vanilla extract

Optional Toppings

Fresh berries

Dark chocolate chips

Crushed nuts

Coconut flakes

Chia seeds

Granola

How to Make Healthy 5-Ingredient Ice Cream

Step 1: Blend the Ingredients

Add to a blender or food processor:

frozen bananas

frozen berries

Greek yogurt

honey

vanilla

Blend until:

smooth

thick

creamy

Scrape down the sides as needed.

Step 2: Adjust Texture

If too thick:

add a small splash of milk

If too soft:

freeze for 30–60 minutes

Step 3: Serve

Serve immediately for soft-serve texture.

Or freeze slightly for scoopable ice cream.

Add your favorite toppings.

Helpful Tips

Use Frozen Bananas

They create the creamy ice cream texture naturally.

Blend Slowly

This prevents overheating the mixture.

Freeze for Firmer Texture

Short freezing gives classic ice cream consistency.

Use Ripe Bananas

Riper bananas make the dessert naturally sweeter.

Frequently asked questions 

Can I make this dairy-free?

Yes, use dairy-free yogurt.

How long does it last?

About 2 weeks frozen.

Can I use fresh fruit?

Frozen fruit works best for creamy texture.

Do I need an ice cream maker?

No.

Is it refined sugar-free?

Yes, if using only fruit or maple syrup.

Nutritional Information

Calories: 160

Protein: 5g

Carbohydrates: 30g

Fiber: 4g

Fat: 2g

Saturated Fat: 1g

Sugar: 20g

Sodium: 35mg

Purple Cabbage Juice 💜🥤

Purple Cabbage Juice 💜🥤

A vibrant homemade drink packed with refreshing flavor and beautiful natural color!

🛒 Ingredients

  • 1 medium purple cabbage, chopped
  • 6 cups water
  • 1 cup sugar or honey
  • 2 tbsp lemon juice
  • 1 tsp vanilla extract
  • Small piece ginger, sliced
  • Ice cubes

👩‍🍳 Step-by-Step Recipe

🥬 Step 1: Prepare the Cabbage

➡️ Wash the purple cabbage thoroughly.
➡️ Chop into small pieces for easier cooking.


💜 Step 2: Boil the Cabbage

➡️ Add cabbage and water to a large pot.
➡️ Bring to a boil over medium heat.
➡️ Cook for 20–25 minutes until the water turns deep purple.


🌀 Step 3: Blend the Mixture

➡️ Allow the cabbage mixture to cool slightly.
➡️ Blend the cabbage with some cooking liquid until smooth.


🥤 Step 4: Strain the Juice

➡️ Pour through a fine sieve or cheesecloth.
➡️ Collect the smooth purple juice in a bowl or pot.


🍋 Step 5: Add Flavor

➡️ Stir in sugar or honey, lemon juice, vanilla extract, and ginger.
➡️ Mix well until fully dissolved.


❄️ Step 6: Chill & Serve

➡️ Pour into clean bottles or jars.
➡️ Refrigerate until cold.
➡️ Serve over ice cubes and enjoy!


🌟 Tips

✅ Lemon juice makes the purple color brighter.
✅ Use honey for a more natural sweetness.
✅ Add sparkling water for a fizzy version.
✅ Serve extra cold for the best flavor.


💪 Benefits

✔️ Rich in antioxidants
✔️ High in vitamin C
✔️ Helps support hydration
✔️ Naturally colorful without artificial dyes
✔️ May support digestion


🥗 Nutrition (Per Serving)

  • Calories: ~70
  • Carbs: 18g
  • Protein: 1g
  • Fat: 0g
  • Fiber: 2g

❓Q/A

❓Why is the juice purple?

➡️ Purple cabbage contains natural pigments called anthocyanins.

❓Can I use less sugar?

➡️ Yes! Adjust sweetness to your taste.

❓How long does it last?

➡️ Store refrigerated for up to 4 days.


✨ Conclusion

This Purple Cabbage Juice is colorful, refreshing, and easy to make. Perfect for parties, family gatherings, or a unique homemade drink everyone will talk about!

Zero Point Fatbomb Fluff

Zero Point Fatbomb Fluff 🍫✨

Ingredients 🍴

  • 1 cup Greek yogurt
  • 2 tbsp cocoa powder
  • 2 tbsp sugar-free sweetener or honey
  • 2 tbsp mini chocolate chips

Detailed Procedure 👩‍🍳

Step 1: Prepare the Mixing Bowl 🥣

➡️ Take a medium bowl and make sure it is clean and dry.
➡️ Cold bowls help the fluff stay thick and creamy.


Step 2: Add the Yogurt 🍦

➡️ Spoon the Greek yogurt into the bowl.
➡️ Stir it slowly for a few seconds to make it smooth.


Step 3: Mix the Chocolate Flavor 🍫

➡️ Add cocoa powder to the yogurt.
➡️ Add the sweetener or honey.
➡️ Mix very well using a whisk or spoon until the color becomes fully chocolatey with no dry powder left.


Step 4: Make It Fluffy ✨

➡️ Whisk the mixture for about 2–3 minutes.
➡️ The more you whisk, the lighter and fluffier it becomes.
➡️ Scrape the sides of the bowl while mixing so everything blends evenly.


Step 5: Add Chocolate Chips 🍪

➡️ Fold in half of the chocolate chips gently.
➡️ Do not overmix or the fluff may lose some airiness.


Step 6: Chill the Fluff ❄️

➡️ Place the bowl in the fridge for 15–20 minutes.
➡️ Chilling helps the texture become thicker and creamier.


Step 7: Serve & Decorate 🍴

➡️ Spoon the fluff into a serving bowl or ramekin.
➡️ Sprinkle the remaining chocolate chips on top.
➡️ Serve cold and enjoy the creamy chocolate texture.


Quick Q&A ❓

Can I freeze it?

✅ Yes, freeze for 1–2 hours for an ice-cream-like texture.

Can I use regular yogurt?

✅ Yes, but Greek yogurt makes it thicker and creamier.

How long does it last?

✅ Store in the fridge for up to 2 days.

Baked Blueberry Cottage Cheese Breakfast Bowls

Baked Blueberry Cottage Cheese Breakfast Bowls 🫐🥣

These creamy blueberry breakfast bowls are soft, lightly sweet, and packed with juicy blueberries in every bite. Perfect for cozy mornings, meal prep, or a healthy dessert!

Ingredients 🥄

  • 1 cup cottage cheese
  • 2 eggs
  • 2 tbsp honey or maple syrup
  • 1 tsp vanilla extract
  • 1 cup blueberries
  • ½ cup oats or granola

Step-by-Step Instructions 👩‍🍳

🫐 Step 1: Prepare the Blueberries

  • Wash the blueberries gently under cool water.
  • Pat them dry with a paper towel.

👉 Keep a few extra blueberries for topping later.


🥣 Step 2: Make the Creamy Mixture

  • In a mixing bowl, add:
    • cottage cheese
    • eggs
    • honey
    • vanilla
  • Whisk everything together until creamy and smooth.

✨ The mixture should look thick and creamy.


🌾 Step 3: Add the Oats

  • Stir the oats or granola into the mixture.
  • Mix gently so everything combines evenly.

👉 This gives the bowls a soft baked texture.


🍇 Step 4: Fold in Blueberries

  • Add most of the blueberries into the bowl.
  • Carefully fold them into the batter so they don’t burst too much.

🧈 Step 5: Prepare Baking Dish

  • Lightly grease small ramekins or one baking dish.
  • Pour the mixture evenly into the dishes.
  • Sprinkle extra blueberries on top.

🔥 Step 6: Bake

  • Bake at 175°C (350°F) for about 25–30 minutes.

✅ The top should look lightly golden and the center should be set.


❄️ Step 7: Cool & Serve

  • Let the bowls cool for 5 minutes.
  • Add extra granola or honey on top if desired.

✨ Serve warm for the best cozy flavor.


Quick Q&A ❓

Can I use frozen blueberries?

Yes 👍 No need to thaw them first.

Is this good for meal prep?

Absolutely 😊 Store in the fridge for up to 3 days.

Can I make it sweeter?

Yes 🍯 Add a little extra honey or maple syrup.

Easy Lemon Cake 🍋🍰

Easy Lemon Cake 🍋🍰

Soft, fluffy, and full of fresh lemon flavor, this easy lemon cake is perfect for tea time, breakfast, or dessert. Even beginners can make it perfectly on the first try!

Ingredients 🥄

  • 4 eggs
  • 1 cup sugar
  • Juice & zest of 1 lemon
  • 1 cup vegetable oil
  • 4/5 cup milk
  • 4 tsp baking powder
  • 2½ cups all-purpose flour

Step-by-Step Instructions 👩‍🍳

🥚 Step 1: Beat the Eggs & Sugar

  • Crack the eggs into a large mixing bowl.
  • Add the sugar.
  • Beat with a whisk or mixer for 3–4 minutes until light, pale, and slightly fluffy.

👉 This helps make the cake soft and airy.


🍋 Step 2: Add Lemon Flavor

  • Grate the lemon zest carefully.
  • Squeeze the lemon juice.
  • Add both to the egg mixture.

✨ The zest gives the cake a strong fresh lemon aroma.


🥛 Step 3: Add Wet Ingredients

  • Pour in the vegetable oil and milk.
  • Mix slowly until smooth and fully combined.

👉 Do not overmix.


🌾 Step 4: Add Dry Ingredients

  • In another bowl, combine:
    • flour
    • baking powder
  • Gradually add the dry ingredients into the wet mixture.
  • Stir gently until the batter becomes smooth with no dry flour left.

✨ The batter should be thick but pourable.


🧈 Step 5: Prepare the Pan

  • Grease a loaf pan with oil or butter.
  • Lightly dust with flour to prevent sticking.

🔥 Step 6: Bake the Cake

  • Pour the batter into the prepared pan.
  • Bake at 170°C (340°F) for about 40–45 minutes.

✅ The cake is ready when:

  • the top is golden
  • a toothpick inserted in the center comes out clean

❄️ Step 7: Cool & Serve

  • Let the cake cool for 10 minutes before removing from the pan.
  • Slice and enjoy with tea or coffee ☕🍋

Quick Q&A ❓

Can I use butter instead of oil?

Yes 👍 Melted butter works well too.

How do I make it extra lemony?

Add a little extra lemon zest on top after baking.

Can beginners make this?

Absolutely 😊 This is one of the easiest homemade cakes.

Lemon & Ginger Wellness Tonic

Lemon & Ginger Wellness Tonic

A refreshing homemade wellness tonic packed with lemon, ginger, turmeric, and apple cider vinegar to help support digestion, hydration, and natural energy. Perfect as a morning wellness shot or soothing warm drink.

🛒 Ingredients

  • 2 large Lemons (washed well) 🍋
  • 3-inch piece Fresh ginger root (peeled & sliced) 🌿
  • 1 tsp Ground turmeric (or 1-inch fresh turmeric root) ✨
  • 1 tbsp Apple cider vinegar (with “the mother”)
  • 1 pinch Black pepper
  • 1 cup Filtered water 💧
  • Optional: 1 tsp Raw honey or natural sweetener 🍯

👩‍🍳 Step-by-Step Instructions

1️⃣ Prepare the Ingredients

Slice the lemons into thin rounds.
Peel and grate the ginger (and turmeric if using fresh) to release maximum flavor and nutrients.

2️⃣ Blend or Steep

🥤 Method A — Smoothie Style

Add lemons, ginger, turmeric, black pepper, and water to a blender. Blend until smooth.

☕ Method B — Infusion Style

Simmer ginger and turmeric in water for about 10 minutes.
Remove from heat, cool slightly, then stir in fresh lemon juice and apple cider vinegar.


3️⃣ Strain (Optional)

For a smoother tonic, strain the mixture through a fine-mesh strainer or cheesecloth into a clean jar or bottle. Press the solids well to extract all the liquid.


4️⃣ Store

Pour into a glass bottle or airtight jar and refrigerate.
Keeps fresh for about 5–7 days.


🥄 How to Use

  • Take 1–2 tablespoons daily as a wellness shot.
  • Or mix into warm (not boiling) water for a soothing tea.

💡 Pro Tip

Drinking this tonic first thing in the morning may help wake up your digestive system and keep you feeling refreshed and hydrated throughout the day.

Crispy Cheesy Potato Muffins

Crispy Cheesy Potato Muffins

These crispy potato muffins are cheesy on the outside, soft inside, and perfect as a snack or side dish 😍 Served with a creamy dip for extra flavor!


🛒 Ingredients

  • 3 cups potatoes, grated 🥔
  • 1 cup mozzarella or cheddar cheese 🧀
  • 1 egg
  • 2 tbsp flour
  • 2 green onions, chopped
  • Salt & black pepper
  • Oil or butter for greasing

👩‍🍳 Instructions

🥔 1. Prepare the Potatoes

Peel and grate the potatoes using a grater.

Place the grated potatoes in a clean towel and squeeze out as much water as possible.

➡️ Removing extra water helps the muffins become crispy.


🥣 2. Make the Mixture

In a large bowl, add:

  • Grated potatoes
  • Cheese
  • Egg
  • Flour
  • Green onions
  • Salt & pepper

Mix everything well until fully combined.

➡️ The mixture should hold together when pressed with a spoon.


🧁 3. Fill the Muffin Tray

Grease a muffin tray lightly with oil or butter.

Scoop the potato mixture into each muffin cup and press gently.

➡️ Fill each cup almost to the top.


🔥 4. Bake

Preheat oven to 200°C (400°F).

Bake for 30–35 minutes until the tops become golden brown and crispy.

➡️ The edges should look crispy and cheesy.


✨ 5. Serve

Let them cool for 5 minutes before removing from the tray.

Serve warm with sour cream, garlic sauce, or ketchup 😋


💡 Tips

✅ Squeeze potatoes well for extra crispiness.
✅ Add chili flakes for spicy flavor 🌶️
✅ Use parmesan cheese for a richer taste.


❓ Q/A

❓Can I make these without flour?

➡️ Yes! You can use cornstarch instead.

❓Can I fry them instead of baking?

➡️ Yes, shape into patties and fry until golden.

❓How do I store leftovers?

➡️ Keep in the fridge for up to 2 days and reheat in the oven.

Creamy Mandarin Orange Dessert Salad

🍊 Creamy Mandarin Orange Dessert Salad

This creamy mandarin orange dessert salad is light, fluffy, sweet, and refreshing 😍 Perfect for parties, holidays, or a quick no-bake dessert.


🛒 Ingredients

  • 2 cups whipped topping
  • 1 can mandarin oranges, drained 🍊
  • 1 cup mini marshmallows
  • ½ cup sour cream or vanilla yogurt
  • ½ cup crushed pineapple, drained (optional)

👩‍🍳 Instructions

🍊 1. Prepare the Fruit

Drain the mandarin oranges very well.

➡️ Too much juice can make the salad watery.

If using pineapple, drain it completely too.


🥣 2. Make the Creamy Mixture

In a large bowl, add:

  • Whipped topping
  • Sour cream or yogurt

Mix gently until smooth and creamy.

➡️ This creates the fluffy dessert base.


🍬 3. Add the Ingredients

Add mandarin oranges and mini marshmallows into the bowl.

If using pineapple, add it now.

➡️ Fold everything gently so the oranges stay whole.


❄️ 4. Chill the Salad

Cover the bowl and place it in the refrigerator for at least 1 hour.

➡️ Chilling helps the flavors blend together and makes the salad extra creamy.


✨ 5. Serve

Serve cold and top with extra mandarin oranges for decoration 😋

Perfect for summer gatherings and family dinners.


💡 Tips

✅ Use cold ingredients for the best texture.
✅ Add shredded coconut for extra flavor.
✅ Do not overmix or the oranges may break apart.


❓ Q/A

❓Can I make this ahead of time?

➡️ Yes! It tastes even better after chilling for a few hours.

❓Can I use fresh oranges?

➡️ Yes, but canned mandarins are softer and sweeter.

❓How long does it stay fresh?

➡️ Store in the fridge for up to 2 days.

Crispy Veggie Potato Patties Recipe

Crispy Veggie Potato Patties Recipe

These golden veggie patties are crispy outside, soft inside, and perfect for breakfast or snacks 😍

🛒 Ingredients

  • 🥔 3 medium potatoes (boiled & mashed)
  • 🥕 1 carrot (grated)
  • 🥬 1 zucchini or cabbage (grated)
  • 🟢 ½ cup green beans or capsicum (finely chopped)
  • 🥚 2 eggs
  • 🧂 Salt to taste
  • 🌶️ Black pepper or chili flakes
  • 🌿 2 tbsp chopped coriander or parsley
  • 🍞 3–4 tbsp breadcrumbs or flour
  • 🛢️ Oil for frying

👩‍🍳 Step-by-Step Recipe

1️⃣ Prepare the Vegetables

  • Grate carrot and zucchini/cabbage.
  • Finely chop green beans or capsicum.
  • Squeeze extra water from grated veggies. 💧

2️⃣ Make the Mixture

  • In a large bowl add:
    • mashed potatoes
    • grated carrot
    • grated zucchini/cabbage
    • chopped green veggies
    • eggs
    • salt & pepper
    • coriander
    • breadcrumbs
  • Mix everything until combined. 🥣

3️⃣ Shape the Patties

  • Take small portions of mixture.
  • Shape into oval or cylinder patties with your hands. ✋

4️⃣ Cook the Patties

  • Heat a little oil in a pan. 🔥
  • Place patties gently in the pan.
  • Cook 3–4 minutes per side until golden brown and crispy.

5️⃣ Serve

  • Serve hot with:
    • 🍅 ketchup
    • 🌶️ chili sauce
    • 🥛 garlic yogurt dip

💡 Tips

  • Chill mixture for 15 minutes if too soft.
  • Add extra breadcrumbs if mixture feels wet.
  • Use nonstick pan for best texture.

❓Q/A

❓Can I bake these instead of frying?

✅ Yes, bake at 200°C (400°F) for about 25 minutes, flipping halfway.

❓Can I freeze them?

✅ Yes, freeze uncooked patties for up to 1 month.

❓What other veggies can I use?

✅ Corn, spinach, peas, or bell peppers work great.

Berry Circulation Smoothie

Berry Circulation Smoothie

🛒 Ingredients

  • 1 cup Blueberries (fresh or frozen)

  • 1 Medium beetroot (peeled and chopped)

  • 1 Ripe banana

  • 1 cup Water or coconut water 🥥

  • 1 tbsp Honey (or maple syrup)

  • 1 tsp Chia seeds

  • Handful Ice cubes 🧊


👩‍🍳 Step-by-Step Recipe

  1. Prep the Produce ➡️ Wash the blueberries and beetroot thoroughly under cold water.

  2. Chop for Success ➡️ Peel the beetroot and dice it into small, uniform cubes. ⚠️ Tip: Small pieces ensure a perfectly smooth texture without “crunchy” surprises!

  3. Load the Blender ➡️ Place the blueberries, beetroot, banana, honey, chia seeds, and ice into your blender canister.

  4. Add Liquid ➡️ Pour in your water or coconut water. 💧

  5. The Big Blend ➡️ Start on a low speed and transition to high. Blend for 1–2 minutes until the color is a deep, vibrant magenta and the texture is silky.

  6. Consistency Check ➡️ If the smoothie is too thick to sip, add an extra splash of liquid and pulse for 10 seconds.

  7. Serve & Sip ➡️ Pour into a chilled glass. 🥂 Serve immediately to enjoy the peak flavor and texture!


❓ Q&A: Tips & Substitutions

Q: Can I make it without banana? A: Yes! ➡️ If you want to skip the banana, try adding 1/2 cup of Greek yogurt or 1/4 of an avocado to maintain that signature creamy texture. 🥑

Q: Can I store it for later? A: It’s best enjoyed fresh, but you can keep it in an airtight jar in the fridge for up to 24 hours. ➡️ Give it a quick shake before drinking as the chia seeds may thicken the mixture over time.

Q: What does beetroot do in the smoothie? A: Beetroot provides that incredible “vibe” and earthy depth. ➡️ It is often used in “circulation” smoothies because it contains natural nitrates that support blood flow!

Q: My blender is struggling with the raw beet. What should I do? A: You can lightly steam the beetroot chunks first and let them cool, or use a splash more liquid to help the blades catch the ingredients. 🌪️

Tapioca Pudding

A classic creamy dessert made with small tapioca pearls, milk, sugar, and vanilla. It has a smooth, custard-like texture with soft, chewy pearls that make it comforting and satisfying.

Description

Tapioca pudding is a rich and creamy dessert popular in many cultures around the world. The tiny tapioca pearls become translucent and tender when cooked, creating a silky pudding with a pleasant chewy texture. It can be served warm or chilled and is often flavored with vanilla, cinnamon, or coconut milk.

Ingredients (Serves 4–6)

  • ½ cup small tapioca pearls
  • 2½ cups whole milk
  • ½ cup heavy cream (optional for extra richness)
  • ⅓–½ cup sugar (adjust to taste)
  • 1 large egg
  • 1 teaspoon vanilla extract
  • Pinch of salt
  • Optional garnish:
    • Cinnamon
    • Nutmeg
    • Fresh fruit
    • Toasted coconut

Instructions


Step 1: Soak the Tapioca

  • Place tapioca pearls in a bowl with water.
  • Soak for 30 minutes if using quick-cooking pearls.
  • Drain before cooking.

Step 2: Heat the Milk

  • In a medium saucepan, combine:
    • Milk
    • Cream
    • Sugar
    • Salt
  • Heat over medium-low until warm but not boiling.

Step 3: Cook the Tapioca

  • Stir in tapioca pearls.
  • Simmer gently for 15–20 minutes.
  • Stir frequently to prevent sticking.
  • Pearls should become mostly translucent.

Step 4: Temper the Egg


  • Beat the egg in a small bowl.
  • Slowly add 2–3 tablespoons of hot pudding mixture into the egg while whisking.
  • Pour the tempered egg back into the saucepan.

Step 5: Finish the Pudding

  • Cook another 2–3 minutes until thickened.
  • Remove from heat.
  • Stir in vanilla extract.

Step 6: Serve

  • Serve warm for a comforting dessert.
  • Or chill for 2 hours for a thicker pudding.

Recipe Notes

  • The pudding thickens more as it cools.
  • Stir often to keep pearls evenly distributed.
  • If pudding becomes too thick, add a splash of milk before serving.
  • Small pearl tapioca works best for this classic texture.

Tips for Best Results

For Creamier Texture

Use whole milk and heavy cream together.

Avoid lumps.


Temper the egg slowly to prevent scrambling.

Extra Flavor Ideas

Add:

  • Coconut milk
  • Cardamom
  • Cinnamon stick
  • Lemon zest

Storage

  • Refrigerate up to 4 days.
  • Stir before serving.

Servings

  • Makes: 4–6 servings
  • Prep Time: 10 minutes
  • Cook Time: 25 minutes
  • Chill Time (optional): 2 hours

Nutritional Information (Approx. Per Serving)

Nutrient Amount
Calories 220–280
Carbohydrates 35g
Protein 5g
Fat 8g
Sugar 20g
Fiber 1g

Values vary depending on ingredients used.


Benefits

Energy Boost

Tapioca provides quick carbohydrates for energy.

Gluten-Free

Naturally gluten-free when prepared with gluten-free ingredients.

Easy to Digest

Gentle on the stomach and commonly used in light desserts.

Comfort Food

Warm tapioca pudding is soothing and satisfying.

Common Q&A


Q: Can I make it dairy-free?

Yes. Use:

  • Coconut milk
  • Almond milk
  • Oat milk

Q: Why are my pearls still hard?

They need more simmering time or soaking beforehand.

Q: Can I make it vegan?

Yes. Skip the egg and use plant milk with cornstarch for thickening.

Q: Is tapioca the same as boba?

Not exactly. Tapioca pearls for pudding are usually much smaller than boba pearls used in bubble tea.

Q: Can I freeze tapioca pudding?

Not recommended. Freezing changes the texture of the pearls.

Q: How do I make it thicker?

Cook slightly longer or chill before serving.

Carrot Cinnamon Muffins

🥕 Carrot Cinnamon Muffins

✨ Soft, moist, and perfectly spiced muffins packed with fresh carrots!

🛒 Ingredients

  • 1 ½ cups (190g) all-purpose flour
  • 1 tsp baking powder
  • 1 tsp baking soda
  • 1 ½ tsp ground cinnamon
  • ¼ tsp nutmeg (optional)
  • ½ tsp salt
  • 1 ½ cups grated carrots 🥕
  • ½ cup brown sugar
  • ⅓ cup oil or melted butter 🧈
  • 2 eggs 🥚
  • 1 tsp vanilla extract
  • ½ cup milk 🥛

👩‍🍳 Step-by-Step Recipe

➡️ Step 1: Preheat the Oven

🔥 Preheat oven to 350°F (175°C).
🧁 Line a muffin tray with paper liners or lightly grease it.


➡️ Step 2: Mix the Dry Ingredients

🥣 In a large bowl, combine:

  • Flour
  • Baking powder
  • Baking soda
  • Cinnamon
  • Nutmeg
  • Salt

✨ Whisk well so the spices spread evenly.


➡️ Step 3: Prepare the Wet Ingredients

🥄 In another bowl:

  • Add brown sugar and oil
  • Mix until smooth

🥚 Add eggs one at a time and whisk well.
🍦 Stir in vanilla extract and milk.


➡️ Step 4: Add the Carrots

🥕 Fold the grated carrots into the wet mixture.

✨ This keeps the muffins moist and flavorful!


➡️ Step 5: Combine Wet & Dry Mixtures

➡️ Pour the wet ingredients into the dry ingredients.
🥄 Gently fold together until just combined.

⚠️ Avoid overmixing so the muffins stay soft.


➡️ Step 6: Fill the Muffin Tray

🧁 Spoon batter into muffin cups until about ¾ full.

✨ Optional: Sprinkle a little cinnamon sugar on top.


➡️ Step 7: Bake

🔥 Bake for 18–22 minutes until:
✔️ Muffins are golden on top
✔️ A toothpick inserted in the center comes out clean


➡️ Step 8: Cool & Enjoy

🌬️ Let muffins cool for 5 minutes in the tray.
➡️ Transfer to a rack to cool completely.

☕ Enjoy warm with tea or coffee!


❓Q/A

❓Can I add walnuts or raisins?

✅ Yes! They add extra texture and flavor.

❓Can I make these muffins healthier?

🥕 You can use whole wheat flour and reduce the sugar slightly.

❓How should I store them?

📦 Keep in an airtight container for up to 3 days.

Diabetes-Friendly “Miracle Vitamin” Smoothie

Diabetes-Friendly “Miracle Vitamin” Smoothie

A nutrient-rich breakfast smoothie that supports steady energy and healthy blood sugar habits — but no vitamin or food can cure diabetes.

Important Note

There is currently no vitamin proven to cure Diabetes. Some nutrients may help support overall health and blood sugar management alongside medical care, exercise, sleep, and a balanced diet. Always follow guidance from your healthcare provider.

Recipe Overview

Description

This creamy berry-green smoothie is packed with fiber, healthy fats, antioxidants, and protein to help support fullness and balanced blood sugar levels. It’s naturally sweetened with berries and contains ingredients rich in vitamins C, D, magnesium, and omega-3 fats.

Ingredients (2 Servings)

  • 1 cup unsweetened almond milk
  • ½ cup plain Greek yogurt
  • 1 cup spinach
  • ½ cup frozen blueberries
  • ½ avocado
  • 1 tablespoon chia seeds
  • 1 tablespoon ground flaxseed
  • ½ teaspoon cinnamon
  • ½ teaspoon vanilla extract
  • Ice cubes (optional)

Instructions

  1. Add almond milk to a blender first.
  2. Add spinach, blueberries, avocado, yogurt, chia seeds, flaxseed, cinnamon, and vanilla.
  3. Blend until smooth and creamy.
  4. Add ice if desired and blend again.
  5. Serve immediately.

Prep & Cook Time

  • Prep Time: 5 minutes
  • Total Time: 5 minutes

Servings

2 servings

Nutritional Information (Per Serving Approx.)

Nutrient Amount
Calories 220
Protein 11g
Carbohydrates 14g
Fiber 8g
Sugar 6g
Fat 14g
Omega-3 2g

Health Benefits

Spinach

Rich in vitamins A, C, and magnesium which support overall wellness.

Blueberries

Contain antioxidants and fiber that may help support healthy glucose control.

Chia & Flaxseeds

Provide omega-3 fats and fiber for fullness and heart health.

Greek Yogurt

Adds protein to help slow digestion and stabilize energy.

Cinnamon

May help improve flavor without added sugar.

Tips

  • Use unsweetened ingredients to keep sugar lower.
  • Add a scoop of protein powder for extra protein.
  • Avoid fruit juice or added sweeteners.
  • Freeze avocado chunks ahead for a thicker texture.
  • Monitor your own blood sugar response since foods affect people differently.

Storage

  • Best enjoyed fresh.
  • Can be refrigerated up to 24 hours in a sealed jar.

Recipe Notes

  • For dairy-free: use coconut yogurt instead of Greek yogurt.
  • For extra greens: add kale or cucumber.
  • For a lighter version: reduce avocado to ¼.

Frequently Asked Questions

Q: Can this smoothie cure diabetes?

No. No smoothie, vitamin, or supplement can cure diabetes. Healthy eating helps support blood sugar management but does not replace medical treatment.

Q: Is this good for Type 2 diabetes?

It can fit into many balanced eating plans because it is high in fiber and relatively low in added sugars.

Q: Can I drink it daily?

Yes, if it fits your nutritional needs and blood sugar goals.

Q: Can I use other fruits?

Yes. Strawberries and raspberries are lower-sugar options.

Q: Is it keto-friendly?

Mostly yes, though blueberries contribute some carbs.

Peanut Butter Protein Truffles

Peanut Butter Protein Truffles

Ingredients

For the Filling:

  • 1 cup creamy natural peanut butter (look for “peanuts and salt” only)

  • 1/4 cup coconut flour (helps provide structure without traditional flour)

  • 1/4 cup granulated monk fruit or erythritol

  • 1 tsp vanilla extract

  • A pinch of sea salt (if the peanut butter is unsalted)

For the Chocolate Coating:

  • 1 cup sugar-free dark chocolate chips

  • 1 tbsp coconut oil (helps the chocolate melt smoothly and stay shiny)


Instructions

1. Mix the Center

  1. In a medium bowl, combine the peanut butter, coconut flour, sweetener, and vanilla.

  2. Stir until the mixture forms a thick, dough-like consistency. If it feels too soft, add one more tablespoon of coconut flour.

2. Roll the Truffles

  1. Scoop about one tablespoon of the mixture at a time and roll it between your palms to create smooth balls.

  2. Place the balls on a tray lined with parchment paper.

  3. Freeze for 15–20 minutes to firm them up; this makes the dipping process much cleaner.

3. Melt the Chocolate

  1. In a microwave-safe bowl, combine the sugar-free chocolate chips and coconut oil.

  2. Microwave in 30-second intervals, stirring in between, until the chocolate is completely smooth.

4. Dip and Set

  1. Remove the truffles from the freezer.

  2. Using a fork or a toothpick, dip each ball into the melted chocolate, allowing the excess to drip off.

  3. Place them back on the parchment paper.

  4. Optional: Sprinkle a tiny pinch of sea salt on top before the chocolate sets.

  5. Refrigerate for at least 30 minutes until the shells are hard.