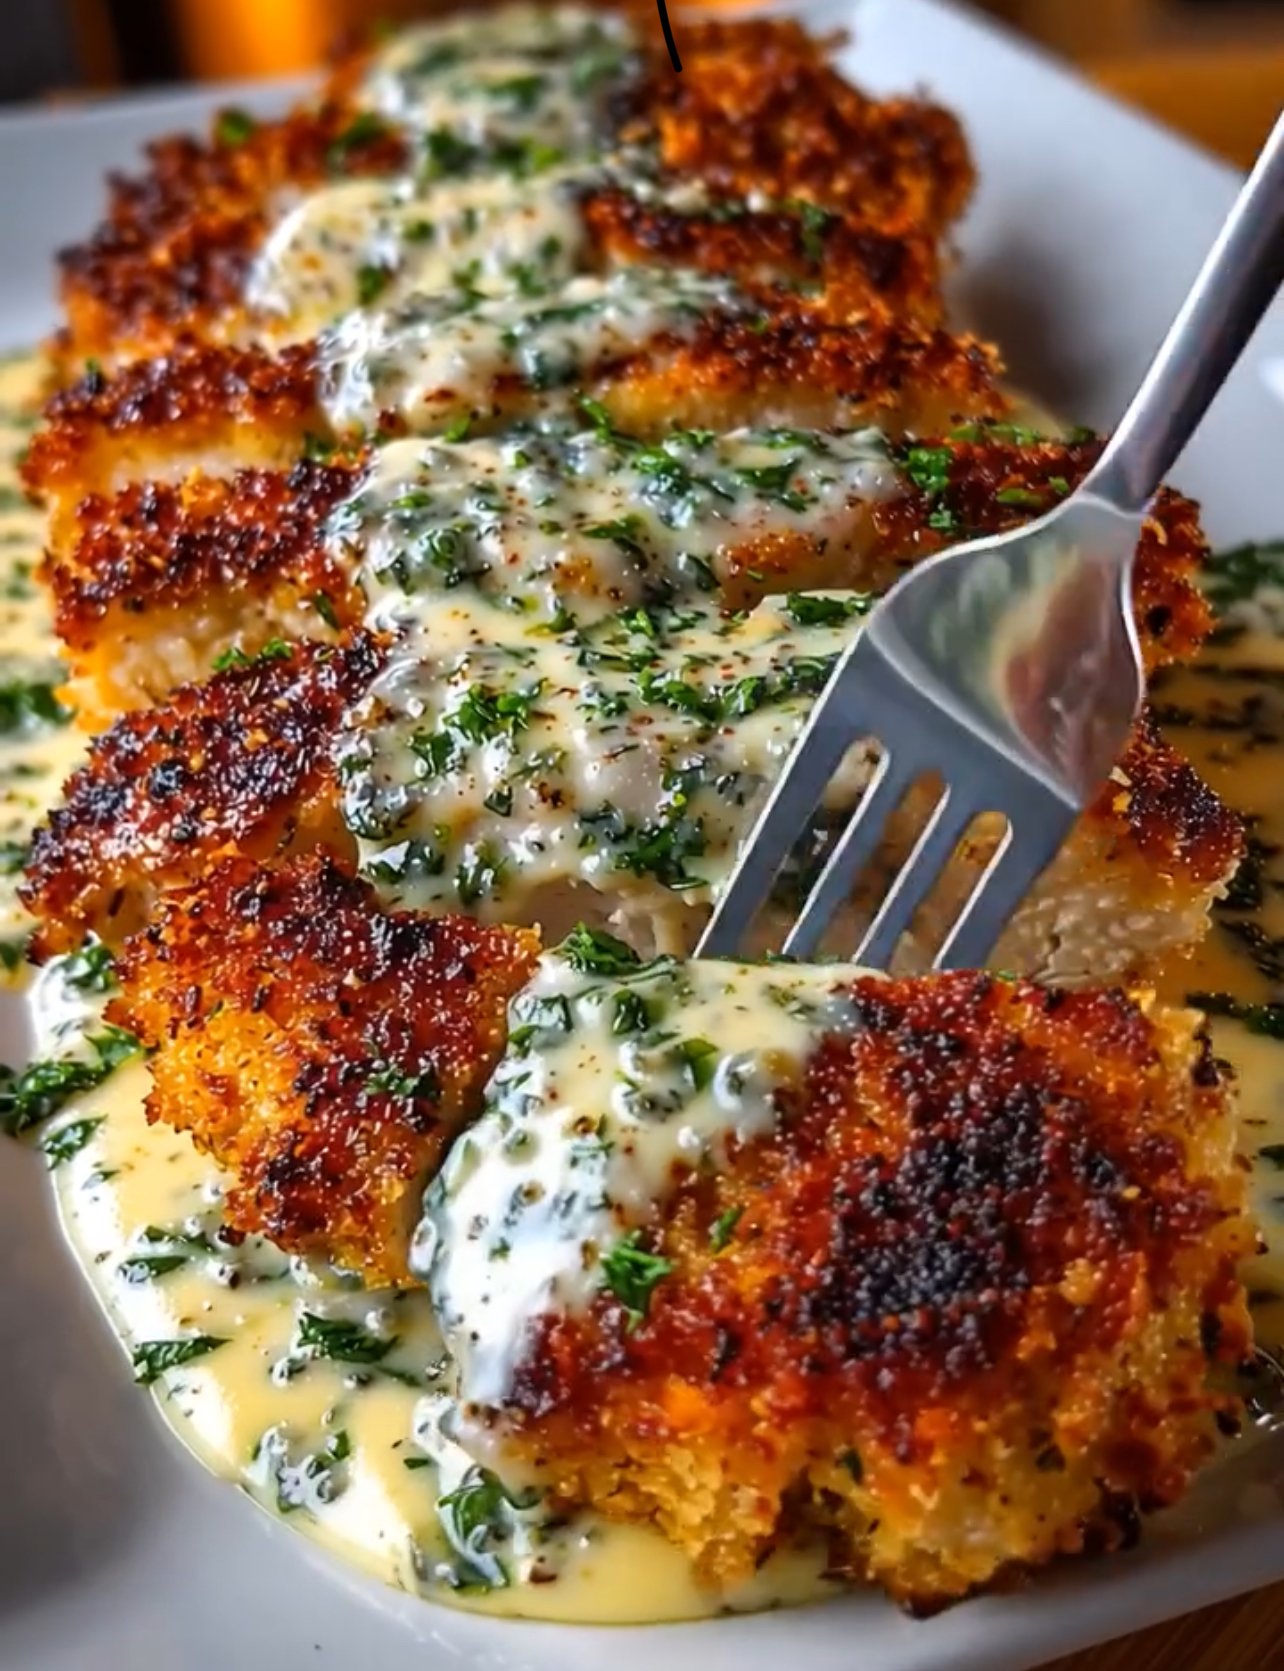
HealthyDiet RecipeWorld
Honey Lime Chicken and Avocado Rice Stack
Servings: 4 stacks
Prep time: 20 mins | Cook time: 15 mins
The Ingredients
For the Chicken:
-
1 lb Chicken breast, diced into small cubes
-
2 tbsp Honey
-
Juice of 2 Limes (reserve some zest)
-
2 cloves Garlic, minced
-
1 tbsp Olive oil
-
Salt and cracked black pepper to taste
-
1/2 tsp Smoked paprika
For the Rice & Avocado:
-
2 cups Cooked Jasmine or Basmati rice (warm)
-
1/4 cup Fresh cilantro, chopped
-
2 Large ripe avocados, diced
-
1/2 Red onion, finely diced
-
1 tbsp Lime juice (to keep the avocado green)
Instructions
-
Marinate & Sear: In a bowl, whisk honey, lime juice, garlic, paprika, salt, and pepper. Toss the chicken in the mixture. Heat olive oil in a large skillet over medium-high heat. Add chicken and cook for 8–10 minutes until caramelized and cooked through.
-
Prep the Base: While the chicken cooks, toss your warm cooked rice with cilantro and a pinch of salt. In a separate small bowl, gently fold the diced avocado with red onion and a squeeze of lime juice.
-
The Assembly: Use a measuring cup (1-cup size) or a professional food mold.
-
Lightly grease the inside of the cup.
-
Pack 1/4 of the avocado mixture into the bottom.
-
Top with 1/4 of the cilantro rice, pressing down firmly with a spoon.
-
Invert the cup onto a plate and tap gently until it slides out.
-
-
The Topping: Spoon the warm honey-lime chicken generously over the top of the stack. Garnish with extra lime zest and cilantro.
Tips for Success
-
The “Pack” is Key: Don’t be afraid to press the rice down firmly. If it’s too loose, the stack will crumble like a sandcastle.
-
Sticky Rice: Using slightly sticky rice (like Jasmine) works better for structural integrity than long-grain converted rice.
-
Cold vs. Warm: This dish is best served “California style”—warm chicken over room-temperature avocado and rice.
Benefits
-
Healthy Fats: Avocado provides monounsaturated fats which are great for heart health and keeping you full.
-
High Protein: Lean chicken breast makes this a muscle-building powerhouse.
-
Gluten-Free: Naturally wheat-free (just double-check your spices/honey sources).
Nutritional Info (Per Stack)
| Calories | Protein | Fat | Carbs | Fiber |
| 480 kcal | 32g | 18g | 46g | 7g |
Q&A
Q: Can I make this ahead of time?
A: You can prep the chicken and rice, but don’t dice the avocado or assemble the stack until you’re ready to eat. Avocado browns quickly once exposed to air.
Q: I don’t have a food mold. What can I use?
A: A standard 1-cup dry measuring cup or even a small empty tuna can (with both ends removed and cleaned) works perfectly!
Q: Is it spicy?
A: Not at all. It’s sweet and tangy. If you want heat, add a teaspoon of sriracha or red pepper flakes to the chicken marinade.
Watermelon Ginger Juice (1–2 servings)
Roasted Cabbage Steaks
-
Prep time: 10 minutes
-
Cook time: 25–30 minutes
-
Servings: 4 (about 2 steaks per person)
Ingredients
-
1 medium head of green cabbage (firm and heavy)
-
3 tbsp extra virgin olive oil
-
3 cloves garlic, minced (or 1 tsp garlic powder)
-
1 tsp kosher salt
-
½ tsp black pepper
-
½ tsp smoked paprika (optional, for color and depth)
-
Garnish: Red pepper flakes, fresh parsley, or a squeeze of lemon juice.
Instructions
-
Preheat & Prep: Preheat your oven to 400°F (200°C). Line a large baking sheet with parchment paper or silicone mats to prevent sticking.
-
Slice the “Steaks”: Remove any wilted outer leaves from the cabbage. Slice off the bottom stem end. Cut the cabbage into ¾-inch thick rounds. Try to keep the core intact for each slice; this holds the “steak” together.
-
Season: Place the slices on the baking sheet. In a small bowl, whisk the olive oil, garlic, salt, pepper, and paprika. Brush both sides of each cabbage slice generously with the oil mixture.
-
Roast: Roast for 25–30 minutes. At the 15-minute mark, carefully flip them with a wide spatula (though some prefer not to flip to keep the structure perfectly intact—it’s up to you!).
-
Finish: Cook until the edges are dark brown and crispy, and the center is fork-tender. Serve immediately while hot.
Chef’s Notes & Tips
-
Don’t skip the fat: Cabbage is lean. To get those crispy edges, you need a healthy coating of oil.
-
Crowding is the enemy: If the steaks are too close together, they will steam rather than roast. Give them at least an inch of “personal space” on the tray.
-
The Core is Key: Do not cut the core out before roasting. It softens beautifully in the oven and is the only thing keeping your “steak” from becoming a pile of loose leaves.
Nutritional Info (Per Serving)
-
Calories: 135 kcal
-
Fat: 10g
-
Carbohydrates: 10g (Net Carbs: 6g)
-
Fiber: 4g
-
Protein: 2g
Health Benefits
-
Vitamin C Powerhouse: One serving provides a significant chunk of your daily Vitamin C, which is great for immune support and skin health.
-
Anti-Inflammatory: Cabbage contains sulforaphane and anthocyanins, which help reduce chronic inflammation.
-
Gut Health: High in insoluble fiber, it keeps your digestive system moving and feeds the “good” bacteria in your gut.
Q&A
Q: Can I use Red Cabbage?A: Absolutely. Red cabbage is denser and may take 5 minutes longer to roast, but it looks stunning and offers even more antioxidants.
Q: How do I store leftovers?A: Store in an airtight container for up to 3 days. Reheat in a skillet or air fryer to regain that crispiness; the microwave will make them soggy.
Q: What should I serve this with?A: These pair beautifully with roasted chicken, grilled salmon, or even topped with a fried egg and hot sauce for a light lunch.
Blueberry Streusel Muffins
-
Prep time: 15 minutes
-
Cook time: 20-25 minutes
-
Servings: 12 Large Muffins
The Ingredients
For the Streusel Topping:
-
1/2 cup all-purpose flour
-
1/2 cup granulated sugar
-
1/4 cup unsalted butter, melted
-
1 tsp ground cinnamon
For the Muffin Batter:
-
1 1/2 cups all-purpose flour
-
3/4 cup granulated sugar
-
1/2 tsp salt
-
2 tsp baking powder
-
1/3 cup vegetable oil
-
1 large egg
-
1/3 cup whole milk
-
1 cup fresh blueberries (frozen works too, just don’t thaw them!)
-
1 tsp vanilla extract
Instructions
-
Prep the Oven: Preheat your oven to 200°C (400°F). Line a 12-cup muffin tin with paper liners.
-
Make the Crunch: In a small bowl, mix the streusel ingredients with a fork until it looks like coarse crumbs. Set aside.
-
Mix Dry & Wet: In a large bowl, whisk together the flour, sugar, baking powder, and salt. In a separate measuring jug, whisk the oil, egg, milk, and vanilla.
-
Combine: Pour the wet ingredients into the dry. Fold gently with a spatula. Stop as soon as the flour streaks disappear—lumps are your friend here!
-
Fold in Berries: Gently toss your blueberries in a teaspoon of flour (this stops them sinking) and fold them into the batter.
-
Bake: Fill muffin cups to the brim. Pile that streusel on top generously. Bake for 20–25 minutes or until a toothpick comes out clean.
Nutritional Info (Per Muffin)
| Calorie/Macro | Amount |
| Calories | 240 kcal |
| Total Fat | 9g |
| Carbohydrates | 36g |
| Protein | 3g |
| Sugar | 18g |
Pro Tips for Success
-
The “No-Overmix” Rule: Overmixing develops gluten, which leads to tough, rubbery muffins. Mix until “just combined.”
-
High Heat Start: Starting at 200°C creates a rapid steam burst that lifts the muffin tops into those beautiful domes.
-
Fresh vs. Frozen: If using frozen berries, do not thaw them. If you do, they’ll bleed juice and turn your entire muffin grey-purple.
Benefits of this Recipe
-
Antioxidant Boost: Blueberries are packed with anthocyanins, which support heart health and brain function.
-
Texture Contrast: You get the soft, fluffy interior paired with a biscuit-like crunch on top.
-
Versatility: You can swap the blueberries for raspberries or blackberries using the exact same ratios.
Q&A
Q: Can I use Greek yogurt instead of milk?
A: Absolutely. It will make the muffins even more moist and slightly tangier. Use a 1:1 swap.
Q: My muffins didn’t rise, what happened?
A: Check your baking powder! If it’s older than 6 months, it might be expired. Also, ensure your oven was fully preheated before the tin went in.
Q: How do I store these?
A: Keep them in an airtight container at room temperature for 2 days. For longer storage, they freeze beautifully for up to 3 months.
Oatmeal and Cocoa Dessert
Oatmeal and cocoa dessert is a delightful treat that strikes the perfect balance between sweet and wholesome. With rich cocoa notes and the comforting texture of oats, this dessert is not only satisfying but also packs a nutritional punch. It’s an excellent choice for those who want something chocolatey but without all the guilt. Plus, the added bananas and walnuts give it a lovely fruity and nutty dimension, making this dessert feel indulgent while still being good for you.
Recipe Overview
- Prep time: 15 minutes
- Cook time: 40-45 minutes
- Total time: 55-60 minutes
- Servings: 4
- Estimated calories: Approximately 220 calories per serving
Ingredients
- 150g oat flakes
- 125ml milk
- 2 bananas
- 1 egg
- 1 tablespoon baking powder
- 1.5 tablespoons cocoa
- 50g walnuts
- 1 tablespoon honey
Instructions
- Preheat the oven to 180°C (350°F).
- In a mixing bowl, combine oat flakes, milk, egg, baking powder, cocoa, and honey.
- Mash one banana and slice the other into thin rounds.
- Add the mashed banana and the sliced banana to the mixture.
- Chop the walnuts into small pieces and fold them into the mixture.
- Pour the complete mixture into a baking dish.
- Bake it in the preheated oven for 40-45 minutes or until it’s set and golden.
- Allow it to cool slightly before serving.
Why This Recipe Works
This recipe is appealing because it pairs the heartiness of oats with cocoa’s rich flavor. The bananas add natural sweetness, while the walnuts contribute a satisfying crunch. It’s simple to make and uses readily available ingredients, making it an easy go-to dessert for any occasion.
Serving Ideas
This dessert is perfect on its own for a cozy evening snack or served warm with a dollop of yogurt or whipped cream. For an extra treat, add a scoop of vanilla ice cream on top for a delightful contrast in temperatures.
Helpful Tips
- If you prefer a sweeter dessert, feel free to adjust the amount of honey to your taste.
- Make sure to let the dessert cool a bit before cutting; this will help it hold its shape better.
- Store leftovers in an airtight container in the fridge for up to three days.
- To reheat, pop a piece in the microwave for a few seconds or warm it up in the oven.
- Experiment with nuts or seeds of your choice to change up the texture!
FAQ
Can I use rolled oats instead of oat flakes?
Yes, rolled oats work well too. Just ensure they’re adjusted for the same weight.
Is there a substitute for the banana?
You could use applesauce as a substitute for added moisture and sweetness.
Can I make this dessert vegan?
You can substitute the egg with a flaxseed meal mixture or another egg replacement and use plant-based milk.
How can I make this gluten-free?
Simply make sure to use certified gluten-free oats to keep this recipe gluten-free.
Enjoy making this oatmeal and cocoa dessert! It’s a heartwarming treat that’s sure to please both family and guests alike. Give it a try; you might just find it becoming a new favorite in your home!
Crispy Parmesan Crusted Chicken with Creamy Garlic Sauce
🛒 Ingredients (Serves 4)
For the Chicken:
• 2 large chicken breasts (cut in half lengthwise to make 4 fillets)
• 1 teaspoon salt
• ½ teaspoon black pepper
• ½ teaspoon paprika
• 1 cup all-purpose flour
• 2 eggs (beaten)
• 1 cup breadcrumbs (panko for extra crispiness)
• ½ cup grated Parmesan cheese
• ½ teaspoon garlic powder
• Oil for frying (about ½ cup)
⸻
For the Creamy Garlic Herb Sauce:
• 3 tablespoons butter
• 4 cloves garlic (minced)
• 1 cup fresh cream (or heavy cream)
• ¼ cup grated Parmesan cheese
• ½ teaspoon black pepper
• ¼ teaspoon salt
• 1 tablespoon chopped fresh parsley
• 1 teaspoon Italian seasoning (optional)
⸻
👩🍳 Step-by-Step Instructions
Step 1: Prepare the Chicken
1. Slice chicken breasts into thinner fillets.
2. Cover with plastic wrap and gently pound to even thickness.
3. Season both sides with salt, pepper, and paprika.
⸻
Step 2: Prepare Coating Stations
Set up 3 bowls:
1️⃣ Bowl 1: Flour
2️⃣ Bowl 2: Beaten eggs
3️⃣ Bowl 3: Breadcrumbs + Parmesan + garlic powder (mix well)
⸻
Step 3: Coat the Chicken
• Dip chicken in flour (shake off excess).
• Dip into egg mixture.
• Press into breadcrumb mixture firmly to coat well.
⸻
Step 4: Fry Until Golden
1. Heat oil in a pan over medium heat.
2. Fry chicken for about 4–5 minutes per side.
3. Cook until deep golden brown and fully cooked inside.
4. Remove and place on paper towel.
✨ Tip: Do not overcrowd the pan.
⸻
Step 5: Make the Creamy Garlic Sauce
1. In another pan, melt butter.
2. Add minced garlic and sauté 30 seconds.
3. Pour in cream and stir.
4. Add Parmesan, salt, and pepper.
5. Let simmer 3–4 minutes until slightly thick.
6. Add parsley and Italian seasoning.
⸻
Step 6: Assemble
• Place crispy chicken on a plate.
• Spoon creamy garlic sauce generously over the top.
• Sprinkle extra parsley.
• Serve hot.
⸻
🍽️ Serve With:
• Mashed potatoes
• Steamed vegetables
• Pasta
• Garlic rice
Lemon Garlic Butter Baked Fish
🐟 Lemon Garlic Butter Baked Fish
🛒 Ingredients (Serves 4)
- 4 white fish fillets (cod, tilapia, halibut, or basa)
- 3 tablespoons butter (melted)
- 2 tablespoons olive oil
- 4 cloves garlic (minced)
- Juice of 1 lemon
- 1 lemon (sliced into rounds)
- ½ teaspoon salt (or to taste)
- ½ teaspoon black pepper
- ½ teaspoon red chili flakes (optional)
- 1 teaspoon dried oregano or thyme (or fresh thyme sprigs)
- 1 tablespoon fresh parsley (chopped, for garnish)
👩🍳 Step-by-Step Instructions
Step 1: Prepare the Fish
- Wash the fish fillets and pat them completely dry with paper towel.
- Season both sides with salt and black pepper.
Step 2: Make the Lemon Garlic Butter Sauce
- In a small bowl, mix:
- Melted butter
- Olive oil
- Minced garlic
- Lemon juice
- Chili flakes
- Oregano or thyme
- Stir well to combine.
Step 3: Arrange for Baking
- Preheat your oven to 180°C (350°F).
- Lightly grease a baking dish.
- Place the seasoned fish fillets in the dish.
- Pour the lemon garlic butter mixture evenly over the fish.
- Place lemon slices on top of each fillet.
- Add a few fresh thyme sprigs (optional but recommended).
Step 4: Bake
- Bake uncovered for 15–20 minutes.
- Fish is done when:
- It flakes easily with a fork
- It turns opaque white
- Internal temperature reaches about 63°C (145°F)
(Do not overcook or it will become dry.)
Step 5: Optional Broil (For Golden Top)
- For a slightly golden surface like in the picture, broil for 2–3 minutes at the end.
Step 6: Garnish & Serve
- Spoon some of the buttery sauce from the dish over the fish.
- Sprinkle fresh parsley.
- Serve hot with:
- Steamed rice
- Mashed potatoes
- Roasted vegetables
- Garlic bread
🌟 Extra Tips for Juicy Fish
- Do not overbake.
- Use fresh lemon juice (not bottled).
- Let fish rest for 2–3 minutes before serving.
- You can add a splash of white cream for a richer sauce.
Rustic Mediterranean Bread and SpicyFeta Board
Ingredients
For the Spicy Whipped Feta
- 8 oz feta cheese, crumbled
- ½ cup plain Greek yogurt
- 2 tablespoons olive oil
- 1–2 tablespoons hot honey
- 1 teaspoon crushed red pepper flakes
- 1 small garlic clove, minced
- 1 tablespoon fresh lemon juice
- 1 teaspoon lemon zest
For the Bread
- 1 large rustic artisan loaf (sourdough or country bread)
- 2 tablespoons olive oil (for brushing)
- ½ teaspoon dried oregano
- Pinch of sea salt
For the Board Additions
- 1 cup mixed olives (Kalamata and green)
- ½ cup roasted red peppers, sliced
- 1 cup cherry tomatoes
- ½ cucumber, sliced
- ¼ red onion, thinly sliced
- Fresh parsley or basil for garnish
- Extra hot honey for drizzling
Directions
STEP 1 :Prepare the Spicy Whipped Feta
In a food processor, combine feta cheese, Greek yogurt, olive oil, hot honey, crushed red pepper flakes, minced garlic, lemon juice, and lemon zest.
Blend until smooth and creamy.
Taste and adjust spice or honey as desired.
Transfer to a serving bowl and drizzle lightly with olive oil and extra hot honey.
Step 2: Prepare the Bread
Preheat oven to 375°F (190°C).
Slice the rustic loaf into thick slices.
Brush lightly with olive oil and sprinkle with dried oregano and sea salt.
Toast in the oven for 8–10 minutes until lightly crisp on the edges but still soft inside.
Step 3: Assemble the Board
Place the bowl of spicy whipped feta in the center of a large serving board.
Arrange toasted bread slices around the feta.
Fill remaining space with olives, roasted red peppers, cherry tomatoes, cucumber slices, and red onion.
Garnish with fresh parsley or basil.
Finish with a drizzle of hot honey over the feta just before serving.
Serve immediately while the bread is warm for the best texture and flavor.
Nutritional Information (Per Serving – Approximate)
Calories: 520 kcal
Protein: 16 g
Carbohydrates: 45 g
Fat: 30 g
Saturated Fat: 11 g
Fiber: 4 g
Sugar: 8 g
Sodium: 900 mg
Spicy Crispy Hot Honey Lemon Feta Chicken with Parmesan Herb Crust
Ingredients
For the Chicken
- 4 boneless, skinless chicken breasts
- 1 teaspoon salt
- 1 teaspoon black pepper
- 1 teaspoon smoked paprika
- 1 teaspoon garlic powder
- ½ teaspoon crushed red pepper flakes
- Zest of 1 lemon
For the Parmesan Herb Crust
- 1 cup panko breadcrumbs
- ½ cup freshly grated Parmesan cheese
- 1 tablespoon chopped fresh parsley
- 1 teaspoon dried oregano
- ½ teaspoon dried thyme
- 2 tablespoons olive oil
For the Hot Honey Lemon Feta Sauce
- ½ cup crumbled feta cheese
- ⅓ cup plain Greek yogurt
- 2 tablespoons hot honey
- 1 tablespoon fresh lemon juice
- 1 teaspoon lemon zest
- 1 small garlic clove, minced
- 1–2 tablespoons warm water (to thin if needed)
Optional Garnish
- Extra hot honey drizzle
- Fresh chopped parsley
- Lemon wedges
Directions
Step 1: Prepare the Chicken
Preheat your oven to 400°F (200°C). Line a baking sheet with parchment paper.
Pat the chicken breasts dry with paper towels.
Season both sides with salt, black pepper, smoked paprika, garlic powder, crushed red pepper flakes, and lemon zest.
Step 2: Make the Parmesan Herb Crust
In a bowl, combine panko breadcrumbs, Parmesan cheese, parsley, oregano, thyme, and olive oil.
Mix until the breadcrumbs are evenly coated and slightly moist.
Step 3: Coat the Chicken
Lightly brush each chicken breast with olive oil.
Press the Parmesan herb crust mixture firmly onto the top of each chicken breast, creating a thick coating.
Step 4: Bake Until Crispy
Place the coated chicken on the prepared baking sheet.
Bake for 22–28 minutes, or until the internal temperature reaches 165°F (74°C) and the crust is golden brown and crispy.
For extra crispiness, broil for 2–3 minutes at the end. Watch carefully to prevent burning.
Step 5: Prepare the Hot Honey Lemon Feta Sauce
In a small bowl, whisk together feta cheese, Greek yogurt, hot honey, lemon juice, lemon zest, and minced garlic.
Add warm water a tablespoon at a time until the sauce reaches a creamy, drizzle-able consistency.
Step 6: Assemble and Serve
Let the chicken rest for 5 minutes after baking.
Spoon or drizzle the hot honey lemon feta sauce over the crispy chicken.
Garnish with extra hot honey, chopped parsley, and fresh lemon wedges.
Serve with roasted vegetables, lemon rice, or a fresh Mediterranean salad for a complete meal.
Nutritional Information (Per Serving – Approximate)
Calories: 520 kcal
Protein: 48 g
Carbohydrates: 24 g
Fat: 26 g
Saturated Fat: 9 g
Fiber: 1 g
Sugar: 6 g
Sodium: 720 mg
Greek Appetizer Board with Hot Honey Feta, Roasted Red Peppers & Pita Chips
Ingredients
For the Hot Honey Feta
8 oz block feta cheese
3 tablespoons hot honey
1 teaspoon crushed red pepper flakes
1 teaspoon fresh thyme leaves
1 tablespoon olive oil
Zest of ½ lemon
For the Roasted Red Peppers
2 large red bell peppers
1 tablespoon olive oil
½ teaspoon salt
¼ teaspoon black pepper
For the Pita Chips
4 pita breads
2 tablespoons olive oil
½ teaspoon garlic powder
½ teaspoon dried oregano
¼ teaspoon salt
Additional Board Items (Optional)
Cherry tomatoes
Cucumber slices
Olives (green or Kalamata)
Hummus
Fresh parsley or dill
Directions
Step 1: Roast the Red Peppers
Preheat oven to 400°F (200°C).
Cut red peppers in half, remove seeds, and slice into strips.
Toss with olive oil, salt, and pepper.
Roast on a baking sheet for 20–25 minutes until tender and slightly charred. Set aside.
Step 2: Prepare the Hot Honey Feta
Preheat oven to 375°F (190°C).
Place feta block in a small baking dish.
Drizzle with olive oil and hot honey.
Sprinkle with crushed red pepper flakes, thyme, and lemon zest.
Bake for 12–15 minutes until softened and slightly golden on top.
Step 3: Make the Pita Chips
Cut pita breads into triangles.
Toss with olive oil, garlic powder, oregano, and salt.
Arrange in a single layer on a baking sheet.
Bake at 375°F (190°C) for 8–12 minutes until crisp and golden.
Step 4: Assemble the Board
Place the warm hot honey feta in the center of a large serving board.
Arrange roasted red pepper strips around the feta.
Add pita chips and optional items like cherry tomatoes, cucumber slices, olives, and hummus.
Garnish with fresh parsley or dill and drizzle extra hot honey over the feta if desired.
Serve immediately while the feta is warm and the pita chips are crisp.
Nutritional Information (Per Serving – Approximate)
Calories: 470 kcal
Protein: 14 g
Carbohydrates: 38 g
Fat: 28 g
Saturated Fat: 10 g
Fiber: 4 g
Sugar: 9 g
Sodium: 820 mg
🍰 1-Minute Keto Microwave Cheesecake
This single-serving recipe is designed for speed and simplicity, offering a rich, velvety texture without the need for an oven.
-
Prep time: 2–3 minutes
-
Cook time: ~1 minute
-
Servings: 1
Ingredients
-
2 oz cream cheese, softened
-
2 tbsp sour cream
-
1 tbsp powdered erythritol (adjust to your preferred sweetness)
-
1/2 tsp vanilla extract
-
1 large egg
-
Optional: Butter or oil for greasing
Instructions
-
Prepare the Vessel: Grease a microwave-safe mug or ramekin with a small amount of butter or oil to prevent sticking.
-
Mix the Base: In a small bowl, whisk together the softened cream cheese, sour cream, powdered erythritol, and vanilla extract until the mixture is smooth.
-
Incorporate the Egg: Add the egg to the bowl and stir until fully incorporated and the consistency is uniform.
-
Transfer: Pour your cheesecake batter into the prepared mug or ramekin.
-
Microwave: Cook on high for approximately 1 minute. Watch closely, as it should puff up and set in the center.
-
Test for Doneness: Insert a toothpick into the center; it should come out clean or with just a few moist crumbs.
-
Cool: Let the cheesecake rest for a few minutes to firm up before eating.
-
Garnish: Top with fresh berries (like the raspberries in the photo), a dollop of whipped cream, or a dash of cinnamon.
Nutrition Facts (Per Serving)
| Nutrient | Amount |
| Calories | 300 kcal |
| Fat | 25g |
| Protein | 8g |
| Total Carbs | 3g |
| Net Carbs | 3g |
Mediterranean Mushroom, Shallots & Herbed Goat Cheese Tarts
These flaky puff pastry tarts are layered with sweet caramelized shallots, savory Mediterranean-style mushrooms, and creamy herbed goat cheese. They’re elegant enough for entertaining but simple enough for a weeknight appetizer or light lunch.
📝 Ingredients
1 sheet puff pastry (thawed if frozen)
1 egg, beaten (for brushing)
2 tablespoons olive oil
3 shallots, thinly sliced
10 oz (280 g) cremini or mixed mushrooms, sliced
3–4 oz goat cheese, softened
1 tablespoon fresh thyme, chopped (or ½ tsp dried)
1 tablespoon fresh parsley, chopped
1 small garlic clove, minced
Salt and black pepper, to taste
Optional: drizzle of honey or balsamic glaze for finishing
👩🍳 Instructions
1️⃣ Prepare the Pastry
Preheat oven to 400°F (200°C).
Line a baking sheet with parchment paper.
Roll out the puff pastry slightly to smooth edges.
Cut into 4–6 rectangles or squares.
Score a ½-inch border around each piece (don’t cut all the way through).
Brush the borders with beaten egg.
Prick the center with a fork to prevent puffing.
2️⃣ Cook the Mushroom-Shallot Filling
Heat olive oil in a skillet over medium heat.
Add sliced shallots and cook 4–5 minutes until softened and lightly caramelized.
Add mushrooms and cook 6–8 minutes until browned and moisture evaporates.
Stir in garlic, thyme, salt, and pepper. Cook 1 more minute.
Remove from heat and let cool slightly.
3️⃣ Make the Herbed Goat Cheese
In a small bowl, mix:
Goat cheese
Fresh parsley
Pinch of salt and pepper
Stir until smooth and creamy.
4️⃣ Assemble the Tarts
Spread a thin layer of herbed goat cheese inside each pastry border.
Top evenly with mushroom-shallot mixture.
Bake for 15–20 minutes or until pastry is golden and puffed.
5️⃣ Finish & Serve
Let cool slightly.
Drizzle lightly with honey or balsamic glaze (optional).
Garnish with extra fresh herbs if desired.
Serve warm or at room temperature.
🍽 Servings
Makes 4–6 tarts
Prep Time: 15 minutes
Cook Time: 20 minutes
Total Time: 35 minutes
📌 Notes
Make sure mushrooms release all their moisture to avoid soggy pastry.
Chill assembled tarts for 10 minutes before baking for extra puff.
For extra Mediterranean flavor, add chopped sun-dried tomatoes or olives.
💡 Tips
Use a mix of mushrooms (cremini, shiitake, oyster) for deeper flavor.
Add a sprinkle of crumbled feta for extra tang.
Serve with a simple arugula salad with lemon vinaigrette.
🥗 Nutritional Info (Approx. per tart)
Calories: 280–320
Protein: 7g
Fat: 20g
Carbs: 22g
Fiber: 2g
(Values vary depending on portion size.)
🌿 Benefits
Rich in antioxidants from mushrooms
Contains healthy fats from olive oil
Vegetarian-friendly
Elegant appetizer for gatherings
❓ Q & A
Q: Can I make these ahead of time?
Yes! Prepare filling in advance and assemble just before baking.
Q: Can I freeze them?
You can freeze unbaked assembled tarts. Bake from frozen, adding 3–5 extra minutes.
Q: Can I make it vegan?
Use vegan puff pastry and dairy-free cream cheese alternative.
Out-of-this-World Corn Dip
🌽 Out-of-This-World Mexicorn Dip
This dip is a crowd-pleaser that balances the sweetness of corn with a smoky, creamy finish. It’s best made ahead of time to let the flavors meld.
-
Prep time: 15 minutes
-
Chilling time: 2 hours (minimum)
-
Yields: A large party bowl
Ingredients
The Base:
-
3 (11 oz) cans Mexicorn (corn with red and green peppers), thoroughly drained
-
1 (7 oz) can chopped green chiles
-
1 (6 oz) can chopped jalapeños (drained, but keep the liquid to adjust heat)
-
1/2 cup green onions, finely chopped
-
1/4 cup fresh cilantro, chopped (optional, for that “aromatic finish”)
The Creamy Binder:
-
1 cup Mayonnaise
-
1 cup Sour cream (or softened cream cheese for a thicker texture)
-
1 (16 oz) package Shredded sharp cheddar cheese (or a mix of Cheddar and Monterey Jack)
The Secret Seasonings:
-
1 tsp Black pepper
-
1/2 tsp Garlic powder
-
1/2 tsp Ground cumin
-
1/4 tsp Chili powder
For Serving:
-
2-3 bags Fritos Scoops or sturdy tortilla chips
Instructions
-
Prep the Vegetables: Ensure the Mexicorn, green chiles, and jalapeños are well-drained so the dip doesn’t become watery.
-
Combine: In a large mixing bowl, fold together the mayonnaise and sour cream until smooth.
-
Mix: Add the drained corn mixture, chopped green onions, cilantro, and the shredded cheese. Stir until everything is evenly coated.
-
Season: Fold in the pepper, garlic powder, cumin, and chili powder. Taste a small amount; if you want more “kick,” add a teaspoon or two of the reserved jalapeño liquid.
-
Chill: Cover the bowl tightly with plastic wrap and refrigerate for at least 2 hours, though overnight is even better for the flavors to develop.
-
Serve: Give it one quick stir before placing it in a serving bowl. Surround it with Fritos Scoops and watch it disappear!
Pro-Tip for Variations
If you want to lean into that “roasted” flavor you mentioned, you can lightly char the drained corn in a dry cast-iron skillet for 3-5 minutes before mixing it into the cream base.
Crockpot Potato Broccoli Cheddar Soup
🦀 Light & Healthy Crab Salad
Ingredients
-
16 oz crab meat (preferably grated)
-
½ cup celery, finely diced
-
3 tbsp red onion, very finely diced
-
½ tsp Old Bay seasoning
-
2 tsp fresh lemon juice
-
½ cup light or reduced-fat mayonnaise
-
1½ tbsp fresh dill, chopped (or ½ tsp dried dill)
-
Salt and black pepper, to taste
Instructions
Step 1
Place the crab meat into a large mixing bowl.
Step 2
Add the diced celery and diced red onion.
Step 3
Sprinkle in the Old Bay seasoning and add the lemon juice.
Step 4
Add the mayonnaise and chopped dill.
Step 5
Season with salt and pepper to taste.
Step 6
Gently toss everything together until well combined.
👉 Be careful not to break up the crab too much.
Step 7
Serve immediately or cover and refrigerate for up to 2 days.
✔ Light
✔ Fresh
✔ Perfect for sandwiches, wraps, or crackers
🍓🫐 Banana Berry Yogurt Parfait 🍌🍯
🛒 Ingredients:
1 cup Greek yogurt 🥣
1/2 banana, sliced 🍌
3–4 strawberries, sliced 🍓
Handful of blueberries 🫐
1/4 cup granola 🌾
1–2 tbsp honey 🍯
2 tbsp berry jam or compote 🍓
👩🍳 Instructions:
1️⃣ Add a layer of granola at the bottom of your glass 🌾
2️⃣ Spoon in a thick layer of creamy Greek yogurt 🥣
3️⃣ Drizzle honey and a little berry jam for that sweet swirl 🍯🍓
4️⃣ Repeat the layers (granola + yogurt + jam) for a beautiful parfait effect ✨
5️⃣ Top with banana slices, strawberries, blueberries, and extra granola 🍌🍓🫐
6️⃣ Finish with a final drizzle of honey 🍯
Creamy Seafood & Cucumber Salad
Prep time: 15 mins | Servings: 4
Ingredients
• 250g (approx. 9oz) Imitation crab meat (surimi), chopped or sliced into bite-sized pieces.
• 150g (approx. 5oz) Small shrimp, cooked and chilled (optional, but visible in the photo).
• 1 medium Cucumber, partially peeled, deseeded, and sliced into half-moons.
• 2 stalks Celery, finely diced (for extra crunch).
• 1 tbsp Fresh dill, finely chopped (plus extra for garnish).
For the Creamy Dressing
• 1/2 cup High-quality Mayonnaise.
• 1 tbsp Fresh lemon juice.
• 1 tsp Sugar (to balance the acidity).
• 1/2 tsp Garlic powder.
• Salt & Black pepper to taste.
Instructions
1. Prep the Base: In a large mixing bowl, combine the imitation crab, shrimp, sliced cucumbers, and celery.
2. Make the Dressing: In a separate small bowl, whisk together the mayonnaise, lemon juice, sugar, garlic powder, and chopped dill until smooth.
3. Toss: Pour the dressing over the seafood mixture. Toss gently with a spatula until everything is evenly coated.
4. Chill: Cover the bowl and refrigerate for at least 30 minutes. This salad is best served cold as it allows the flavors to meld together.
5. Garnish: Just before serving, sprinkle with extra black pepper and place a fresh sprig of dill on top, just like in your photo.
Pro-Tips
• Dry the Veggies: To prevent the salad from getting watery, pat the cucumber slices dry with a paper towel before adding them to the bowl.
• Add a Kick: If you like a bit of heat, add a pinch of Old Bay seasoning or smoked paprika to the dressing.
This Egg Spread Toast
This Egg Spread Toast is a budget-friendly breakfast that’s simple, creamy, satisfying, and protein-packed — your new go-to morning favorite!
you will need
2 hard-boiled eggs, peeled
1 tbsp mayo or Greek yogurt
1 tsp mustard (optional)
Salt & pepper to taste
Pinch of paprika or chili flakes (optional)
1–2 slices of bread, toasted
Optional toppings: chopped chives, microgreens, sliced radish, or avocado
instructions
Mash the hard-boiled eggs in a bowl using a fork.
Add mayo (or Greek yogurt for a lighter version), mustard (if using), salt, and pepper. Mix until creamy but still a little chunky.
Toast the bread slices to your preferred crispness.
Spread the egg mixture generously over warm toast.
Sprinkle with paprika, chili flakes, or your favorite fresh herbs.
Greek Yogurt Chicken Salad
-
1 pound cooked chicken breast, diced
-
½ cup plain Greek yogurt (instead of mayo)
-
¼ cup chopped cucumber
-
¼ cup chopped red onion
-
2 tablespoons crumbled feta cheese
-
1 tablespoon lemon juice
-
1 teaspoon dried oregano
-
Salt and pepper to taste
-
Optional: a few olives or fresh dill
-
In a large bowl, combine diced chicken, Greek yogurt, cucumber, onion, feta, lemon juice, and oregano.
-
Mix everything until well coated.
-
Season with salt and pepper to taste.
-
Chill in the fridge for 30 minutes so the flavors blend together.
-
Serve in lettuce wraps, with low-carb pita, or just eat it straight from the bowl.
WW Cheesy Rotel Soup
In the realm of comforting soups, few recipes rival the exquisite flavor and simplicity of Cheesy Rotel Soup. A symphony of savory goodness, this culinary gem harmonizes the zesty kick of Rotel diced tomatoes and green chilies with the creamy richness of cheddar cheese. Embark on a culinary journey that tantalizes taste buds and warms the soul with each spoonful.
The Flavors of Rotel: At the heart of this masterpiece lies the vibrant essence of Rotel diced tomatoes and green chilies, infusing the soup with a delightful medley of tangy tomatoes and spicy chilies. Their robust flavors awaken the palate and set the stage for a culinary adventure unlike any other.
Elevating Creaminess: Complementing the invigorating essence of Rotel, condensed cheddar cheese soup envelops the senses with its velvety texture and indulgent taste. With each spoonful, the creamy base forms a luxurious backdrop, allowing the flavors to meld harmoniously and create a symphony of taste sensations.
Crafting the Perfect Consistency: To achieve the ideal balance of richness and depth, our recipe calls for a meticulous blend of chicken broth and milk. This dynamic duo not only imparts a luscious creaminess to the soup but also imbues it with layers of savory complexity, elevating every sip to new heights of culinary delight.
A Touch of Seasoning Sophistication: Infused with hints of garlic powder, salt, and pepper, our Cheesy Rotel Soup boasts a nuanced flavor profile that captivates discerning palates. The subtle interplay of spices enhances the essence of each ingredient, ensuring a harmonious union of taste and texture in every bowl.
The Melting Pot of Cheese: No cheesy delight would be complete without the crowning glory of shredded cheddar cheese. As it melts gracefully into the simmering broth, the cheese bestows a velvety richness and irresistible decadence upon the soup, culminating in a crescendo of culinary opulence.
A Gastronomic Symphony: Simmered to perfection, our Cheesy Rotel Soup beckons aficionados of fine dining to savor its exquisite flavors and bask in its comforting embrace. Whether enjoyed as a standalone indulgence or paired with your favorite accompaniments, this culinary masterpiece promises an unforgettable gastronomic experience.
Conclusion: Embark on a culinary odyssey that transcends the ordinary and celebrates the artistry of flavor with our gourmet Cheesy Rotel Soup. From its tantalizing aroma to its velvety texture, every aspect of this culinary creation beckons you to embrace the essence of indulgence and elevate your dining experience to new heights. Succumb to the allure of savory perfection and treat yourself to a bowl of pure culinary bliss.
Ingredients:
- 1 can (10 oz) of Rotel diced tomatoes and green chilies
- 1 can (10.5 oz) of condensed cheddar cheese soup
- 1 cup of chicken broth
- 1 cup of milk
- 1 cup of shredded cheddar cheese
- 1/2 teaspoon of garlic powder
- Salt and pepper to taste
- Optional toppings: crushed tortilla chips, diced avocado, sour cream, chopped cilantro
Instructions:
- In a large saucepan or pot, combine the Rotel diced tomatoes and green chilies (undrained), condensed cheddar cheese soup, chicken broth, and milk.
- Place the saucepan over medium heat and stir the ingredients together until well combined.
- Add the garlic powder, salt, and pepper to taste. Adjust the seasoning according to your preference.
- Allow the soup to simmer for about 10-15 minutes, stirring occasionally, until it is heated through and slightly thickened.
- Once the soup is heated through, stir in the shredded cheddar cheese until it’s fully melted and incorporated into the soup.
- Taste the soup and adjust the seasoning if necessary.
- Once the cheese is melted and the soup is heated through, remove it from the heat.
- Serve the Cheesy Rotel Soup hot, garnished with optional toppings such as crushed tortilla chips, diced avocado, sour cream, or chopped cilantro.
Chocolate Chip Strawberry Smoothie
Prep time: 5 minutes | Servings: 1-2
Ingredients
-
1 ½ cups Fresh or frozen strawberries (frozen makes it thicker!)
-
1 cup Milk of your choice (dairy, almond, or oat milk work great)
-
½ cup Greek yogurt (plain or vanilla for extra creaminess)
-
1 tbsp Honey or maple syrup (optional, depending on berry sweetness)
-
2 tbsp Mini dark chocolate chips (plus extra for topping)
-
½ tsp Vanilla extract
-
Ice cubes (if using fresh strawberries)
Instructions
-
Combine: Add the strawberries, milk, yogurt, sweetener, and vanilla extract into a high-speed blender.
-
Blend: Pulse until the mixture is completely smooth and creamy.
-
Add the Crunch: Add the chocolate chips to the blender and pulse for just 3-5 seconds. You want them broken into tiny pieces, not completely liquefied, to get that nice texture.
-
Serve: Pour into a glass.
-
Garnish: Top with a few whole mini chocolate chips and a fresh strawberry on the side, just like the photo.
Pro Tips
-
Make it a Protein Shake: Add a scoop of vanilla or chocolate protein powder for a post-workout treat.
-
Keep it Cold: If you use fresh berries instead of frozen, add about ½ cup of ice to get that chilled, frothy consistency.
The Famous KFC Coleslaw Recipe,
Ingredients:
1/2 cup mayonnaise
1/3 cup sugar
1/4 cup milk
1/4 cup buttermilk
2 1/2 tablespoons lemon juice
1 1/2 tablespoons white vinegar
1/2 teaspoon salt
1/8 teaspoon pepper
8 cups finely chopped cabbage (approx. 1 head)
1/4 cup shredded carrot (1 medium carrot)
2 tablespoons minced onion
How to Make It:
-Be sure cabbage and carrots are chopped into very fine pieces (a little bigger than rice)
-Combine the mayonnaise, sugar, milk, buttermilk, lemon juice, vinegar, salt and pepper in large bowl. Beat until smooth
-Add cabbage, carrots, and onions. Mix well.
-Cover and refrigerate for at least 2 hours, if you let it sit over night it’s even better/
Aunt Betty’s Homestyle German Rocks: A Timeless Cookie Tradition
Aunt Betty’s Homestyle German Rocks are the kind of cookies that evoke memories of cozy kitchens, family gatherings, and the simple joy of homemade treats. These buttery, nut-filled cookies have a rustic charm and a delicate sweetness that makes them absolutely irresistible. With their tender crumb, rich vanilla flavor, and crunchy walnut pieces, they’re perfect for dunking in coffee, serving alongside tea, or simply enjoying by the handful.
These cookies are a beloved heirloom recipe for good reason. They’re simple to make, use basic pantry ingredients, and deliver a result that feels both nostalgic and special. The name “German Rocks” likely refers to their rustic, irregular shape and the hearty, satisfying nature of these little gems.
Why This Recipe Works
This recipe succeeds because it follows the classic principles of butter cookie making. The creamed butter and sugarcreate a light, tender base. The vanillaadds warm, aromatic depth. The chopped walnuts provide crunchy contrast to the buttery, melt-in-your-mouth cookie. A dusting of confectioners’ sugar adds a sweet, elegant finish.
The Complete Recipe: Aunt Betty’s Homestyle German Rocks
Prep Time: 15 minutes | Cook Time: 12-15 minutes | Total Time: 30 minutes | Yield:Approximately 24 cookies
Ingredients
-
2 cups all-purpose flour
-
1 cup unsalted butter, softened
-
½ cup granulated sugar
-
¼ teaspoon salt
-
1 teaspoon vanilla extract
-
½ cup chopped walnuts
-
Confectioners’ sugar for dusting (optional)
Step-by-Step Instructions
Step 1: Preheat and Prepare
Preheat your oven to 350°F (175°C). Line a baking sheet with parchment paper for easy cleanup and to prevent sticking.
Step 2: Cream Butter and Sugar
In a large mixing bowl, cream together the softened butter and granulated sugar until light, fluffy, and pale in color. This should take about 2 to 3 minutes with an electric mixer. Scrape down the sides of the bowl as needed.
Step 3: Add Vanilla and Dry Ingredients
Add the vanilla extract and mix well. Gradually incorporate the flour and salt, mixing on low speed until a soft dough forms. Do not overmix—stop as soon as the flour disappears.
Step 4: Fold in Walnuts
Gently fold in the chopped walnuts until they are evenly distributed throughout the dough.
Step 5: Shape and Place
Shape the dough into small balls, about 1 inch in diameter. Place them on the prepared baking sheet, spacing them about 2 inches apart to allow for slight spreading during baking.
Step 6: Bake
Bake the cookies for 12 to 15 minutes, or until the edges are lightly golden. The centers will still look pale and soft—that’s perfect. They’ll continue to set as they cool.
Step 7: Cool
Remove from the oven and let the cookies cool on the baking sheet for 5 minutes. Then transfer them to a wire rack to cool completely.
Step 8: Dust and Serve
Once completely cooled, dust the German Rocks with confectioners’ sugar for a sweet finish. Enjoy these delightful treats with a cup of coffee or tea for the perfect snack or dessert.
Pro Tips for Perfect German Rocks
-
Butter Temperature: Ensure your butter is truly softened but not melted. It should give slightly when pressed but still hold its shape.
-
Don’t Overmix: Overmixing the dough after adding the flour can develop gluten and make the cookies tough. Mix just until combined.
-
Walnut Variations: Toast the walnuts lightly before adding for extra nutty flavor. Spread them on a baking sheet and toast at 350°F for 5 to 7 minutes, watching closely.
-
Even Sizing: Try to make the balls uniform in size so they bake evenly.
-
Cool Before Dusting: Wait until the cookies are completely cool before dusting with confectioners’ sugar, or the sugar will melt into the warm cookies.
Delicious Variations
-
Pecan German Rocks: Substitute pecans for the walnuts.
-
Spiced Version: Add ½ teaspoon of cinnamon or nutmeg to the flour mixture.
-
Chocolate Dip: Dip half of each cooled cookie in melted dark chocolate.
-
Lemon Zest: Add 1 teaspoon of lemon zest along with the vanilla for a citrusy twist.
-
Almond Extract: Substitute ½ teaspoon of almond extract for half the vanilla.
Serving Suggestions
-
Serve with a cup of hot coffee or teafor an afternoon treat
-
Arrange on a holiday cookie platter for gifting
-
Package in tins for homemade gifts
-
Enjoy as a simple dessert with a glass of cold milk
-
Serve alongside ice cream for an extra-special treat
Storage
-
Room Temperature: Store in an airtight container for up to 1 week.
-
Freezer: These cookies freeze beautifully for up to 2 months. Place in a single layer in a freezer-safe container. Thaw at room temperature.
Conclusion: A Taste of Family Tradition
Aunt Betty’s Homestyle German Rocks are proof that the best recipes are often the simplest. With their buttery richness, nutty crunch, and delicate sweetness, these cookies have stood the test of time for good reason.
Whether you’re carrying on a family tradition or discovering them for the first time, these cookies are sure to become a favorite in your home. Simple, comforting, and absolutely delicious.
Best Ever Crock Pot Chicken and Dumplings (Creamy, Cozy & Foolproof)
When comfort food cravings hit, nothing satisfies quite like Crock Pot Chicken and Dumplings. This slow-cooked classic is rich, creamy, and packed with tender shredded chicken, hearty vegetables, and soft biscuit dumplings that soak up all that savory goodness. Best of all, it’s incredibly easy—your crock pot does most of the work.
This recipe is perfect for busy weeknights, chilly evenings, or anytime you want a warm, homemade meal that feels like a hug in a bowl.
Why This Is the Best Ever Version
-
Boneless chicken thighs stay extra juicy and tender
-
Cream of chicken + cream of celery create a silky, flavorful base
-
Refrigerated biscuits make easy, fluffy dumplings—no dough required
-
One-pot slow cooker meal with minimal prep
-
Family-approved comfort food that reheats beautifully
Ingredients
-
1 onion, diced
-
6 boneless skinless chicken thighs
-
1 can cream of chicken soup
-
1 can cream of celery soup
-
2 tablespoons fresh parsley, chopped (plus more for garnish)
-
1 teaspoon poultry seasoning
-
2 cups chicken broth
-
1 can buttermilk refrigerated biscuits
-
2 cups frozen mixed vegetables, defrosted
-
Black pepper, to taste
How to Make Best Ever Crock Pot Chicken and Dumplings
1. Layer the Base
Add the diced onion to the bottom of your crock pot. Place the chicken thighs on top in a single, even layer.
2. Mix the Creamy Sauce
In a mixing bowl, combine:
-
Cream of chicken soup
-
Cream of celery soup
-
Poultry seasoning
-
Fresh chopped parsley
-
Black pepper to taste
Stir until smooth, then pour the mixture evenly over the chicken thighs.
3. Add the Broth & Cook
Pour the chicken broth over the chicken. Cover with the lid and cook on HIGH for 5 hours.
Tip: Do not open the lid until the final hour—this helps maintain consistent heat and tenderness.
4. Shred the Chicken & Add Vegetables
With 1 hour remaining, open the lid. Add the defrosted mixed vegetables and gently stir, shredding the chicken as you mix.
5. Prepare the Dumplings
Open the can of refrigerated biscuits. Flatten each biscuit slightly and cut into 4 long strips.
Place the biscuit pieces evenly over the top of the chicken mixture.
6. Finish Cooking
Cover and let cook for the remaining 1 hour. Once done, gently stir to incorporate the dumplings into the creamy sauce.
7. Serve
Spoon into bowls and garnish with freshly chopped parsley. Serve hot and enjoy every cozy bite.
Pro Tips for Perfect Chicken & Dumplings
-
Use thighs, not breasts – they won’t dry out during long cooking
-
Defrost veggies first to avoid watering down the sauce
-
Cut biscuits evenly so dumplings cook at the same rate
-
Don’t over-stir after adding dumplings—gentle mixing keeps them fluffy
Variations & Add-Ins
-
Extra creamy: Stir in ½ cup heavy cream at the end
-
Garlic lovers: Add 1 teaspoon garlic powder to the sauce
-
Herb upgrade: Add thyme or rosemary with the poultry seasoning
-
Spicy kick: A pinch of cayenne or cracked red pepper
Storage & Reheating
-
Refrigerator: Store leftovers in an airtight container for up to 3 days
-
Reheat: Warm gently on the stovetop or microwave with a splash of broth
-
Not freezer-friendly: Dumplings are best fresh
Final Thoughts
This Best Ever Crock Pot Chicken and Dumplings recipe is the ultimate comfort meal—simple ingredients, rich flavor, and zero stress. It’s the kind of dinner everyone asks for again and again, especially on cold nights or busy days.
No-Bake Coconut Protein Bars
Recipe: No-Bake Coconut Protein Bars
-
Prep time: 15 minutes
-
Chilling time: 1 hour
-
Servings: 10 bars
Ingredients
-
Protein Powder: 1 ½ cups (Vanilla whey or pea protein works best)
-
Shredded Coconut: 1 cup (Unsweetened, finely shredded)
-
Coconut Flour: ¼ cup (Helps bind and adds fiber)
-
Liquid Sweetener: ⅓ cup (Maple syrup, honey, or agave)
-
Coconut Oil: ¼ cup (Melted)
-
Coconut Milk: 2–4 tbsp (Full fat, canned; add one by one until dough forms)
-
Dark Chocolate: ½ cup (For the topping/drizzle)
Instructions
-
Mix Dry: In a large bowl, whisk together the protein powder, shredded coconut, and coconut flour.
-
Add Wet: Stir in the melted coconut oil and sweetener.
-
Bind: Add coconut milk one tablespoon at a time, mixing with your hands or a spatula, until the mixture feels like a thick, slightly sticky dough.
-
Press: Line an 8×4 inch loaf pan with parchment paper. Press the mixture firmly into the bottom until it is flat and even.
-
Freeze: Place in the freezer for 20 minutes to set.
-
Coat: Melt the dark chocolate. Pour it over the bars (or dip individual bars into it if you’re feeling fancy).
-
Slice: Refrigerate for another 30 minutes, then slice into 10 even bars.
Nutritional Info (Per Bar)
-
Calories: 215 kcal
-
Protein: 12g
-
Fat: 14g
-
Net Carbs: 9g
-
Fiber: 4g
Tips for Success
-
Watch the Texture: Protein powders vary wildly in absorbency. If your “dough” is too crumbly, add a splash more milk. If it’s too sticky to handle, add a teaspoon of coconut flour.
-
Fine Shreds: Use finely shredded coconut rather than large flakes so the bars hold together better when sliced.
-
Salt it: A tiny pinch of sea salt in the chocolate topping makes the coconut flavor pop.
Benefits of These Bars
-
MCTs: Coconut oil and milk provide Medium-Chain Triglycerides, which are used by the body for immediate energy rather than being stored as fat.
-
Satiety: The high fiber from the coconut flour combined with the protein keeps you full for hours.
-
Low Glycemic: Using a natural sweetener like maple syrup (or a sugar-free alternative) prevents the “spike and crash” of store-bought candy bars.
Common Questions & Answers
Q: Can I use Whey protein instead of Plant-based? A: Yes, but be careful. Whey tends to be “stickier.” You may need less liquid than if you were using a plant-based (pea or soy) protein, which is very thirsty.
Q: How should I store these? A: Because of the coconut oil, these will soften at room temperature. Keep them in an airtight container in the fridge for up to 1 week, or the freezer for 1 month.
Q: My bars are crumbling when I cut them. What happened? A: They likely didn’t have enough moisture or weren’t pressed down hard enough. Use the bottom of a heavy glass to really pack the mixture into the pan before freezing.