S’mores Dessert Cups

These no-bake S’mores Dessert Cups are creamy, chocolatey, crunchy, and perfect for parties, summer nights, or quick desserts. They taste just like campfire s’mores in a cup — without the mess!

Prep Time

  • Prep Time: 20 minutes
  • Chill Time: 1 hour
  • Total Time: 1 hour 20 minutes

Servings

4–6 dessert cups

Ingredients

Graham Cracker Layer

  • 1½ cups graham cracker crumbs
  • 3 tbsp melted butter
  • 1 tbsp sugar

Cream Layer

  • 1 package (8 oz) cream cheese, softened
  • 1 cup whipped topping or whipped cream
  • 1/4 cup powdered sugar
  • 1 tsp vanilla extract

Chocolate Layer

  • 1 cup chocolate pudding or chocolate mousse
  • 1/2 cup mini chocolate chips

Toppings

  • Mini marshmallows
  • Extra graham cracker crumbs
  • Chocolate chips
  • Whipped cream

Instructions

1. Make the Graham Cracker Base

Mix:

  • graham cracker crumbs
  • melted butter
  • sugar

Stir until crumbly.

2. Prepare the Cream Layer

Beat cream cheese, powdered sugar, and vanilla until smooth.

Fold in whipped topping gently.

3. Assemble the Cups

Layer in clear dessert cups:

  1. Graham cracker crumbs
  2. Cream layer
  3. Chocolate pudding
  4. Repeat layers

4. Add Toppings

Top with:

  • whipped cream
  • marshmallows
  • chocolate chips
  • graham cracker crumbs

5. Chill

Refrigerate for at least 1 hour before serving.

Optional Add-Ons

  • Toast marshmallows with a kitchen torch
  • Add Nutella drizzle
  • Use brownie crumbs instead of graham crackers
  • Add peanut butter chips

Storage

  • Refrigerate up to 3 days
  • Best served chilled

Blueberry Chia Power Smoothie.

Blueberry Chia Power Smoothie.

Ingredients

  • 1 ½ cups Frozen wild blueberries (wild blueberries offer a more intense color and flavor)

  • 1 cup Unsweetened almond milk or cashew milk

  • ½ cup Plain Greek yogurt (for protein and creaminess)

  • 1 tbsp Chia seeds

  • 1 small Medjool date (pitted) or 1 tsp honey for natural sweetness

  • ¼ tsp Ground cinnamon

  • ½ cup Fresh baby spinach (optional; it won’t change the color, but adds nutrients!)

  • A few Fresh blueberries (for garnish)


Instructions

  1. Hydrate the Chia (Optional): If you prefer a smoother texture, soak the chia seeds in your milk for about 5 to 10 minutes before blending. This allows them to swell and creates a “gel” that blends more seamlessly.

  2. Combine Ingredients: In a high-speed blender, pour in the almond milk and Greek yogurt first. Adding liquids at the bottom helps the blender blades move freely without getting stuck on frozen fruit.

  3. Add the Superfoods: Add the frozen blueberries, the pitted date (or honey), cinnamon, and the chia seeds. If you are adding spinach for an extra boost, toss that in now.

  4. The Blend: Start your blender on the lowest setting to break up the frozen berries, then quickly move to high speed. Blend for 60 seconds. You want to make sure the chia seeds and the date are fully pulverized into the mixture.

  5. Check Consistency: This smoothie should be thick enough to hold a straw upright. If it’s too thick, add a splash more milk. If you want it frostier, add three or four ice cubes and pulse again.

  6. The Reveal: Pour the smoothie into a glass jar or mason jar. Top with a few fresh blueberries and serve with a reusable metal straw to match the aesthetic in the photo.


Why it Works

The combination of frozen berries and chia seeds creates a natural thickening effect that mimics a milkshake without the heavy sugars. The cinnamon acts as a bridge, bringing out the natural sweetness of the blueberries while providing a warm, comforting finish. Enjoy!

Lemon Ginger Smoothie

Zesty Lemon Ginger Smoothie

Ingredients

  • 1 cup Greek yogurt (or plain coconut yogurt for a dairy-free version)

  • ½ cup Milk of choice (almond, oat, or dairy)

  • 1 medium Lemon (zested and juiced)

  • 1 inch Fresh ginger root (peeled and roughly chopped)

  • 1 frozen Banana (sliced before freezing for the creamiest texture)

  • 1 tbsp Honey or maple syrup (adjust based on your sweetness preference)

  • ½ tsp Vanilla extract

  • A pinch of Turmeric (optional, for that bright golden color)

  • ½ cup Ice cubes


Instructions

  1. Prep the Aromatics: Begin by zesting half of your lemon. Be careful to only get the yellow outer layer, as the white pith can be bitter. Squeeze the juice from the entire lemon into a small bowl, discarding any seeds.

  2. Prepare the Ginger: Peel the ginger using the edge of a spoon—it’s the easiest way to get into the nooks and crannies! Chop it into small pieces to ensure your blender can process it into a smooth consistency.

  3. Layer the Blender: To ensure a smooth blend, add your liquids first (milk, lemon juice, and honey). Follow with the yogurt, ginger, lemon zest, and vanilla. Finally, add the frozen banana slices and ice on top.

  4. Blend: Start the blender on a low speed, gradually increasing to high. Blend for about 45–60 seconds until the mixture is completely velvety and no ginger chunks remain.

  5. Adjust: Taste the smoothie. if it’s too tart, add a splash more honey. If it’s too thick, add a tablespoon of milk and pulse again.

  6. Serve: Pour into a chilled glass. Garnish with a fresh lemon slice and a colorful straw, just like in the photo!


Pro Tips for the Best Texture

  • The Frozen Banana: This is the secret to the “shake-like” consistency. If you use a room-temperature banana, the drink will be much thinner.

  • Ginger Kick: If you love a spicy burn, increase the ginger to 1.5 inches. If you prefer just a hint of warmth, stick to a half-inch piece.

Potato Roll with Minced Meat

This cheesy potato roll stuffed with savory minced meat is crispy on the outside, juicy inside, and loaded with melted cheese. Perfect for dinner, parties, or comfort food nights.

Ingredients

For the Filling

  • 500 g minced meat (beef or mixed)
  • 1 onion, finely chopped
  • 2 garlic cloves, minced
  • 1 yellow bell pepper, diced
  • 3 tbsp tomato paste
  • 1 tsp dried thyme
  • 1 tsp paprika
  • Fresh parsley, chopped
  • 200 g mozzarella cheese, shredded
  • Salt & black pepper to taste
  • 1 tbsp olive oil

For the Potato Base

  • 4–5 large potatoes, thinly sliced
  • 100 g Parmesan cheese, grated
  • 100 g mozzarella cheese, shredded

Instructions

1. Prepare the Potato Base

  1. Preheat oven to 400°F (200°C).
  2. Line a baking tray with parchment paper.
  3. Arrange thin potato slices overlapping in a rectangle shape.
  4. Sprinkle Parmesan and mozzarella evenly over the potatoes.
  5. Bake for 25–30 minutes until golden and slightly crispy.

2. Make the Meat Filling

  1. Heat olive oil in a pan.
  2. Cook onion and garlic until soft.
  3. Add minced meat and cook until browned.
  4. Stir in:
    • bell pepper
    • tomato paste
    • thyme
    • paprika
    • salt & pepper
  5. Cook for 5–7 minutes.
  6. Add chopped parsley.

3. Assemble the Roll

  1. Remove potato base from oven.
  2. Spread meat filling evenly over the potatoes.
  3. Top with 200 g mozzarella cheese.
  4. Carefully roll it tightly using the parchment paper.

4. Final Bake

  1. Place seam-side down.
  2. Bake another 10–15 minutes until cheese melts and top becomes golden.

Serving Ideas

Serve with:

  • garlic sauce
  • sour cream
  • fresh salad
  • spicy mayo

Tips

  • Slice potatoes very thin for easy rolling.
  • Let cool slightly before slicing.
  • Add mushrooms or jalapeños for extra flavor.

Storage

  • Refrigerate up to 3 days
  • Reheat in oven or air fryer for best texture

Diabetes-Friendly “Miracle Vitamin” Smoothie

Diabetes-Friendly “Miracle Vitamin” Smoothie

A nutrient-rich breakfast smoothie that supports steady energy and healthy blood sugar habits — but no vitamin or food can cure diabetes.

Important Note

There is currently no vitamin proven to cure Diabetes. Some nutrients may help support overall health and blood sugar management alongside medical care, exercise, sleep, and a balanced diet. Always follow guidance from your healthcare provider.

Recipe Overview

Description

This creamy berry-green smoothie is packed with fiber, healthy fats, antioxidants, and protein to help support fullness and balanced blood sugar levels. It’s naturally sweetened with berries and contains ingredients rich in vitamins C, D, magnesium, and omega-3 fats.

Ingredients (2 Servings)

  • 1 cup unsweetened almond milk
  • ½ cup plain Greek yogurt
  • 1 cup spinach
  • ½ cup frozen blueberries
  • ½ avocado
  • 1 tablespoon chia seeds
  • 1 tablespoon ground flaxseed
  • ½ teaspoon cinnamon
  • ½ teaspoon vanilla extract
  • Ice cubes (optional)

Instructions

  1. Add almond milk to a blender first.
  2. Add spinach, blueberries, avocado, yogurt, chia seeds, flaxseed, cinnamon, and vanilla.
  3. Blend until smooth and creamy.
  4. Add ice if desired and blend again.
  5. Serve immediately.

Prep & Cook Time

  • Prep Time: 5 minutes
  • Total Time: 5 minutes

Servings

2 servings

Nutritional Information (Per Serving Approx.)

Nutrient Amount
Calories 220
Protein 11g
Carbohydrates 14g
Fiber 8g
Sugar 6g
Fat 14g
Omega-3 2g

Health Benefits

Spinach

Rich in vitamins A, C, and magnesium which support overall wellness.

Blueberries

Contain antioxidants and fiber that may help support healthy glucose control.

Chia & Flaxseeds

Provide omega-3 fats and fiber for fullness and heart health.

Greek Yogurt

Adds protein to help slow digestion and stabilize energy.

Cinnamon

May help improve flavor without added sugar.

Tips

  • Use unsweetened ingredients to keep sugar lower.
  • Add a scoop of protein powder for extra protein.
  • Avoid fruit juice or added sweeteners.
  • Freeze avocado chunks ahead for a thicker texture.
  • Monitor your own blood sugar response since foods affect people differently.

Storage

  • Best enjoyed fresh.
  • Can be refrigerated up to 24 hours in a sealed jar.

Recipe Notes

  • For dairy-free: use coconut yogurt instead of Greek yogurt.
  • For extra greens: add kale or cucumber.
  • For a lighter version: reduce avocado to ¼.

Frequently Asked Questions

Q: Can this smoothie cure diabetes?

No. No smoothie, vitamin, or supplement can cure diabetes. Healthy eating helps support blood sugar management but does not replace medical treatment.

Q: Is this good for Type 2 diabetes?

It can fit into many balanced eating plans because it is high in fiber and relatively low in added sugars.

Q: Can I drink it daily?

Yes, if it fits your nutritional needs and blood sugar goals.

Q: Can I use other fruits?

Yes. Strawberries and raspberries are lower-sugar options.

Q: Is it keto-friendly?

Mostly yes, though blueberries contribute some carbs.

Ground Beef and Cabbage Stir Fry

This quick ground beef and cabbage stir fry is savory, slightly sweet, packed with flavor, and perfect for busy weeknights. It’s budget-friendly, healthy, and comes together in one pan in about 30 minutes.

Prep & Cook Time

  • Prep Time: 10 minutes
  • Cook Time: 20 minutes
  • Total Time: 30 minutes

Servings

4–6 servings

Ingredients

  • 1 lb ground beef
  • 1 small head cabbage, chopped
  • 2 carrots, sliced into thin strips
  • 3 green onions, chopped
  • 3 cloves garlic, minced
  • 1 tbsp fresh ginger, minced
  • 2 tbsp soy sauce
  • 1 tbsp oyster sauce
  • 1 tbsp sesame oil
  • 1 tbsp brown sugar or honey
  • 1 tbsp vegetable oil
  • Salt and black pepper, to taste
  • Optional: red pepper flakes or sriracha for heat

Instructions

1. Cook the Beef

Heat vegetable oil in a large skillet or wok over medium-high heat.

Add ground beef and cook until browned, breaking it apart as it cooks.

Drain excess grease if needed.

2. Add Aromatics

Stir in:

  • garlic
  • ginger

Cook for about 1 minute until fragrant.

3. Cook the Vegetables

Add:

  • chopped cabbage
  • carrots

Stir fry for 5–7 minutes until cabbage softens slightly but still has some crunch.

4. Make the Sauce

In a small bowl, mix:

  • soy sauce
  • oyster sauce
  • sesame oil
  • brown sugar

Pour sauce into the skillet and stir well to coat everything evenly.

5. Finish

Cook another 2–3 minutes until glossy and heated through.

Top with green onions before serving.

Serving Ideas

Serve with:

  • steamed rice
  • noodles
  • cauliflower rice
  • lettuce wraps

Variations

  • Use ground turkey or chicken instead of beef
  • Add mushrooms or bell peppers
  • Make it spicy with chili garlic sauce
  • Add scrambled eggs for extra protein

Storage

  • Refrigerate up to 4 days
  • Reheats beautifully for meal prep

Pro Tip

For extra flavor, let the cabbage char slightly in the pan before stirring too much.

Grandma Helen calls this her 4 ingredient secret weapon for potlucks. I finally learned how easy they are to make and I am completely obsessed.

These easy butterscotch pecan bars are rich, chewy, buttery, and perfect for potlucks, holidays, bake sales, or quick family desserts. With only 4 ingredients, they come together fast and bake into sweet golden squares with crunchy pecans and gooey butterscotch flavor.

Prep & Cook Time

  • Prep Time: 10 minutes
  • Bake Time: 22–28 minutes
  • Cooling Time: 1–2 hours
  • Total Time: About 2 hours

Servings

16 bars

Ingredients

  • 2 cups graham cracker crumbs
    (about 14–16 full graham cracker sheets, finely crushed)
  • 1 can (14 oz) sweetened condensed milk
  • 1½ cups butterscotch chips
  • 1 cup chopped pecans

Instructions

1. Prepare the Pan

Preheat oven to 350°F (175°C).

Grease an 8×8-inch or 9×9-inch ceramic baking dish lightly, or line with parchment paper for easier removal.

2. Make the Crust

Spread graham cracker crumbs evenly across the bottom of the dish.

Press firmly into an even layer using:

  • clean hands
  • the back of a spoon
  • or a flat measuring cup

3. Add the Sweetened Condensed Milk

Pour the sweetened condensed milk slowly and evenly over the crumb layer.

Use a spatula to spread gently so the entire crust is coated.

4. Add Toppings

Sprinkle butterscotch chips evenly across the surface.

Top with chopped pecans and lightly press them into the chips.

5. Bake

Bake for 22–28 minutes until:

  • edges are bubbly
  • top looks glossy and set
  • edges turn golden brown

The center should no longer appear wet.

6. Cool Completely

Let bars cool in the pan for at least 1–2 hours.

For cleaner slices:

  • chill 30–45 minutes after cooling
  • use a sharp knife wiped clean between cuts

Cut into 16 squares.

Serving Ideas

These bars pair wonderfully with:

  • coffee
  • hot tea
  • cold milk
  • vanilla ice cream
  • whipped cream

They’re excellent for:

  • church potlucks
  • bake sales
  • holiday dessert trays
  • family gatherings

Variations

Nut-Free Version

Leave out the pecans or replace them with extra butterscotch chips.

Less Sweet

Use:

  • 1 cup butterscotch chips
  • 1½ cups chopped pecans

Different Nuts

Try:

  • walnuts
  • mixed nuts
  • toasted pecans for extra flavor

Storage

  • Room temperature: up to 3 days in an airtight container
  • Refrigerator: up to 1 week

The bars become firmer when chilled.

Tips for Best Results

  • Let bars cool completely before covering.
  • Avoid overbaking—the center firms as it cools.
  • Transport directly in the baking dish covered tightly with foil.
  • Do not leave in a hot car for long periods.

Baked Oatmeal with Fruits and Nuts

Preparation Time:

  • Prep Time: 10 minutes
  • Cook Time: 30 minutes
  • Total Time: 40 minutes

Ingredients:

  • 1 cup oatmeal
  • 50 g cranberries
  • 50 g dried apricots
  • 60 g nuts (your choice)
  • 1 banana
  • 1 apple
  • 50 g oat flakes

Instructions:

  1. Preheat Oven: Preheat your oven to 180°C (360°F).
  2. Prepare Ingredients:
    • Slice the banana and apple into small pieces.
    • Chop the dried apricots into smaller bits.
    • Roughly chop the nuts.
  3. Mix Ingredients: In a large bowl, combine the oatmeal, cranberries, dried apricots, nuts, banana slices, and apple pieces. Mix well.
  4. Add Oat Flakes: Add the oat flakes to the mixture and stir until everything is well combined.
  5. Bake: Transfer the mixture into a baking dish and spread it out evenly. Bake in the for 30 minutes.
  6. Cool and Serve: Let it cool slightly before serving. Enjoy your delicious and healthy baked oatmeal!

Serving Suggestions:

  • Serve warm with a dollop of Greek or a splash of milk.
  • Top with fresh berries or a drizzle of honey for extra sweetness.
  • Enjoy as a snack on its own or paired with a hot cup of tea or coffee.

Cooking Tips:

  • Use ripe bananas for added natural sweetness.
  • Feel free to substitute the dried fruits and nuts with your favorites. For a vegan version, use plant-based milk and  alternatives.

Nutritional Benefits:

  • Oats: High in fiber, can help lower cholesterol levels and stabilize blood sugar.
  • Fruits: Provide essential vitamins and antioxidants.
  • Nuts: A good source of healthy fats and protein.

Dietary Information:

  • Vegetarian: Yes
  • Vegan: Yes, if using plant-based substitutes
  • Gluten-Free: Use gluten-free oats
  • Dairy-Free: Yes, if using plant-based substitutes

Storage:

  • Store leftovers in an in the for up to 5 days.
  • Reheat individual servings in the microwave or enjoy cold.

Why You’ll Love This Recipe:

  • It’s a versatile and easy-to-make recipe.
  • Packed with wholesome ingredients, making it a nutritious option.
  • Perfect for meal prep and can be enjoyed throughout the week.
  • Adaptable to various dietary needs and preferences.

Conclusion:

This baked oatmeal with fruits and nuts is a fantastic way to start your day or enjoy as a nutritious snack. Its delightful combination of flavors and textures will leave you satisfied and energized. Try it out and make it a staple in your meal rotation!

Heavy legs, tiredness and tingling… your circulation could be asking for help

Vitality Beet Juice

A simple, concentrated way to enjoy the benefits of beets.

Juice
  • Ingredients:

    • 1 medium beet, peeled and diced

    • 1 glass of water

    • ½ lemon, juiced (optional, for vitamin C and flavor)

  • Instructions:

    1. Place the diced beets and water into a high-speed blender.

    2. Blend until completely smooth.

    3. If you prefer a thinner consistency, strain the mixture through a fine-mesh sieve or nut  milk bag.

      Milk
    4. Stir in the lemon  juice and serve chilled.


2. Energizing Circulation Smoothie

Discover more
Sugar
cakes
pan

A more filling option that combines fiber with the nitric oxide boost of beets.

  • Ingredients:

    • 1 small beet, peeled and diced

    • 1 crisp apple (like Granny Smith or Gala), cored

    • 1 small knob of fresh ginger (about 1/2 inch), peeled

    • 1 glass of water (or coconut water for extra electrolytes)

  • Instructions:

    1. Add the beet, apple, and ginger to the blender.

    2. Pour in the water.

    3. Blend on high until the ginger and beet are fully pulverized.

    4. Drink immediately, preferably in the morning, to jumpstart your energy.


Quick Tips for Heavy Legs

Discover more
Bread
Food
Dairy & Eggs

In addition to these recipes, the text suggests these lifestyle habits for better circulation:

  • Movement: Walk at least 30 minutes daily.

  • Elevation: Raise your legs above heart level when resting.

  • Hydration: Drink plenty of water and reduce salt intake to minimize fluid retention.

Note: While beets are a wonderful superfood, symptoms like “collapsing circulation” or chronic heavy/tingling legs should always be evaluated by a medical professional to rule out serious conditions.

Heavy legs, tiredness and tingling… your circulation could be asking for help

Vitality Beet Juice

A simple, concentrated way to enjoy the benefits of beets.

Juice
  • Ingredients:

    • 1 medium beet, peeled and diced

    • 1 glass of water

    • ½ lemon, juiced (optional, for vitamin C and flavor)

  • Instructions:

    1. Place the diced beets and water into a high-speed blender.

    2. Blend until completely smooth.

    3. If you prefer a thinner consistency, strain the mixture through a fine-mesh sieve or nut milk bag.

      Milk
    4. Stir in the lemon  juice and serve chilled.


2. Energizing Circulation Smoothie

Discover more
Sugar
cakes
pan

A more filling option that combines fiber with the nitric oxide boost of beets.

  • Ingredients:

    • 1 small beet, peeled and diced

    • 1 crisp apple (like Granny Smith or Gala), cored

    • 1 small knob of fresh ginger (about 1/2 inch), peeled

    • 1 glass of water (or coconut water for extra electrolytes)

  • Instructions:

    1. Add the beet, apple, and ginger to the blender.

    2. Pour in the water.

    3. Blend on high until the ginger and beet are fully pulverized.

    4. Drink immediately, preferably in the morning, to jumpstart your energy.


Quick Tips for Heavy Legs

Discover more
Bread
Food
Dairy & Eggs

In addition to these recipes, the text suggests these lifestyle habits for better circulation:

  • Movement: Walk at least 30 minutes daily.

  • Elevation: Raise your legs above heart level when resting.

  • Hydration: Drink plenty of water and reduce salt intake to minimize fluid retention.

Note: While beets are a wonderful superfood, symptoms like “collapsing circulation” or chronic heavy/tingling legs should always be evaluated by a medical professional to rule out serious conditions.

Blackened Cod Bites with Lemon Garlic Aioli

Blackened Cod Bites with Lemon Garlic Aioli

Description

These crispy, smoky blackened cod bites are tender on the inside with a flavorful spice crust on the outside. Served with a creamy lemon garlic aioli, they make a perfect appetizer, light dinner, taco filling, or game-day snack. The cod cooks quickly, making this recipe ideal for busy weeknights while still feeling restaurant-worthy.

The blackening seasoning delivers bold Cajun-inspired flavor with paprika, garlic, herbs, and a hint of heat, while the aioli balances everything with bright citrus and creamy richness.

Recipe Information

Prep Time: 15 minutes

  • Cook Time: 10 minutes
  • Total Time: 25 minutes
  • Cuisine: American / Cajun-Inspired
  • Difficulty: Easy
  • Servings: 4 servings

Ingredients

For the Blackened Cod Bites

  • 1½ pounds cod fillets, skin removed
  • 2 tablespoons olive oil
  • 1 teaspoon smoked paprika
  • 1 teaspoon paprika
  • 1 teaspoon garlic powder
  • 1 teaspoon onion powder
  • ½ teaspoon dried thyme
  • ½ teaspoon dried oregano
  • ½ teaspoon cayenne pepper (adjust to taste)
  • ½ teaspoon black pepper
  • ¾ teaspoon salt

For the Lemon Garlic Aioli

  • ½ cup mayonnaise
  • 2 garlic cloves, minced
  • 1 tablespoon lemon juice
  • 1 teaspoon lemon zest
  • ½ teaspoon Dijon mustard
  • Pinch of salt
  • Pinch of black pepper

Optional Garnishes

  • Chopped parsley
  • Lemon wedges
  • Extra aioli for dipping

Instructions

Step 1: Prepare the Cod

Pat the cod fillets dry with paper towels. Cut into bite-sized cubes, about 1 to 1½ inches each.

Drying the fish helps create a better crust when cooking.

Step 2: Make the Blackening Seasoning

In a small bowl, combine:

  • smoked paprika
  • paprika
  • garlic powder
  • onion powder
  • thyme
  • oregano
  • cayenne
  • black pepper
  • salt

Mix thoroughly.

Step 3: Season the Fish

Place the cod bites in a large bowl. Drizzle with olive oil and toss gently.

Sprinkle the seasoning mixture over the fish and coat evenly.

Step 4: Cook the Cod

Heat a large skillet or cast-iron pan over medium-high heat.

Add the cod bites in a single layer without overcrowding the pan.

Cook for:

  • 2–3 minutes per side
  • until blackened and cooked through

The fish should flake easily with a fork and reach an internal temperature of 145°F (63°C).

Step 5: Make the Lemon Garlic Aioli

In a small bowl, whisk together:

  • mayonnaise
  • garlic
  • lemon juice
  • lemon zest
  • Dijon mustard
  • salt
  • pepper

Taste and adjust lemon or seasoning as desired.

Step 6: Serve

Serve the hot blackened cod bites immediately with lemon garlic aioli on the side.

Garnish with parsley and lemon wedges if desired.

Serving Suggestions

These cod bites pair well with:

  • roasted vegetables
  • rice bowls
  • coleslaw
  • fries
  • tacos
  • fresh salads
  • grilled corn
  • mashed potatoes

They also work wonderfully in wraps or lettuce cups.

Recipe Notes

  • Cod is mild and flaky, making it perfect for bold blackened seasoning.
  • Cast-iron pans create the best blackened crust.
  • Avoid overcooking; cod becomes dry quickly.
  • Fresh lemon juice gives the aioli brighter flavor than bottled juice.
  • If using frozen cod, thaw completely and pat dry before seasoning.

Tips for Success

1. Dry the Fish Well

Moisture prevents proper browning and crust formation.

2. Don’t Overcrowd the Pan

Cook in batches if needed to maintain high heat.

3. Adjust Spice Level

Reduce cayenne for milder bites or increase for extra heat.

4. Let the Pan Get Hot

A properly heated pan gives the signature blackened exterior.

5. Make Aioli Ahead

The aioli tastes even better after chilling for 20–30 minutes.

Nutritional Information (Per Serving Approx.)

Nutrient Amount
Calories 320
Protein 28g
Carbohydrates 3g
Fat 21g
Saturated Fat 3g
Fiber 1g
Sugar 1g
Sodium 540mg


Health Benefits

High in Lean Protein

Cod provides high-quality protein that supports muscle repair and satiety.

Rich in Omega-3 Fatty Acids

Cod contains beneficial fats that support heart and brain health.

Lower in Calories

Compared to fried seafood dishes, these cod bites are relatively light while still flavorful.

Garlic Benefits

Garlic may help support immune function and cardiovascular health.

Vitamin C from Lemon

Fresh lemon juice and zest provide antioxidants and vitamin C.

Variations

Air Fryer Version

Cook at 400°F (200°C) for 8–10 minutes, shaking halfway through.

Oven-Baked Version

Bake at 425°F (220°C) for 12–15 minutes.

Spicy Version

Add hot sauce to the aioli or extra cayenne to the seasoning blend.

Gluten-Free

This recipe is naturally gluten-free if all packaged ingredients are certified gluten-free.

Storage & Reheating

Refrigerator

Store leftovers in an airtight container for up to 2 days.

Reheating

Reheat in:

  • skillet over medium heat
  • air fryer at 350°F for 3–4 minutes

Avoid microwaving to maintain texture.

Frequently Asked Questions

Can I use another fish?

Yes. Haddock, tilapia, halibut, or salmon also work well.

Is blackened seasoning very spicy?

It has moderate heat, but you can easily adjust the cayenne pepper.

Can I make this dairy-free?

Yes. The recipe is naturally dairy-free if using dairy-free mayonnaise.

Can I prepare the fish ahead of time?

You can season the fish a few hours ahead and refrigerate until cooking.

What does “blackened” mean?

Blackening refers to cooking seasoned food over high heat until a dark, flavorful crust forms.

Can I freeze leftovers?

Cooked cod can be frozen, but texture is best when eaten fresh.

Conclusion

Blackened Cod Bites with Lemon Garlic Aioli are quick, flavorful, and versatile. The smoky spice blend combined with creamy citrus aioli creates an irresistible balance of heat and freshness. Whether served as an appetizer, main dish, or party snack, this recipe delivers bold flavor with minimal effort.

Carrot and Cheese Sandwich Spread

Carrot and Cheese Sandwich Spread

Description

Carrot and Cheese Sandwich Spread is a creamy, slightly sweet and savory spread made by combining grated carrots with cheese, herbs, and seasonings. It’s quick to prepare, budget-friendly, and works perfectly for sandwiches, wraps, toast, or even as a dip for crackers and veggies. The natural sweetness of carrots balances beautifully with the richness of cheese.

Ingredients (Makes ~2 cups spread)

  • 2 medium carrots (finely grated)
  • 1 cup cream cheese (softened)
  • ½ cup grated cheddar cheese (or processed cheese)
  • 2 tbsp mayonnaise (optional, for extra creaminess)
  • 1 tbsp butter (softened, optional)
  • 1–2 tbsp fresh parsley or coriander (chopped)
  • 1 tsp lemon juice
  • ½ tsp black pepper
  • Salt to taste
  • ½ tsp garlic powder (optional)
  • ½ tsp mustard (optional for tang)

Instructions

  1. Prepare carrots: Wash, peel, and finely grate carrots. Lightly squeeze to remove excess moisture.
  2. Mix base: In a bowl, combine cream cheese, butter, and mayonnaise until smooth.
  3. Add cheese: Mix in grated cheddar until evenly blended.
  4. Combine carrots: Add grated carrots and mix well.
  5. Season: Add lemon juice, salt, pepper, garlic powder, and mustard.
  6. Herbs: Stir in chopped parsley or coriander.
  7. Chill: Refrigerate for 20–30 minutes for flavors to blend.

Serving Suggestions

  • Spread on toasted bread or sandwich slices
  • Use in wraps with lettuce and cucumber
  • Serve as a dip with crackers or veggie sticks
  • Pair with grilled chicken or boiled eggs in sandwiches

Tips & Notes

  • Dry carrots well to avoid watery spread.
  • For a healthier version, replace mayonnaise with Greek yogurt.
  • Use sharp cheddar for stronger flavor.
  • Add chopped nuts (walnuts or almonds) for crunch.
  • Store in an airtight container in the fridge.

Servings

  • Makes: 6–8 sandwiches
  • Yield: ~2 cups spread
  • Serving size: 2 tablespoons per sandwich

Nutritional Info (Approx. per 2 tbsp serving)

  • Calories: 90–120 kcal
  • Protein: 3–4 g
  • Fat: 7–9 g
  • Carbohydrates: 3–5 g
  • Fiber: 0.5–1 g
  • Calcium: Moderate
    (Values vary based on ingredients used)

Health Benefits

  • 🥕 Carrots: Rich in beta-carotene for eye and skin health
  • 🧀 Cheese: Good source of calcium and protein
  • 🌿 Herbs: Provide antioxidants and freshness
  • 🧈 Healthy fats (in moderation): Help absorb fat-soluble vitamins

Q & A

Q1: Can I make it ahead of time?
Yes, it stays fresh for 2–3 days in the refrigerator.

Q2: Can I make it vegan?
Yes, use vegan cream cheese and plant-based cheese alternatives.

Q3: Why is my spread watery?
Carrots likely had excess moisture—always squeeze them after grating.

Q4: Can I skip mayonnaise?
Yes, replace it with yogurt, cream cheese, or simply omit it.

Q5: What bread works best?
Whole wheat, sourdough, or sandwich bread all work well.

flour-free bread alternative

This recipe offers a delicious, flour-free  bread alternative that is perfect for anyone following a low-carb or keto diet. It’s quick to prepare, with simple ingredients, and is light yet satisfying. You can eat as much as you like, making it a perfect option for those trying to reduce carbs while still enjoying tasty bread-like textures.

Baked Goods

Ingredients:

  • 1 cup full-fat  Greek yogurt
  • 1 cup almond  flour (or coconut flour, depending on preference)
  • 1 egg
  • 1 teaspoon baking powder
  • A pinch of salt
  • Butter or olive oil (for cooking)

Instructions:

  1. Combine the Ingredients: In a bowl, mix together the Greek yogurt, almond flour, egg, baking powder, and salt. Stir until a smooth dough forms.
  2. Knead the Dough: Knead the dough for a few minutes until it becomes soft and smooth, not sticky.
  3. Shape the Dough: Divide the dough into small portions and roll them into balls. Flatten each ball to form a thin round shape.
  4. Cook the Flatbreads: Heat a non-stick pan over medium heat, and brush with a little butter or olive oil. Place the flattened dough into the pan and cook each side for 2-3 minutes, or until golden brown and cooked through.
  5. Serve and Enjoy: Once cooked, serve the flatbreads warm. They can be paired with your favorite dip or spread for added flavor. Enjoy your zero-carb, delicious bread!

Frozen Yogurt

Ingredients

  • 2 cups Greek yogurt (full-fat for creamier texture)
  • 1 cup heavy cream
  • 1/2 cup sweetened condensed milk
  • 1/4 cup sugar (adjust to taste)
  • 1 tsp vanilla extract
  • Pinch of salt

Instructions

1. Mix the Base

  1. In a bowl, whisk together:
    • Greek yogurt
    • condensed milk
    • sugar
    • vanilla
    • salt
  2. In another bowl, whip heavy cream until soft peaks form.
  3. Fold whipped cream gently into the yogurt mixture.

2. Freeze

Ice Cream Machine Method

  • Pour mixture into an ice cream maker and churn for 20–25 minutes until soft-serve consistency.

No Machine Method

  1. Pour into a freezer-safe container.
  2. Freeze for 1 hour.
  3. Stir vigorously with a fork or mixer.
  4. Repeat every 30–45 minutes for 3–4 hours until smooth and creamy.

3. Serve

  • Serve immediately for soft-serve texture.
  • Freeze 1–2 extra hours for firmer scoops.

Tips

  • Use full-fat yogurt for the creamiest result.
  • Add honey instead of sugar for a tangier flavor.
  • Freeze serving bowls beforehand for slower melting.

Flavor Variations

  • Strawberry puree
  • Mango chunks
  • Chocolate chips
  • Oreo crumbs
  • Lemon zest and honey

Butter Cookies

  • 1 cup (225g) unsalted butter, softened
  • 1/2 cup (100g) sugar
  • 1 egg
  • 1 tsp vanilla extract
  • 2 cups (250g) all-purpose flour
  • 2 tbsp cornstarch
  • 1/4 tsp salt

Instructions

1. Prepare the Dough

  1. Preheat oven to 350°F (175°C).
  2. Line a baking tray with parchment paper.
  3. Beat butter and sugar until light and fluffy.
  4. Add egg and vanilla; mix well.
  5. Sift in flour, cornstarch, and salt.
  6. Mix until a soft dough forms.

2. Pipe the Cookies

  1. Transfer dough into a piping bag fitted with a large star tip.
  2. Pipe spiral/swirl shapes onto the tray.

3. Bake

  1. Bake for 12–15 minutes or until edges turn light golden.
  2. Cool on tray for 5 minutes, then transfer to a rack.

Tips

  • If dough is too thick to pipe, let it warm slightly or add 1–2 tsp milk.
  • Chill piped cookies for 10 minutes before baking for sharper shapes.
  • Store in an airtight container for up to 1 week.

Optional Variations

  • Dip half in melted chocolate.
  • Add lemon zest or almond extract.
  • Sprinkle sugar on top before baking.

Easy Cheesy Chicken Bake

Ingredients

  • 2 chicken breasts, cooked and diced
  • 2 cups cooked pasta or rice
  • 1 cup heavy cream
  • 1 cup milk
  • 2 cups shredded mozzarella cheese
  • 1 cup cheddar cheese
  • 1 small onion, chopped
  • 1 red bell pepper, diced
  • 2 cloves garlic, minced
  • 1 tsp paprika
  • 1 tsp Italian seasoning
  • Salt and black pepper to taste
  • 1 tbsp butter or olive oil
  • Fresh parsley for garnish

Instructions

1. Prepare the filling

  • Heat butter in a pan.
  • Add onion, garlic, and bell pepper.
  • Cook for 3–4 minutes until soft.

2. Add chicken

  • Stir in cooked chicken.
  • Season with paprika, Italian seasoning, salt, and pepper.

3. Make it creamy

  • Pour in cream and milk.
  • Add half the mozzarella and cheddar cheese.
  • Mix until creamy and melted.

4. Combine

  • Add cooked pasta or rice.
  • Stir well so everything is coated.

5. Bake

  • Transfer to a baking dish.
  • Top with remaining cheese.
  • Bake at 375°F (190°C) for 20–25 minutes until bubbly and golden.

Serving Ideas

  • Garlic bread
  • Fresh salad
  • Ranch or garlic sauceV

Fresh Strawberry Yogurt Bread

Fresh Strawberry Yogurt Bread

Ingredients

  • The Fruit: 1 ½ cups fresh strawberries (hulled and diced).

  • The Dry Base: 2 cups all-purpose flour.

  • Leavening & Salt: 1 tsp baking powder, ½ tsp baking soda, and ½ tsp salt.

  • The Fats & Sugar: ½ cup unsalted butter (softened) and 1 cup granulated sugar.

  • The Binder: 2 large eggs (room temperature).

  • The Moisture: 1 cup Greek yogurt (plain or vanilla) and 1 tsp vanilla extract.

  • Optional Zest: 1 tbsp lemon zest for a bright kick.


Instructions

1. Prep the Oven and Pan Preheat your oven to 350°F (175°C). Grease a 9×5-inch loaf pan thoroughly with butter or non-stick spray. For easy removal, line the bottom with a strip of parchment paper.

2. Cream the Butter and Sugar In a large bowl, beat the softened butter and granulated sugar together until the mixture is pale and fluffy. This usually takes about 2 to 3 minutes. Add the eggs one at a time, beating well after each addition, then stir in the vanilla extract and lemon zest.

3. Mix in the Yogurt Fold in the Greek yogurt until just combined. Don’t worry if the batter looks slightly curdled at this stage; it will smoothen out once the flour is added.

4. Combine Dry Ingredients In a separate small bowl, whisk together the flour, baking powder, baking soda, and salt. Gently fold the dry ingredients into the wet mixture. Pro Tip: Toss your diced strawberries in 1 tablespoon of flour before adding them to the batter; this prevents them from sinking to the bottom.

5. Fold and Bake Gently fold the strawberries into the thick batter. Pour the mixture into your prepared pan and smooth the top. Bake for 50 to 60 minutes, or until a toothpick inserted into the center comes out clean.

6. Cool and Serve Let the bread cool in the pan for 10 minutes before transferring it to a wire rack. Slice only once completely cool to ensure the berries have set.


Quick Tips for Success

  • Don’t Overmix: Once you add the flour, mix until just combined. Overworking the dough leads to a tough, rubbery loaf.

  • Fresh vs. Frozen: Fresh berries work best. If using frozen, do not thaw them first, or they will bleed blue/purple streaks into your beautiful yellow cake.

Strawberry Kiwi Layered Smoothie

Strawberry Kiwi Layered Smoothie

Prep time: 10 minutes | Servings: 2 | Calories: ~180 per serving

Ingredients

The Kiwi Layer (Green):

  • 3 ripe kiwis, peeled and sliced

  • 1 frozen banana (provides a creamy, soft-serve texture)

  • 1/2 cup baby spinach (optional, for a deeper green color without changing the flavor)

  • 1/2 cup Greek yogurt or coconut yogurt

  • 1/4 cup almond milk (or any milk of choice)

The Strawberry Layer (Pink):

  • 1 ½ cups frozen strawberries

  • 1/2 cup orange juice (adds a nice citrus zing)

  • 1 tablespoon honey or maple syrup (optional, depending on berry sweetness)

  • A splash of water if the blend is too thick

Garnish:

  • Fresh kiwi slices and strawberry halves


Preparation Instructions

  1. Prepare the Green Base: In a high-speed blender, combine the peeled kiwis, frozen banana slices, yogurt, milk, and optional spinach. Blend until completely smooth and thick. If the mixture is too thin, add a few ice cubes; it needs to be sturdy enough to support the second layer. Pour this mixture into two glasses, filling them about two-thirds of the way. Place the glasses in the freezer for 5 minutes to set slightly while you make the next layer.

  2. Prepare the Pink Topping: Rinse your blender pitcher. Add the frozen strawberries, orange juice, and sweetener. Blend on high until the mixture is a thick, slushy consistency. Because strawberries can be fibrous, ensure you blend long enough to achieve a velvety texture.

  3. The Artistic Pour: Remove the glasses from the freezer. To achieve the beautiful swirl effect seen in your photo, use a large spoon to gently “float” the strawberry mixture over the kiwi base. You can use a skewer to lightly swirl the colors together at the meeting point.

  4. Final Touches: Thread a slice of kiwi and a strawberry onto a cocktail pick or small skewer. Place it across the rim of the glass. Serve immediately with a reusable straw.


Quick Tips for Success

  • Frozen Fruit is Key: Using frozen fruit instead of ice prevents the smoothie from becoming watered down and ensures that “thick” texture required for layering.

  • Consistency Check: If your layers are blending too much, your smoothie is likely too warm. Chill your glasses beforehand to help the fruit “hold” its place.

Blueberry Peach Power Smoothie

Blueberry Peach Power Smoothie

Ingredients

  • Fruit: 1 cup frozen blueberries and 1 fresh peach (sliced).

  • Protein: 1 scoop of vanilla or unflavored protein powder.

  • Healthy Fats: 1 generous tablespoon of creamy peanut butter.

  • Fiber: ¼ cup rolled oats (provide a thick, cookie-dough-like texture).

  • Liquid: 1 cup of your choice of milk (almond, oat, or dairy).

  • Optional Swirl: 1 tablespoon of extra peanut butter and a few peach slices for garnish.


Instructions

  1. Prep the Fruit: If your peach is fresh, slice it into wedges. Using frozen blueberries is highly recommended as it creates a thick, chilled consistency without needing to add extra ice, which can sometimes water down the flavor.

  2. Layer the Blender: To ensure a smooth blend, add your liquid base first. This prevents the protein powder or oats from getting stuck at the bottom. Follow with the oats, protein powder, and peanut butter. Finally, add the blueberries and peach slices on top.

  3. Blend: Start the blender on a low speed to break up the frozen berries and oats, then gradually increase to high. Blend for about 45–60 seconds until the mixture is completely velvety and no oat “grit” remains.

  4. The Swirl Technique: To achieve the beautiful look in your photo, take a small spoon and smear a bit of peanut butter along the inside walls of your glass before pouring.

  5. Serve: Pour the smoothie into the prepared glass. Top with a few fresh blueberries and a peach wedge for a professional touch.


Nutrition Highlights

This smoothie is a powerhouse of balanced nutrition. The blueberries provide a high dose of antioxidants, while the peaches add natural sweetness and Vitamin C. The oats are excellent for sustained energy due to their complex carbohydrates. By including protein powder and peanut butter, you ensure that the smoothie is satiating and helps with muscle repair.

Customization Tip

If you prefer a sweeter drink, you can add a pitted Medjool date or a teaspoon of honey. If the smoothie is too thick for your blender, simply add an extra splash of milk until it reaches your desired consistency. Enjoy!

Spinach and Feta Savory Bites

Spinach and Feta Savory Bites

Ingredients

  • Puff Pastry: 1 sheet (thawed according to package directions)

  • Fresh Spinach: 2 cups, finely chopped

  • Feta Cheese: ½ cup, crumbled

  • Cream Cheese: 2 tablespoons (softened)

  • Garlic: 1 clove, minced

  • Green Onions: 2, thinly sliced

  • Egg: 1 large (for egg wash)

  • Seasoning: A pinch of salt, black pepper, and dried oregano

  • Optional: Sesame seeds or red pepper flakes for topping


Instructions

  1. Prepare the Oven and Tin: Preheat your oven to 200°C (400°F). Lightly grease a standard muffin tin or a mini-muffin tin with butter or non-stick spray.

  2. Sauté the Greens: In a small pan over medium heat, sauté the minced garlic and chopped spinach until the spinach has completely wilted. Crucial step: Place the cooked spinach in a fine-mesh strainer or paper towel and squeeze out as much liquid as possible. Excess moisture will make the pastry soggy.

  3. Mix the Filling: In a medium bowl, combine the drained spinach, crumbled feta, softened cream cheese, green onions, and oregano. Season with a small amount of salt (feta is already quite salty) and plenty of black pepper. Mix until well combined.

  4. Cut the Pastry: Unroll your puff pastry sheet on a lightly floured surface. Cut the sheet into even squares (usually 9 or 12 depending on the size of your tin).

  5. Assemble: Place each pastry square into a muffin cup, pressing down gently so the corners hang over the edges. Spoon about 1–2 tablespoons of the spinach mixture into the center of each square. Fold the corners of the pastry slightly inward toward the center.

  6. The Finishing Touch: Whisk the egg with a teaspoon of water and brush the exposed pastry edges. This ensures a beautiful golden-brown finish. Sprinkle with sesame seeds if desired.

  7. Bake: Place in the oven for 15–18 minutes, or until the pastry is puffed and deeply golden.


Serving Suggestion

Allow the bites to cool in the tin for 5 minutes before removing. They are best served warm, but they can be reheated in an oven or air fryer to maintain that signature crunch. Enjoy!

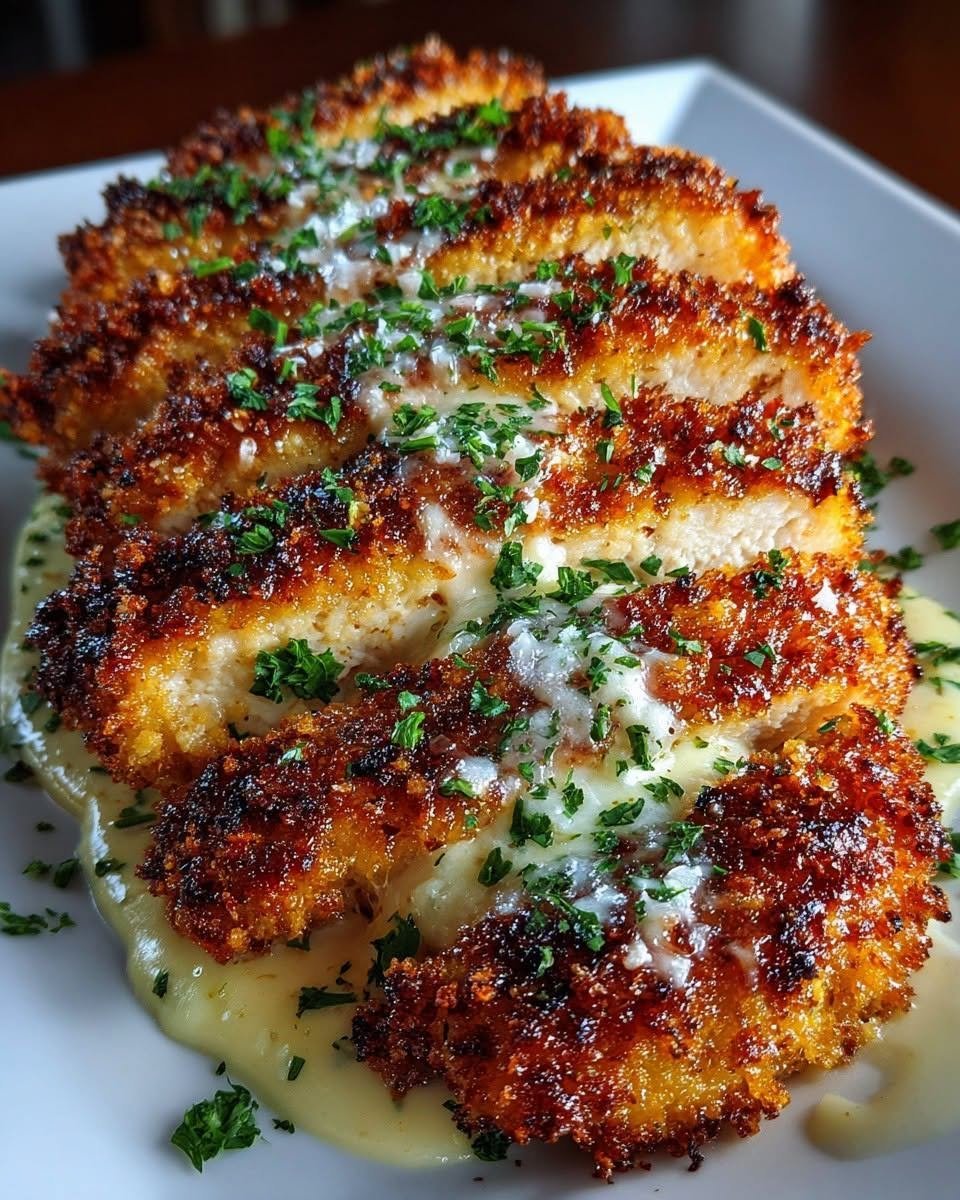
Crispy Lemon Garlic Butter Chicken

Crispy Lemon Garlic Butter Chicken

Ingredients

  • Chicken: 2 large chicken breasts (halved lengthwise into cutlets).

  • Breading: ½ cup Panko breadcrumbs, ¼ cup grated Parmesan, 1 tsp garlic powder, salt, and black pepper.

  • Coating: 1 large egg (beaten) or 2 tbsp Dijon mustard.

  • The Sauce: 3 tbsp butter, 3 cloves minced garlic, ¼ cup chicken broth, juice of ½ lemon, and 1 tsp lemon zest.

  • Topping: ½ cup shredded Mozzarella or Provolone and fresh chopped parsley.


Instructions

1. Prepare the Chicken

Place the chicken cutlets between sheets of plastic wrap and pound them to an even thickness (about ½ inch). This ensures they cook quickly without drying out. Season both sides with salt and pepper.

2. Bread the Cutlets

In one shallow bowl, place your beaten egg. In a second bowl, combine the breadcrumbs, Parmesan cheese, and garlic powder. Dip each chicken piece into the egg, let the excess drip off, and then press firmly into the breadcrumb mixture until fully coated.

3. Pan-Fry to Perfection

Heat 2 tablespoons of oil in a large skillet over medium-high heat. Once shimmering, add the chicken. Cook for 3–4 minutes per side until the crust is deep golden brown and the internal temperature reaches 74°C (165°F). Remove the chicken and set aside on a plate.

4. Make the Lemon Garlic Sauce

Wipe out the skillet. Lower the heat to medium and melt the butter. Add the minced garlic and sauté for 1 minute until fragrant. Pour in the chicken broth and lemon juice. Let it simmer for 2 minutes to reduce slightly. Stir in the lemon zest.

5. Melt and Serve

Place the chicken back into the skillet (or on a baking sheet). Spoon a little sauce over each piece and top with a generous sprinkle of shredded cheese. Cover the pan for 1 minute or place under a broiler until the cheese is bubbly and melted.

Garnish with fresh parsley and serve with extra lemon wedges on the side.


Serving Suggestions

This dish pairs beautifully with:

  • Garlic mashed potatoes to soak up the extra sauce.

  • Lightly sautéed asparagus or green beans.

  • Pasta (linguine or angel hair) tossed in olive oil.

High-Protein Cottage Cheese Veggie Bake

High-Protein Cottage Cheese Veggie Bake

Ingredients

  • 8 large eggs (preferably free-range)

  • 2 cups low-fat cottage cheese (small curd works best)

  • 1/2 cup shredded parmesan or mozzarella

  • 1/4 cup almond flour (optional, for a sturdier structure)

The Fillings

  • 1 cup broccoli florets, chopped small

  • 1 cup mushrooms, sliced and sautéed

  • 1 red bell pepper, diced

  • 2 cups fresh baby spinach, roughly chopped

  • 2 green onions, sliced

Seasoning

  • 1 tsp garlic powder

  • 1/2 tsp smoked paprika

  • Salt and black pepper to taste

  • Fresh thyme for garnish


Instructions

  1. Prep the Oven and Pan: Preheat your oven to 190°C (375°F). Lightly grease a 9×9 inch baking dish with olive oil or avocado oil spray.

  2. Sauté for Flavor: While you can use raw veggies, sautéing the mushrooms and peppers for 3–5 minutes first removes excess moisture, preventing the bake from becoming watery. Toss the spinach in at the last second just to wilt it.

  3. Blend the Base: In a large bowl, whisk the eggs thoroughly. Stir in the cottage cheese, shredded cheese, and seasonings. For an ultra-smooth, “hidden” cheese texture, you can pulse the eggs and cottage cheese in a blender before adding the other ingredients.

  4. Combine: Fold the sautéed vegetables and raw broccoli into the egg mixture. Ensure the veggies are evenly distributed so every bite is packed with nutrients.

  5. Bake: Pour the mixture into your prepared dish. Bake for 35–45 minutes. You’ll know it’s ready when the center is set (it shouldn’t jiggle) and the top is a beautiful golden brown.

  6. Rest and Serve: Let the bake sit for at least 10 minutes before slicing. This allows the proteins to firm up, giving you those clean, square slices shown in the image.


Why This Works

Unlike traditional quiches, this bake relies on the moisture of the cottage cheese to stay juicy. It’s naturally low-carb, gluten-free, and stays fresh in the fridge for up to 4 days, making it the ultimate “grab-and-go” fuel for a busy week. Enjoy!

Creamy Egg Salad Sandwich with Fresh Dill

Creamy Egg Salad Sandwich with Fresh Dill

Ingredients

For the Egg Salad:

  • 6 large eggs, hard-boiled and peeled

  • 1/4 cup mayonnaise

  • 1 tbsp Dijon mustard

  • 2 tbsp fresh dill, finely chopped (plus extra for garnish)

  • 1 stalk celery, finely diced (for crunch)

  • 1/2 tsp paprika

  • Salt and black pepper to taste

For the Sandwich:

  • 4 slices whole-grain or sourdough bread, lightly toasted

  • Optional: A handful of fresh arugula or lettuce for the base


Instructions

1. Prepare the Eggs

  1. Place the eggs in a saucepan and cover with cold water. Bring to a boil, then remove from heat, cover, and let sit for 12 minutes.

  2. Transfer the eggs to an ice bath for 5 minutes before peeling.

  3. Once peeled, chop the eggs into bite-sized cubes.

2. Mix the Salad

  1. In a medium bowl, whisk together the mayonnaise, Dijon mustard, paprika, salt, and pepper.

  2. Gently fold in the chopped eggs, diced celery, and fresh dill until the eggs are well-coated but still hold their shape.

3. Assemble the Sandwich

  1. Lay out your toasted bread slices.

  2. If using, place a small layer of arugula on the bottom slice.

  3. Generously scoop the egg salad onto the bread, spreading it evenly to the edges.

  4. Top with extra fresh dill and a pinch of paprika as shown in the image.

  5. Place the second slice of bread on top and slice diagonally.


Quick Tips for Your Social Media Page:

  • The Perfect Boil: Mention that an ice bath is the secret to easy-peeling eggs and preventing that “green ring” around the yolk.

  • Texture Matters: Remind your audience that hand-chopping the eggs rather than mashing them provides the beautiful, chunky texture seen in the photo.

Chocolate-Lined Creamy Ice Pops

Chocolate-Lined Creamy Ice Pops

Ingredients

For the Chocolate Shell:

  • 200g (about 2 bars) Nestlé Classic Chocolate (or any good quality milk or semi-sweet chocolate)

For the Creamy Filling:

  • 1 can (14 oz) Sweetened condensed milk

  • 1 box/can (7.5 oz) Table cream (or heavy whipping cream)

  • 3 cups Whole milk

  • 1 tbsp Vanilla extract (or vanilla bean paste for those authentic specks)

  • Optional: 1/2 cup crushed chocolate chip cookies or chocolate flakes (to match the speckled look in the photo)

Equipment Needed:

  • Ice candy bags (long, narrow food-safe plastic pouches)

  • A funnel or piping bag


Instructions

1. Prepare the Creamy Filling

  • In a large blender, combine the whole milk, sweetened condensed milk, table cream, and vanilla.

  • Blend for 1-2 minutes until completely smooth and slightly frothy.

  • Note: If you are adding crushed cookies or chocolate flakes to get that speckled look, stir them in by hand after blending so they don’t completely dissolve. Set the mixture aside.

2. Melt the Chocolate

  • Break the Nestlé chocolate bars into small pieces.

  • Melt the chocolate in a microwave-safe bowl in 30-second intervals, stirring in between until completely smooth. (Alternatively, use a double boiler on the stove). Let it cool for just a minute so it’s not piping hot, but still very fluid.

3. Create the Chocolate Shell

  • Using a small spoon or a piping bag, insert about 1 to 1.5 tablespoons of melted chocolate into an empty ice candy bag.

  • Squeeze the outside of the bag to spread the chocolate evenly all around the inside, pushing it up towards the middle. Leave the top couple of inches clean so you have room to tie the knot later.

4. Fill and Tie

  • Before the chocolate has a chance to harden, place a funnel into the opening of the bag.

  • Pour your creamy liquid filling directly into the chocolate-coated bag. The liquid will push the chocolate out to the edges, creating a perfect inner lining!

  • Twist the top of the bag tightly to remove any trapped air, and tie a firm knot.

5. Freeze

  • Lay the filled bags flat on a baking sheet and place them in the freezer.

  • Freeze for at least 4 to 6 hours, or overnight, until completely solid.

Low Carb Creamy Bacon Cheddar Celery Boats

Crunchy celery filled with a creamy bacon-cheddar mixture — perfect for parties, meal prep, or a quick low-carb snack!

🛒 Ingredients

  • 8–10 large celery stalks
  • 8 oz cream cheese, softened
  • 1/3 cup sour cream
  • 1 cup shredded sharp cheddar cheese
  • 4 slices bacon, cooked crispy and crumbled
  • 2 tbsp chopped green onion or chives
  • 1/4 tsp garlic powder
  • 1/4 tsp onion powder
  • 1/4 tsp smoked paprika (optional)
  • Salt & black pepper to taste

👩‍🍳 Step-by-Step Recipe

🥬 1. Prep the Celery

  • Wash and dry the celery well.
  • Trim the ends and cut into 3-inch sticks.
  • If stalks are very wide, slice them lengthwise.
  • Arrange them hollow-side up on a tray or dish.

🥣 2. Make the Creamy Filling

  • In a bowl, mix:
    • softened cream cheese
    • sour cream
  • Stir until smooth and creamy.

🥓 3. Add Flavor

Mix in:

  • cheddar cheese
  • crumbled bacon
  • green onion
  • garlic powder
  • onion powder
  • smoked paprika
  • salt & pepper

Stir until everything is evenly combined.


👌 4. Fill the Celery Boats

  • Spoon the creamy mixture into each celery stick.
  • Smooth the tops with a spoon or butter knife.

❄️ 5. Chill & Serve

  • Refrigerate for 20–30 minutes before serving.
  • Serve cold for the best crunchy texture.

💡 Tips & Variations

  • 🌶️ Add cayenne or hot sauce for spice.
  • 🥛 Use Greek yogurt instead of sour cream for extra protein.
  • 🫒 Skip bacon and add olives or jalapeños for a vegetarian version.
  • 🥒 The filling also works great in cucumber boats or mini peppers.

❓Q&A

Can I make these ahead of time?

Yes! Make the filling up to 2 days early and store in the fridge. Stuff celery on the serving day for maximum crunch.

How do I keep celery crisp?

Dry the celery well after washing and keep refrigerated until serving.

Can I use turkey bacon?

Absolutely — turkey bacon works great for a lighter option.